1/35 M60 A1 w/reactive armour

All your build threads here...

Moderator: T3hGuppy

Post Reply
User avatar
rodrant
Chief Warrant Officer 2
Posts: 1774
Joined: Wed Feb 19, 2014 9:22 pm
Location: Maia - Portugal
Portugal

1/35 M60 A1 w/reactive armour

Post by rodrant »

My 3rd entry :shock:

A 1/35 Tank , well I will have a plane, a Sports car and a Tank ...now wish me luck in doing all till the last day :-D , at least wouldn't be bored :crazy:

Image

:cheers2:
Cheers ,
António

On the Bench
a lot of stuff right now :-)
SteveAFV
Staff Sergeant
Staff Sergeant
Posts: 186
Joined: Tue Jul 26, 2016 10:55 pm

Re: 1/35 M60 A1 w/reactive armour

Post by SteveAFV »

Ah I see I'm not the only one with lots of on going builds. Good luck!
On the bench:
Tamiya 1/48 7ton mk IV armoured car aka Humber
Tamiya 1/35 pz kpfw IV ausf D BUDDY BUILD with mincemeat http://intscalemodeller.com/viewtopic.php?f=29&t=19653
I Heart Tamiya Stug III B
User avatar
Lysus
Captain
Captain
Posts: 4562
Joined: Fri Dec 18, 2015 11:37 pm
Location: Seattle, US
United States of America

Re: 1/35 M60 A1 w/reactive armour

Post by Lysus »

Last day builds are more fun. Can't wait for your updates in December ;)

:pop:
Backlog Progress: |||||||||||||||-------|----------|----------| 26/80
On the bench: Hasegawa 1/72 Tatiana's Vanship
Last Completed: Bandai HGUC Geara Zulu // Hasegawa 1/48 J2M3Raiden Prisoner of War
User avatar
rodrant
Chief Warrant Officer 2
Posts: 1774
Joined: Wed Feb 19, 2014 9:22 pm
Location: Maia - Portugal
Portugal

Re: 1/35 M60 A1 w/reactive armour

Post by rodrant »

Time for some update on this one :-)

The box is a little pressed up

Image

Lots of plastic , all unbagged

Image

One..

Image

Two..

Image

Three...

Image

Four Plastic bags , tamiya usual :-)

Image

A bottom hull

Image

1970 ...uau ...

Image

Rubber tracks , these are Big , I think they are bigger than the M1A Abrahms ... or maybe not , not an expert :-)

Image

A bag with some mesh , a cord (usual tamiya for doing stell cables on tanks ) and I'm intrigued with the steel rods ... :scratch::

Image

WArning , do not heat the sprues marked different than PS<Polistyrene> ones ... always good to remember and not get Toxic fumes ... :crazy:

Image

Instructions ...

Image

The decals are in one of the sprue bags ...never a good idea as they may get damaged ...

Image

So Getting busy here :

First , we must do the driver seat ... :scratch:: , for what ? I think yu didn't get to see it ...oh well

Image

Image

And no colors advice on that ...wow ...Old Tamiya kits aren't that perfect afterall ...

Regarding the bottom hull , also something usual in Tamiya old kits , they were ready to you to place an engine and baterries , so don't get wrong with + and- poles in your batteries :lol: ...nice detail ! We don't have what color to paint the interior , but you have the right lace for batteries ...nice one !

Image

Cutting using my new Faller sprue cutter ...nice , a little heavy and bigger than my old trusty Tamiya , but still a very good sprue cutter for the price

Image

You see some sprues are really old ...this Tamiya logo means something ... old let's say

Image

About this , think Tamiya make a rebos of this one on 1992 as it is the copyright date on the box , and even this can make a Gulf war desert version , so ...think they mix some of this and some of that and presto a new kit ... thin I will get a lot of spares parts not used on this one .

So I mke the driver seat ,even it will be sealed forever ...

Image

Also some lateral piece to be glued on the bottom hull must be fixed with some tape ,so help to glue ... get ready putty to be used on this one ...

Image

Place all the boogies

Image

Drive sprockets ..

Image

:eeek: ....14 road wheels ...

Image

Image

Image

Seems that I discover for what the steel rods are for ..

Image

Image

Image

This was sure ready to be a motorised tank ...

I got here a problem ...the shft on the rear enter well on one side ...

Image

Not on the other , so I cut a litlle of the plastic in order to the rod could fix the sprocket

Image

Image

Image

Done and rear panel also done .

Image

Getting shape of a tank ...it is a big boy this one ...

Image

Upper Hull

Image

Well so not to make mistakes (it is very usual with me ...we will see next ... :-) ) I usually place the plastic parts in the same scheme as the instructions so not to get lost

Image

Done...

Image

I don't know what this is , but we must cut the original one and replace by a new part , seems a light or a periscope ...

Image

Image

Now i also get the driver seat forever sealed in the Pharao Tumb :-) , the hatch could be moveable

Image

Image

Not that you get to see much , but a nice touch from tamiya on this one , for me with all the reactive armur and no figure in it , I refer to leave this closed

Ok , then I could close/fix the upper hull with the bottom hull , but when checking all the stuff I noticed why the rod didn´t match the sprocket support ...I made a mistake and the part wasn't proper glued in site ...so carefully and not to damage all I put some Tamiya Extra Thin in order to soften and to unbond the piece, I get it out ...

Image

I noticed for the distance of the sprocket to the mud guard , impossibel to place the track after ...and very different space form the other side

See those two holes , One was ok, the other wasn't at the right place :bash:

Image

So sanded the place and reglue the pice on the correct position ...always learning ...

Image

Image

Front reactive armour done and placed , thi one I will place before painting , i will not do that in the Turret armour asI will paint fisrt at least with a first layer of Yellow desrt and later I will place it for the lights and shadows on the armour

Image

Image

Turret and Gun

Image

And now this is where it is ...

Nice tank this one :-)

Image

:cheers2:
Cheers ,
António

On the Bench
a lot of stuff right now :-)
User avatar
rodrant
Chief Warrant Officer 2
Posts: 1774
Joined: Wed Feb 19, 2014 9:22 pm
Location: Maia - Portugal
Portugal

Re: 1/35 M60 A1 w/reactive armour

Post by rodrant »

So , more updates on this build !

I'm a fast builder ( and this is not a great stuff to be ... :lol: ) , I'm very impacient and it is something that I must work more in my future builds , not to rush ... always bad result .

On this case however , I decided to make another go on a techniue that I learn/read in a small Book called 'Plastic Model Technique Guide ' , a Tamiya Publish ... this book is great if you are beggining modelling and teach you the very basic techniques and steps on how to build a Plane , a car , a tank or a boat (all Tamiya ) , not considering that we have great How to's here in the Forum , or the great series of videos from Paul , this little book is great , and already tried using this technique in a M1A Abrams Tusk build that I did , I think in the Desert Rats GB one year ago more or less ...

Image

After I glue all the reactive armour turret supports and all littel parts on the turret , the M60A1 is like this , a nice tank .

Image

So , going for the stowage basket ...

It is hard to make asit is very fragile to clean , tamiya give two small plastic parts to help us build the basket

Image

This is the instruction on how to do it ...well I didn't find it very usefull , but ok could help in getting the right space in between the plastic 'rods'

Image

Mesh ...we get some prints on Instruction manual for cutting the mesh on the right size

Image

Hmmm...

Image

Here entered that Tamiya book , and they explain a great technique in order to you to do this :

Image

Cut the figure , glue it on some Tamiya Tape and then all you have to do is to use a scissor to cut the correct mesh shape

Image

Here in the Basket

Image

Ready to paint ...and here another Step I will not do that all people do , Primer ... Yes I will Spray paint all tank using TS 46 Light Sand from Tamiya ...advantage , a fast build , disavantage, the Airbrush is great to control paint and to do correct lights and shadows , but on this build I will go with out using Primer .

Image

Nice cast detail in the turret and in the small command turret

Image

Image

Image

Some putty apllied in some joint where we have some gaps

Image

Image

Ready to spray ...with the crewman already ready for some painting ...

Image

Painted ....well not a Big Difference :-)

Image

Image

Today in the morning , as the Spray paint dries real fast , I do the detail painting ...some XF-49 in the MAntelets of the guns , some X-3 Royal Blue for the command cupola windows ...yes thi is an old kit and you do not have fancy clear parts :-)

Image

I must do some detail painting in those windows , today isn't a good day to paint small stuff , I'm shaking :lol:

Now weathering ...Tamiya Accent Panel Line Color Brown ( the light one ) , will afterward do some DryBrushing using XF-59 and XF-2 Tamiya Color and some Weathering Master with some Ligh Sand and Sand ...

Image

Panel Accent Line apliied ...

Image

Image

Image

And after some cleaning using some X-20 Thinner ( note that it is the X-20 for Enamels , not the X-20 A for Acrylics ) as the Pannel Accent Line is basically Enamel Paint very diluted .I clean using the weathering Brushes from AK , trying to depict the streaks , specially on the Reactive Armour Plates and bolts ...Like the end result

Image

Image

Image

Image

In the back ...nice effect !

Image

So now to work on the Tracks , Will paint them XF-64 , then Drybrushing using XF-84 Dark Iron and Detail paint in the Rubber Plates using XF-85 Rubber Black !

Image

And must still do the stowage that come on the kit and the crew , painting them is going to be hard work , but the build is almost ready now :-) , this technique is very good to make a simple fast build , yet with some interesting finish .

:cheers2:
Cheers ,
António

On the Bench
a lot of stuff right now :-)
User avatar
rodrant
Chief Warrant Officer 2
Posts: 1774
Joined: Wed Feb 19, 2014 9:22 pm
Location: Maia - Portugal
Portugal

Re: 1/35 M60 A1 w/reactive armour

Post by rodrant »

Final update ...:-)

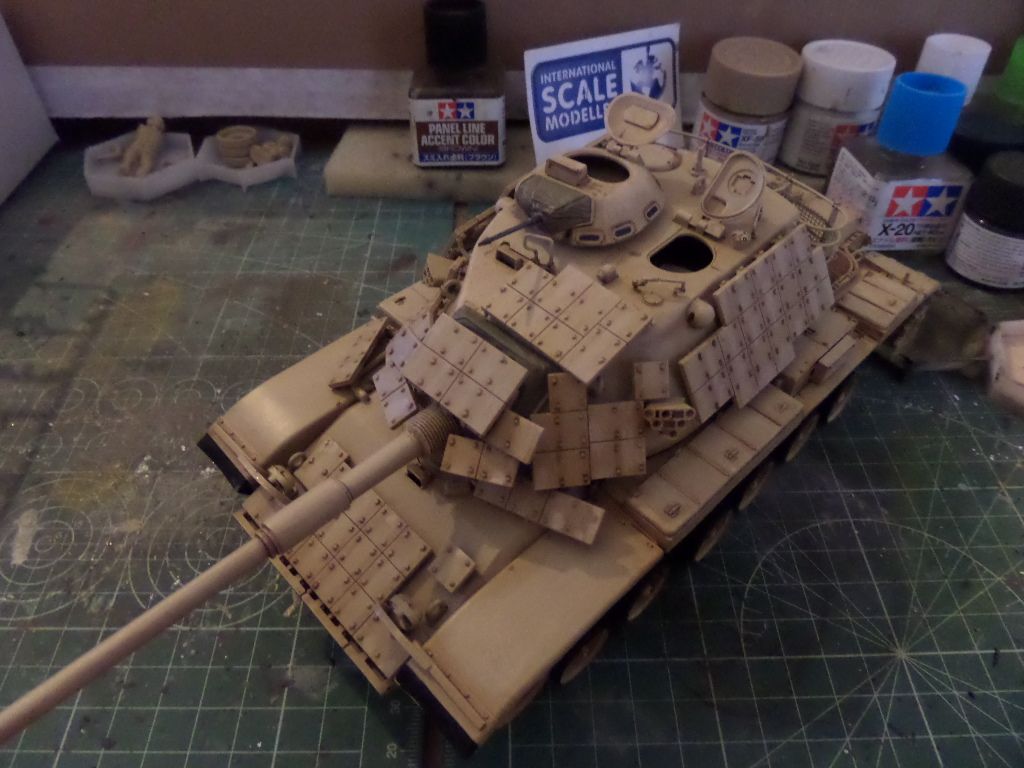
Well this build is I think Typical Tamiya , you get a nice kit with figures , some stowage (not much...) and you get to build a nice model OOB , in this case , an old kit from 1970 , with some new sprues from 1992 ...well you get to build a nice kit ...that's it , a fun , easy build .

so I left you doing the tracks ...

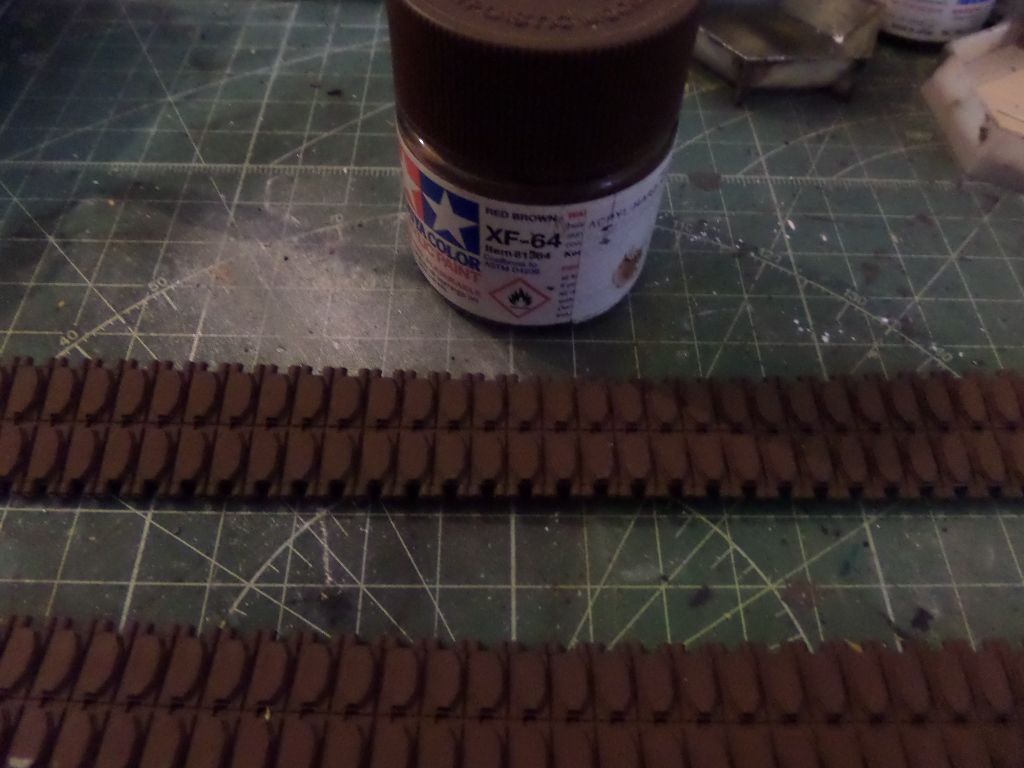
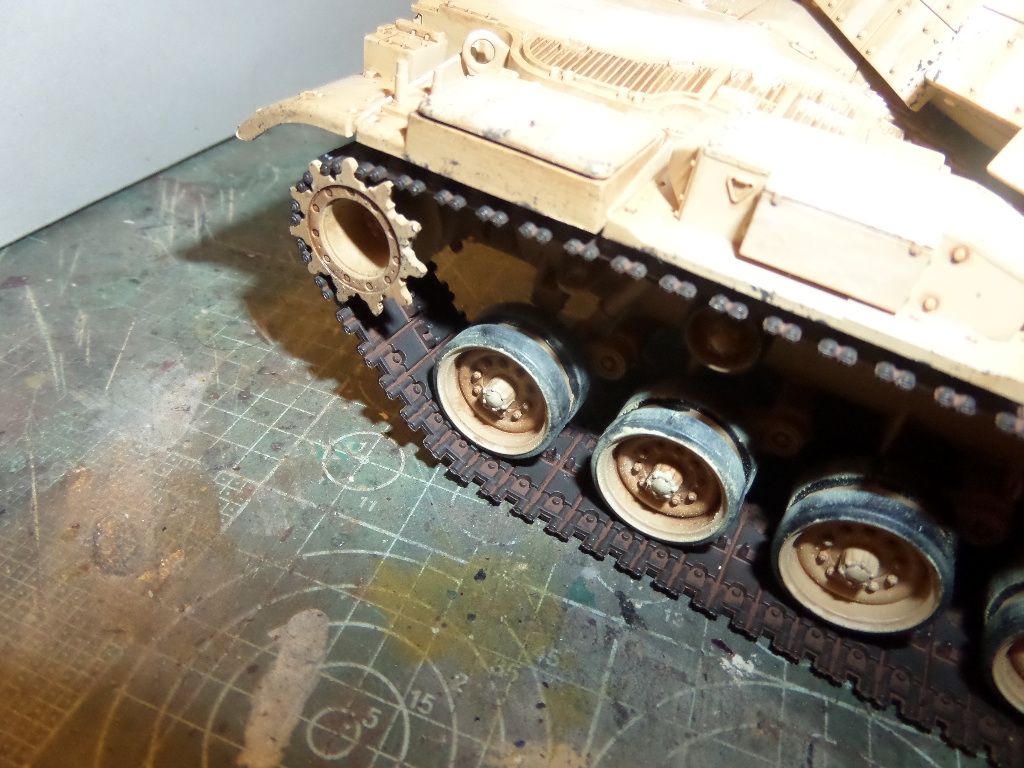
I First paint them with XF-64 Red Brown

Image

Image

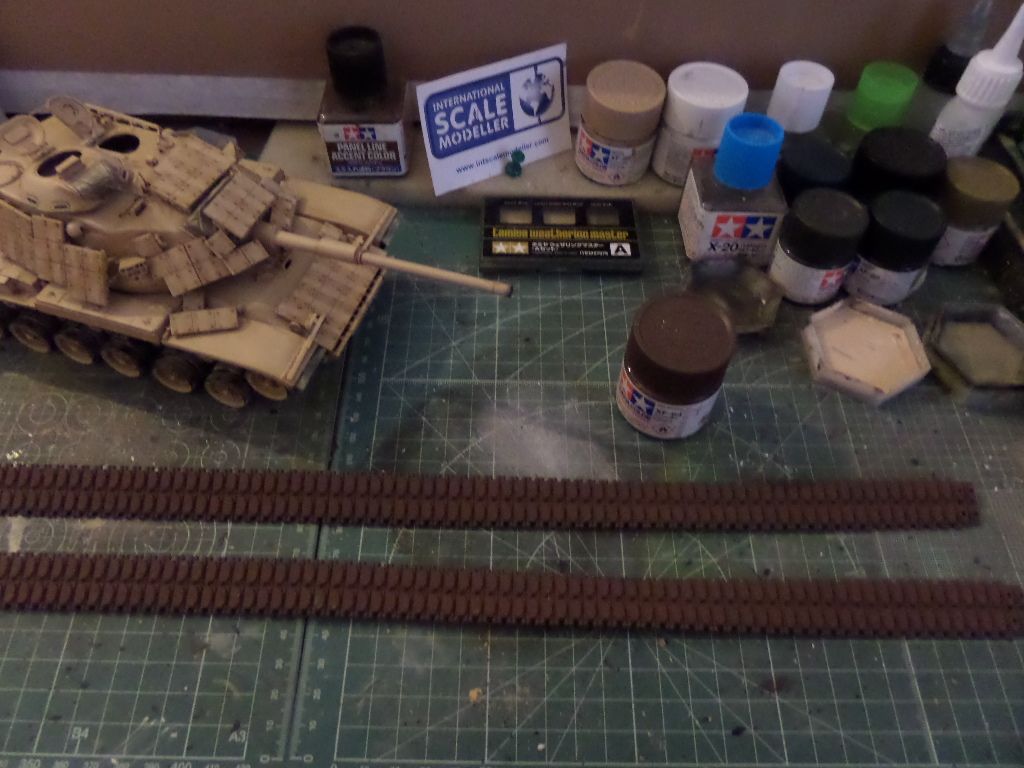
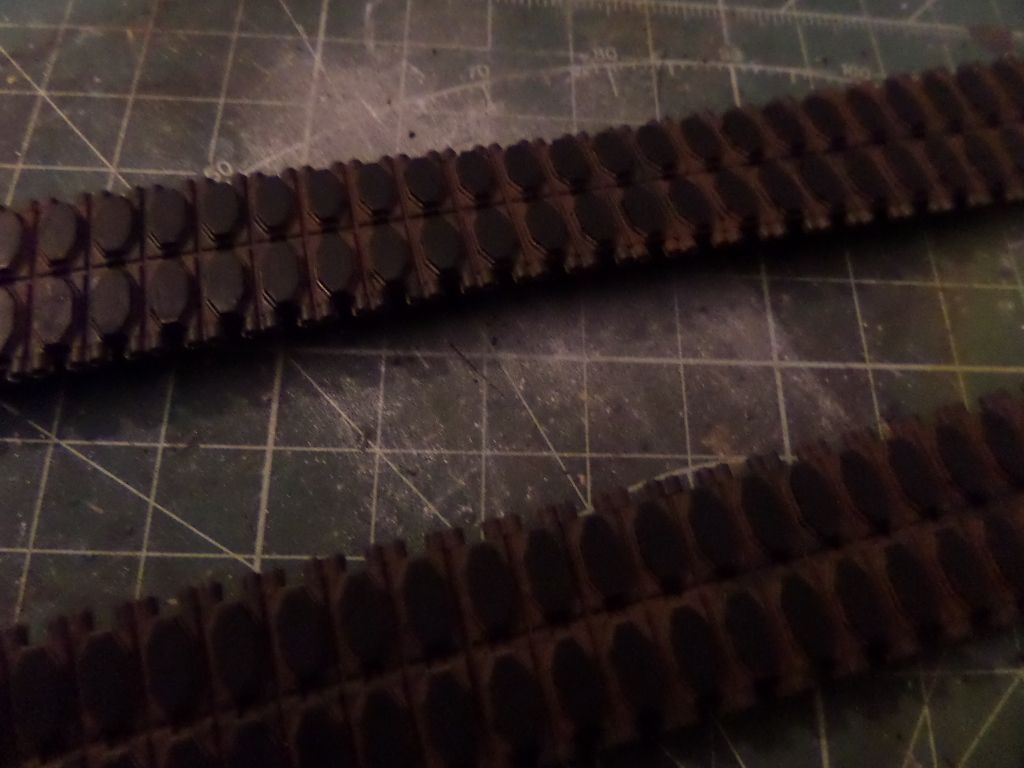
Some Drybrush using XF-84 Dark Iron

Image

And Paint the Rubber Pads using XF-85 ...

Image

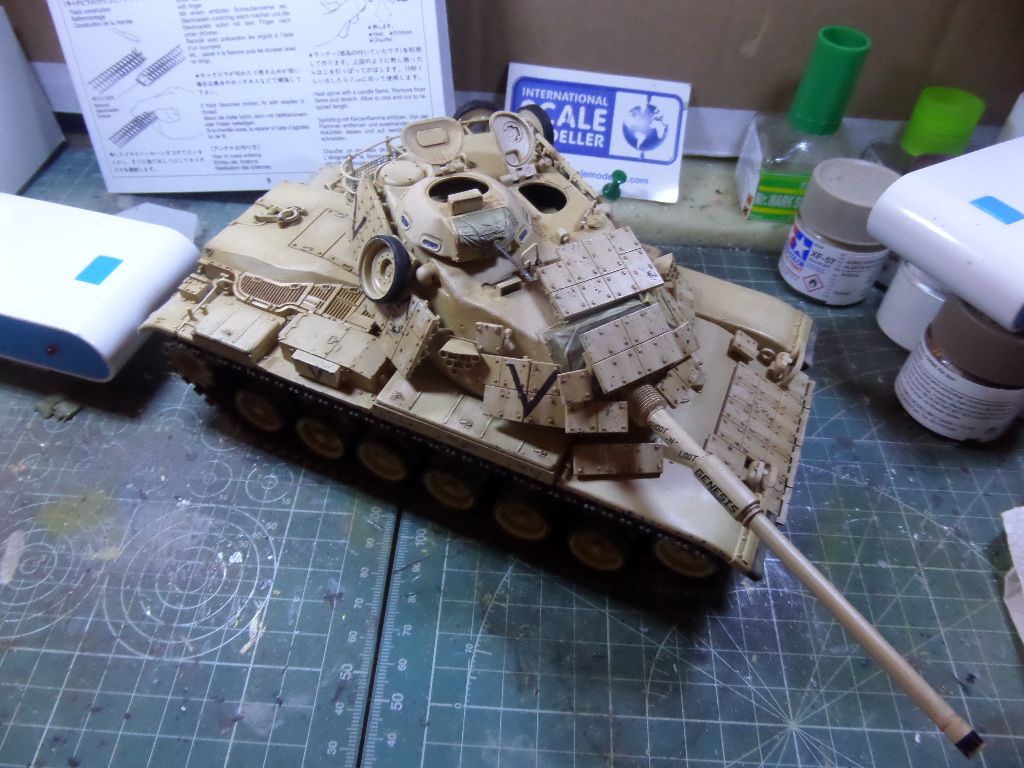
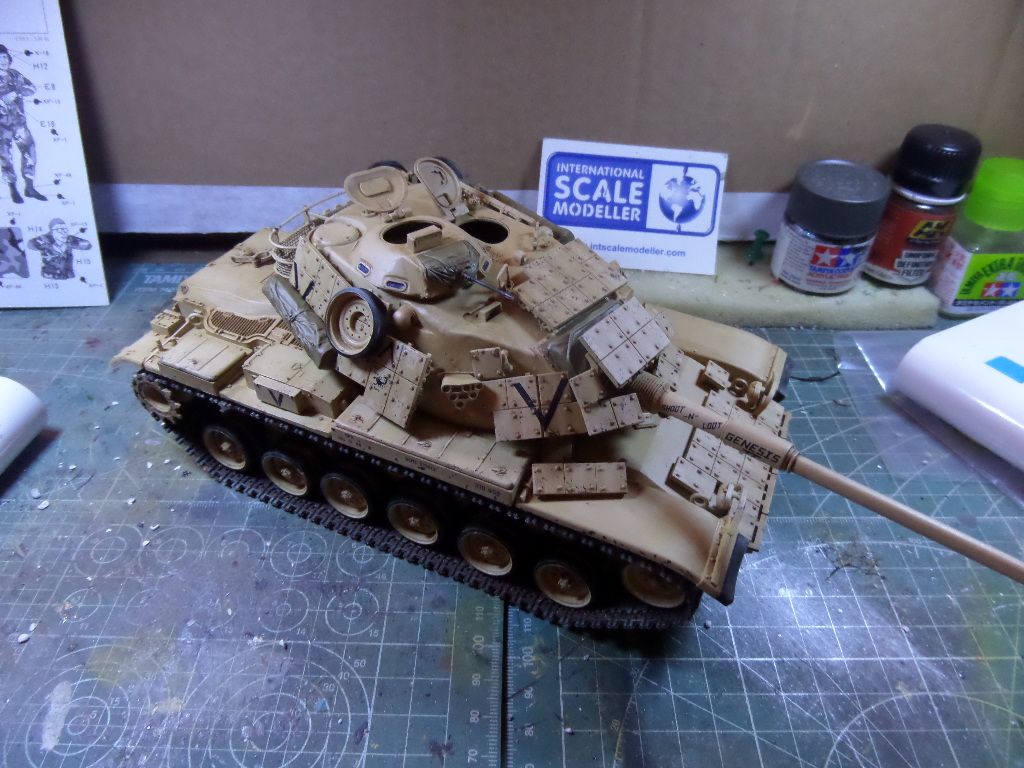
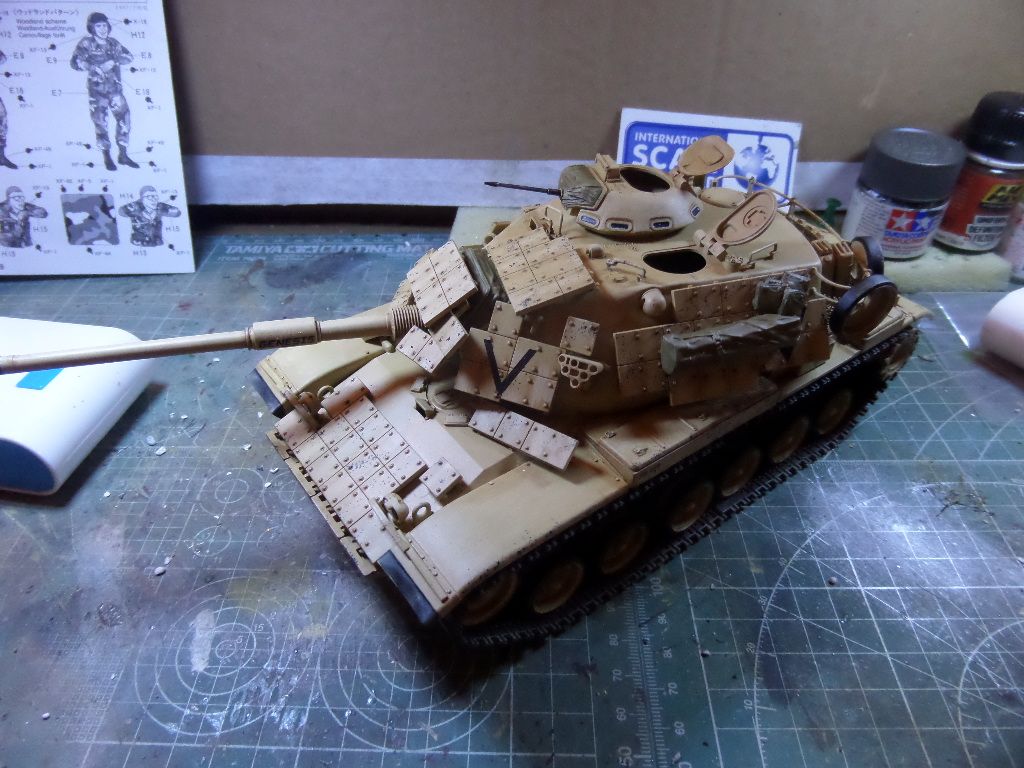
The tank now is like this :

Image

Image

Image

Image

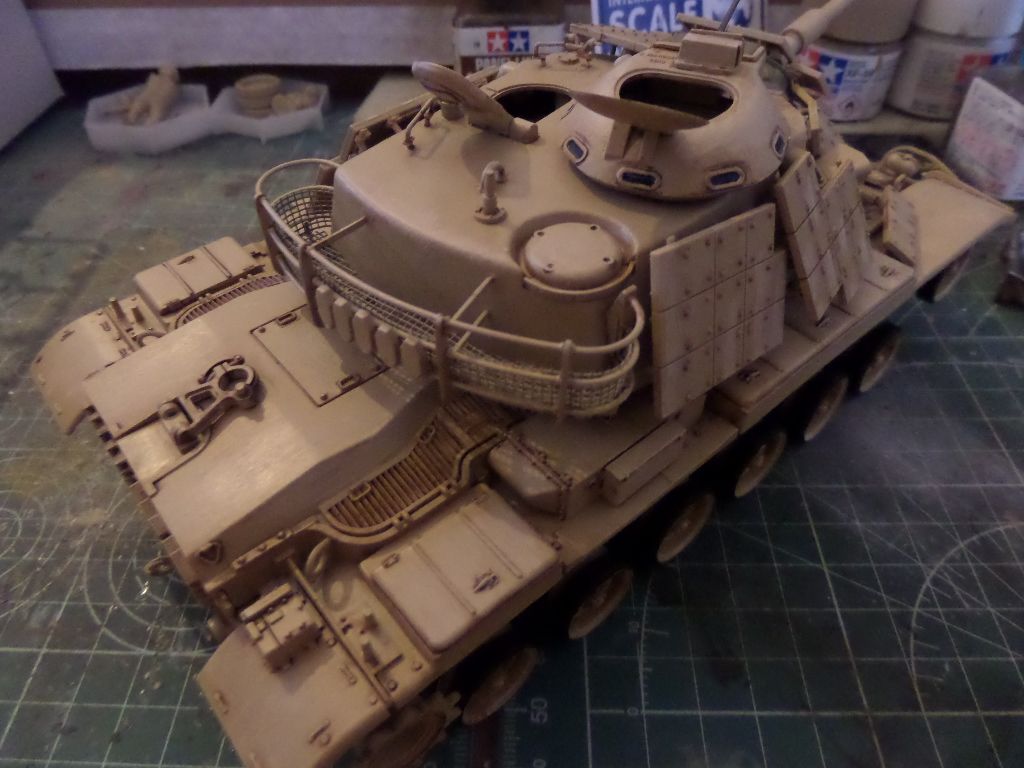
I Apllied some dry Brushing using Tamiya XF-59 mixed with XF-2 White , and I use Tamiya Weathering System (MAke up from Tamiya :-) )

The A set has some Mud , Light Sand and Sand ...nice to Desert Vehicles

Image

I use some Soot from another Set for the Gun Barrel

Image

Some dust on the canvas and on all the tank

Image

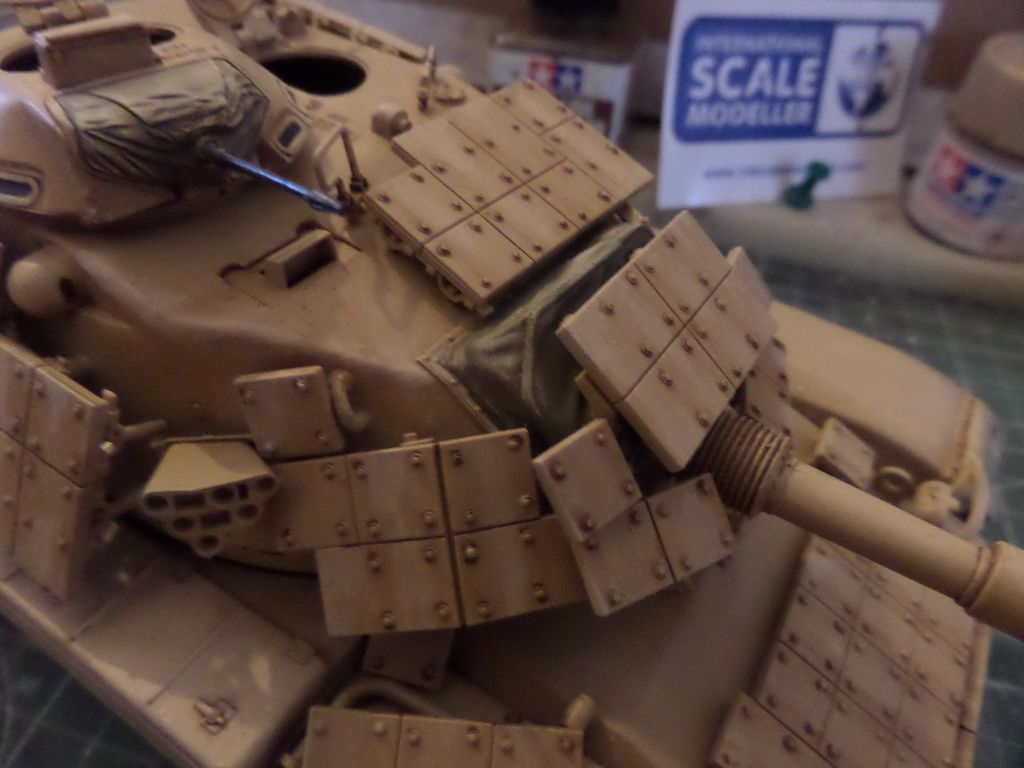
Also I did some chipping using a samll piece of sponge with Dark Iron ...very subtle ...here you can see tracks , soem chipping and some weathering done

Image

Even Rubber tracks aren't the best option , I think painted like this you can have a nice result and effect ...you can paint them using some more mettalic color like XF-56 or even do some d-ry brushing using a more metallic tone than Dark Iron if you want to make a more clean effect ...but I'm not an expert on tanks so this is my best try :D

Image

Image

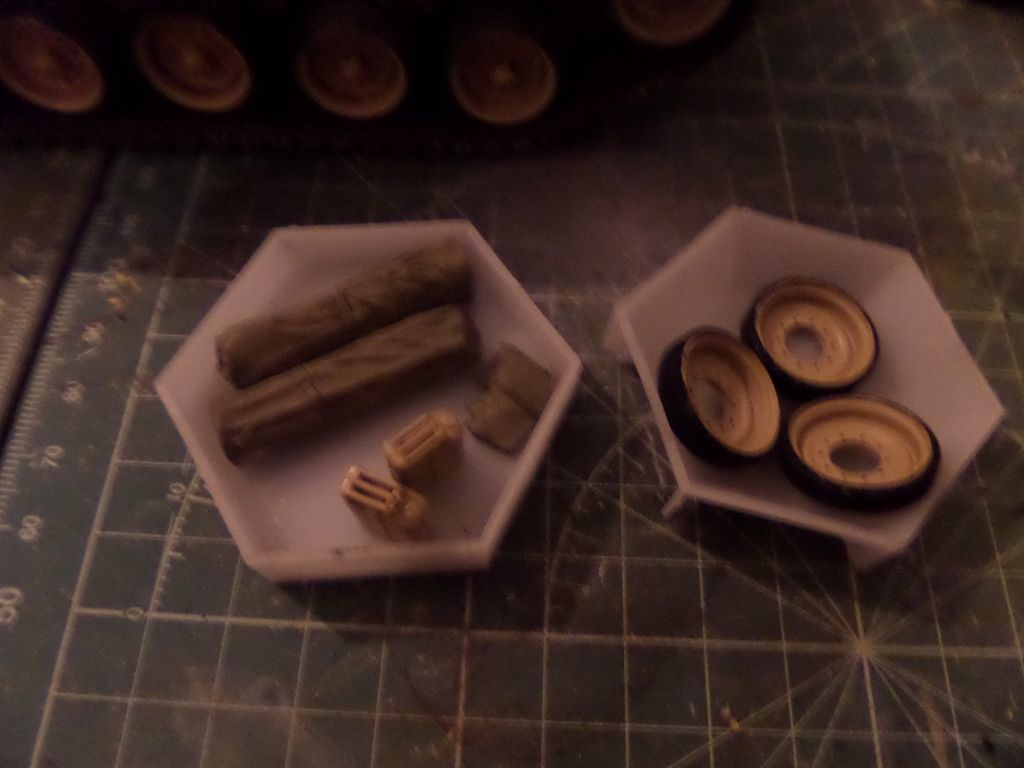
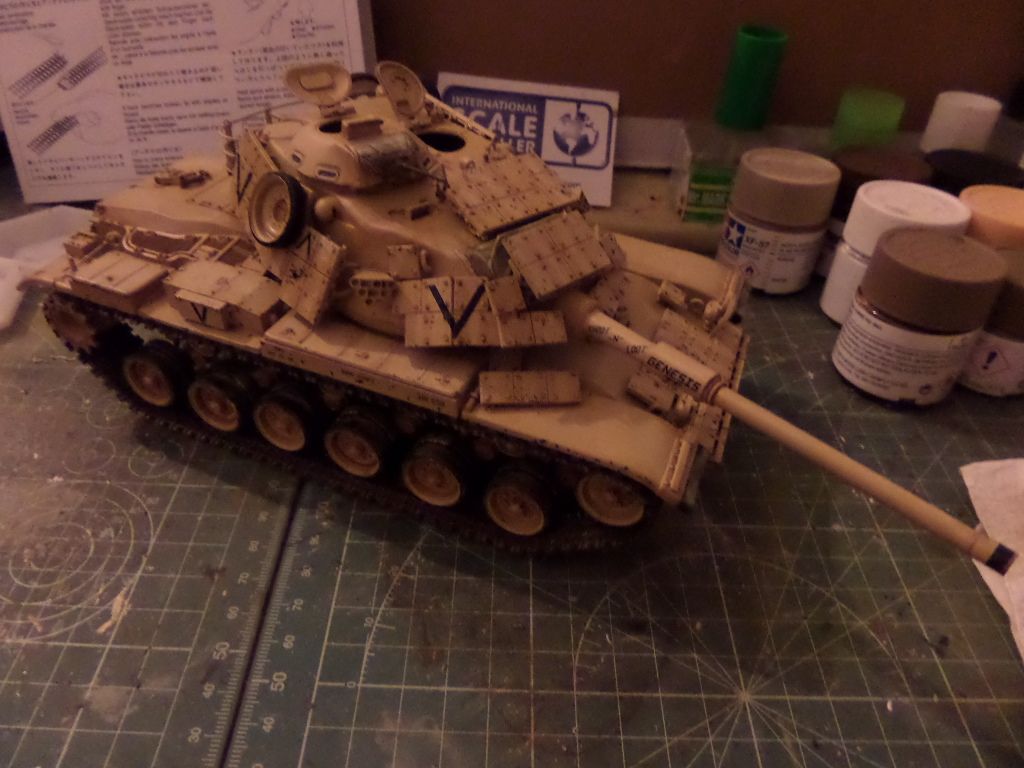
STowage done , some spare wheels , two Camouflage net bags , and water bags ...I really not sure on what colour to use on this , even odd I painted them XF-49 Khaki Green ...I suppose that is the right colour for this , but ... again instructions aren't very clear on this .Also Two JerryCans come with the kit ...

Image

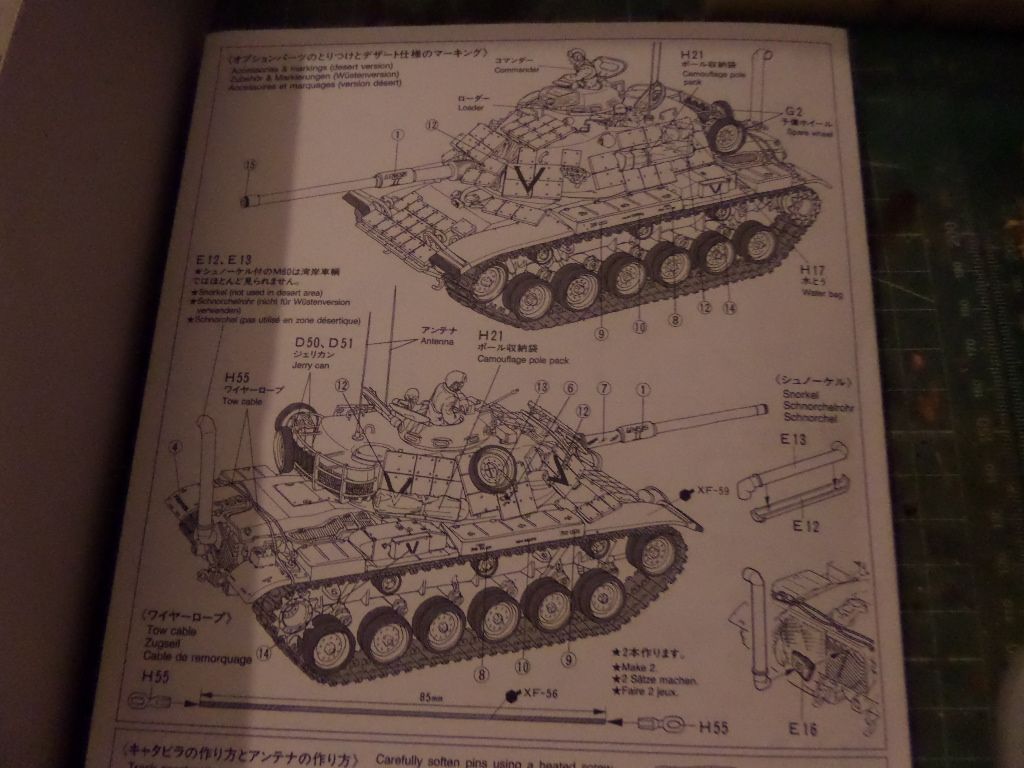
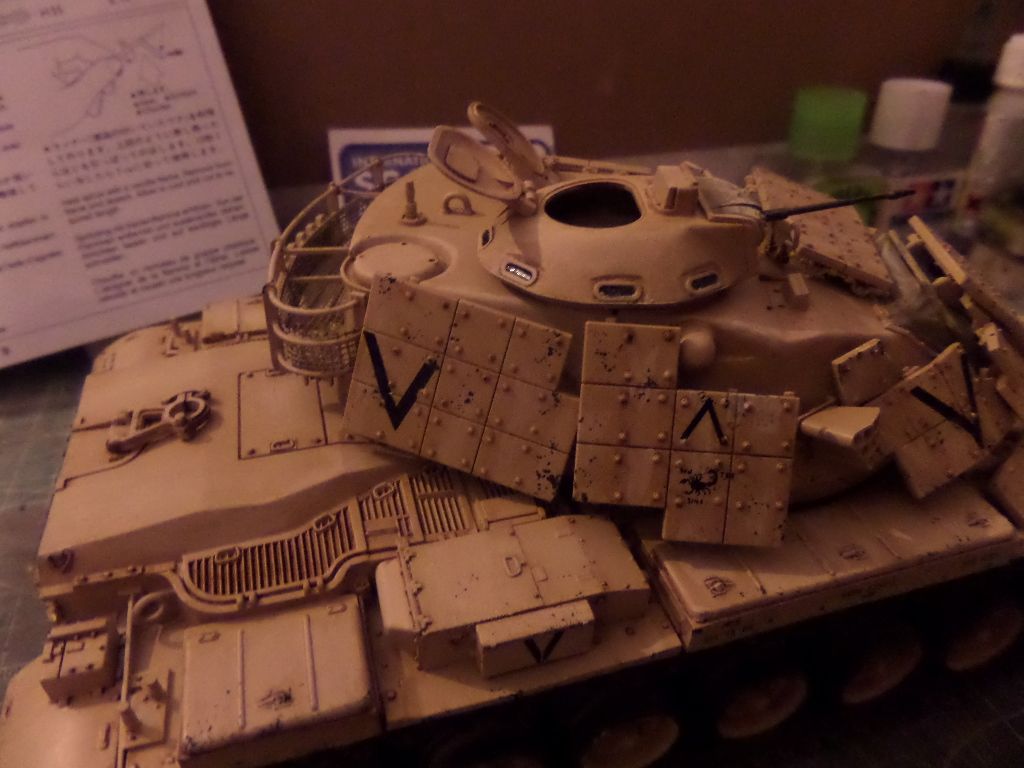
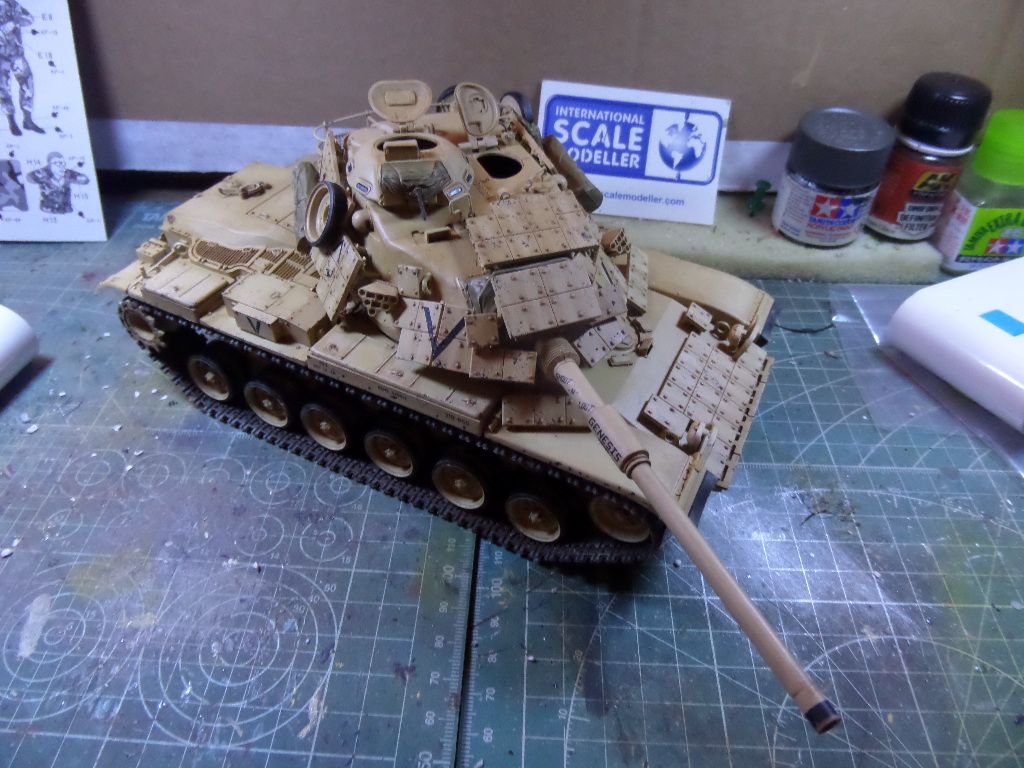
Now with everything ready and placed on the tank ...time to decals before doing the figures ...

this is the decal scheme ...Tri-dimensional view , and it is different ...let's say :scratch::

Image

This are the decals ...

Image

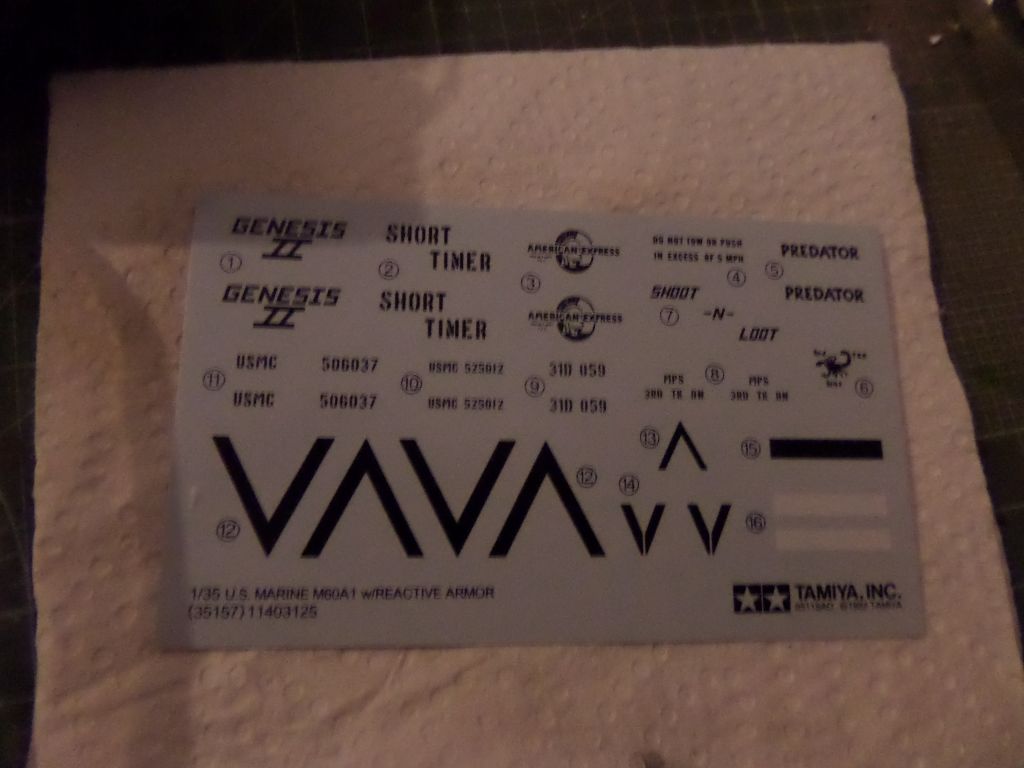
And again , and some Tamiya tradition in some of their kits ...their decals are really great ! :wall: 
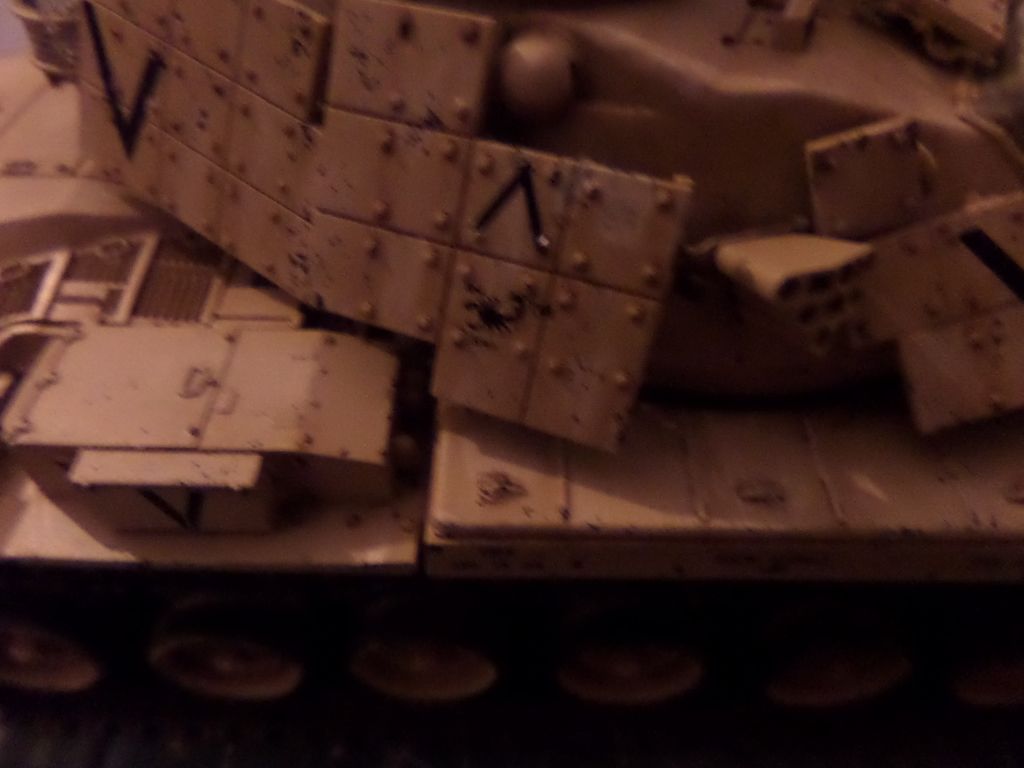
...the unit identification symbols all get in smitherins if you do not have carefull ... this was the first and I noticed right away the type of decals this kit has ...awfull decals , It happens to me about two or three times in Tamiya builds,also I get some great decals in another builds , and mst of them were Tamiya kits ...really I don't know why a brand that gives you some of the easieast kits to build could have such bad decals in some kits ...oh well ...

The V must be painted in one of his tops ... it smithers like if being hit by some desintegration ray :lol: But then making some puzles in the build is also fun !

Image

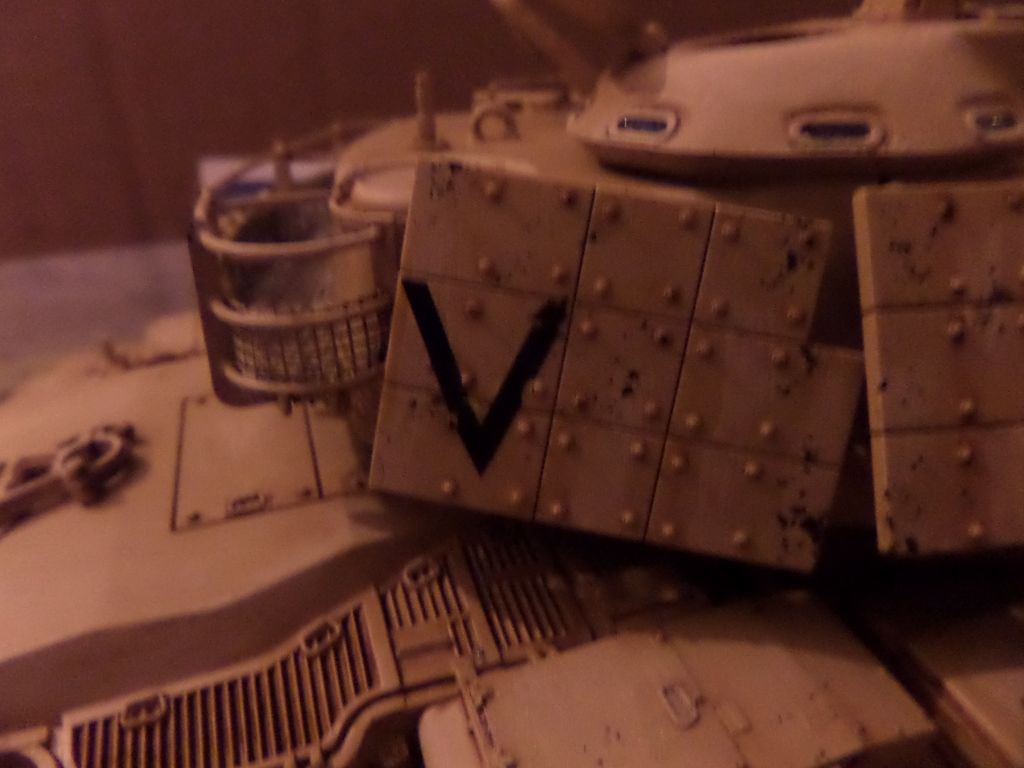
Also hard to place with the rivets from the reactive armour !

Then the others , a nice Scorpion unit badge ... :-)

Image

I was very careful from the first decal , and I did't ruin much , but it was one of the hardests steps in the build , I took some Decal Set from Mr-Hobby , and in some I just place them in tepid water and remove them almost imediatly , they are really thin !

Image

Image

And there was light !!!
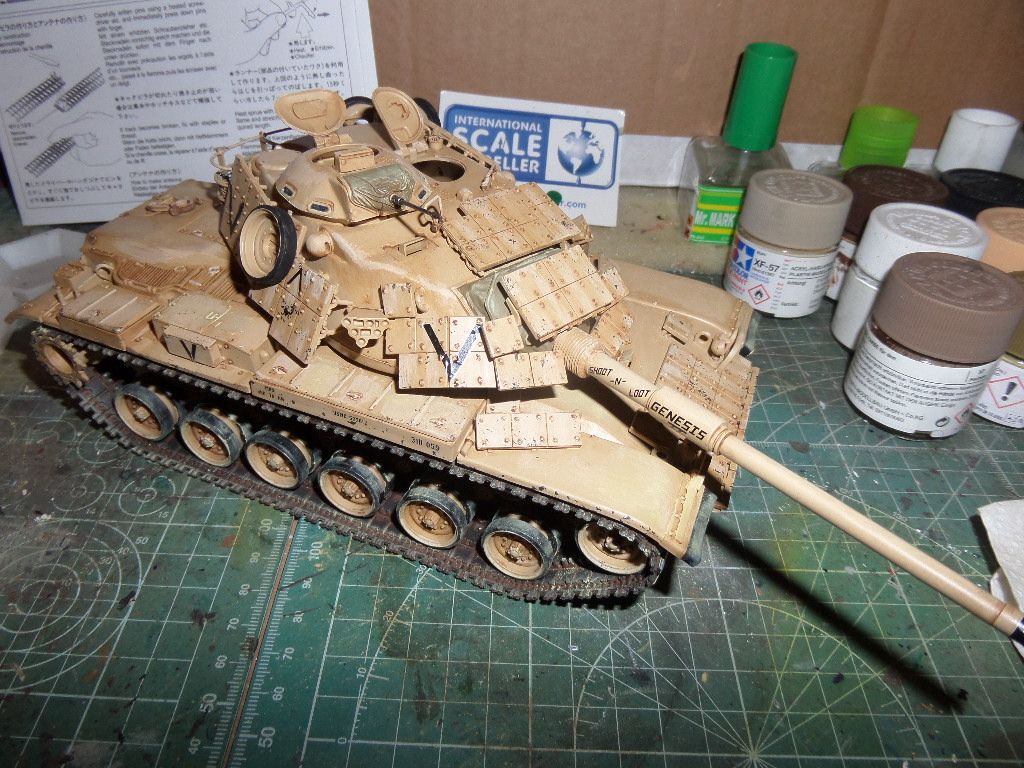
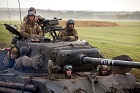
Image

Nice tank !

Image

Image

Figures ...another hard task for me ...This camo uniform schem is hard to do ...but I give my best ...

Image

Image

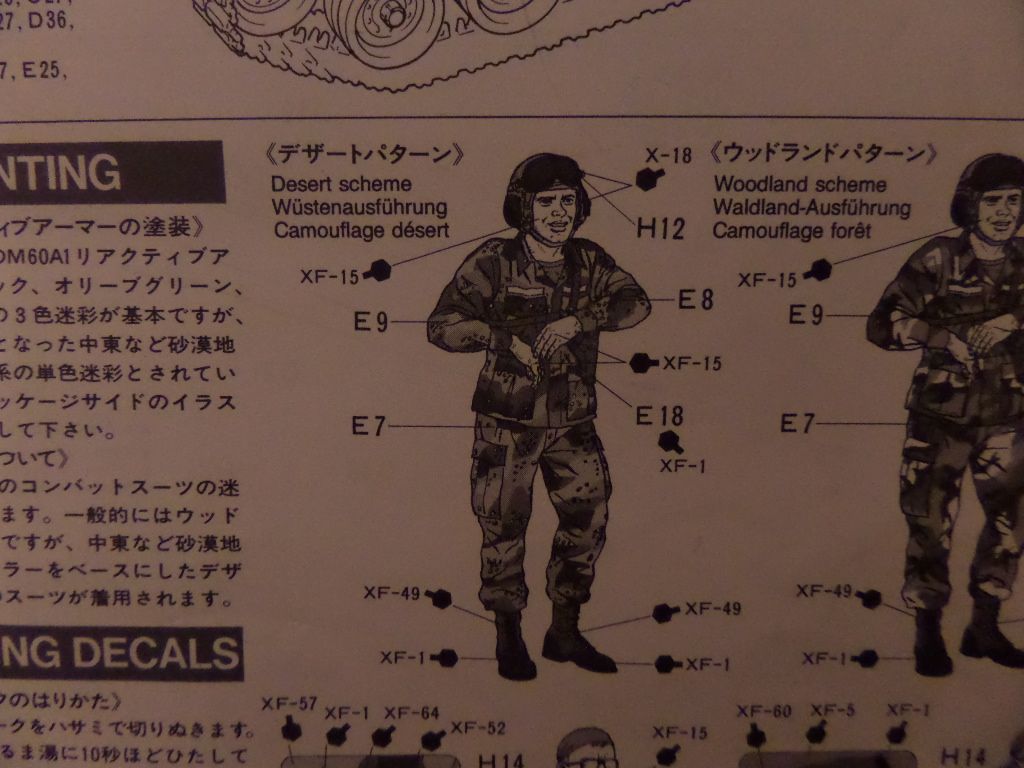
After some Primer , make a base colour of XF-57 , and then worked on the rest of the colours XF-60 , then XF 64 and XF-52 , white XF-2 dots and black dots XF-1

Image

Image

Image

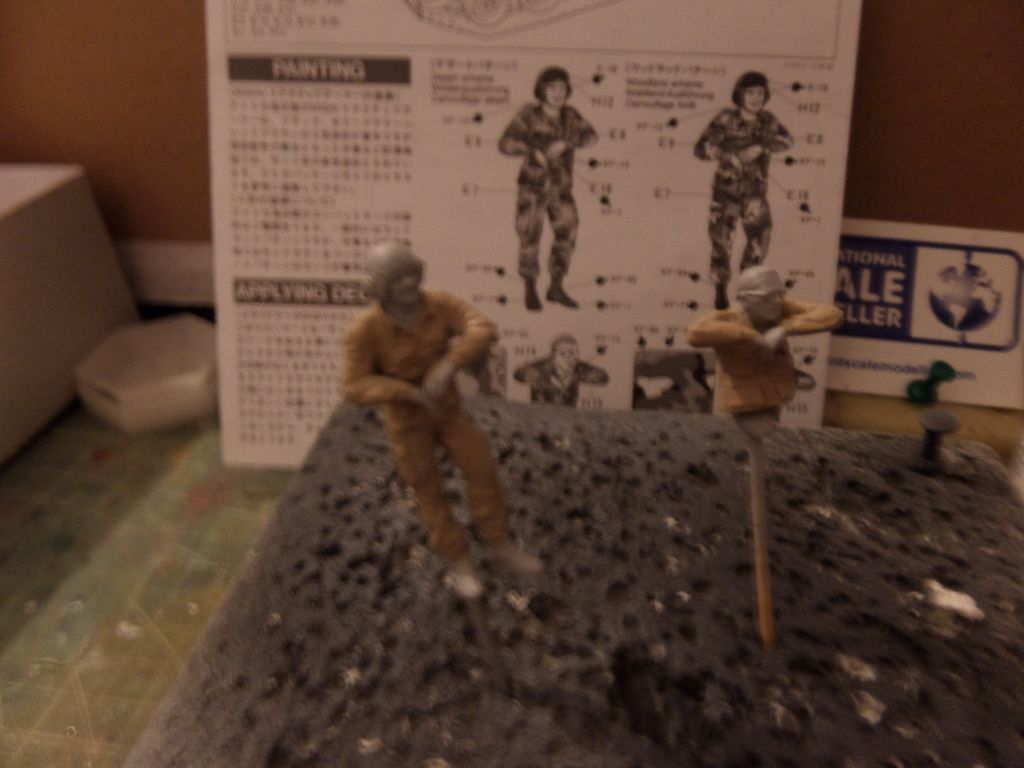
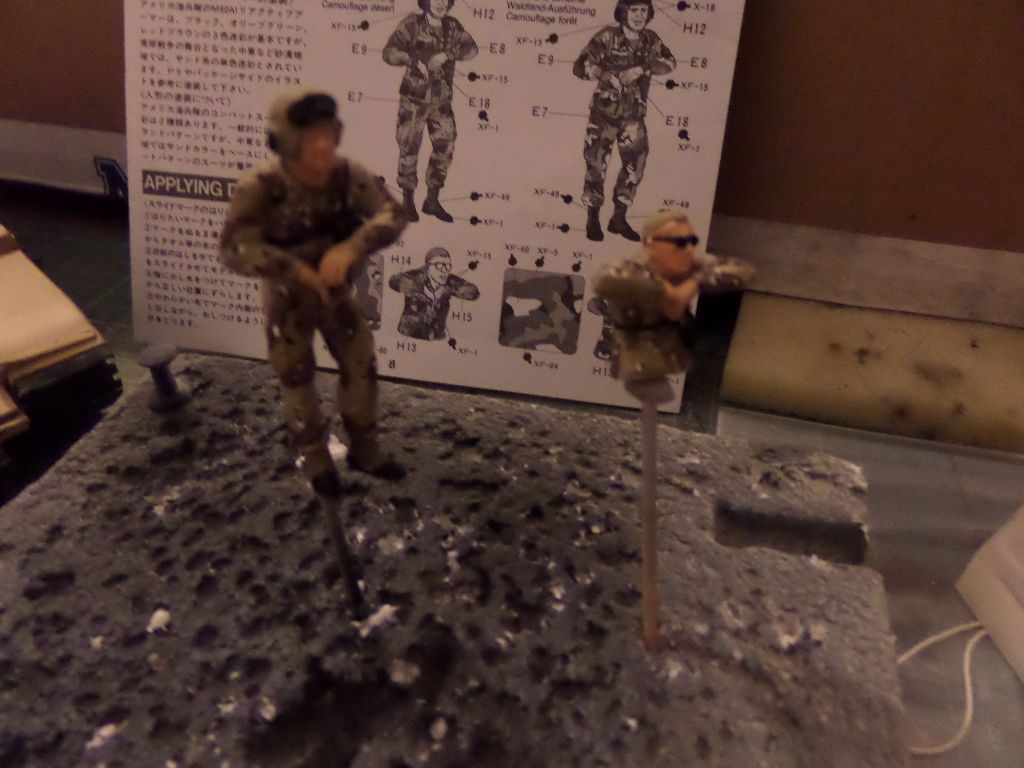
Not the best but for me ok ...it is hard this type of camo ...easy than digital scheme fro US Army in 2nd Gulf War that is true :lol:

Mr.Nicholas Cage :lol:

Image

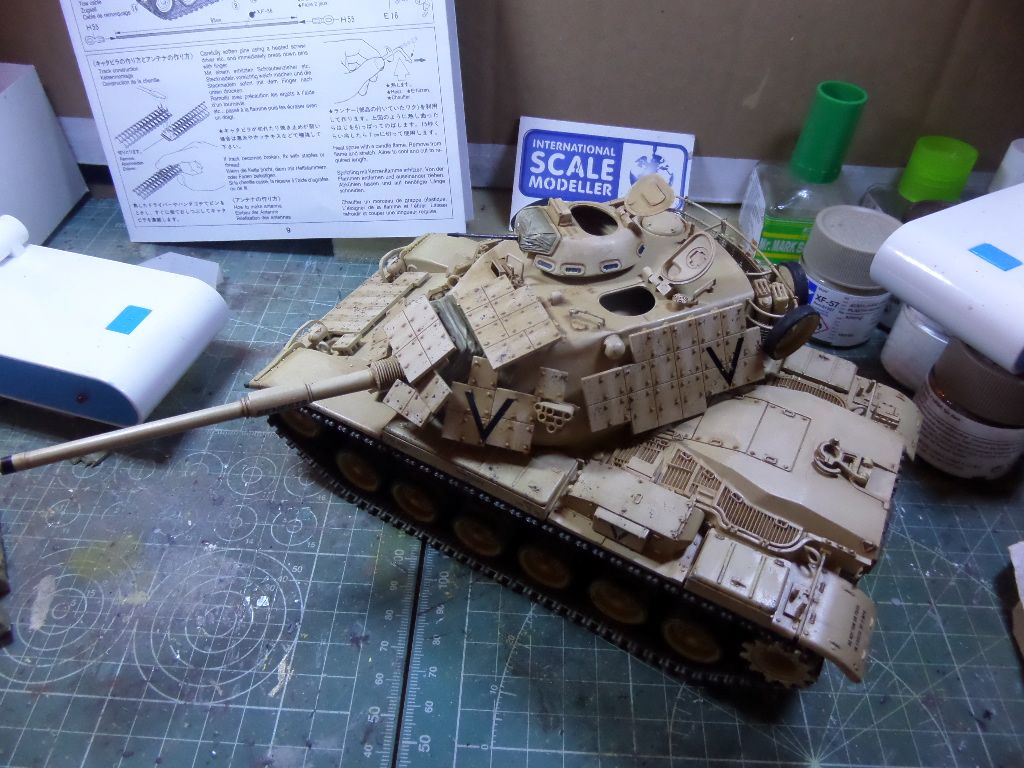
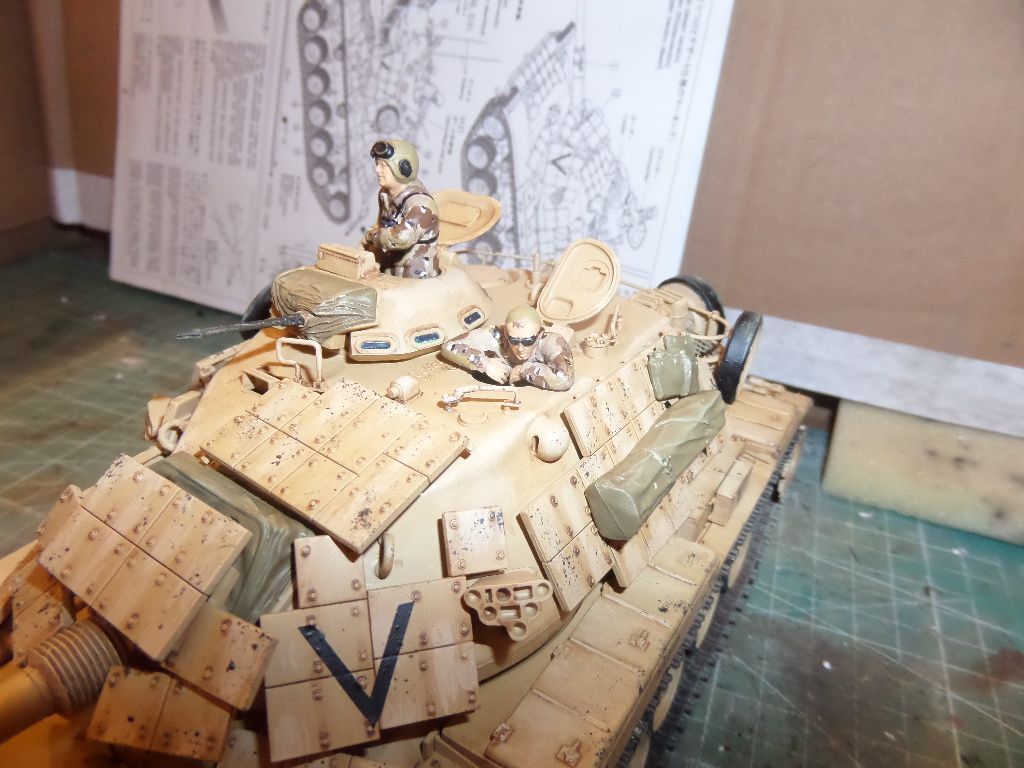
The stowage added to the tank , really like this tank !

Image

Image

Image

Image

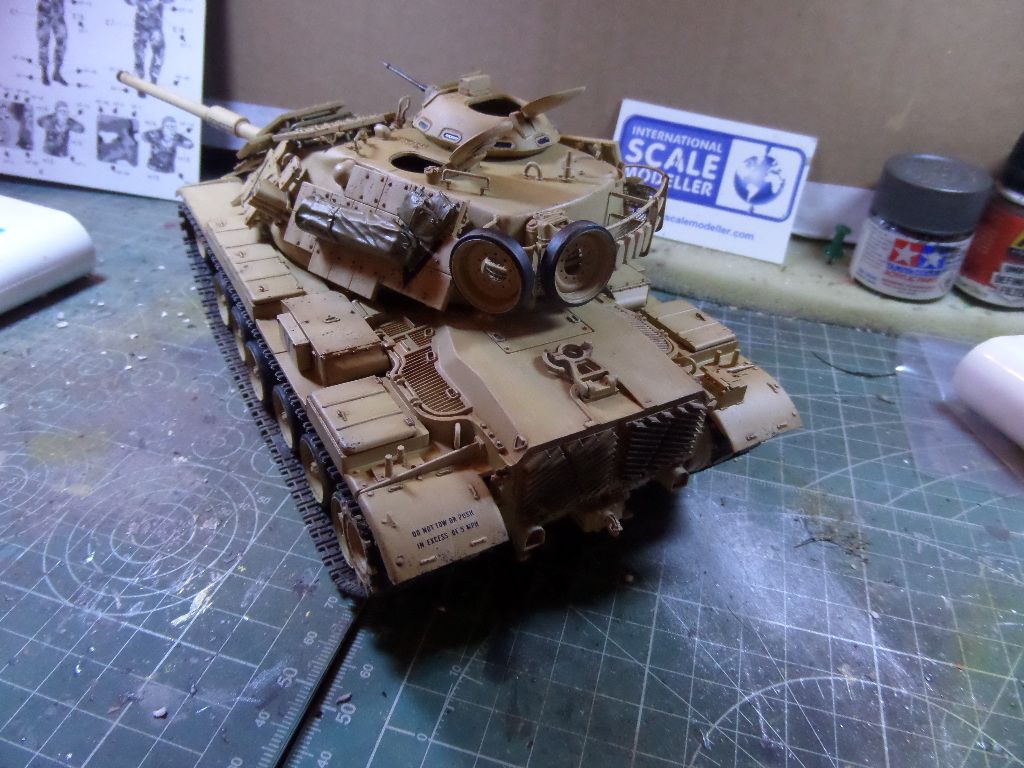
I'm unsure if those pads at the back of the turret basket should be painted in rubber ...they seem spare rubber pads for the track ... :scratch::

Some soot on the engine

Image

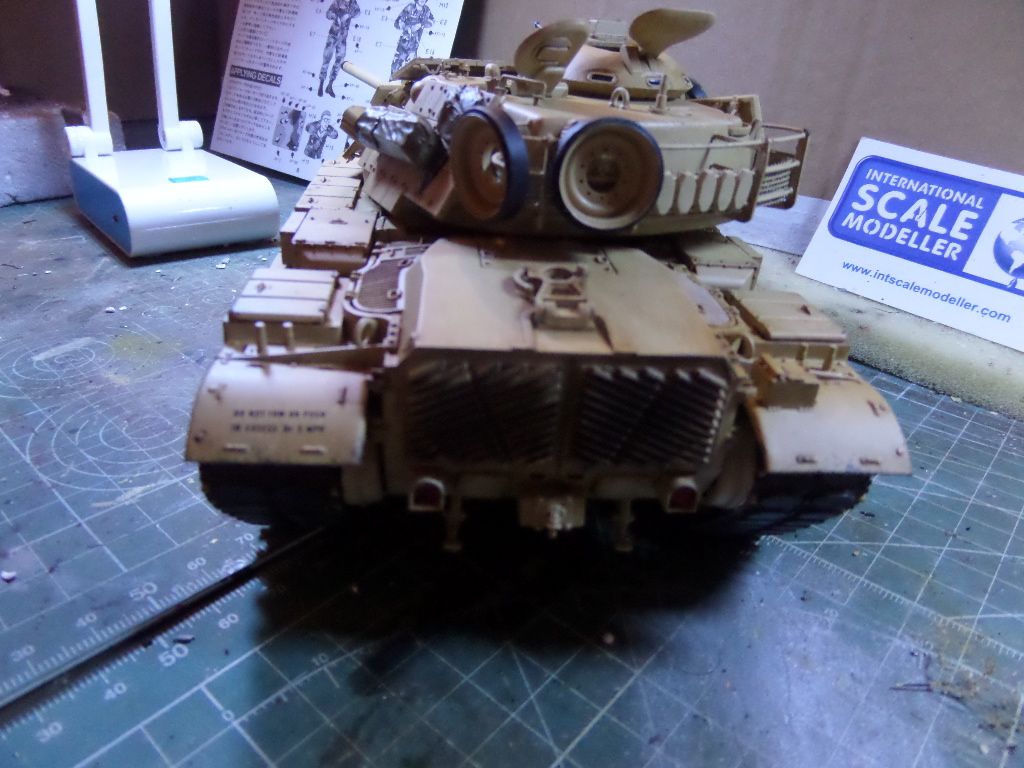
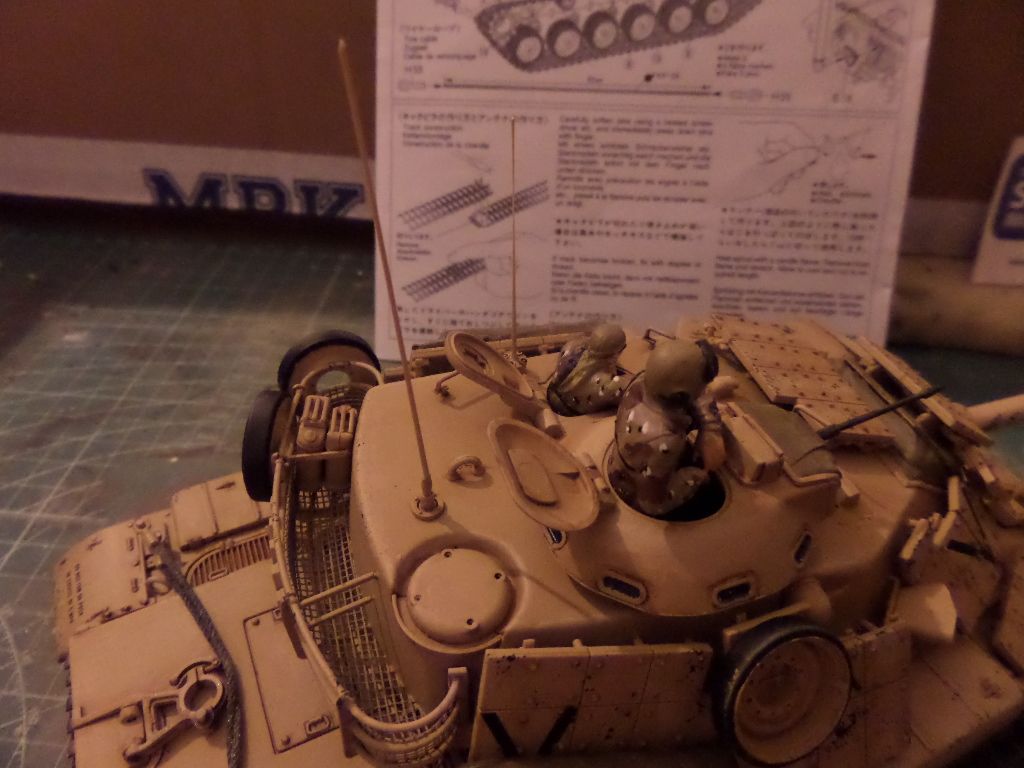
added the cable ...typical Tamiya , a tissue cord , painted in XF-56 and glued to the cable ends

Image

They are at home ...

Image

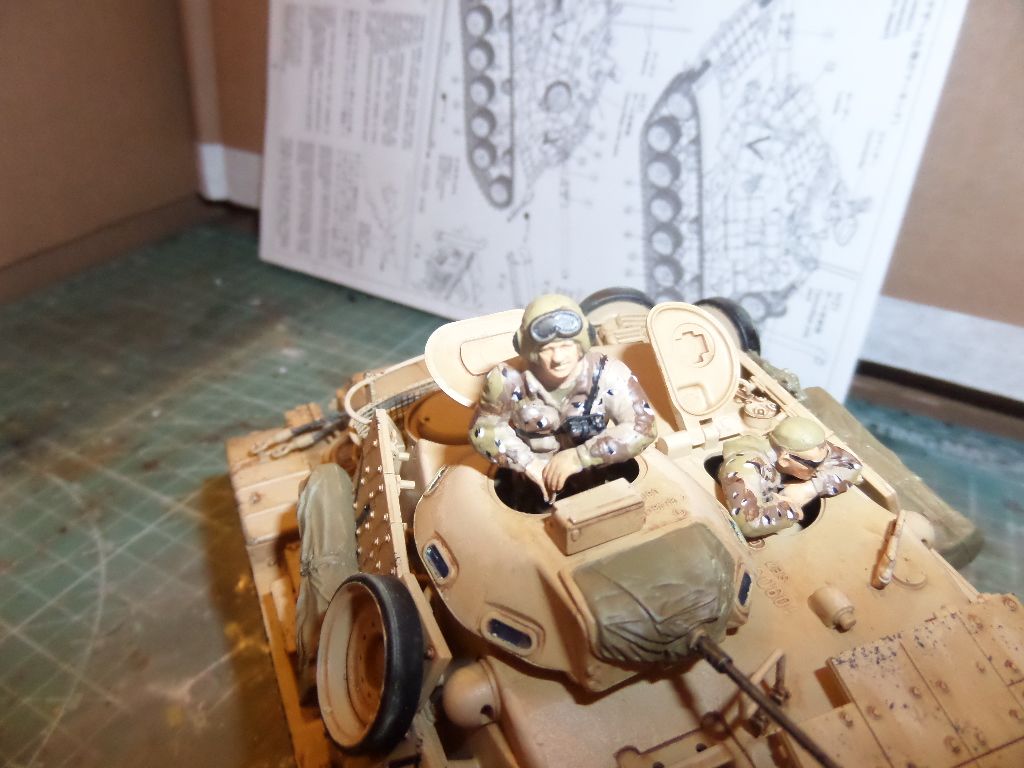
The Tank Commander is hard to adjust to the position , it has some distance from the foot support and is hard to place in the right position ..

Image

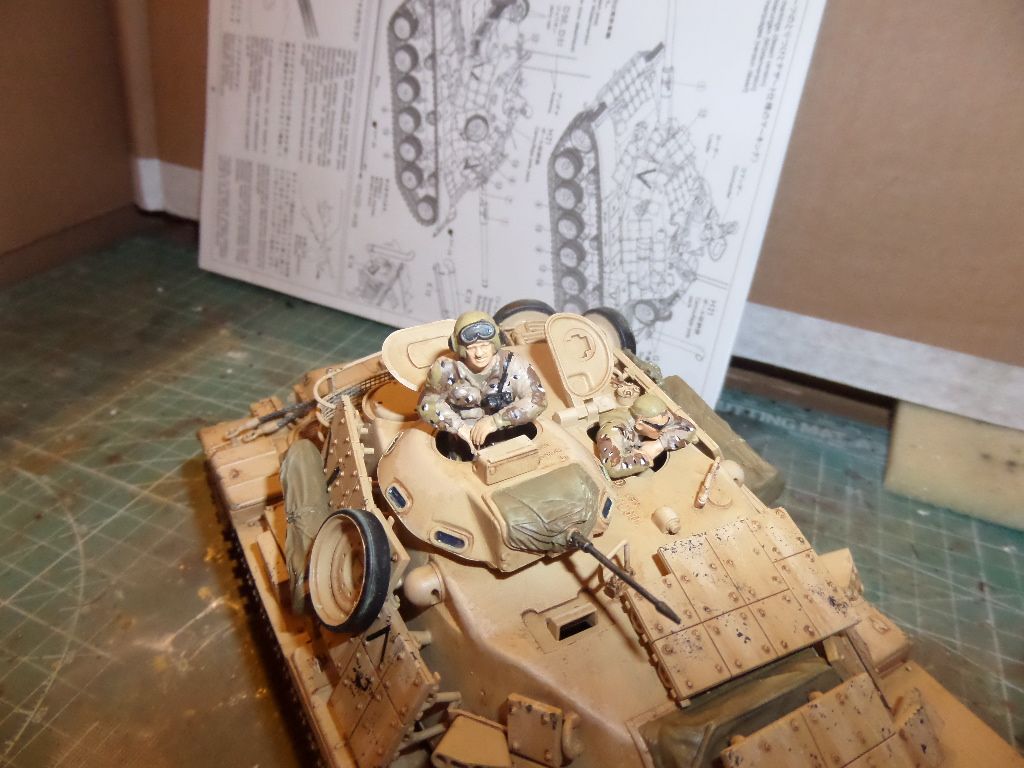
Mr Nicholas Cage however call the turret 'Home Swet Home' very realxed Gunner :-)

Image

To make the two antenas , Melt and streched some sprue and make two nice antenas ...hard to do this for a plane , easy for a tank :-)

Image

Wow ...a little big in diameter ...

Image

So this finish this build , and I like to show you the Final Result here in the reveal thread :

http://intscalemodeller.com/viewtopic.php?f=532&t=20062


Hope that you liked as much as I have fun build this , and it take me about 3/4 Days , maybe less , that's what I like in Tamiya ...fun , easy quick build ....awfull decals however :lol:

:cheers2:
Cheers ,
António

On the Bench
a lot of stuff right now :-)
User avatar
Kevthemodeller
Lieutenant Colonel
Lieutenant Colonel
Posts: 5595
Joined: Sat Mar 26, 2016 8:31 am
Location: Newton Abbot UK
England

Re: 1/35 M60 A1 w/reactive armour

Post by Kevthemodeller »

Fantastic build thread, great looking model the kit isn't one I'd have looked at but I will now :th:
Kev

On the bench:
Border Model FOCKE-WULF W190A-8 R2 - 8
Post Reply

Return to “Builds”