
1/12 Formula One Tyrrel 003
Moderator: T3hGuppy
-
rodrant

- Chief Warrant Officer 2

- Posts: 1774
- Joined: Wed Feb 19, 2014 9:22 pm
- Location: Maia - Portugal

1/12 Formula One Tyrrel 003
My second entry , a sports car , it is a Tamiya GB right ? so a Sports car should be included 

Cheers ,
António
On the Bench
a lot of stuff right now
António
On the Bench
a lot of stuff right now

-
Twokidsnosleep

- General

- Posts: 18254
- Joined: Thu Aug 07, 2014 4:07 pm
- Location: BC,Canada

Re: 1/12 Formula One Tyrrel 003
I am at the front of the concours watching this one 
Edit: holy cow it is 1/12 scale kit, missed that first time around

Edit: holy cow it is 1/12 scale kit, missed that first time around

Last edited by Twokidsnosleep on Wed Aug 31, 2016 9:41 pm, edited 1 time in total.
Scott
On, Under or near the desk
Brewster Buffalo ..buddy build
Rockford Firebird
1/72 Black Pearl Pirate Ship in dry dock
On, Under or near the desk
Brewster Buffalo ..buddy build
Rockford Firebird
1/72 Black Pearl Pirate Ship in dry dock


Re: 1/12 Formula One Tyrrel 003
AHHHH...I don't need more kits...but I need an F1 in my life soon. Can't wait to see this one.
Backlog Progress: |||||||||||||||-------|----------|----------| 26/80
On the bench: Hasegawa 1/72 Tatiana's Vanship
Last Completed: Bandai HGUC Geara Zulu // Hasegawa 1/48 J2M3Raiden Prisoner of War
On the bench: Hasegawa 1/72 Tatiana's Vanship
Last Completed: Bandai HGUC Geara Zulu // Hasegawa 1/48 J2M3Raiden Prisoner of War
-
Rallychef

- Staff Sergeant

- Posts: 182
- Joined: Sat Jul 19, 2014 1:09 pm
- Location: Greystoke, Cumbria. UK.

Re: 1/12 Formula One Tyrrel 003
looking forward to watching this one progress.
-
GazVickers

- Private First Class

- Posts: 29
- Joined: Tue Feb 16, 2016 6:41 pm
- Location: Wigan
- Contact:

Re: 1/12 Formula One Tyrrel 003
I'll be following this with great interest, I'd love to build a few cars but the whole shiny gloss paint and polish scares the bejesus out of me.
So I'll be looking on to pick up a few tips and trick for when I'm brave enough to try my own.
So I'll be looking on to pick up a few tips and trick for when I'm brave enough to try my own.
Smoke me a kipper I'll be back for breakfast!


Re: 1/12 Formula One Tyrrel 003
Nice! My favorite F1 team and favorite driver so I´m definitely watching this!
-
shortCummins

- Chief Warrant Officer 2
- Posts: 1642
- Joined: Mon Aug 04, 2014 4:30 pm
- Location: Cotgrave, Nottingham

Re: 1/12 Formula One Tyrrel 003
any car driven by Jakie Stewart is OK in my book 
rgds
John(shortCummins)
rgds
John(shortCummins)
"I'm tall for my height" - "it looks like it was painted by a blind chimpanzee"


Re: 1/12 Formula One Tyrrel 003
Great choice there mate
-
rodrant
- Chief Warrant Officer 2
- Posts: 1774
- Joined: Wed Feb 19, 2014 9:22 pm
- Location: Maia - Portugal
Re: 1/12 Formula One Tyrrel 003
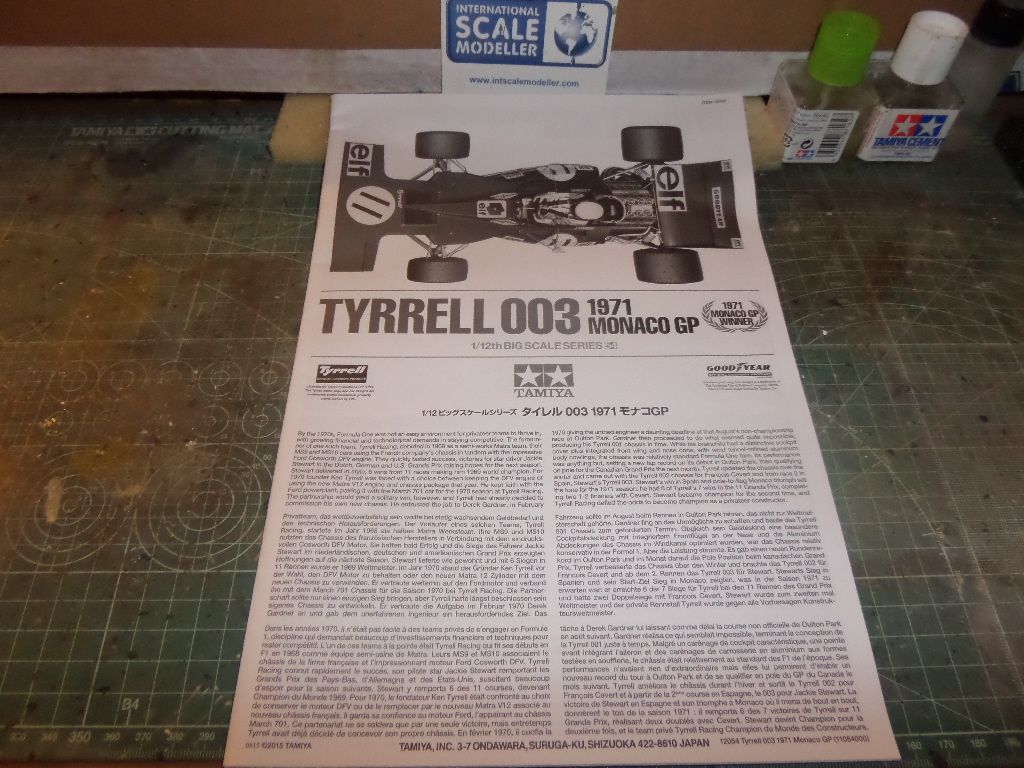
Time to make a start on this ...was my 2nd entry , it is my 3rd build in this GB , hope to finish on time ...
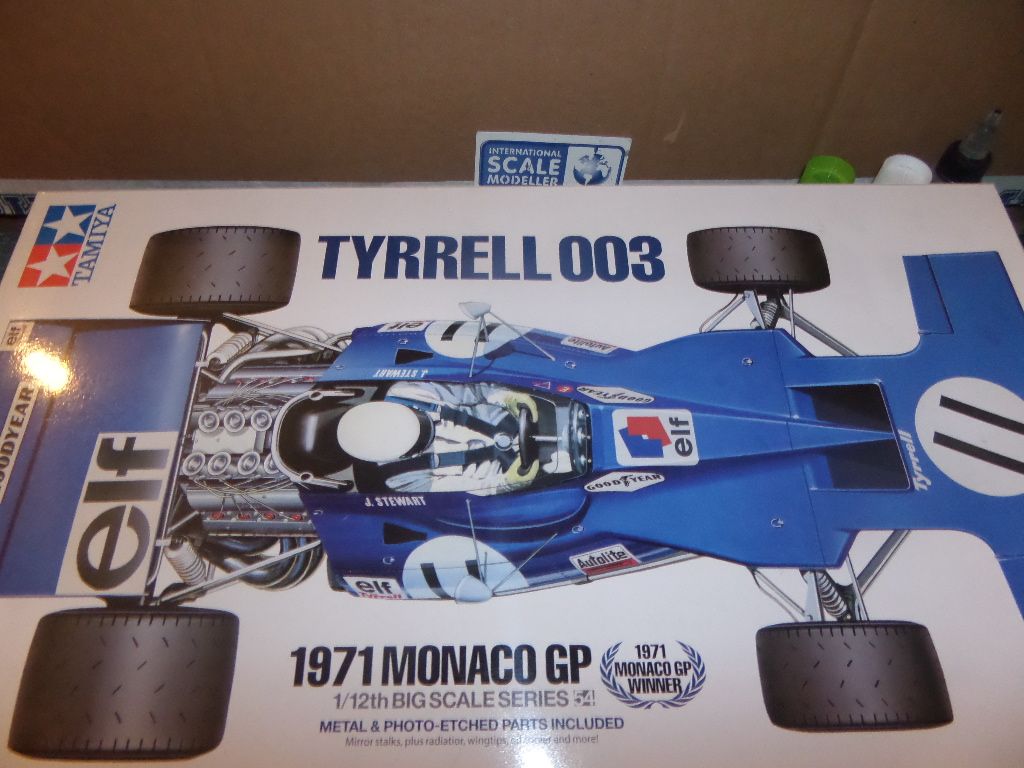
So this is a 1/12 Tamiya Kit of the Tyrrel 003 from the 1971 MonacoGP , depicting one of my favourite F1 pilot Jackie Stewart ...
some history on it , as of the Wikipedia ...
The Tyrrell 003 is a Formula One racing car which was designed for the 1971 Formula One season by Tyrrell's Chief Designer, Derek Gardner. It was effectively the same car as Tyrrell 001, with a redesigned nose section, longer wheelbase and narrower monocoque. Tyrrell 003 was a one-off design, its type number also serving as its Tyrrell chassis number. François Cevert drove the Tyrrell 002.
When Ken Tyrrell, the team's owner, was disenchanted with the poor performance of March chassis during the 1970 season, he decided he would design and build his own car. He employed Derek Gardner to design it in secret at his own house.[1] The project, codenamed "SP" which meant "Special Project" cost Tyrrell over £22,000 of his own money. The resulting car named Tyrrell 001 made its debut at Oulton Park at a non-championship race.
After the season had finished Gardner redesigned some sections of the car, altering the airbox, remodelling the nose section, lengthening the wheelbase and slightly narrowing the monocoque. The redesigned car became known as the 002 and 003, which were chassis numbers given to each of the cars made for the 1971 season. The team also switched tyre supplier to Goodyear after Dunlop withdrew from F1.
Competition
Driven by Jackie Stewart, it debuted at the 1971 Spanish Grand Prix and won at the first attempt. Tyrrell and Jackie Stewart took advantage as Lotus and Ferrari struggled during 1971; they won six races with Stewart claiming his second World Championship. Stewart and team mate François Cevert used different chassis throughout both 1971 and 1972, with Stewart having exclusive use of 003 and Cevert competing with the Tyrrell 002.
The 1972 season saw Lotus back on form with Emerson Fittipaldi challenging Stewart for the championship. 003 was not a match for the developed Lotus 72 and the Tyrrell team only won when the 72 failed to finish. Fittipaldi won the title that season by a comfortable margin. Despite scoring two wins with Stewart during 1972 (he also won two races with the new 005), the 003 had come to the end of its racing life. Tyrrell 003 remains the Tyrrell team's most successful chassis. It is also the individual chassis that has scored the most Grand Prix wins in Formula One history.[citation needed]
The vehicle is currently on display at the National Museum of Scotland, Edinburgh.
The Tyrrell 003 was replaced by 005 for 1973.
Complete Formula One World Championship results[edit]
Year Entrant Driver 1 2 3 4 5 6 7 8 9 10 11 12 Points WCC
1971 Elf Team Tyrrell RSA ESP MON NED FRA GBR GER AUT ITA CAN USA 73† 1st
Jackie Stewart 1 11 1 1 1 Ret Ret 1 5
1972 Elf Team Tyrrell ARG RSA ESP MON BEL FRA GBR GER AUT ITA CAN USA 73‡ 2nd
Jackie Stewart 1 Ret Ret 1 2 11
Technical specifications
Chassis Aluminium monocoque
Suspension (front) Double wishbones, coil springs
Suspension (rear) Double wishbones, coil springs
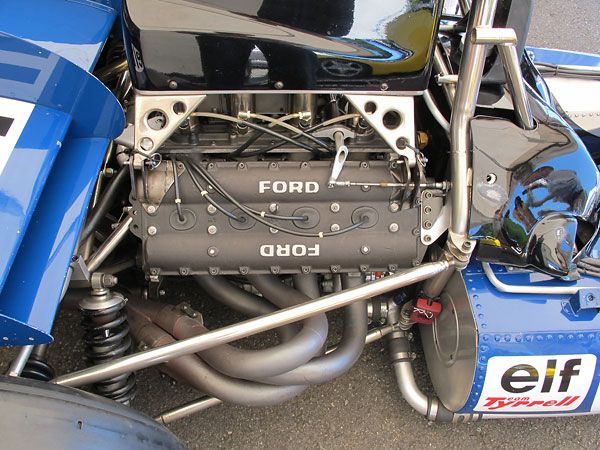
Engine Ford-Cosworth DFV, 2,993 cc (182.6 cu in), 90° V8, Naturally aspirated, mid-mounted,
Transmission Hewland FG400 5-speed manual
Fuel Elf
Tyres Goodyear
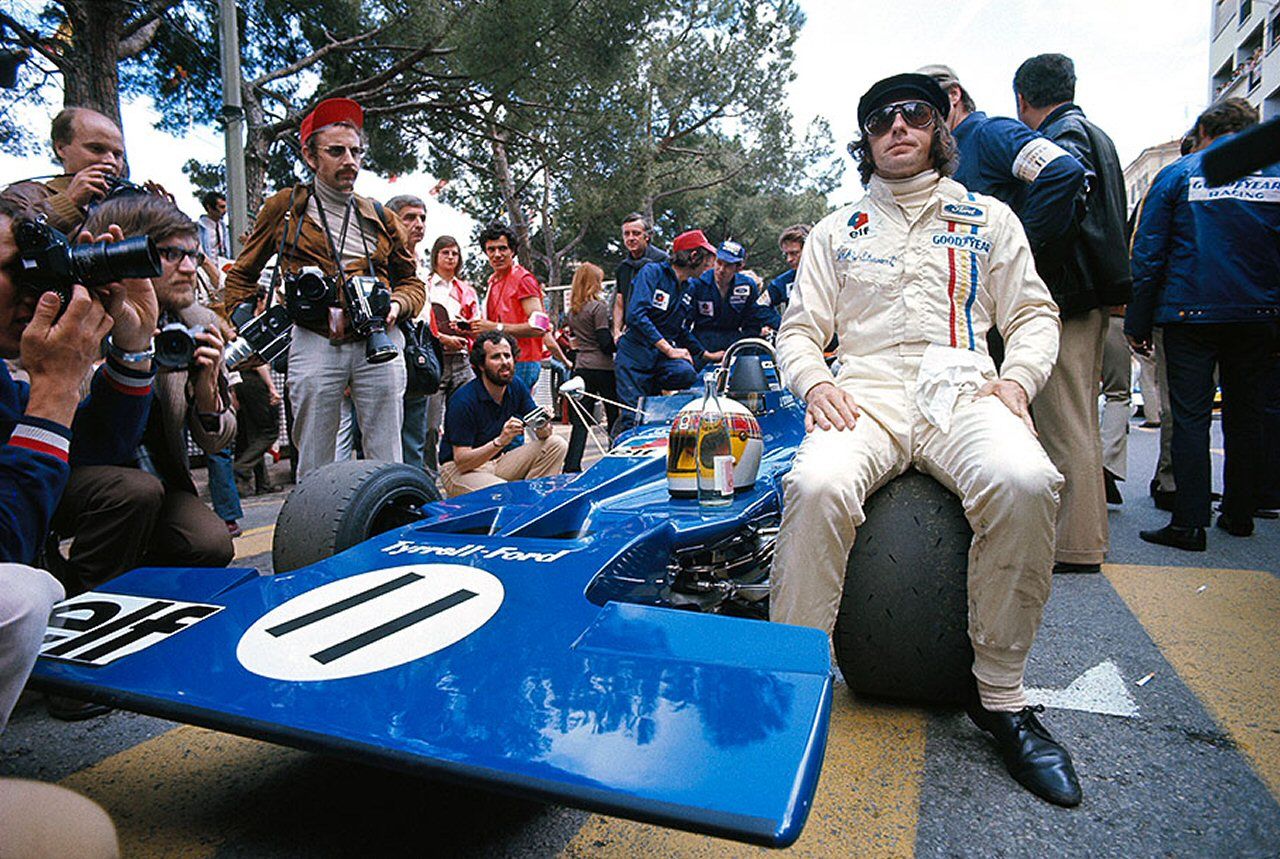
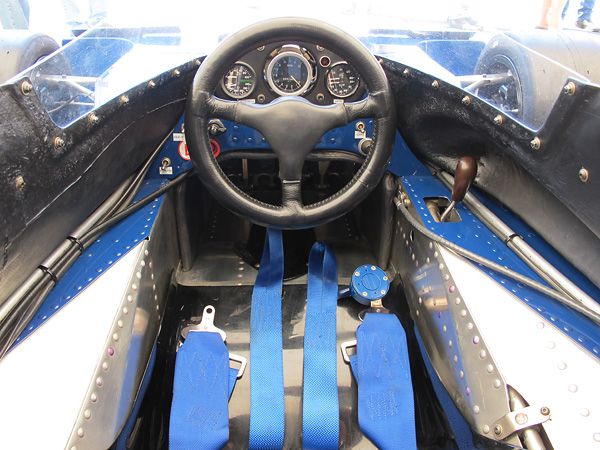
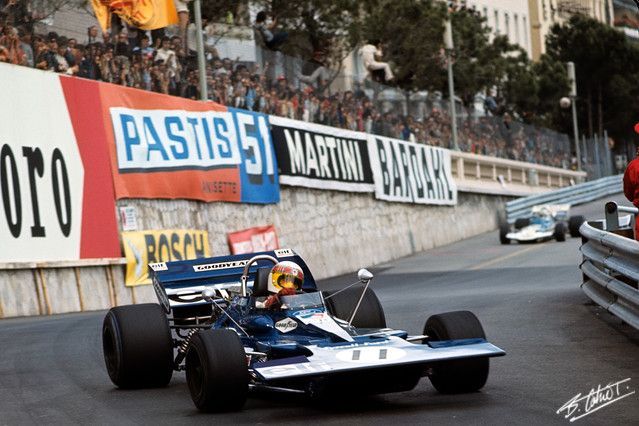
Some photos of the real car ...
JAckie Stewart in 1971 Monaco Gp Grid
The Office
The Ford DFV Cosworth Engine
In action ...
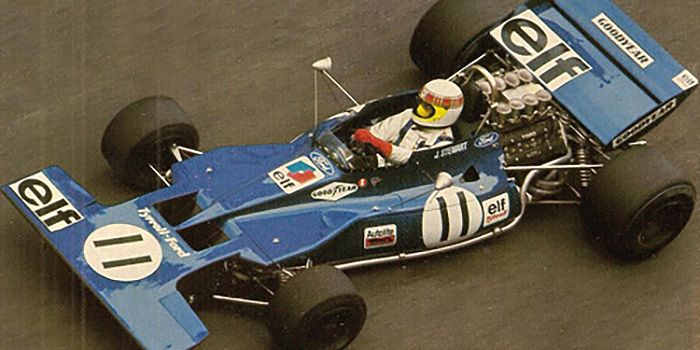
In Monaco

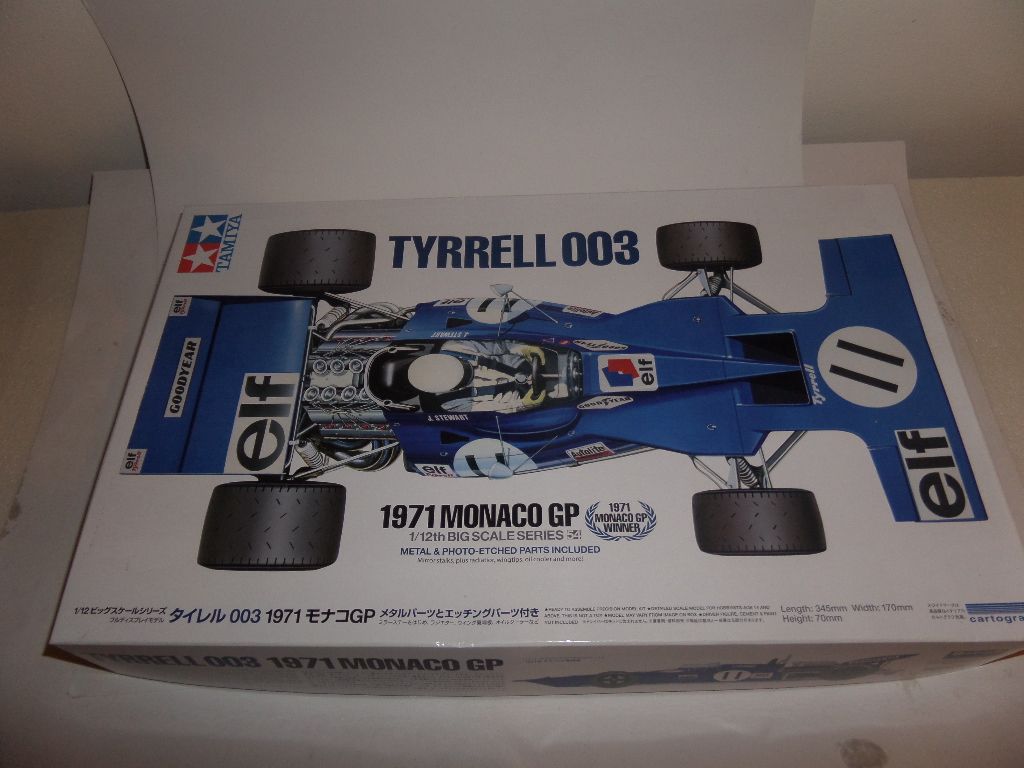
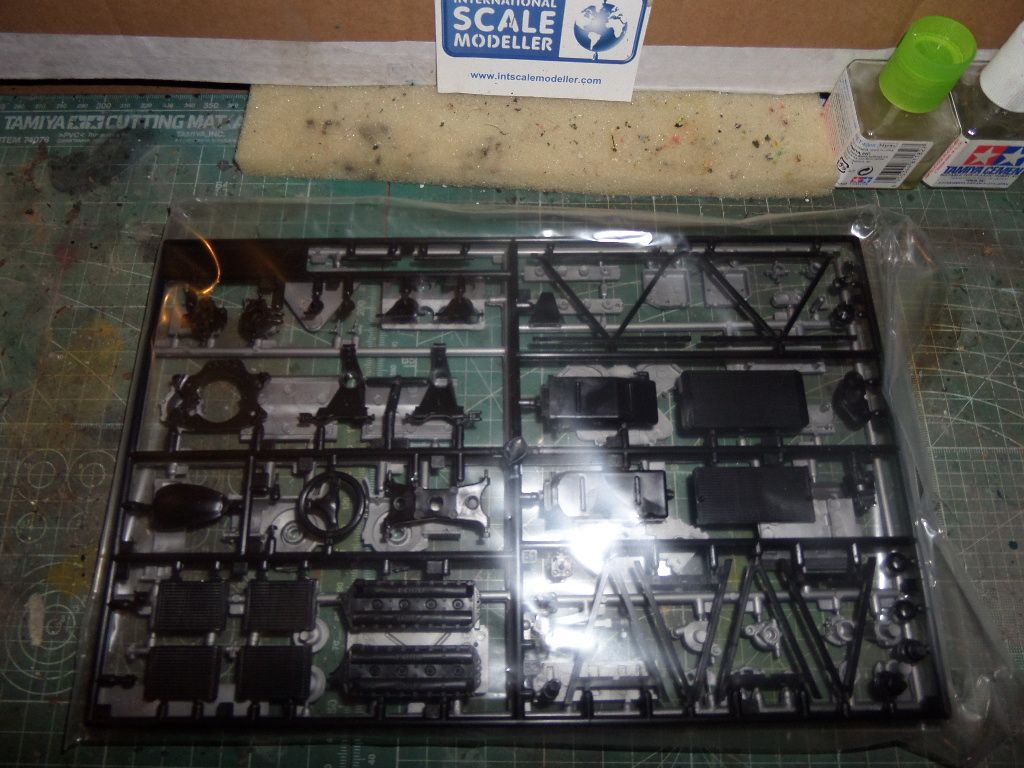
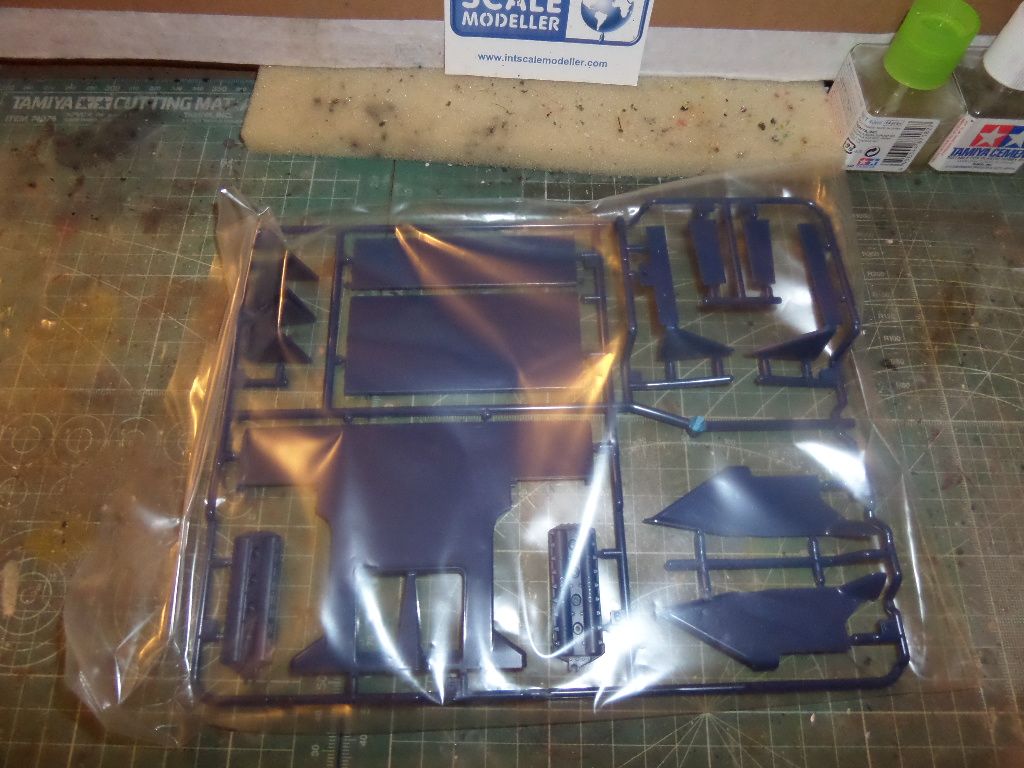
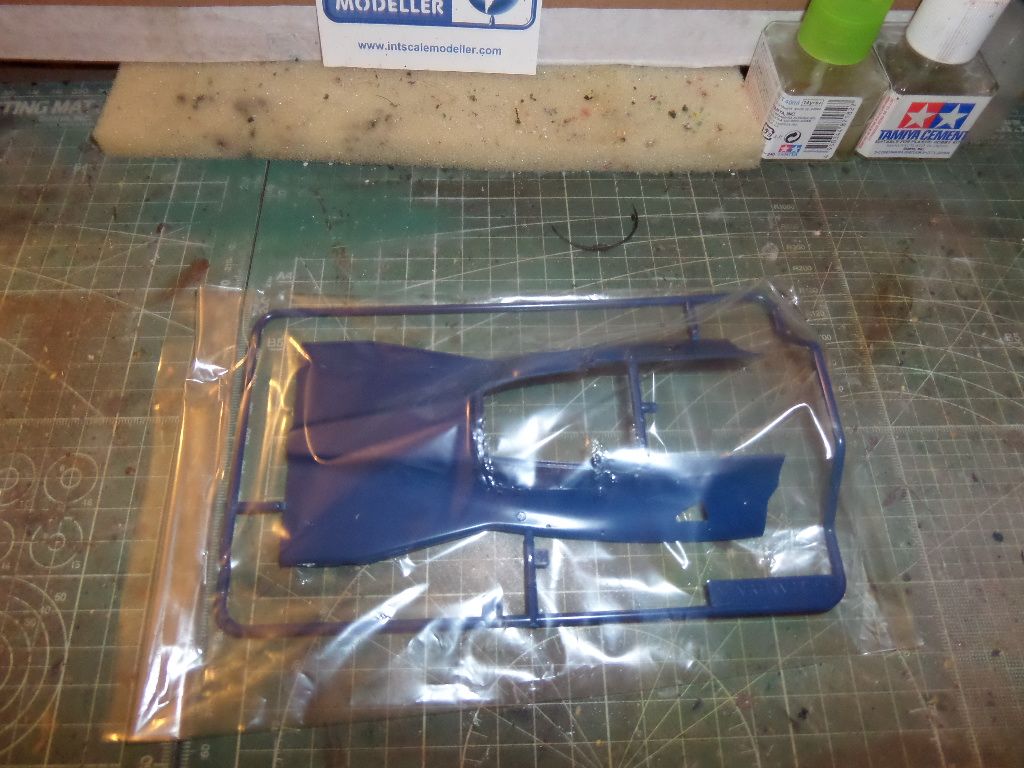
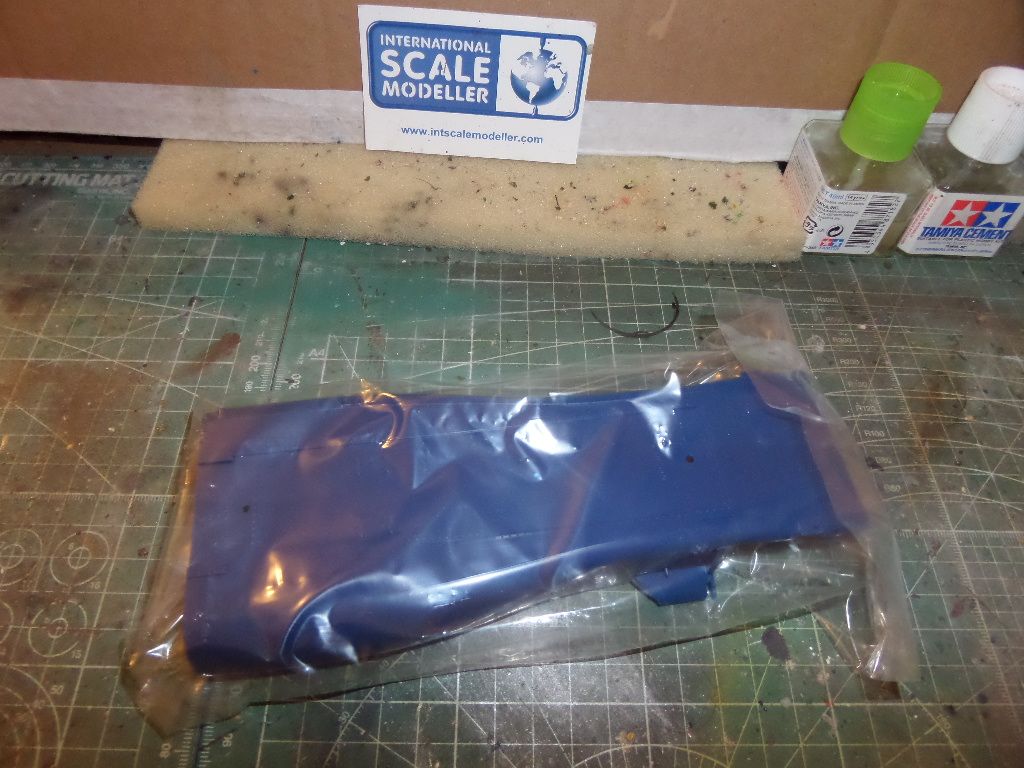
So the kit ...a BIG Box
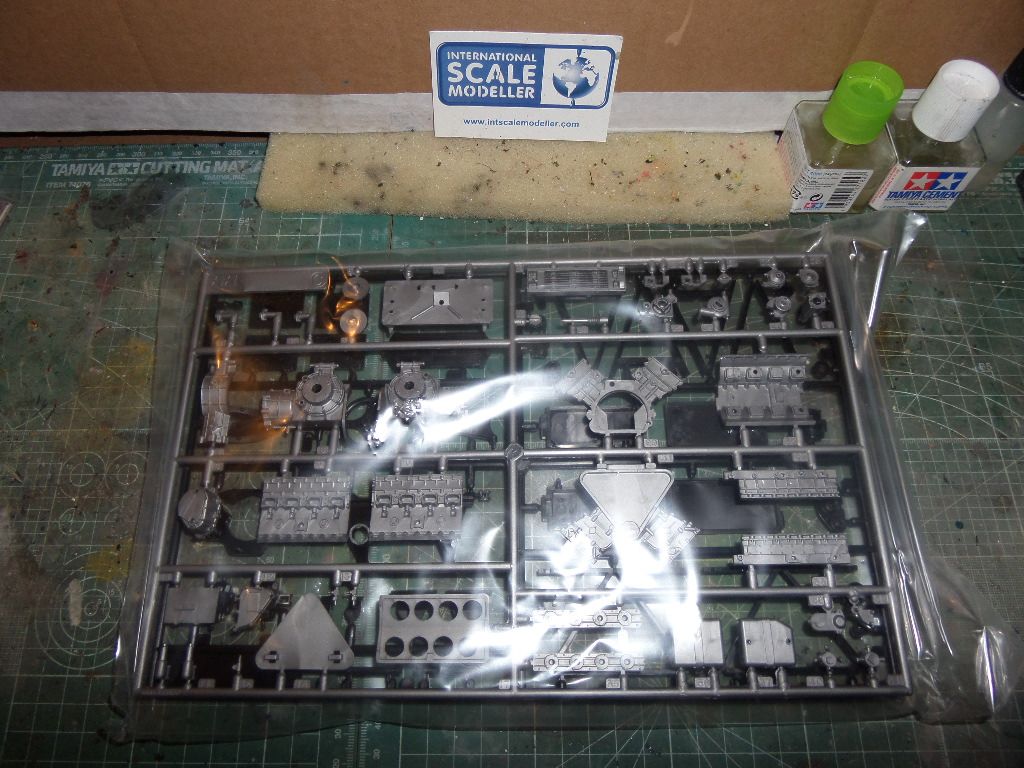
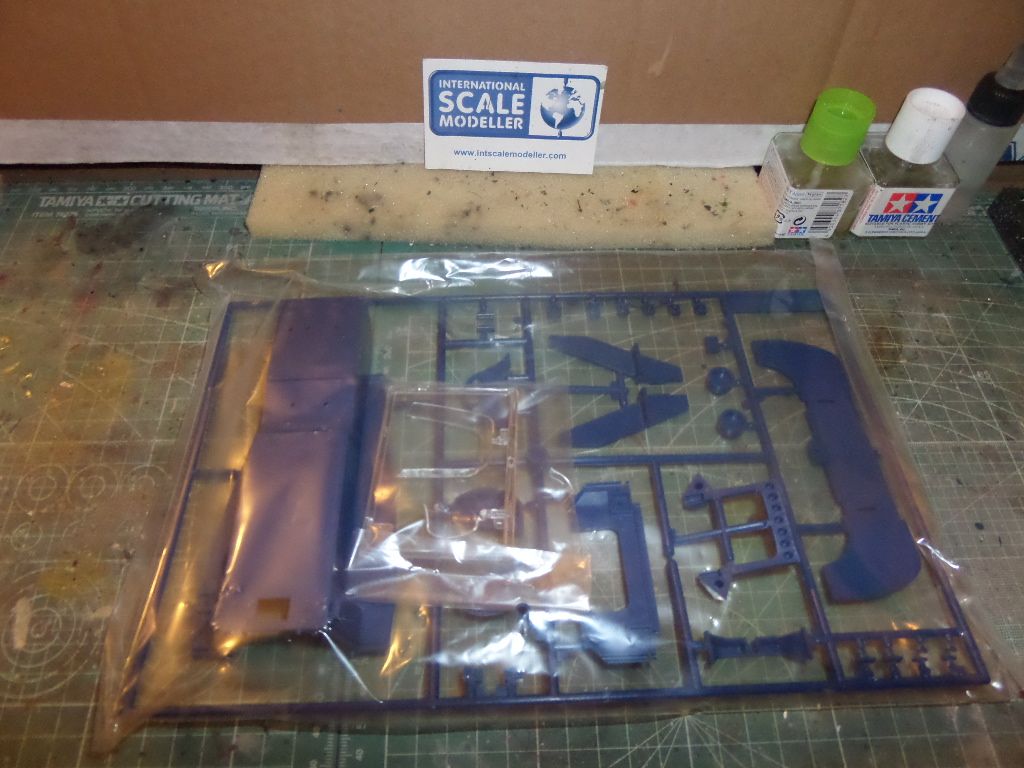
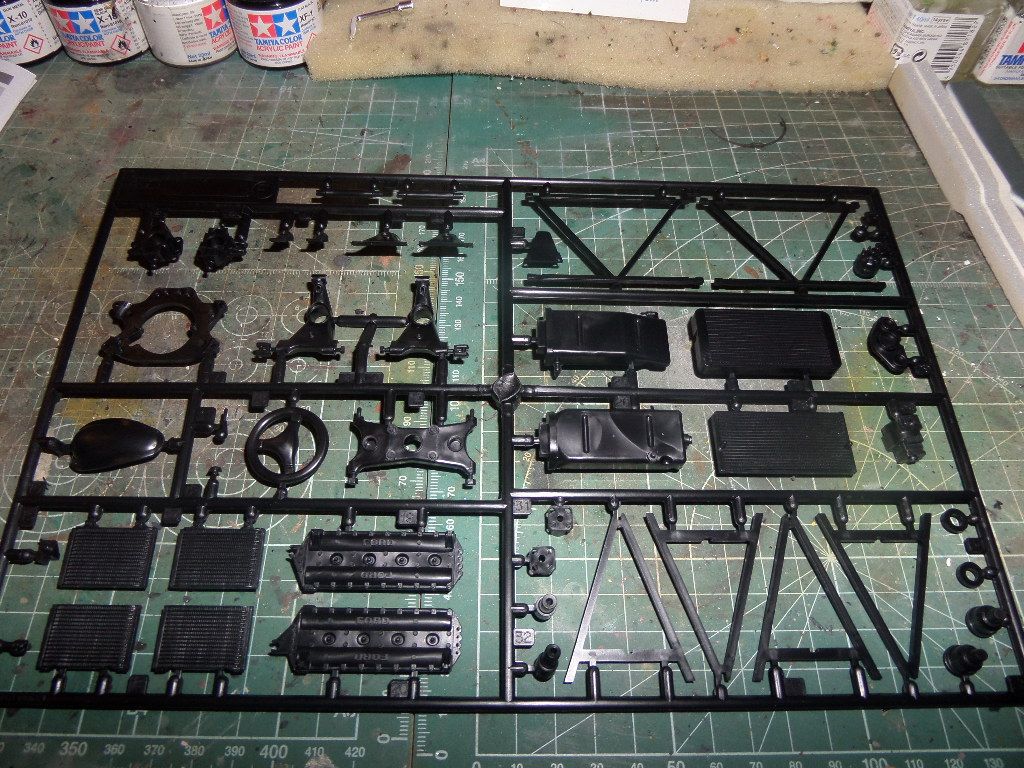
Lots of plastic ...

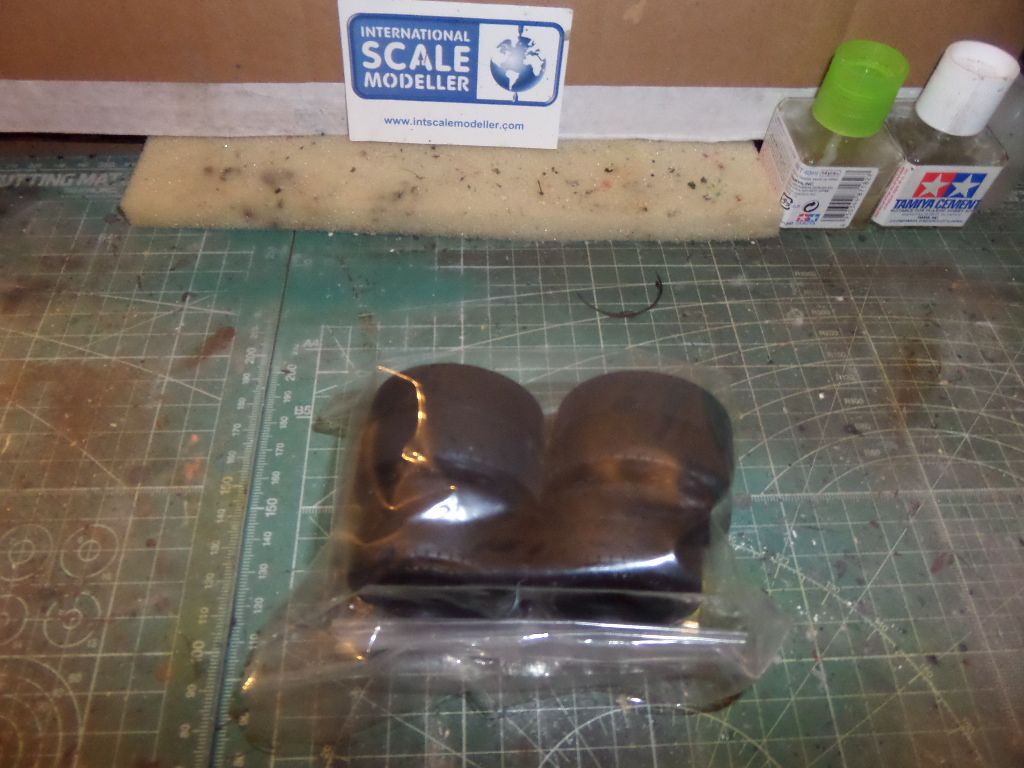
Rubber tyres ...
lots of stuff together with the tyres ...screws , tubes ...what I've done
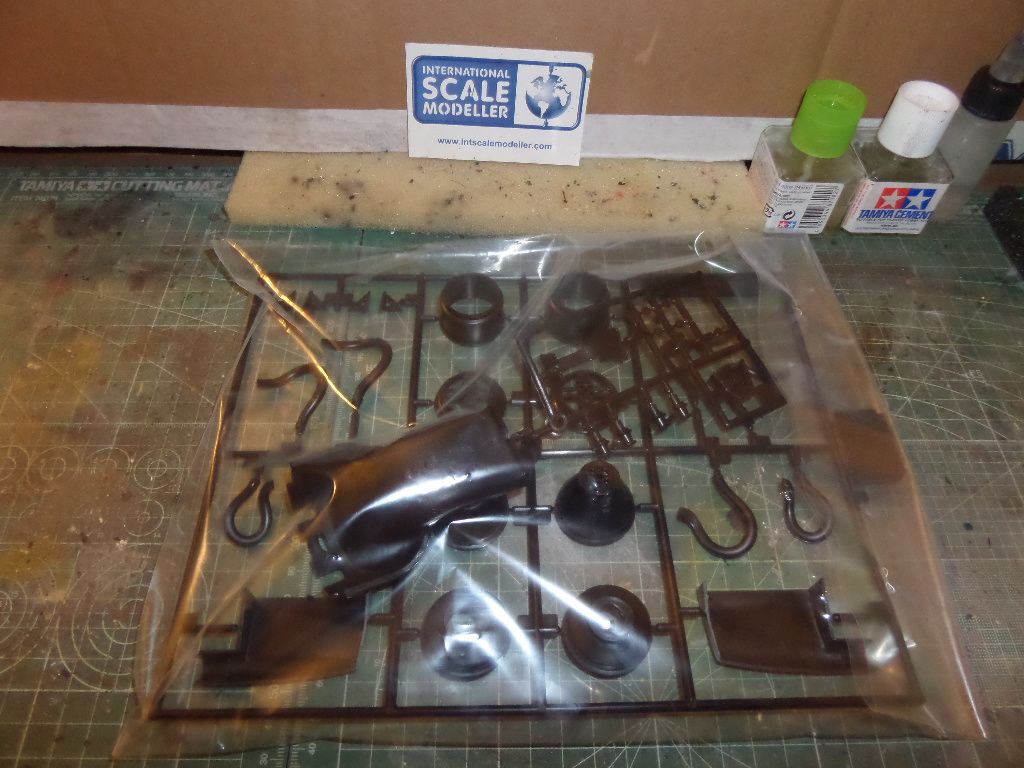
chrome plastic ....
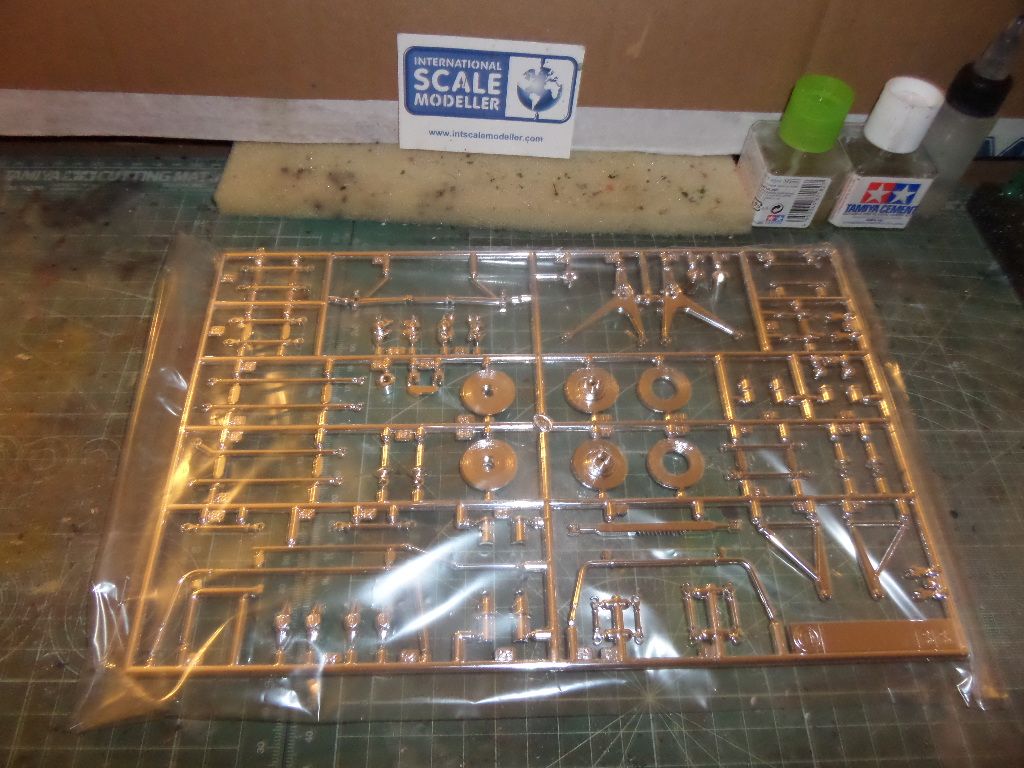
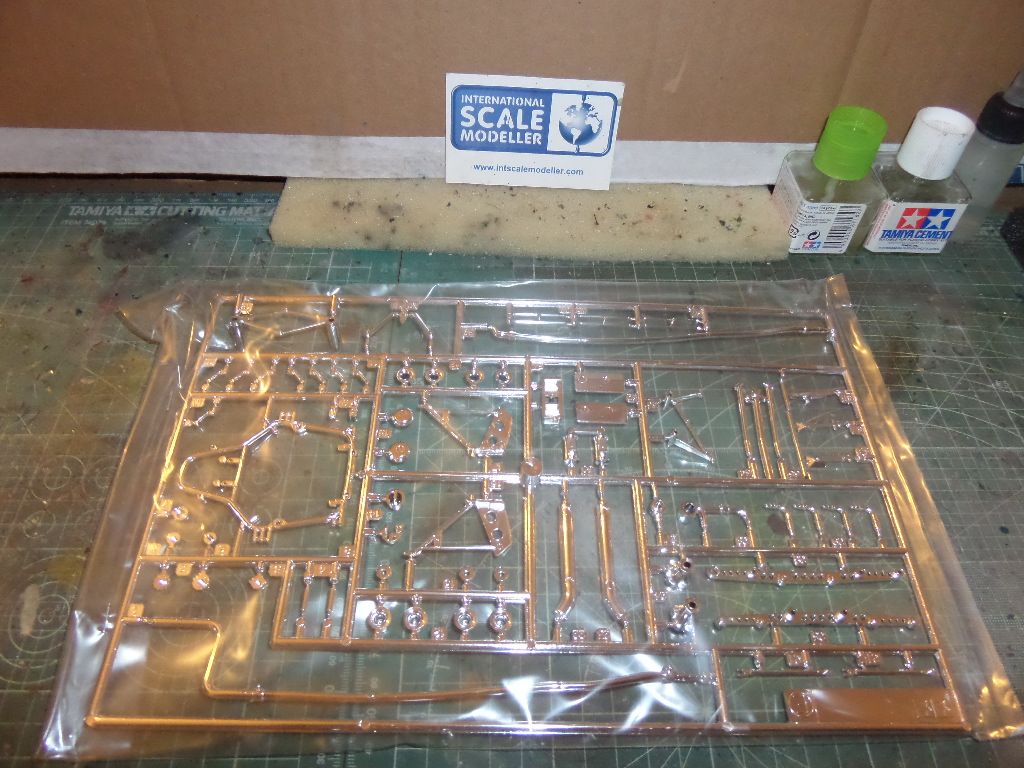
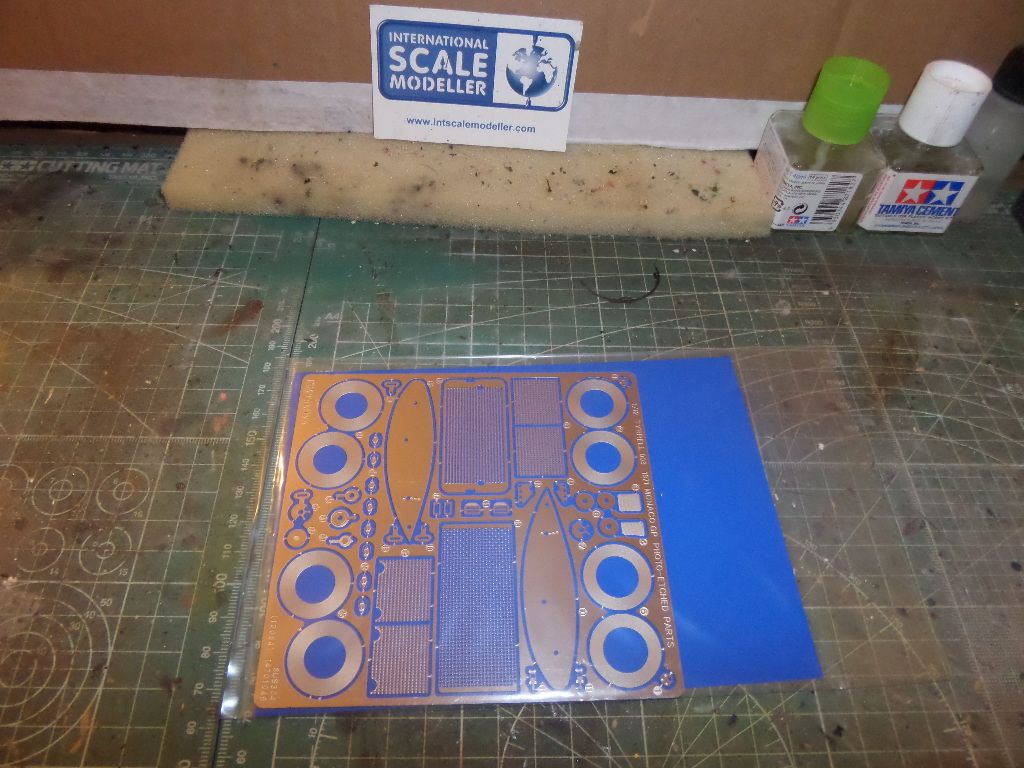
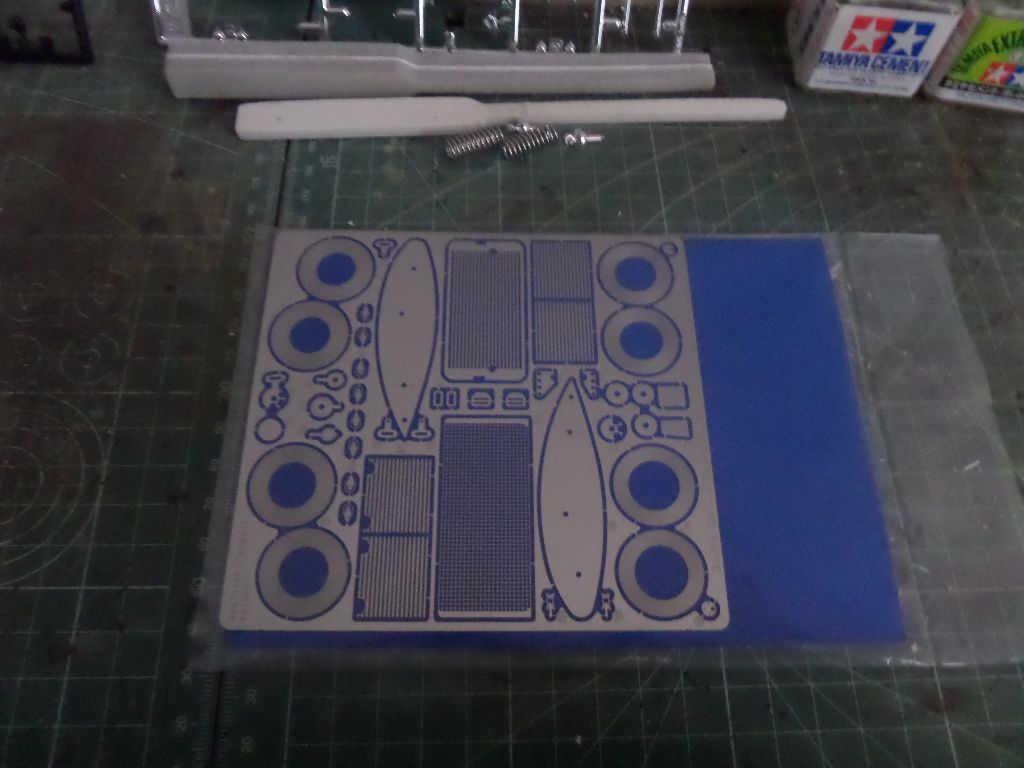
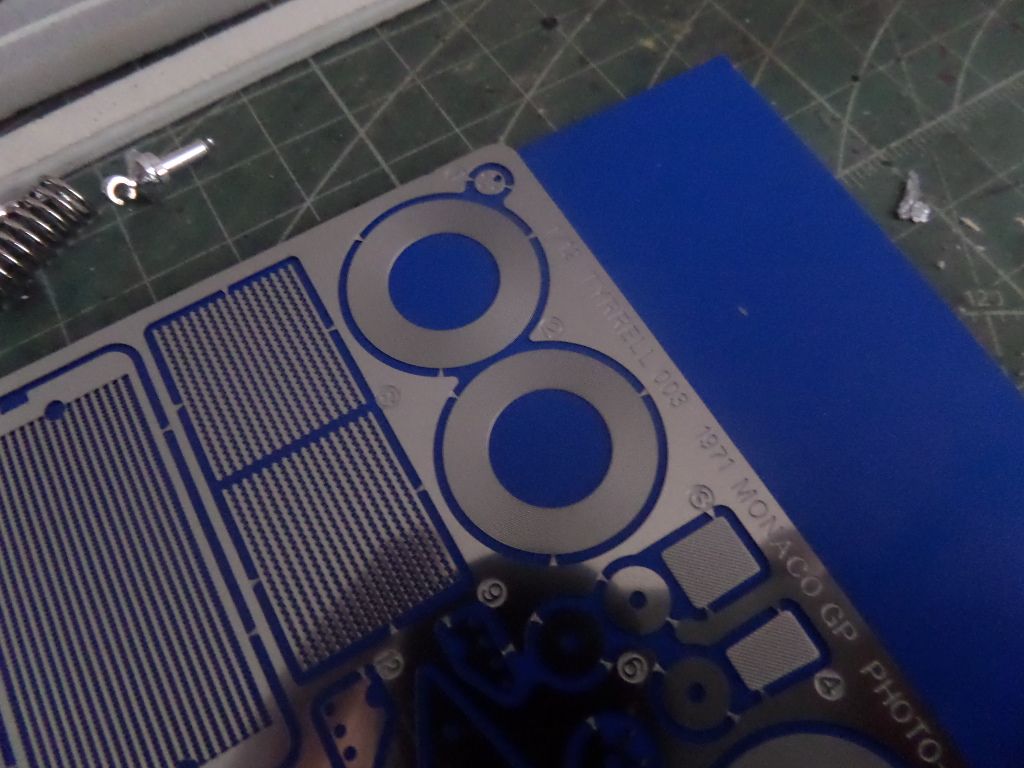
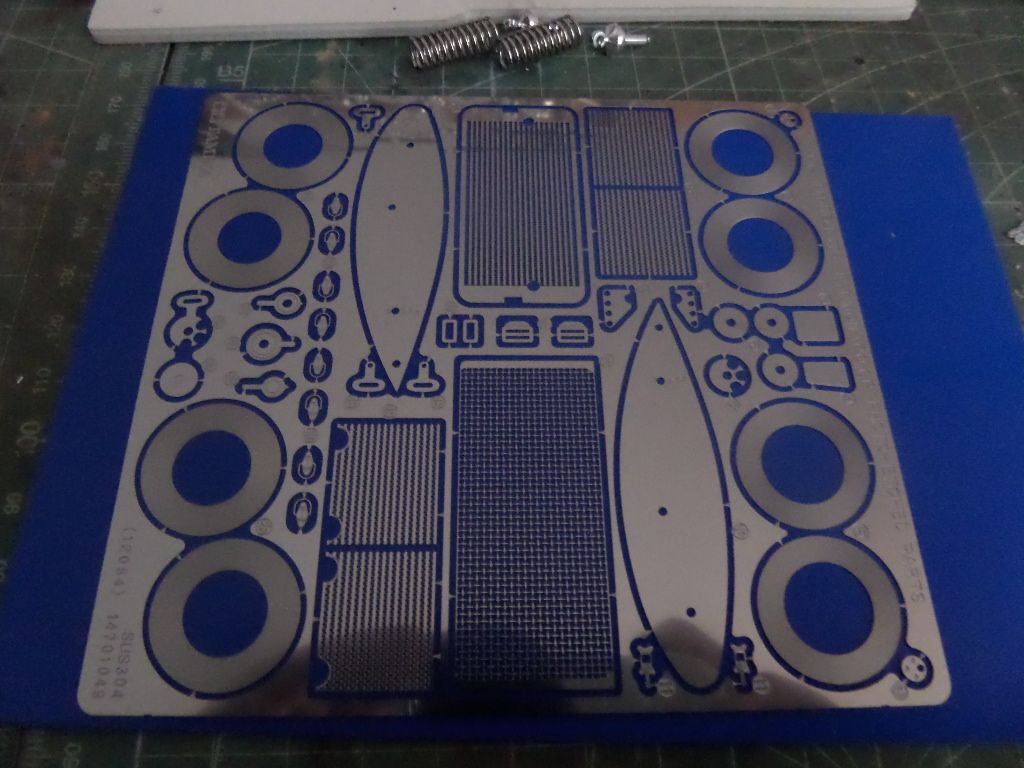
Photo etched ...seems disc brakes , engine parts, seat belts locks and some radiator grids
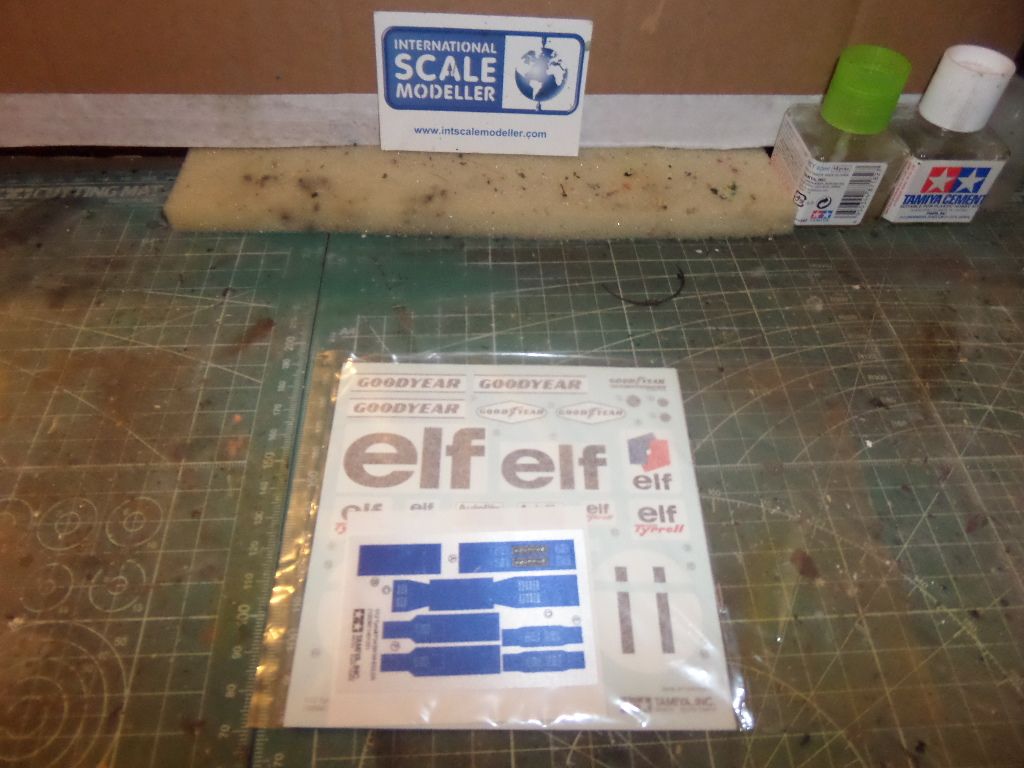
Decals ...by Cartograf (thank god ...I hope ...at least not Tamiya ) and seat belts seems in tissue ...a first for me but could be a nice touch !
Instructions
36 steps ...
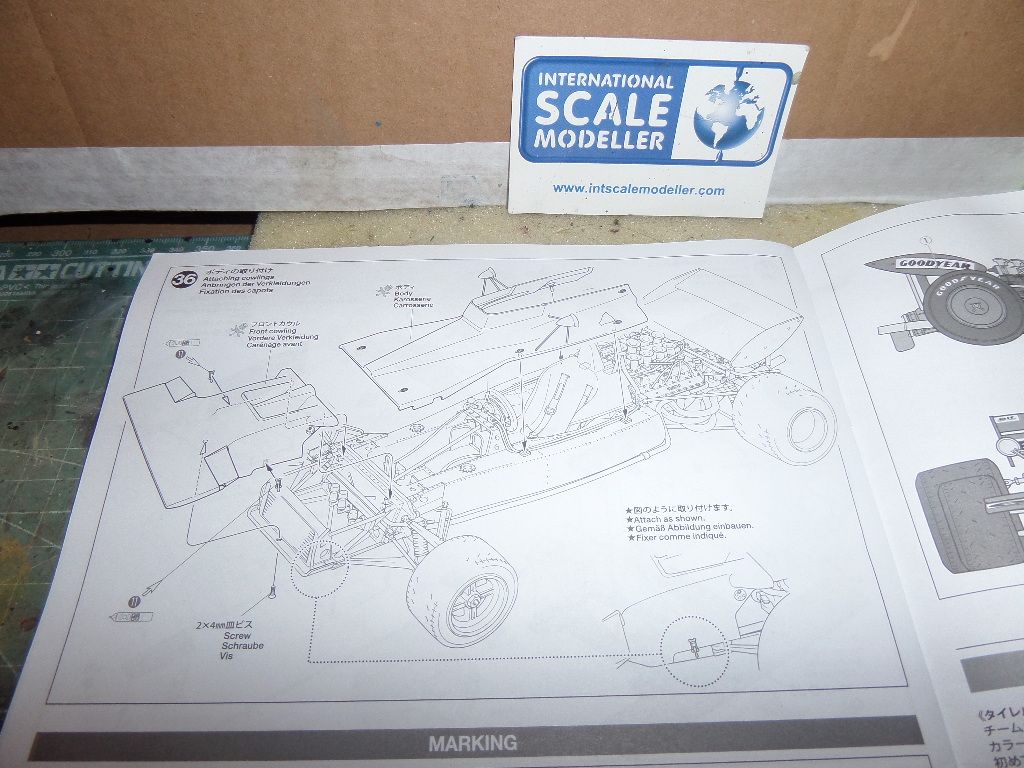
I will show you more detail during the build .
So time to go to something different but also a Tamiya traditional kit , a racing car , this one not 1/24 but 1/12 like their Moto Bike range ...
Hope you liek the build , I hope to enjoy myself doing this one !
So this is a 1/12 Tamiya Kit of the Tyrrel 003 from the 1971 MonacoGP , depicting one of my favourite F1 pilot Jackie Stewart ...
some history on it , as of the Wikipedia ...
The Tyrrell 003 is a Formula One racing car which was designed for the 1971 Formula One season by Tyrrell's Chief Designer, Derek Gardner. It was effectively the same car as Tyrrell 001, with a redesigned nose section, longer wheelbase and narrower monocoque. Tyrrell 003 was a one-off design, its type number also serving as its Tyrrell chassis number. François Cevert drove the Tyrrell 002.
When Ken Tyrrell, the team's owner, was disenchanted with the poor performance of March chassis during the 1970 season, he decided he would design and build his own car. He employed Derek Gardner to design it in secret at his own house.[1] The project, codenamed "SP" which meant "Special Project" cost Tyrrell over £22,000 of his own money. The resulting car named Tyrrell 001 made its debut at Oulton Park at a non-championship race.
After the season had finished Gardner redesigned some sections of the car, altering the airbox, remodelling the nose section, lengthening the wheelbase and slightly narrowing the monocoque. The redesigned car became known as the 002 and 003, which were chassis numbers given to each of the cars made for the 1971 season. The team also switched tyre supplier to Goodyear after Dunlop withdrew from F1.
Competition
Driven by Jackie Stewart, it debuted at the 1971 Spanish Grand Prix and won at the first attempt. Tyrrell and Jackie Stewart took advantage as Lotus and Ferrari struggled during 1971; they won six races with Stewart claiming his second World Championship. Stewart and team mate François Cevert used different chassis throughout both 1971 and 1972, with Stewart having exclusive use of 003 and Cevert competing with the Tyrrell 002.
The 1972 season saw Lotus back on form with Emerson Fittipaldi challenging Stewart for the championship. 003 was not a match for the developed Lotus 72 and the Tyrrell team only won when the 72 failed to finish. Fittipaldi won the title that season by a comfortable margin. Despite scoring two wins with Stewart during 1972 (he also won two races with the new 005), the 003 had come to the end of its racing life. Tyrrell 003 remains the Tyrrell team's most successful chassis. It is also the individual chassis that has scored the most Grand Prix wins in Formula One history.[citation needed]
The vehicle is currently on display at the National Museum of Scotland, Edinburgh.
The Tyrrell 003 was replaced by 005 for 1973.
Complete Formula One World Championship results[edit]
Year Entrant Driver 1 2 3 4 5 6 7 8 9 10 11 12 Points WCC
1971 Elf Team Tyrrell RSA ESP MON NED FRA GBR GER AUT ITA CAN USA 73† 1st
Jackie Stewart 1 11 1 1 1 Ret Ret 1 5
1972 Elf Team Tyrrell ARG RSA ESP MON BEL FRA GBR GER AUT ITA CAN USA 73‡ 2nd
Jackie Stewart 1 Ret Ret 1 2 11
Technical specifications
Chassis Aluminium monocoque
Suspension (front) Double wishbones, coil springs
Suspension (rear) Double wishbones, coil springs
Engine Ford-Cosworth DFV, 2,993 cc (182.6 cu in), 90° V8, Naturally aspirated, mid-mounted,
Transmission Hewland FG400 5-speed manual
Fuel Elf
Tyres Goodyear
Some photos of the real car ...
JAckie Stewart in 1971 Monaco Gp Grid

The Office

The Ford DFV Cosworth Engine

In action ...

In Monaco


So the kit ...a BIG Box

Lots of plastic ...


Rubber tyres ...

lots of stuff together with the tyres ...screws , tubes ...what I've done


chrome plastic ....


Photo etched ...seems disc brakes , engine parts, seat belts locks and some radiator grids

Decals ...by Cartograf (thank god ...I hope ...at least not Tamiya

Instructions

36 steps ...

I will show you more detail during the build .
So time to go to something different but also a Tamiya traditional kit , a racing car , this one not 1/24 but 1/12 like their Moto Bike range ...
Hope you liek the build , I hope to enjoy myself doing this one !
Cheers ,
António
On the Bench
a lot of stuff right now
António
On the Bench
a lot of stuff right now
Re: 1/12 Formula One Tyrrel 003
I'm so in.
Backlog Progress: |||||||||||||||-------|----------|----------| 26/80
On the bench: Hasegawa 1/72 Tatiana's Vanship
Last Completed: Bandai HGUC Geara Zulu // Hasegawa 1/48 J2M3Raiden Prisoner of War
On the bench: Hasegawa 1/72 Tatiana's Vanship
Last Completed: Bandai HGUC Geara Zulu // Hasegawa 1/48 J2M3Raiden Prisoner of War
-
Twokidsnosleep
- General
- Posts: 18254
- Joined: Thu Aug 07, 2014 4:07 pm
- Location: BC,Canada
Re: 1/12 Formula One Tyrrel 003
Right beside himLysus wrote:I'm so in.
Scott
On, Under or near the desk
Brewster Buffalo ..buddy build
Rockford Firebird
1/72 Black Pearl Pirate Ship in dry dock
On, Under or near the desk
Brewster Buffalo ..buddy build
Rockford Firebird
1/72 Black Pearl Pirate Ship in dry dock
Re: 1/12 Formula One Tyrrel 003
Like...I dropped in before...but seeing it all laid out I'm so stoked for this kit...Twokidsnosleep wrote:Right beside himLysus wrote:I'm so in.
Must resist urge to buy another kit...
Backlog Progress: |||||||||||||||-------|----------|----------| 26/80
On the bench: Hasegawa 1/72 Tatiana's Vanship
Last Completed: Bandai HGUC Geara Zulu // Hasegawa 1/48 J2M3Raiden Prisoner of War
On the bench: Hasegawa 1/72 Tatiana's Vanship
Last Completed: Bandai HGUC Geara Zulu // Hasegawa 1/48 J2M3Raiden Prisoner of War
-
rodrant
- Chief Warrant Officer 2
- Posts: 1774
- Joined: Wed Feb 19, 2014 9:22 pm
- Location: Maia - Portugal
Re: 1/12 Formula One Tyrrel 003
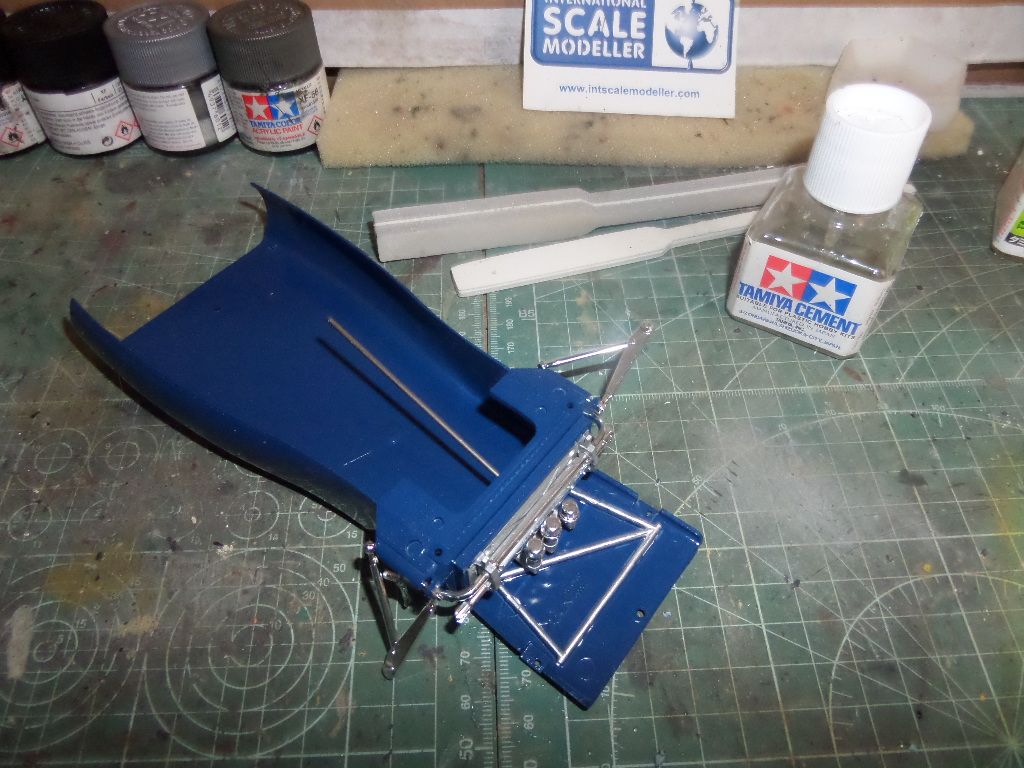
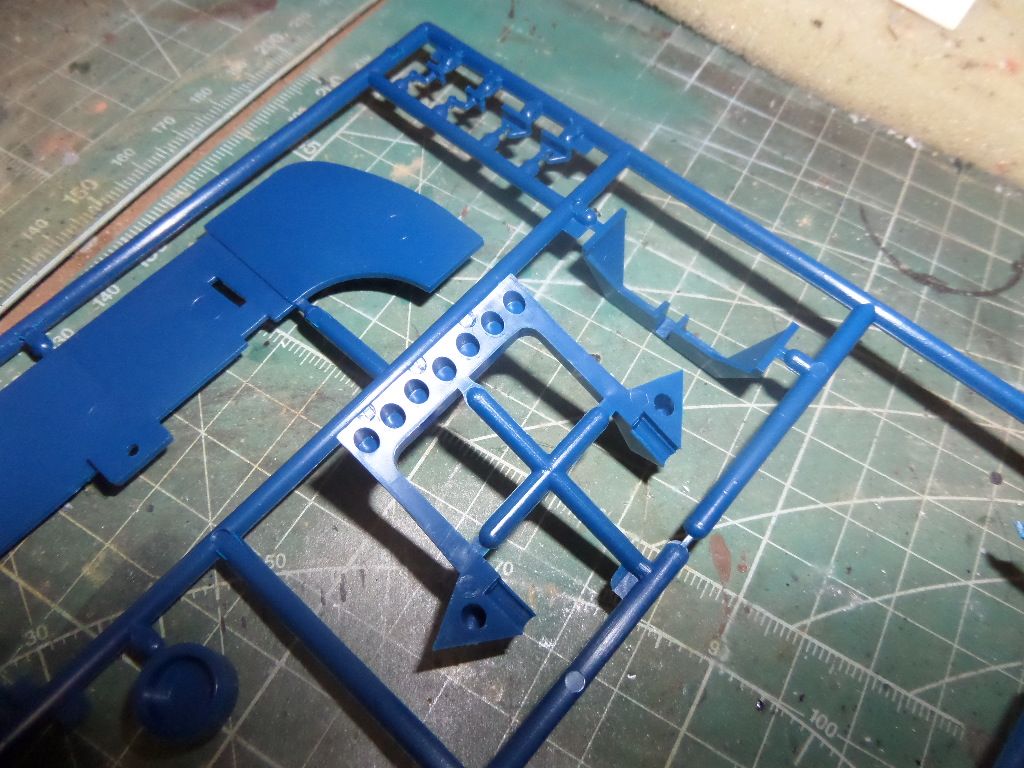
So first build thread , with some work done during last weeks ...this build was stopped several times ...but let's go ...
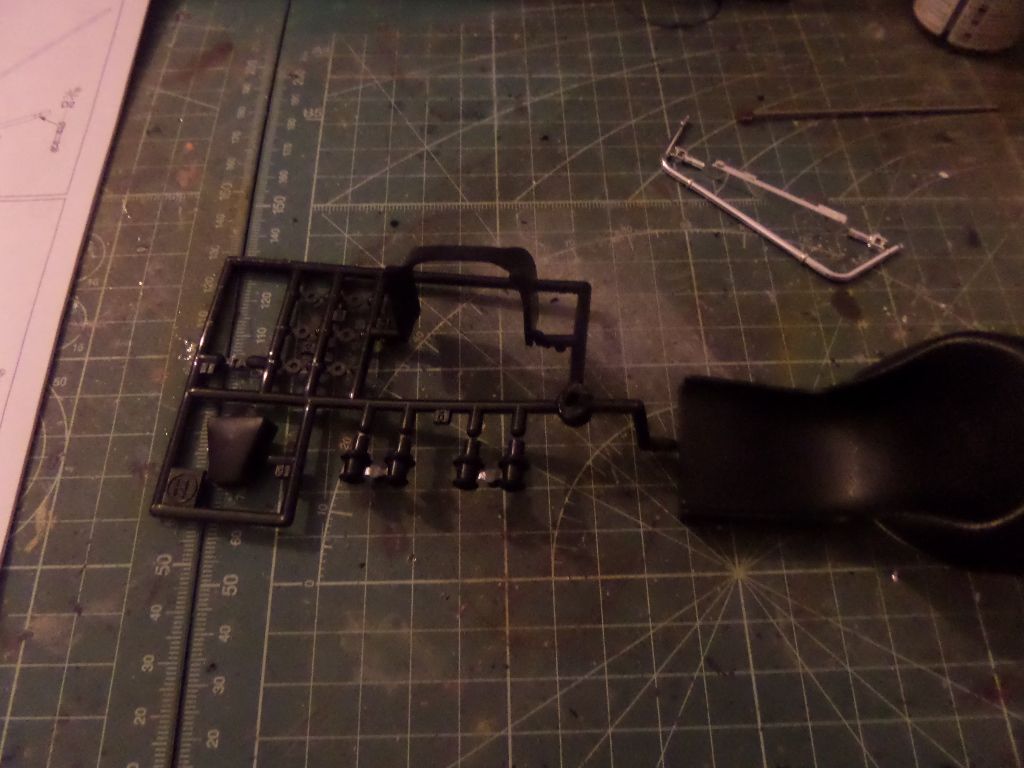
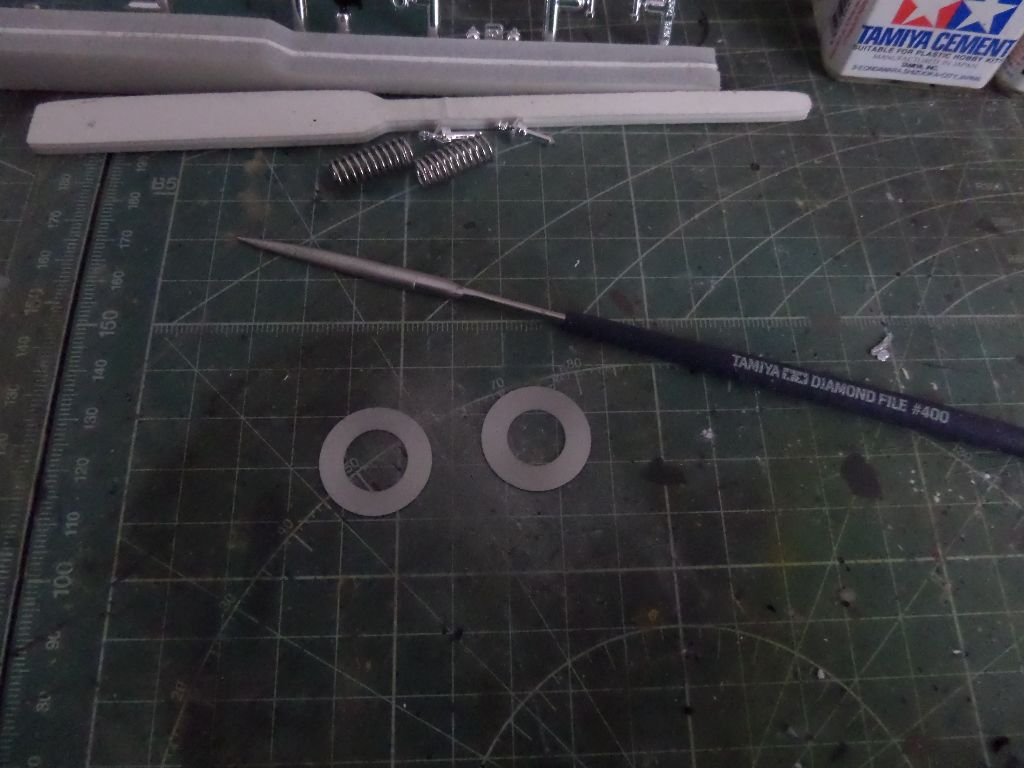
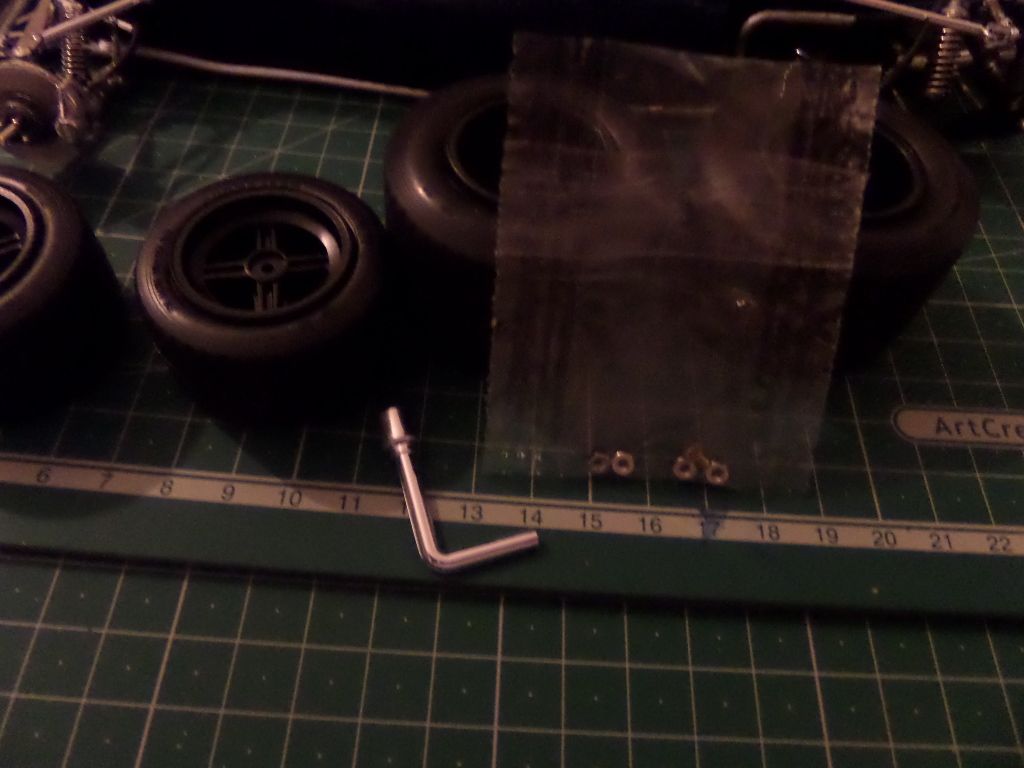
So the first step is to do a wheel tool , made form the chrom plastic sprues ...
The kit is disapointing , for the price you thought to have some nice moulds, but it is full of mould injection marks ...
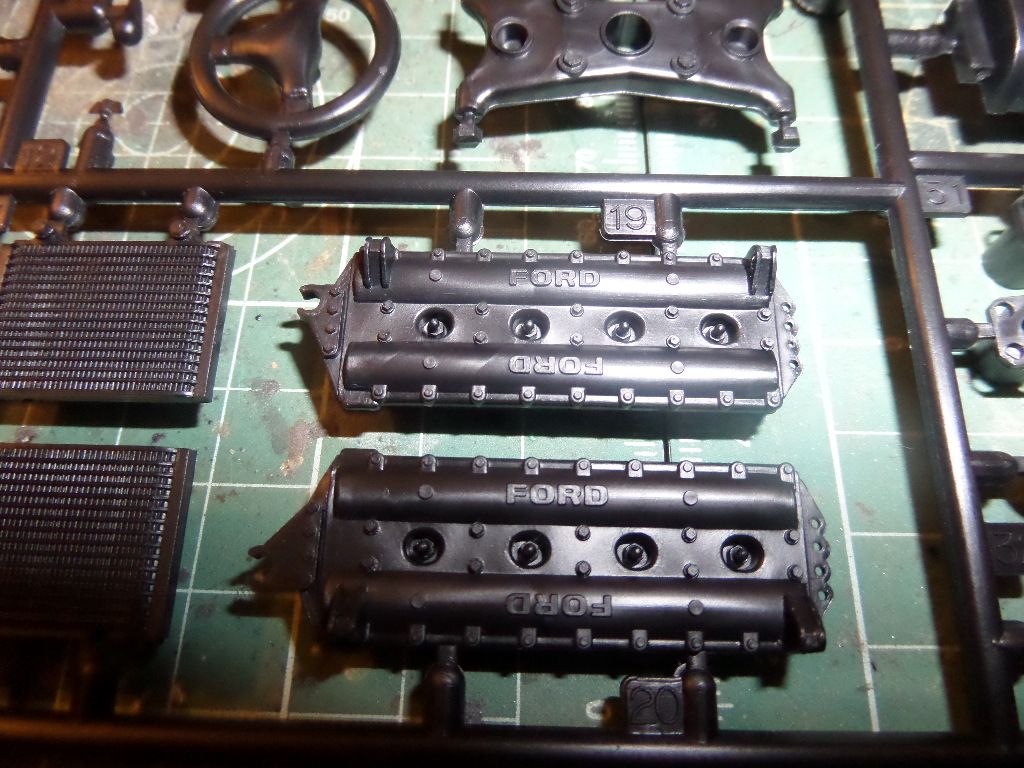
Part of Engine detail
Wheel
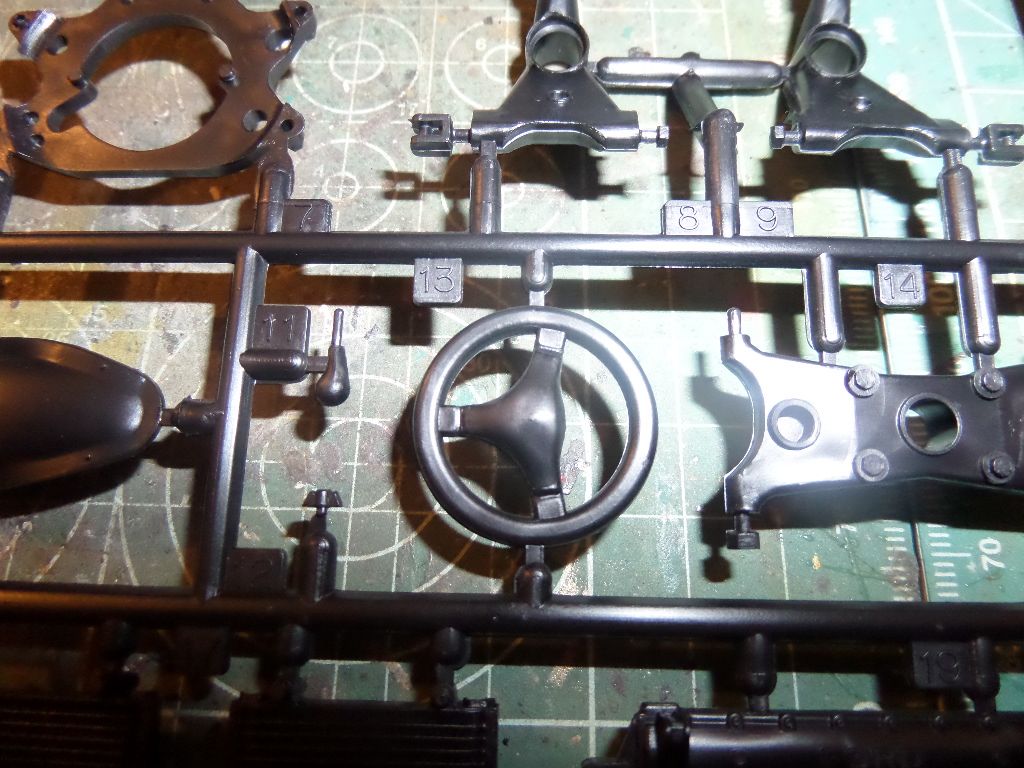
More engine parts
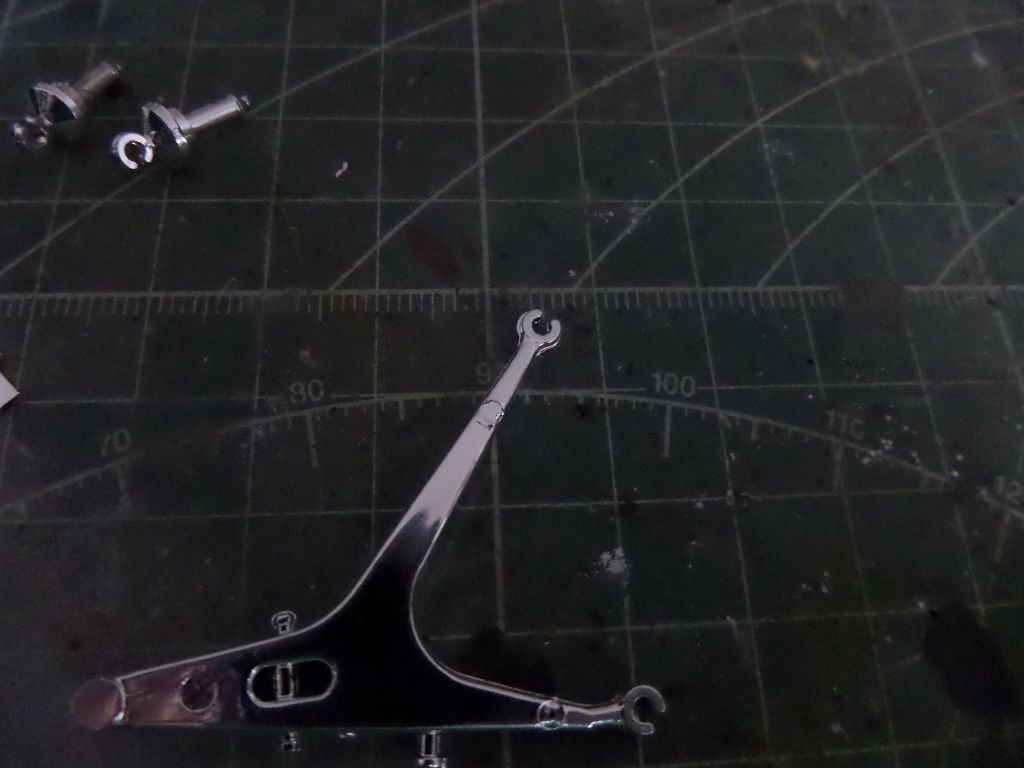
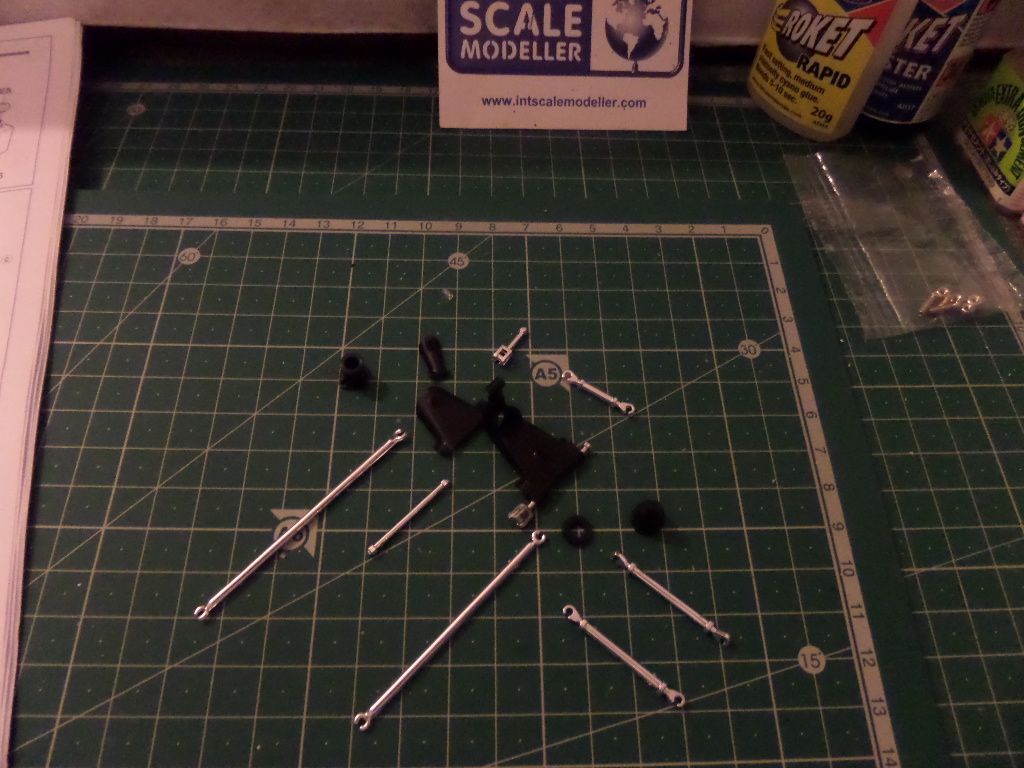
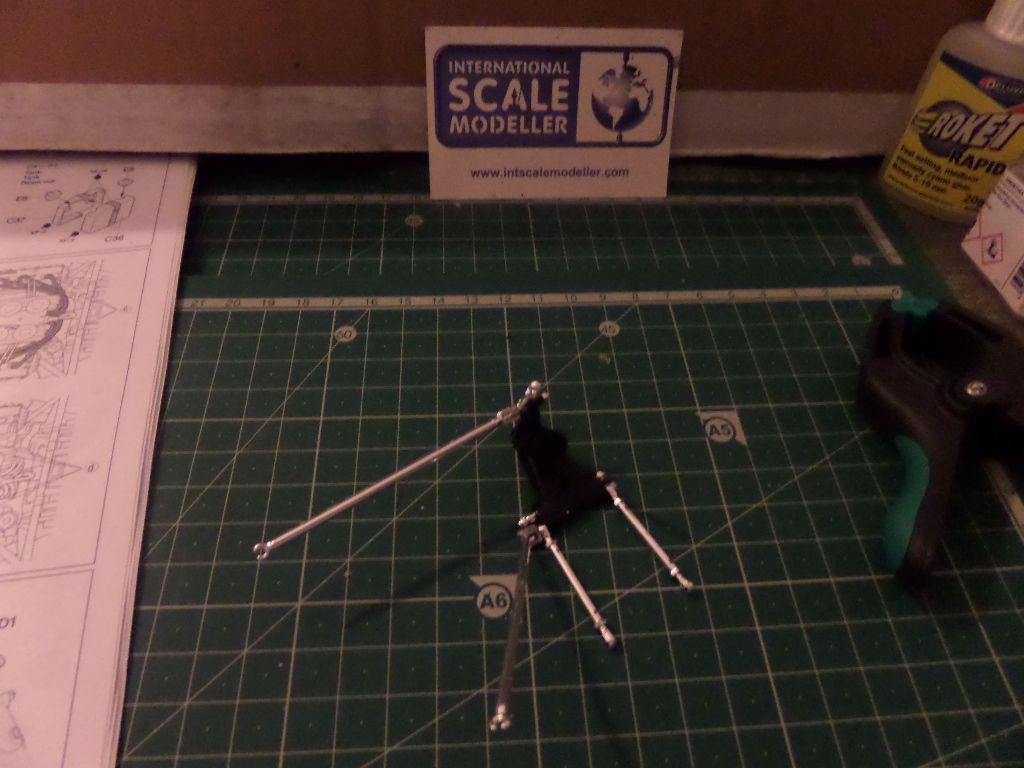
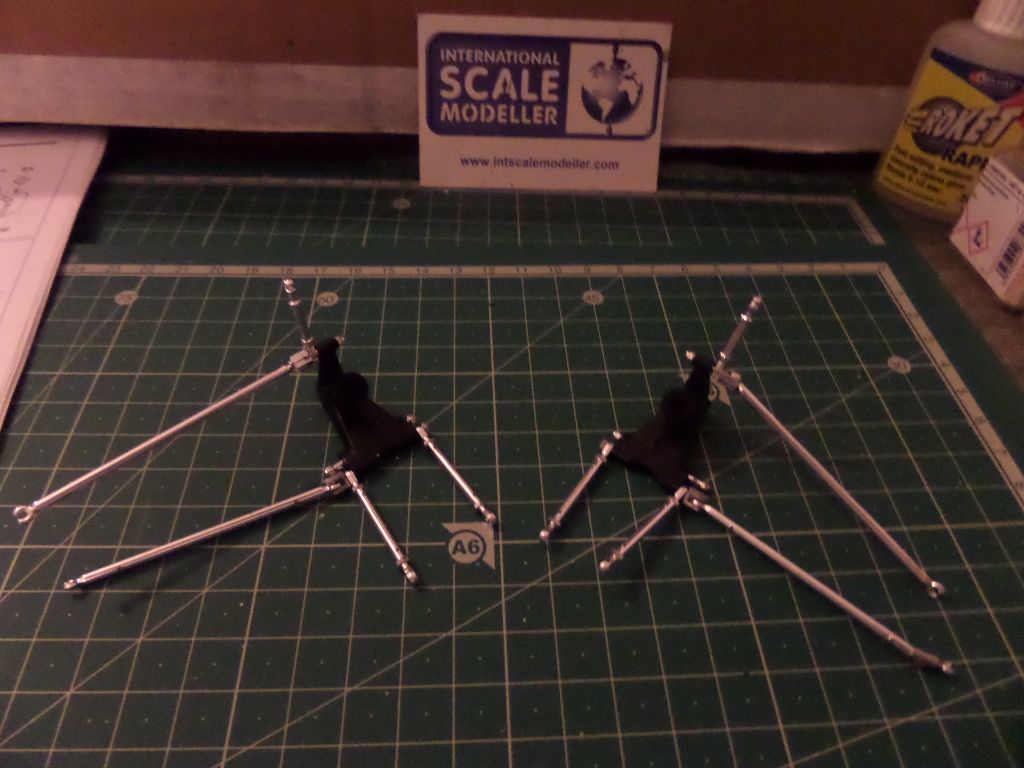
Well after the tool wheel we get to do two stands ... wish I know for what I should do this ...maybe later we can get to see
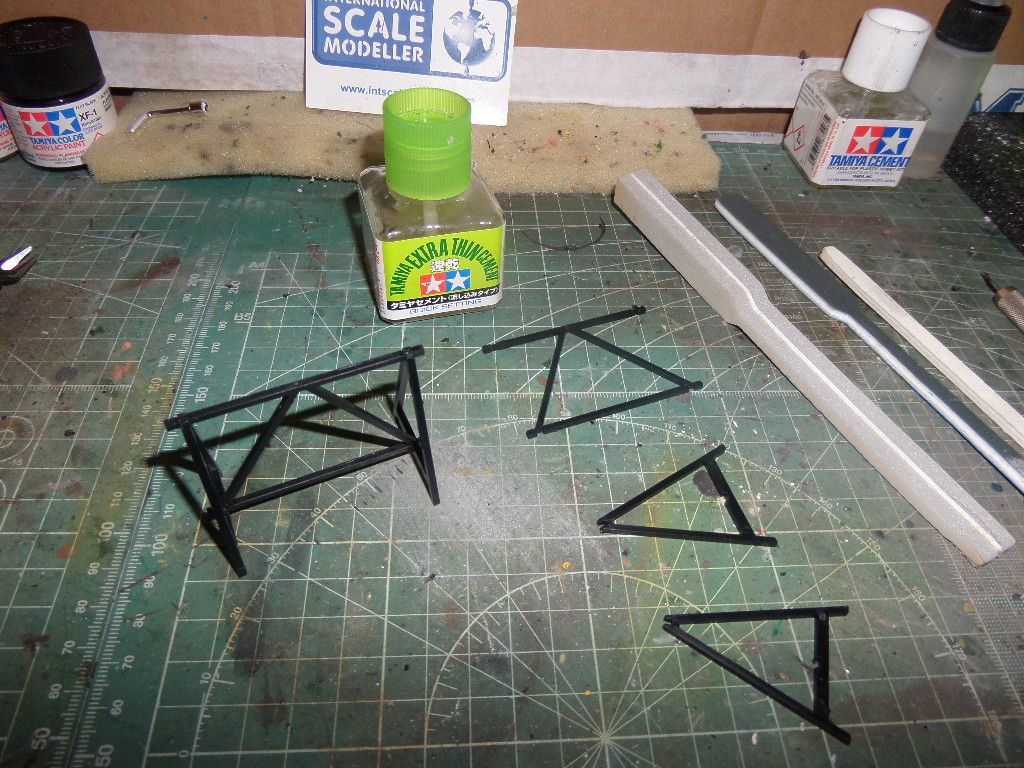
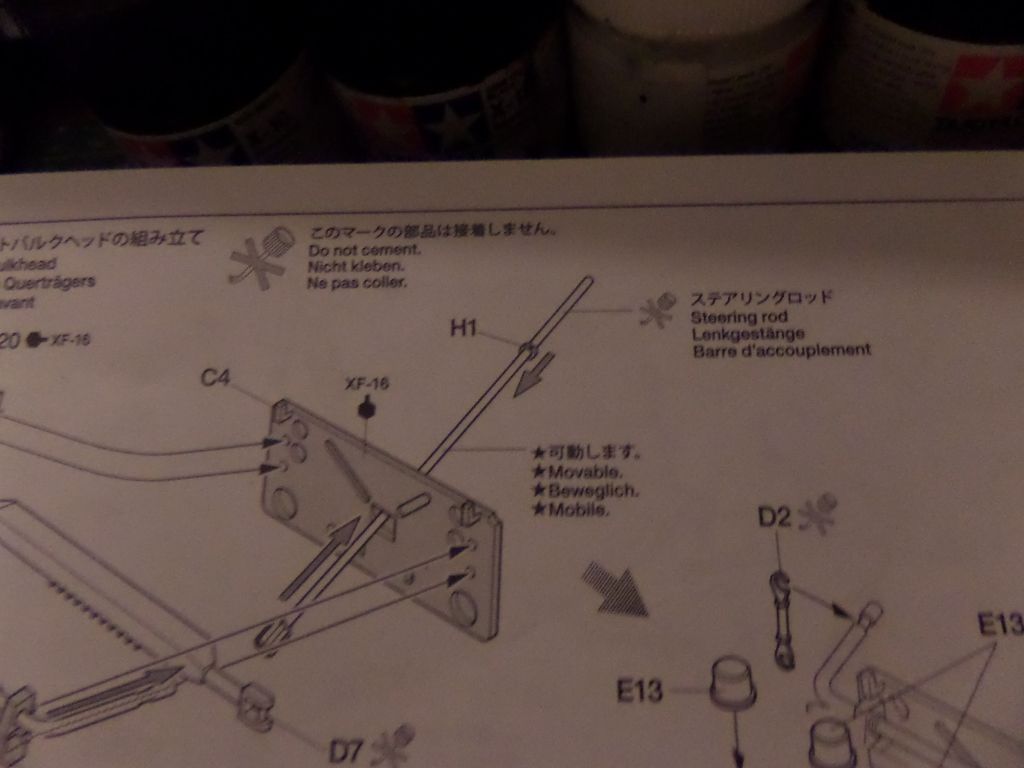
Nest the direction bar
The direction column is a rod in the 'goodies bag' so let's open it
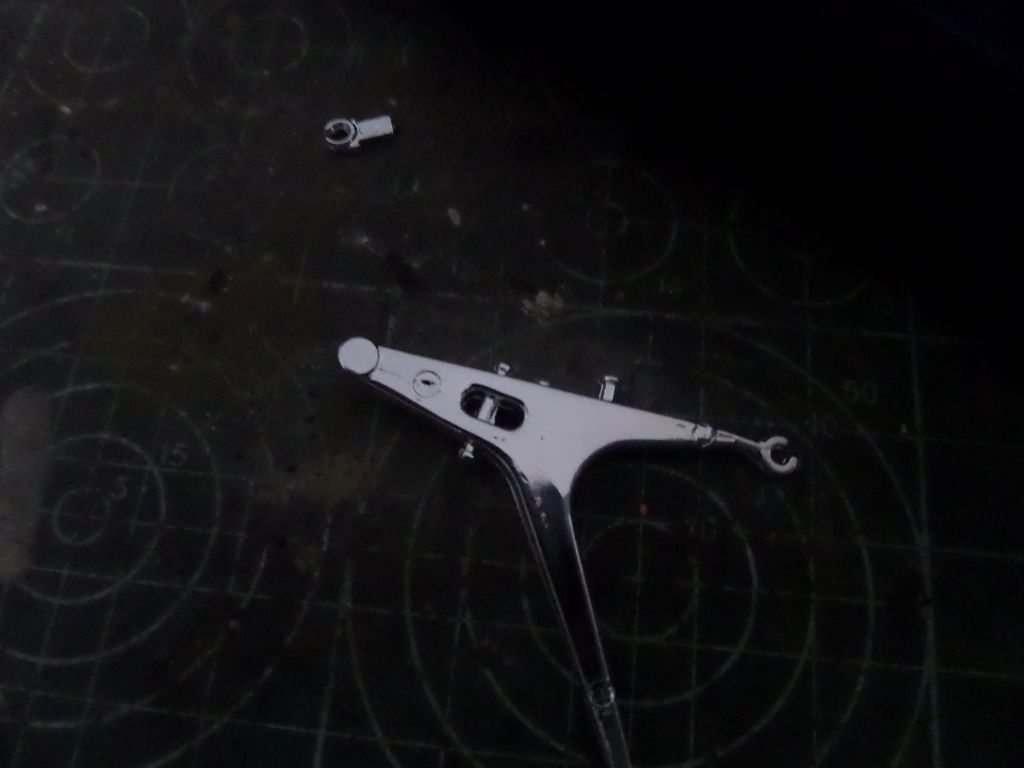
Lot's of cable , sprues ...
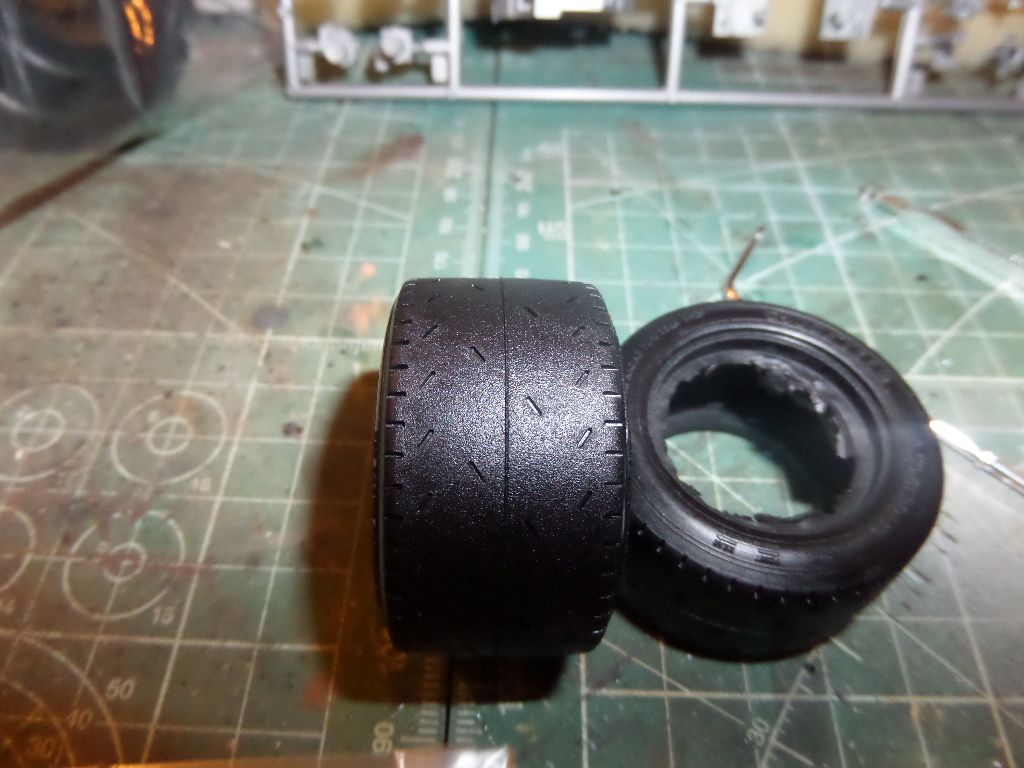
Awfull flash in the tyres ( they are rubber tyres )
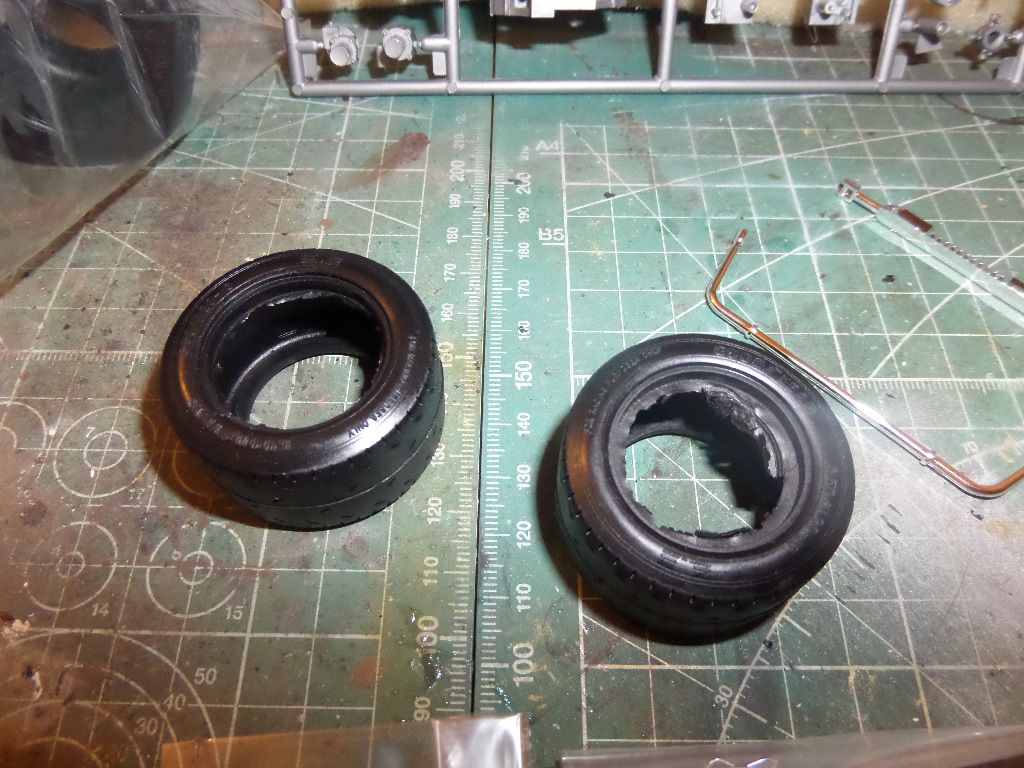
A seam in the middle , actually already someone mention that this seam exist in the real tyres ...
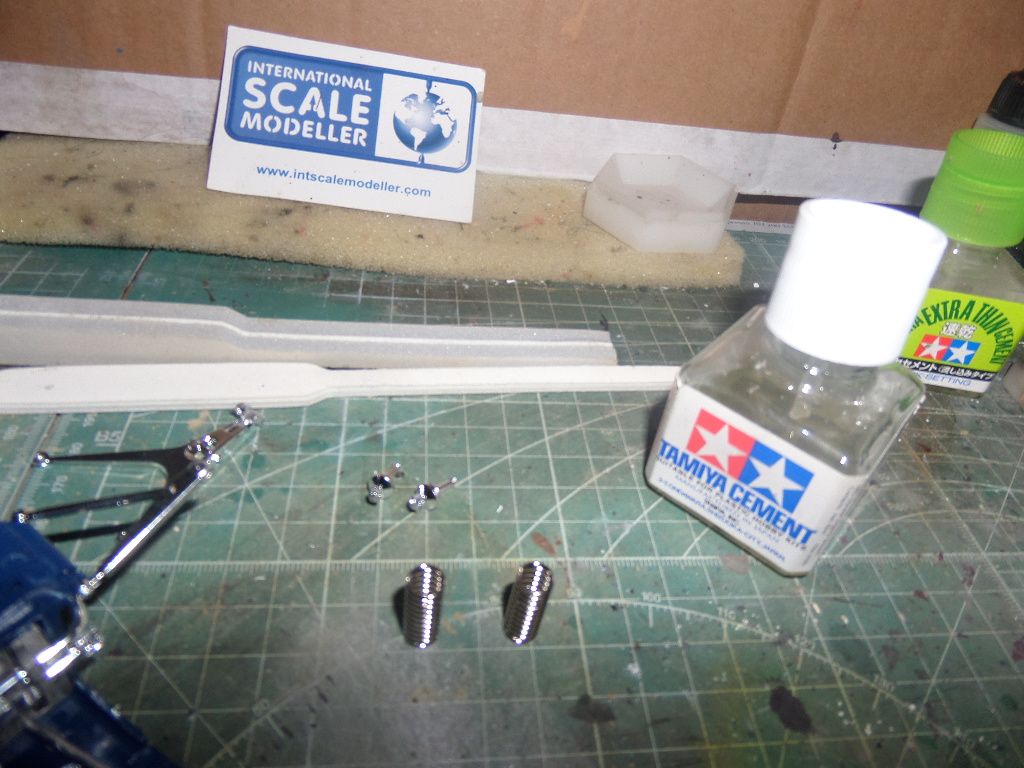
The direction shaft
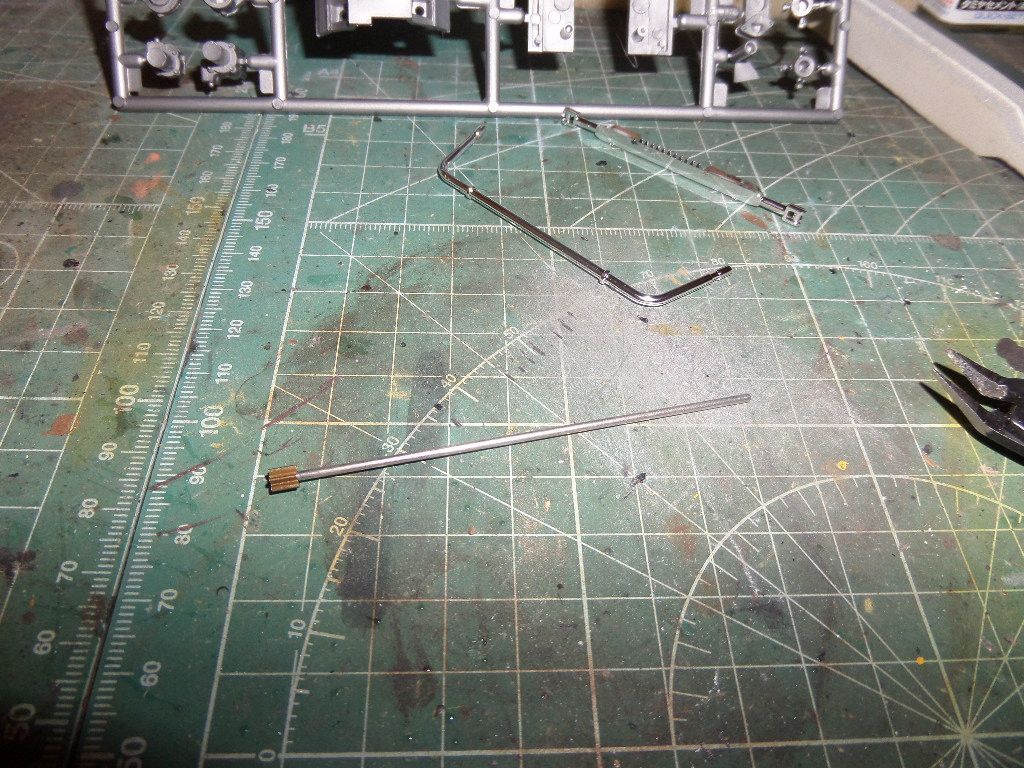
We get to place it using a small rubber ring ,
This is the 'rubber' sprue , also the seat is there
Continuing
Lots of chrome parts...the issue here is that when you cut them form the sprue you get a mark from where you vut it and you also must clean it ...not a bad idea ...they get a nice effect ...but also a lot ( I mean really a lot of mould markings on them )
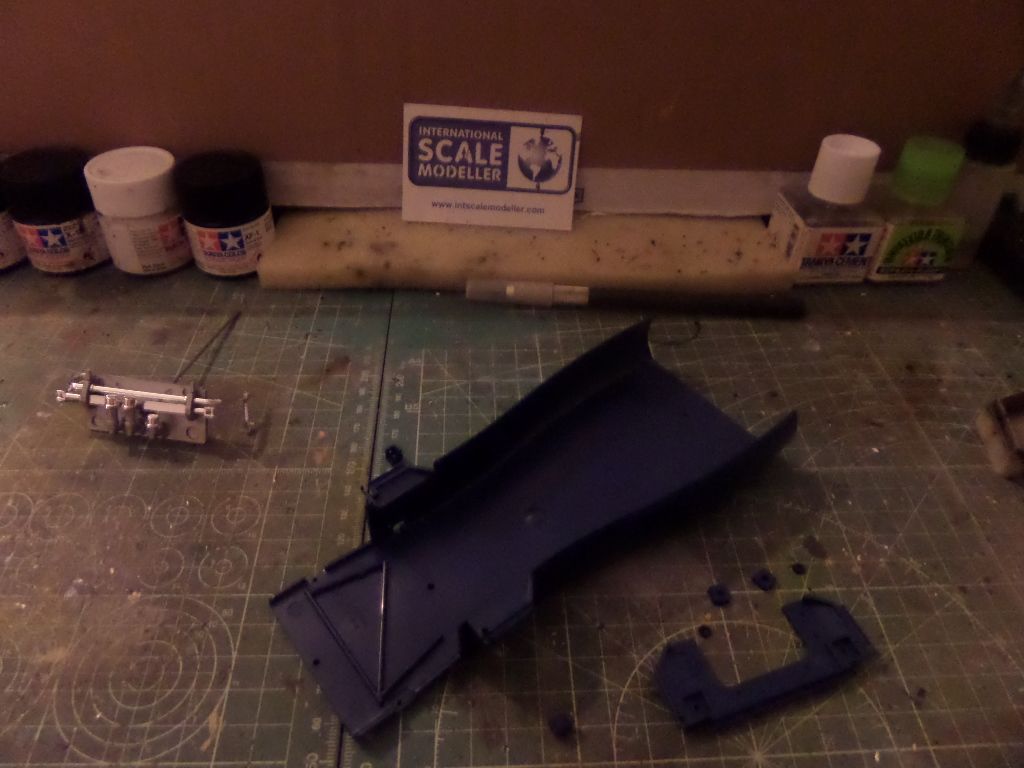
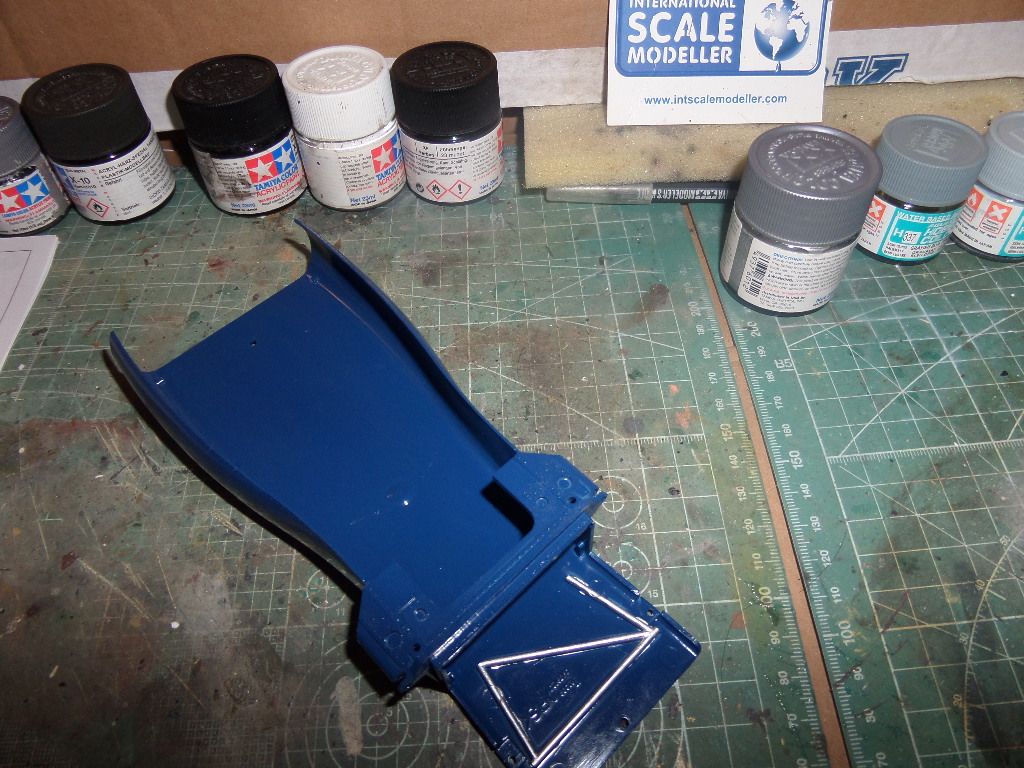
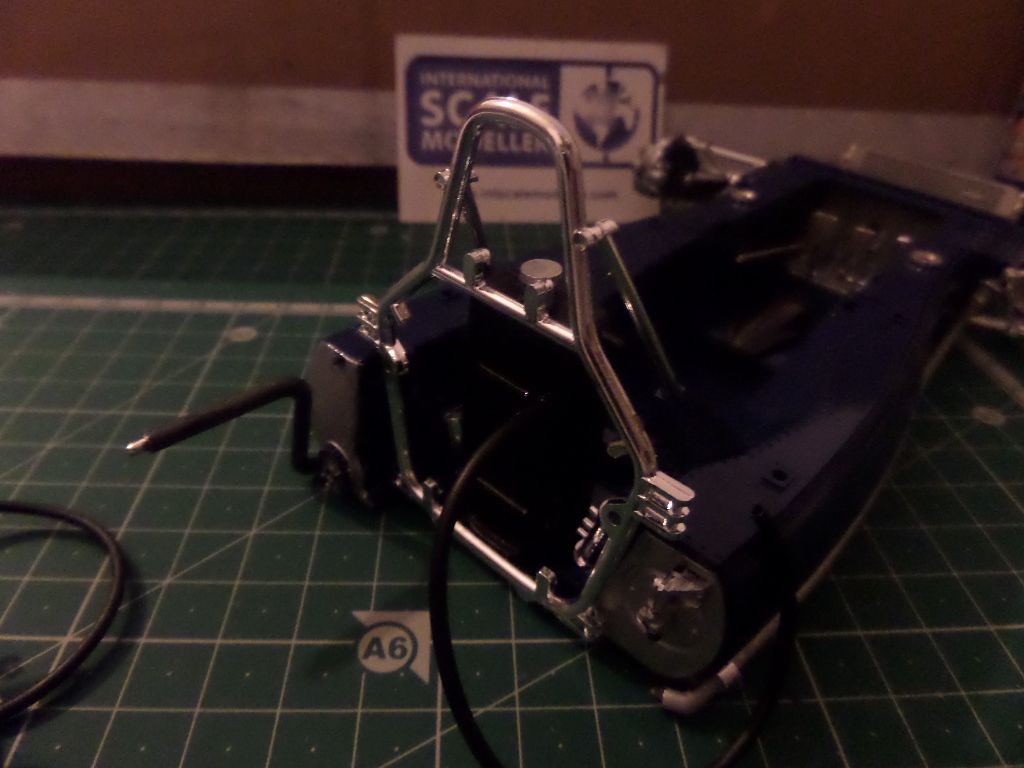
Time for the body ...
1978 ... I have 11 years old back then
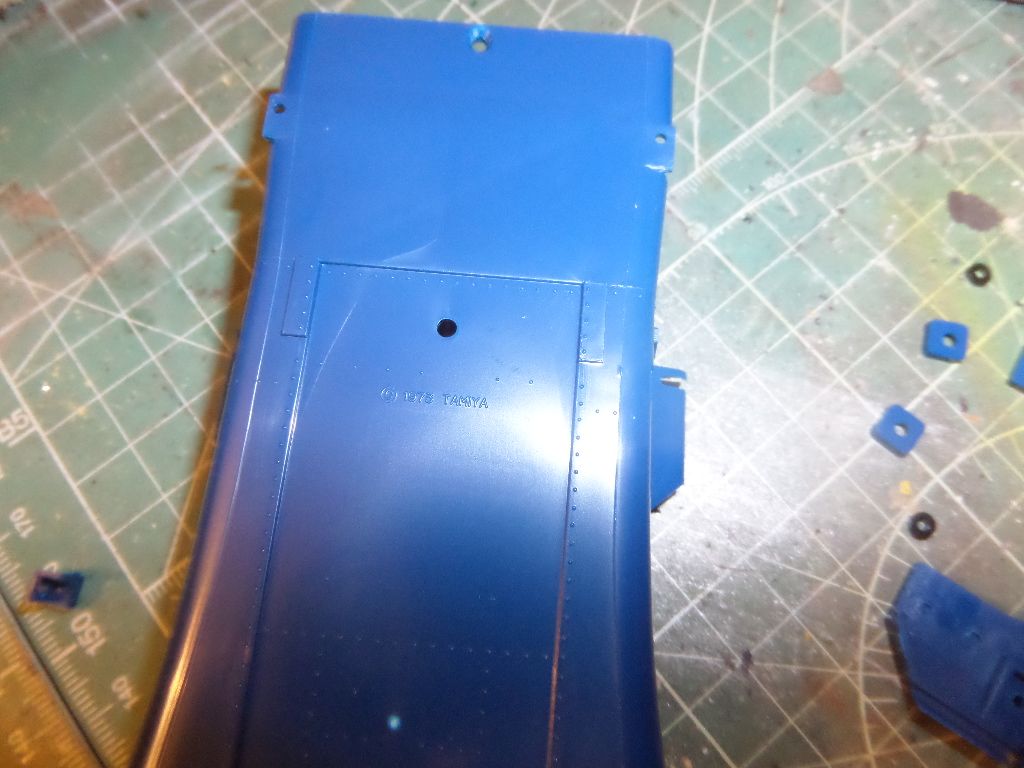
Some paint ...TS-15 on the body and some X.11 for that bars engraved in that piece
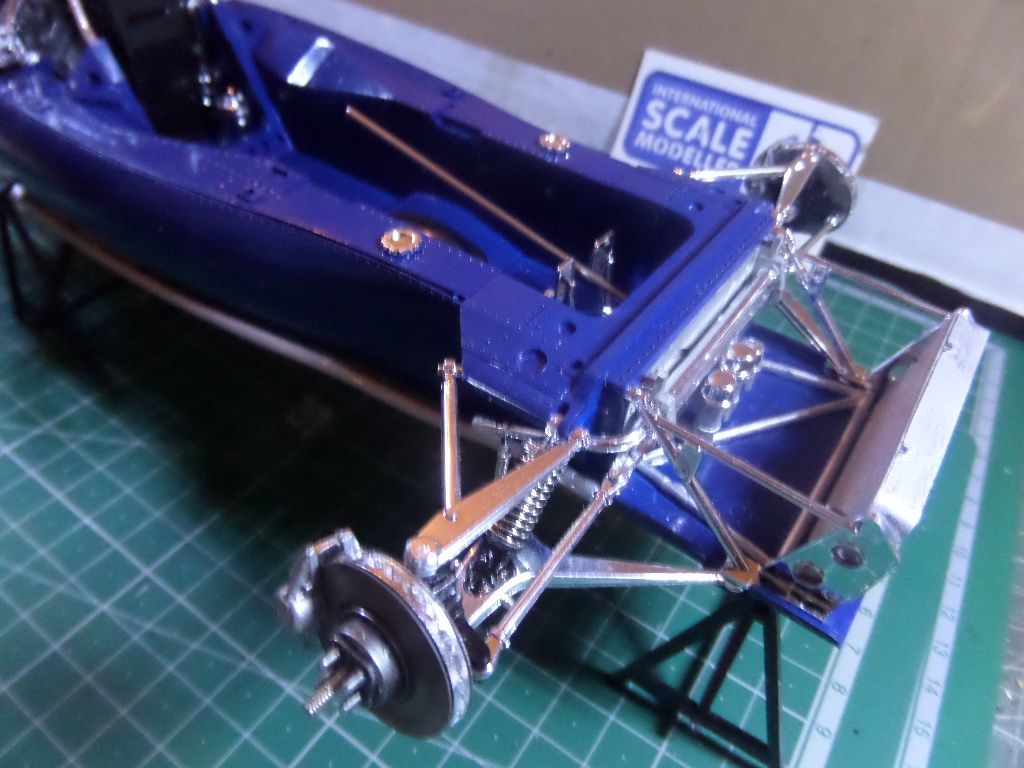
Placing the suspension bars ...
See those marl«ks ...awful...for the price of this kit , I mean ...
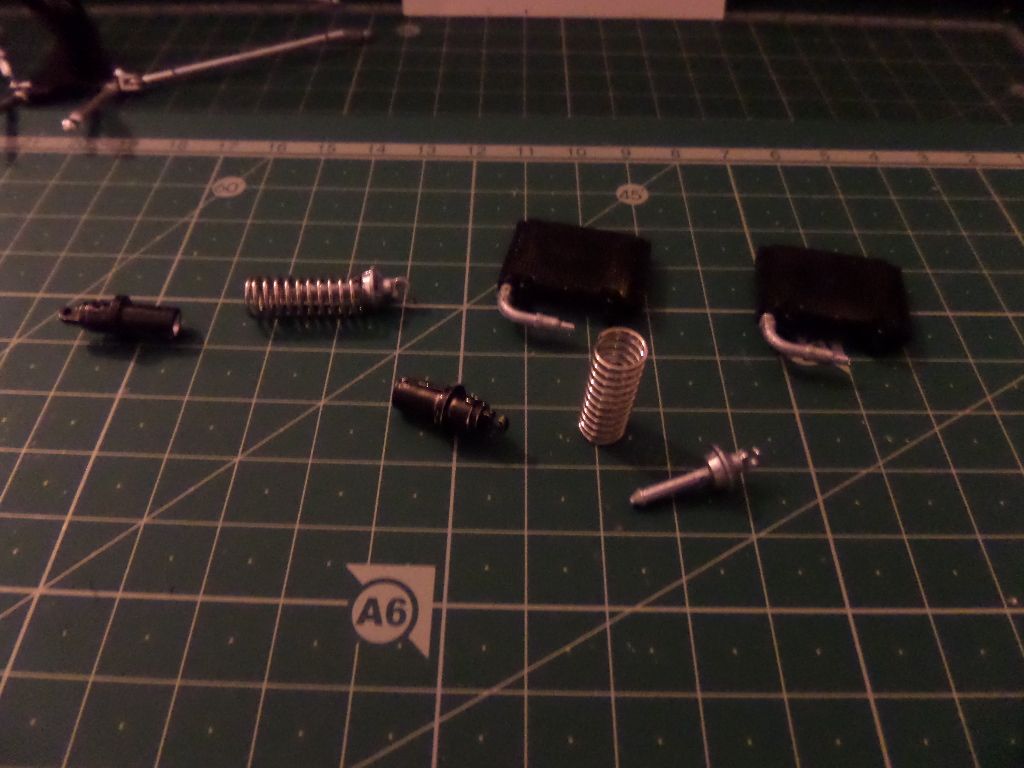
Springs for the bumpers
MAke a mistake here , and place the lower arms upsidedown ...
Those gaps ...almost impossible to correct ...place putty and then paint , will be great
Time for using the PE fro the kit
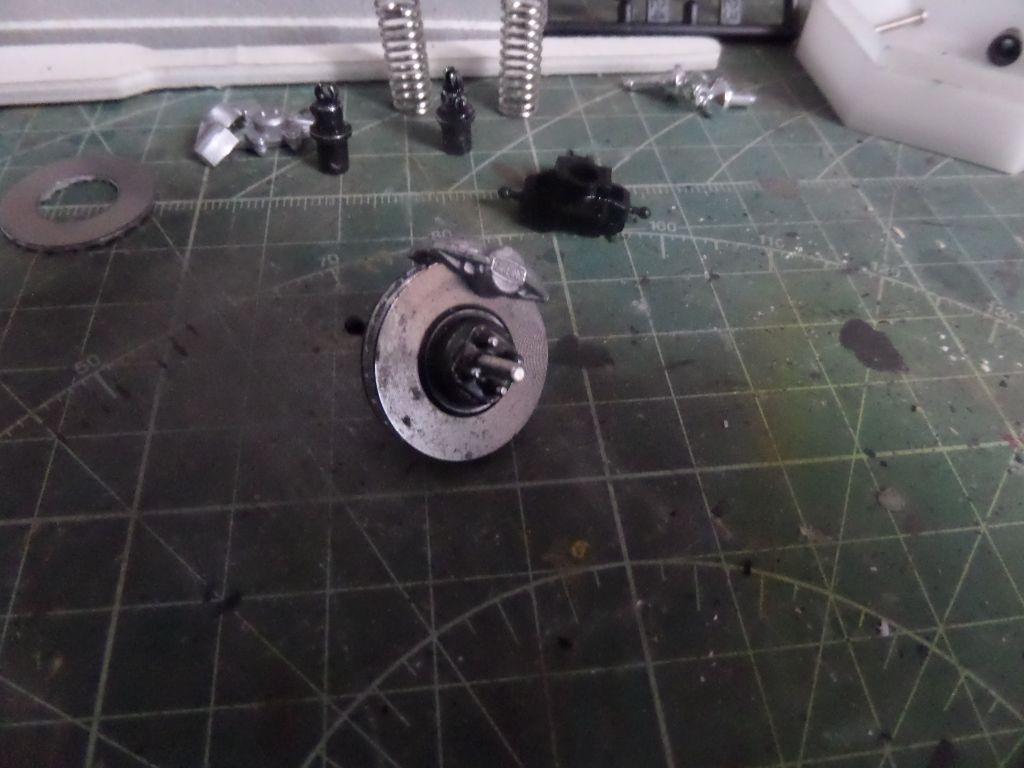
The brake caps are almost impossibel to fix ...the one that we should place last is a holly patience work ...and we must glue it and not to glue the disc brake that should be moveable ... tough work !
On the springs we get two different sizes , being the shorter to use at front ...again awfull system to get them toghether ...
this still has the lower suspention arm wrongly placed ...
More mould marks ....every sprue is like this , I do not bother with thi and will just try to get this altoghether ...not an easy kit !
Pedals ( with the PE cover of the foot pedals already placed in it )
The other part of the low body already painted and ready to go
Voilá ...

Nice ...but a lot , I mean a lot of work !

So the first step is to do a wheel tool , made form the chrom plastic sprues ...

The kit is disapointing , for the price you thought to have some nice moulds, but it is full of mould injection marks ...

Part of Engine detail

Wheel

More engine parts


Well after the tool wheel we get to do two stands ... wish I know for what I should do this ...maybe later we can get to see

Nest the direction bar

The direction column is a rod in the 'goodies bag' so let's open it

Lot's of cable , sprues ...

Awfull flash in the tyres ( they are rubber tyres )

A seam in the middle , actually already someone mention that this seam exist in the real tyres ...

The direction shaft

We get to place it using a small rubber ring ,

This is the 'rubber' sprue , also the seat is there

Continuing


Lots of chrome parts...the issue here is that when you cut them form the sprue you get a mark from where you vut it and you also must clean it ...not a bad idea ...they get a nice effect ...but also a lot ( I mean really a lot of mould markings on them )

Time for the body ...

1978 ... I have 11 years old back then

Some paint ...TS-15 on the body and some X.11 for that bars engraved in that piece


Placing the suspension bars ...

See those marl«ks ...awful...for the price of this kit , I mean ...


Springs for the bumpers

MAke a mistake here , and place the lower arms upsidedown ...

Those gaps ...almost impossible to correct ...place putty and then paint , will be great

Time for using the PE fro the kit


The brake caps are almost impossibel to fix ...the one that we should place last is a holly patience work ...and we must glue it and not to glue the disc brake that should be moveable ... tough work !
On the springs we get two different sizes , being the shorter to use at front ...again awfull system to get them toghether ...

this still has the lower suspention arm wrongly placed ...


More mould marks ....every sprue is like this , I do not bother with thi and will just try to get this altoghether ...not an easy kit !

Pedals ( with the PE cover of the foot pedals already placed in it )

The other part of the low body already painted and ready to go

Voilá ...


Nice ...but a lot , I mean a lot of work !


Cheers ,
António
On the Bench
a lot of stuff right now
António
On the Bench
a lot of stuff right now
-
rodrant
- Chief Warrant Officer 2
- Posts: 1774
- Joined: Wed Feb 19, 2014 9:22 pm
- Location: Maia - Portugal
Re: 1/12 Formula One Tyrrel 003
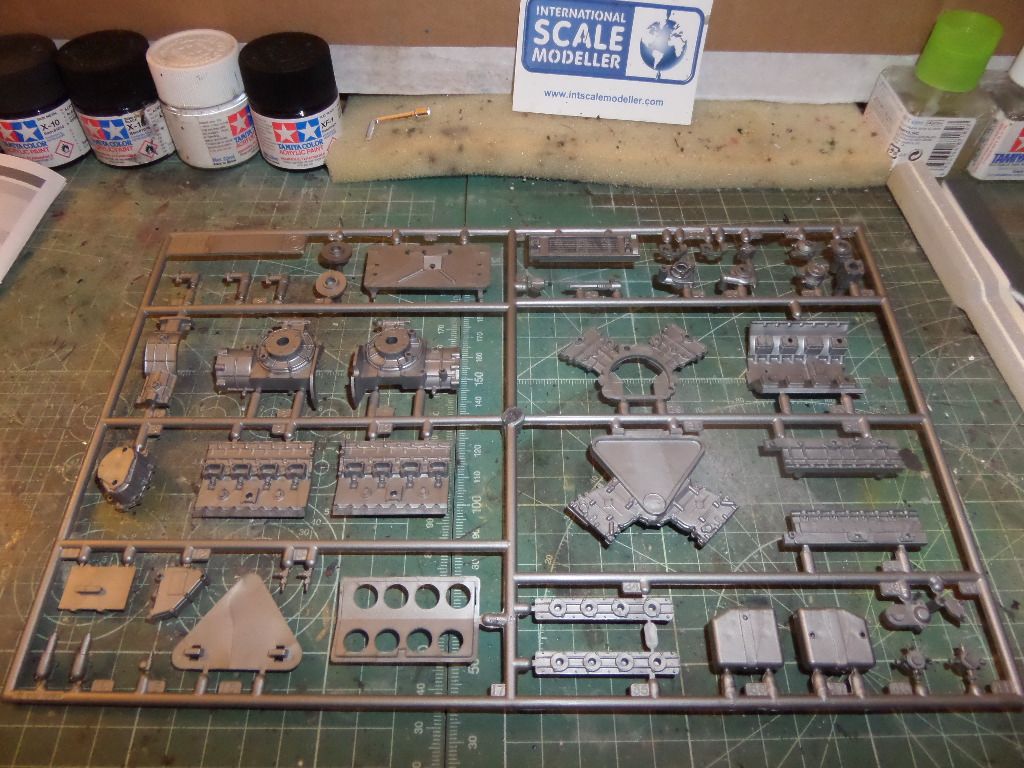
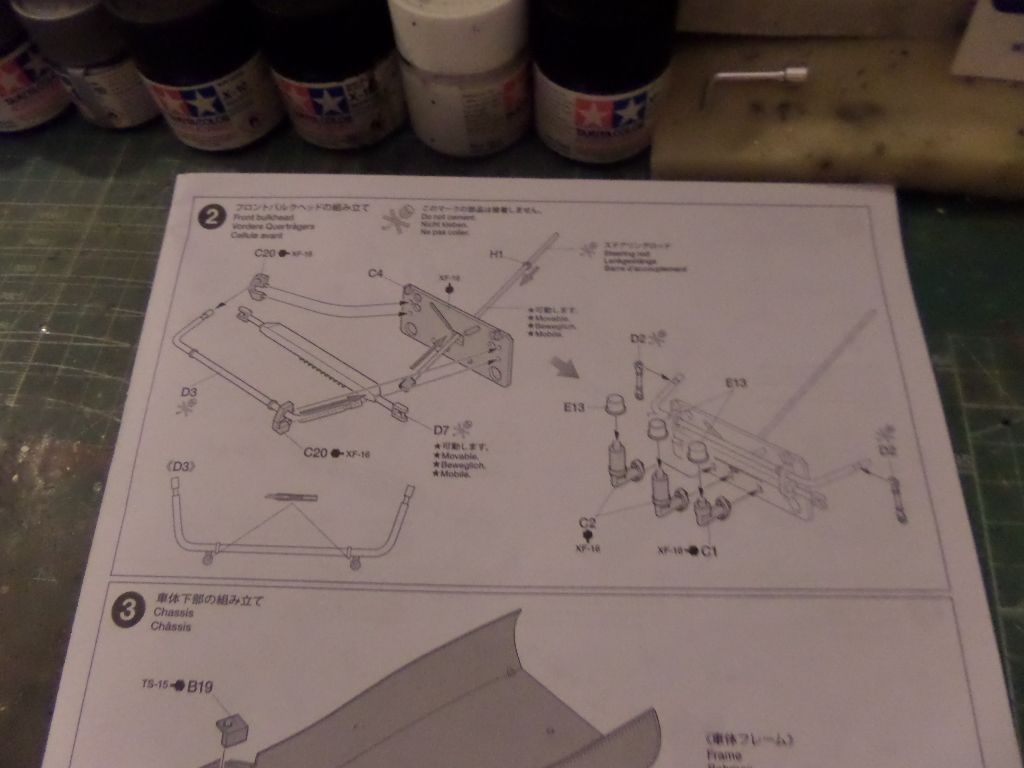
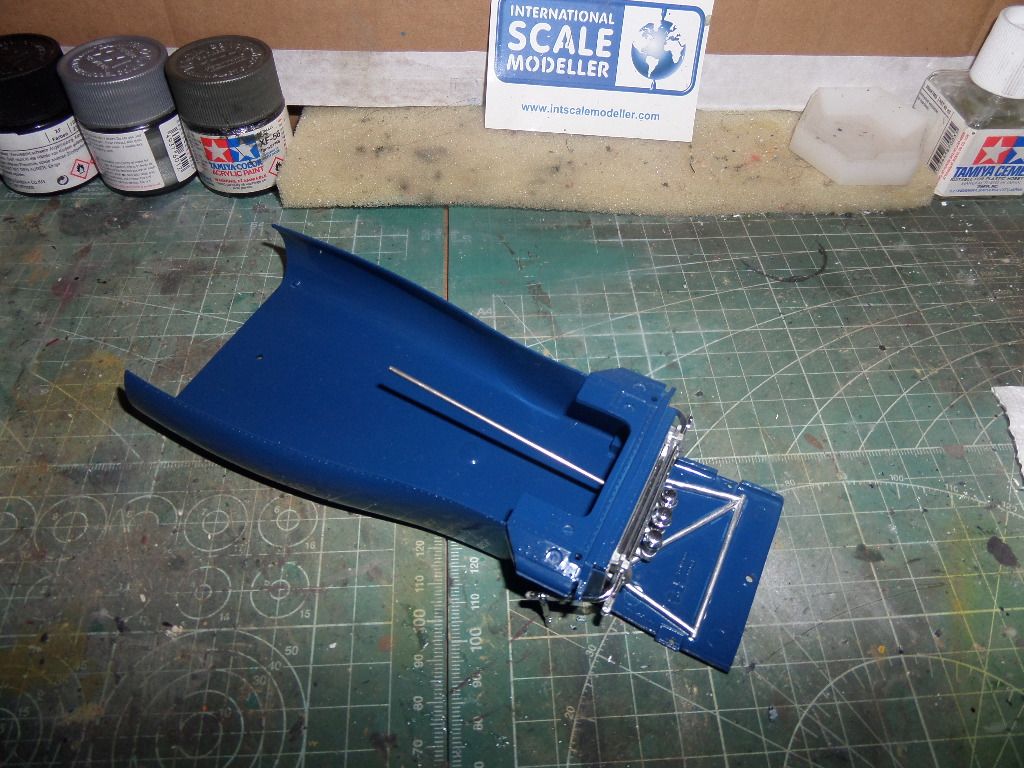
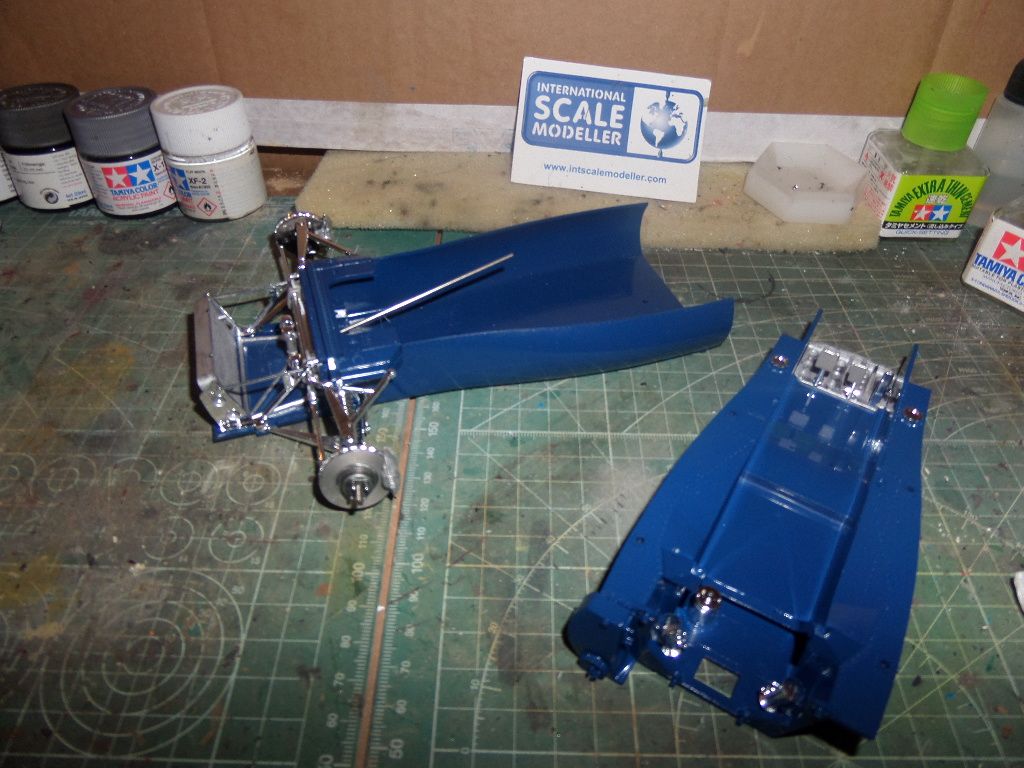
So , this build is going ...even not easy ...I stopped now for doing some figure and a bust in an Interval , as I was starting to stress again , this is a kit to be done with time , to clear the chrome parts ( really advise that ! ) and to clean them from the mould marks . Also must admit that the result , even doing it OOB could be great as the kit is beautiful , and the way as it is made , makes me believe that tamiya have here a great kit , pitty the old parts (Tamiya often do this...) and the mould marks everywhere , in my opinion , and I built already a lot of Tamiya kits , it isn'rt the best plastics that I encontered in a Tamiya Kit , even think that the price is very high for the kit ( even it is a 1/12 scale and brings PE , seat belts ...) but that is only my opinion , even think that the modellers used to do racing cars and with time could ake a tremendous Top Shelf kit , it has wonderfull details , the engine is a kit inside the kit , let's see my progress ,enough talk
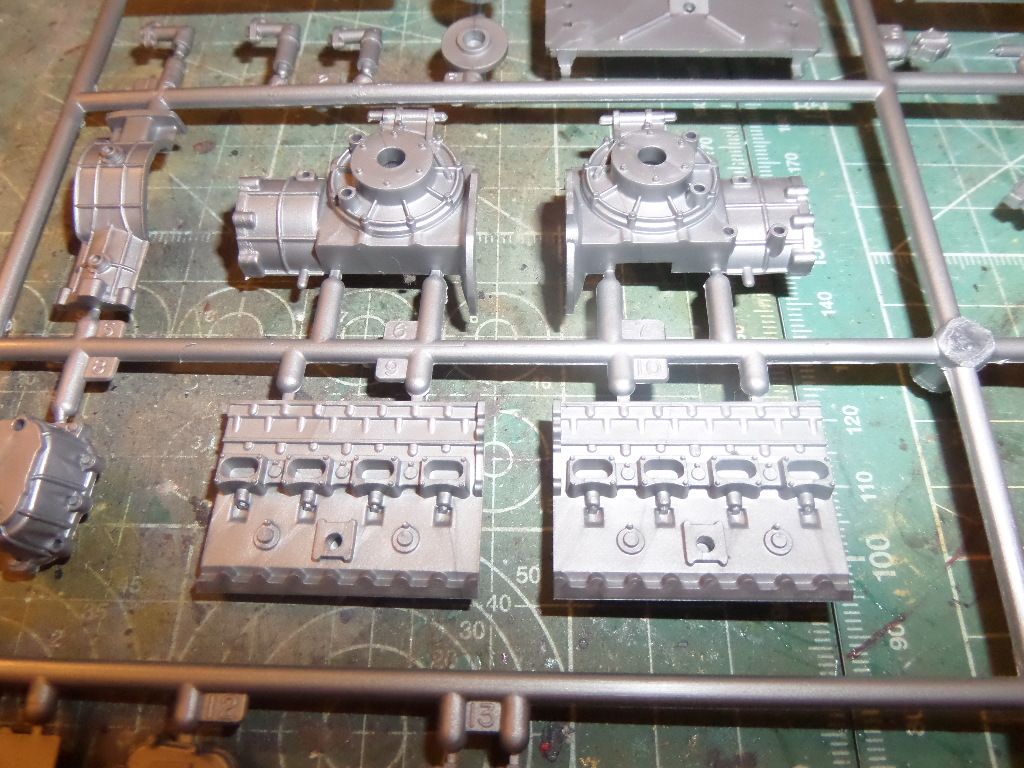
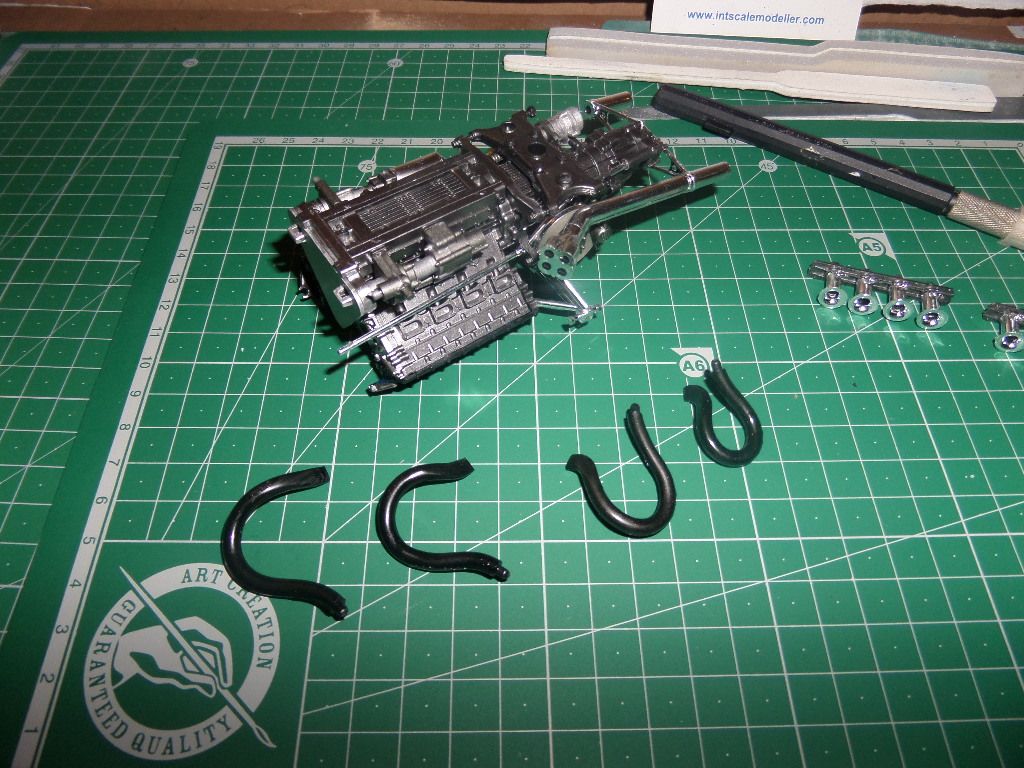
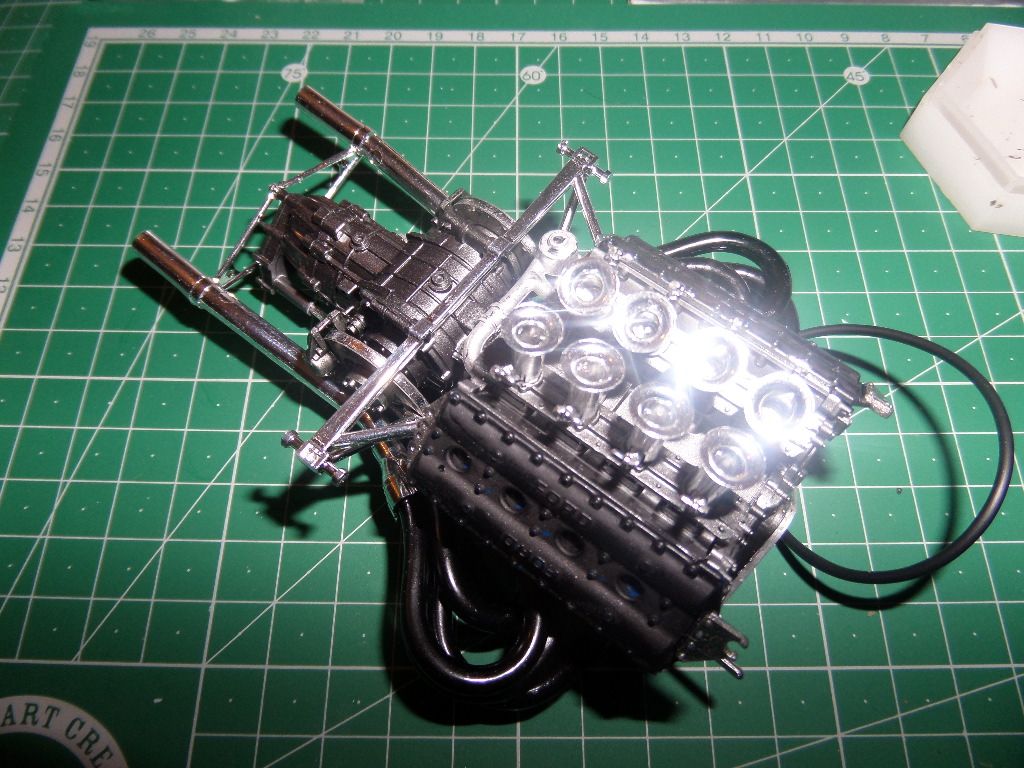
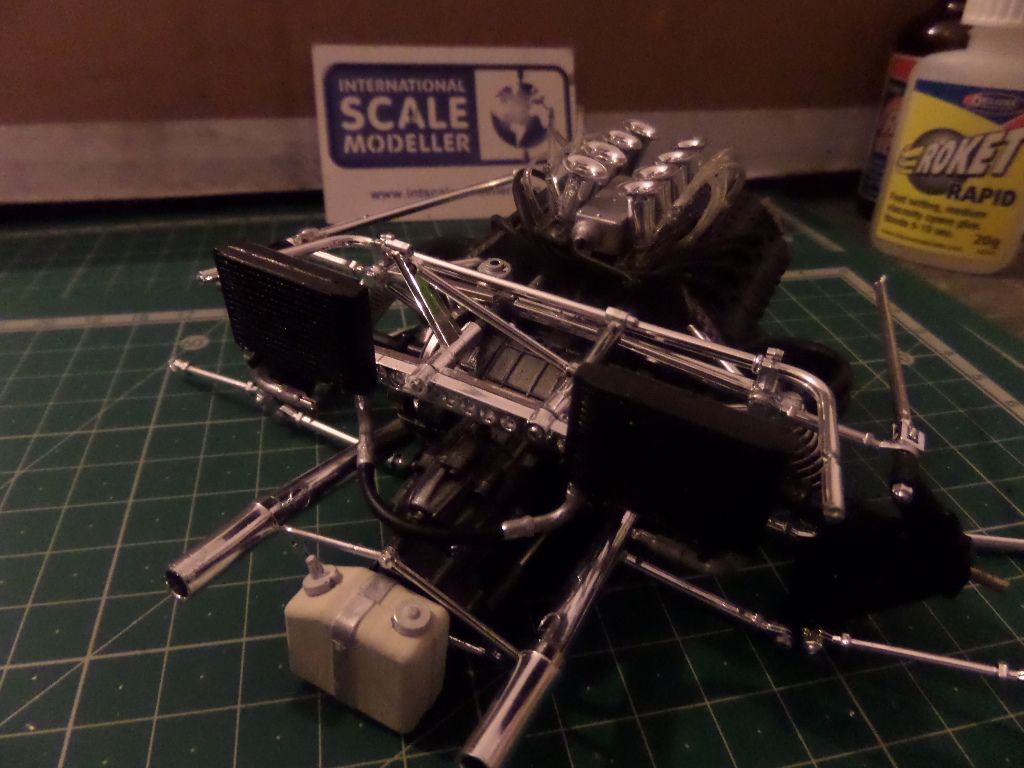
So I make a start on the Engine :
The tub
Not easy to place this two parts !
The engine covers , take two small PE parts on the sides to fix it to the chassis
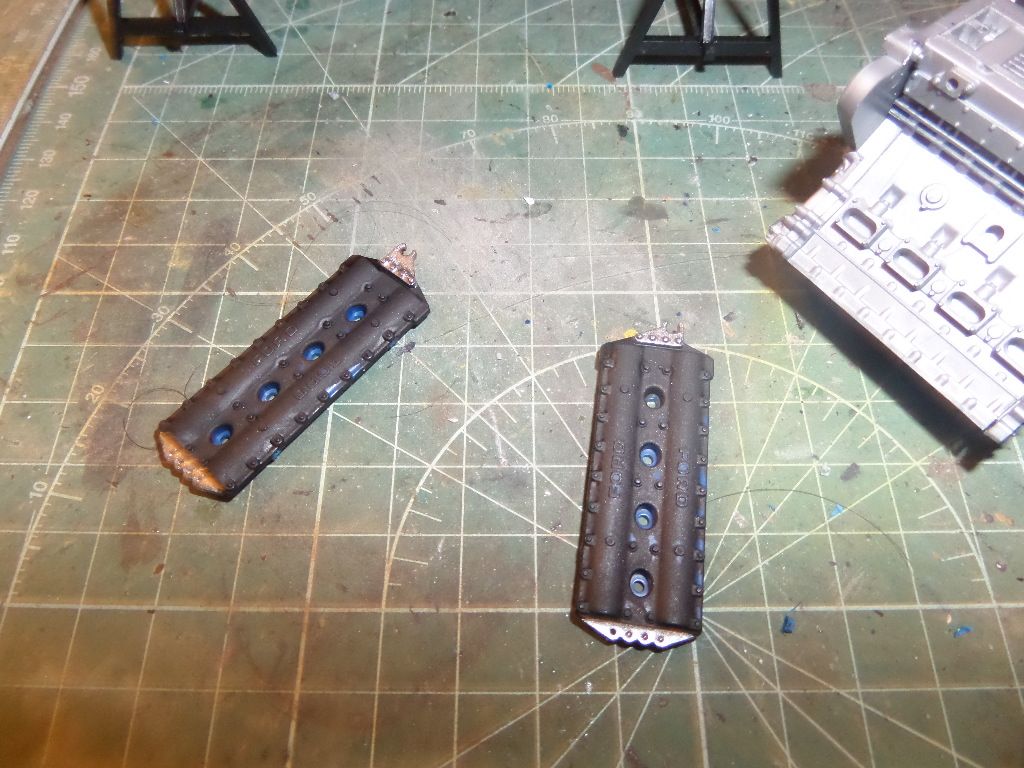
Already painted all with X-10
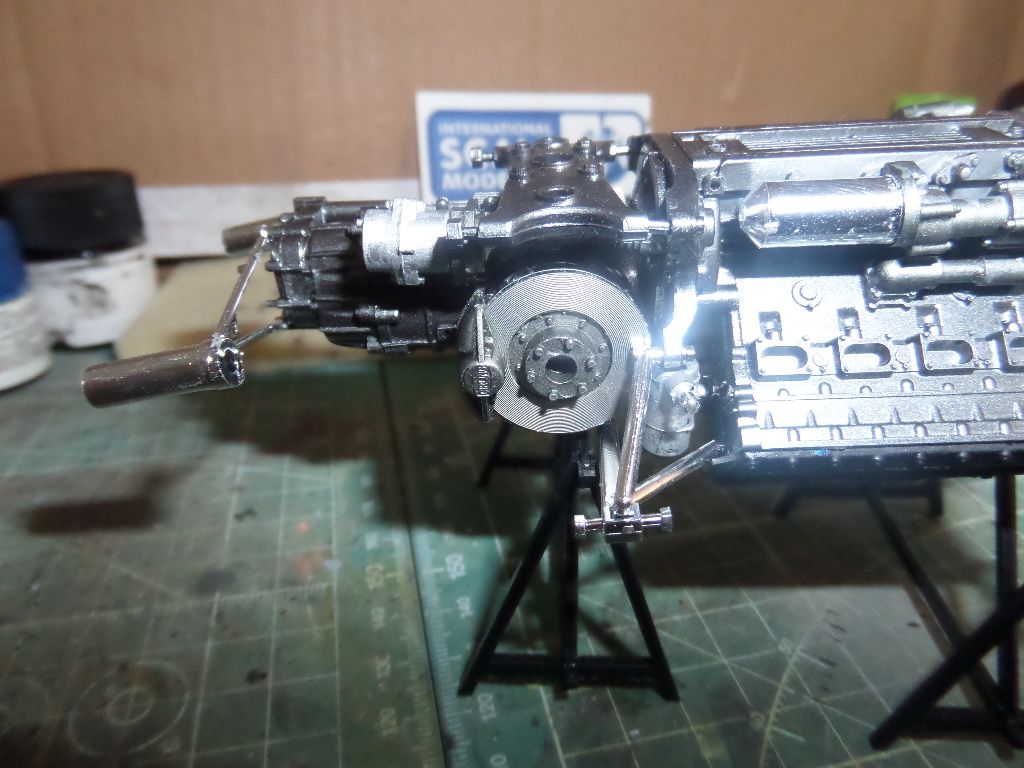
other side with the chrome parts for the engine fixing structure
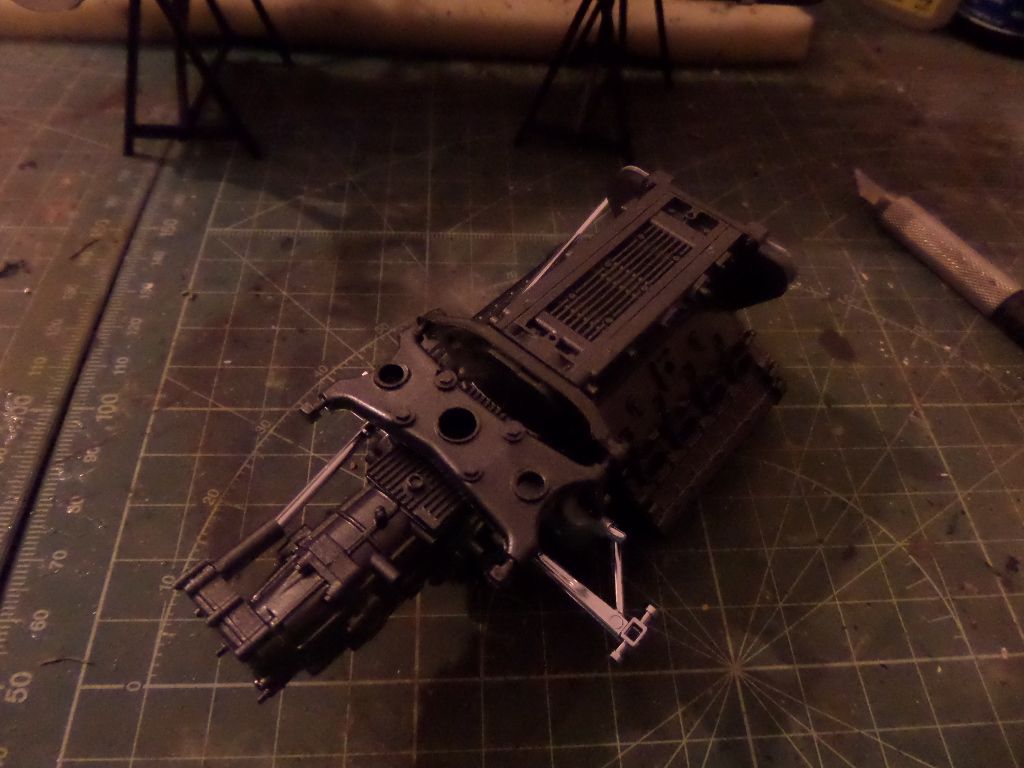
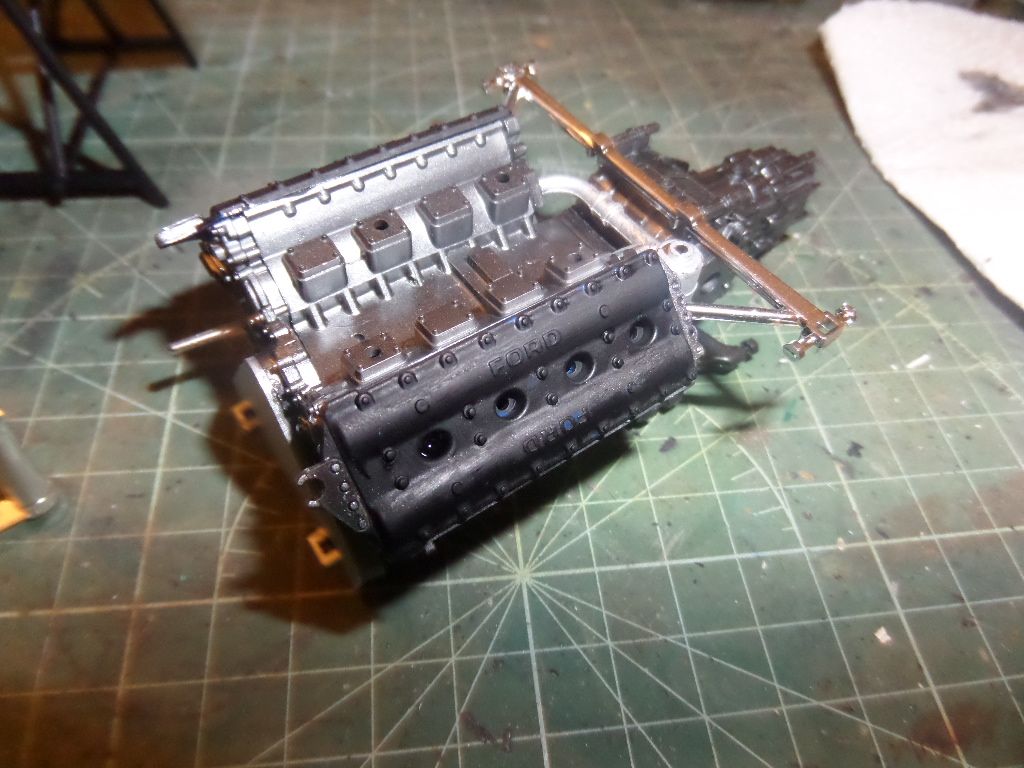
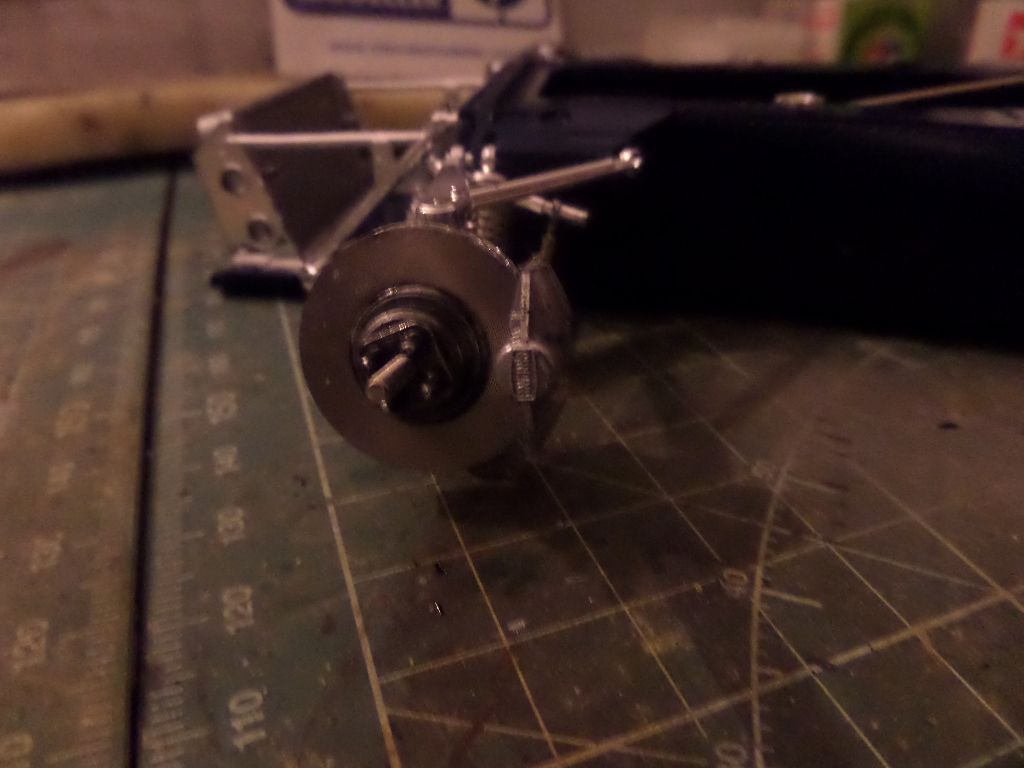
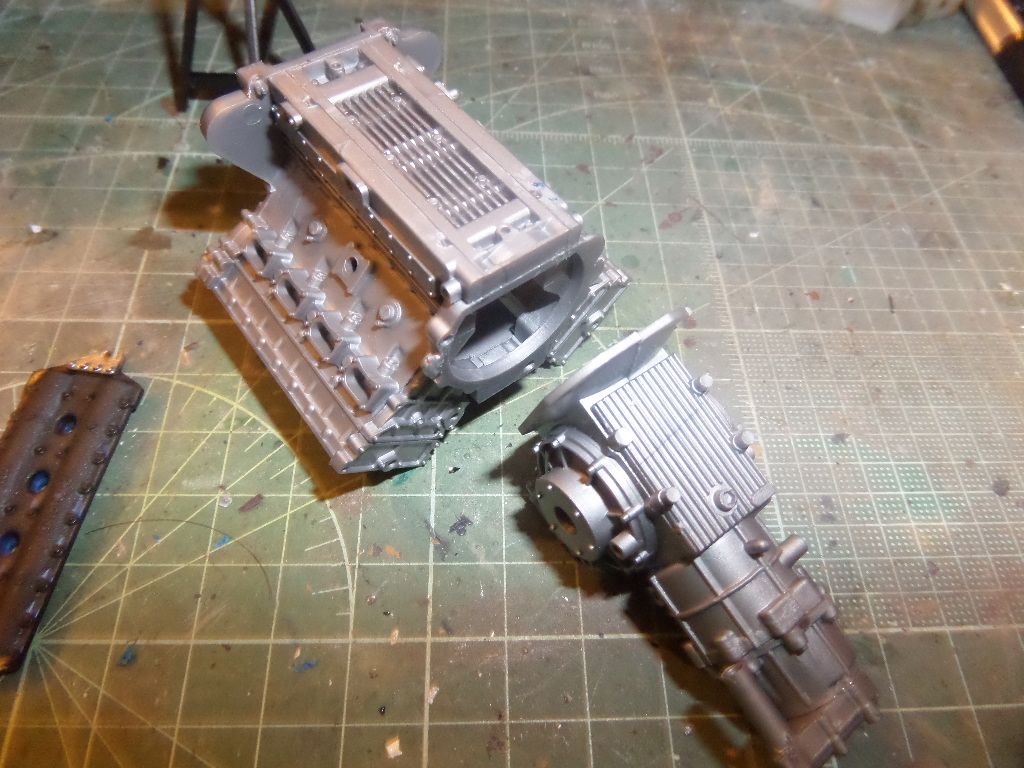
Rear brakes :
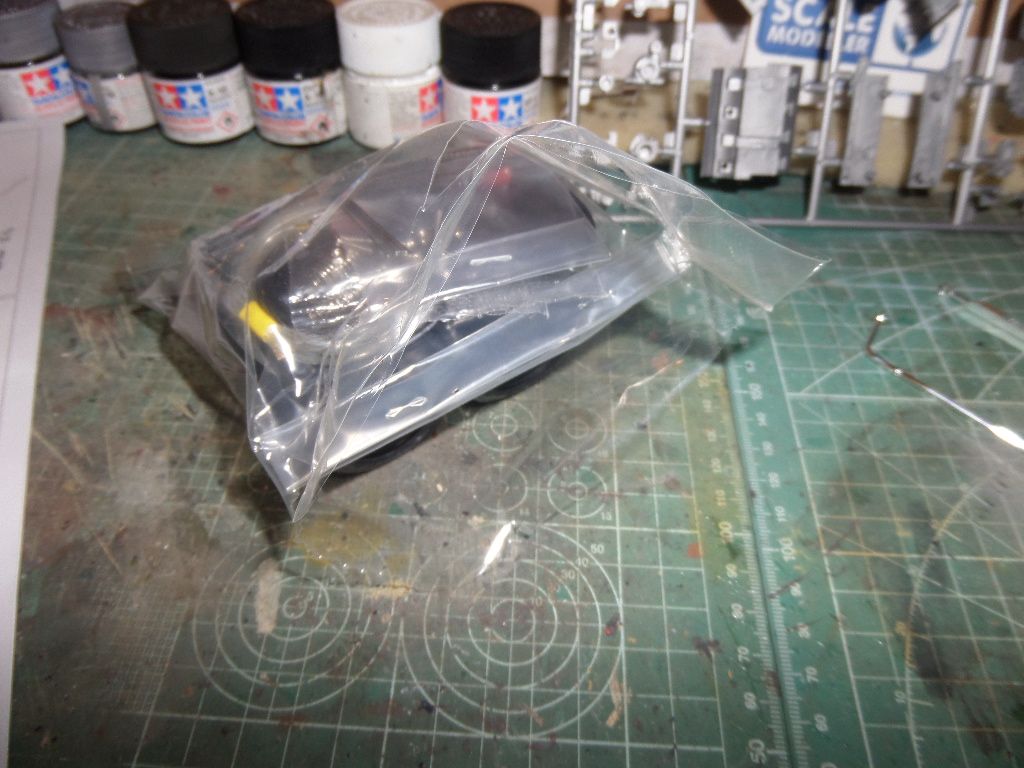
The engine in the support in my 'Racing Workshop'
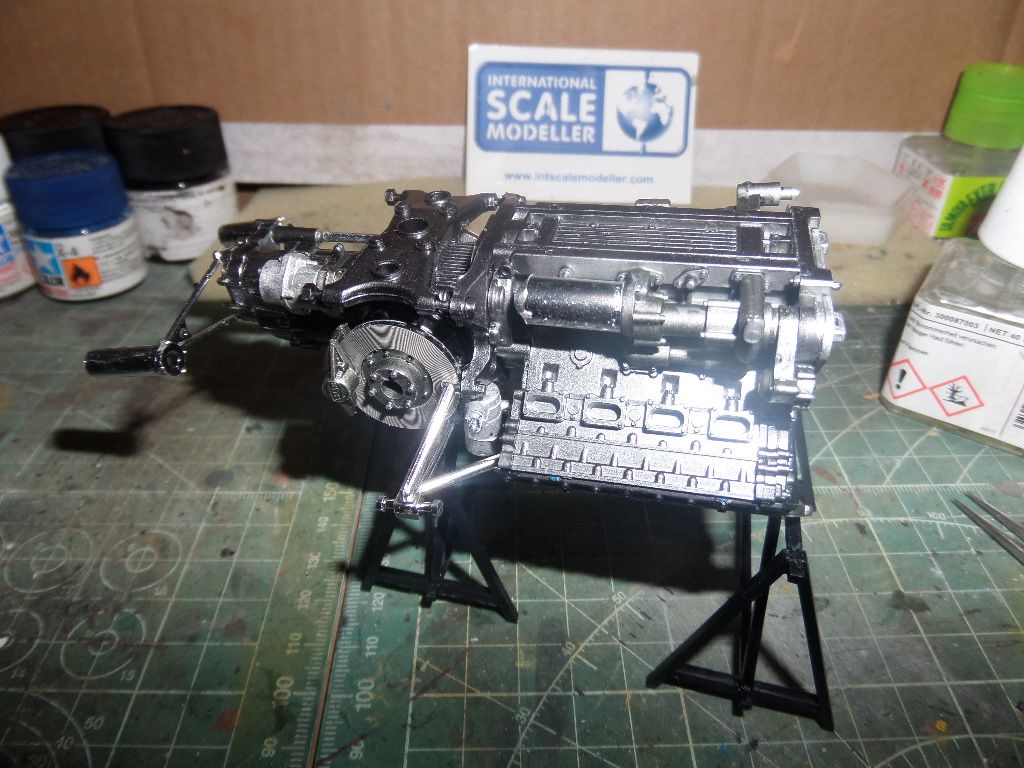
Nice detail !
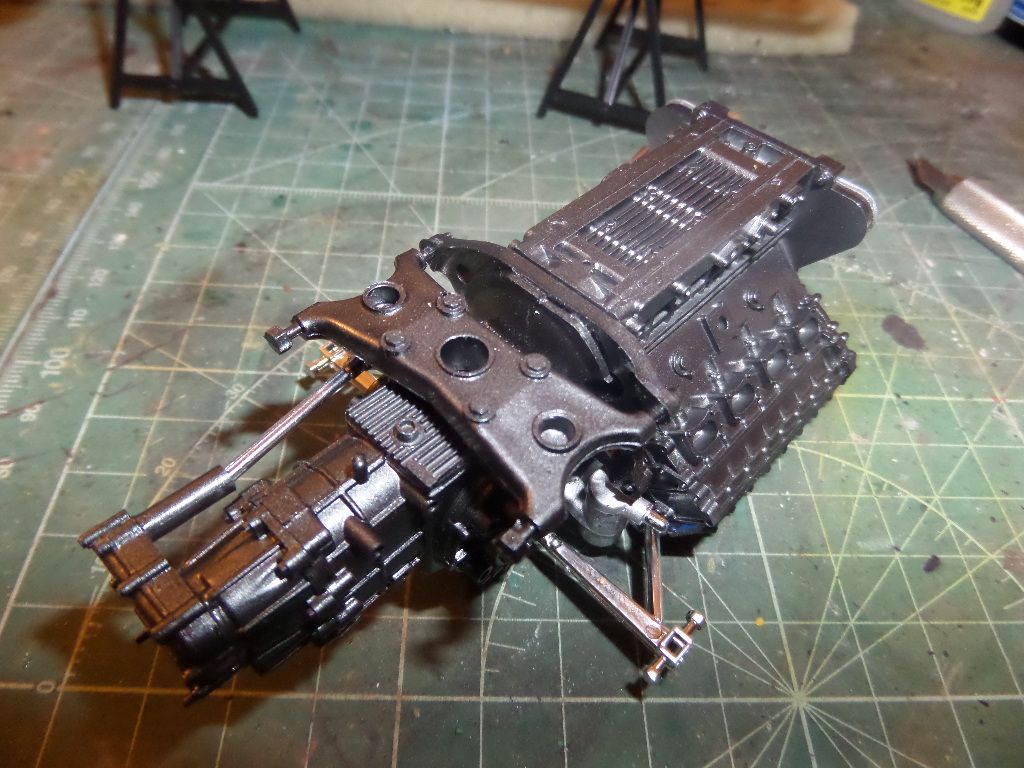
Now I make the Throttle plates ..-
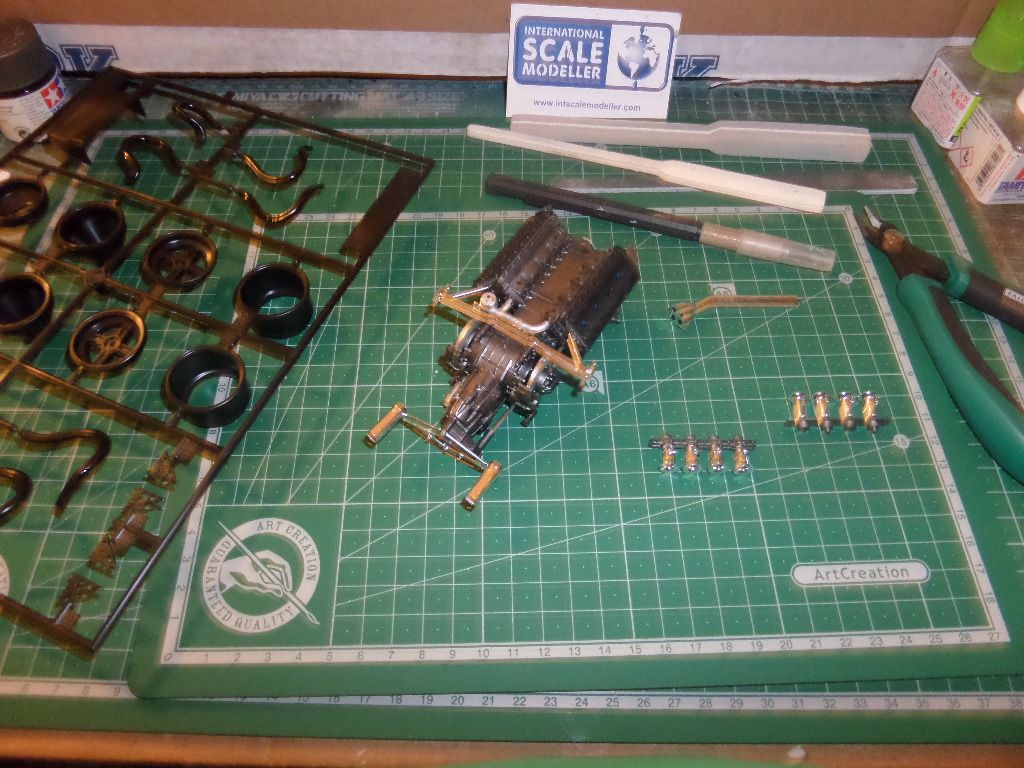
Engine exhausts , already painted X-18
Also seem confusing , but very easy to place, only carefull to Instructions .
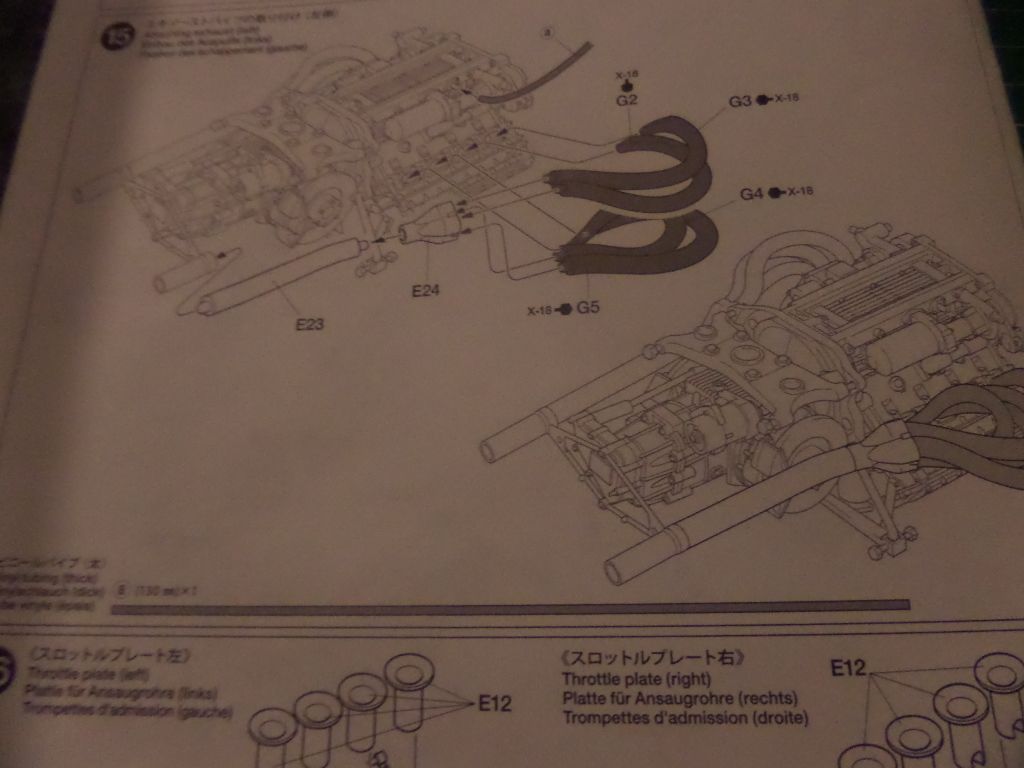
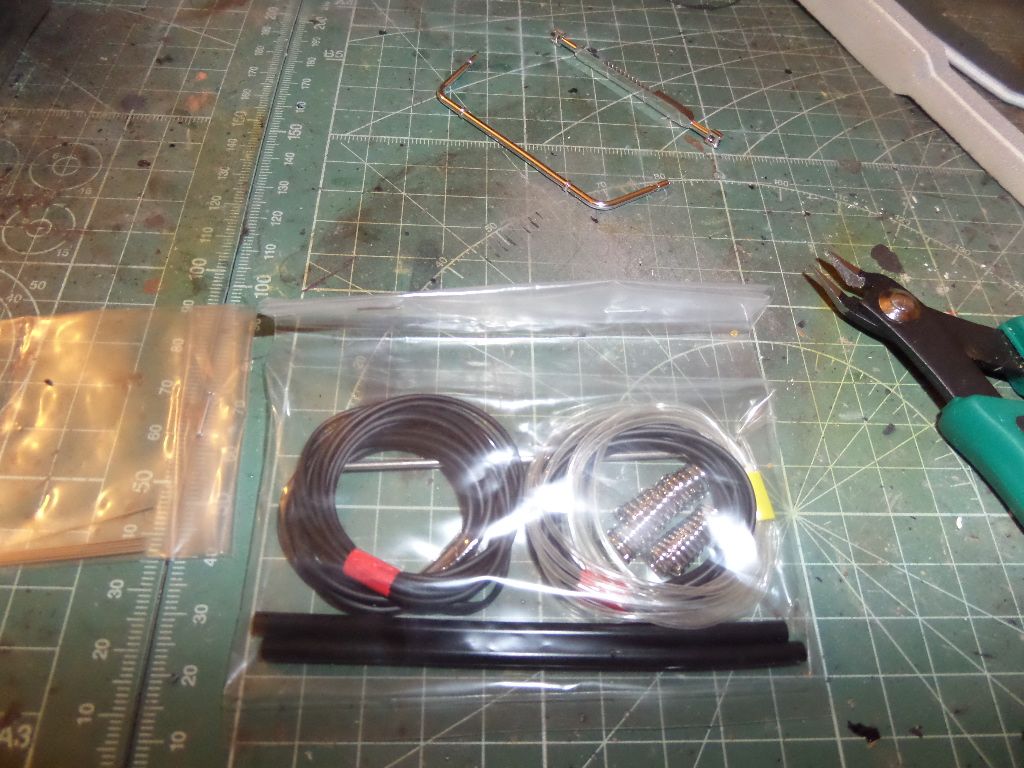
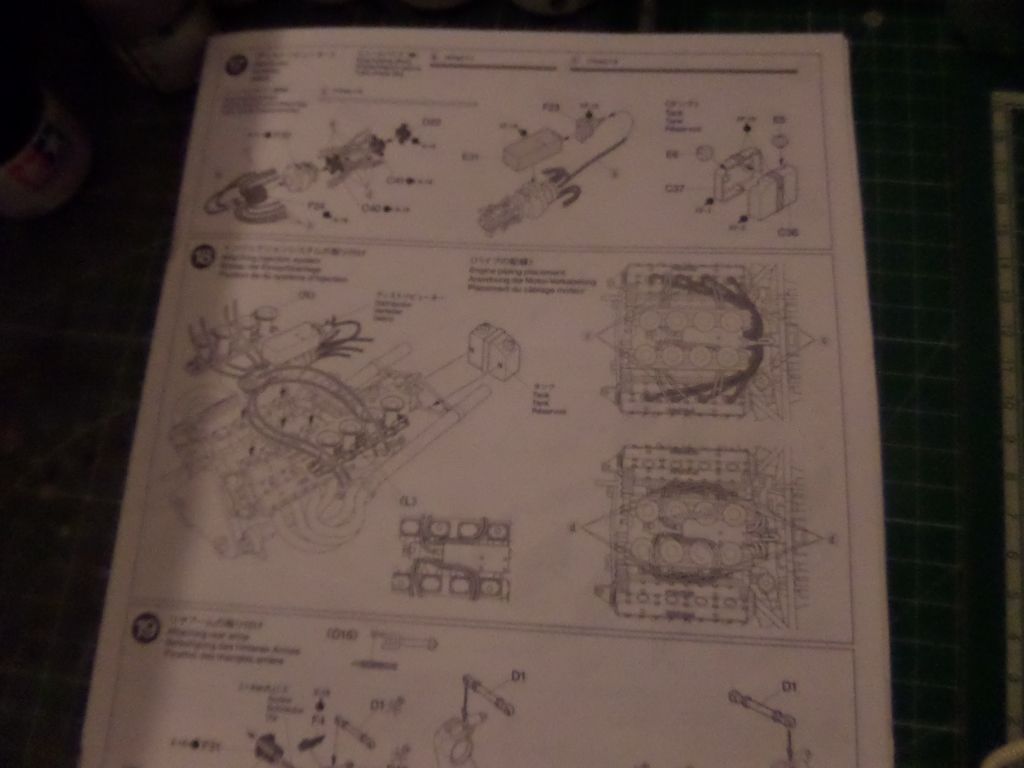
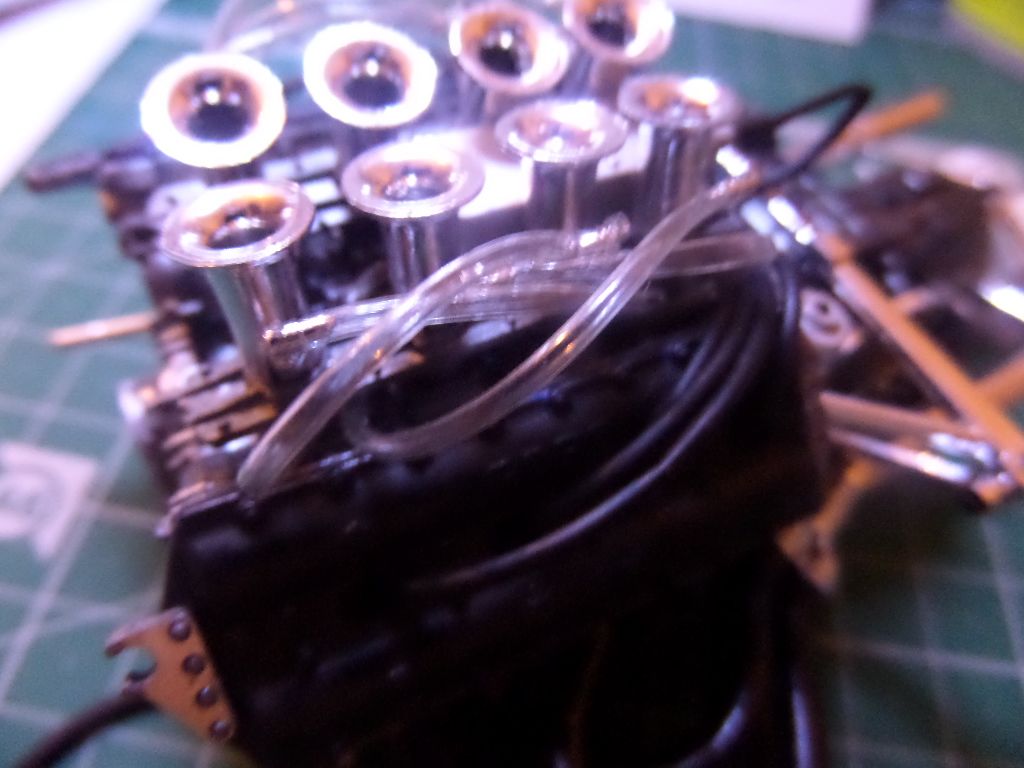
With the exhausts placed time to do some first cable ... the kit gives you all this to enjoy the pleasures of detailing an Racing Engine
Just be carefull to cut at the correct size , you may use a ruler or the instructions as they are the real size , also take carefull in checking the right thickness of the cables as they came in different sizes and types , easy to follow in my opinion !

First cable done ...yeayhhhh , it was easy
Now here I was to check a build mistake ! , see in the top photo where the Throtte plates to fix , there are two different plates ...
Now check carefully as if not and as I glue them with CA glue 8 it is hard to glue the chrome parts with the tamiya glue ! It wasn't possible to me to correct , the Throttles should be placed wiht thecables support to the exterior , one was right as there were 4 holes for it but not the other , with only two holes , O now must drill in the engine and try to solve the situation ...
I noticed when I was checking the instructions for all the cables :
In this step there should be a warning or something so If you are going to make this kit check carefully and not do what I did
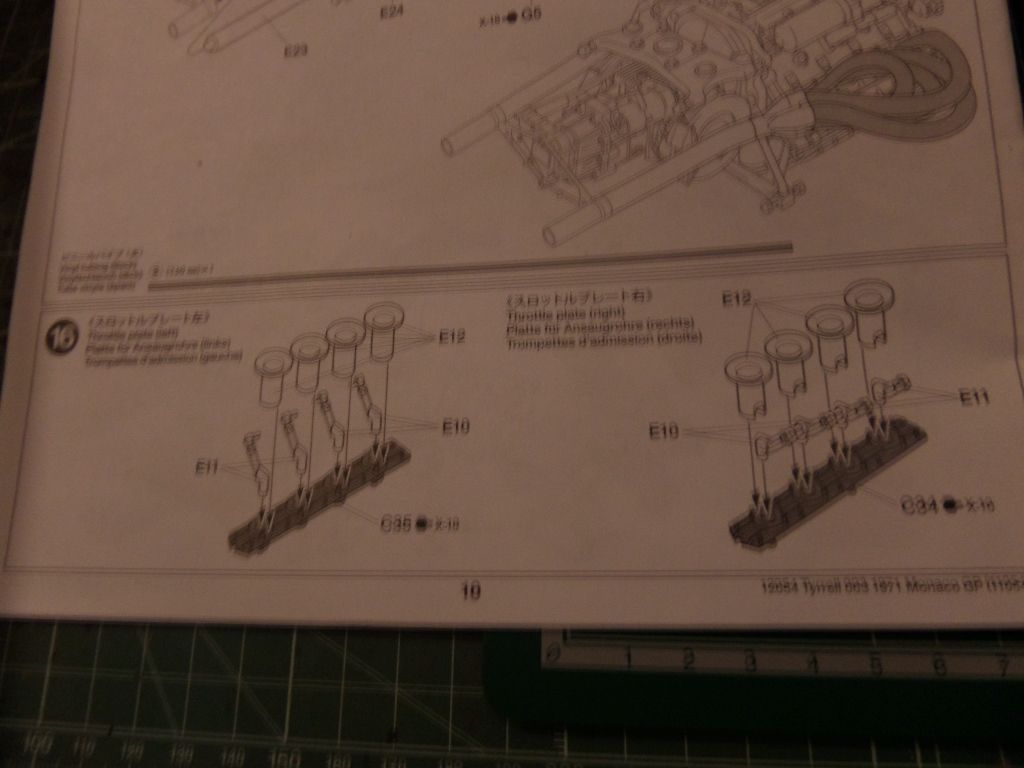
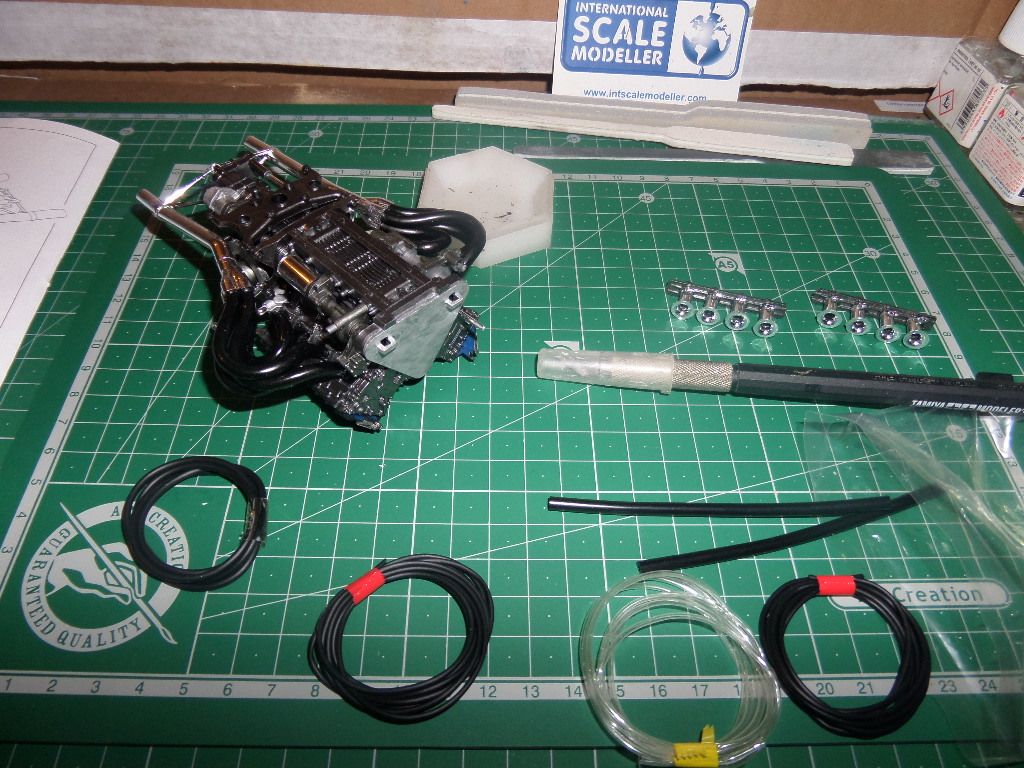
After I drill , was ok , I fix the issue , ufff now to go to cables and distributor
My workshop receive new mats
I shut the lights off
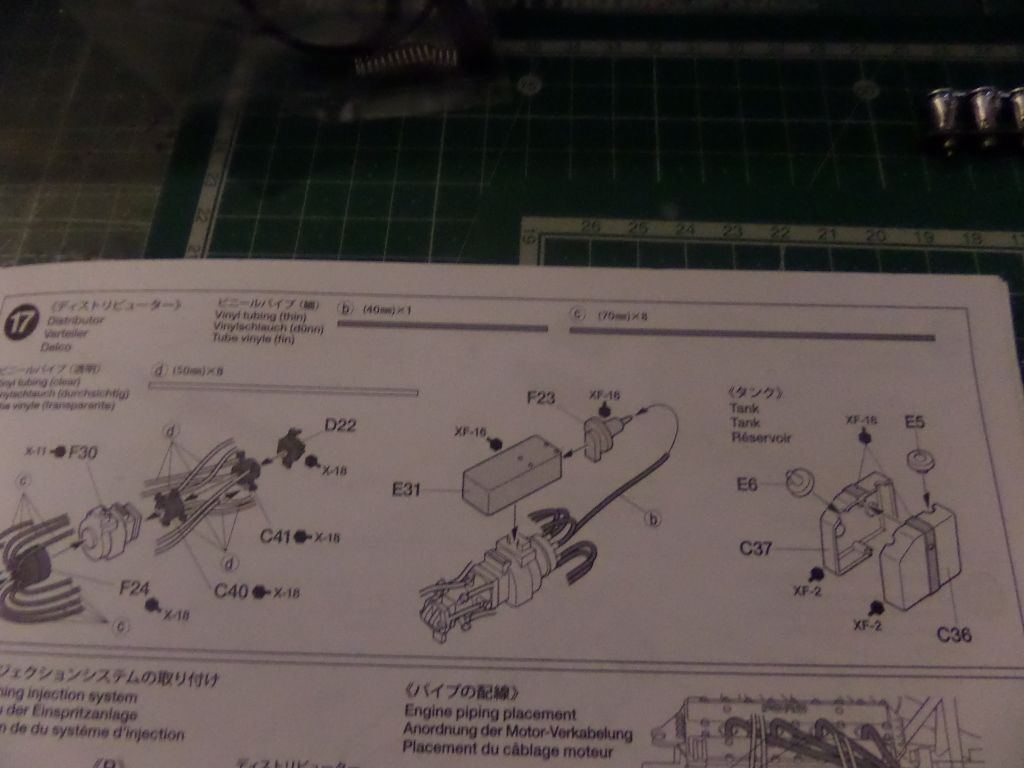
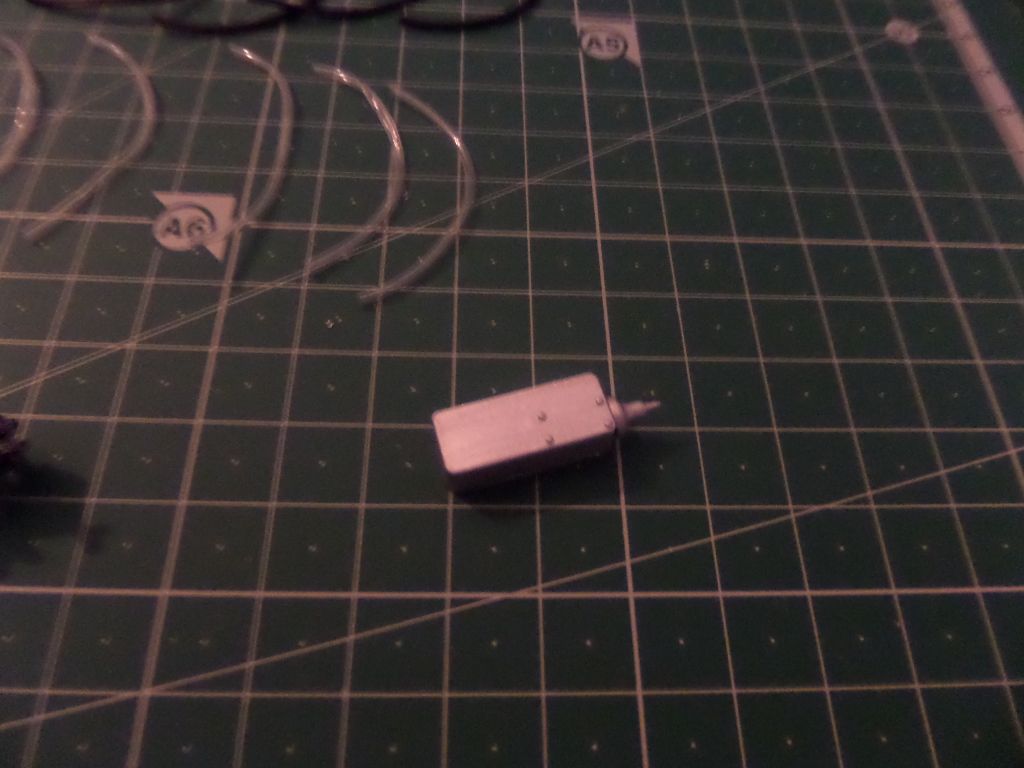
Distributor next ...seems easy ...
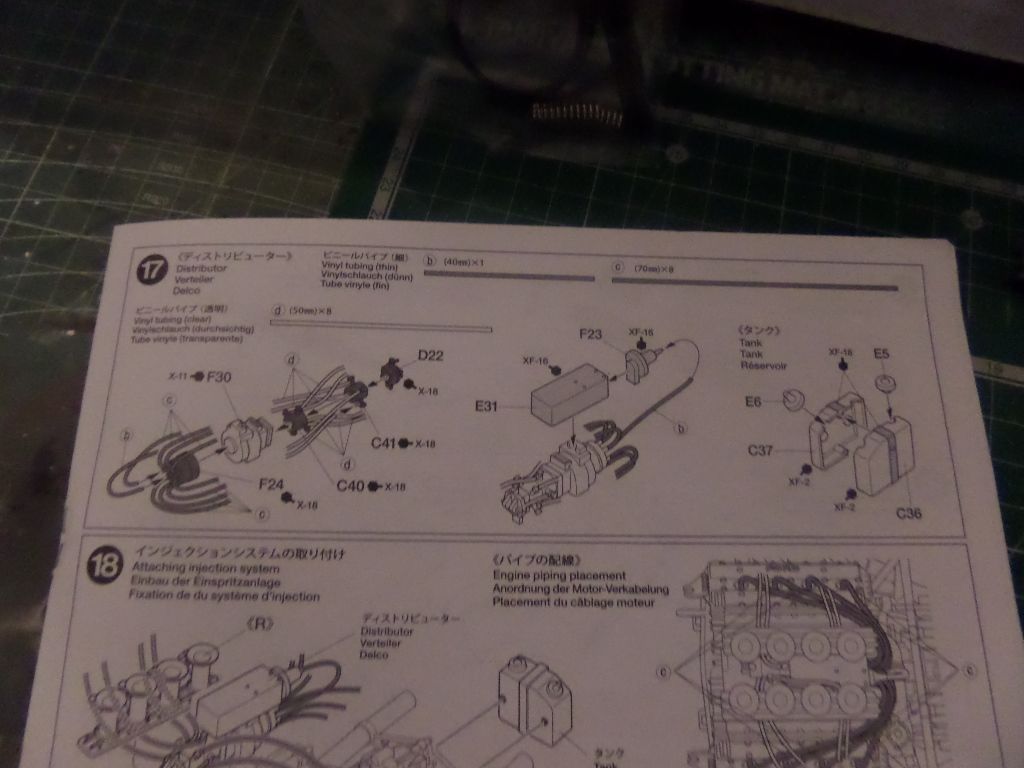
Cables ...
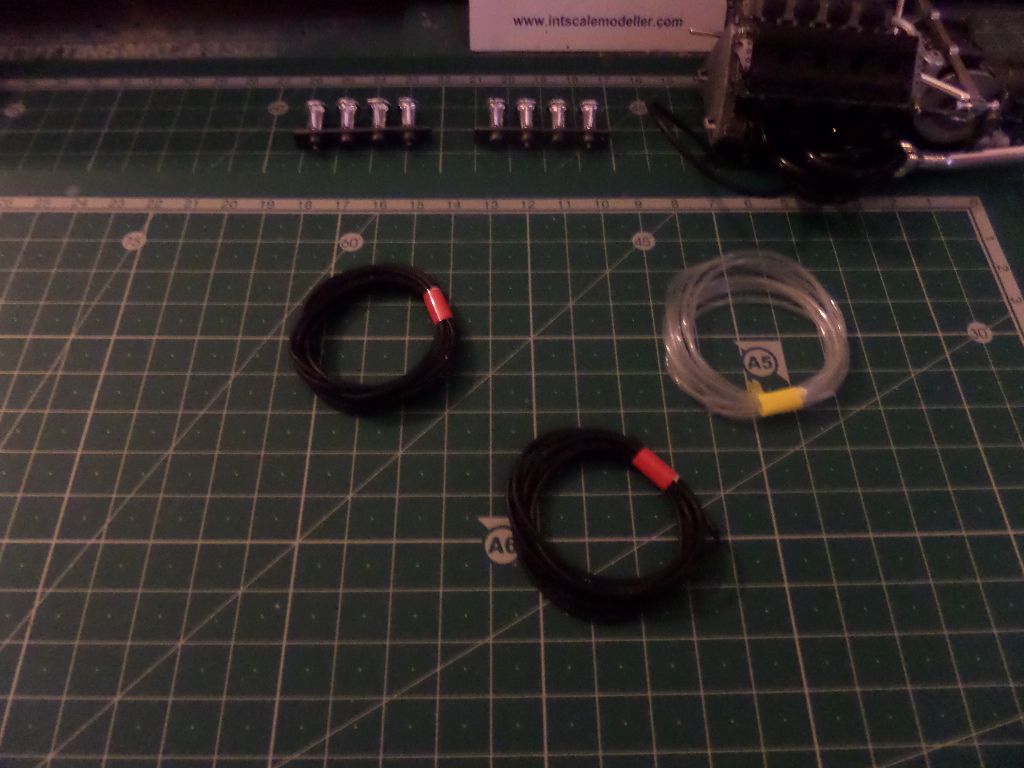
Again you have the quantity , tupe and lenght of the cables to go ...
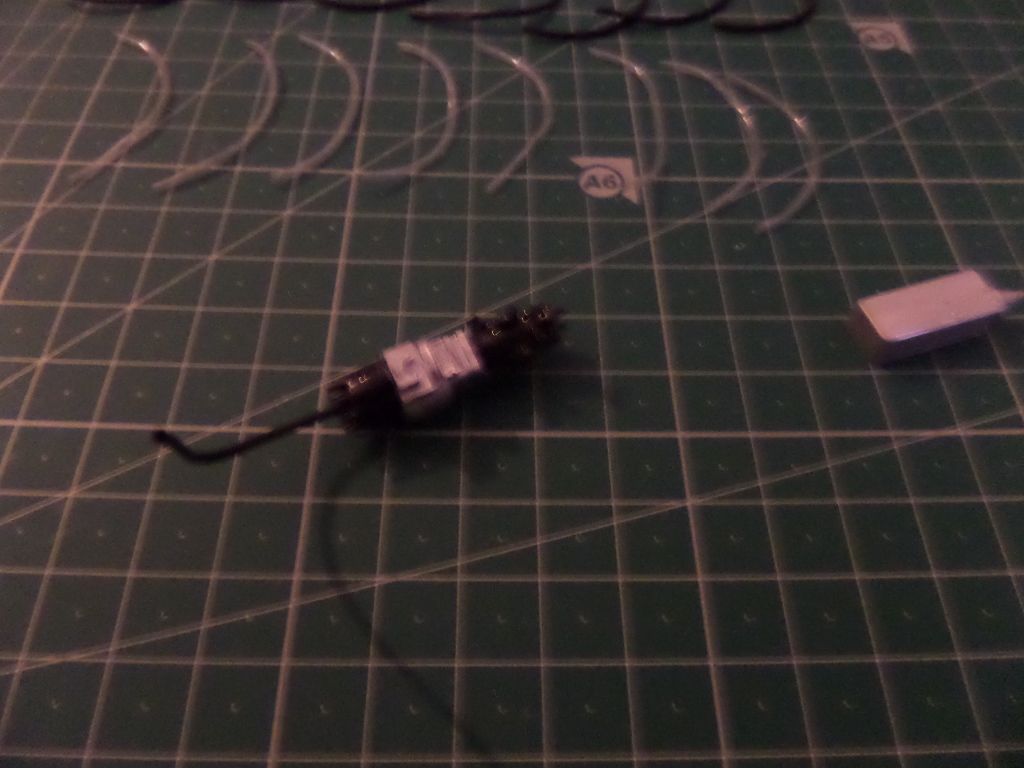
Yayks ...a spider on the bench
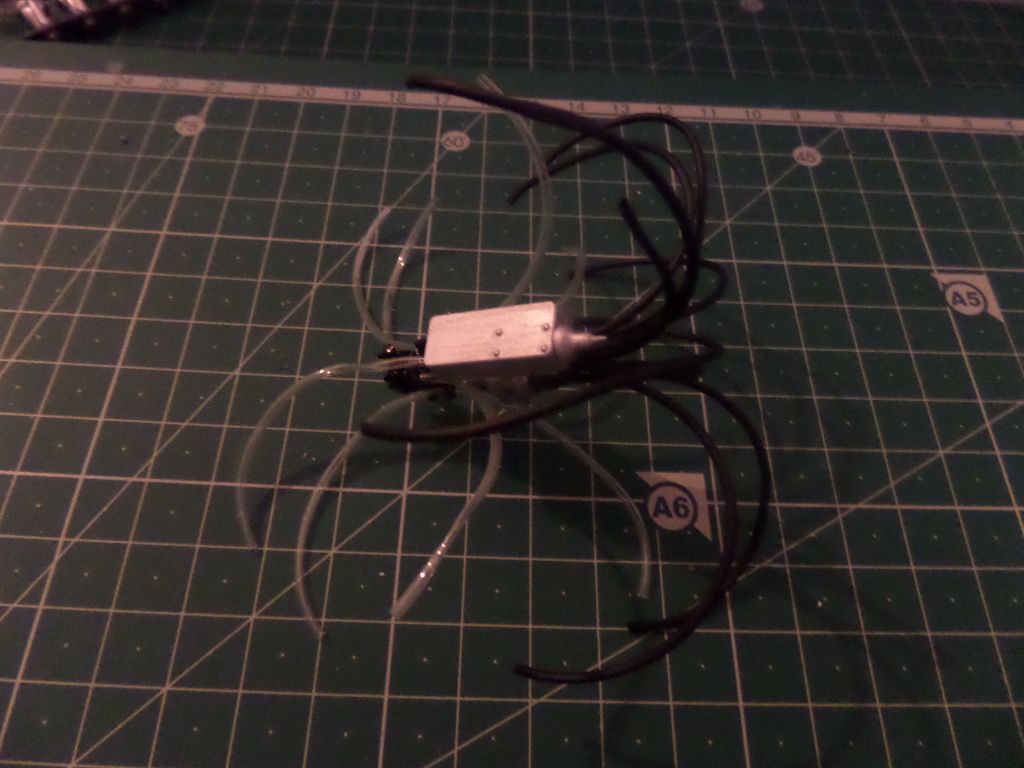
Well it is more easy to do as it looks in the instructions , now to go fotr placing all this in the engine , and next steps very soon !
Hope you like so far this build !
So I make a start on the Engine :


The tub

Not easy to place this two parts !

The engine covers , take two small PE parts on the sides to fix it to the chassis

Already painted all with X-10

other side with the chrome parts for the engine fixing structure


Rear brakes :

The engine in the support in my 'Racing Workshop'

Nice detail !

Now I make the Throttle plates ..-

Engine exhausts , already painted X-18

Also seem confusing , but very easy to place, only carefull to Instructions .

With the exhausts placed time to do some first cable ... the kit gives you all this to enjoy the pleasures of detailing an Racing Engine

Just be carefull to cut at the correct size , you may use a ruler or the instructions as they are the real size , also take carefull in checking the right thickness of the cables as they came in different sizes and types , easy to follow in my opinion !

First cable done ...yeayhhhh , it was easy

Now here I was to check a build mistake ! , see in the top photo where the Throtte plates to fix , there are two different plates ...

Now check carefully as if not and as I glue them with CA glue 8 it is hard to glue the chrome parts with the tamiya glue ! It wasn't possible to me to correct , the Throttles should be placed wiht thecables support to the exterior , one was right as there were 4 holes for it but not the other , with only two holes , O now must drill in the engine and try to solve the situation ...

I noticed when I was checking the instructions for all the cables :

In this step there should be a warning or something so If you are going to make this kit check carefully and not do what I did

After I drill , was ok , I fix the issue , ufff now to go to cables and distributor


My workshop receive new mats

I shut the lights off

Distributor next ...seems easy ...

Cables ...

Again you have the quantity , tupe and lenght of the cables to go ...


Yayks ...a spider on the bench

Well it is more easy to do as it looks in the instructions , now to go fotr placing all this in the engine , and next steps very soon !
Hope you like so far this build !
Cheers ,
António
On the Bench
a lot of stuff right now
António
On the Bench
a lot of stuff right now
-
Twokidsnosleep
- General
- Posts: 18254
- Joined: Thu Aug 07, 2014 4:07 pm
- Location: BC,Canada
Re: 1/12 Formula One Tyrrel 003
It might be fighting you, but you are giving it a good battle 
It is turning out great. I love the engine/ wheel assembly with the PE disks on...SUPER!!!
It is turning out great. I love the engine/ wheel assembly with the PE disks on...SUPER!!!
Scott
On, Under or near the desk
Brewster Buffalo ..buddy build
Rockford Firebird
1/72 Black Pearl Pirate Ship in dry dock
On, Under or near the desk
Brewster Buffalo ..buddy build
Rockford Firebird
1/72 Black Pearl Pirate Ship in dry dock


-
rodrant
- Chief Warrant Officer 2
- Posts: 1774
- Joined: Wed Feb 19, 2014 9:22 pm
- Location: Maia - Portugal
Re: 1/12 Formula One Tyrrel 003
11 years old me ...chops1sc wrote:In 1978, I was born...
Cheers ,
António
On the Bench
a lot of stuff right now
António
On the Bench
a lot of stuff right now
-
rodrant
- Chief Warrant Officer 2
- Posts: 1774
- Joined: Wed Feb 19, 2014 9:22 pm
- Location: Maia - Portugal
Re: 1/12 Formula One Tyrrel 003
Thank you Scott !Twokidsnosleep wrote:It might be fighting you, but you are giving it a good battle
It is turning out great. I love the engine/ wheel assembly with the PE disks on...SUPER!!!
Cheers ,
António
On the Bench
a lot of stuff right now
António
On the Bench
a lot of stuff right now
-
rodrant
- Chief Warrant Officer 2
- Posts: 1774
- Joined: Wed Feb 19, 2014 9:22 pm
- Location: Maia - Portugal
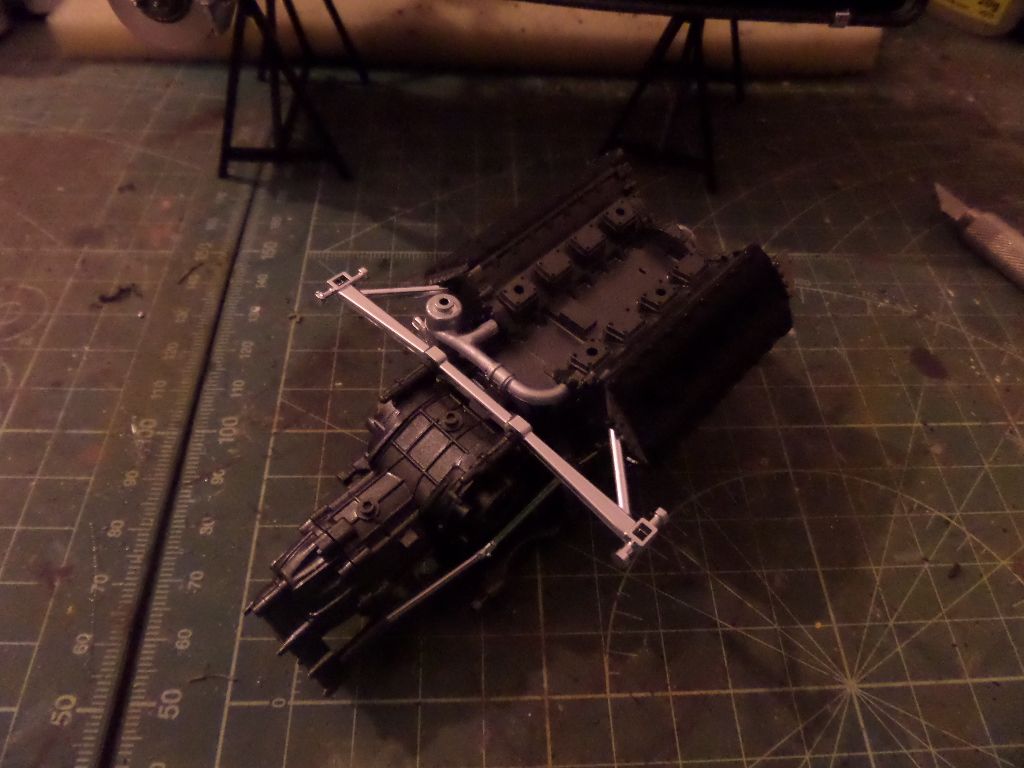
Re: 1/12 Formula One Tyrrel 003
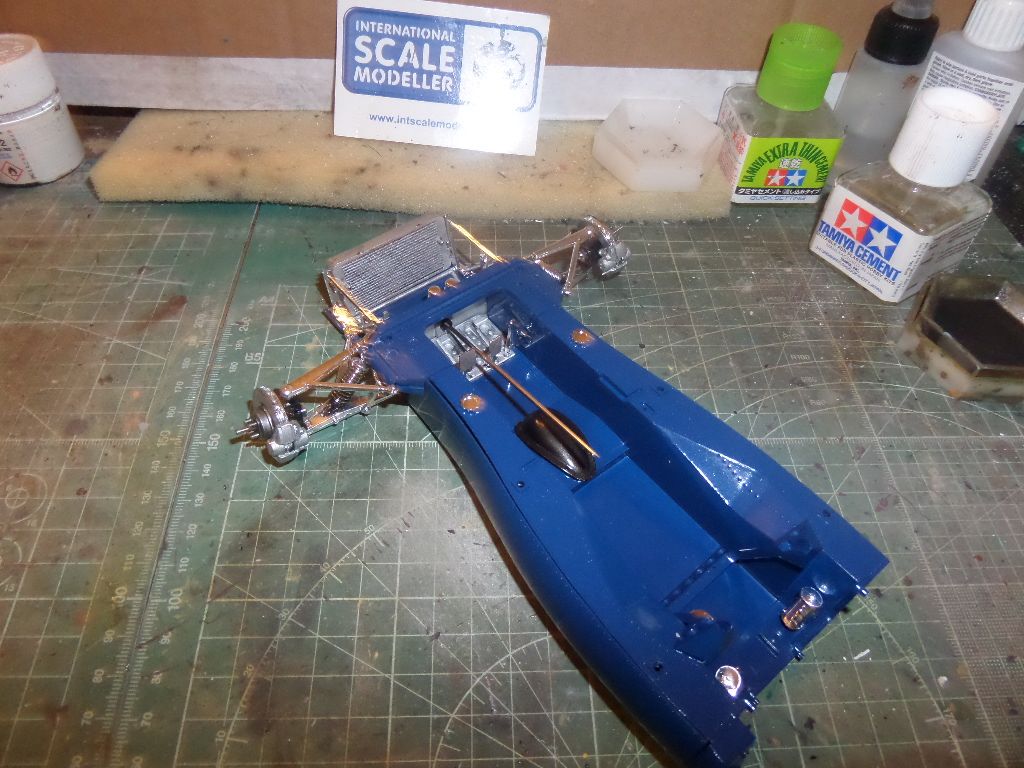
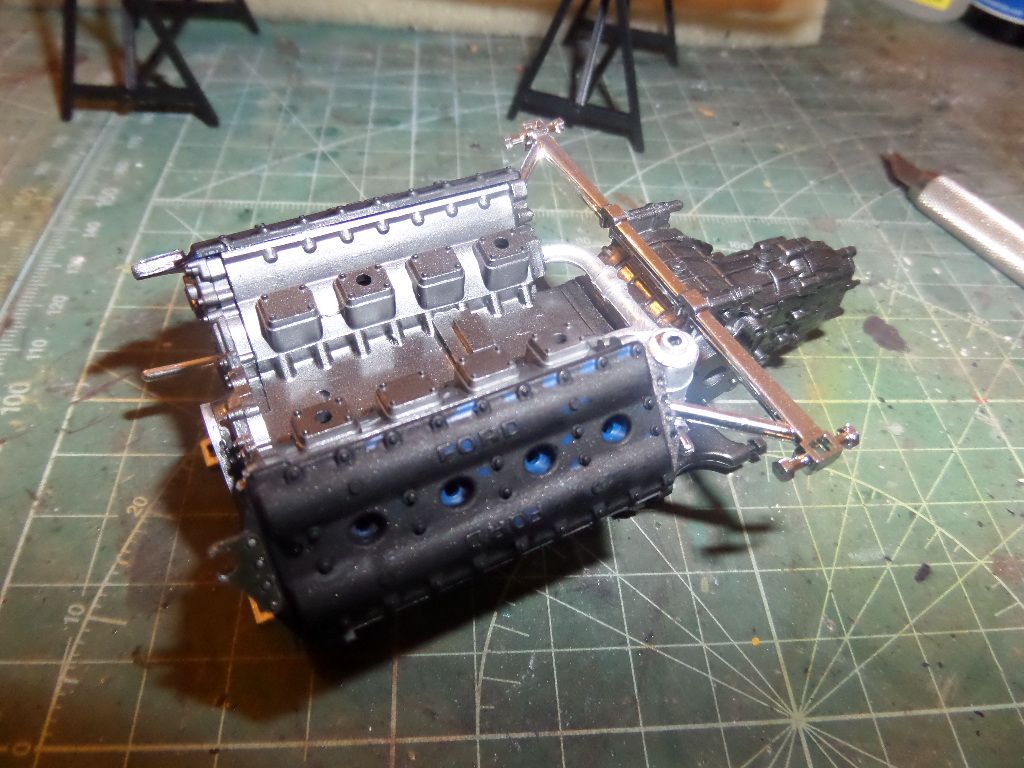
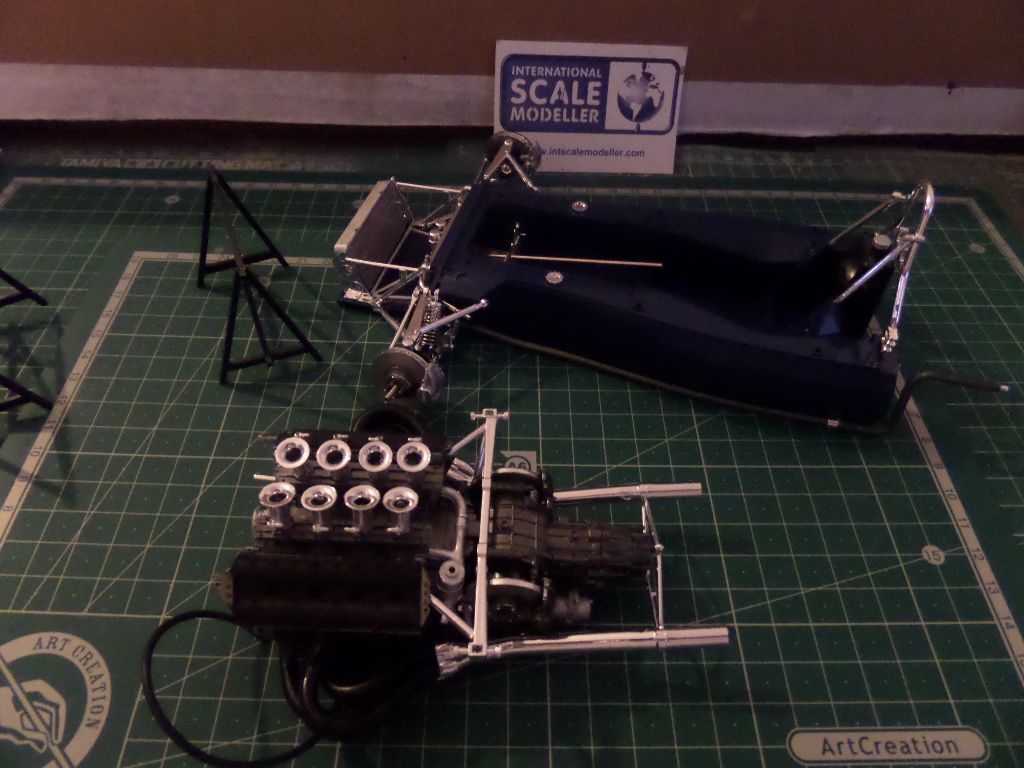
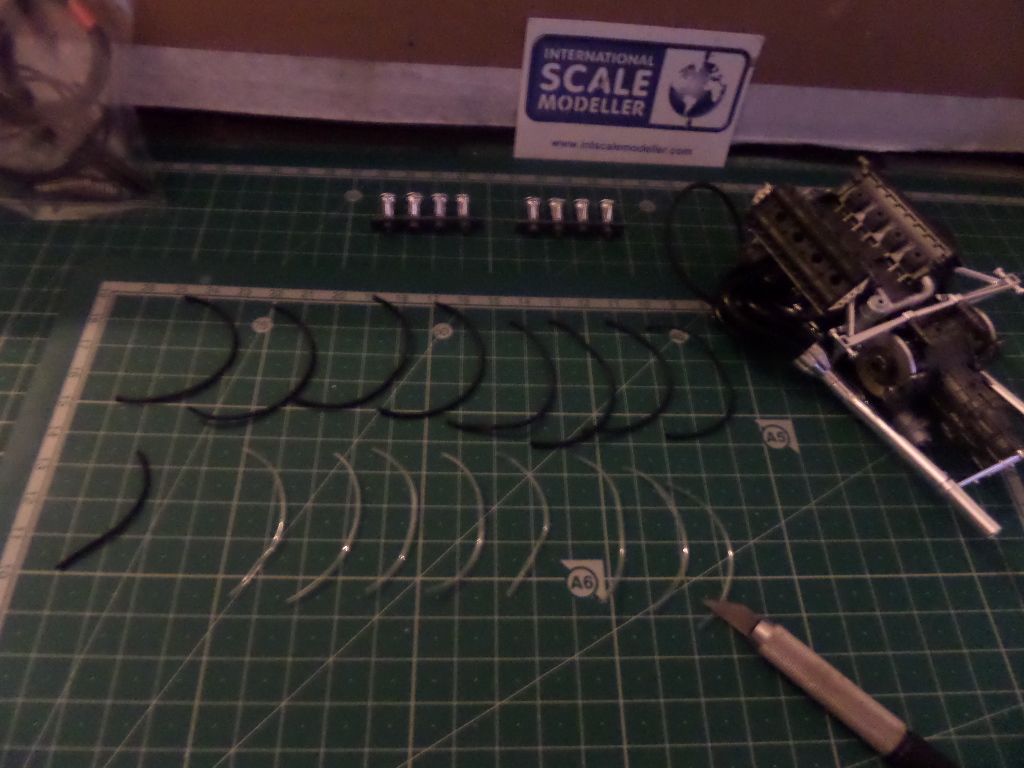
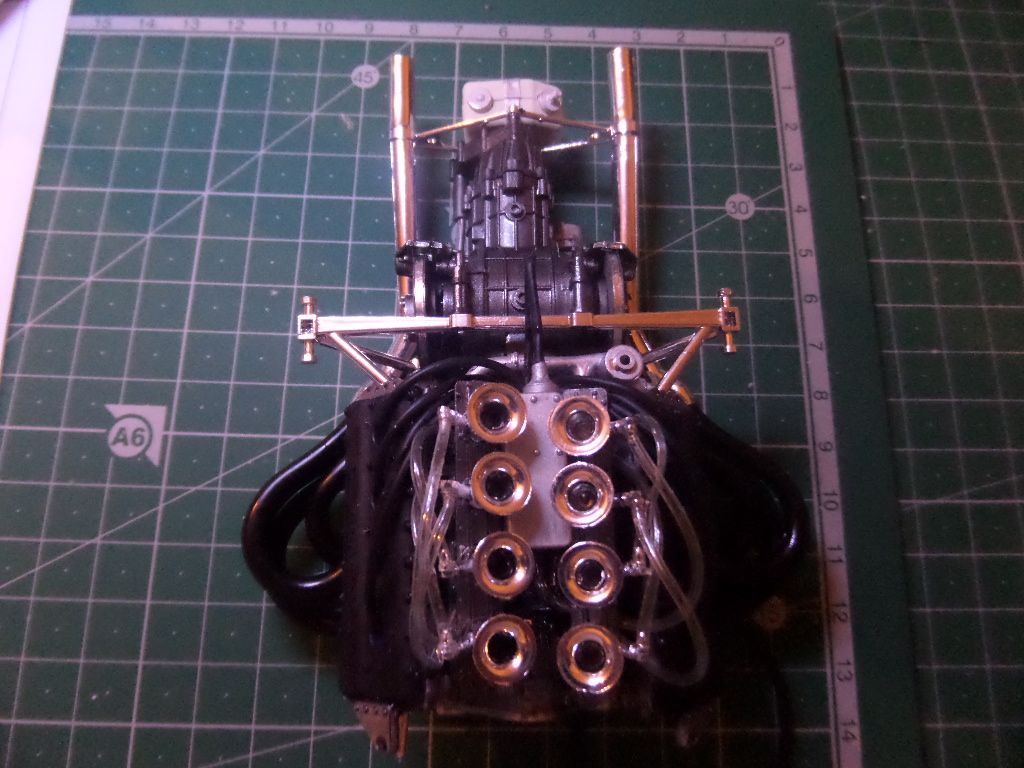
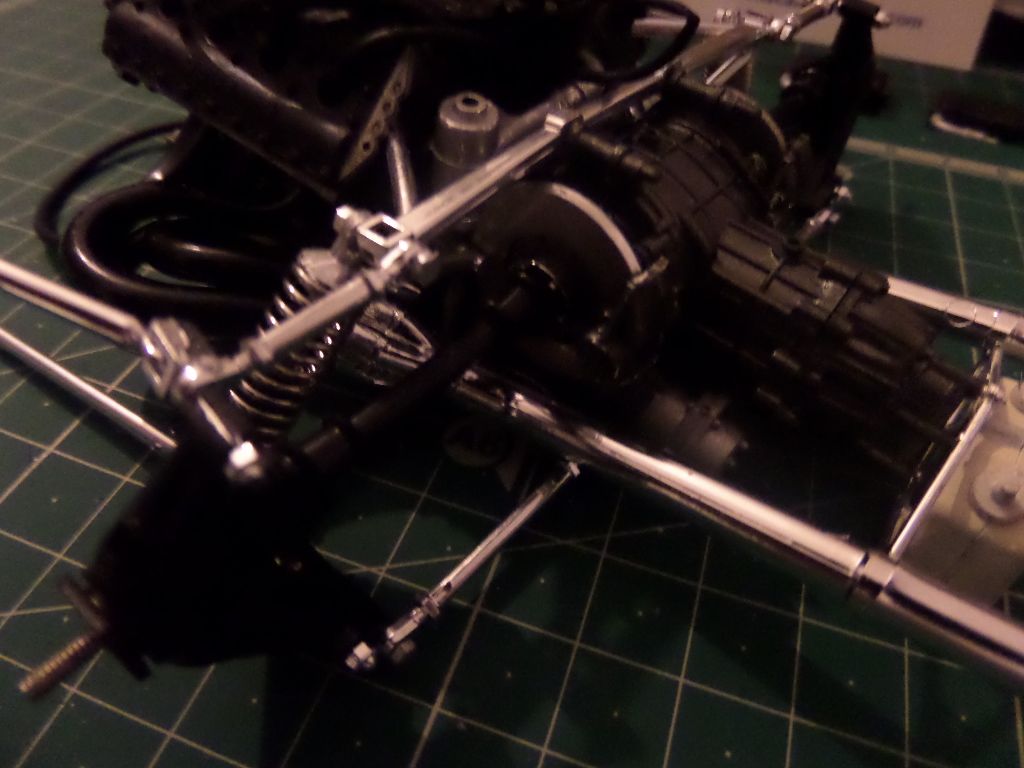
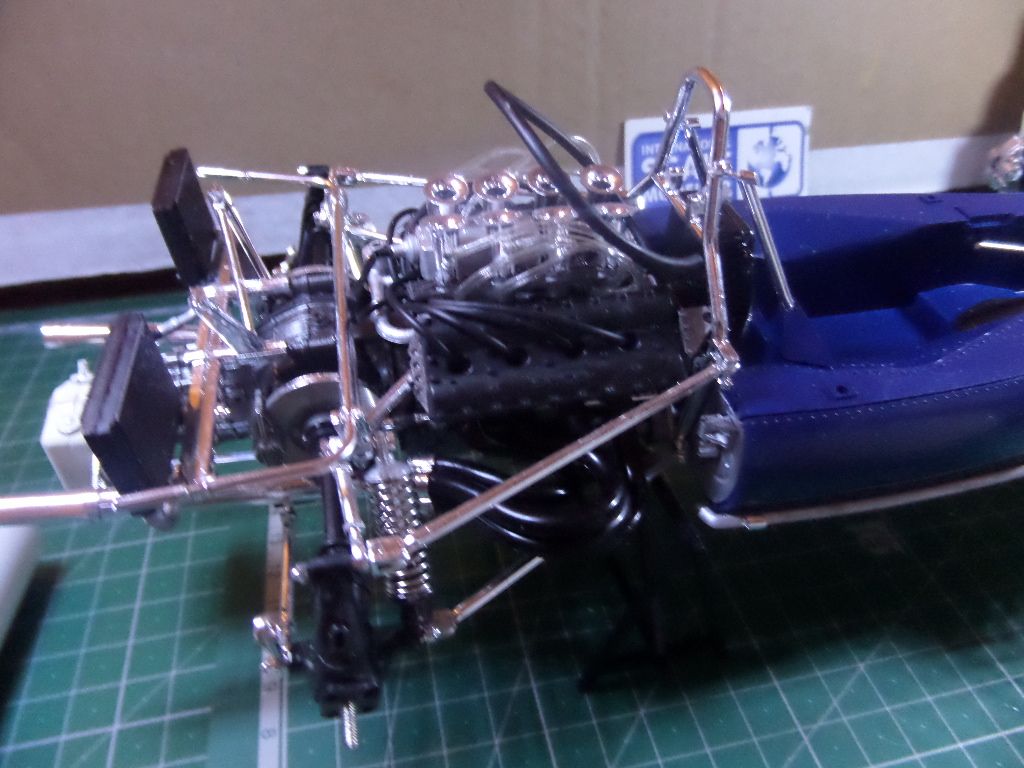
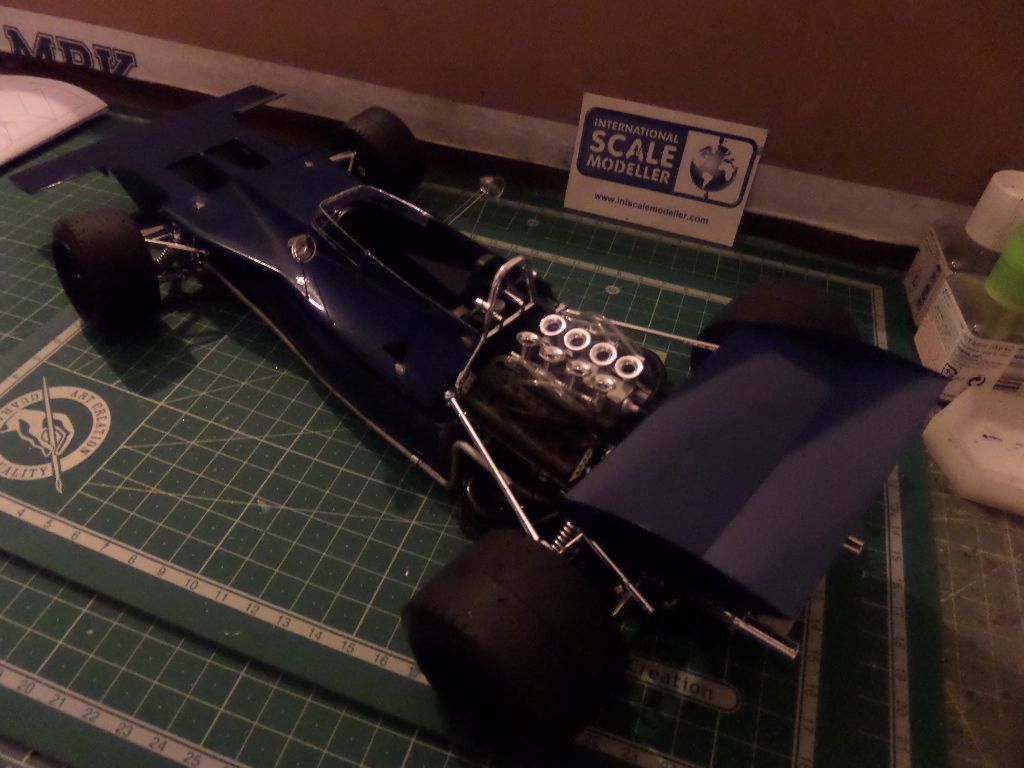
Another update , and will be the final before the final reveal !
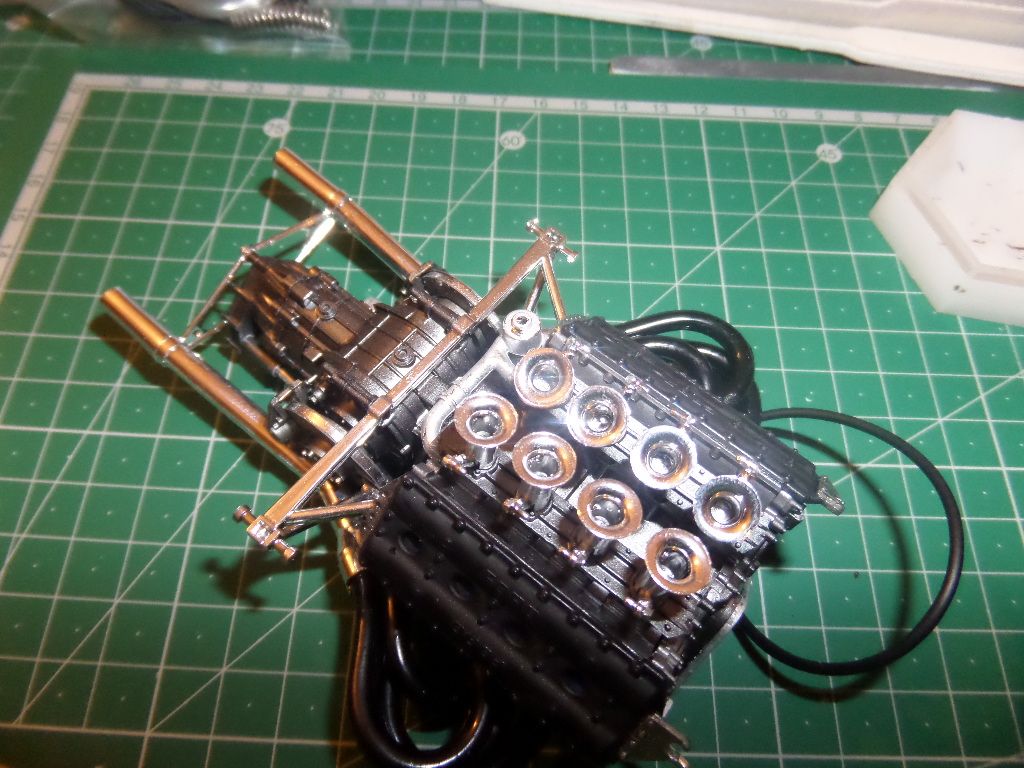
I started then with all the engine cables , the distributor was done , and then placed on the engine with all cables connected
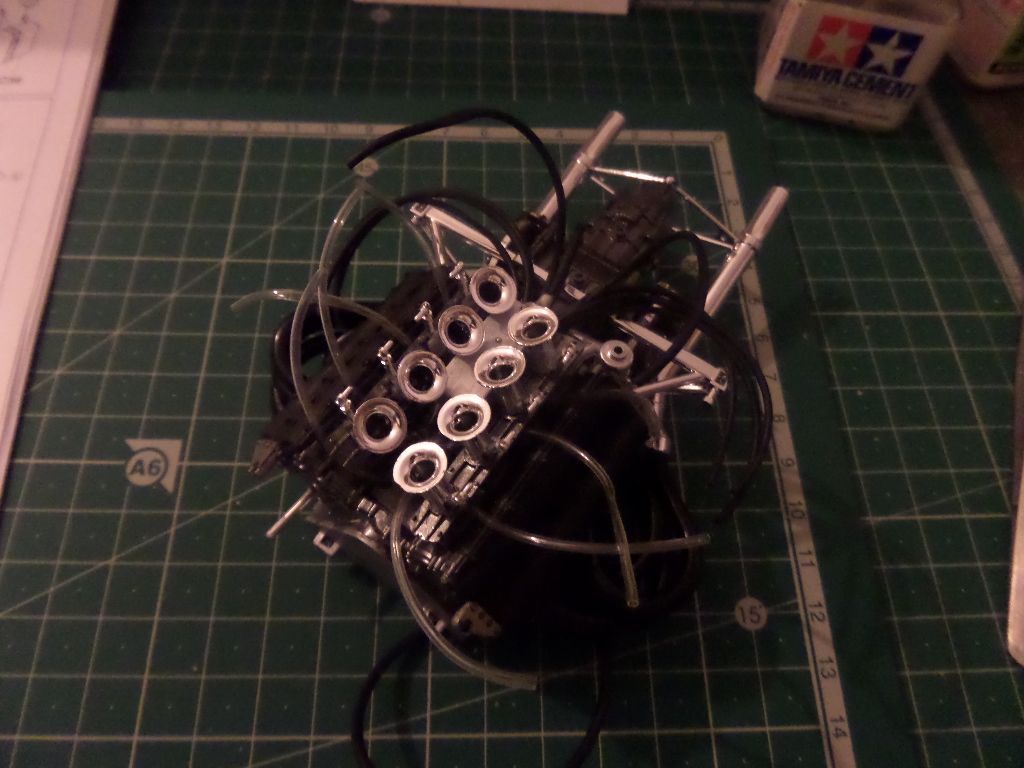
All connected...more easy than it looks ...only issue to fix the cables, I used CA glue
A mess of cables
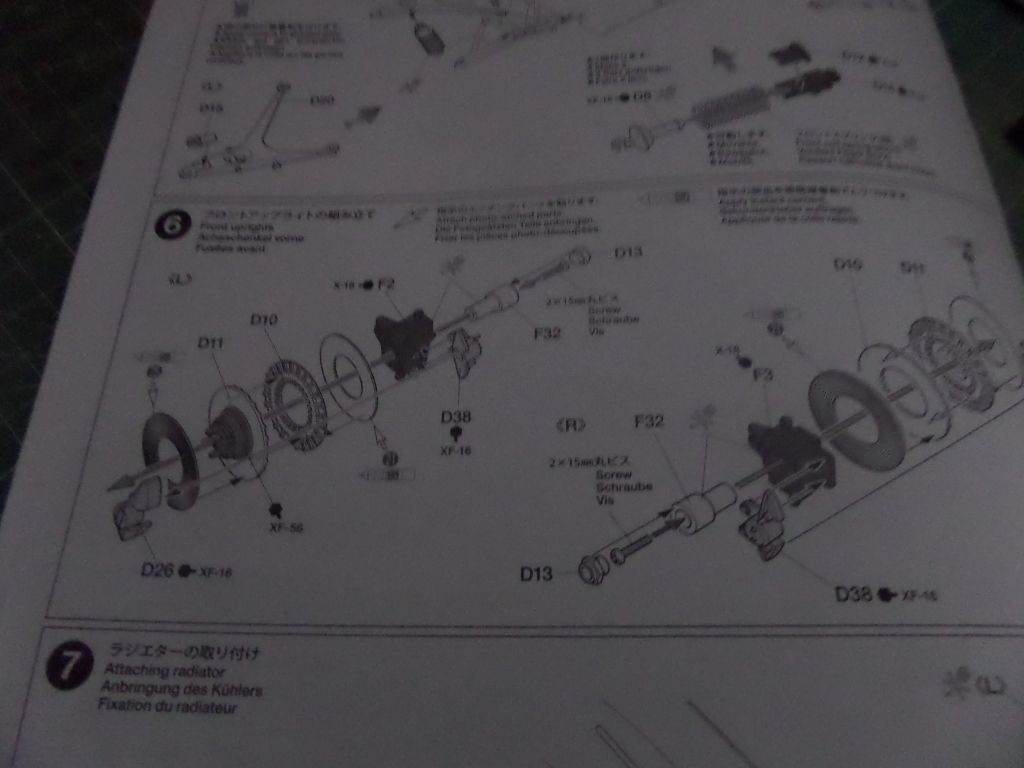
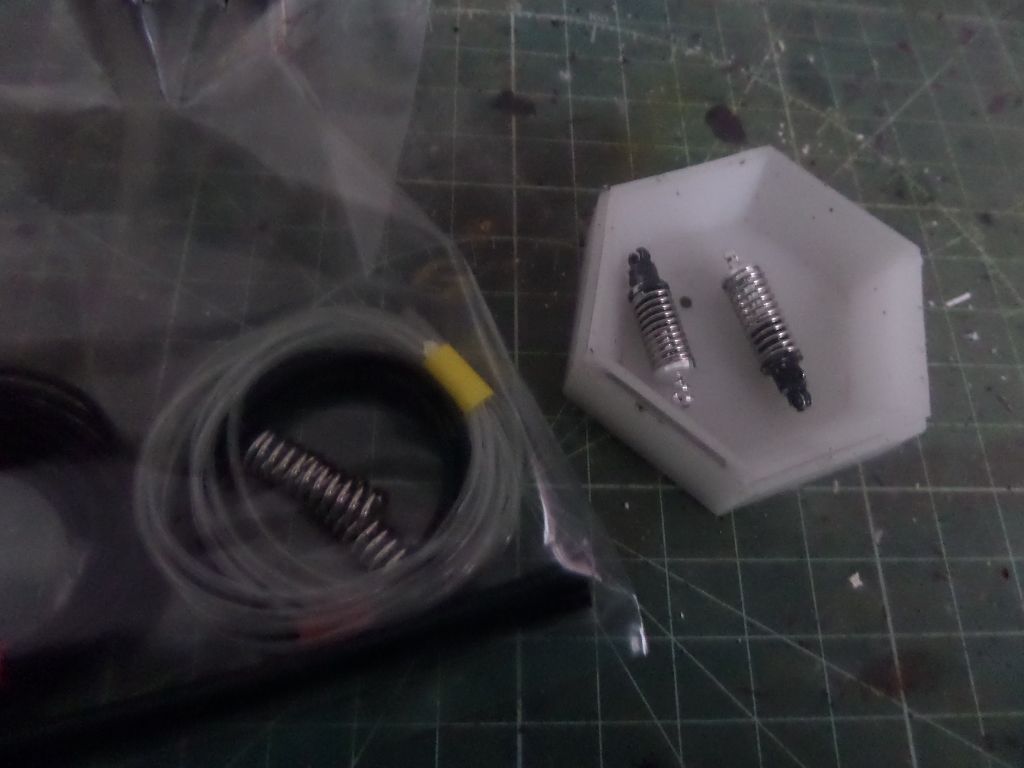
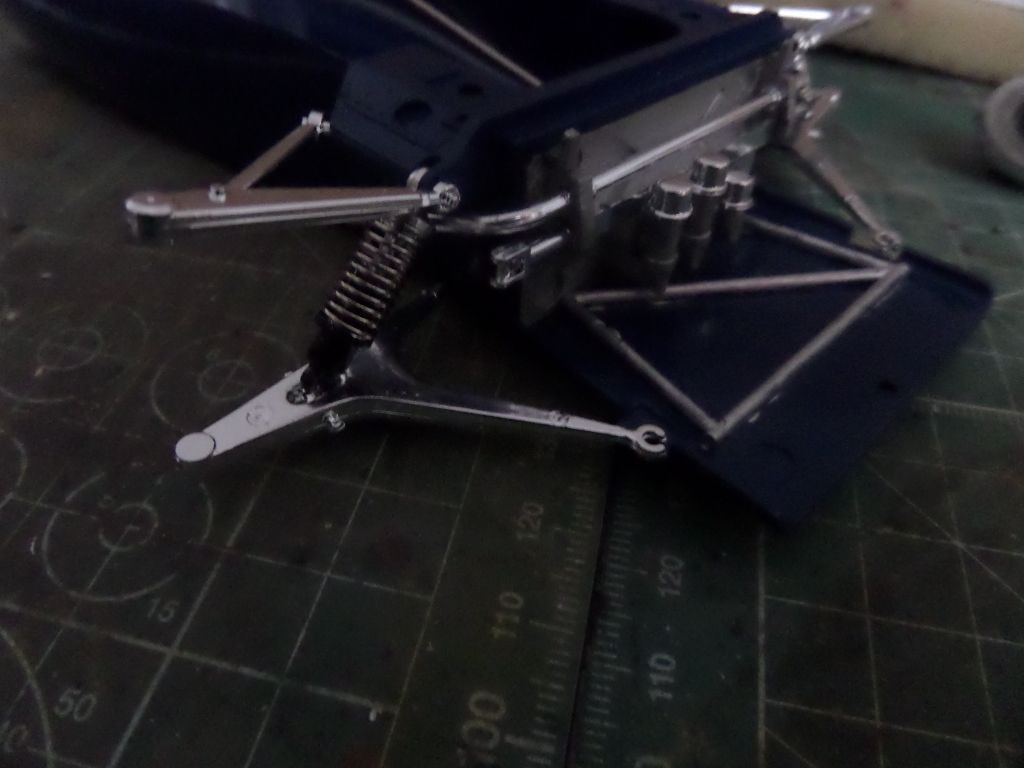
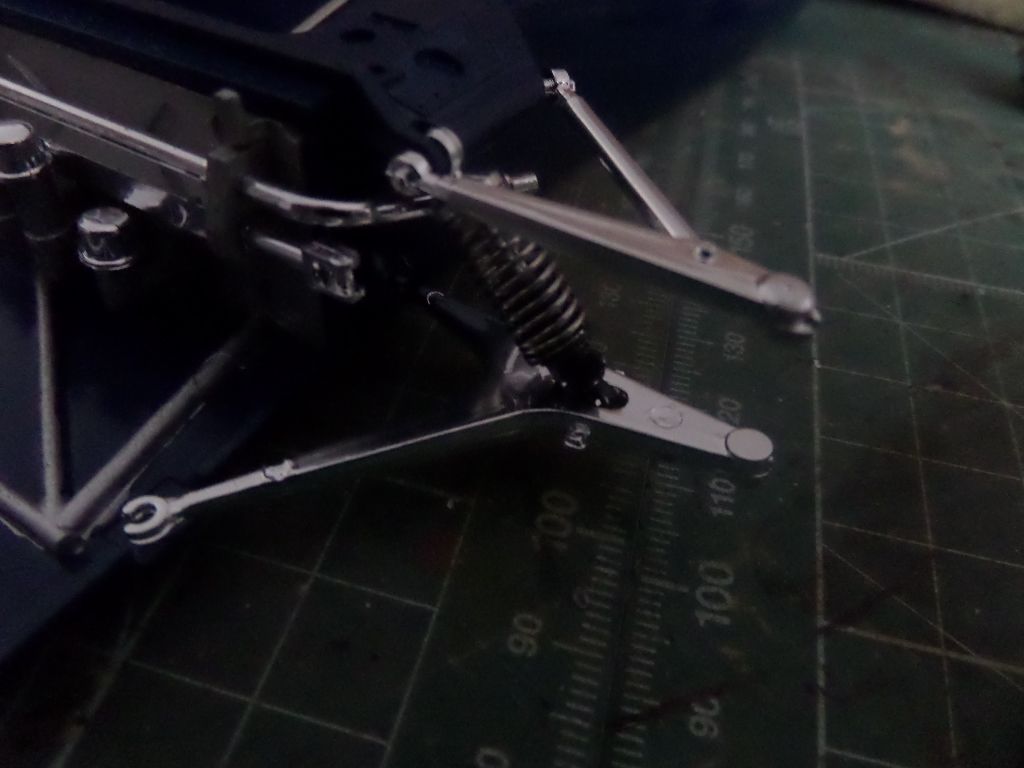
Started the rear suspension arms
Schock absorbers
Radiators

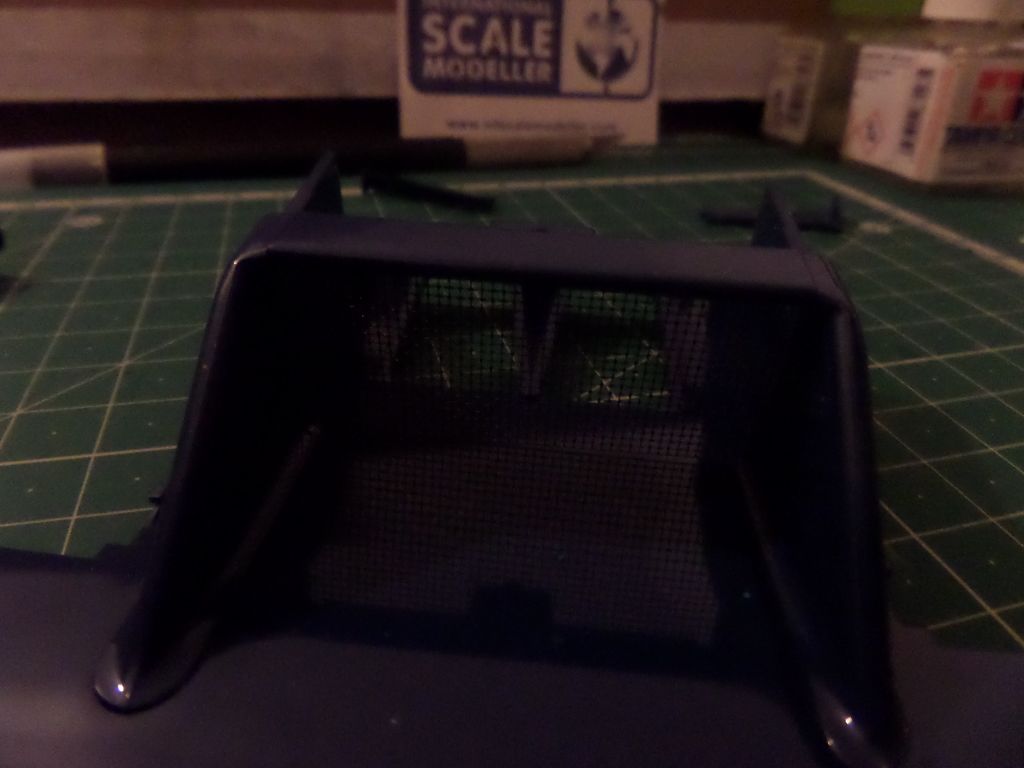
Again this radiators are plastic and take a grill of PE
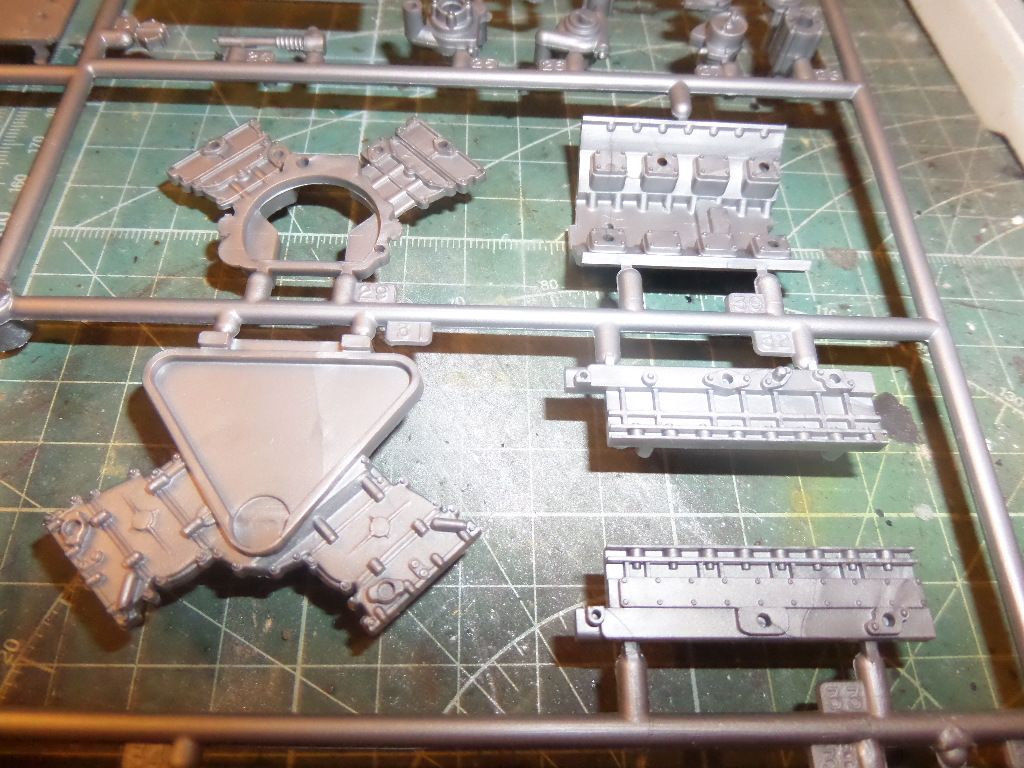
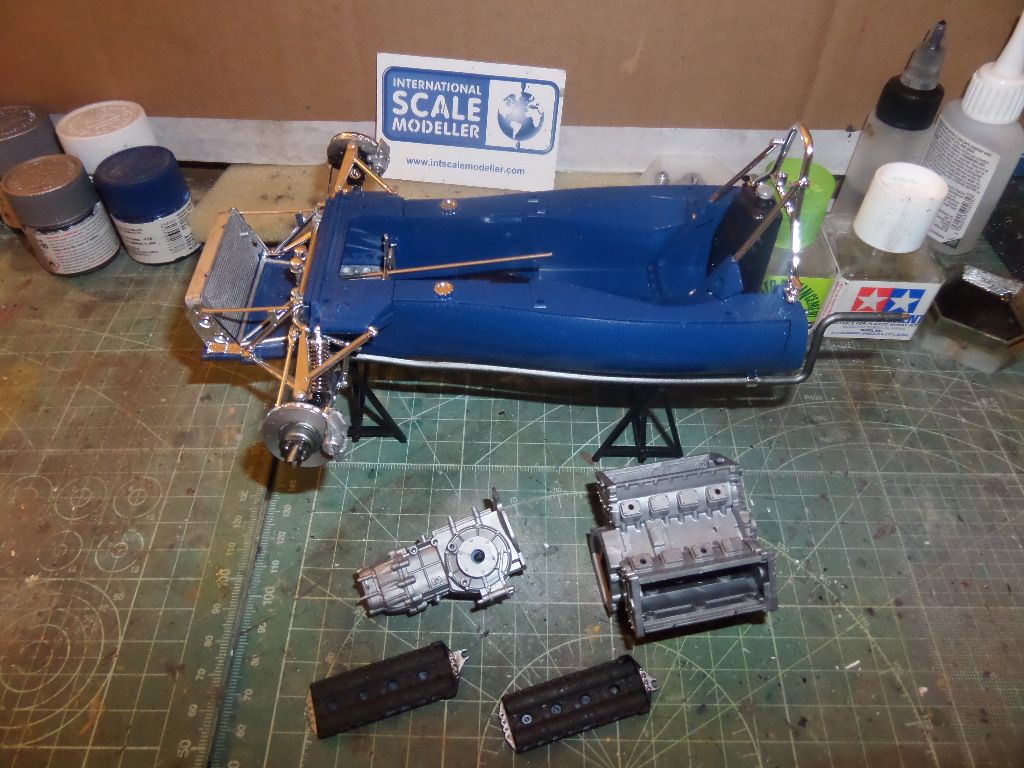
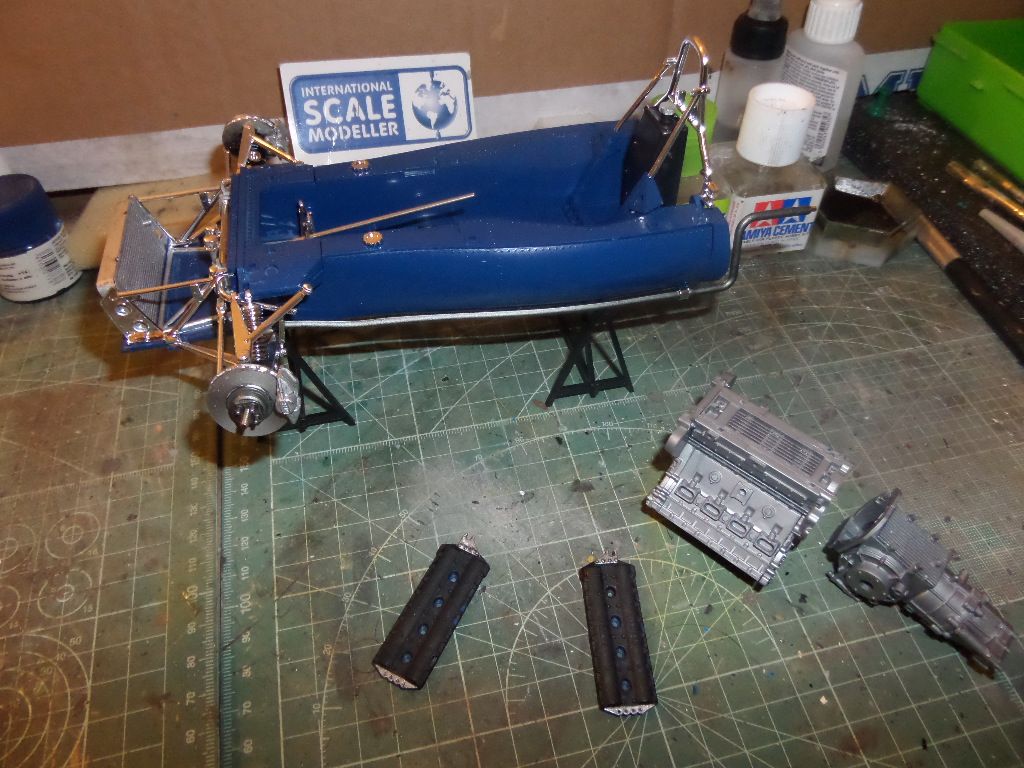
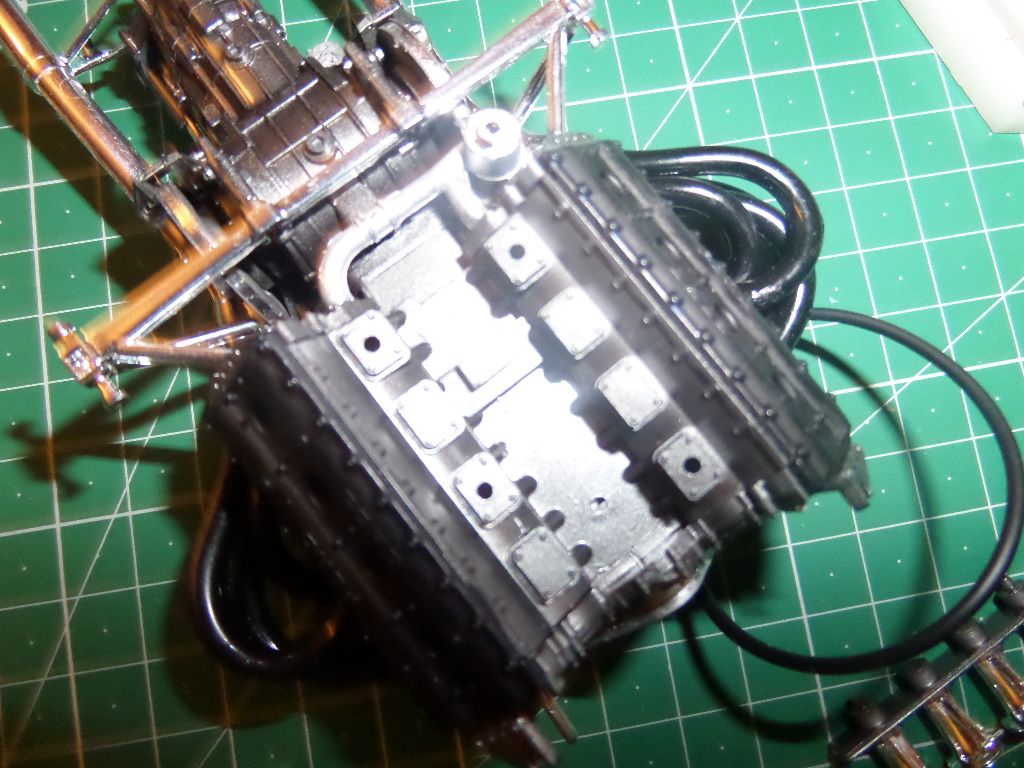
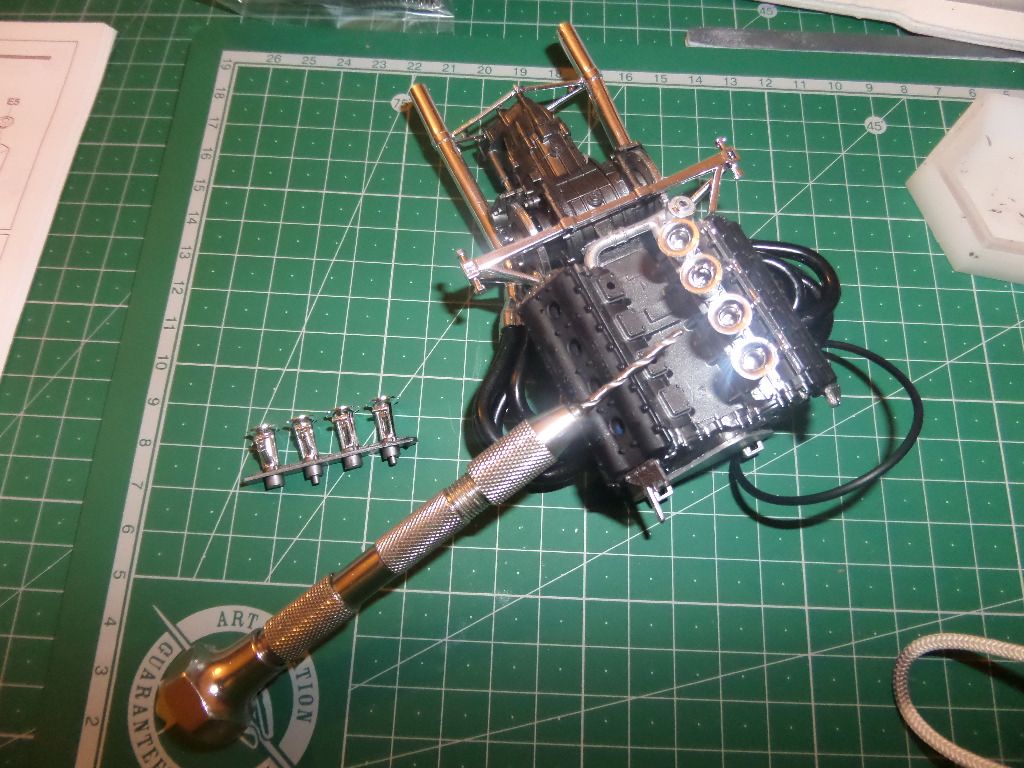
Start making the kit in the kit ...The Ford DFV V8
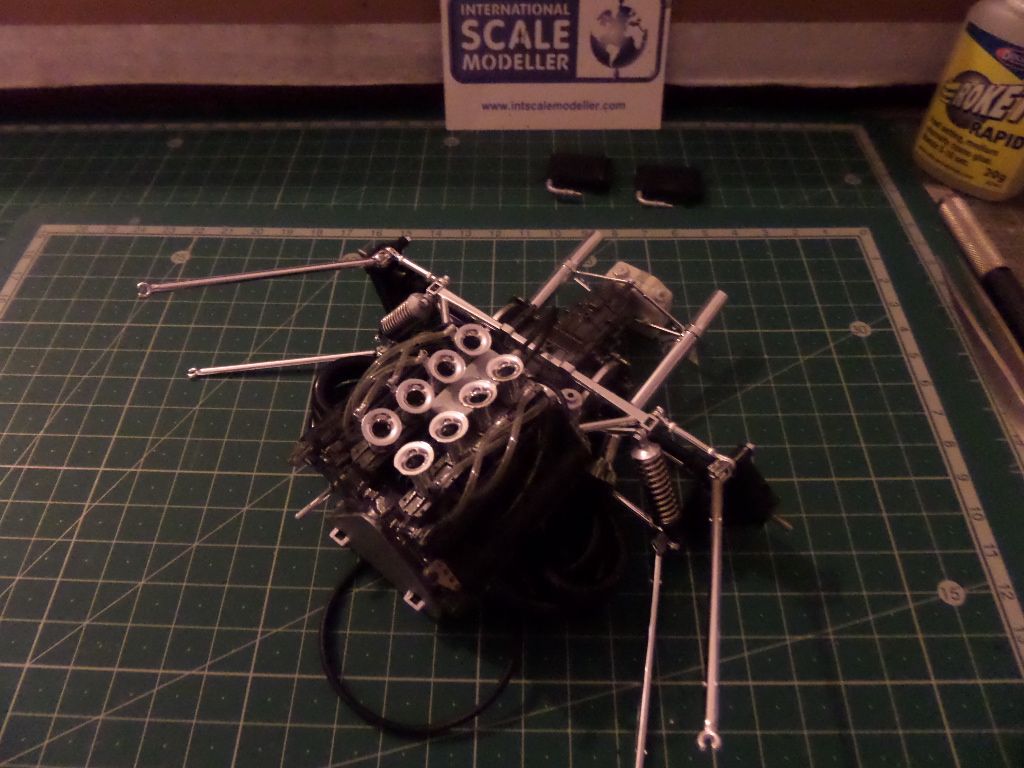
Also the supports and all the suspension arms
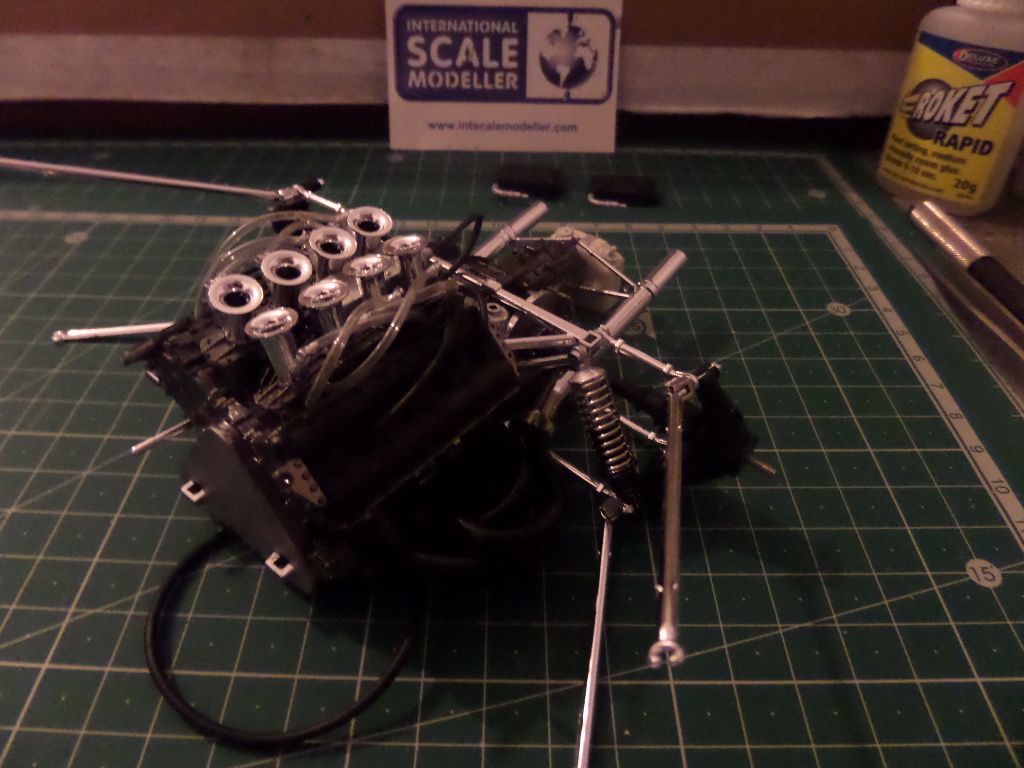
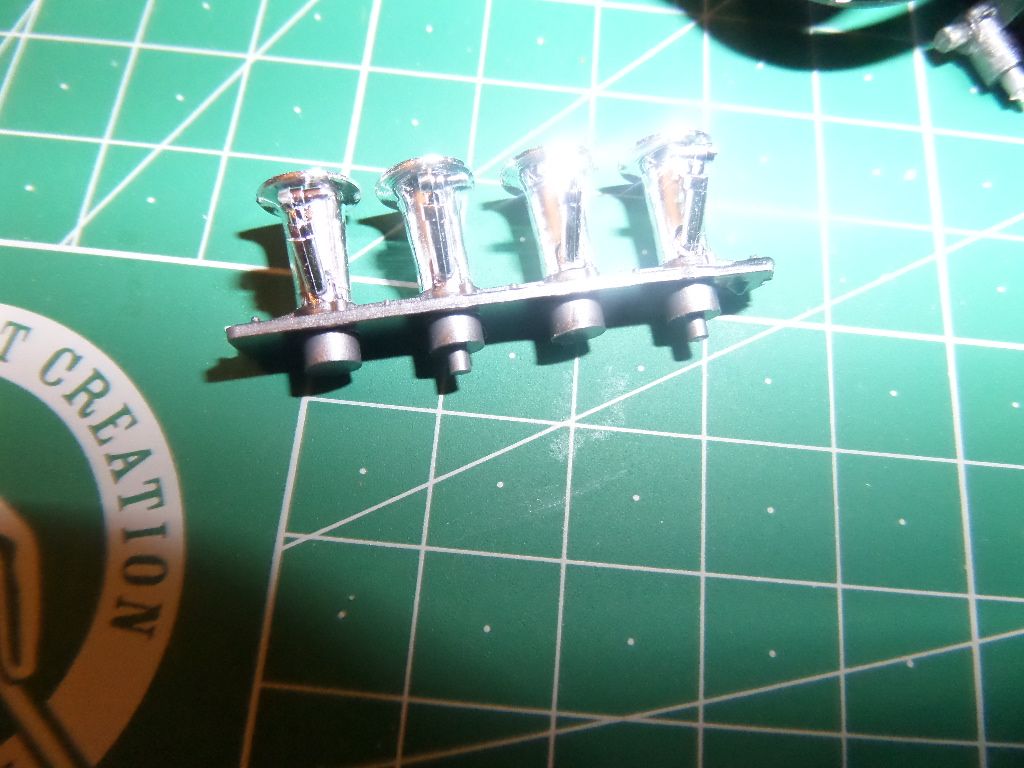
Disc brakes
Some deposit ...painted with XF-2 White
Radiators done with some more cables to do
Another cable
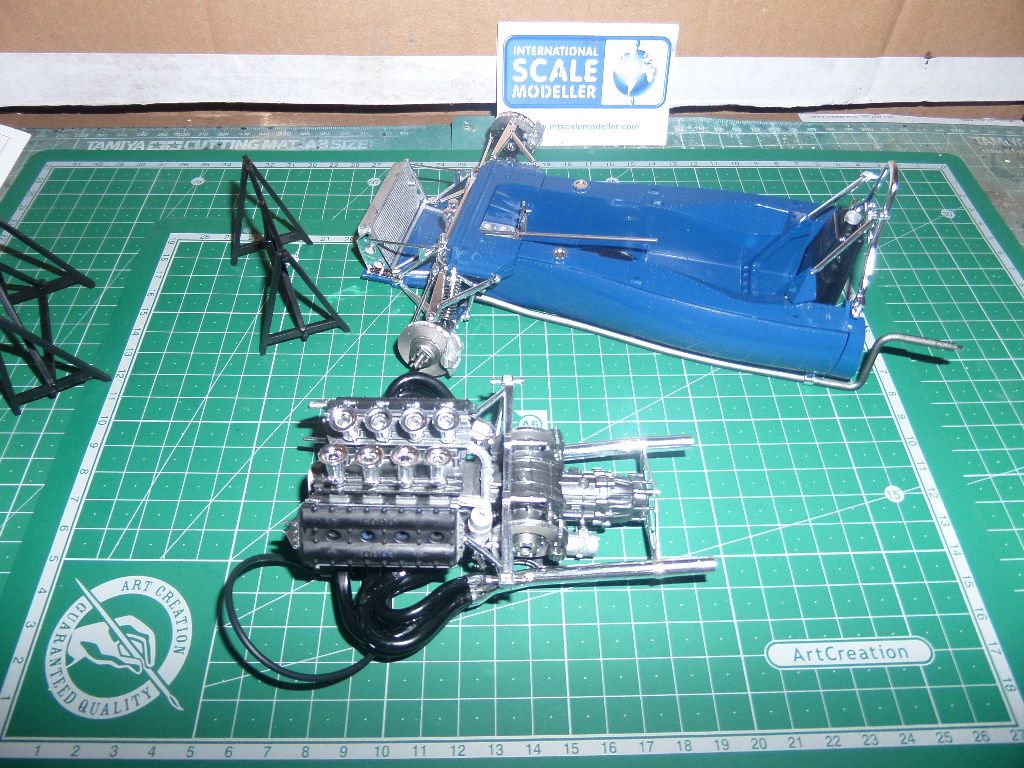
And fixed the engine to the chassis :
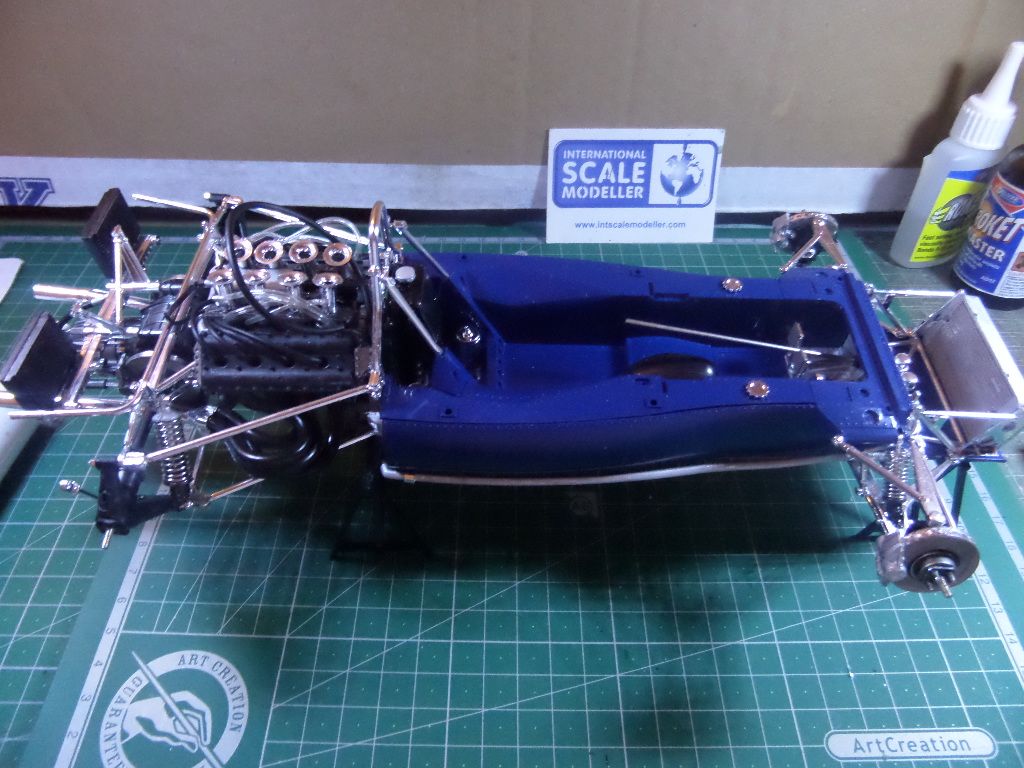
Must say that it is a very nice detail , even OOB
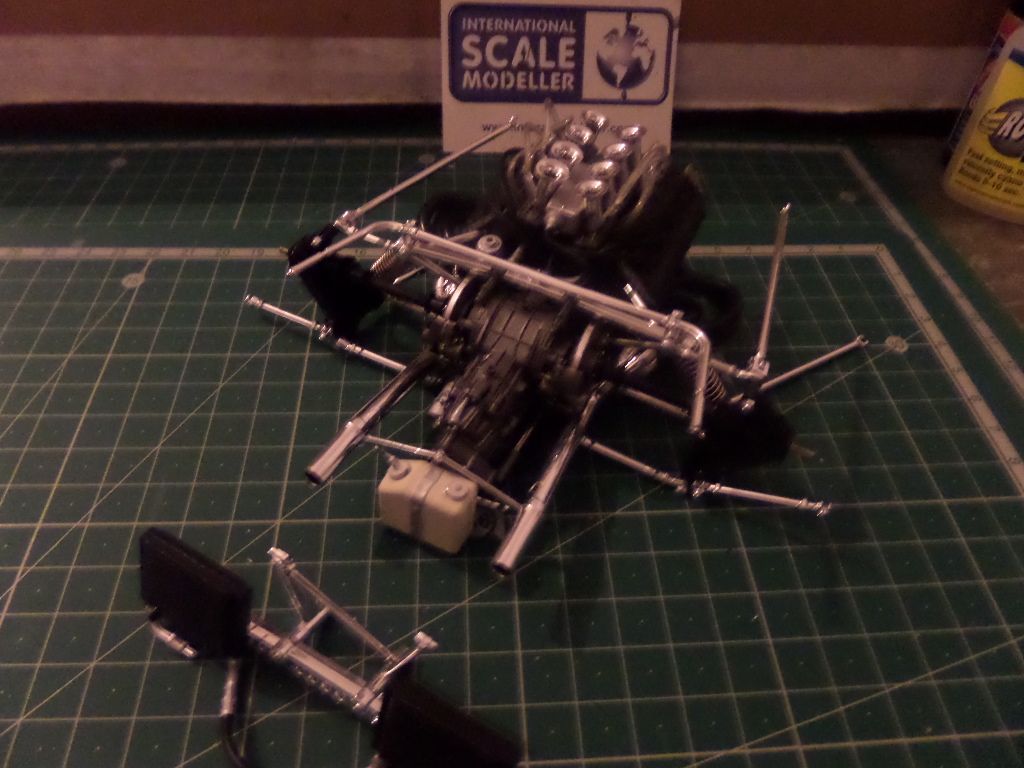
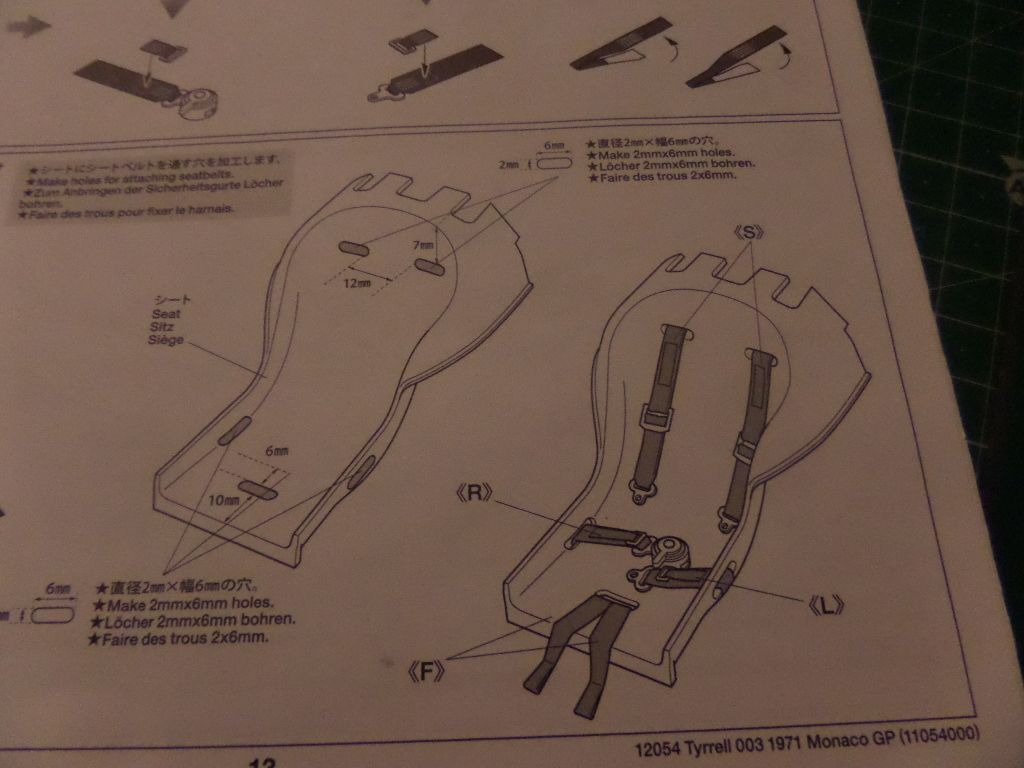
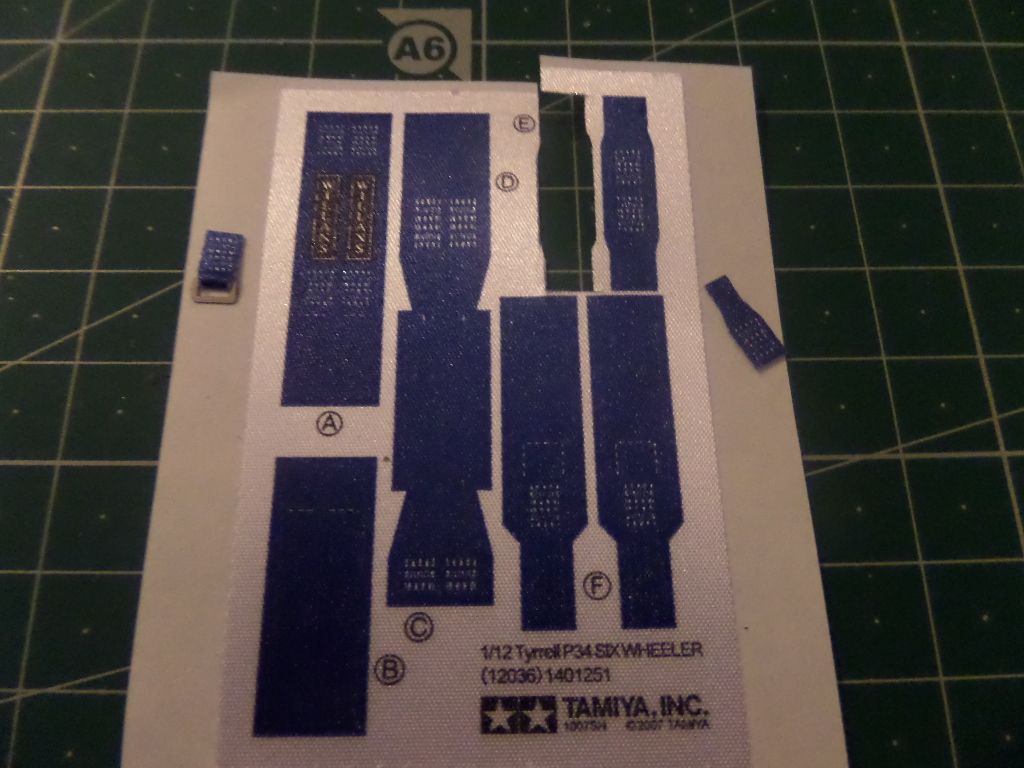
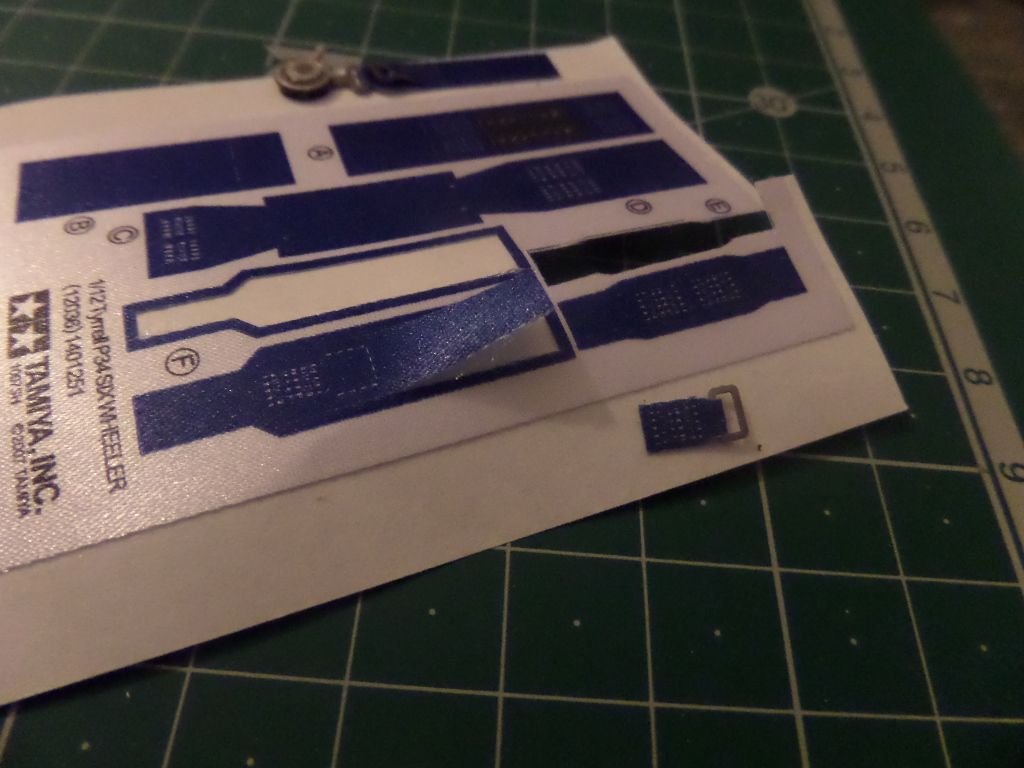
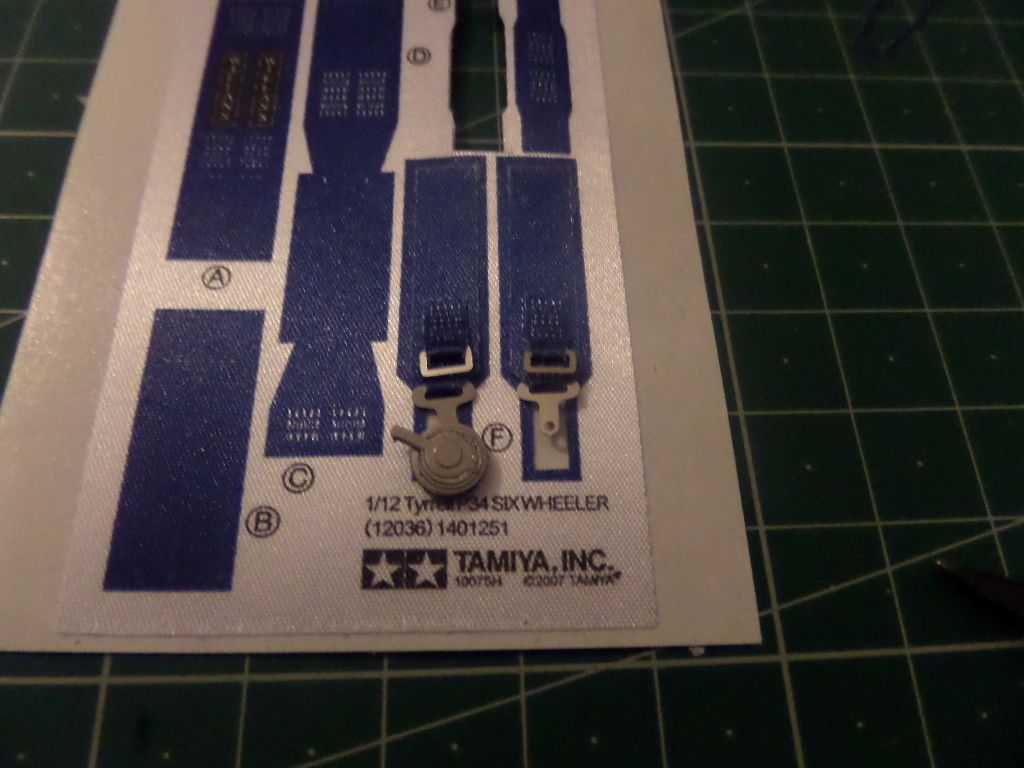
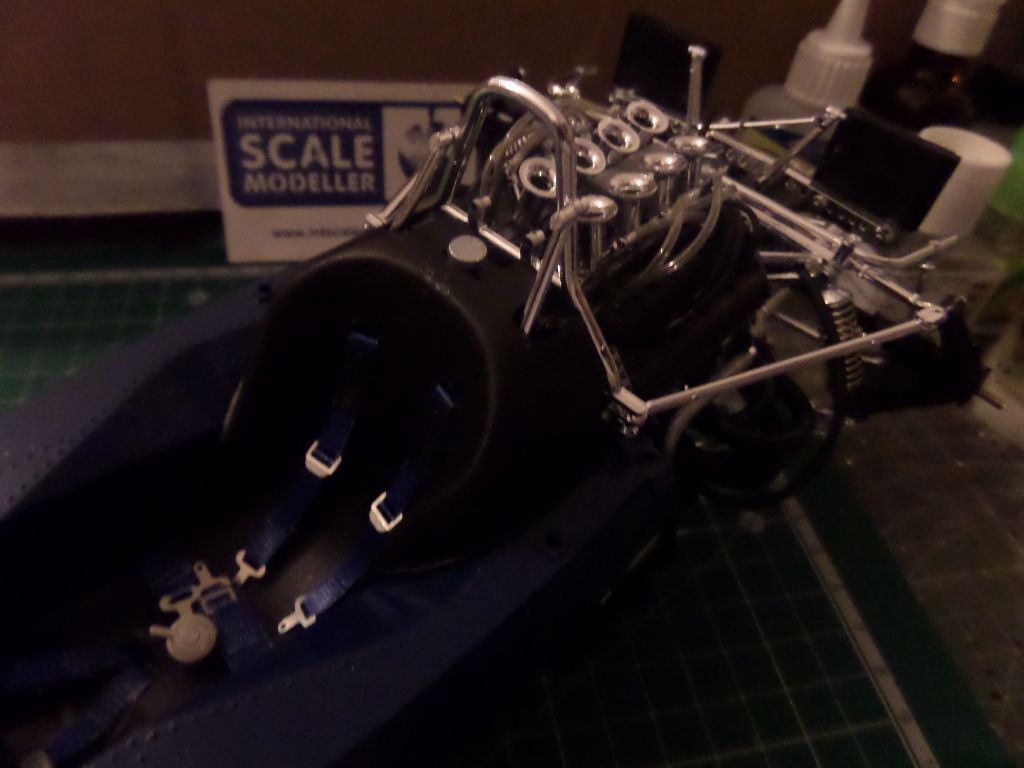
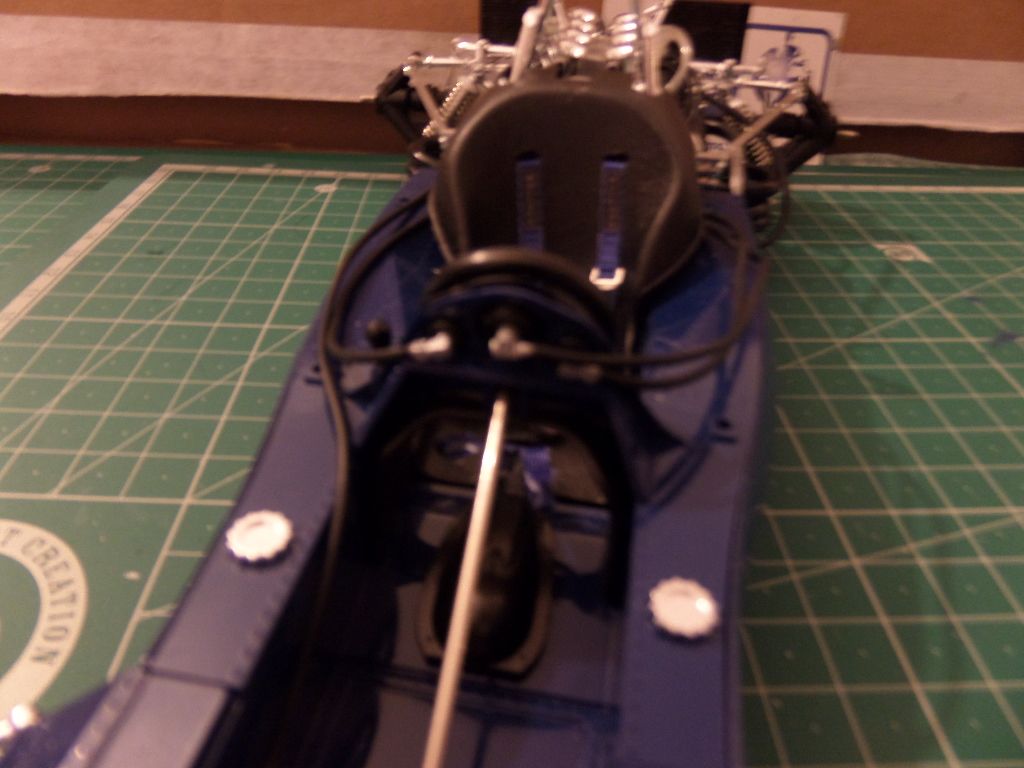
Now let's go to the tub ....seatbelts, nice tissue stickers belts
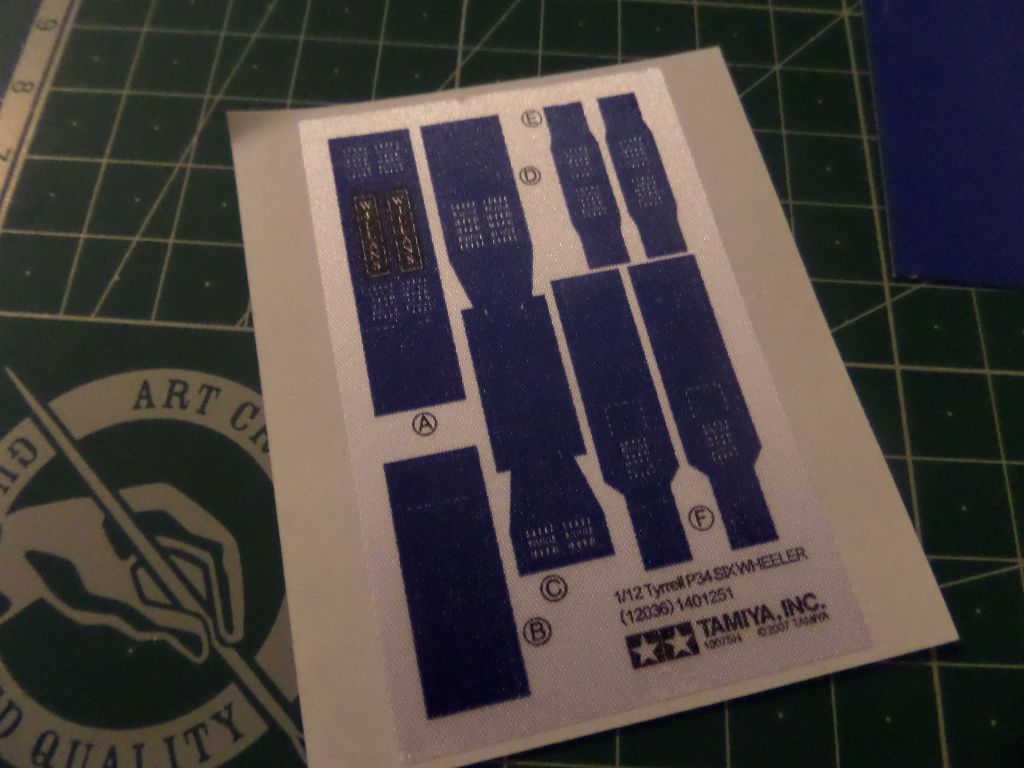
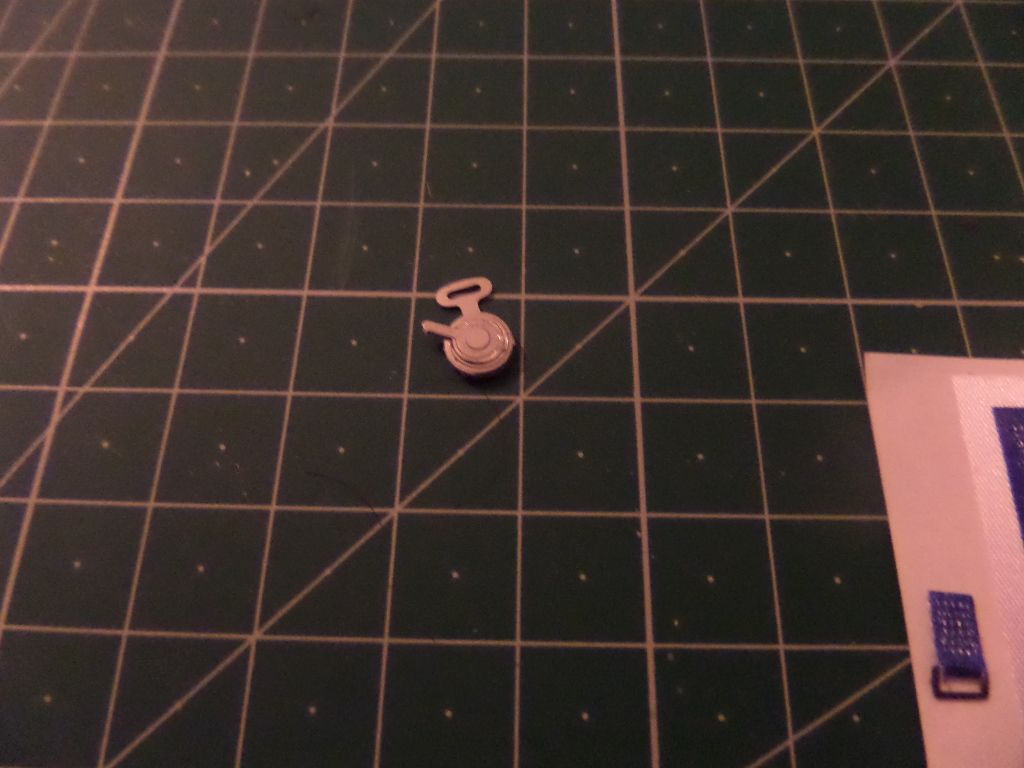
PE for the seat belts
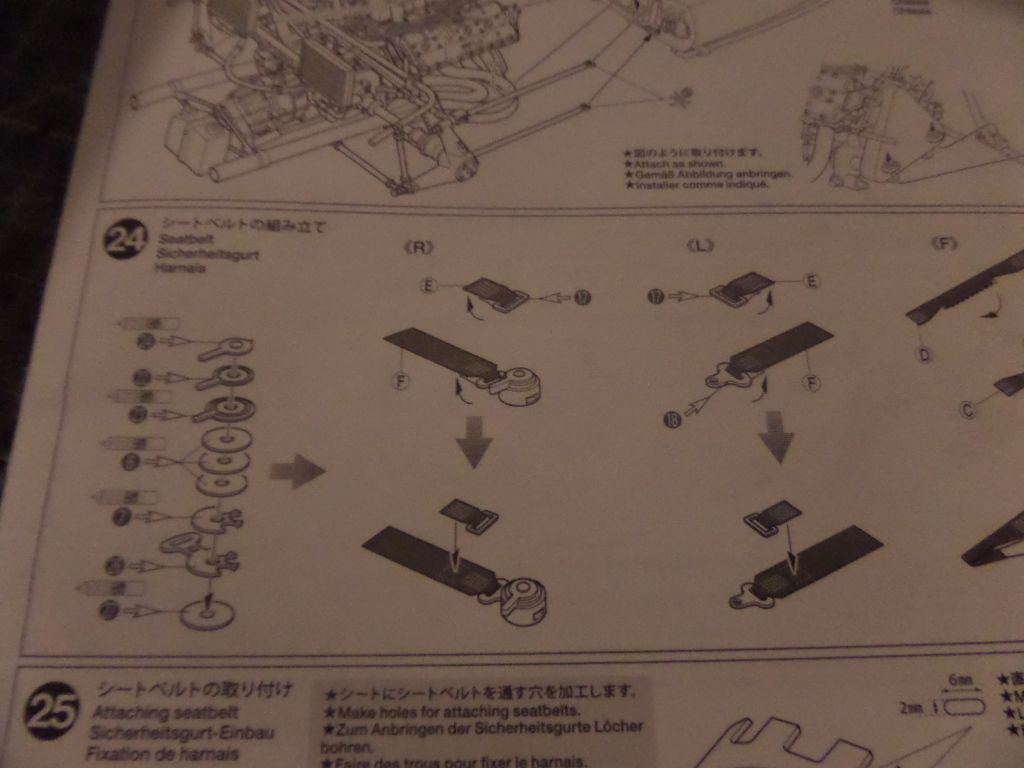
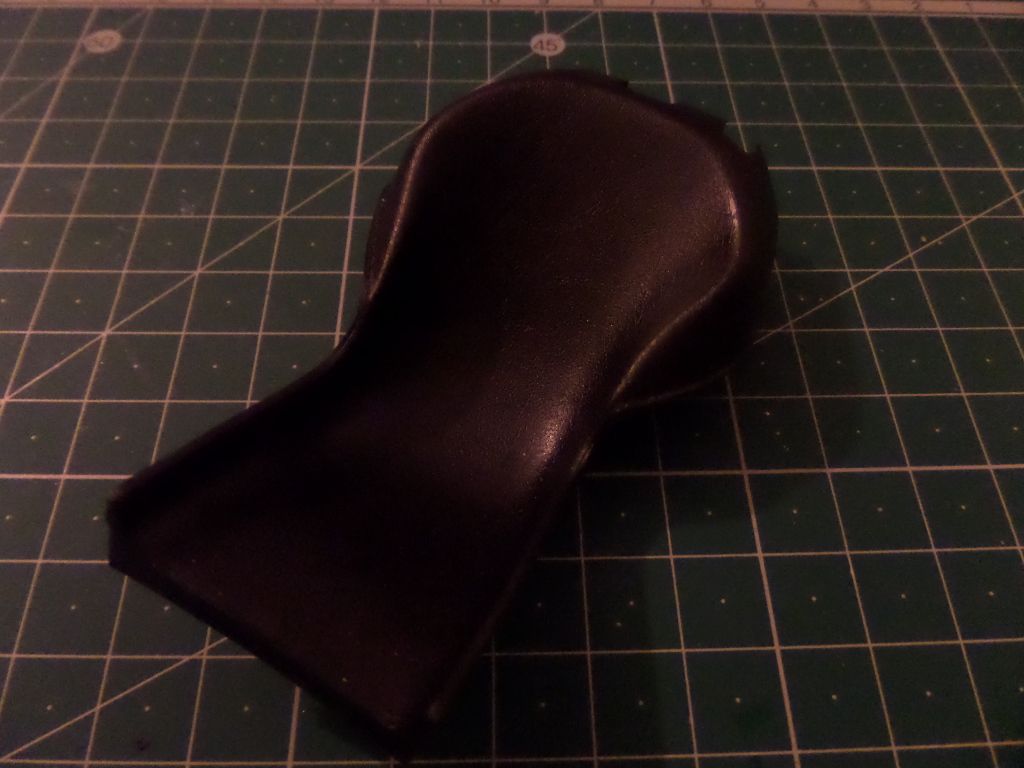
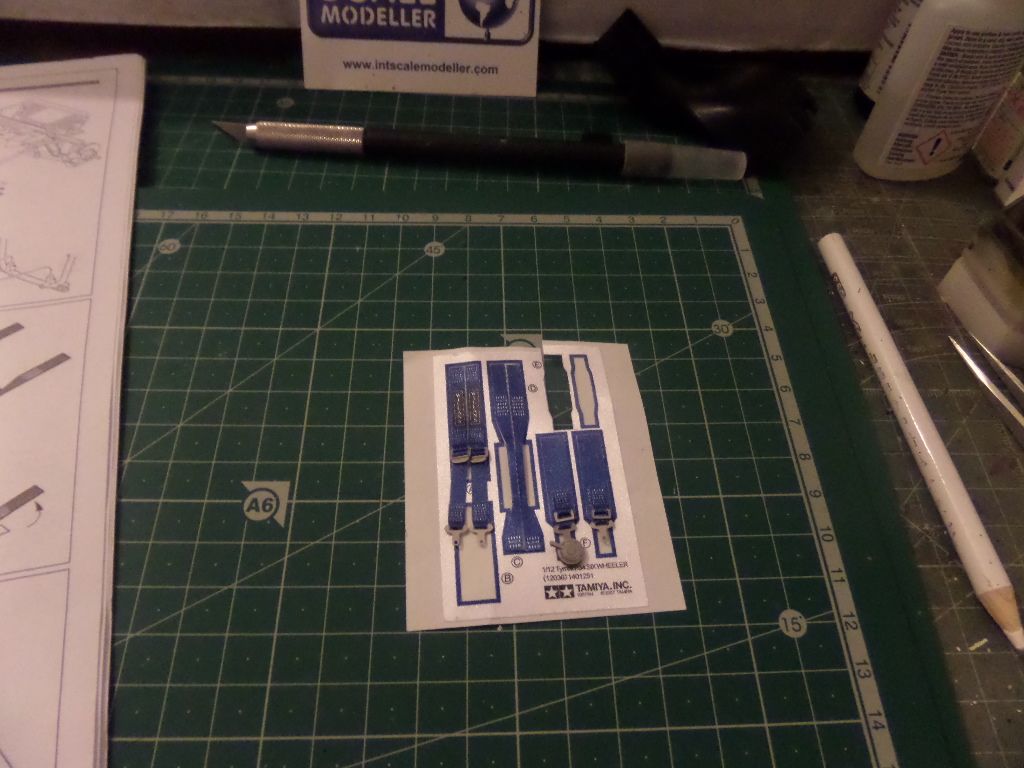
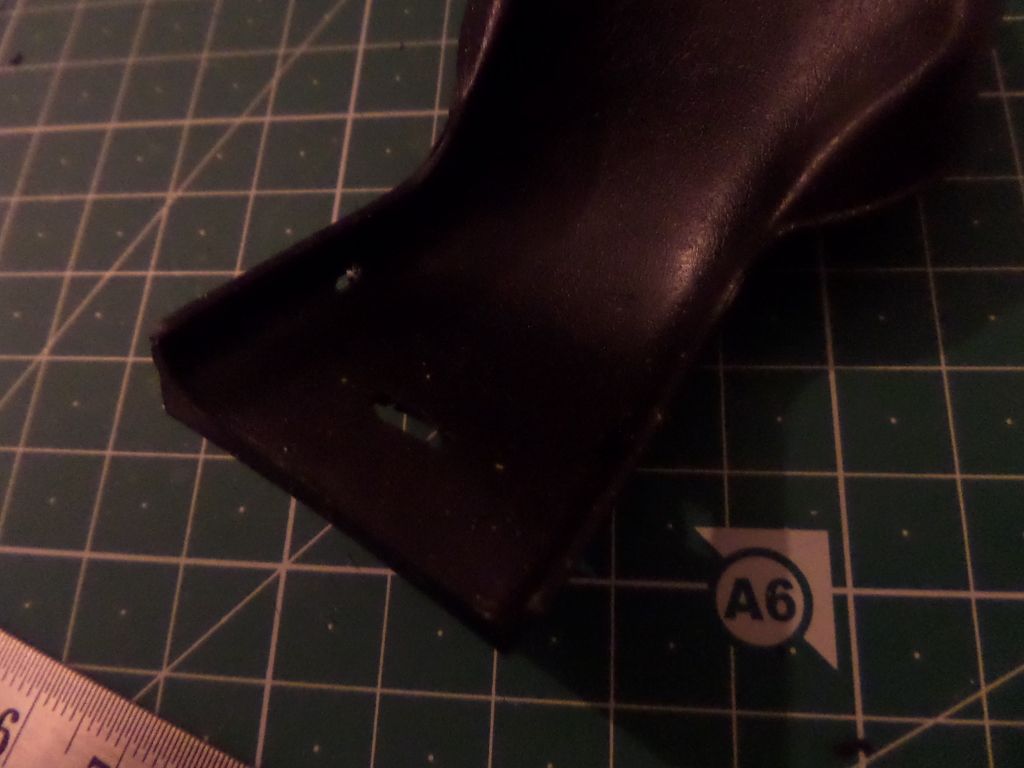
Must cut the seat ...not that easy ....
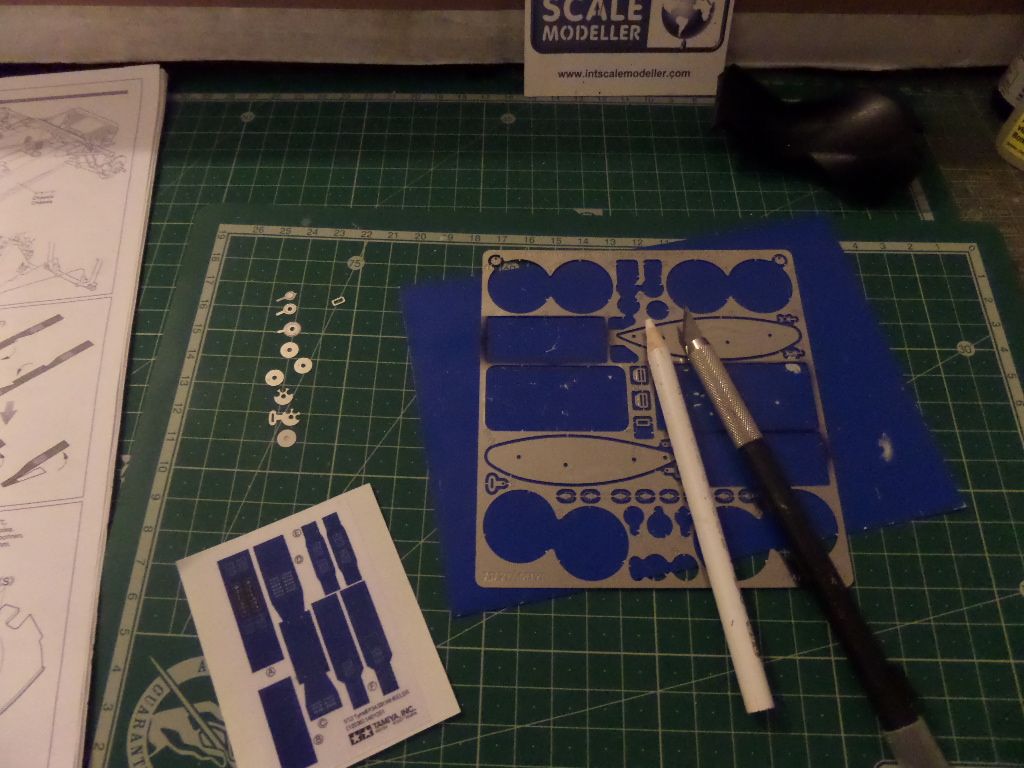
PE done
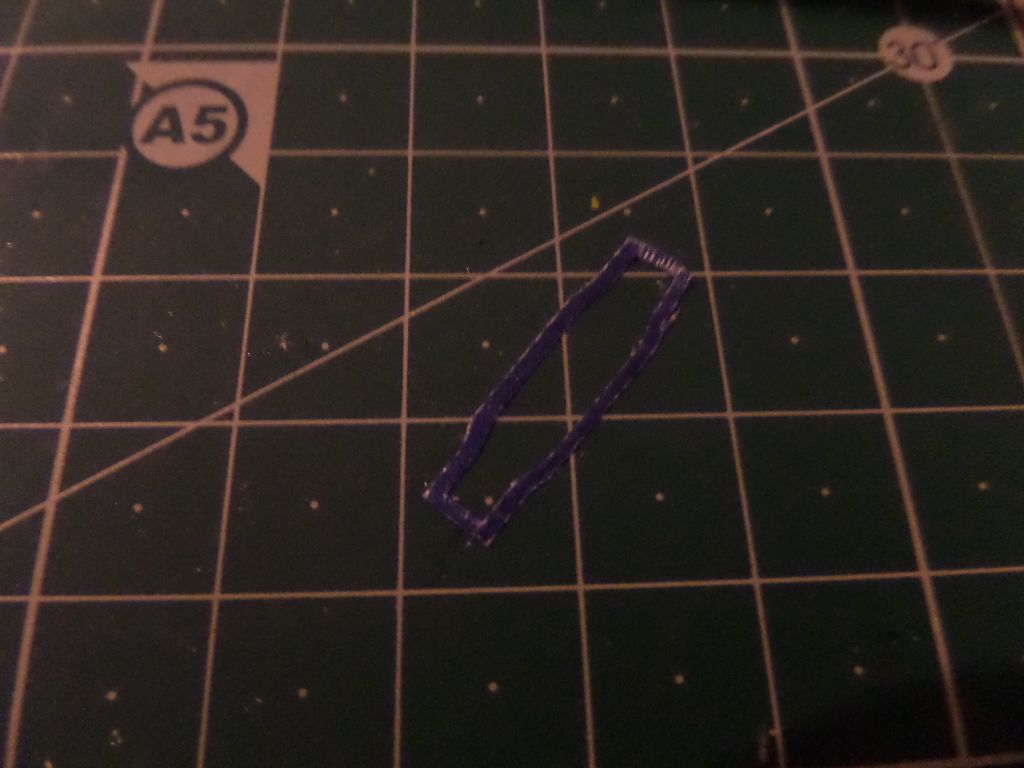
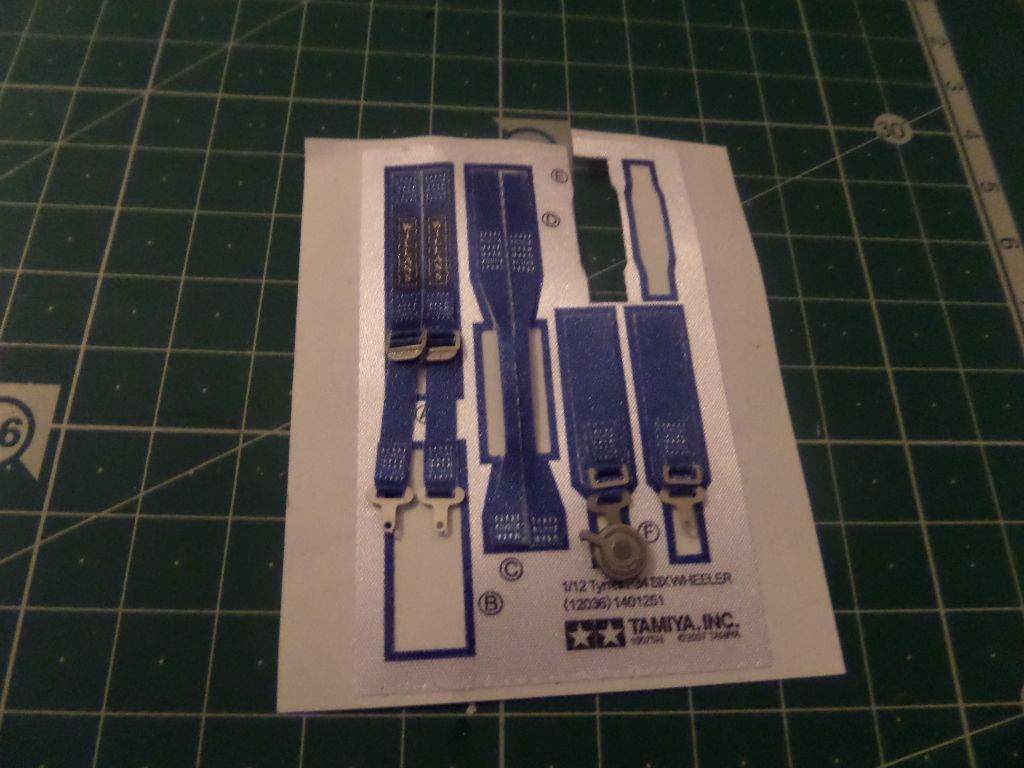
Here I made a mistake ...I use a scissor to cut the seat belts ...wrong , they are pre cut and can be removed from the paper easily !
see...this was cutted ...no need
I was making the seatbelts and placing them in the board of the paper so not to loose the glue
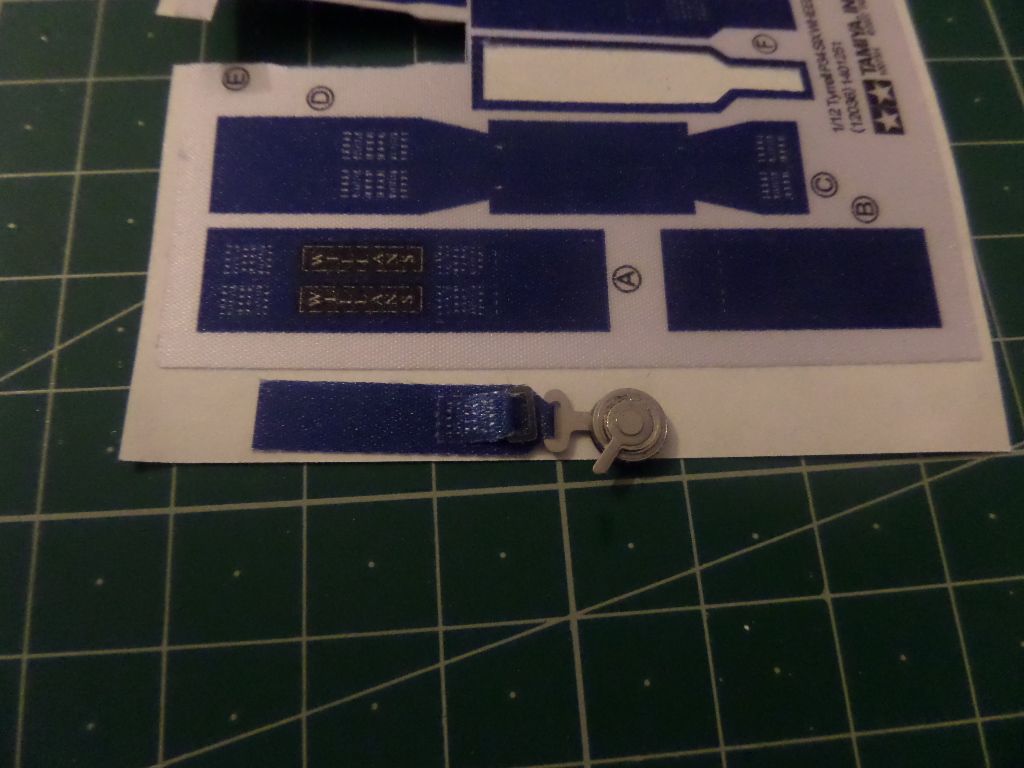
see...easy to lift uo and remove fro the paper
Very nice detail ...They could do this for the 1/24 cars , much better than the usual decals ...
All done !
I cut then the seat ...went ok , just check the measures and position and you will be fine !
Added the seatbelts !
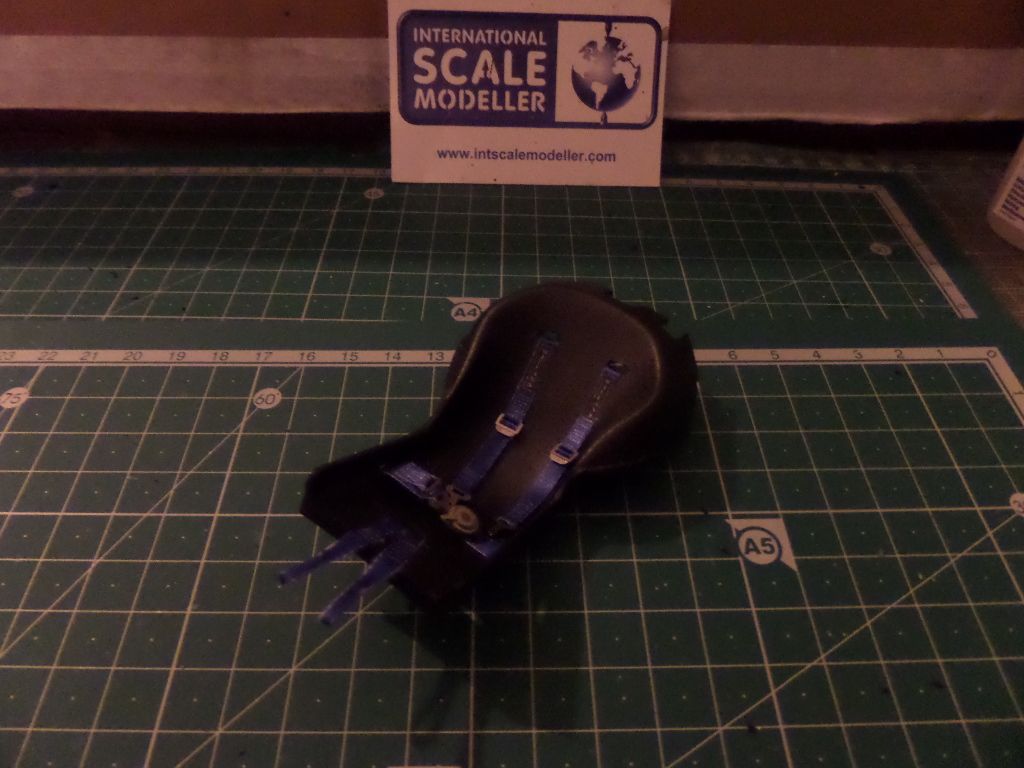
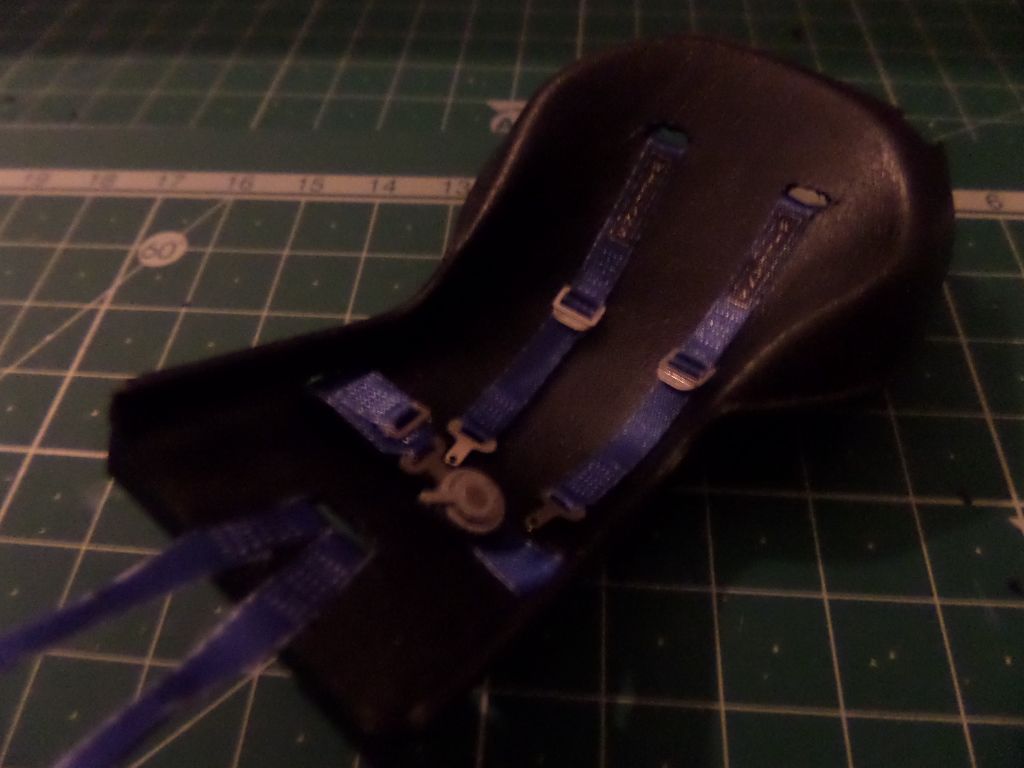
Added the seat to the car tub
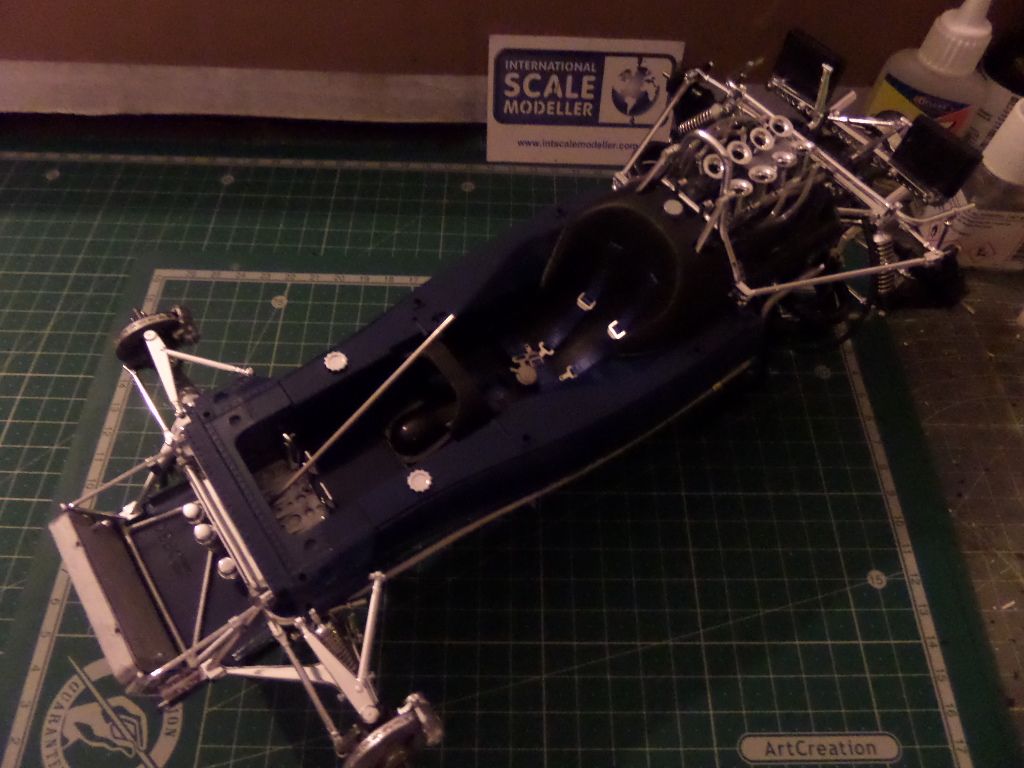
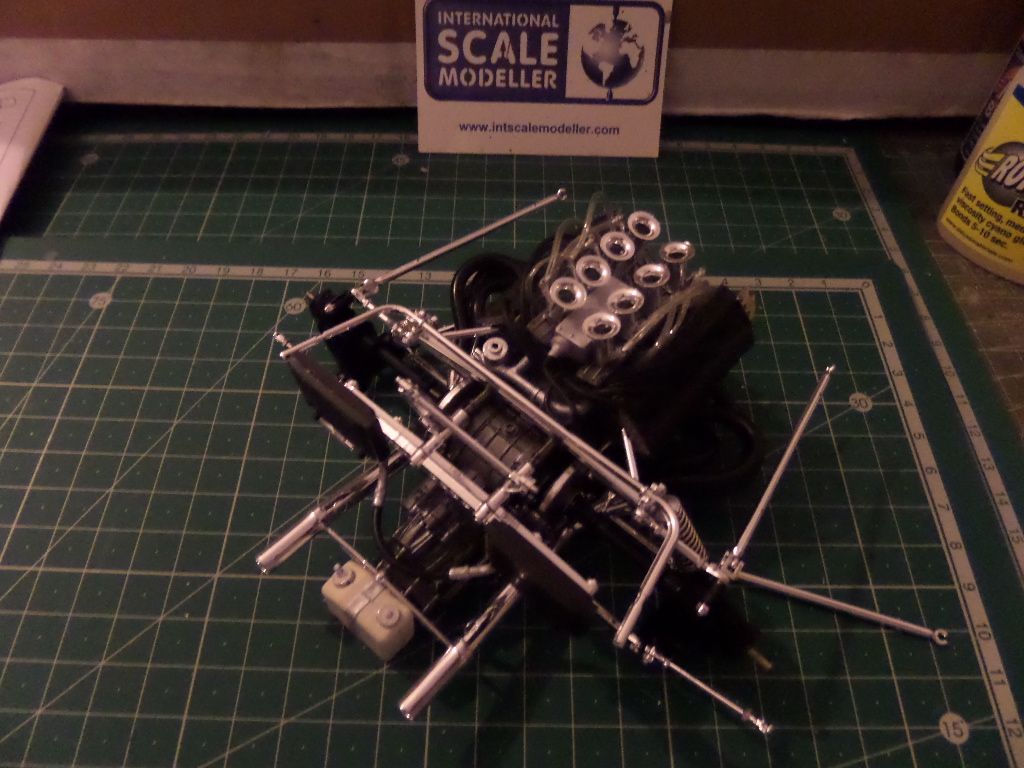
ohhh sorry didn't turn the light in the workshop

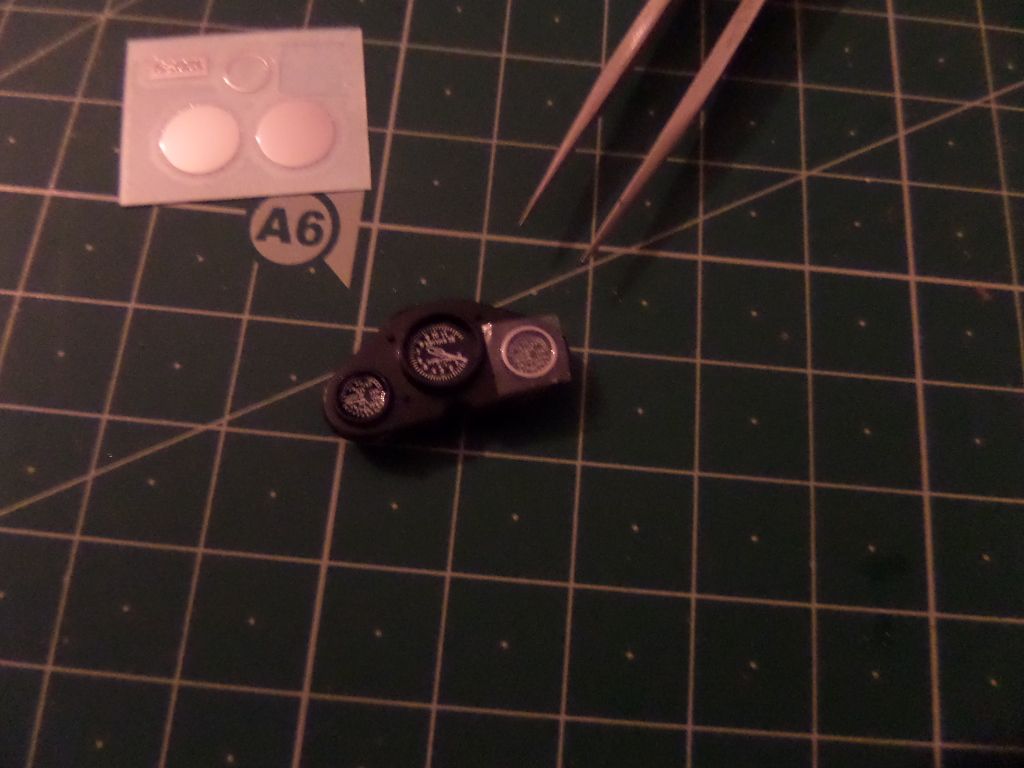
Instruments :
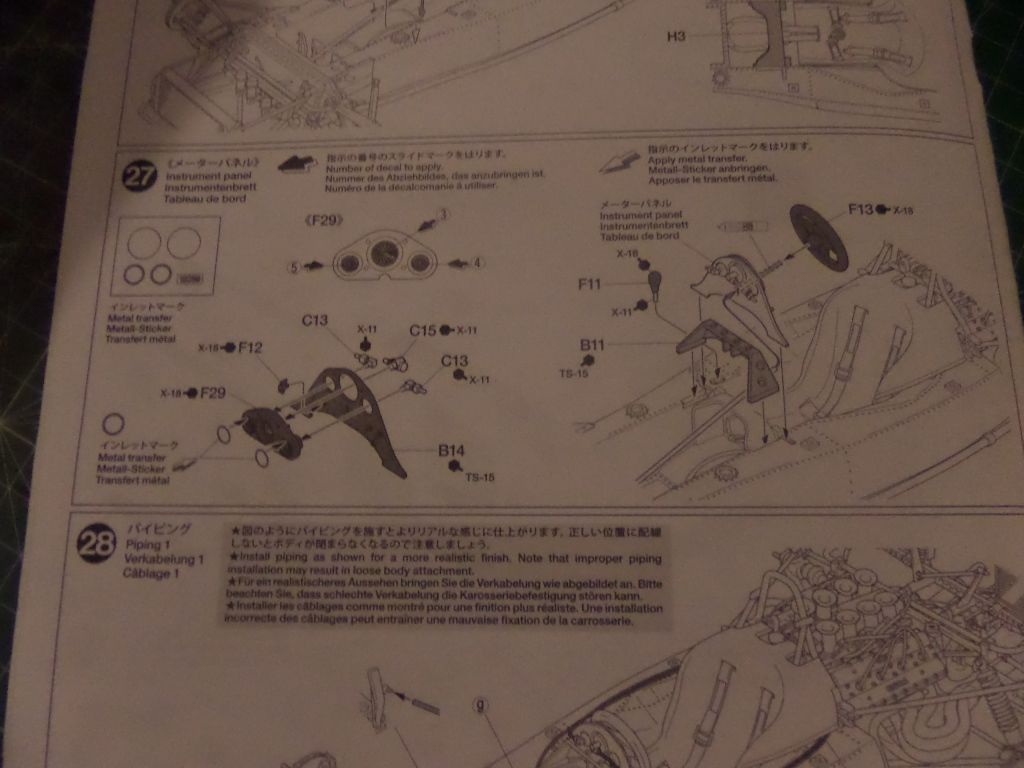
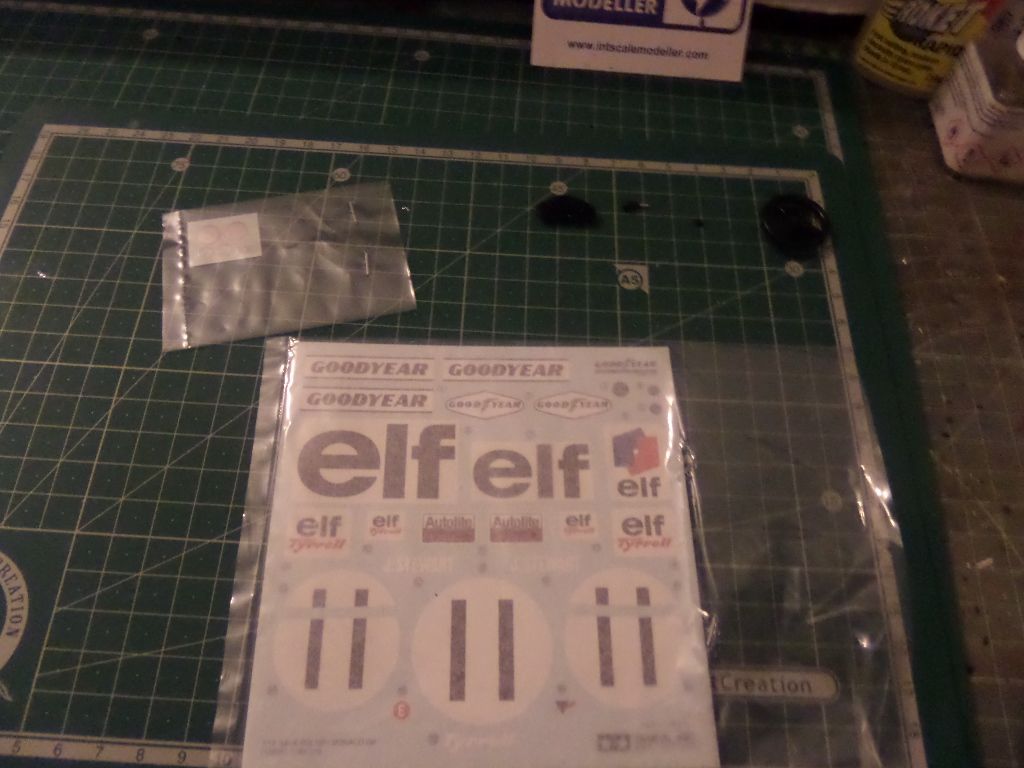
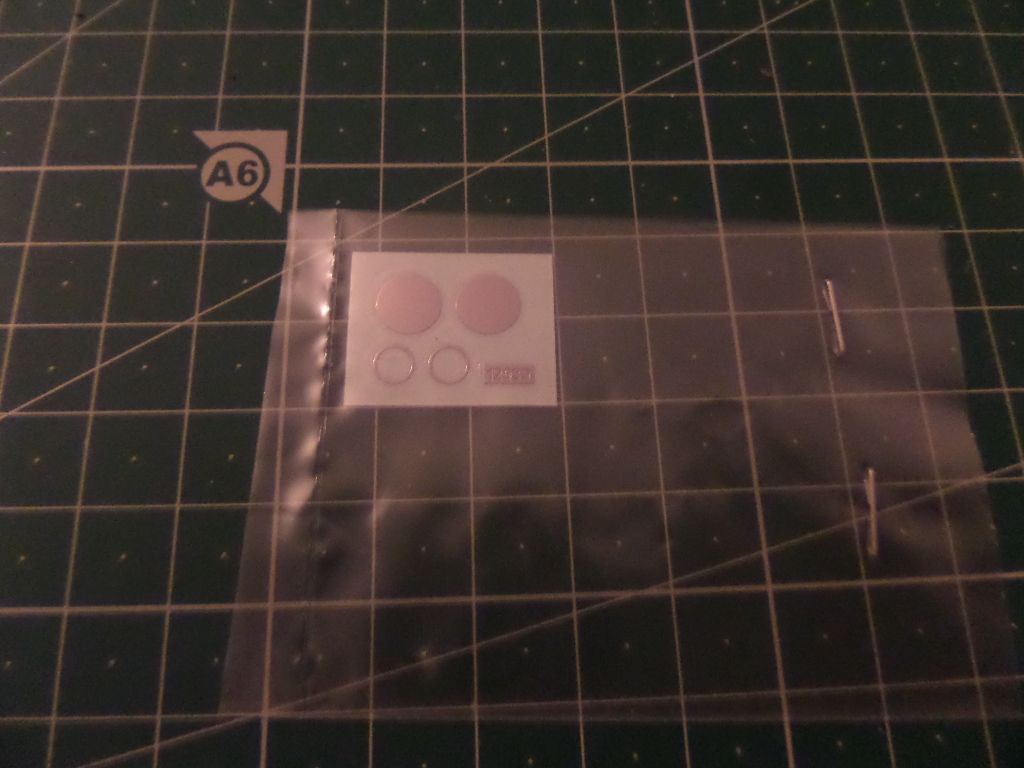
first decals ....
hmmmm metal stickers
after painting the instrument panel ...not too many instruments and gauges compared to today's F1 cars ...
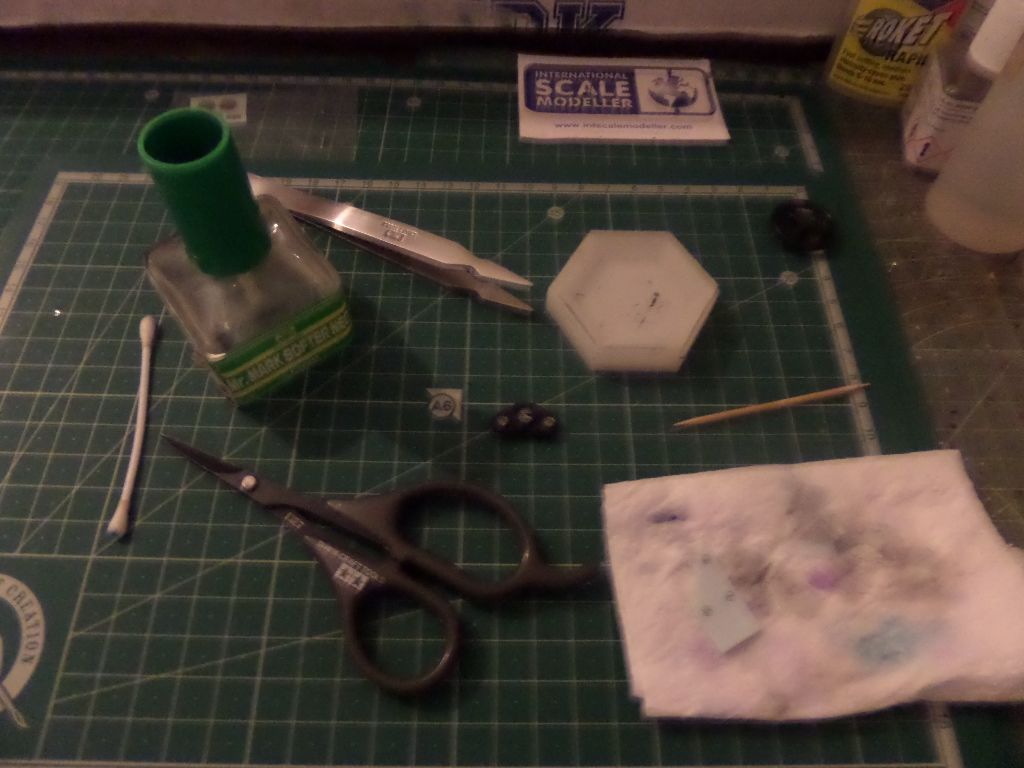
nice !
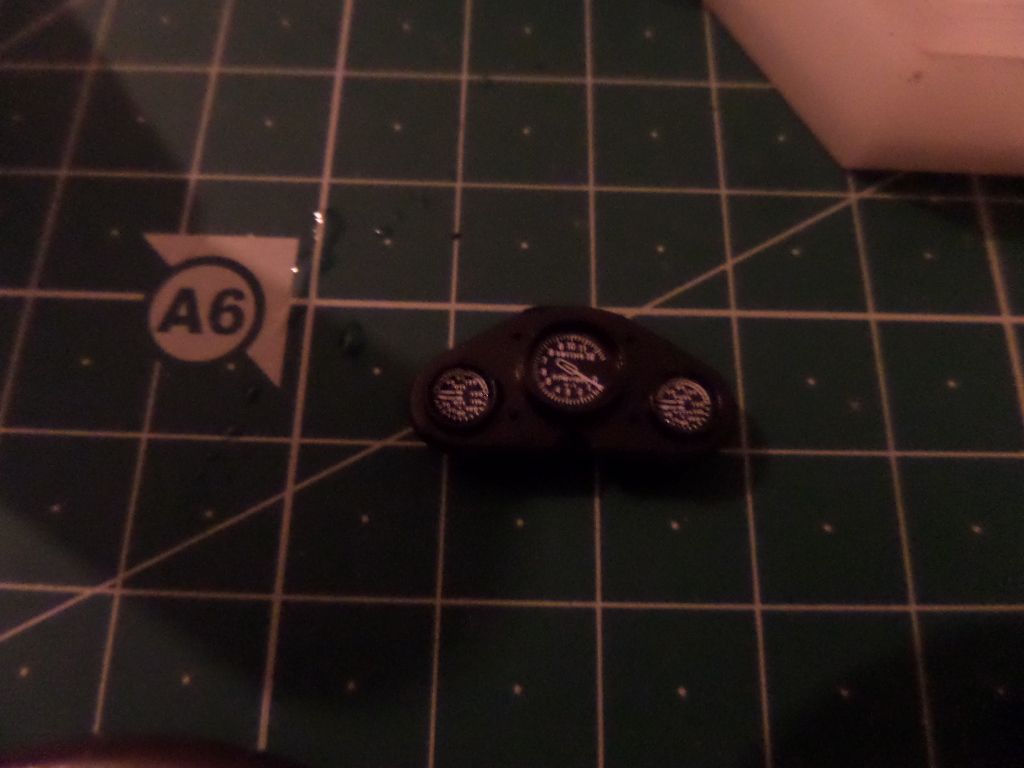
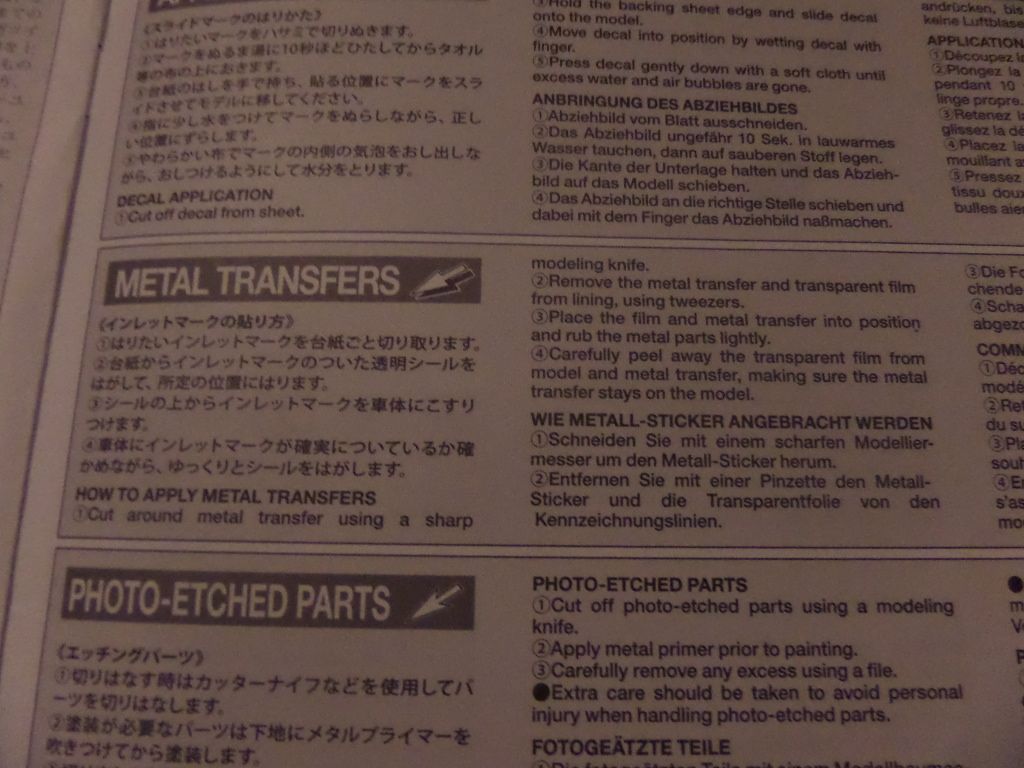
must place now the metal sticker in the lateral gauges
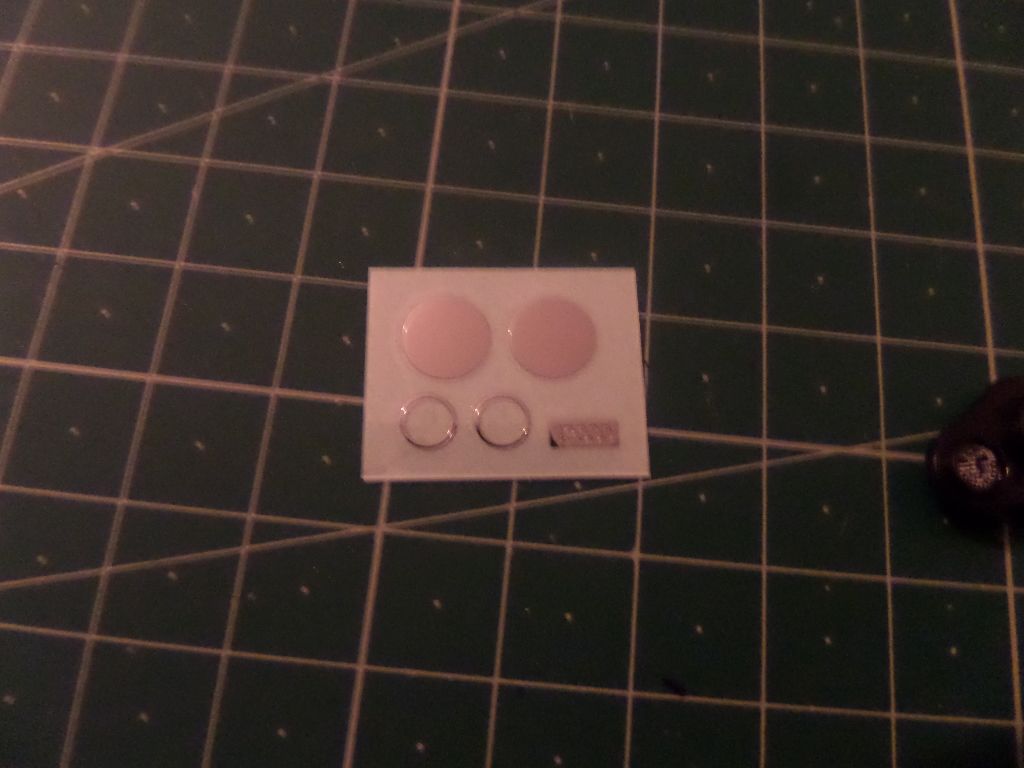
As it was something that I never done , I check the instructions, seem similar to the tyre decals ...place the sticker and rub gently , the remove the transparent film with tweezers ...ok , seems simple enough !
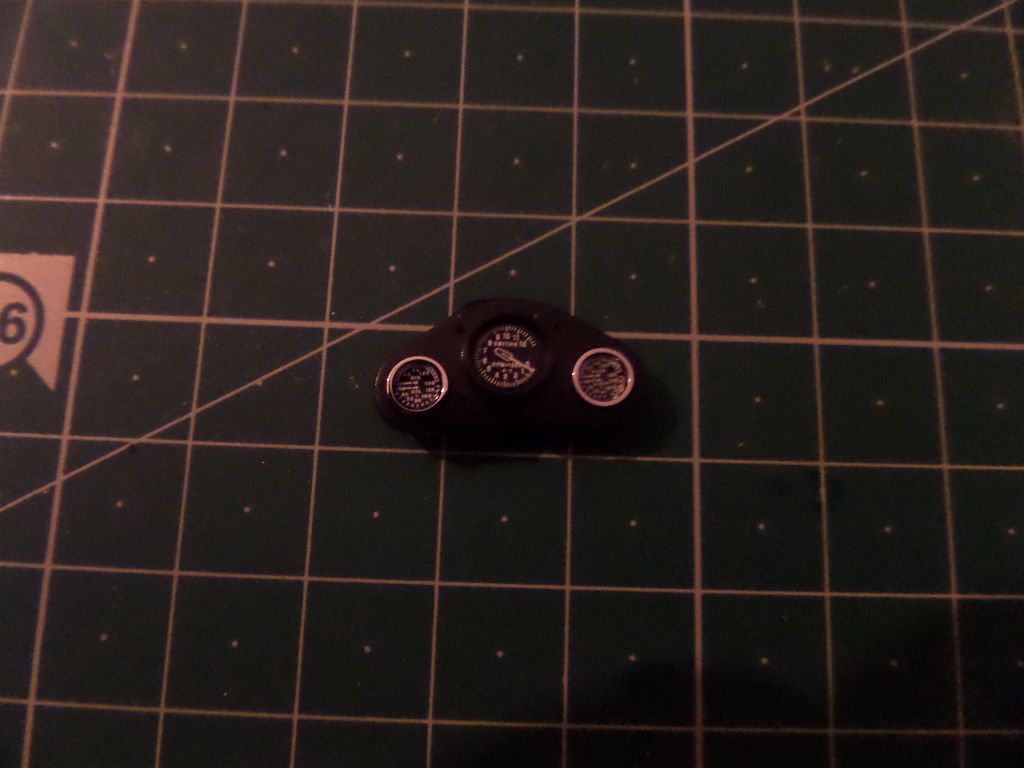
done and continuing with the building
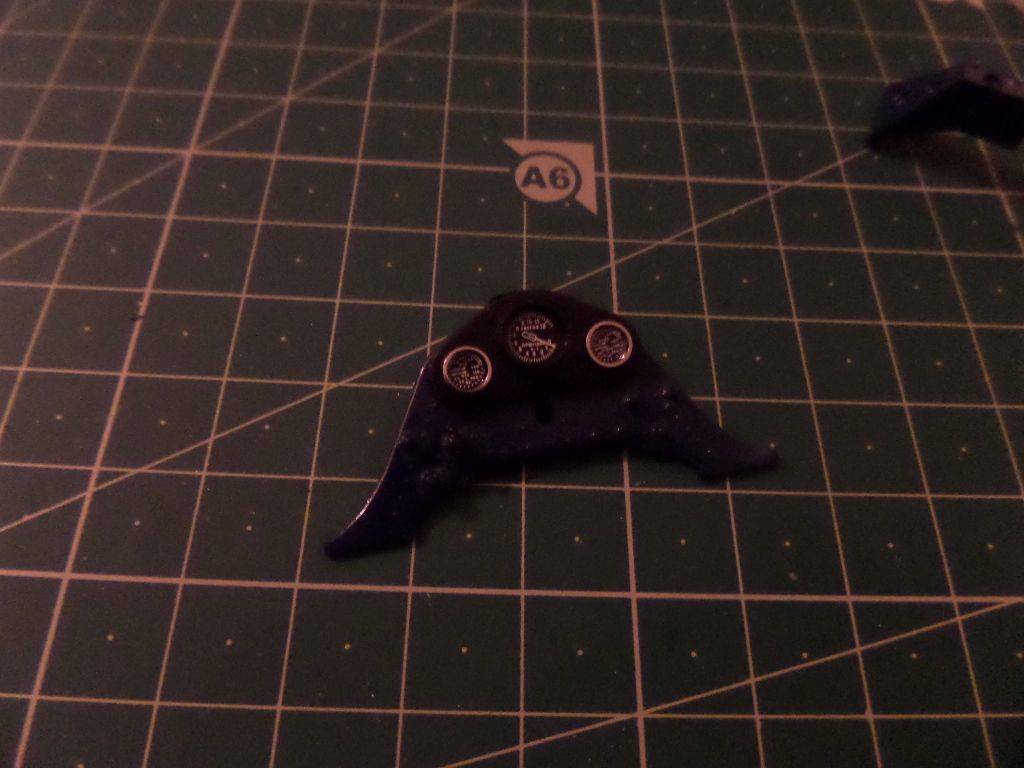
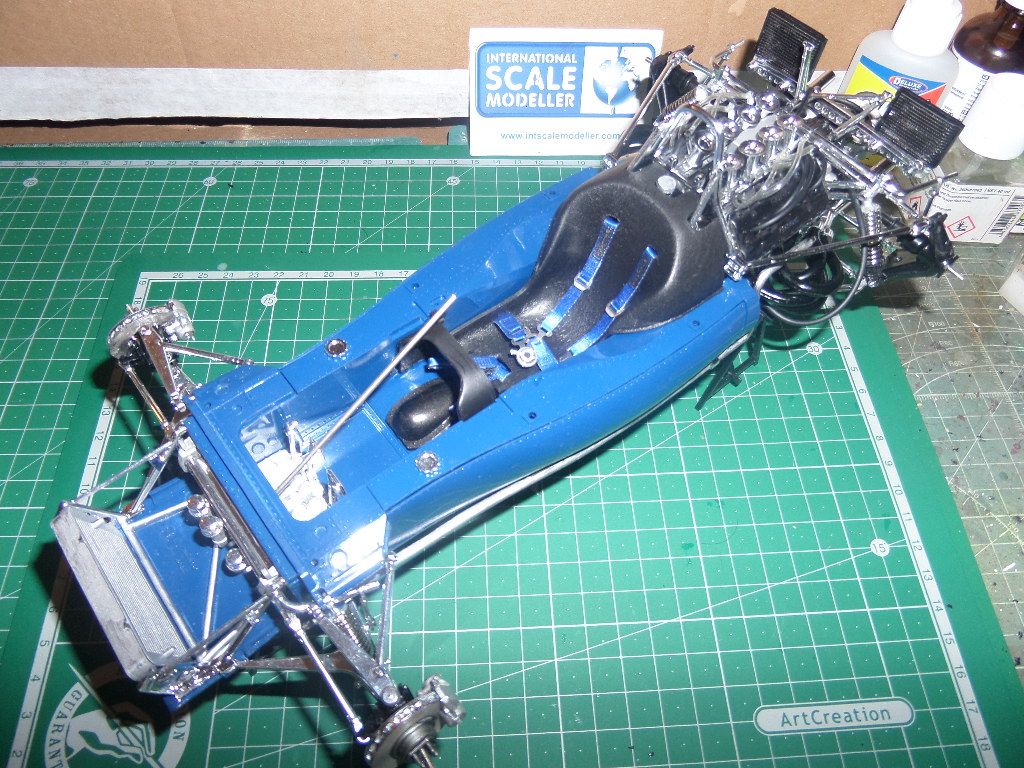
on the rear , there are soem detail , again to add some cables ...nice !

Added steering wheel , gear stick
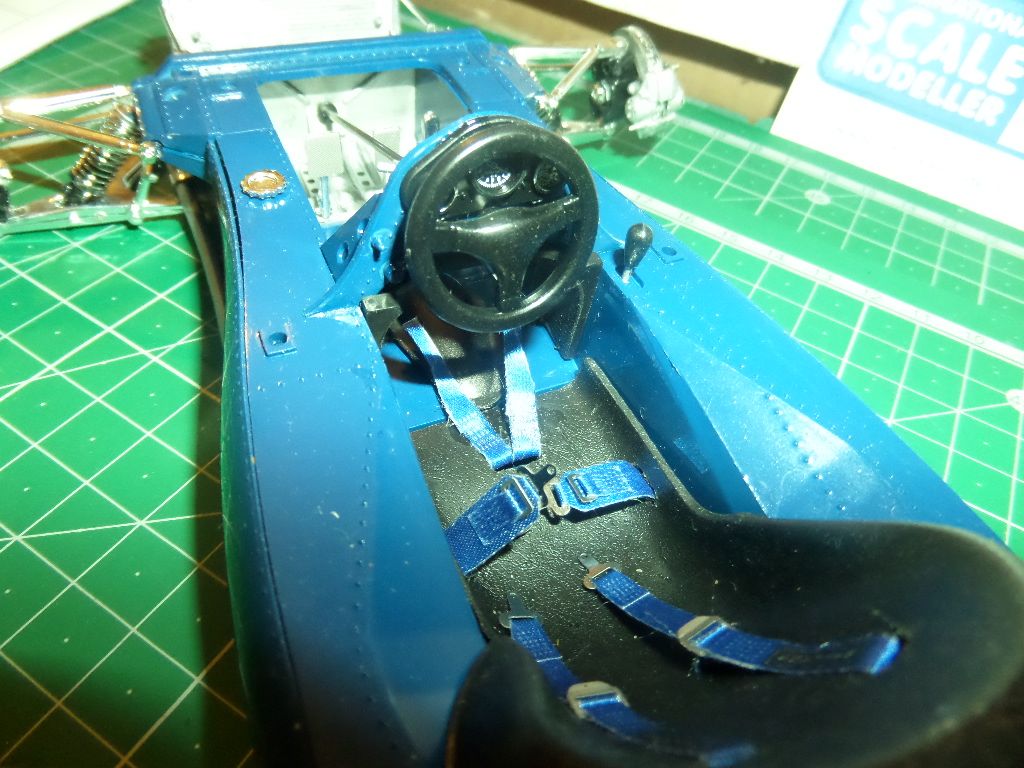
more cables , from the acelerator and instrumet panel to the underside of the seat
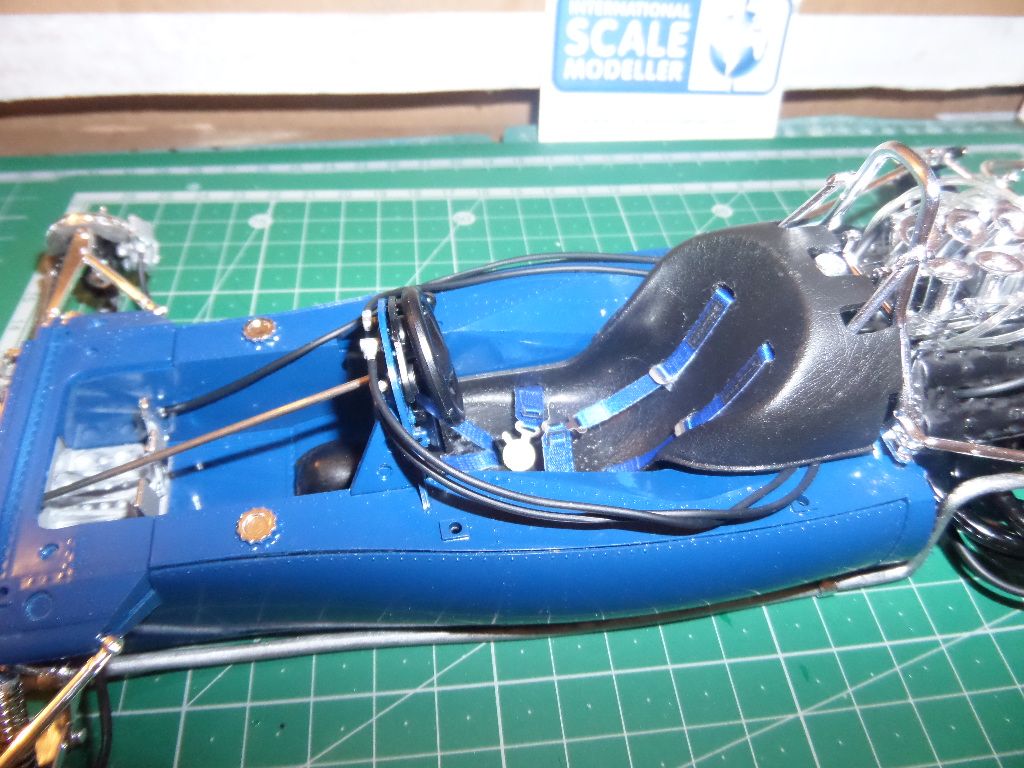
and more cable from the rear deposit to god knows where
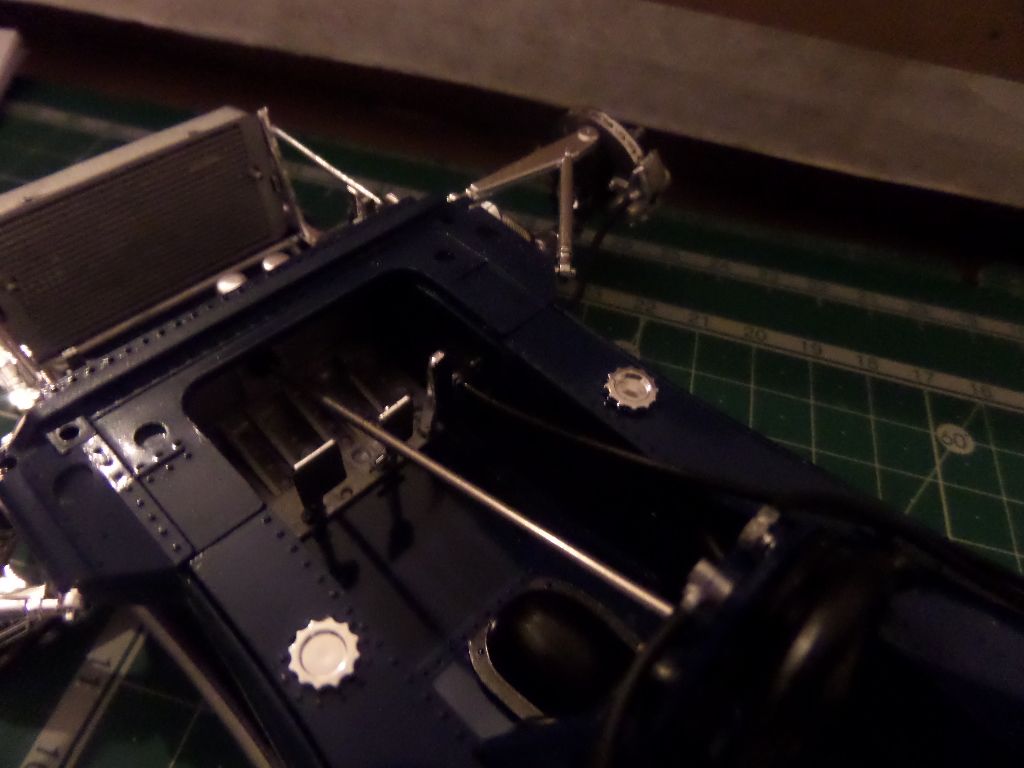
Tyres
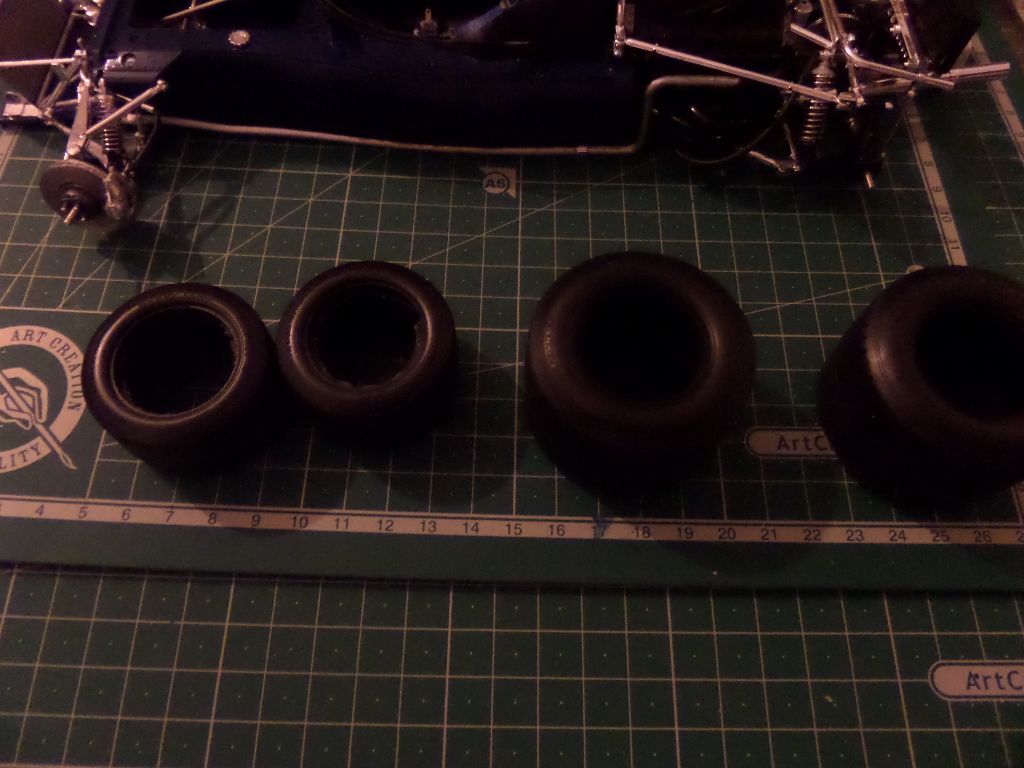
easily done ...
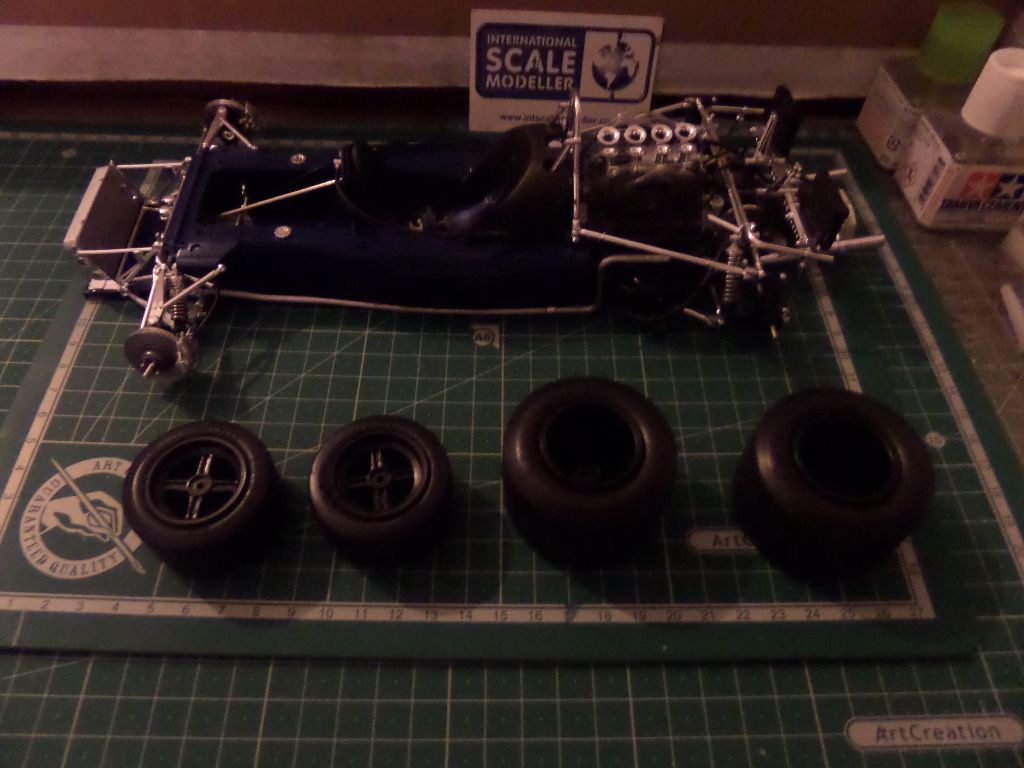
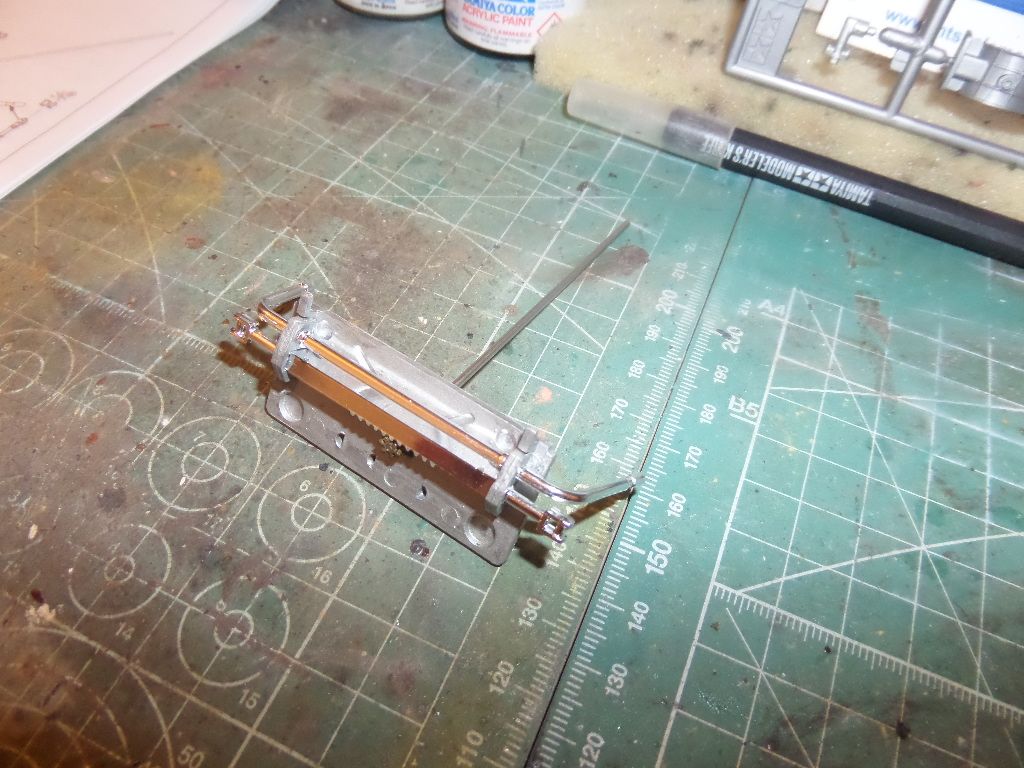
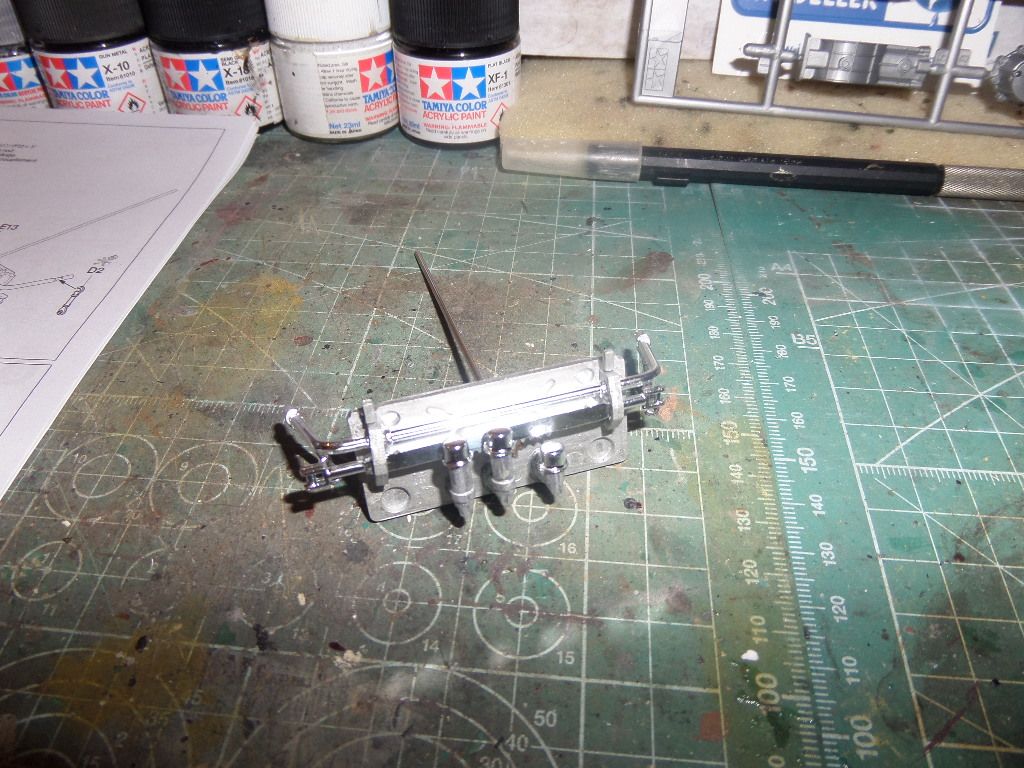
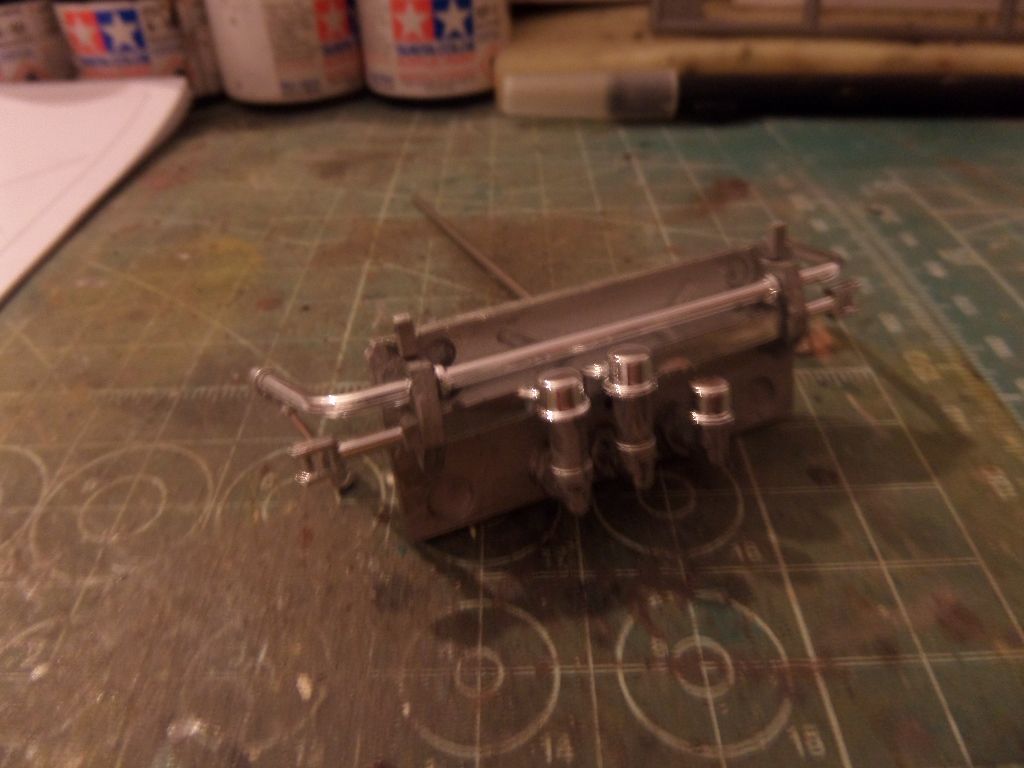
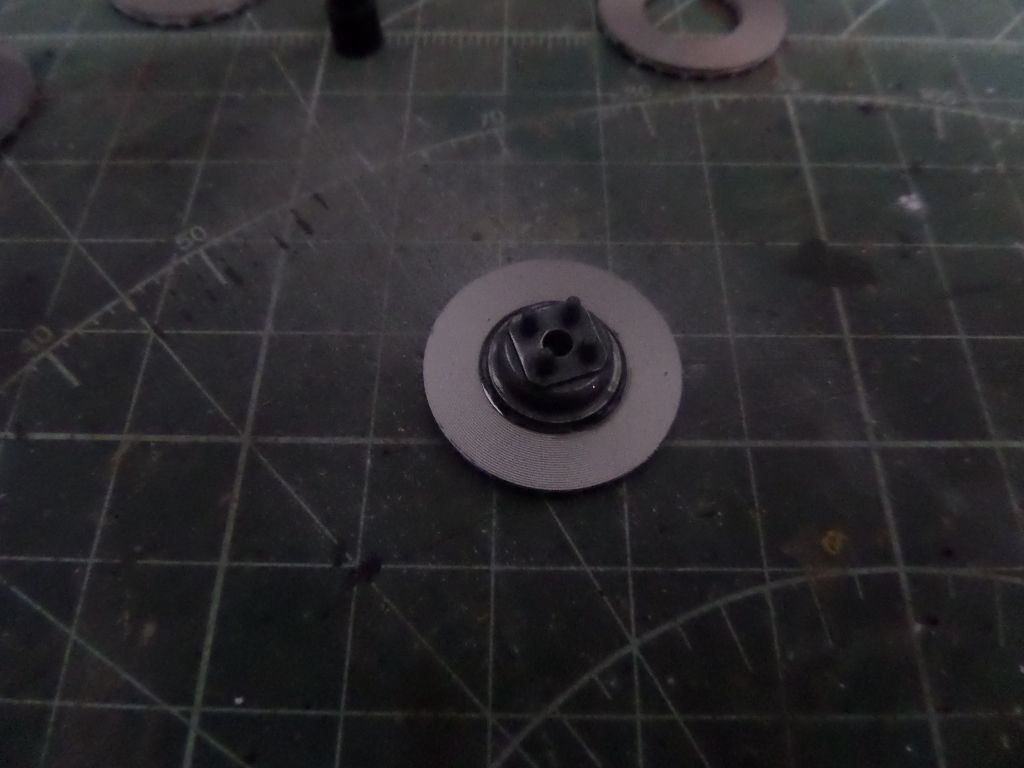
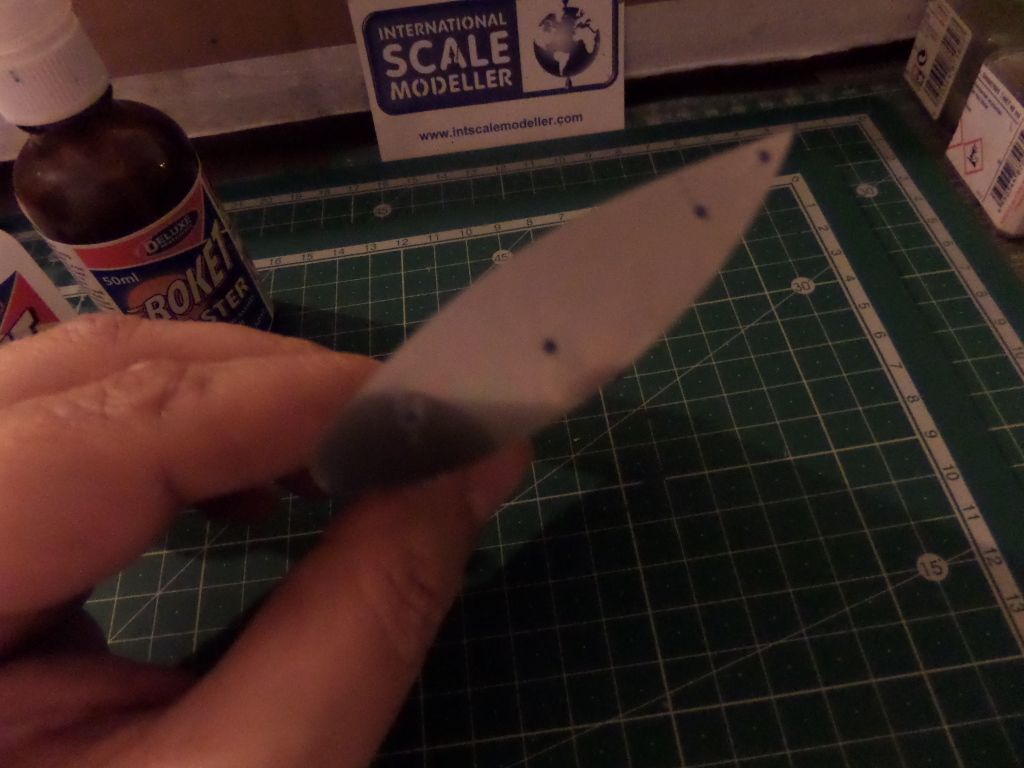
Now to use the special tool that I done just in the beginning of the build ....yeahhhh fantastic tool ...well it does the necessary work , not very pratical though
now it is looking like a F1
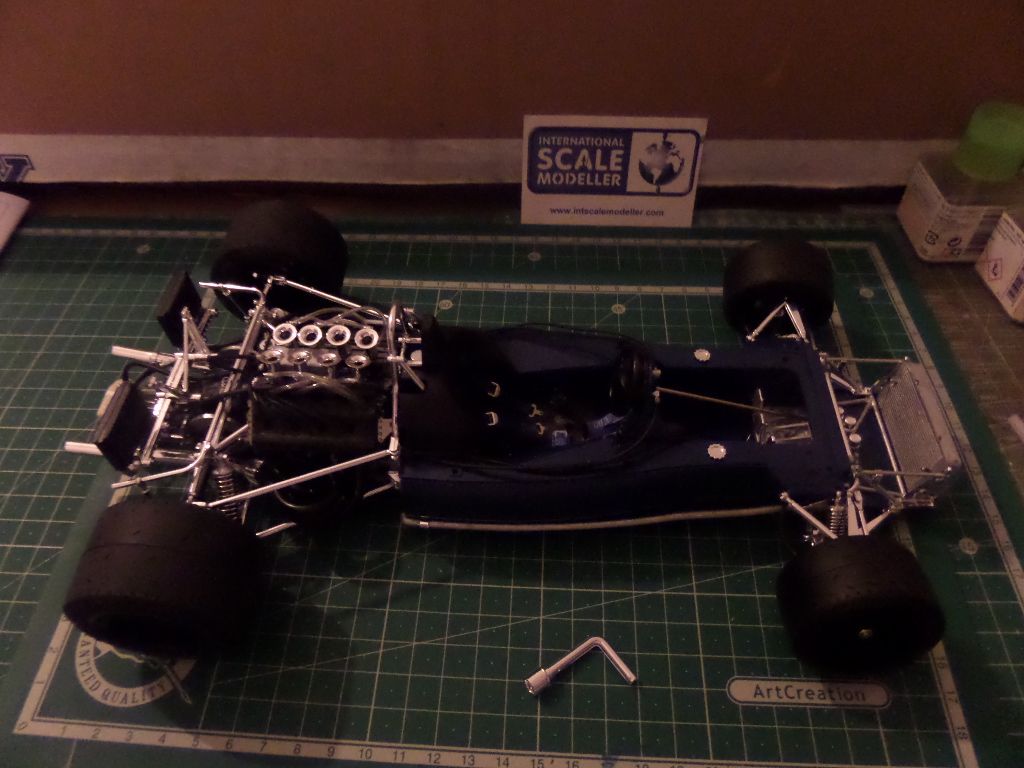
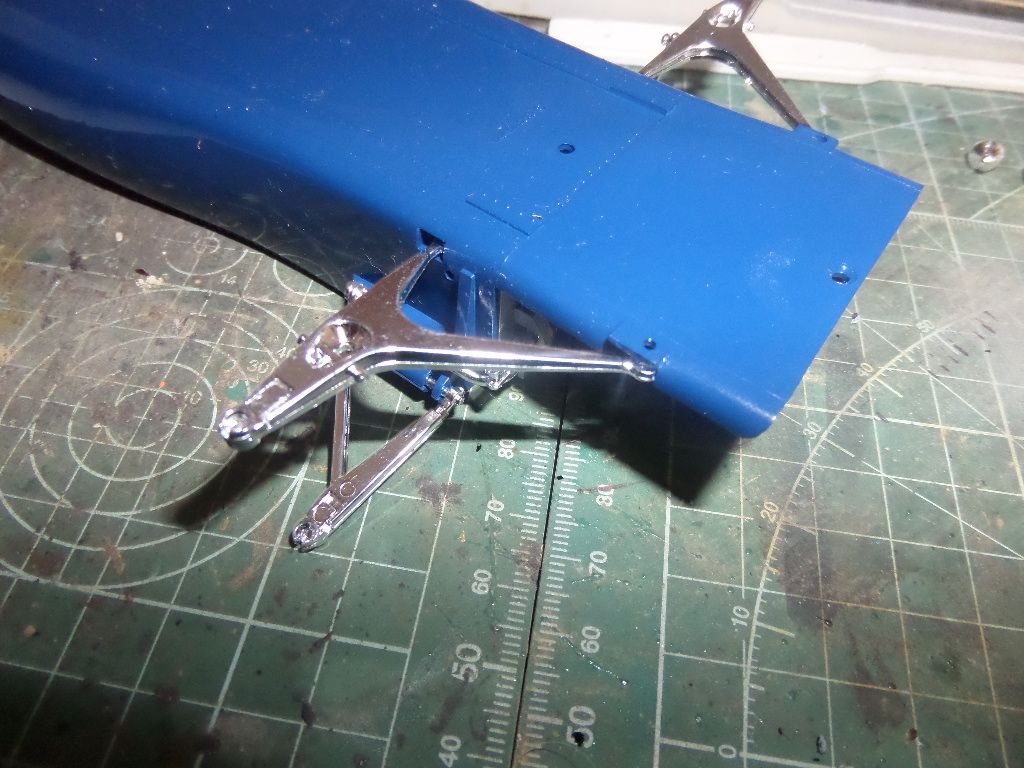
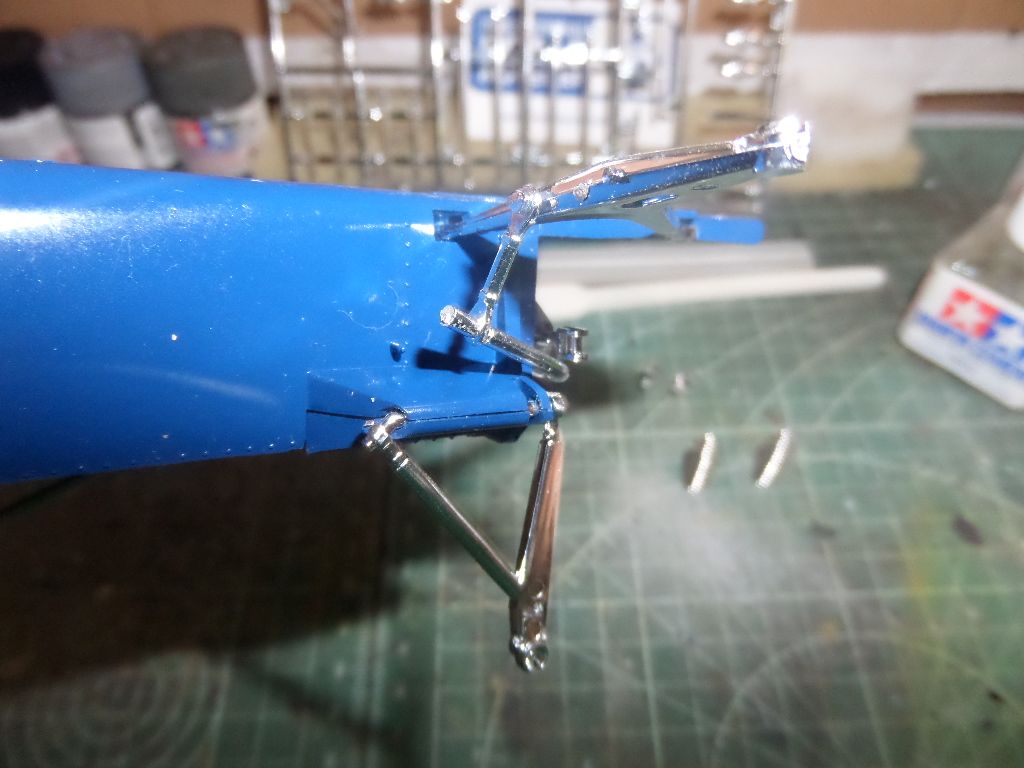
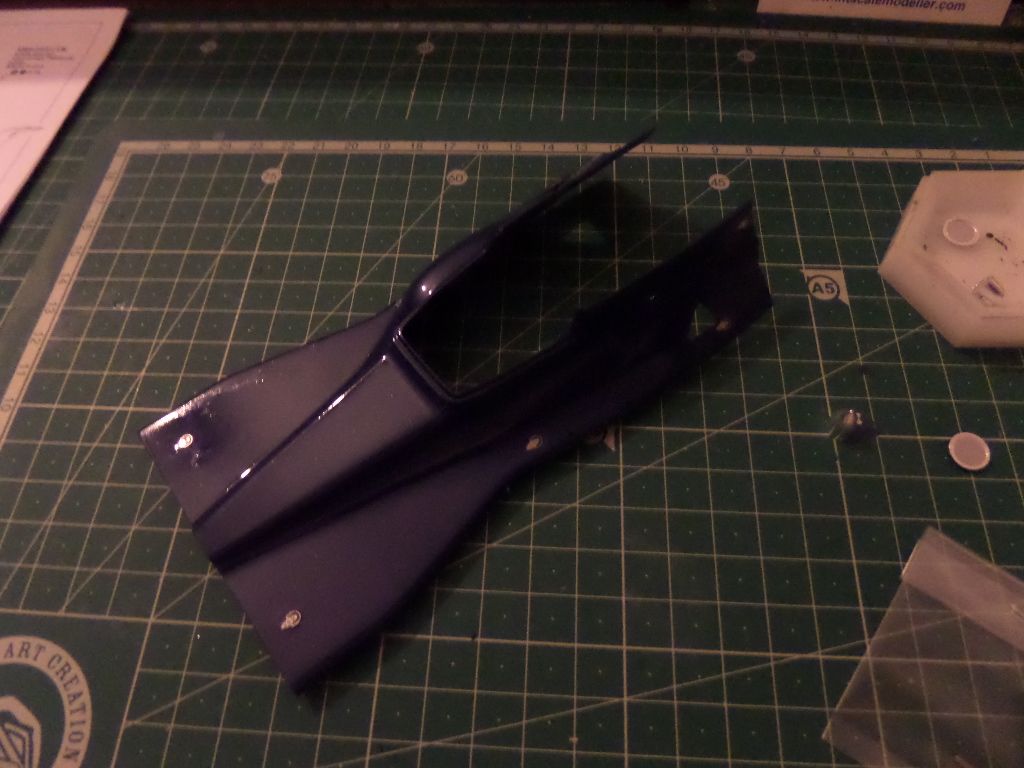
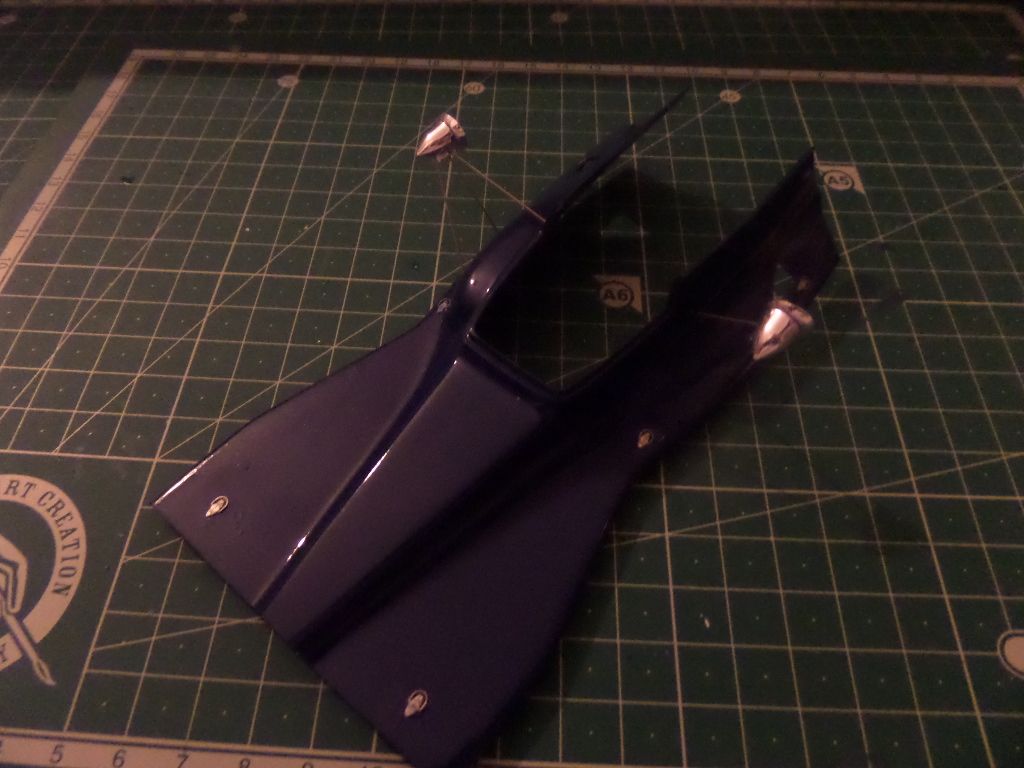
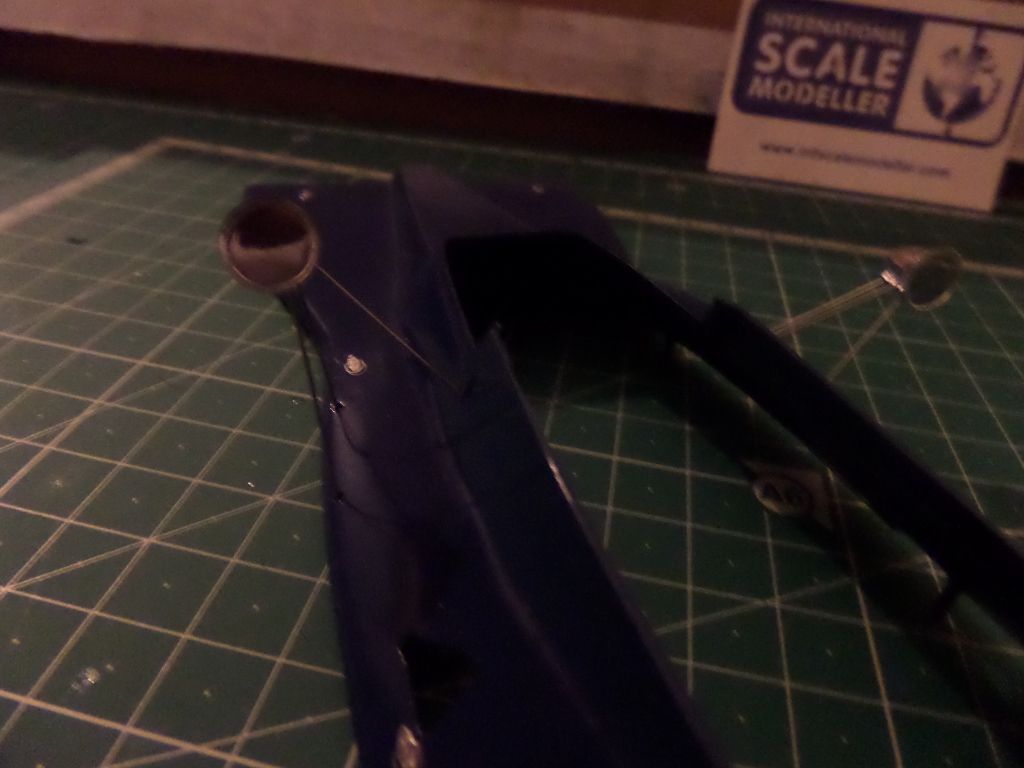
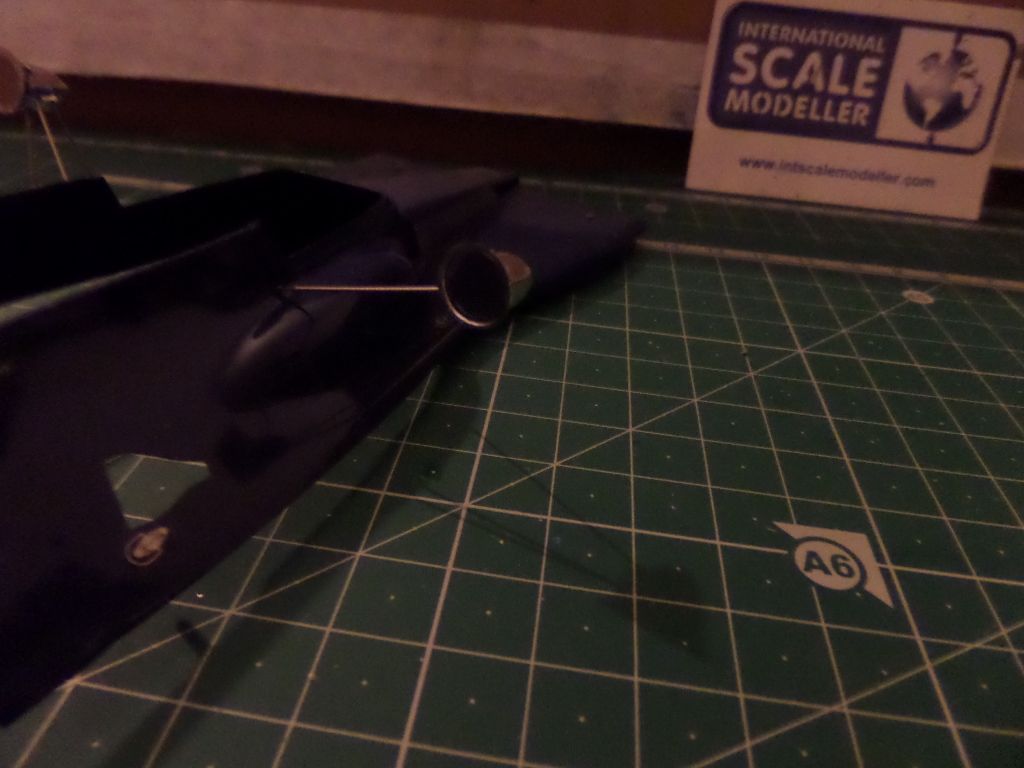
Rear wing
the lateral is in PE
done the front wing and radiator PE Grill
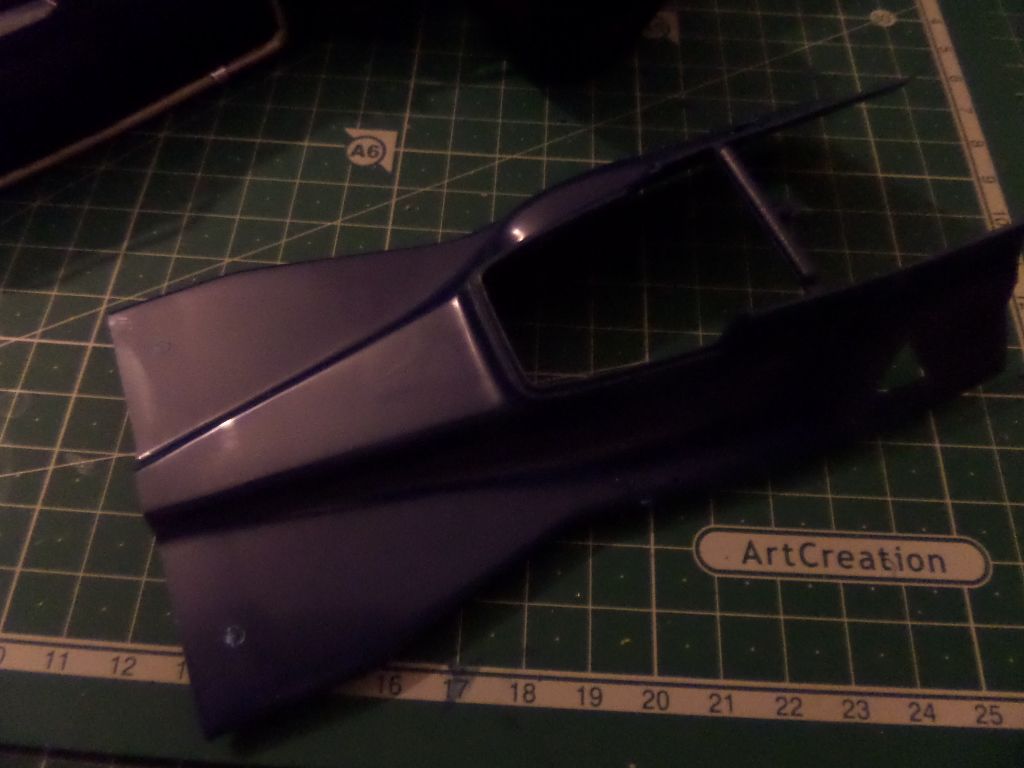
upper chassis cover , remove the locks so to be replaced by PE ones ...not an easy task of the build , done very carefull in order to not to damage the body
rear wing placed after painted
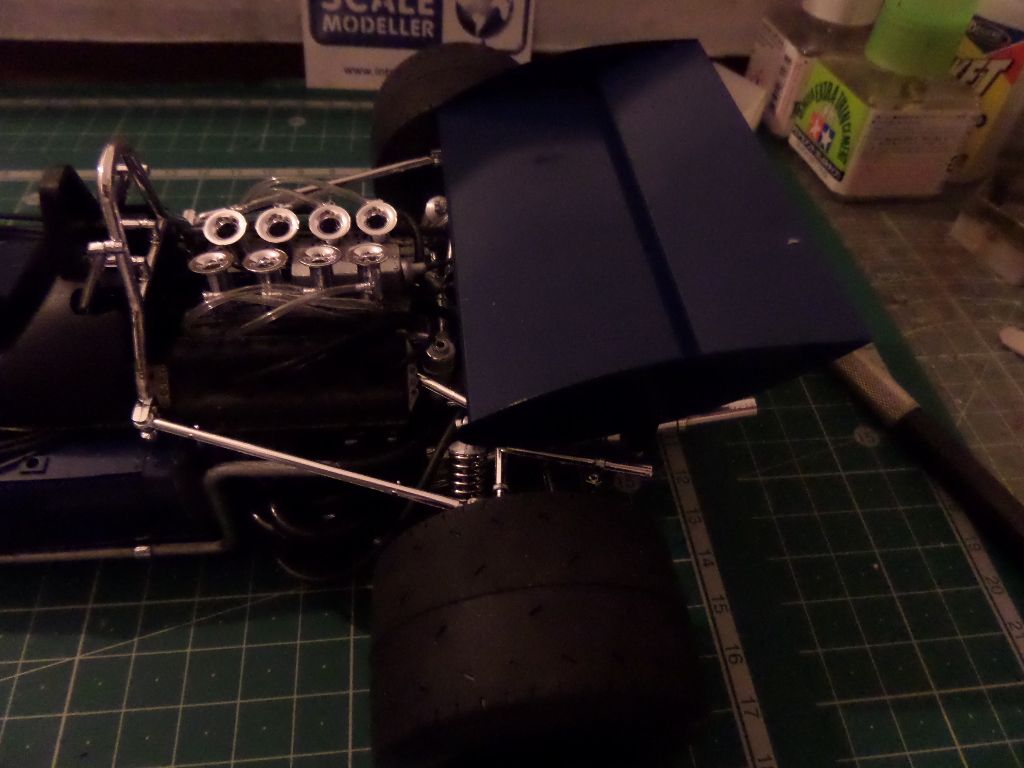
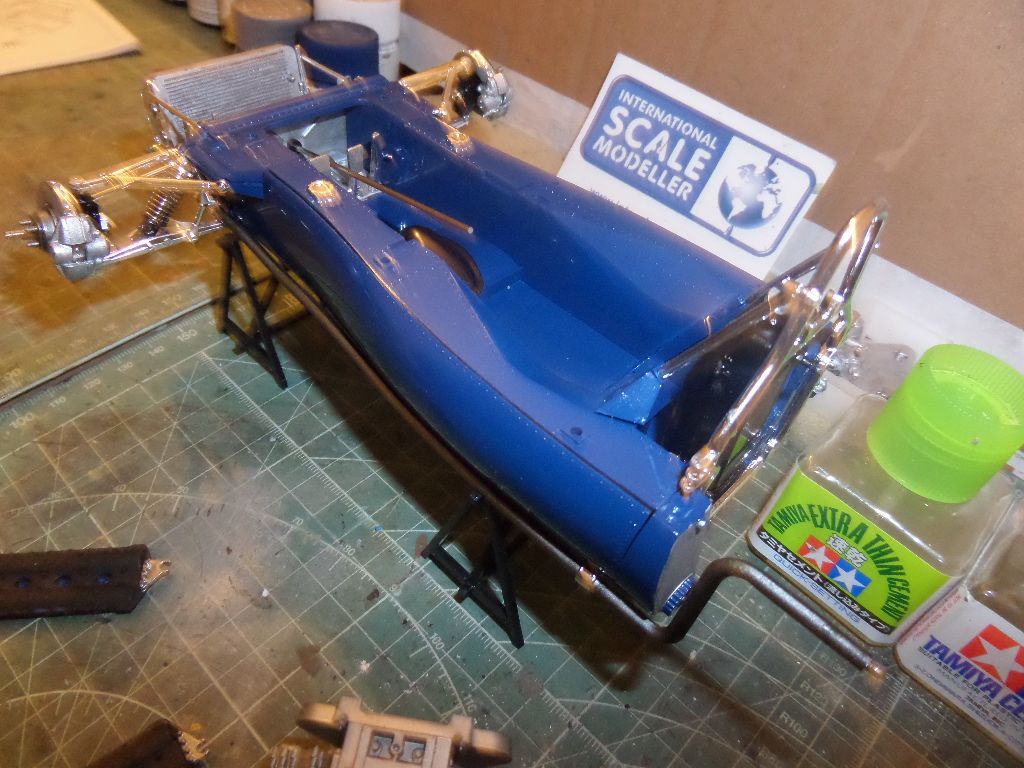
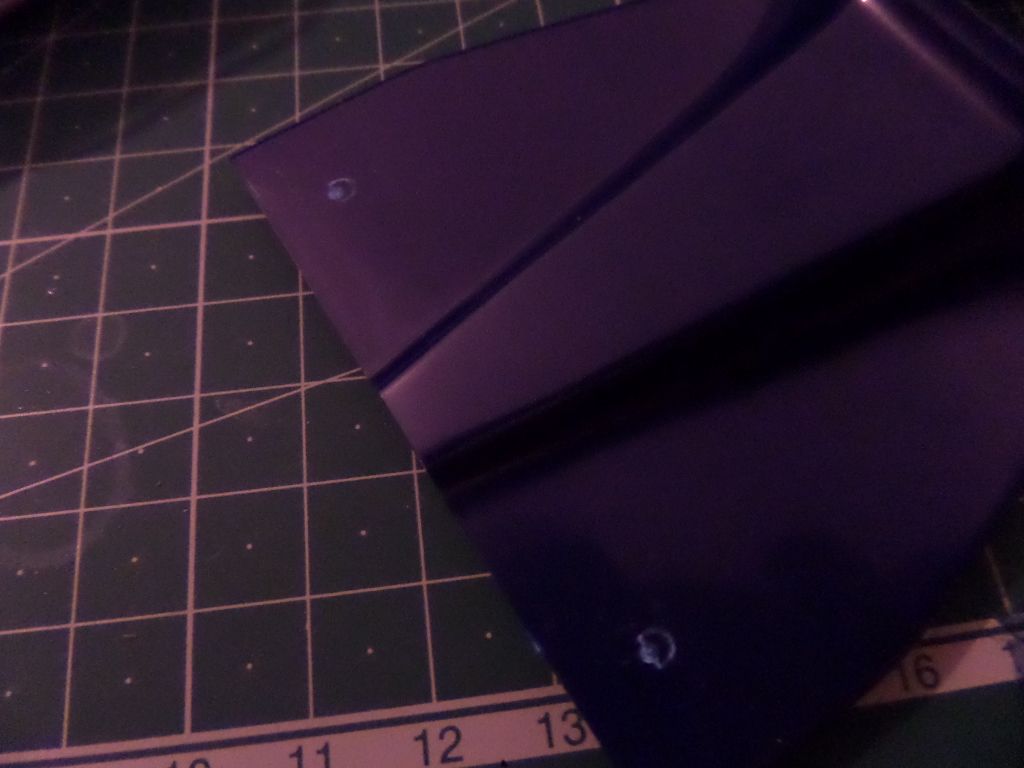
The upper body part cover
Mirrors
Again used the metal transfers ...nice detail
Mirror supports...me not like this ...
After a big strugle , to check and recheck the position ...get to place the mirrors ...with some mistakes ...boy my neighbours today listen all the names that I can throw at this ...but done !
Mirror...mirror ...on the Tyrrell
The car is done and ready for decalling , and now will be the final reveal just after palcing the decals !
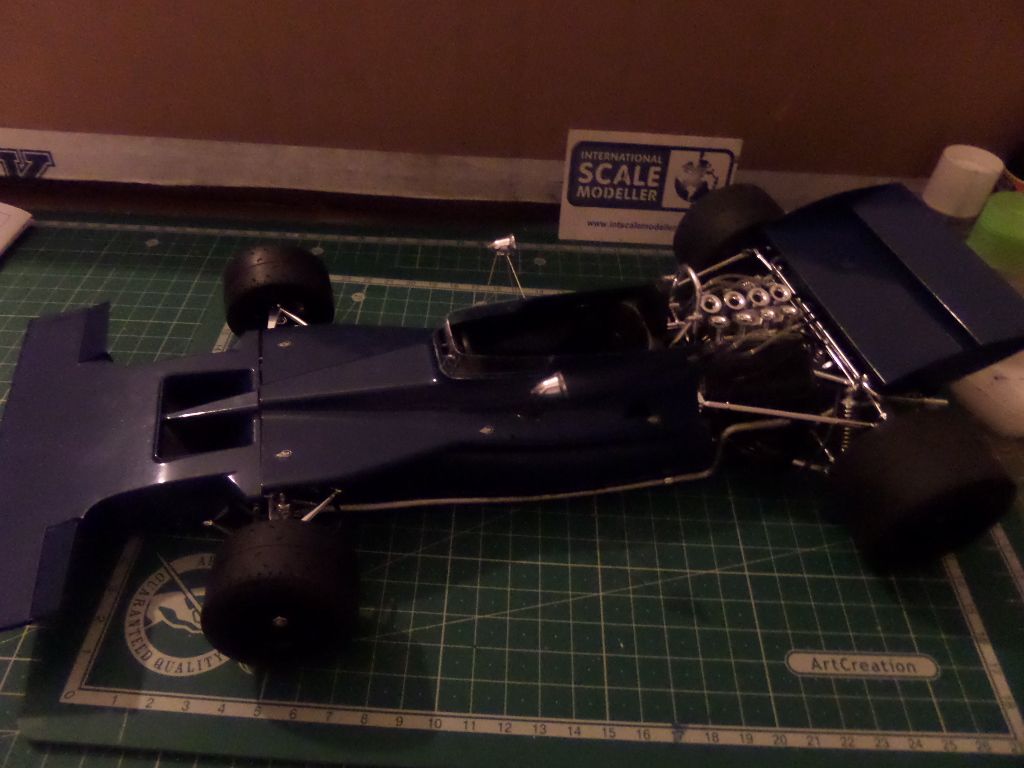
Hope you have enjoyed the build ! My considerations of the kit and the final reveal photos here :
http://intscalemodeller.com/viewtopic.php?f=532&t=20597
I started then with all the engine cables , the distributor was done , and then placed on the engine with all cables connected

All connected...more easy than it looks ...only issue to fix the cables, I used CA glue

A mess of cables

Started the rear suspension arms


Schock absorbers

Radiators

Again this radiators are plastic and take a grill of PE
Start making the kit in the kit ...The Ford DFV V8

Also the supports and all the suspension arms

Disc brakes

Some deposit ...painted with XF-2 White


Radiators done with some more cables to do

Another cable

And fixed the engine to the chassis :

Must say that it is a very nice detail , even OOB


Now let's go to the tub ....seatbelts, nice tissue stickers belts

PE for the seat belts


Must cut the seat ...not that easy ....


PE done

Here I made a mistake ...I use a scissor to cut the seat belts ...wrong , they are pre cut and can be removed from the paper easily !

see...this was cutted ...no need

I was making the seatbelts and placing them in the board of the paper so not to loose the glue

see...easy to lift uo and remove fro the paper

Very nice detail ...They could do this for the 1/24 cars , much better than the usual decals ...

All done !


I cut then the seat ...went ok , just check the measures and position and you will be fine !

Added the seatbelts !


Added the seat to the car tub

ohhh sorry didn't turn the light in the workshop


Instruments :

first decals ....

hmmmm metal stickers

after painting the instrument panel ...not too many instruments and gauges compared to today's F1 cars ...

nice !

must place now the metal sticker in the lateral gauges

As it was something that I never done , I check the instructions, seem similar to the tyre decals ...place the sticker and rub gently , the remove the transparent film with tweezers ...ok , seems simple enough !


done and continuing with the building

on the rear , there are soem detail , again to add some cables ...nice !

Added steering wheel , gear stick

more cables , from the acelerator and instrumet panel to the underside of the seat

and more cable from the rear deposit to god knows where


Tyres

easily done ...

Now to use the special tool that I done just in the beginning of the build ....yeahhhh fantastic tool ...well it does the necessary work , not very pratical though

now it is looking like a F1

Rear wing
the lateral is in PE

done the front wing and radiator PE Grill

upper chassis cover , remove the locks so to be replaced by PE ones ...not an easy task of the build , done very carefull in order to not to damage the body


rear wing placed after painted

The upper body part cover

Mirrors

Again used the metal transfers ...nice detail
Mirror supports...me not like this ...

After a big strugle , to check and recheck the position ...get to place the mirrors ...with some mistakes ...boy my neighbours today listen all the names that I can throw at this ...but done !

Mirror...mirror ...on the Tyrrell


The car is done and ready for decalling , and now will be the final reveal just after palcing the decals !


Hope you have enjoyed the build ! My considerations of the kit and the final reveal photos here :
http://intscalemodeller.com/viewtopic.php?f=532&t=20597
Cheers ,
António
On the Bench
a lot of stuff right now
António
On the Bench
a lot of stuff right now
