Hobby Boss 1/72 Sukhoi T-50 PAK-FA

Post Reply
User avatar
LudvigN
Sergeant Major
Sergeant Major
Posts: 641
Joined: Sun Feb 09, 2014 11:07 pm
Location: Göteborg, Sweden
Sweden

Hobby Boss 1/72 Sukhoi T-50 PAK-FA

Post by LudvigN »

The construction of this kit has already proceeded a decent way when posting this so this first post will be ULTRA LONG :)

I have done a very thorough kit review in the review section which can be found HERE so I will not do any reviewing here. I will only show sprue shots and the WIP-shots. This is a prototype aircraft that havent seen service to this day (i think) and most of the development is still top secret. This is why there is so few reference photos out there and I guess that's why the paint callouts in the instructions for the interior is so sparce. Most of the paint scheme in the interior and the landing bays are made up by me since I lack the reference for it. The same goes for the details I suppose. I can't really blame Hobby Boss for this since they couldn't find the reference for these things.

In the review I mention the big issue I had with this kit before I started and that was the scale of the kit. The kit feels like its more 1/60 scale than 1/72 and it just feels too big. I will illustrate this better when I come to the ejection seat with a photo.

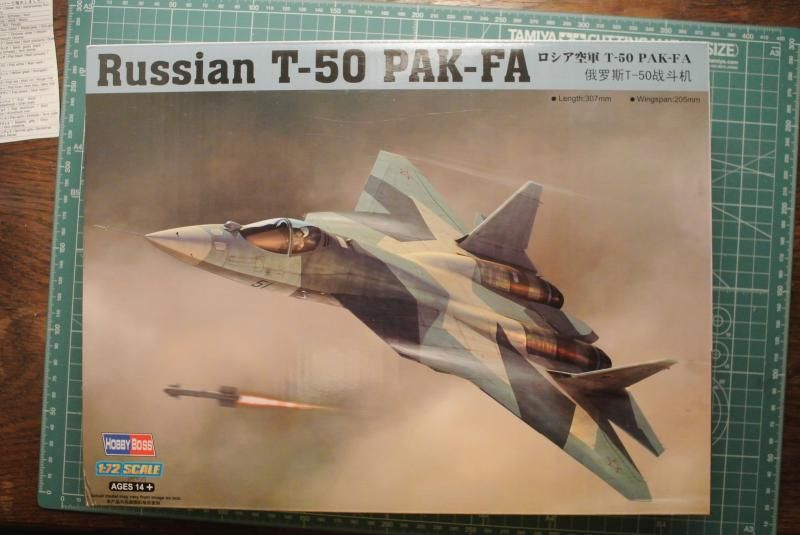
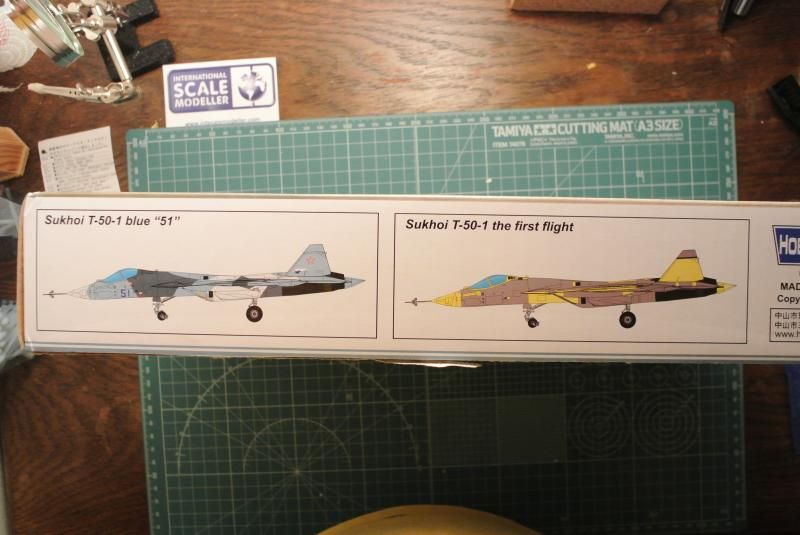
I feel obliged to tell you that I bought this kit mainly because of the cool camo-scheme on the box art and because it was a new tool. This is my first jet build in ages and also my very first Hobby Boss build so I was pretty excited to build this. Here it goes :)

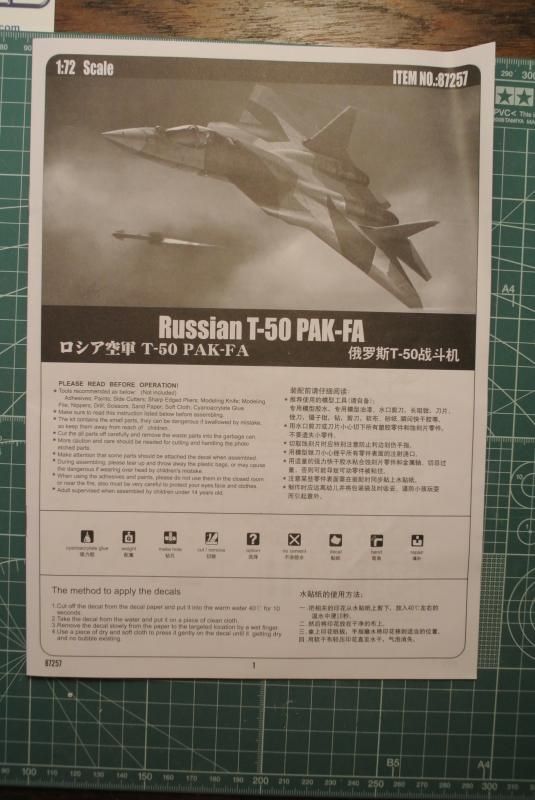
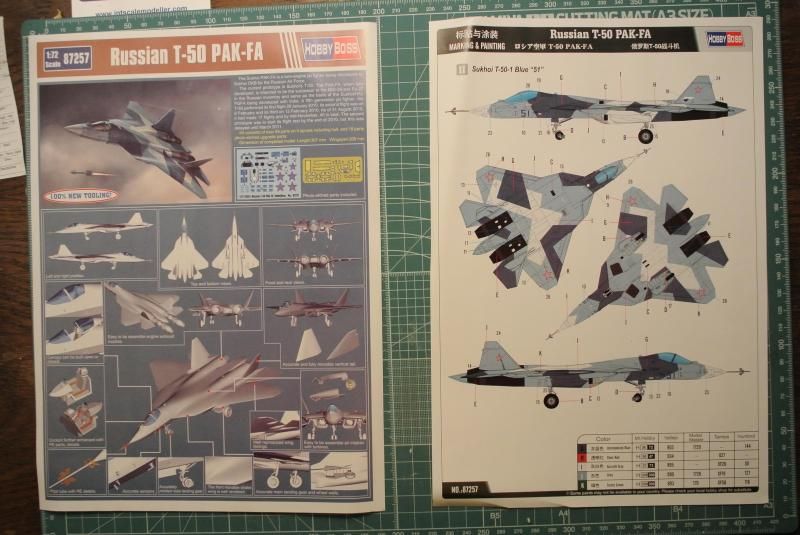
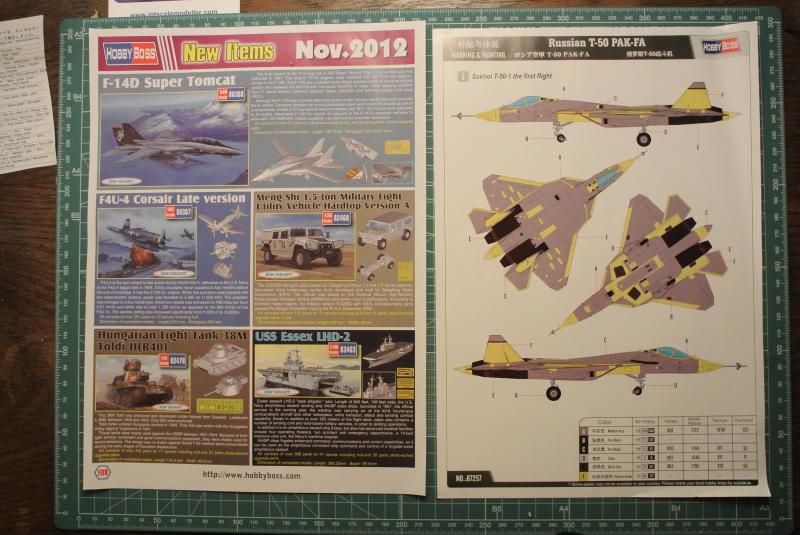
The very cool box art with the very nice camo.
Image

The provided options:
Image

Image

Image

Image

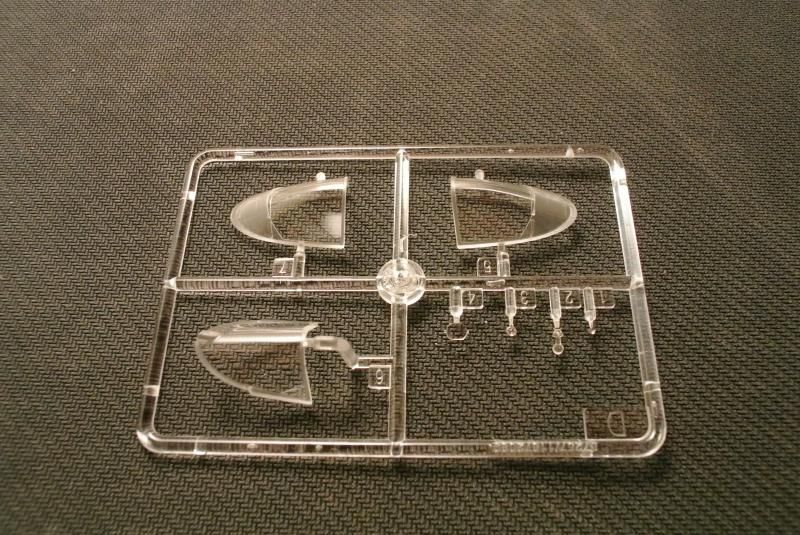
These clear parts are certainly the best looking clear parts I've ever seen on a 1/72 scale. However that might be why, since this is just too big for 1/72 :)
Image

Not sure how to go down with these decals. Do they work with Micro Set/Sol?
Image

Image
Image

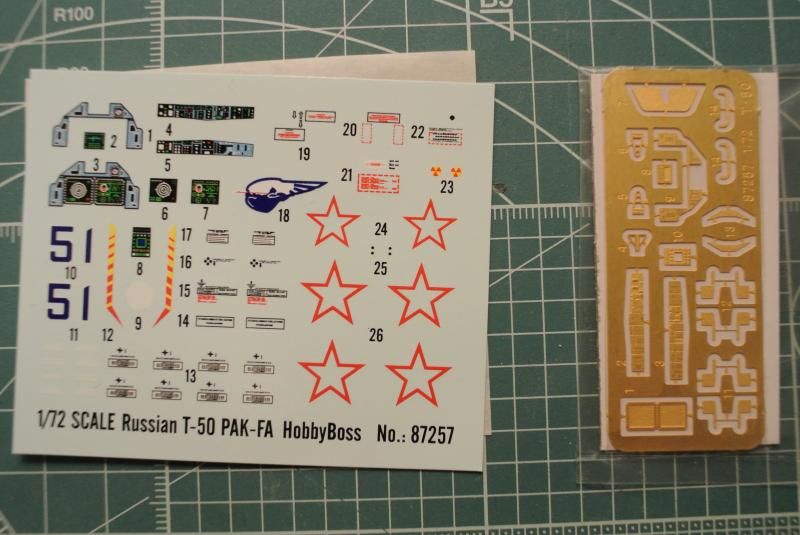
Nice colored paint callouts.
Image

Image


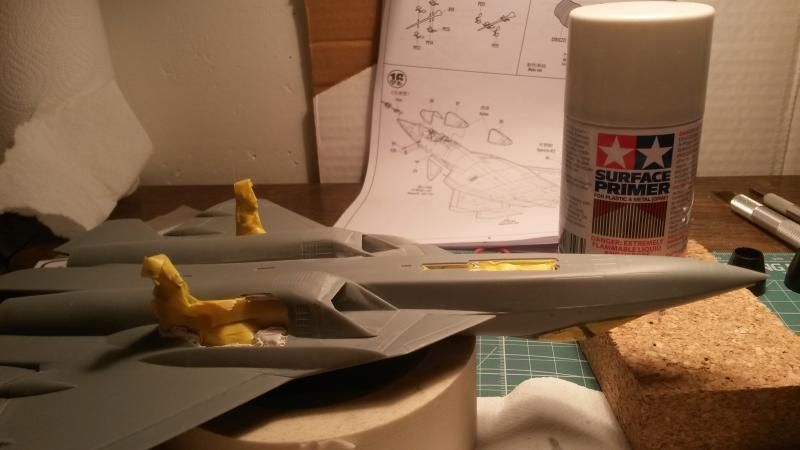
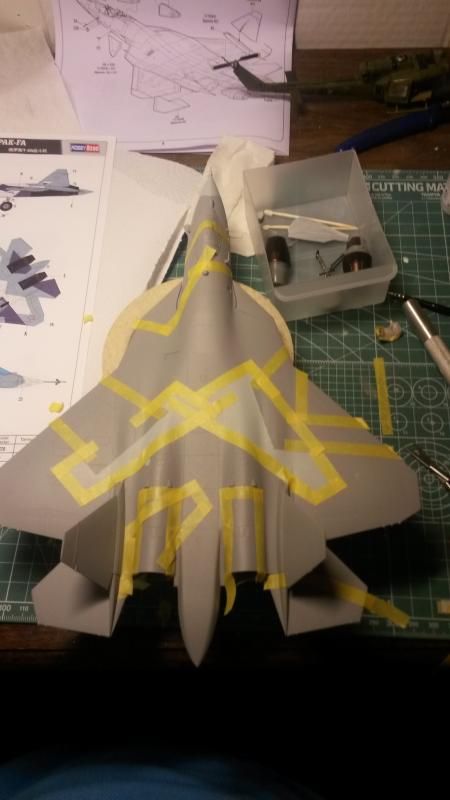
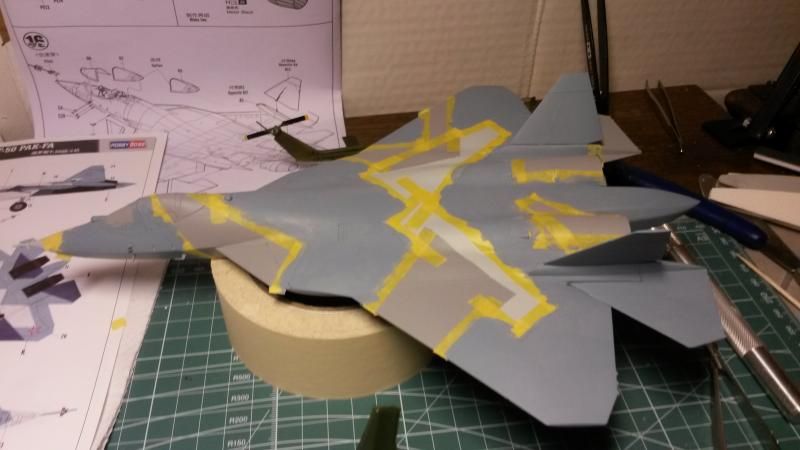
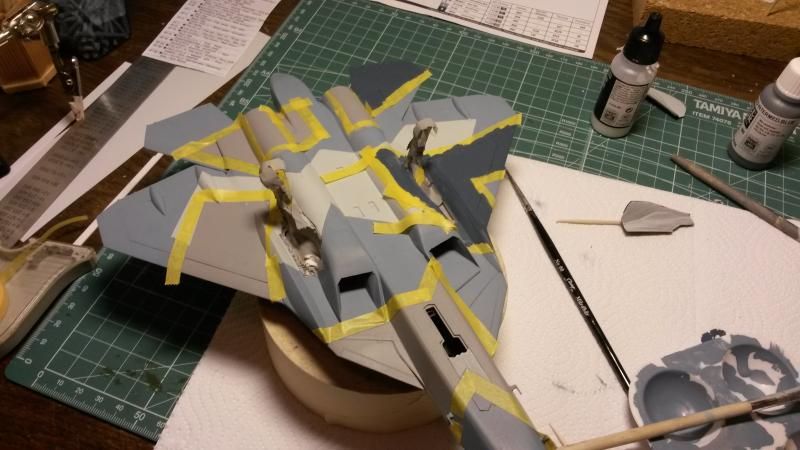
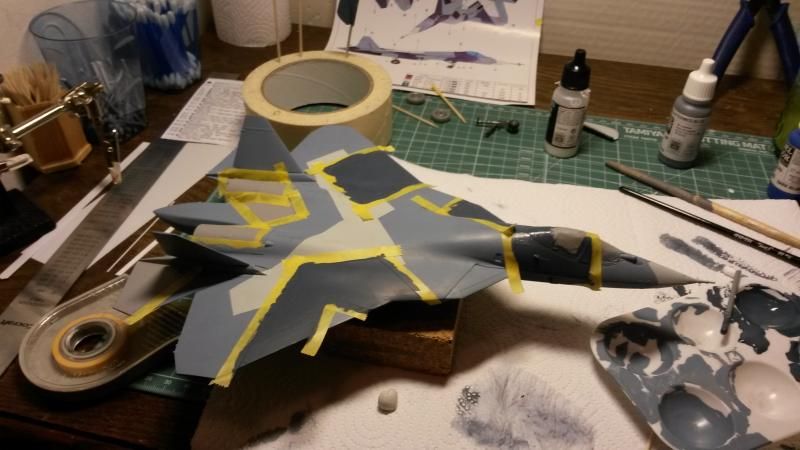
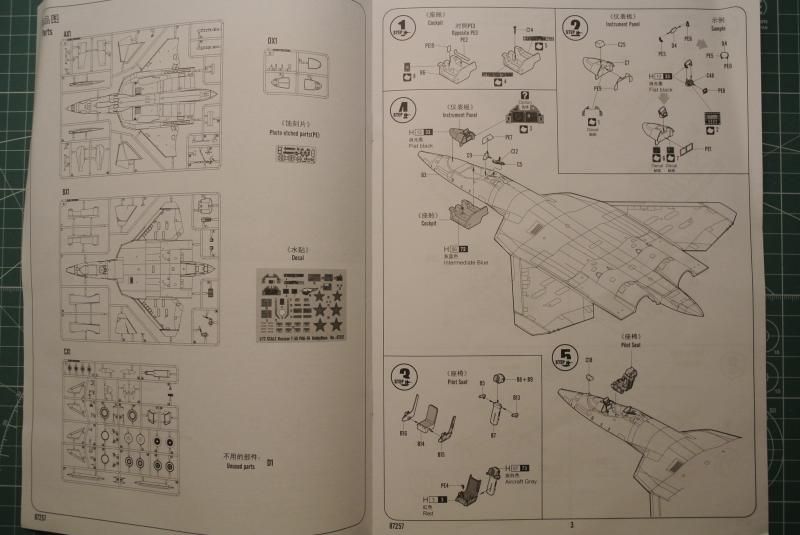
The build is already under way and here follows some construction photograps:

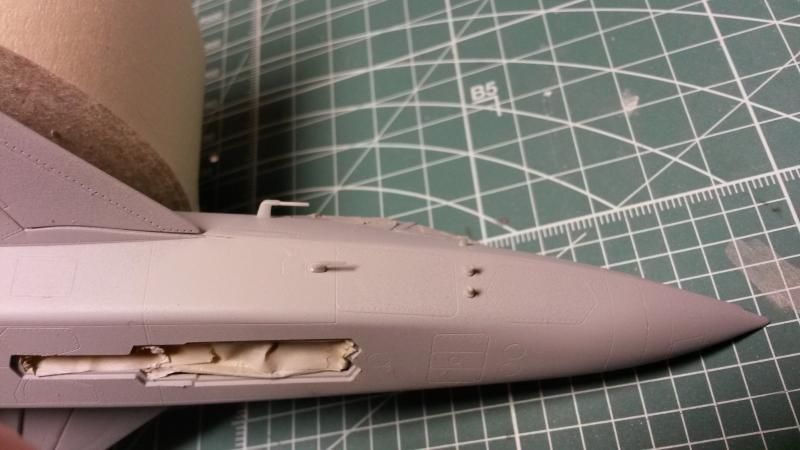
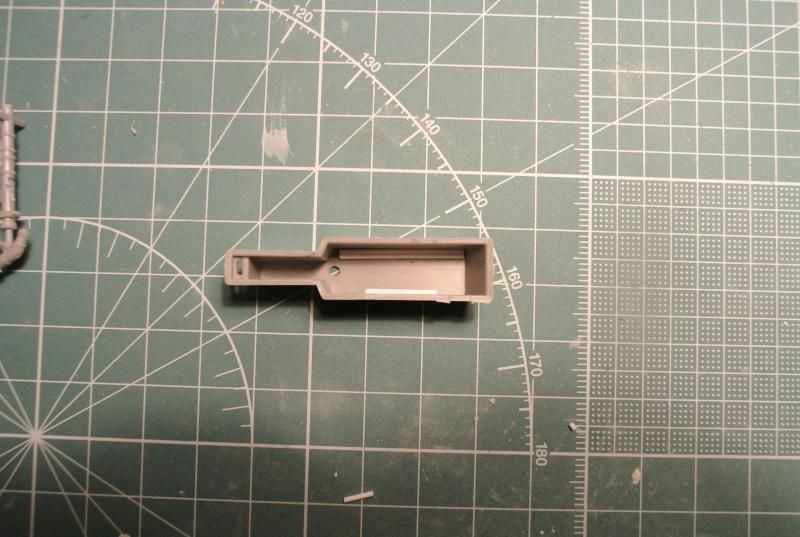
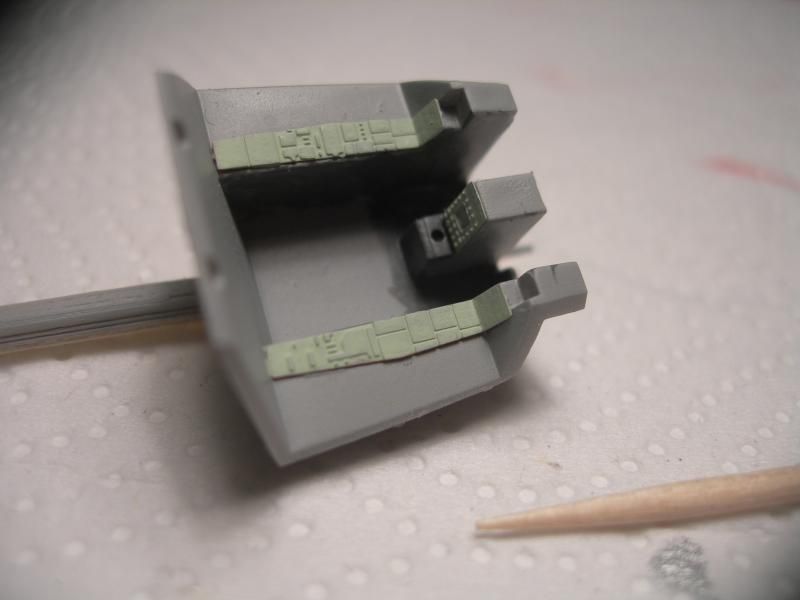
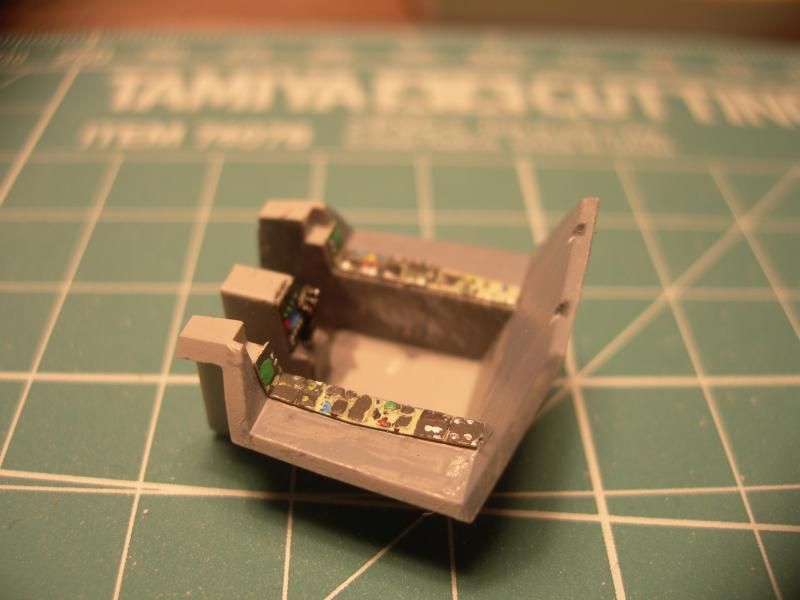
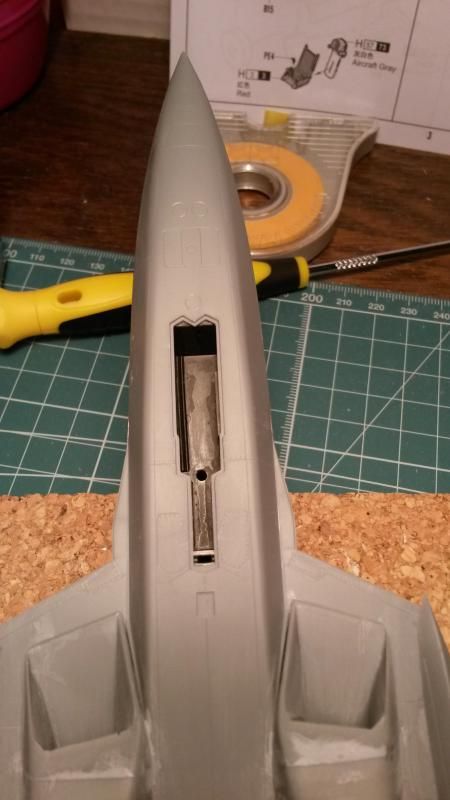
Some very mild scratch building here in the forward landing bays. They were completely blank so I just put some styrene in there to make it look more busy.
Image

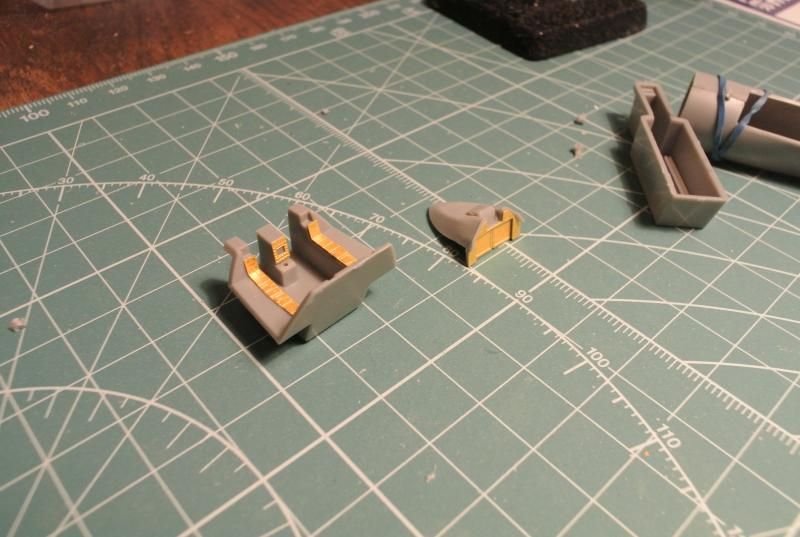
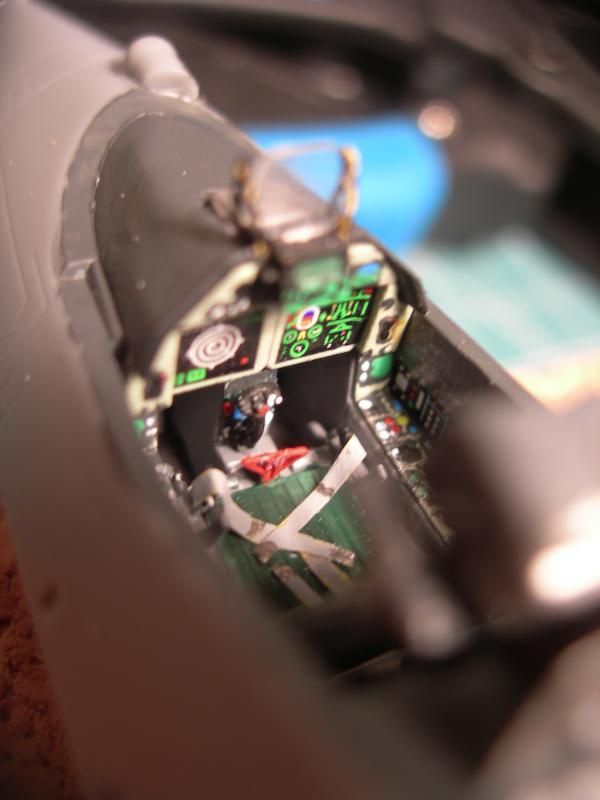
I went for the photo etched option in the cockpit.
Image

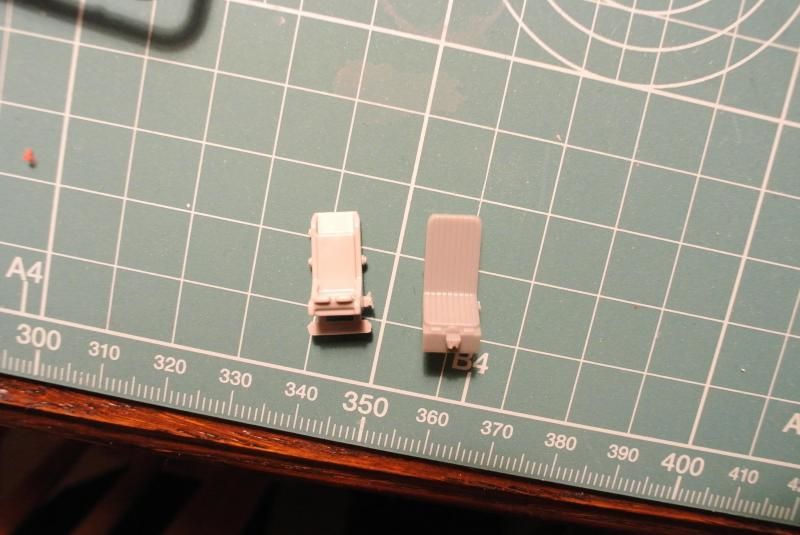
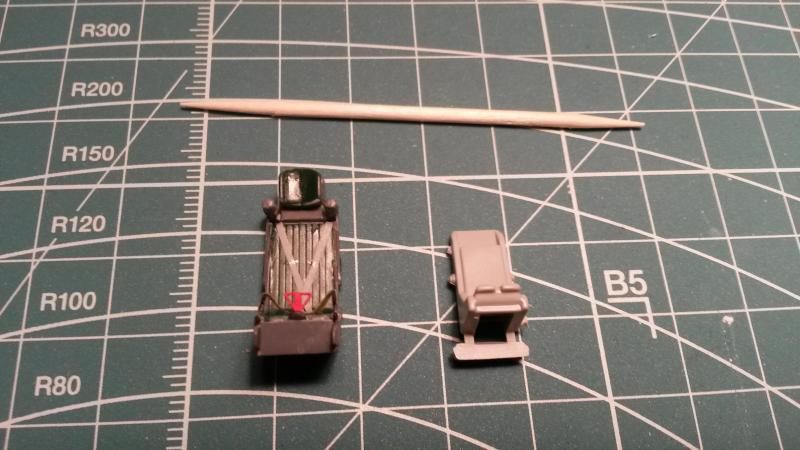
Again, here is the comparison of the two seats (the left one is the seat from my 1/72 Merlin heli) and first is the non constructed comparison.
Image

Here is the comparison with the seat built up. The difference is striking. Can't belive Hobby Boss missed this. Looks more like a 1/48 seat to me.
Image

Image

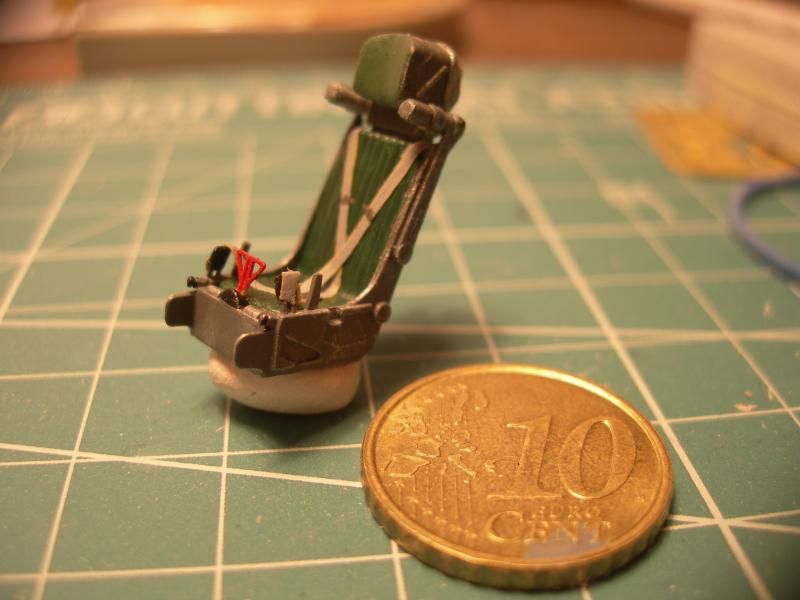
I'm quite happy with the seat in general. Had no reference photos to paint it from. The belts are made out of masking tape. It was really easy to work with this seat cause of it's large size. It consists of 5 different parts, and that's pretty nice.
Image

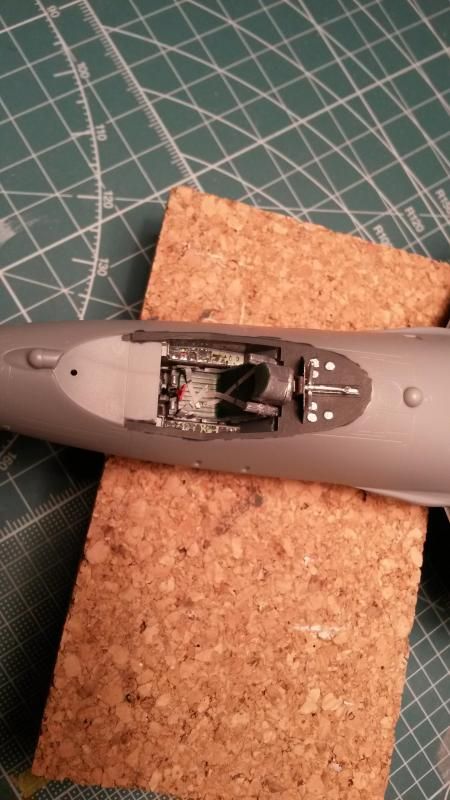
The cockpit is primed and base colored ready to be detailed.
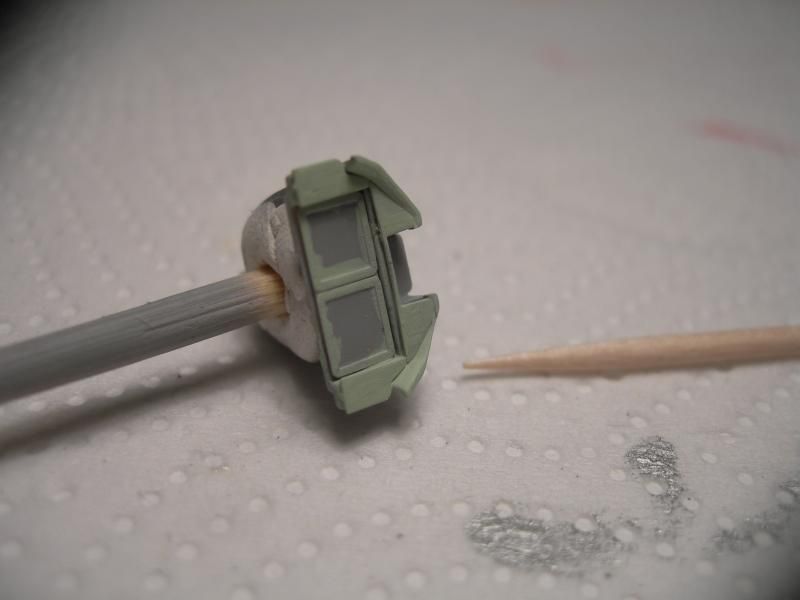
Image

Image

The tub painted up.
Image

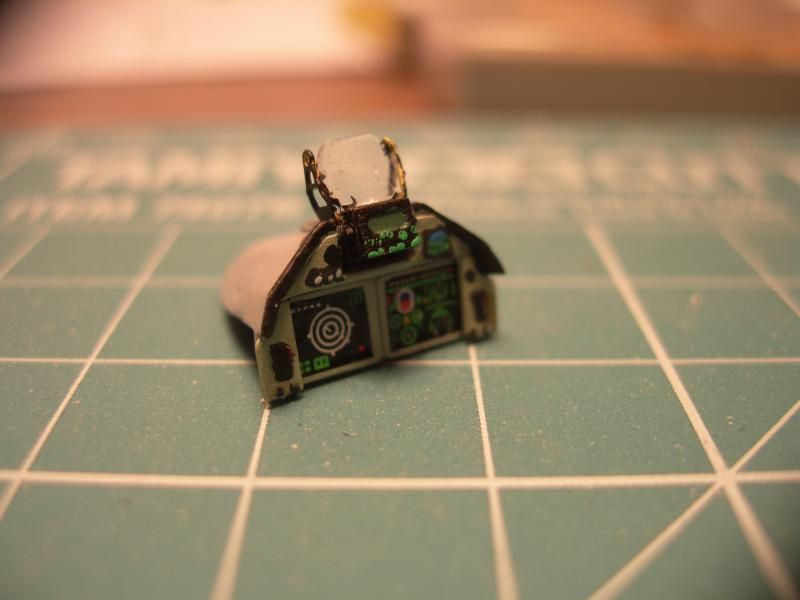
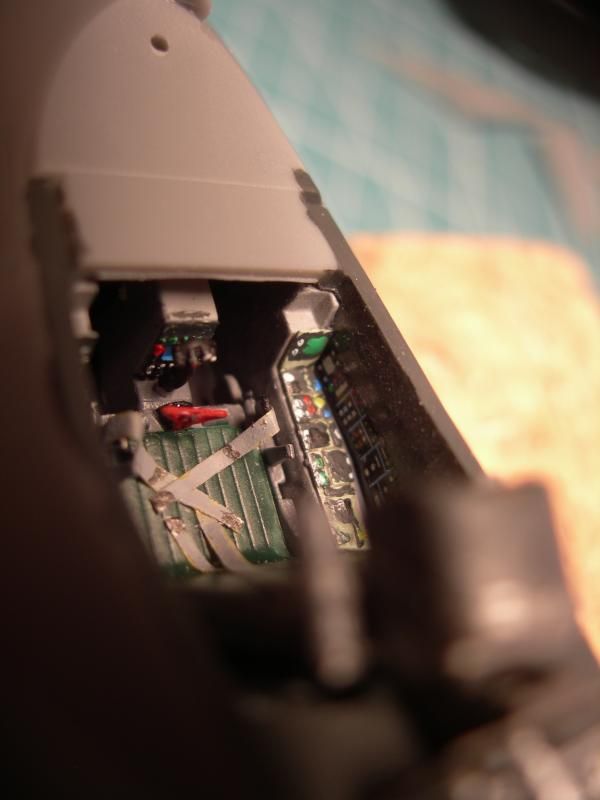
This instrument panel consists of 7 parts plus decals and that's pretty cool for 1/72. Unfortunately the HUD-arms made out of PE had to go because they would'nt fit under the canopy. :wall:
Image

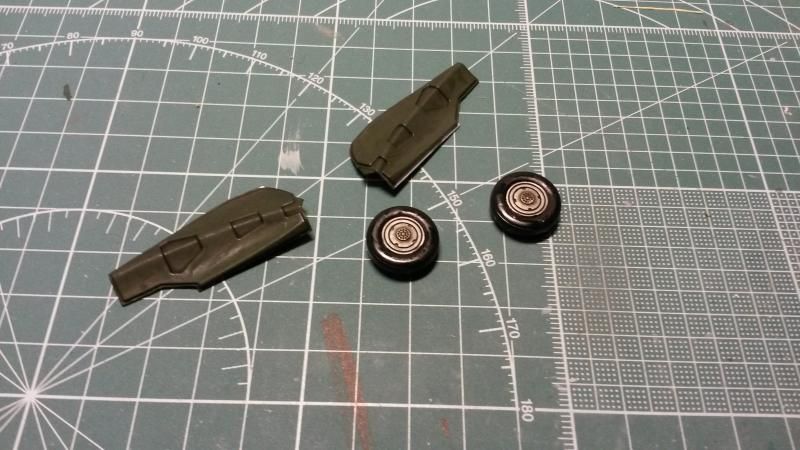
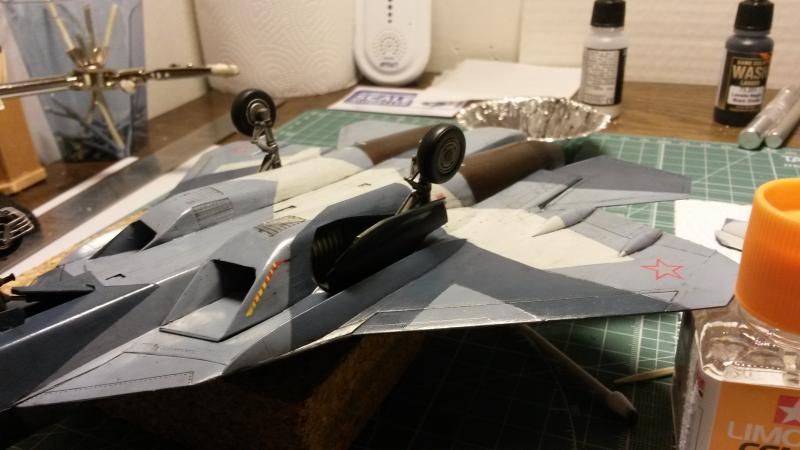
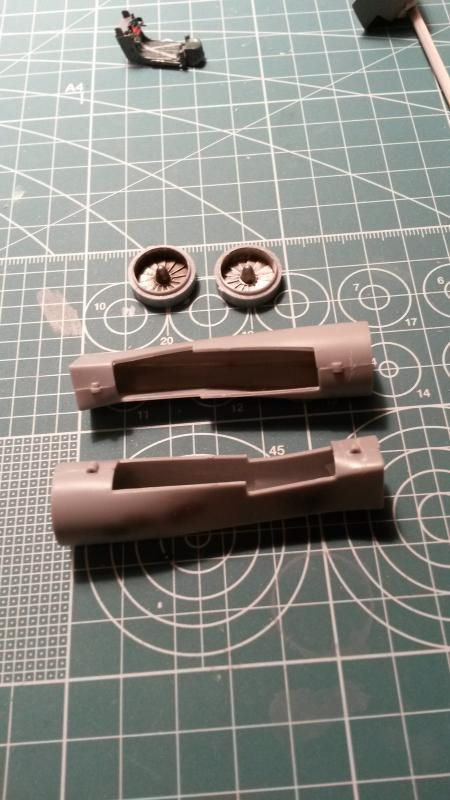
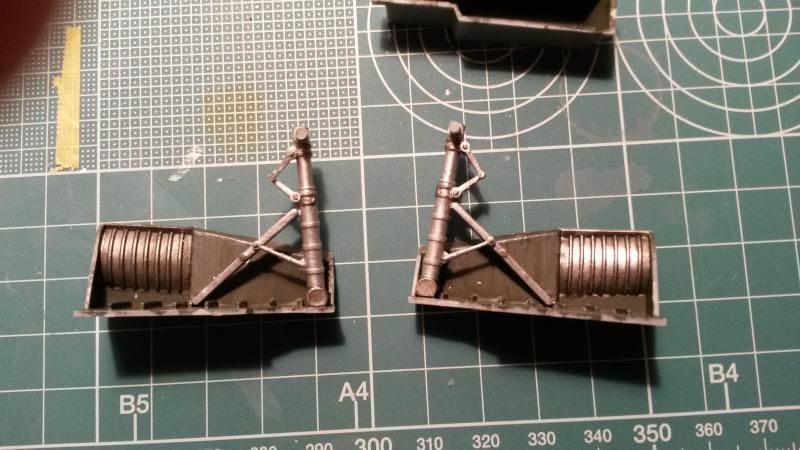
I usually want to build the landing gear last but the construction of this kit prevents me from postponing it.
Image

Got rid of the strange marks.
Image

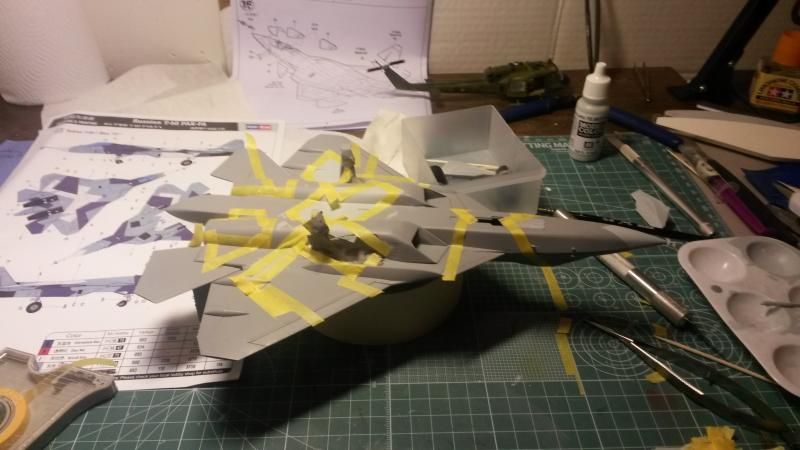
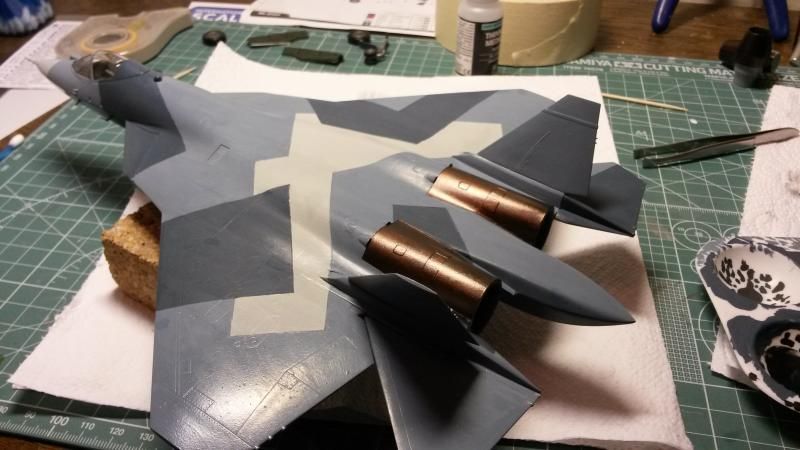
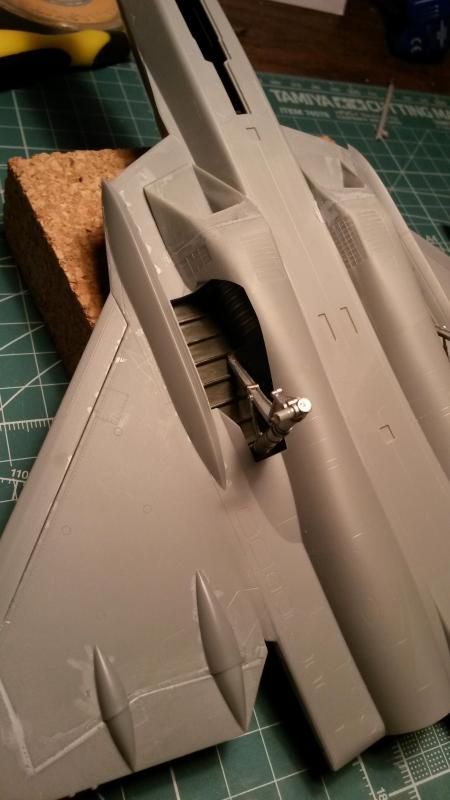
Gluing the intakes. These had a fairly bad fit, and the worst fit so far in the kit. The fit overall so far is pretty good.
Image

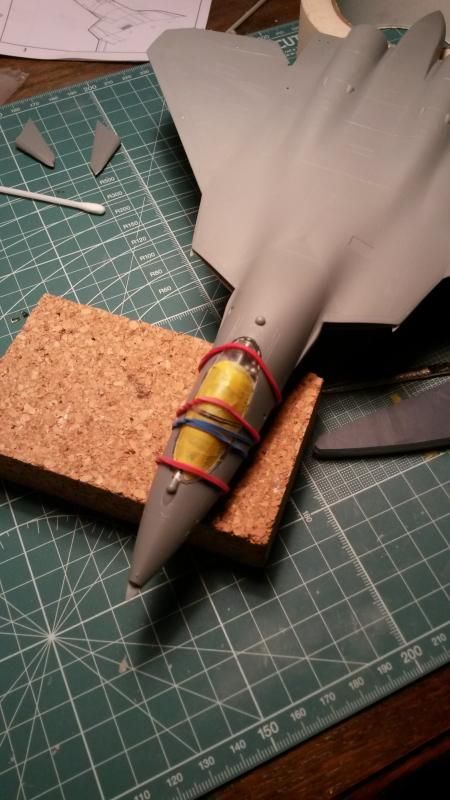
Weighted down the nose. Not sure if it's necessary but Im not the risk taking guy :thumb1:
Image

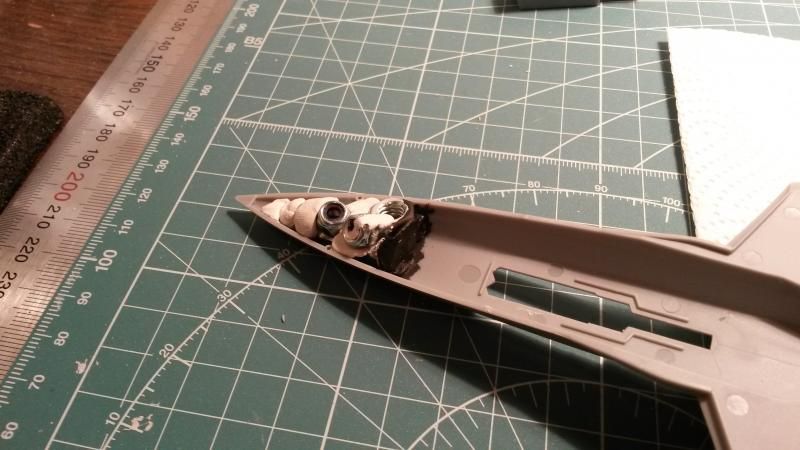
Assembled the intakes together with the landing bay and the glued it in. The tub is also glued in.
Image

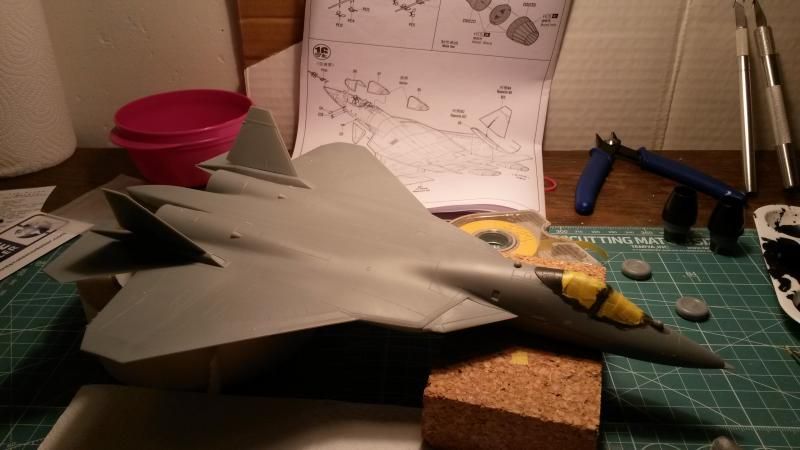
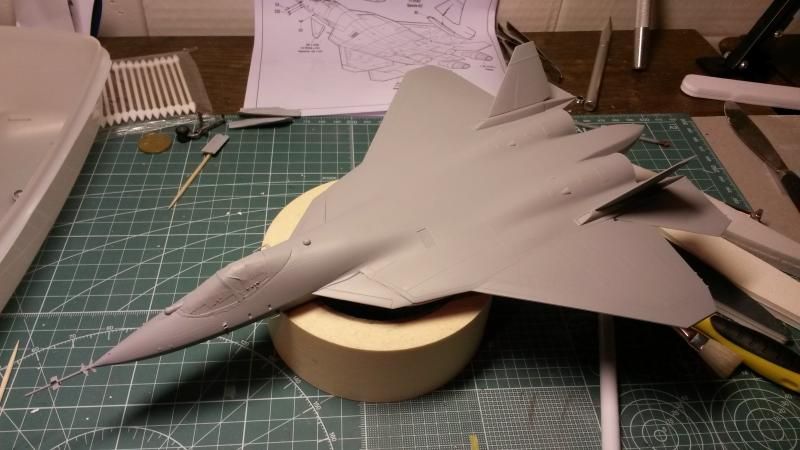
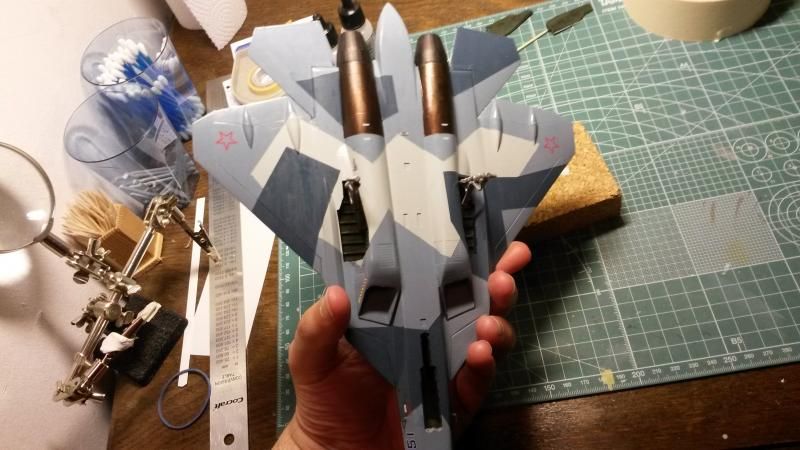
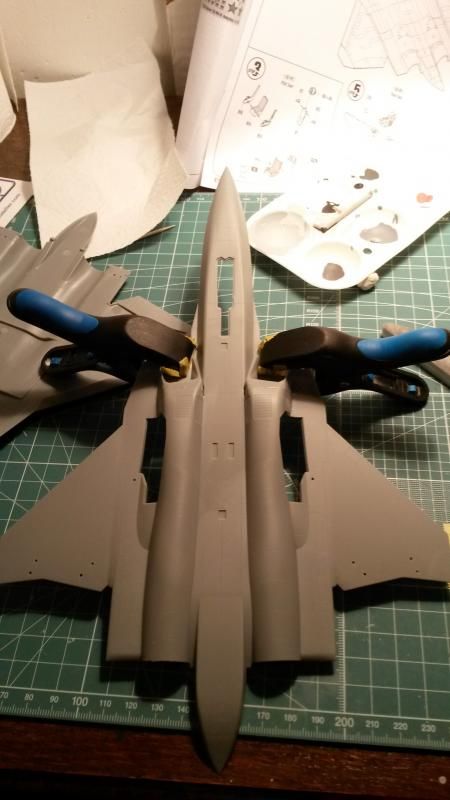
The fusilage glued together.
Image

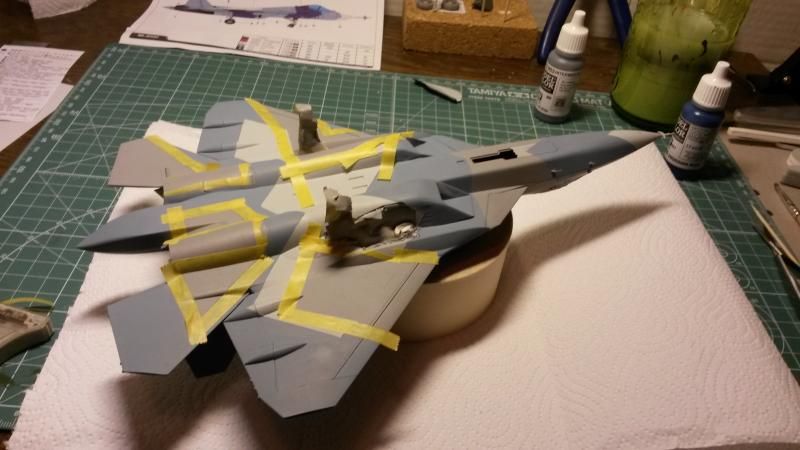
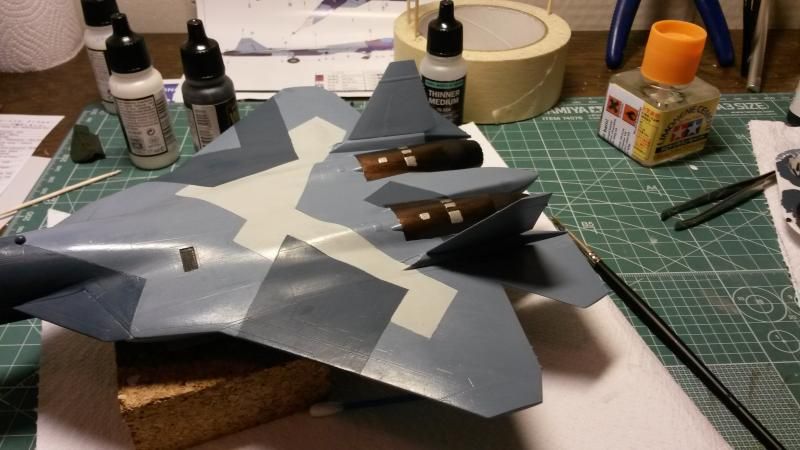
Some filling done and glued on the pylons.
Image

Image

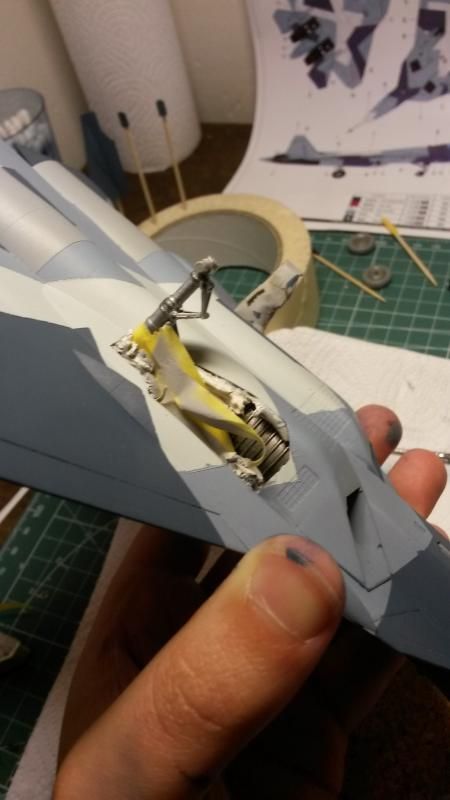
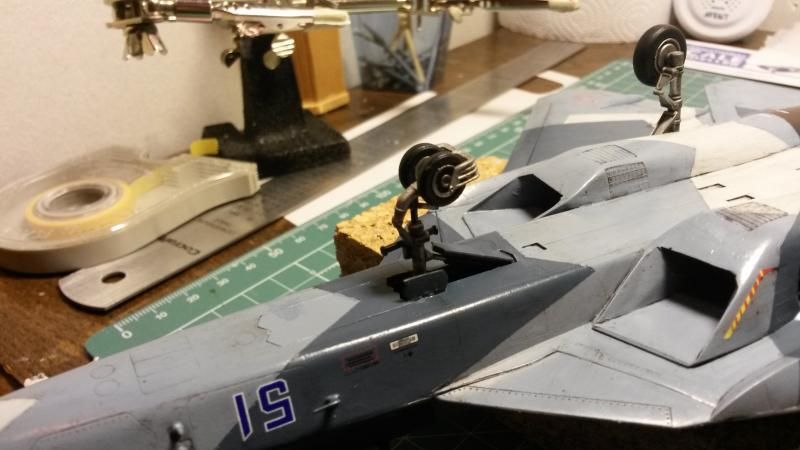
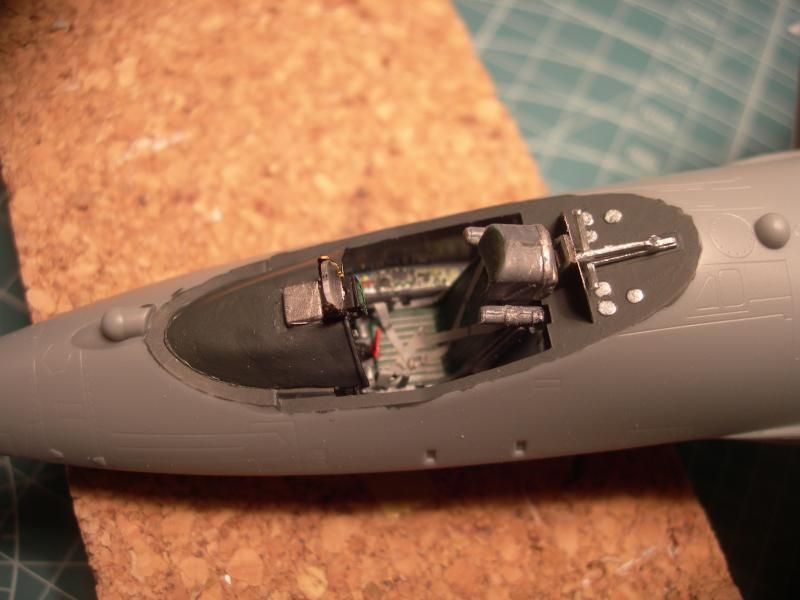
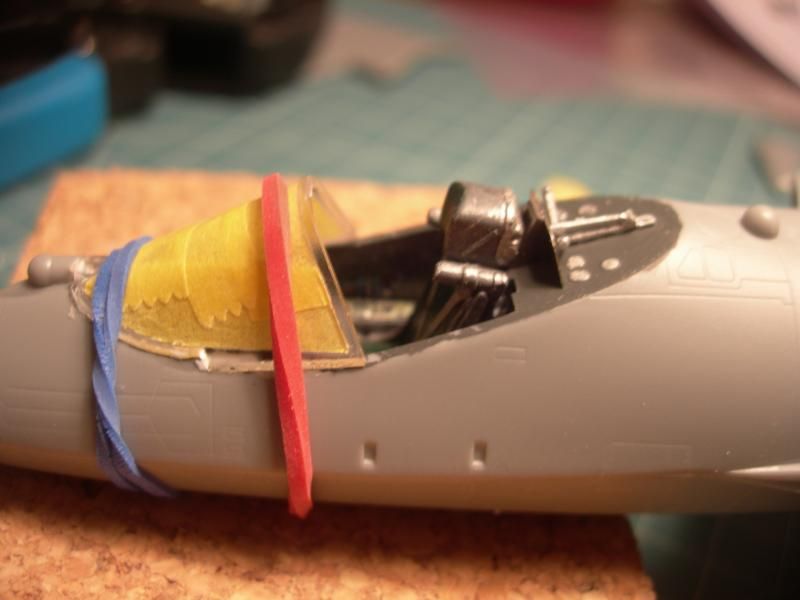
Jammed in the seat to the tub. The canopy attachement-thing behind the seat is made out of photo etch and plastic.
Image

Image

The seat is just too damn big. You can here see the difference between the stick and the ejection lever. How would one fly like that? :bash:
Image

Final cockpit assembly:
Image

Image

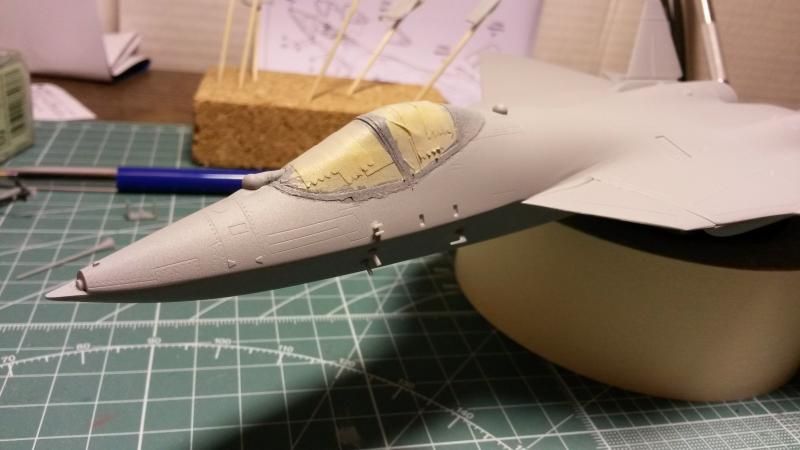
Glueing the canopy using Microscale Krystal Klear
Image

Image

The recessed detail in the canopy can be seen here when I painted the inside colour of the canopy.
Image

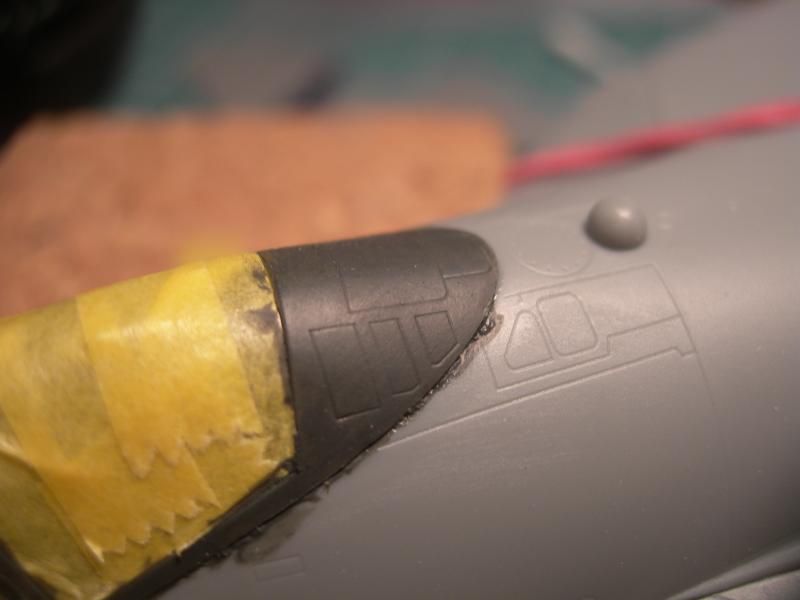
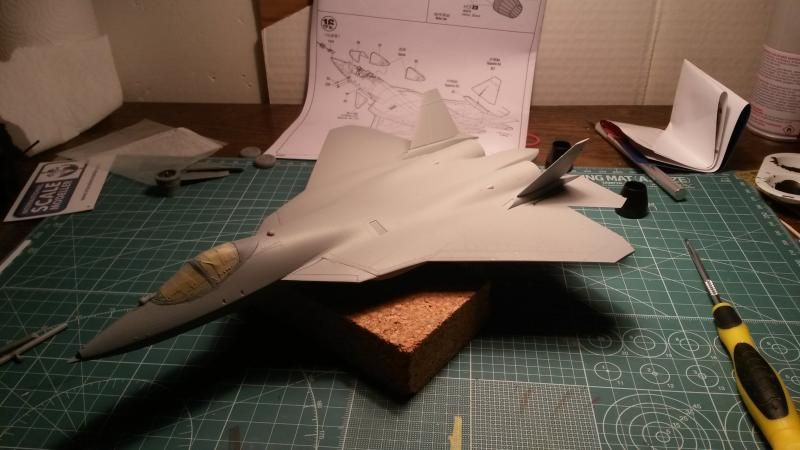
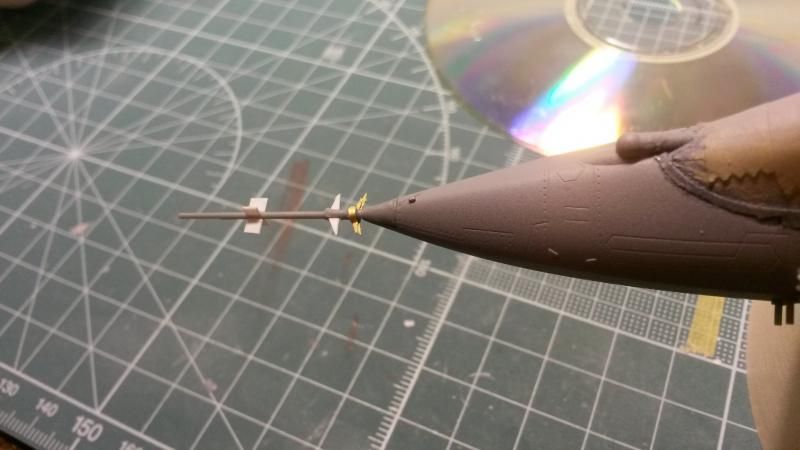
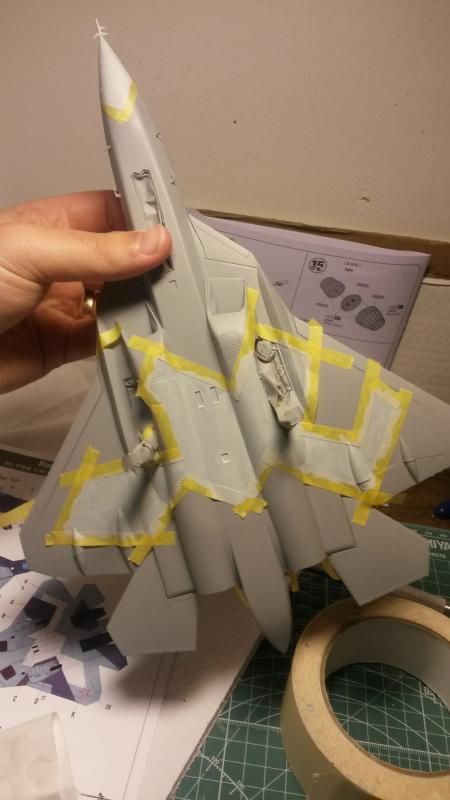
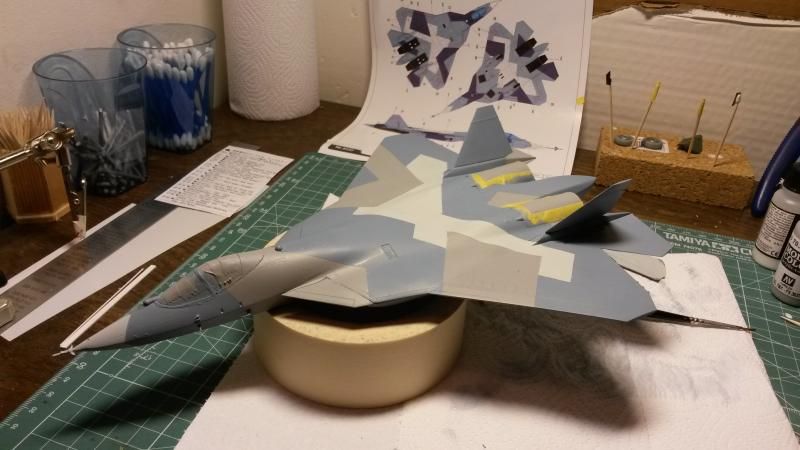
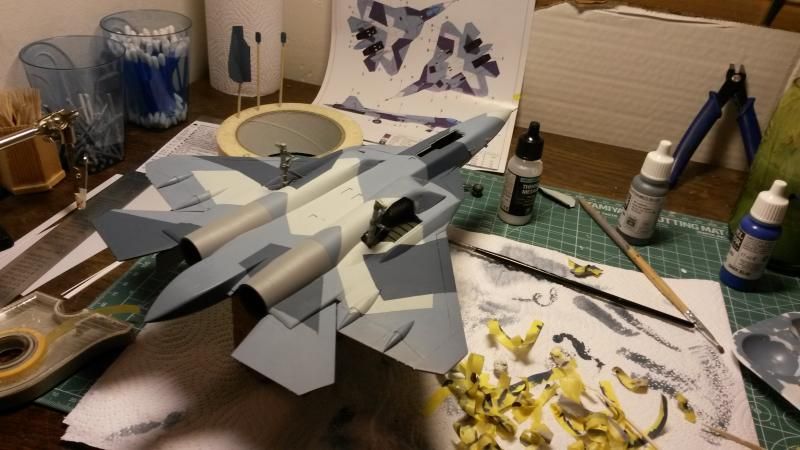
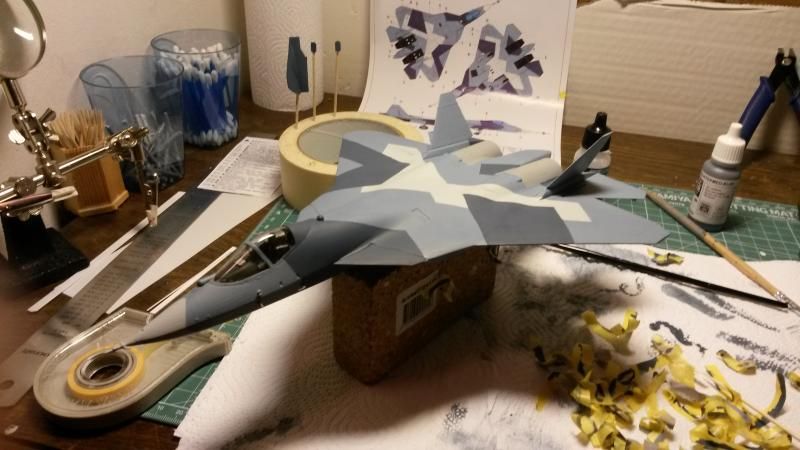
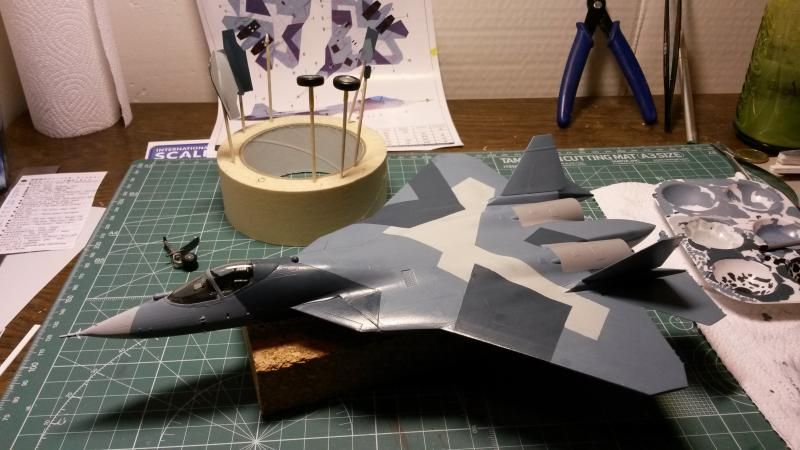
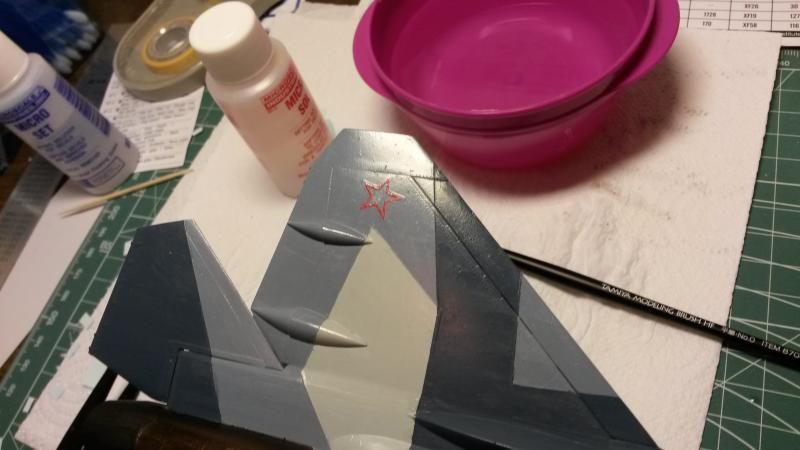
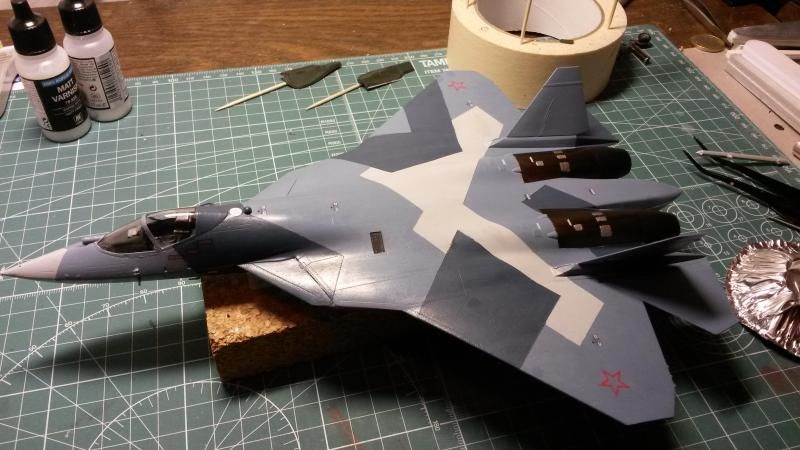
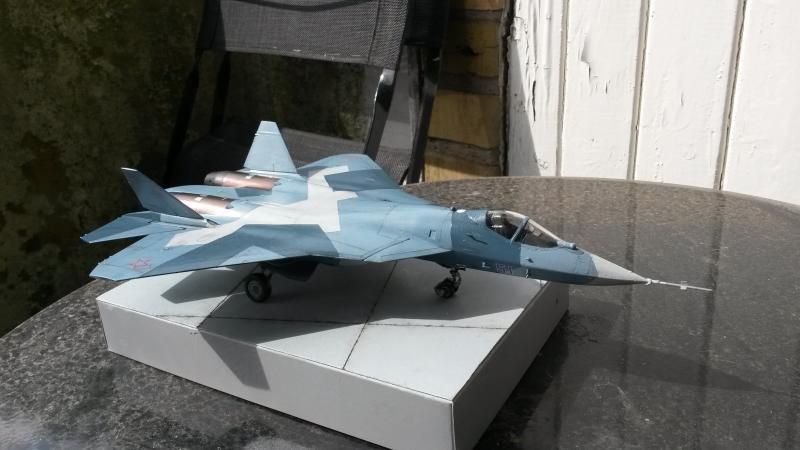
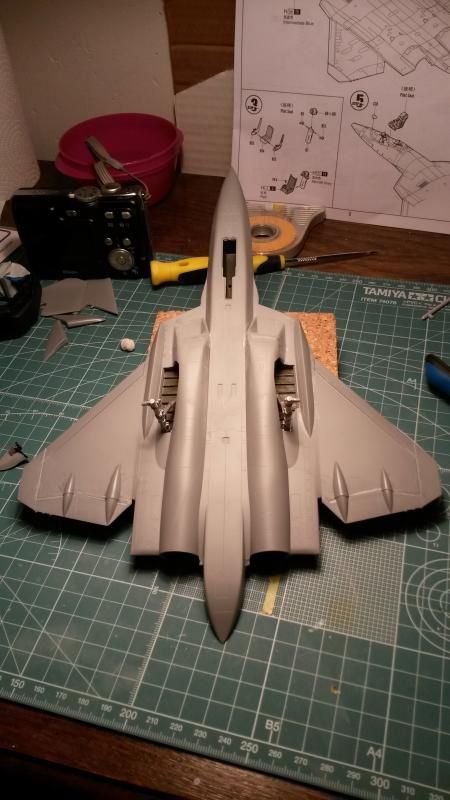
Painted the inside color of the canopy. Glued the front stabilizer and the base for the vertical stabilizer.
Image

PHEW! This was a long post. Will try and finish this kit pretty fast since the nightfighter SiG has already started and I don't want this hanging about. Until next time,

cheers
Ludvig :cheers2:

On the bench:
Airfix 1/72 A-4 Skyhawk
Italeri EH-101 Merlin HAS.1 (Whirlybird SIG)

Last one finished:
Bandai 1/72 A-Wing Gallery
User avatar
gaz45
Chief Warrant Officer 3
Posts: 1971
Joined: Mon Jan 06, 2014 3:35 pm
Location: Nottingham uk
Great Britain

Re: Hobby Boss 1/72 Sukhoi T-50 PAK-FA

Post by gaz45 »

nice work there
User avatar
ScaleModelling1105
Sergeant First Class
Posts: 286
Joined: Mon Oct 28, 2013 10:00 pm
Location: Chichester, West Sussex, England

Re: Hobby Boss 1/72 Sukhoi T-50 PAK-FA

Post by ScaleModelling1105 »

Looking great so far. That seat really does look huge. Good luck with the rest of your build.
Will Hall
ScaleModelling1105
Check out my channel:
https://www.youtube.com/channel/UC8k6eL ... 9pK65QlXCg

What's on the bench:
Revell 1:48 Supermarine Spitfire Mk.XVI (Duke of Edinburgh Silver Award)
User avatar
LudvigN
Sergeant Major
Sergeant Major
Posts: 641
Joined: Sun Feb 09, 2014 11:07 pm
Location: Göteborg, Sweden
Sweden

Re: Hobby Boss 1/72 Sukhoi T-50 PAK-FA

Post by LudvigN »

The build proceeds. I started to prime it but my rattle can ran out of juice so it's not entirely primed yet. Until the new primer arrives in the mail, I tried to push on with the rest of the parts in the kit like the tiny sensors on the fusilage, the front landing gear and the exhausts. So hopefully when I can get this primed, it will be a pretty fluid build from there.

The nice OOB exhausts. Looks very crisp for a 1/72 scale.
Image

Painted glossy black.
Image

Painted using "Warplock bronze" from citadel. Very nice to use with the hairy stick.
Image

Glossed up, ready for a wash. Will do that after the final assembly though.
Image

Some painful masking going on.
Image

All stabilizers assembled, ready for priming.
Image

Almost fully primed, if you look closely you can see the rough spots in the priming. So I will have to respray some areas on the fusilage for a smooth finish.
Image

Some really teeny bits glued on.
Image

Image

Until next time,

cheers
Ludvig :cheers2:

On the bench:
Airfix 1/72 A-4 Skyhawk
Italeri EH-101 Merlin HAS.1 (Whirlybird SIG)

Last one finished:
Bandai 1/72 A-Wing Gallery
User avatar
LudvigN
Sergeant Major
Sergeant Major
Posts: 641
Joined: Sun Feb 09, 2014 11:07 pm
Location: Göteborg, Sweden
Sweden

Re: Hobby Boss 1/72 Sukhoi T-50 PAK-FA

Post by LudvigN »

Quick update. Had a go at the pitot tube wich consists of 1 styrene tube and 8 ultra small photo-etch parts. I had a go at bending those teeny pieces but I lacked the tools, expertise and patience when it all when to hell. I just replaced the PE with some tiny plasticard. It may look like it was put together by an 8-year old, but I just couldnt take the heat!

Image

Re-primed the surface again, with the tube installed.
Image

Will probably start painting it tonight and then push on tomorrow and maybe finish it this week :whip:

cheers
Ludvig :cheers2:

On the bench:
Airfix 1/72 A-4 Skyhawk
Italeri EH-101 Merlin HAS.1 (Whirlybird SIG)

Last one finished:
Bandai 1/72 A-Wing Gallery
User avatar
Paul
Site Admin
Site Admin
Posts: 12622
Joined: Thu May 23, 2013 4:47 pm
Location: Merseyside, England, UK
Contact:
England

Re: Hobby Boss 1/72 Sukhoi T-50 PAK-FA

Post by Paul »

Looking good, great looking aircraft :thumb2:
User avatar
LudvigN
Sergeant Major
Sergeant Major
Posts: 641
Joined: Sun Feb 09, 2014 11:07 pm
Location: Göteborg, Sweden
Sweden

Re: Hobby Boss 1/72 Sukhoi T-50 PAK-FA

Post by LudvigN »

Paul wrote:Looking good, great looking aircraft :thumb2:
Thanks!
Ludvig :cheers2:

On the bench:
Airfix 1/72 A-4 Skyhawk
Italeri EH-101 Merlin HAS.1 (Whirlybird SIG)

Last one finished:
Bandai 1/72 A-Wing Gallery
User avatar
UKguyInUSA
Second Lieutenant
Second Lieutenant
Posts: 3429
Joined: Sun Mar 30, 2014 10:19 pm
Location: New Hampshire, USA formerly Palm Beach, Florida, USA and Leicestershire, UK (until 1999)
Contact:

Re: Hobby Boss 1/72 Sukhoi T-50 PAK-FA

Post by UKguyInUSA »

Great job so far, Ludvig!! :thumb1:

I can't wait to see that interesting looking camo scheme painted on her!

Cheers, :cheers2:

Martin
WIP:: Tamiya 1/48 F4U-1A Corsair

Non-WIP::Eduard 1/48 Fokker DVII, Revell 1/32 Arado AR196 and 1/32 BF109G10 Erla,
User avatar
AchtungPanzer
Chief Warrant Officer 3
Posts: 2299
Joined: Mon Oct 07, 2013 7:59 am
Location: Cracow PL

Re: Hobby Boss 1/72 Sukhoi T-50 PAK-FA

Post by AchtungPanzer »

Very cool model. Well done buddy :th:
User avatar
LudvigN
Sergeant Major
Sergeant Major
Posts: 641
Joined: Sun Feb 09, 2014 11:07 pm
Location: Göteborg, Sweden
Sweden

Re: Hobby Boss 1/72 Sukhoi T-50 PAK-FA

Post by LudvigN »

Phe, it's finally painted and unmasked. This camo was a real pain to mask up for me as a rookie. Truth to be told, this was the first EVER camoflauged vehicle I ever made. I can only say that I have the utmost respect for you camo-guys out there, truly amazing. The masking was the most painful part of the build, no doubt. A bit annoyed over the bleed I got around the masking tape, gonna have to do a major clean-up before it will look respectable. But I guess that's just another disadvantage you have when you're brush painting. With that said, I learned a great deal and it was fun, even thou it was tough at times.

One thing thats astonished me is the fragility of the Vallejo model colors. As soon as you touch the paint, it peels. This makes even unmasking a tough job. But the paints are very good to work with paint-wise.

Bleh, masking
Image

Masking the second color was the most time consuming and hard.
Image

Image

Did some other painting during drying times.
Image

Something really happens to a model when it gets some paint on it.
Image

Last session of the painful masking.
Image

Image

Image

Image

Landing gear rises from the grave. The first thing that I made for this model, sees daylight for the first time in some months.
Image

Heres some modelling wisdom for you folks :tongue:
Image

Image

Image

Now, let's clean up all those cock-ups and the paint-bleeding, gonna be great "fun".

cheers
Ludvig :cheers2:

On the bench:
Airfix 1/72 A-4 Skyhawk
Italeri EH-101 Merlin HAS.1 (Whirlybird SIG)

Last one finished:
Bandai 1/72 A-Wing Gallery
Prop72
Sergeant
Sergeant
Posts: 112
Joined: Wed May 14, 2014 9:34 pm

Re: Hobby Boss 1/72 Sukhoi T-50 PAK-FA

Post by Prop72 »

Ludvig - That's a sharp-looking aircraft and love the camo. You say it's brush-painted? I couldn't see that, so you've done an excellent job. As for Vallejo paints, I use them extensively and find them very fragile. It's a heart in mouth moment when de-masking and it often lifts paint, no matter how long I've let it dry.
User avatar
LudvigN
Sergeant Major
Sergeant Major
Posts: 641
Joined: Sun Feb 09, 2014 11:07 pm
Location: Göteborg, Sweden
Sweden

Re: Hobby Boss 1/72 Sukhoi T-50 PAK-FA

Post by LudvigN »

Prop72 wrote:Ludvig - That's a sharp-looking aircraft and love the camo. You say it's brush-painted? I couldn't see that, so you've done an excellent job. As for Vallejo paints, I use them extensively and find them very fragile. It's a heart in mouth moment when de-masking and it often lifts paint, no matter how long I've let it dry.
First of all, thank you! As for the paints. Earlier in my modelling career when I didnt prime the models I had the same issue with the paint peeling off when you remove the masking tape. When I started priming, im using Tamiya rattlecan, I stopped having this problem. Recently Ive been starting to use Vallejo Matte medium wich im enjoying very much. Feels like it has a small strengthening ability aswell.

cheers
Ludvig :cheers2:

On the bench:
Airfix 1/72 A-4 Skyhawk
Italeri EH-101 Merlin HAS.1 (Whirlybird SIG)

Last one finished:
Bandai 1/72 A-Wing Gallery
User avatar
LudvigN
Sergeant Major
Sergeant Major
Posts: 641
Joined: Sun Feb 09, 2014 11:07 pm
Location: Göteborg, Sweden
Sweden

Re: Hobby Boss 1/72 Sukhoi T-50 PAK-FA

Post by LudvigN »

Pushing on with this build. And as I stated in the previous post, it really does come alive when it gets painted and even more when its decaled. I started by varnishing the body with future clear and let it dry over night. During drying times I painted some other parts thats not yet attached.

Glossed up
Image

Mildly weathered the landing bay doors and the huge back wheels.
Image

Painting the engines with Citadel "Warplock Bronze" mixed with "Leadbelcher". This stuff is so nice to brush. Especially thinned and with a couple of drops of Vallejo's Matte Medium.
Image

Glued on the exhausts and gave them a wash (Citadel's) to make them more dark and flat look like the ones in the reference photos.
Image

The decals are alright. They react very nicely to Micro Set'N'Sol. The carrier film might be a little thick, but I think that is solved when the Sol is completely dry and you varnish it once more. One negative is that they screwed up printing the decals. One is missing and they printed two extra of another decal(If you look on the picture in the beginning of the thread, you can see that there is 2x 17 when there is 3 on the marking sheet. Clearly someone was drunk when these were designed. Can only hope they fix it in a rebox. Didnt let this stop me and used one of the extras. With some fine adjustment, you proably cant tell the difference anyway. Let the decaling begin!

You can hint the carrier film if you reflect it with some light. Lets see how it looks tomorrow.
Image

Image

Image

Image

Decaling went smooth with no issues during applicance. Letting the decals rest until tomorrow and Ill put on some gloss coat and make it ready for some slight weathering.

cheers
Ludvig :cheers2:

On the bench:
Airfix 1/72 A-4 Skyhawk
Italeri EH-101 Merlin HAS.1 (Whirlybird SIG)

Last one finished:
Bandai 1/72 A-Wing Gallery
Orbyn
Sergeant
Sergeant
Posts: 140
Joined: Wed Sep 25, 2013 4:42 am
Location: Chandler, AZ USA

Re: Hobby Boss 1/72 Sukhoi T-50 PAK-FA

Post by Orbyn »

Looks great, :thumb1: I have barely started mine. This is good motivation t get started again,
Regards,

Orbyn

On the bench:
Cyber-Hobby 1/72 Aichi Type 99 "Val" Dive Bomber
User avatar
LudvigN
Sergeant Major
Sergeant Major
Posts: 641
Joined: Sun Feb 09, 2014 11:07 pm
Location: Göteborg, Sweden
Sweden

Re: Hobby Boss 1/72 Sukhoi T-50 PAK-FA

Post by LudvigN »

Turning into the final corner and towards the finishing line. Today it was weathering time. I used a combination of Florymodels black wash and Vallejos model color wash. At first I was decisive that the weathering should be kept to a minimum since this is a pretty new aircraft. However, my artistic side got the better of me and decided to weather it some more. I like to separate weathering from ageing and what Ive done here is some slight weathering. This specific specimen has got a couple of years to it now, so it should show some signs of wear.

First I used Vallejos model wash and did it slowly not to overdo it. Then I decided to put some speed into the process so I went like this:

Image

Im pretty happy with the result of the weathering except that the majority of the panel lines and riveting detail is too shallow to hold a wash. Thats a pity because this kit has alot of fine surface detail that would love a good dark wash. Youll have to wait for the complete result of the weathering til next time when I have varnished the model for the last time.

Finally, the gears are attached and the landing bay doors aswell. The rear doors proved to be tricky to attach since they dont have a clear fit. The nose landing gear is very nice detailed and im really happy with it.

Image

Image

Image

Next update will come tomorrow when the model is finished. Until then,

cheers
Ludvig :cheers2:

On the bench:
Airfix 1/72 A-4 Skyhawk
Italeri EH-101 Merlin HAS.1 (Whirlybird SIG)

Last one finished:
Bandai 1/72 A-Wing Gallery
User avatar
LudvigN
Sergeant Major
Sergeant Major
Posts: 641
Joined: Sun Feb 09, 2014 11:07 pm
Location: Göteborg, Sweden
Sweden

Re: Hobby Boss 1/72 Sukhoi T-50 PAK-FA

Post by LudvigN »

Ok, so its all finished. I will give you a link to the Gallery-section where I will post all of the pics. Have also written down a final conclusion. See you there!

http://intscalemodeller.com/viewtopic.php?f=45&t=6838

Image
Ludvig :cheers2:

On the bench:
Airfix 1/72 A-4 Skyhawk
Italeri EH-101 Merlin HAS.1 (Whirlybird SIG)

Last one finished:
Bandai 1/72 A-Wing Gallery
User avatar
RobertA
First Sergeant
First Sergeant
Posts: 502
Joined: Tue Jun 04, 2013 2:37 pm
Location: Colchester UK

Re: Hobby Boss 1/72 Sukhoi T-50 PAK-FA

Post by RobertA »

Brilliant... Looks like a great kit, and the end result is beautiful.. :)
Hairbrush, not airbrush!!

On the workbench:
Hasegawa 1/72 Saab J35 J 'Draken' x 2
Hasegawa 1/72 MiG-17 E / D
portlandjoe
Corporal
Corporal
Posts: 96
Joined: Sun May 26, 2013 7:22 pm
Location: Marion,KY

Re: Hobby Boss 1/72 Sukhoi T-50 PAK-FA

Post by portlandjoe »

Nice looking job. I just wish my eyes and nerves could handle 1/72.
I came into this world with out my consent and will leave it against my will.
User avatar
UKguyInUSA
Second Lieutenant
Second Lieutenant
Posts: 3429
Joined: Sun Mar 30, 2014 10:19 pm
Location: New Hampshire, USA formerly Palm Beach, Florida, USA and Leicestershire, UK (until 1999)
Contact:

Re: Hobby Boss 1/72 Sukhoi T-50 PAK-FA

Post by UKguyInUSA »

Great job, mate! :thumb1:
WIP:: Tamiya 1/48 F4U-1A Corsair

Non-WIP::Eduard 1/48 Fokker DVII, Revell 1/32 Arado AR196 and 1/32 BF109G10 Erla,
Post Reply

Return to “Jet Aircraft”