Page 1 of 2

Viggen JA37

Posted: Thu Apr 30, 2015 7:15 pm
by JonMW
Finally time that I can get started on this! The plan is to do a pretty detailed version of the Viggen using a bit of aftermarket, painted in the splinter camo.

Image

Image

Image

Image

Image

Image

Image

Image

Image

Image
Sadly Tarangus idea of putting all sprues in one bag is not the best and one part was broken.

Image

Image

Image

Image

Image

Image

Image

Image

Re: Viggen JA37

Posted: Fri May 01, 2015 6:28 pm
by JediBoer
I'm so jealous! Great kit and awesome AM! Looking forward to this one! :cheers2:

Re: Viggen JA37

Posted: Sat May 02, 2015 9:55 am
by chief5437
Lots of nice extra bits there! :th: can't wait to see the cam scheme! Good luck buddy :th: :th:

Re: Viggen JA37

Posted: Sat May 02, 2015 2:48 pm
by Aliktren
that camo is gonna look amazing - good stuff!

Re: Viggen JA37

Posted: Sat May 02, 2015 5:12 pm
by patrickroos
:th: :pop:

:cheers2:

Re: Viggen JA37

Posted: Sun May 03, 2015 1:21 pm
by TommyKillander
Cool!

This will be an awesome build.

I must admit that I haven't grown enough balls to start building my Viggen yet - I have bought loads of aftermarket stuff (costed me as much as the kit itself), so I want it to be a perfect build.
That splinter cammo scares me Brad Pitt-less.... :lol: :lol: :D

Good Luck!
:cheers2:

Re: Viggen JA37

Posted: Wed May 06, 2015 10:30 pm
by JonMW
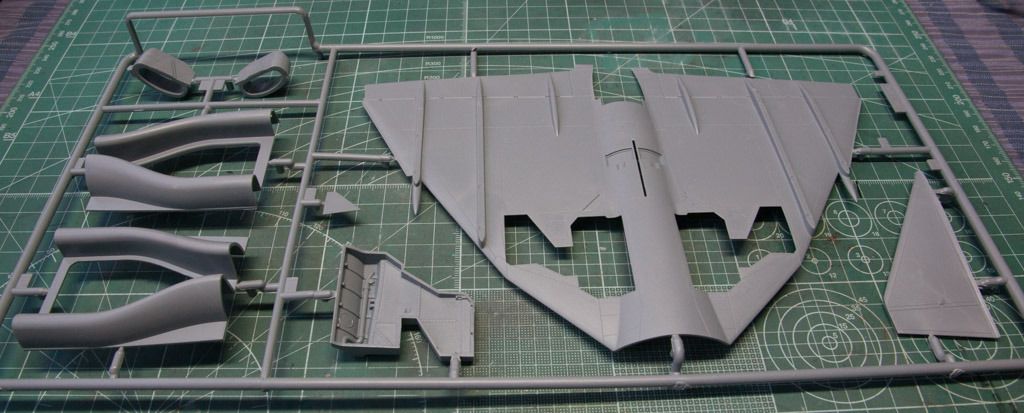
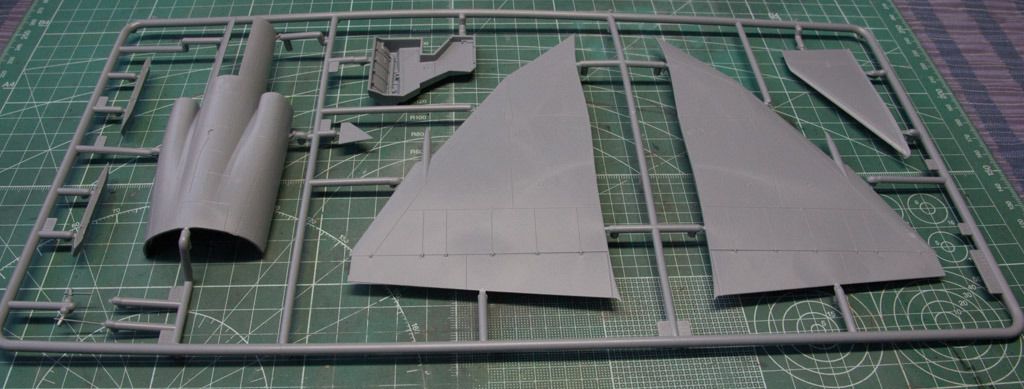
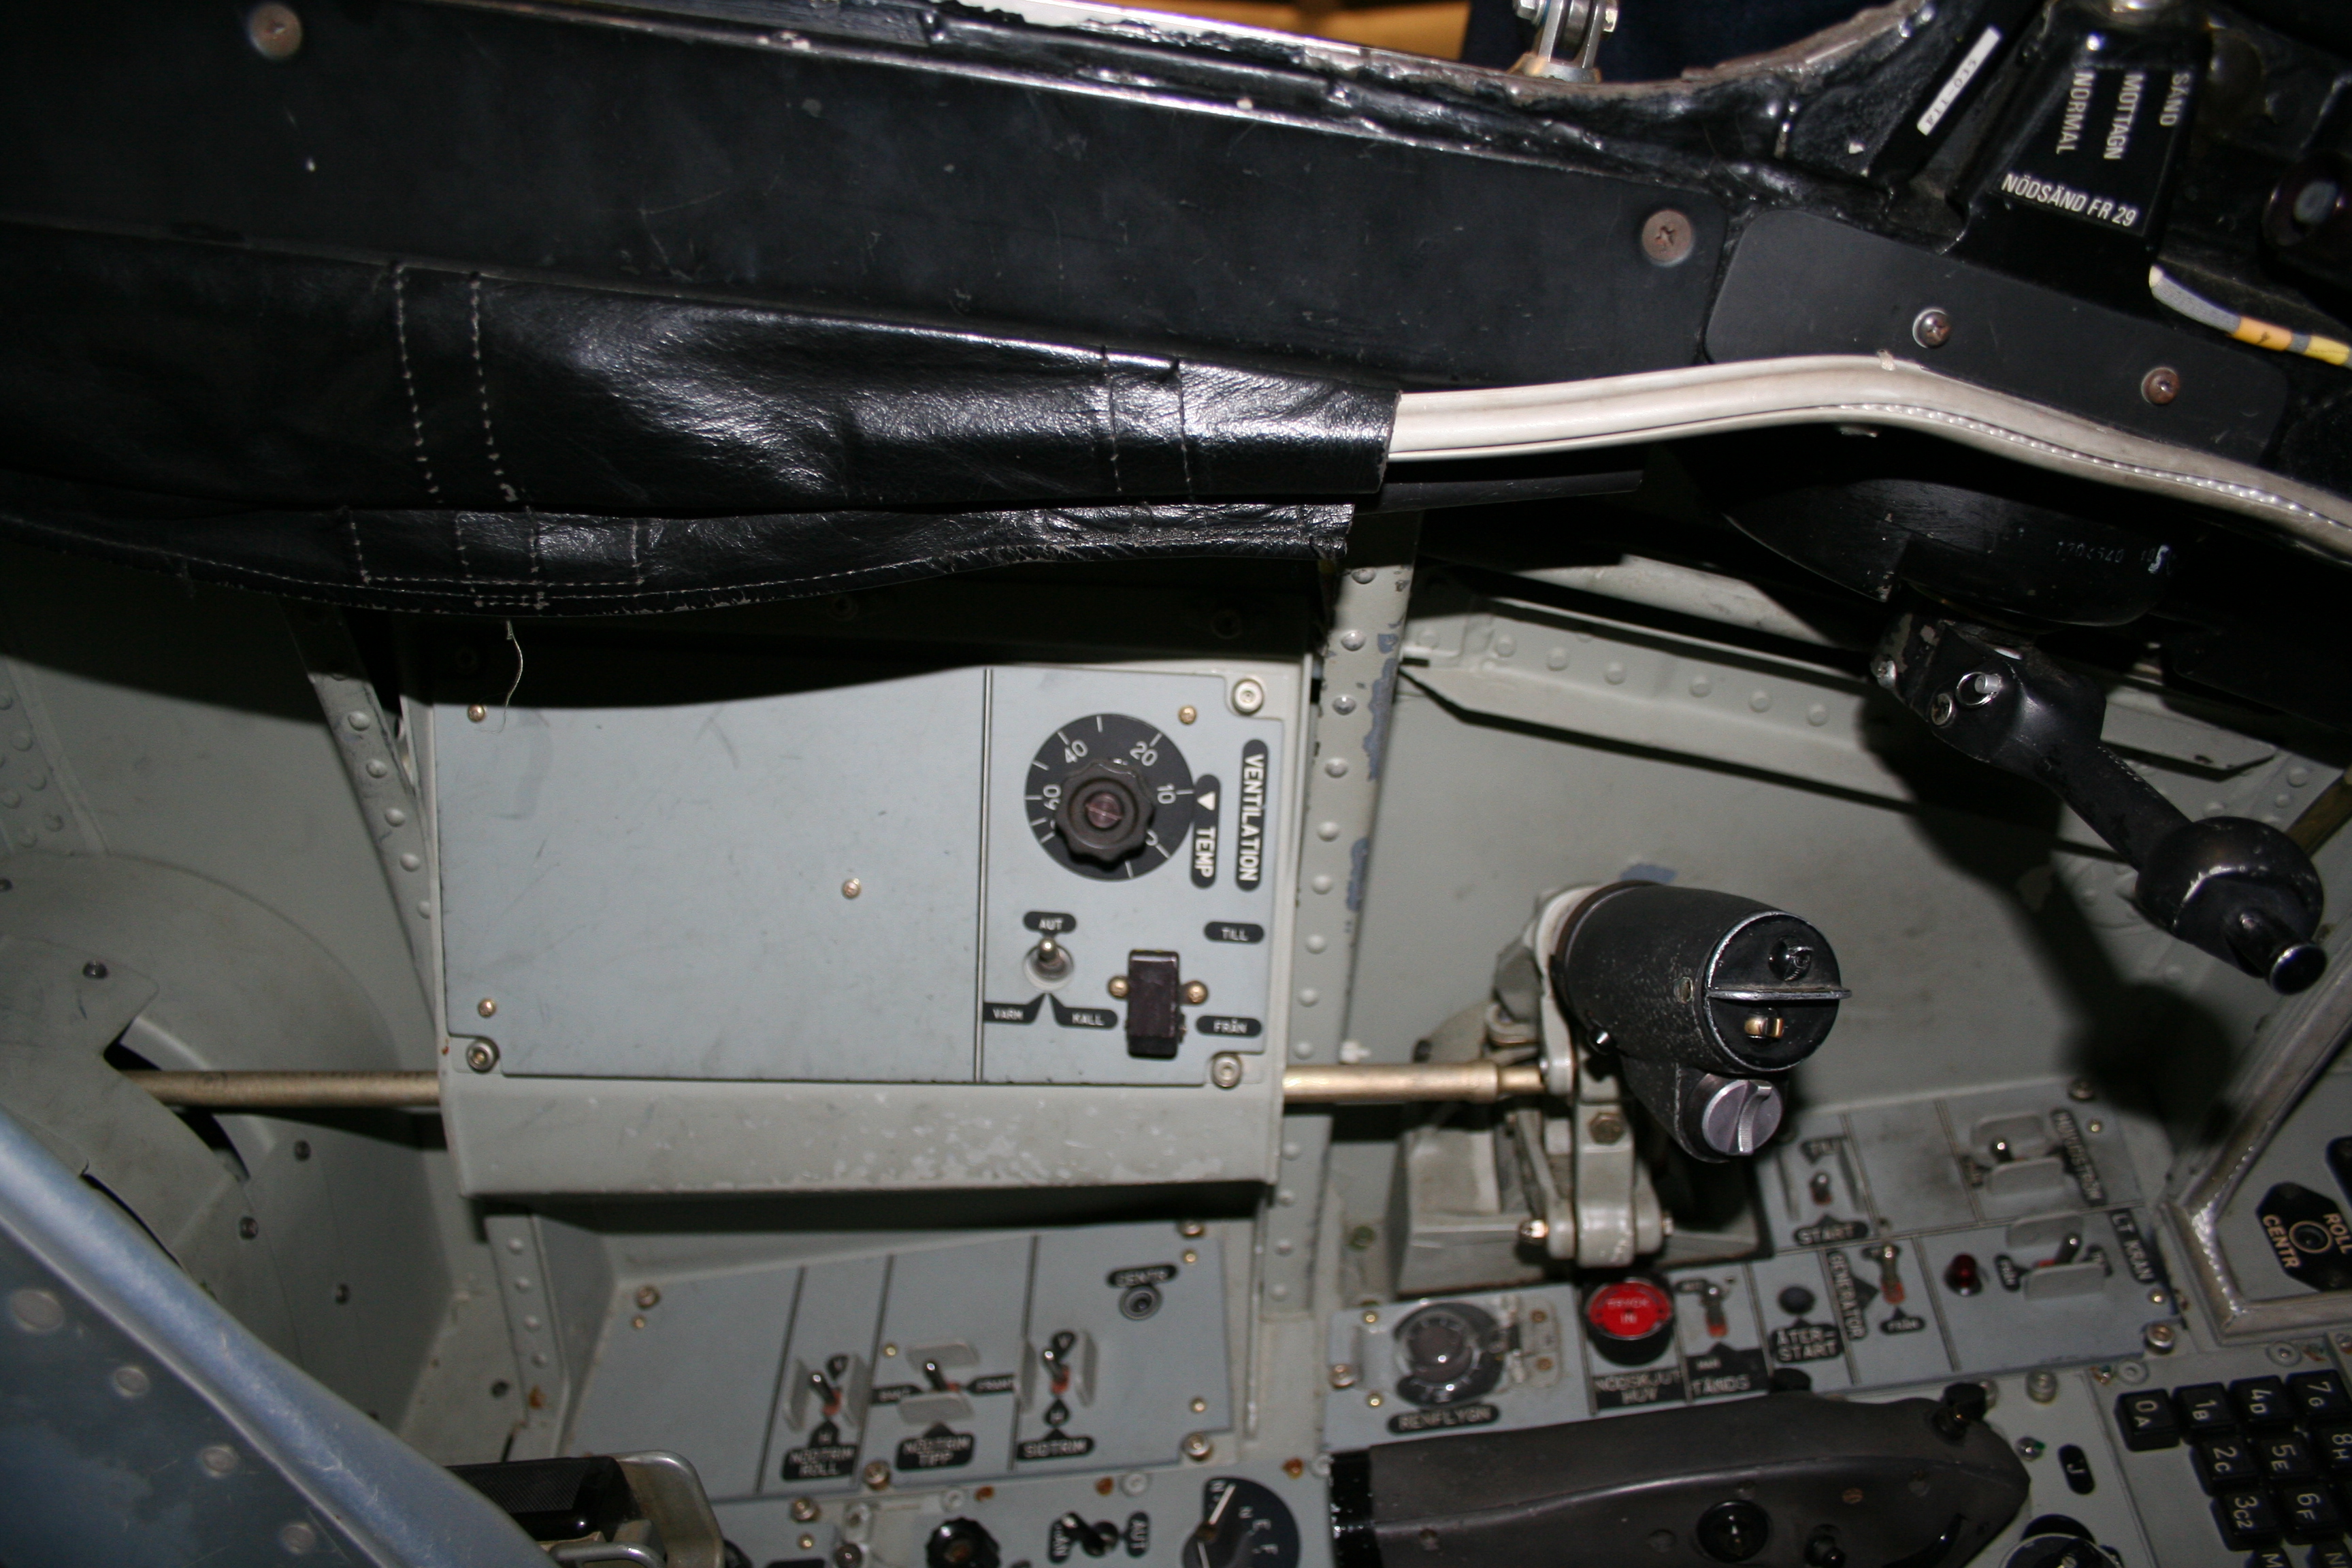
So a little info on the Viggen.

The Saab 37 Viggen ("Thunderbolt, ambiguous with ‌"Tufted duck") is a Swedish single-seat, single-engine, short-medium range combat aircraft, manufactured between 1970 and 1990. Several distinctive variants were produced to perform the roles of strike fighter (AJ37), aerial reconnaissance (SF 37), maritime patrol aircraft (SH 37) and a two-seat trainer. In the late 1970s the all-weather fighter-interceptor aircraft JA 37 was added.

The Viggen was initially developed as a replacement for the Saab 32 Lansen in the attack role and later the Saab 35 Draken as a fighter. The first studies were carried out between 1952 and 1957 involving the Finnish aircraft designer Aarne Lakomaa. Several different concepts were studied involving both single- and twin engines, both simple and double delta wings and also with canard wings. Even VTOL designs were considered, with separate lift engines.

The aim was to produce a robust aircraft with good short-runway performance that could be operated from numerous specially prepared roads and highways to reduce the vulnerability to attack in the event of war. Other requirements included supersonic ability at low level, Mach 2 performance at altitude, and the ability to make short landings at low angles of attack (to avoid damaging improvised runways). The aircraft was also designed from the beginning to be easy to repair and service, even for personnel without much training.

To meet these design goals, Saab selected a radical configuration: a conventional delta wing with a small, high-set canard fore-plane. Canard aircraft have since become common in fighter aircraft, notably with the Eurofighter Typhoon, Dassault Rafale, Saab JAS 39 Gripen and the IAI Kfir, but mainly for agility reasons rather than STOL capabilities. The final proposal was presented and accepted on 28 September 1962. Construction started in 1964, with a first prototype maiden flight on 8 February 1967.

In 1960, the U.S. National Security Council, led by President Eisenhower, formulated a military security guarantee for Sweden. The U.S. promised to help the Swedish militarily in the event of a Soviet attack against Sweden; both countries signed a military-technology agreement. In what was known as the "37-annex", Sweden was allowed access to advanced U.S. aeronautical technology which made it possible to design and produce the Saab 37 Viggen much faster and more cheaply than would otherwise have been possible.

According to research by Nils Bruzelius at the Swedish National Defence College, the reason for this officially unexplained U.S. support was the need to protect U.S. Polaris submarines deployed just outside the Swedish west coast against the threat of Soviet anti-submarine aircraft. However, Bruzelius' theory has been discredited by Simon Moores and Jerker Widén. The Polaris and Saab 37 connection also appears highly doubtful due to the time scale – the Saab 37 system only became operational in 1971 (strike version) and 1978 (fighter version) respectively, long after the Polaris system had been retired.

For more info have a look here http://en.wikipedia.org/wiki/Saab_37_Viggen

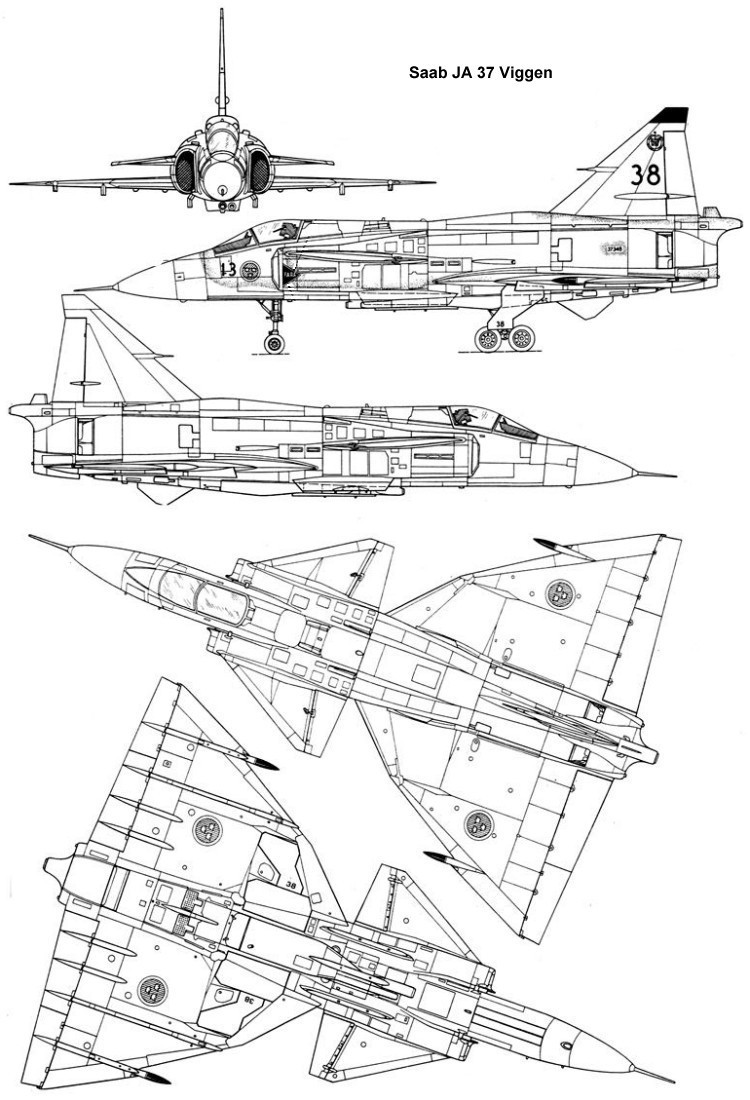
General characteristics
Crew: One
Length: 16.4 m (53 ft 9 in)
Wingspan: 10.6 m (34 ft 9 in)
Height: 5.9 m (19 ft 4 in)
Wing area: 46 m² (500 ft²)
Empty weight: 9,500 kg (21,000 lb)
Loaded weight: AJ 16,000 kg; JA 17,000 kg (AJ 35,273 lb; JA 37,478 lb)
Max. takeoff weight: 20,000 kg (44,000 lb)
Powerplant: 1 × Volvo RM8B afterburning turbofan, 72.1 kN / 125.0 kN afterburning (16,200 lbf dry, 28,110 lbf afterburning)

Performance
Maximum speed: Mach 2.1, 2,231 km/h (1,386 mph) at 11,000 m (1,386 mph at 36,100 ft (11,003 m))
Range: 2,000 km internal fuel only (1242 mi)
Service ceiling: 18,000 m (59,100 ft)
Rate of climb: 203 m/s (12,200 m/min) (40,026 ft/min)

Armament
1x 30 mm Oerlikon KCA cannon with 150 rounds
Six missile stations for two RB71 Skyflash (only JA37), four AIM-120 AMRAAM (JA 37D), or six AIM-9 Sidewinder or four 135 mm (5.4 in) rocket pods.
U95 ECM pod (JA 37D)

Image

[youtube]PoQtnugT6A4[/youtube]
Short infomercial movie from the Swedish Air force describing how the road bases work, sorry it's in Swedish but there are some nice clips of the plane.

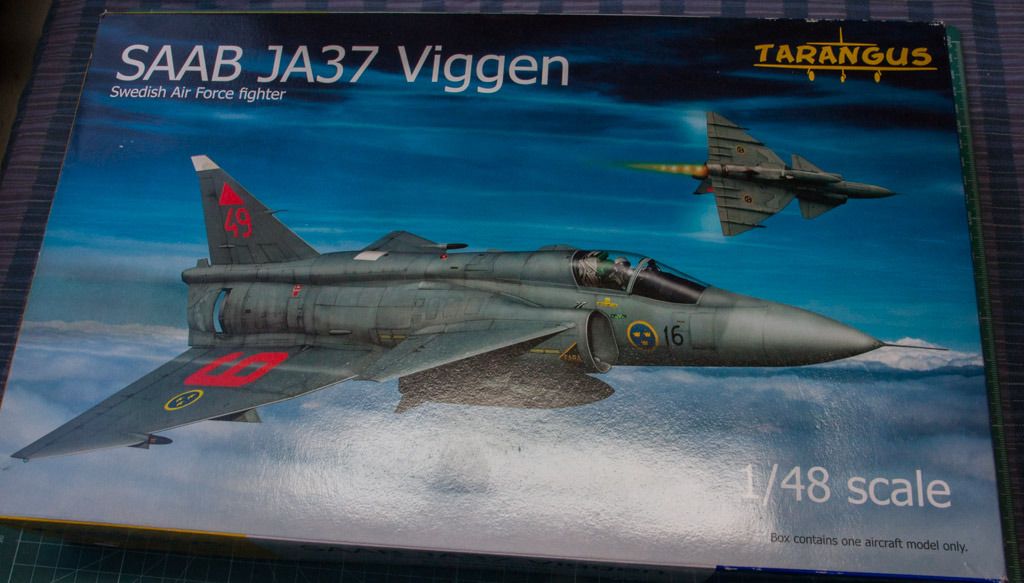
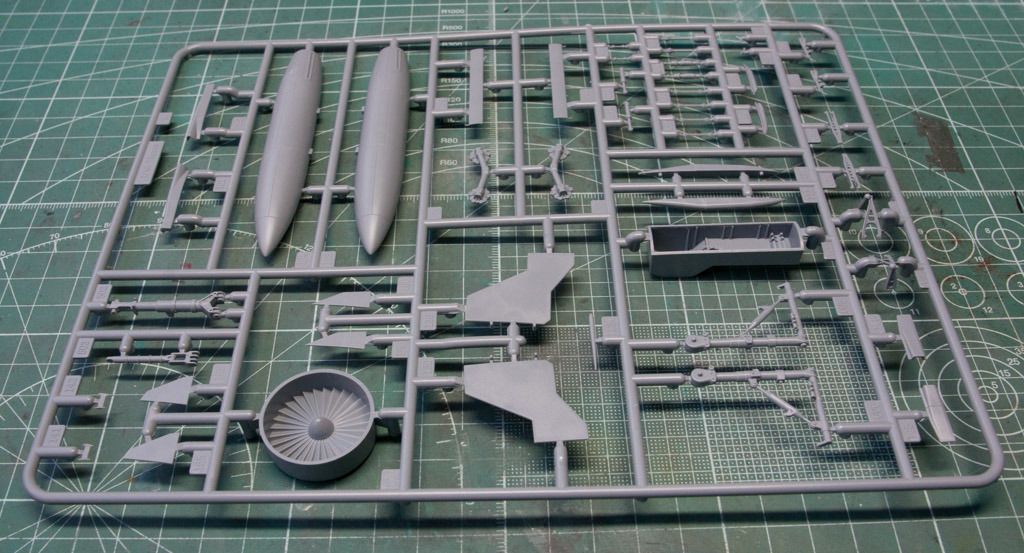
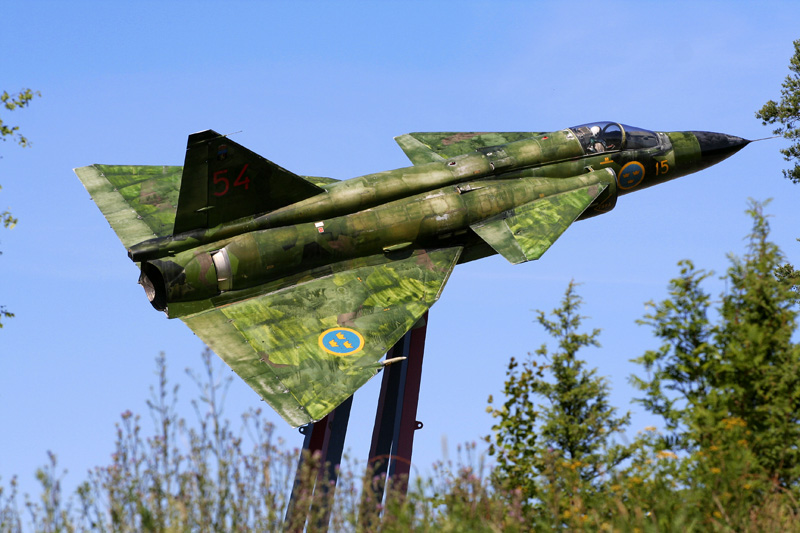
I'm planning to a small base for the plane, was thinking about something like a mix of these two.

Image

Image

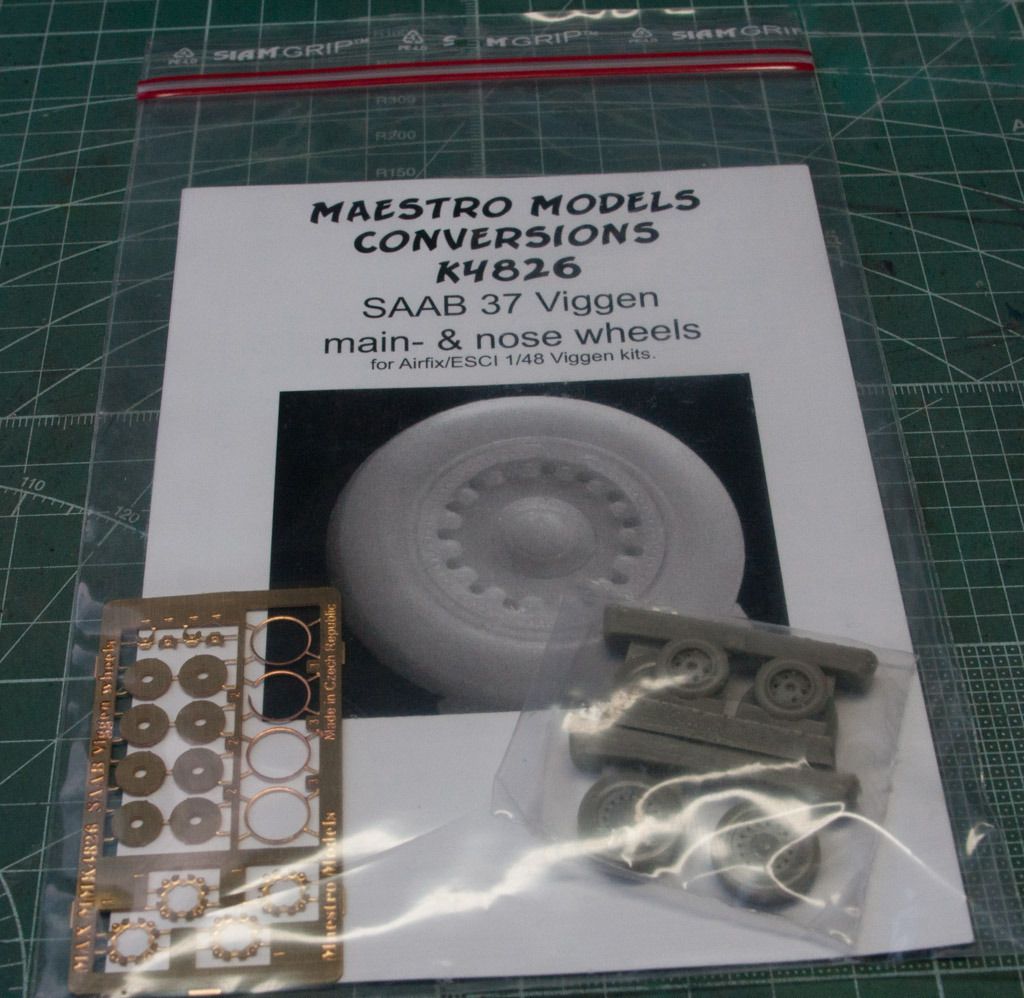
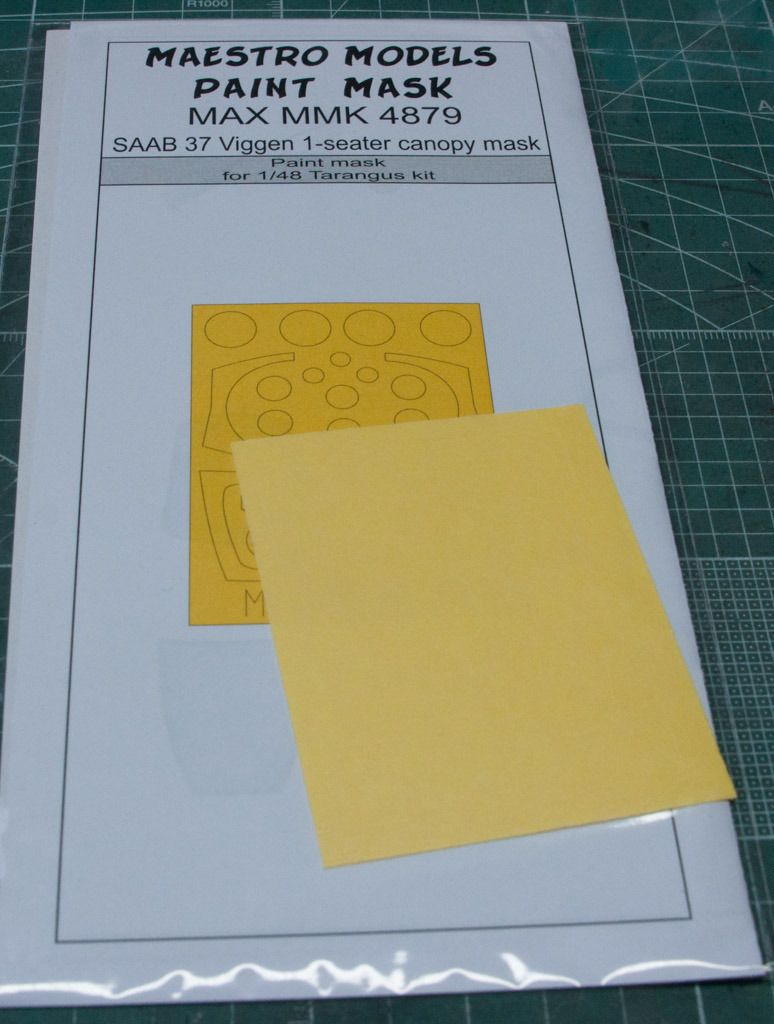
Maestro Models has a resin kit for building with the fin in folded position but I'm not sure if it's released yet, will see if I can find it.

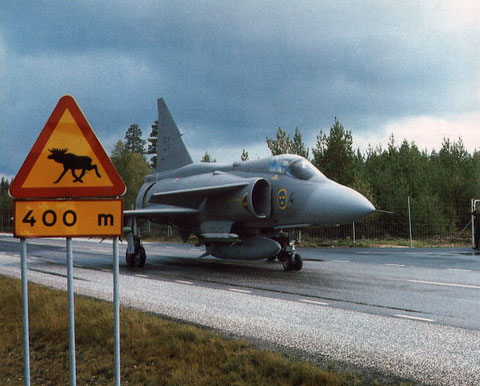
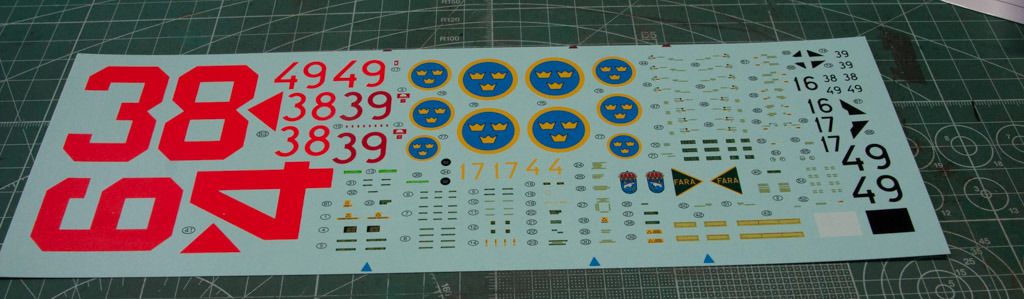
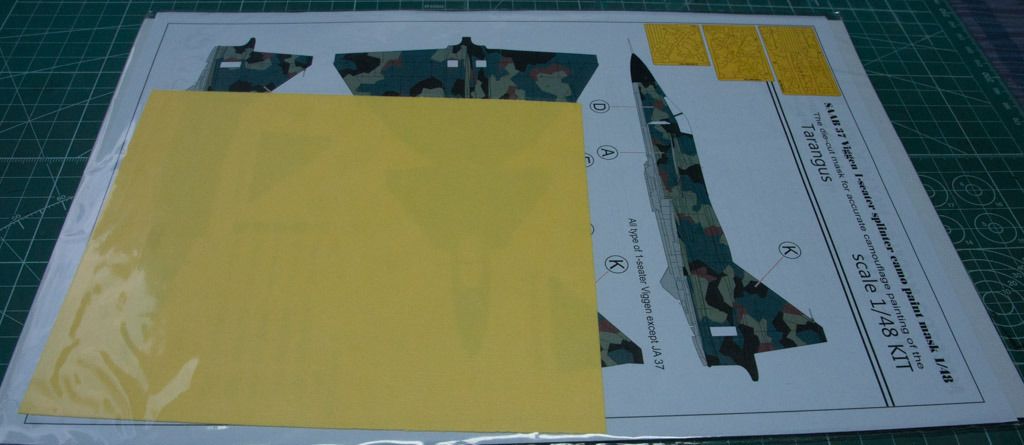
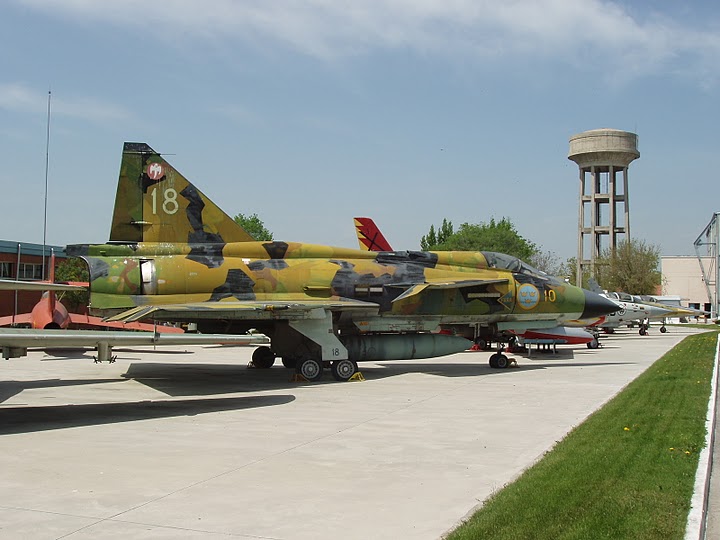
The kit decals for the splinter camo version is from the F4 unit in Frösön in northern Sweden, specifically F4-38 or serial number 37378. During the last years of its service it flew with a NMF tail, this is how I'm going to paint it.

Image
F4-38 sitting at it's new home, the RFN museum in Vidsel northern Sweden.

Re: Viggen JA37

Posted: Thu May 07, 2015 8:02 pm
by Nige201980
I'm really looking forward to this one. Good luck with it.

Re: Viggen JA37

Posted: Thu May 07, 2015 11:14 pm
by patrickroos
Love the idea with the road sign, what about a "30" sign!?
:lol:

Re: Viggen JA37

Posted: Tue May 12, 2015 11:05 pm
by JonMW
Finally got started on this, got most of the cockpit painted today, but i'm not too happy with the color match with the PE so will probably repaint it. But I have gotten the seat cushion done. I wanted to test a new technique for this one, this was something I found in the MIG Encyclopedia of aircraft book. It's more or less using color modulation to add artificial highlights and shadows using thin paints applied with a brush.

Image

To start the part was sprayed in Alclad dull aluminium, then the PE part was attached and the cushion was painted in RLM 71 which was a good match to both the PE part and reference pictures.

Image

Next the top of the back and the edges of the lower part was painted in a very thin, lighter shade of the same green that was then feathered and blended into the base color.

Image

Image

One more lighter color was applied, as well as a darker shade at the lower part of the back to add some shadow.

Image

This is the four colors I used, from left to right: shadow (about 2 drops black, 6 drops RLM 71), first highlight (about 2 drops white, 6 drops RLM 71), second highlight (about 4 drops white, 9 drops RLM 71) and the base RLM 71.

Image

Image

To finish it off I added a black oil pin wash to darken the creases. I'm pretty happy with how it turned out, will need a bit more practice to get good at it. But i can see it being useful especially in tight cockpits where it might be hard to get light into.

Re: Viggen JA37

Posted: Wed May 13, 2015 6:28 am
by TommyKillander
Sweet!

:thumb2: :thumb2:

/Tommy

Re: Viggen JA37

Posted: Wed May 13, 2015 9:45 am
by patrickroos
TommyKillander wrote:Sweet!

:thumb2: :thumb2:

/Tommy
Agreed, nice! :th:

Hope to get cracking on my J26 tomorrow!

:cheers2:

Re: Viggen JA37

Posted: Fri May 15, 2015 10:46 pm
by JonMW
Thanks!

It's really nice to have a couple of extra days off work and since it's been raining I have an excuse to not go out to the summer house and do garden work. So instead I've had some nice productive days at the workbench, and got the cockpit almost done.

Started by removing the molded in details on the seat and the cockpit that will be replaced with PE with a chisel.

Image

Got the seat assembled and painted, used AK Xtreme metal Aluminium and the cockpit color for the seat. The head rest was given the same modulation as the cushion but using a lighter green as the base. Then all the PE was applied.

Image

Image

To finish the seat I used some Ultimate Dark dirt wash and also used some 502 Faded navy blue oil paint as a filter on the head rest to add a blue hue to the green.

Image

Image

The cockpit done. In the instructions for the PE it looks like you'r not supposed to use kit part 208 (which in the kit instructions have the wrong orientation). But it should still be there if you look at this reference picture from the Tarangus web site http://www.tarangus.se/wp-content/uploa ... G_4135.jpg, and there is nothing in the picture looking like PE part #19. So I went with something more like the picture then the instructions. Also add the linkage using a acupuncture needle that is about 0.2-0.25 mm thick.

Image

The PE instructions also tells you to glue PE part #23 directly to the side of the cockpit, however it is supposed to go on top of lit part #203 which can also be clearly seen in the reference picture.

Image

Image

Image

And everything test fitted together.

Image

Image

Image

After taking the picture I saw that the foot controls are way too close to the seat so I will need to move those a bit. There is also a control stick missing on the left side and the plastic part included is just way too big now that I re positioned part #208 so I'll need to make something smaller. I'm also thinking of adding a couple of wires to add a bit more detail.

Re: Viggen JA37

Posted: Sat May 16, 2015 12:36 pm
by TommyKillander
The cockpit looks fantastic!

Really love the scratchmarks in the floor in front of the rudderpedals.

Some great detailed work around the ejection seat as well !! :thumb2: :thumb2:

:cheers2:

Re: Viggen JA37

Posted: Sat May 23, 2015 12:01 pm
by patrickroos
Agreed, the cockpit looks really good! :th:

:cheers2:

Re: Viggen JA37

Posted: Sat May 23, 2015 5:24 pm
by JonMW
Thank you!

Re: Viggen JA37

Posted: Sat May 23, 2015 5:34 pm
by Twokidsnosleep
Always learn cool things from your builds, no matter what the subject!
Stupendous cockpit work :thumb1:

Re: Viggen JA37

Posted: Thu May 28, 2015 7:25 pm
by JonMW
Have started joining the fuselage together and filling the seams with molten sprue.

Image

Re: Viggen JA37

Posted: Mon Jun 22, 2015 9:11 pm
by JonMW
With the Navy SIG build done I can finally get back to this. The Fuselage has been sanded and is almost ready for rescribing, not sure but it feels like the fir of this was worse then the first one I build. Have also started work on the engine.

Image

Image
The kit part, nice detail in the bottom but a little bit soft at the edge.

Image
It's not completely clear in the instructions for the PE parts how they are supposed to go together. It looks like you'r supposed to just glue the PE parts on top on the plastic as it doesn't say to cut anywhere. But I decided to cut off the bottom of the engine.

Image
Then cutting out the center cone.

Image
Then bending and gluing together the four PE parts and using the plastic cone.

Image
To add a bit more interest I started cutting a bunch of small parts of styreen sheet and rod.

Image

Image

Image
And glued it to the engine. It might not be accurate but it adds more sharp edges that will hold a wash better then the kit part and will hopefully look more interesting.

Image
Glued the PE parts and the shroud to a sheet of styreen to add a back so you can't see into the fuselage when it's all build.

Image
All done, now it just needs some paint and weathering.

Re: Viggen JA37

Posted: Mon Jun 22, 2015 9:45 pm
by vdbo76
Very nice addition to the exhaust and impressive execution!

Re: Viggen JA37

Posted: Tue Jun 23, 2015 6:44 pm
by Nige201980
Nice work mate love those extra touches.

Re: Viggen JA37

Posted: Tue Jun 23, 2015 6:44 pm
by patrickroos
Really nice work! :th:

:cheers2:

Re: Viggen JA37

Posted: Sun Jul 12, 2015 7:01 pm
by JonMW
This thing is starting to fight me. I had the fuselage and wings glued, filled, sanded and rescribed, pretty much ready for primer. Looked at it from behind and saw that the main wings was right tip up. So I started to try to figure out where the problem was, and of course it was the fuselage that was twisted. So I had to tare it all apart again and will need to start over with a lot of sanding. Not sure why this happened as the first one I build didn't have this problem.

Image

Re: Viggen JA37

Posted: Sun Jul 12, 2015 10:22 pm
by Jack
Love the cockpit looks great so far :th:

Re: Viggen JA37

Posted: Tue Jul 28, 2015 12:30 pm
by JonMW
Things are finally back on track after the problem with the twisted fuselage. Got all the parts bend to shape reassembled, filled the seams and steps using Tamiya putty.

Image

Next I started to rescribe all the panel lines that where lost, as some of them where completely gone I started by drawing them on with a pencil.

Image

Then using 3M Fine line tape and a Tamiya scriber I started adding the bigger panel lines.

Image

For the smaller panels I used a scribing template and an old 0.4 mm airbrush needle stuck in a pin wise. The needle is one that I dropped on the floor years ago, and if you drop an airbrush needle on the floor it will land point down and get stuck in the floor. And when you pick it up you will hit it and bend the tip, 100% guaranteed. So I sharpened it up again for this sort of use or making rivet marks and such.

Image

Got a coat of primer over the areas that I have been working on, there is still some small spots that will need to be filled, this time probably using CA glue and some of the lines needs a bit of a touch up.But over all it's coming together.

Image

Re: Viggen JA37

Posted: Tue Jul 28, 2015 1:29 pm
by Paul
Great work Jon, its starting to come together nicely now :cheers2:

Re: Viggen JA37

Posted: Tue Jul 28, 2015 3:51 pm
by OliveDrab
Very nice, the engine detail work is amazing :th:

Re: Viggen JA37

Posted: Thu Jul 30, 2015 9:53 pm
by JonMW
Thanks for the comments!

After I had to take the all the wings off earlier one of the canards got damaged. So to fix it I cut off a bit more to have more surface area to work with.

Image

Next I put some Tamiya tape on the fuselage to protect it.

Image

Mixed some Milliput and filled the hole.

Image

Sanded it smooth,, applied some Tamiya putty thinned with cellulose thinner and sanded again.

Image

Image

Image

Put the canards and most of the other parts on the fuselage.

Image

It's getting closer to paint, so it's time to start to think about what to use. The Viggen was painted in specific Swedish colors that don't have a direct conversion in say FS595 so it's a bit tricky to get the right colors. Combine that with changes due to weathering and it gets really tricky. Using the list at the bottom of this page http://peosflyg.fagelochflyg.se/gamla/v10/SCOLOR.HTM and IPMS Stockholms reference http://www.ipmsstockholm.org/colorchart ... sweden.htm and the colors Tarangus recommend I started to try to convert the colors to Vallejo Model Air or Tamiya as that is what I use. Doing this I got some really odd colors, like using the same green for both the dark and light and using a dark grey for both the light grey and the light green. So I did a bunch of test paints on a sheet of plastic to get a better look.

Image

The dark green for all of these is Akan FS34079, which to me looks pretty good, XF13 is supposed to be really good so I'll probably get some and give it ago. The tan is Akan FS30219 that seems to be good and the tan color is the one that changes the most with weathering. Now the light green needed a bit more testing, the colors are from left Akan FS34102, Akan RLM82, XF5, six parts XF5 one part XF2 one part XF3. That mix was one that I found on a Swedish forum, I think that is the one that looks best but I might add a bit more white to get it slightly lighter. I got pretty much two different grays odd thing is that "The Ultimate Paint Conversion Chart" says that these are interchangeable, the dark one is XF53 and the light is Vallejo 71.046. The XF53 is probably the one that is closest to the real color.

Image

Image

Image

Image

Some pictures that shows ow much the colors change over time due to weathering, sure none of these are in service and are out in the weather all the time. The first three picture are of the same plane taken at different times.

Re: Viggen JA37

Posted: Thu Jul 30, 2015 10:39 pm
by vdbo76
Great research! Amazing how much those colors change. Do you have any ideas of the timeframe those pics are taken?

Re: Viggen JA37

Posted: Thu Jul 30, 2015 10:59 pm
by TommyKillander
Great job with the color matching and the build as well. :thumb2: :thumb2:

Thanks for the tip converting a used airbrush needle as a rescibing tool, I will keep that in mind and try that.

Cheers
:cheers2:

Re: Viggen JA37

Posted: Sat Aug 01, 2015 4:35 pm
by JonMW
Thanks, no I have no idea when those pictures where taken.

I have been doing a bit of painting and a lot of masking. Started with some AK primer followed by Alclad gloss black and dull aluminium on the leading edges of the wings and around the back of the engine. I then took a sponge and dabbed some liquid latex on the leading edges of the wings to get some chipping.

Image

Since it's really hard to see the cut lines on the masking sheets I took some time and drew the lines and also noted what color each one should mask.

Image

I started with the brown color.

Image

Masked those areas painted the light green, masked those areas. I had to use some masking tape in some spots as I couldn't get the masks to line up. I also added some liquid latex where the masks for the different colors meet to make sure there wouldn't be a line between the colors.

Image

Image

The finally I could start removing all the masking. There are some spots that needs a bit of work. The paint pulled off in one or two spots and a couple of the edges is a bit soft but it's not too bad. When I put on the last layer of masking I started to feel a bit worried that the pattern would look wrong as some of the masks didn't meet up as they should and I had to use masking tape in some spots. But in the end I think it came out pretty good.

Image

There is still two more colors to add, the black on the nose and grey on the underside. I did a couple of more tests with the paints and XF13 is really close to the Akan color I used for the dark green and same with XF52 for the tan. One thing I still need to do is post shading along all the panel lines as I didn't do any pre shading and I'll probably add some lighter versions of the all the colors to give the whole paint job a bit more faded look, since right now it looks too good and uniform.

Re: Viggen JA37

Posted: Sat Aug 01, 2015 4:47 pm
by Klargplutte
Thats some splendid splinter camo , good work :cheers2:

Re: Viggen JA37

Posted: Sat Aug 01, 2015 5:11 pm
by chief5437
:jd: that is soooo cool! Great work buddy, she's beautiful :th:

Re: Viggen JA37

Posted: Sat Aug 01, 2015 5:16 pm
by Twokidsnosleep
It is an awesome camo pattern, really like the effect! :th:

Re: Viggen JA37

Posted: Sat Aug 01, 2015 8:30 pm
by TommyKillander
Yeah! :clap: :clap: :thumb2:

That's how to do splinter-cammo - great job. It looks fantastic!

Cheers
:cheers2:

Re: Viggen JA37

Posted: Sun Aug 02, 2015 12:45 pm
by patrickroos
Impressive work on the Viggen Jon! :th:
Great work with the recovery, re-assembly, fixing the problems and re-scribing etc.
As for the colours they look really nice, for those not familiar with especially Draken (J35), Viggen (J37) and JAS (J39) builds, Swedish camo colors are a djungle! :scratch::
As I have written before, no luxury of ready made colours from Tamiya, Vallejo etc. You have to mix Your own.
Great work on the research and mixing Jon :thumb1: , it looks the part for sure.

This will be one badass Viggen! :pistols:

:cheers2: :cheers2:

Re: Viggen JA37

Posted: Sun Aug 02, 2015 12:46 pm
by patrickroos
Sorry forgot...
So Your saying that the pre-cut camo masks does not really fit?

:cheers2:

Re: Viggen JA37

Posted: Sun Aug 02, 2015 10:52 pm
by JonMW
Thanks for the comments!
patrickroos wrote:Sorry forgot...
So Your saying that the pre-cut camo masks does not really fit?

:cheers2:
The thing is that I started with painting the tan and then adding those masks that are located in the middle of the wing only using the panel lines as reference. The problem then comes when adding the second layer of masking that has to line up with more the one of the tan masks that might not be perfectly placed. If one of them is off by only 1 mm or 1 degree you have problems, especially when you get to the third layer of masking that has to align to three (or more) misplaced masks. Also some of the masks overlap, the ones that are on the edge of the sheet and also the ones on the edges of the wing. All of this adds up to make it really hard to get it perfect. The masks probably fit just as they should, I blame everything on "skit bakom spakarna". If I where to do this again I might start in one corner and just paint that area, mask it, pain the adjacent area, mask that and keep going until the whole model is painted. This would take a lot longer, but that way all the masks will line up as they should.

Re: Viggen JA37

Posted: Mon Aug 03, 2015 4:03 pm
by JonMW
Continued with the painting, put some black on the nose cone and the top of the vertical stabilizer and painted the underside in XF53 grey. I think it came out a bit darker then I had hoped for and maybe should have a tone of blue to it, but it works. Also did some post shading using X19 Smoke along the panel lines and doing small figures of eights and mottling to get some color variations.

Image

Image

Then it was time for a coat of Alclad Aqua gloss and decals. I think it really comes alive when all the decals are added, especially when they have such a big contrast in color to the paint. I have to complain a little bit about the decals and the instructions. The decals are nice and thin, conform well and don't rip, but the numbering on the sheet is all over the place so it takes a lot of time to find the correct decal. But ok I can live with that, bigger problem are the decals that are missing numbers on the sheet and/or in the instructions. And then there are some extra one on the instructions that are not on the sheet and of course the ones that are numbered wrong in the instructions. But if you watch out for it it's fine, just irritating.

Image

Image

Next up is one more coat of clear then some Ultimate wash.

Re: Viggen JA37

Posted: Mon Aug 03, 2015 7:28 pm
by Nige201980
Oh man she looks so SEXY. Brilliant work on the camo outstanding.

Re: Viggen JA37

Posted: Mon Aug 03, 2015 7:49 pm
by shortCummins
Nige201980 wrote:Oh man she looks so SEXY. Brilliant work on the camo outstanding.
I second that :bow::

rgds
John(shortCummins)

Re: Viggen JA37

Posted: Tue Aug 04, 2015 11:43 am
by wally
Nice Viggen and the camo work looks terrific. The idea with the own paint masks is also very interesting. I like how it looks especially underside. :th:
Keep up good work.

Re: Viggen JA37

Posted: Tue Aug 04, 2015 12:11 pm
by patrickroos
JonMW wrote:Thanks for the comments!
patrickroos wrote:Sorry forgot...
So Your saying that the pre-cut camo masks does not really fit?

:cheers2:
The thing is that I started with painting the tan and then adding those masks that are located in the middle of the wing only using the panel lines as reference. The problem then comes when adding the second layer of masking that has to line up with more the one of the tan masks that might not be perfectly placed. If one of them is off by only 1 mm or 1 degree you have problems, especially when you get to the third layer of masking that has to align to three (or more) misplaced masks. Also some of the masks overlap, the ones that are on the edge of the sheet and also the ones on the edges of the wing. All of this adds up to make it really hard to get it perfect. The masks probably fit just as they should, I blame everything on "skit bakom spakarna". If I where to do this again I might start in one corner and just paint that area, mask it, pain the adjacent area, mask that and keep going until the whole model is painted. This would take a lot longer, but that way all the masks will line up as they should.
OK! :bash:
Good to know! Thanks! :th:

Re: Viggen JA37

Posted: Tue Aug 04, 2015 12:13 pm
by patrickroos
Wow, now it really looks like a Viggen mate, beautiful!!! :th: :pistols: :cheers2:

Re: Viggen JA37

Posted: Fri Aug 07, 2015 7:27 am
by JonMW
Thanks!

Been doing a bit more work, put a second coat of Aqua Gloss on followed by the new Ultimate Dark Dirt and then a coat of Model Master flat clear.

Image

After all the clear coats the metal around the engine didn't look too good, so I repainted it this time also using AK burned metal to get some color variation.

Image

Next up was the landing gear. Since I'm using the white metal ones they need a bit of clean up. For this I used a small wire brush for a dremel, but used it by hand.

Image

Gives a bit more of a shine on the part. One thing of note, I don't know what type of white metal Tarangus but some types can contain lead. So use gloves when cleaning the parts. Even if they most likely use a white metal without lead you can never be too sure.

Image

The landing gear assembled and waiting for paint.

Image

Re: Viggen JA37

Posted: Sun Aug 09, 2015 10:45 am
by Avgas
Fantastic job, that camo is awesome.

Re: Viggen JA37

Posted: Sun Aug 09, 2015 7:59 pm
by planemaker
Stunning camo work, Jon! :bow:: The Viggen really comes to life now.

Re: Viggen JA37

Posted: Sun Aug 09, 2015 11:27 pm
by JonMW
Thanks guys!

Have started working on the wheels, the resin ones has a lot more details then the kit ones.

Image

Image

But one of the main wheels in my package had a big air bubble in it and one of the rings on the PE has a gap in it. I could probably have contacted Maestro and gotten a new one, but I figured why bother them with that since I can fix it with maybe 15 minutes of work. First I glued on of the good PE rings on one of the good wheels.

Image

Image

Next I put a thin layer of clay on a sheet of plastic pushed the wheel into the clay so that it only covers the side wall and a little bit of the tread. The clay I used is an oil based clay called Monster clay, it might not be the best clay for this, a softer clay would be a little bit easier to work with, like a water clay. The good thing with this is that you can cast silicon directly on it, if you use a water based clay it needs to be sealed with something like a clear coat.

Image

Image

Image

I then made some dimples around the wheel using the back of a brush, I left a gap to be able to pour the resin in. Then build a small box of lego around the wheel.

Image

Image

Mixed about 20 grams of silicon, poured it in and let it cure for about 45 minutes.

Image

Image

The silicon came off the clay really easy and left a good cast.

Image

I then put the silicon back in the lego box, coated it with normal washing up liquid otherwise the second part of the silicon mold is going to stick to the first one and you will have a solid block of silicon with an in cased wheel. After letting the second half of the mold cure for 45 minutes I could take it apart, remove the wheel and then cut a channel to get the resin into the mold.

Image

Image

Taped the two half together mixed about 2 ml of resin and using a pipette forced it into the mold, I found that doing it that way there is less risk of getting air bubbles in the part. Also tapped the mold on the table to help dislodge any air bubble that might still be in there. Waited about 30 minutes and took out the new wheel, it needs a little bit of clean up but should look as good as the other ones when done.

Image

Image

Re: Viggen JA37

Posted: Mon Aug 10, 2015 1:10 am
by rwsmith14
Thats pretty neat !!

Re: Viggen JA37

Posted: Mon Aug 10, 2015 7:24 am
by TommyKillander
Very impressive!

I had to double check the resin-wheels in my stash, they seem ok.

:cheers2: