Page 1 of 1

Airfix 1/72 Supermarine Spitfire MK1a - First Ever Build!

Posted: Tue Dec 17, 2013 11:00 pm
by Drazimo
Greetings and Salutations Ladies and Gentlemen,

As the title suggests, this is going to be my first ever aeroplane build and it's going to be one of the most iconic fighters of WWII, the Supermarine Spitfire Mk1a. :fly: I expect I will make many mistakes along the way (I know I've already done it :-p), but plan to not get too frustrated, learn from it and move on.

Without further delay, below you'll see my little desk setup, with the sprues out and the box all cut up. I cut the box front and back off simply because I ripped it in my hurry to look at the aircraft. You'll also notice my Razer Deathadder mouse and mouse mat, yes, I am a geeky gamer too and due to living in a shared house with Anne's (girlfriends) friends who are all filipino (so is she lol) I don't have a spare area to model in, so I have to do it at my PC desk in the bedroom. I have a tea towel under the mat to stop it sliding around the desk, I do plan to get a rubber mat when I see one, but thought we used tea towels for chopping boards in the kitchen, I don't see why it wouldn't work for a cutting mat.

Image

The first thing I did as told by the instructions was to clip out the cockpit sections off the sprue and then I cleaned them up, which I'd had a bit of practice doing last night when I found some of my old GW Beastmen Gor Herd models (I'll be doing a W.I.P of these for painting figures). The image below is of them pre-cleaned before anyone points out there is still pieces of sprue attached to them. :nena:

Image

Once they were all clean up I decided I'd be a devil and put the cockpit together, not including the pilot as I'm not a fan seeing pilots in aircraft models, but that's just my personal preference. Plus, the pilot in the spitfire kit looks like my nan when she's sitting on the sofa waiting for a cuppa. At this stage of my career I don't really know what I can leave un-built, paint and then add, and what can go together at the same time, I'm assuming the cockpit can be painted and then glued but we'll see. The only issue I had was the joystick wouldn't go in so I had to take my hobby knife and scrap away at the hole so it would fit...

Image

Once the cockpit was all together I decided instead of painting it straight away I'd need to sort out the fuselage first, meaning I didn't need to rush it. So as you can imagine I set to work getting the fuselage off the sprue and this is where I ran into my first 'Well that was stupid' moment. I know from playing Warhammer 40k years ago, and reading up recently that you cut away from the model on the sprue and leave 1-2mm gap so not to cause cut-ins on the model, and that's what I thought I was doing. Apparently not, on the top part of the fuselage, near the tail I spotted a 2mm piece of sprue, but also a 'chipped' section next to it, I must have not been paying enough attention when cutting. I assume it'll be a simple case of putty filling later on and to me it looks HUGE as I'm new and learning, but honestly in reality its a small gap on a small model. :bash:

Image

I then went around cleaning up the sprue and little pieces of flash that were mostly on the tail sections and quite small, however I thing I may have taken a little too much off the top of a wing while doing it. I haven't a picture, but when it's inspected next session we'll see.

If you've built this kit you'll know the fuselage is meant to 'click' together with these little pin tabs on the inside and for me they were a bit hit and miss. Some of them were fine, others with a little tight fitting and the one on the tail just didn't want to click together at all. What's worse is that when all but the tail were in and lined up there was a lip/ledge around the fuselage. Here's a picture of the gap in the tail caused by the pin:

Image

I thought to myself 'I'm not having this' and snipped them all off. Once operation 'Pin Removal' was complete I didn't have such an issue with the tail, there is a small gap but this could be a common trait with WW2 aeroplanes, I'm new I don't know. In the next picture you'll be able to see the reduction in the tail gap, and the gouge in the fuselage caused by my heavy handedness.

Image

I also took note of how the fuselage seemed to fit better once the pins were removed, and there wasn't so much of a lip; this was of course if I could stop the bloody thing slipping out of my hands when trying to hold the two halves together.

Well guys, that's the end of Session One for me, I learnt a bit along the way, and it was really enjoyable and I'm looking forward to getting to grips with painting the cockpit and other parts on the wings. Once done I think it'll be a case of filling gaps, sanding and possibly re-scribing the fuselage not that I have a scribing tool... does anyone thing a hobby knife would work, or too cumbersome?

Anyway, thanks for taking the time to look over my progress so far, I hope you tune in for the next episode of 'How to be a Newbie'.

Re: Airfix 1/72 Supermarine Spitfire MK1a - First Ever Buil

Posted: Tue Dec 17, 2013 11:34 pm
by wappynutter
Looking mighty fine so far dude.. :th:
Don't get stressed, just go with the flow and enjoy it....
I'll hang around a bit and await your next post.... "How to be a Newbie"...
I posted a similar one not so long ago so I can't offer any advice on the scribe technique or build tips, all I can say is well done mate, keep up the good work.. :th:
Happy modelling ..
:cheers2:

Re: Airfix 1/72 Supermarine Spitfire MK1a - First Ever Buil

Posted: Wed Dec 18, 2013 12:11 am
by Paul
Of to a great start mate nice work

This may prove useful to you.

http://intscalemodeller.com/viewtopic.php?f=63&t=855

Re: Airfix 1/72 Supermarine Spitfire MK1a - First Ever Buil

Posted: Wed Dec 18, 2013 12:13 am
by longlance67
real nice kit you picked matey, just take your time and enjoy it, that's best advice I can give you, just enjoy yourself :)

Re: Airfix 1/72 Supermarine Spitfire MK1a - First Ever Buil

Posted: Wed Dec 18, 2013 5:46 am
by oldgit
Great plane to start with, by the way I painted up lots of units of Gors- some of my favourite figures :th:

Re: Airfix 1/72 Supermarine Spitfire MK1a - First Ever Buil

Posted: Wed Dec 18, 2013 6:59 am
by Joesdad
Well done Draz, you'll be fine, just don't lose your knife in them moosive panel lines!!!!

Tim

Re: Airfix 1/72 Supermarine Spitfire MK1a - First Ever Buil

Posted: Wed Dec 18, 2013 10:20 am
by Drazimo
Thanks for the support guys, really appreciate it. :cheers2:

@wappynutter - Aye, I will try my best not to get stressed, when I was younger I never really got irritated and was known for my patience, but the older I've got the more I notice it's slipped away, I need that calming part of my persona back. :-D As for not being able to give advice, I'm one that believes to can gain something from anyone regardless of their experience, sure technically 'experts' know the ins and outs, but they also get blinkered and it's down to us newer inexperienced Padawans to be innovative. lol.

@Paul - Cheers dude, and thanks for the link. I believe I've seen a few of those tutorials, but I'll definitely be revisiting them in the next day or so, work depending, should give me a little boost.

@longlance67 - That's the plan, taking it sow, it's probably why I've taken over a week to start. I didn't want to rush in, cut, snip and butcher the thing, and then end up with pieces glued to my forehead and paint all over my feet. A joke my dad once told me 'A young bull goes to an old bull "Why don't we run down the hill and 'do' one of those cows." The older bull looks at the younger bull and simply says "Why run and do one, when we can walk and do them all." ' Sometimes rushing around in this world isn't the best way to approach a situation.

@oldgit - Two reasons I pick it, one was slight patriotism (sad I know) and the other was because I'd read about it and seemed to be a good choice. I've never been a Warhammer Fantasy player, mostly 40k, but I love the units in fantasy except maybe the minotaurs, to me they look goofy. The Gors I have won't be all painted the same as I'll be using them to get some practice in, and I'll mostly be using Kevin Dallimores 3 colour method, it's one of those love/hate styles I think. It's not realistic, but I like it. Predator - Troll and WW2 bycicle Dads Army

@Joesdad - Haha. Cheers, and I'll definitely look out for my knife, hopefully there isn't a Styrene Troll living in the panel lines. :tongue:

-D

Re: Airfix 1/72 Supermarine Spitfire MK1a - First Ever Buil

Posted: Mon Dec 23, 2013 6:52 am
by rm6239
Drazimo

Great start and a Spitfire is always an awesome build. As the other guys said, take your time and enjoy the build, treat this as a learning experience. Looking forward to seeing your next update.

cheers

Rossco

Re: Airfix 1/72 Supermarine Spitfire MK1a - First Ever Buil

Posted: Sun Dec 29, 2013 11:48 am
by MakingModelsAgain
Well done Drazimo and welcome to the hobby.

At this stage in your career, when you say you expect to make mistakes, don't worry... we all do. And speaking for myself, a lot! It's how we learn and improve our skills more rapidly than over the course of a few years of trouble-free kit-building. I can safely say there isn't a kit I've built to date that I haven't screwed something up, then recovered by adopting a different method or strategy. Actually, screwing up is a lot more fun that it sounds. At first it's all 'Oh no, what have I done?' and then when you surmount the 'issue' the satisfaction is immense. Plus you've probably added another string to you bow in the process.

But above all, HAVE FUN regardless!

Re: Airfix 1/72 Supermarine Spitfire MK1a - First Ever Buil

Posted: Sat Jan 04, 2014 9:21 pm
by Drazimo
Hello again!

Due to working in retail and being a dreaded Security Officer Christmas and New Year have been pretty busy for me, working silly hours and not really having much time to just sit and relax. My first day to do this was New Years Day, so I told the OH if she wanted to go out it's early or nothing as I really just wanted to sit and model and wasn't going to be interrupted by sudden 'Lets do "this"' NO! So with that said, I got out the Spitfire to see if I could get some work done.

The first thing I did was cut the canopy from the sprue and dip it in Scale Modellers Ambrosia... aka Future. Once done, I carefully placed it in a tupperware container and placed it on the wardrobe to dry nice and safe away from dust and the stomping girlfriend. :walk:

Before
Image

After
Image

I then went onto painting the cockpit and inside the fuselage with Lifecolor's Interior Green, and no airbrush used here, just a hairy stick. I added a few bits of black to certain parts as directed in the instructions, the seat was also painted in Vallejo model colour 'Tan'. I did a little dry brush of Citadels Boltgun Metal on the inside of the fuselage to pick out a few bits of detail. While painting I noticed that the control panel actually had two ejector pin marks I hadn't previously noticed, which scuppered my plans of painting it black, and then dabbing bits of white for dials and then coating with future for a nice shine. As this is my first model I wasn't too fussed and just left it green... :shock: crazy I know. There was also every intention of giving the cockpit a nice wash in Dabad Black by citadel, but I got too excited and pit the fuselage together, completely forgetting.

Image
Image

Not the best brush work, but I used the largest round brush I had, which wasn't very big as I wanted to save my new flat brush for the main bulk of the spitfire, call me OC.

My next job was you are probably guessing is getting the fuselage together, the part I had been waiting for and most looking forward to. For me, this was a bit fiddly, and I think it was in part because I cut off the clips that are designed to click the model together, however, if you've read my previous post it was unavoidable. So with my tongue sticking out and waving around like a worm on a hook, and my finger failing to grip onto the two halves of the fuselage and the cockpit, I finally managed to get a fair fit. Knowing I wouldn't be able to hold onto all part and use Tamiya's ET cement I used my really expensive £1 clips from Poundland!

Image
Image

Right, the fuselage is nicely clamped, although in hind sight I realise some tape could have been used here instead of the scaffolding you see in the picture above. We live and learn. My next port of call is the wings, I could have stopped and had a rest, but I wanted to get the wings and fuselage together in this session due to not being able to do much modelling for the Christmas period. I'd pretty much already cut them from the sprue and cleaned them up, so it was a case of gluing them, and for the most part was quite easy to do, no sweat. I don't actually have a picture of them together as I forgot once again in my excitement. lol.

Image

It is at this point in the build where I had some issues, and to me it was like I had been thrown into the modelling arena with the world champion of bad fits. I'm sure to you veterans it'll be a simple fix and nothing to note, but for me, I was David, and my model was Goliath. When I went to fit my fuselage together with my wings, the fuselage wouldn't fit in the area it was meant to. I would slot in one side, and there would be this big honking crater on the other side that just wouldn't clip in no matter how I tried to tease it. Could this be because I glued the wings wrong?

The way I eventually managed to fit it was to actually pull away some of the upper wing from the lower wing at the front of the whole wing section, this when allowed the fuselage to fit, although I still had to cut away the tabs that are on the lower wing and are designed for the fuselage to 'lock' to.

Before
Image

After
Image

I then had to re-glue the front of the wings and push them down firm to prevent there being a big gap caused by the fuselages being put in. To me it seemed a bit strange that I had such an issue with the joining of the parts, especially as I've been informed it's a good fitting kit, I'll put it down to my inexperience. I did, however, feel a great sense of achievement from overcoming the obstacle and ending up with something that is starting to look like a Supermarine Spitfire Mk1a.

There are a few gaps in the model, two on the underside; the first being at the front end where the wing meets the front of the fuselage, and the second towards the rear, again where the two parts meet.

Image
Image

The other gap is at the top by the canopy, and I'm assuming that the best way of filling this gap is to install the canopy and then fill it, anyone have any suggestions on that?
Image
Image

It's been fun so far, I believe I've learnt quite a bit this far in and I look forward to installing the canopy and getting out the perfect putty. Also, as I'm a complete newb at this, if anyone has some advice on where I may have slipped up and can change, or general advice on what you've seen please go ahead a throw it my way! :th:

Re: Airfix 1/72 Supermarine Spitfire MK1a - First Ever Buil

Posted: Sat Jan 04, 2014 9:54 pm
by Paul
Off to a great start mate, look forward to seeing more :cheers2:

Re: Airfix 1/72 Supermarine Spitfire MK1a - First Ever Buil

Posted: Sat Jan 04, 2014 11:01 pm
by longlance67
great work mate, its a lovely kit and your doing a great job


keep it up buddy


Shane

Re: Airfix 1/72 Supermarine Spitfire MK1a - First Ever Buil

Posted: Sun Jan 05, 2014 9:01 am
by Drazimo
Thank you very much to you both. *tips hat*

-Draz

Re: Airfix 1/72 Supermarine Spitfire MK1a - First Ever Buil

Posted: Tue Jan 14, 2014 8:55 pm
by Bissyboat
Good progress on the Spit. :th:

Re: Airfix 1/72 Supermarine Spitfire MK1a - First Ever Buil

Posted: Thu Jan 16, 2014 8:01 am
by Drazimo
It's been a bit since I've actually posted on here, even though I'd actually done more from my last post, but life gets in the way and more importantly the procrastination demon was also on my back. :nena:

Anyway, so from where I left off it was time to start filling in some gaps! I don't know about any of you, but I find that Perfect Putty is pretty awesome, and dentistry tools work really well for sculpting and now applying putty. They're sold as 'Wax Carvers', this would explain why we're all scared of the dentist...

Image
Image

Before I could do that though the canopy needed to be masked and put in place, this was mostly due to a big gap at the from of the canopy where the fuselage met. The masking tape was brought out, applied to the glass and then using a shape knife I attempted to cut along the seam edges, it's not perfect but ok for a first go and first time of asking.

Image
Image
Image

At this stage I also decided to the a few extra pieces like the exhausts and the tail parts. Looking back I could have left the exhaust off to make painting easier, but it didn't cause too many issues.

From there I taped off the areas I wanted to apply putty, my goal was to use the tape and make my work area on the model neater, but in the end it didn't fully work as intended more putty was required, however, for a first time I don't think it turned out too bad, and for the most part I managed to smooth off most gaps fairly well.

Image
Image
Image
Image

Once the putty had dried, all areas were given a good sanding as were the seam lines where putty wasn't used. Personally for me sanding is the scariest part, the fear of over sanding an area and making it look wonky is always in the back of my mind, for the life of me I don't know why, but there we go. A layer of Vallejo Game Colour Black was used to pick out anything that need sanding further for a smoother finish. As it happens I thought I'd got everything, even after the black paint, I was proven wrong but luckily it doesn't really show through the paint too much once primed.

Image
Image

I have done some painting, and I'll put that in another post below just to separate them and not make one post too long.

-Draz

Re: Airfix 1/72 Supermarine Spitfire MK1a - First Ever Buil

Posted: Thu Jan 16, 2014 8:36 am
by Drazimo
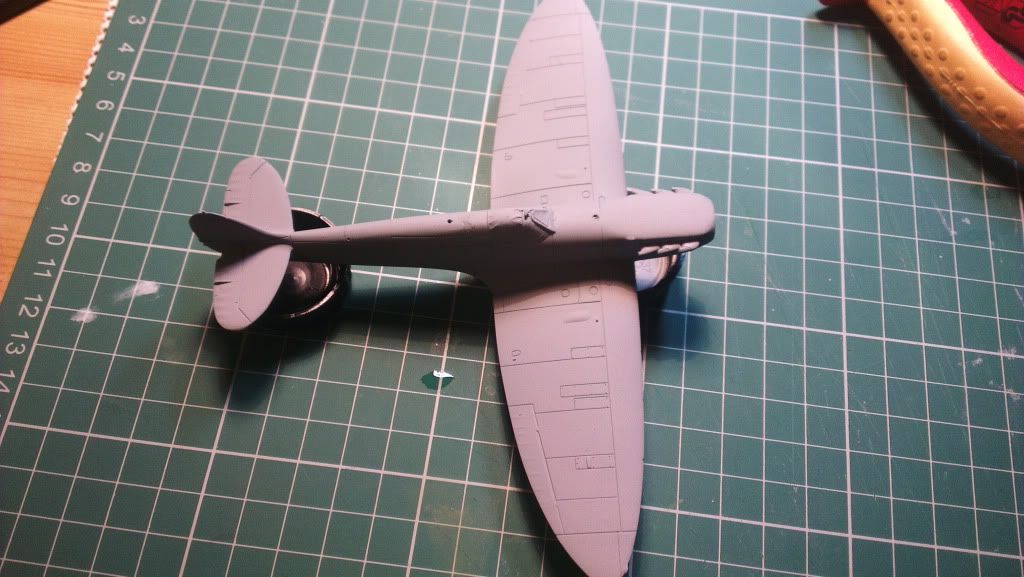
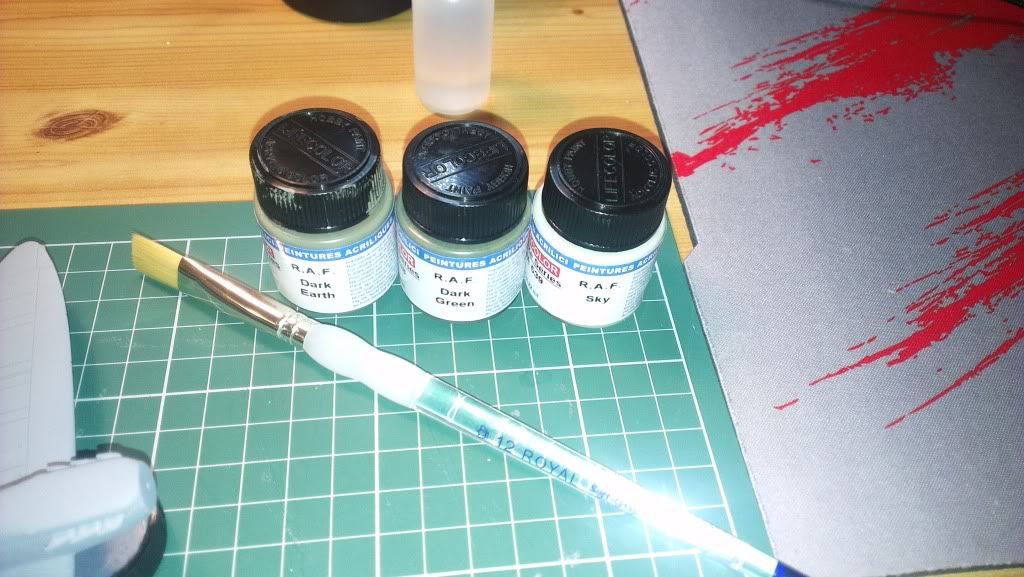
All primed up and time to paint. As some of you might know I'm new, so don't have access or really the space for an air brush, this means a hairy stick is going to be used. Having got rid of my vallejo set of 150+ paints 6 months ago due to not thinking I'd be using them again for war gaming :bash: I decided to try something new, Lifecolor. I've heard good things about them from people on the forum, namely Paul, especially in his paints video I believe it was. As this is a spitfire I thought it only right to purchase the 'Easy 3' RAF colours to do the job.

Image

It has to be said that from the get go I loved these paints, they aren't overly think, smooth down really well on the model and they don't smell like my nose is being savagely attacked, which is important as I model in 'our' bedroom. :pistols:

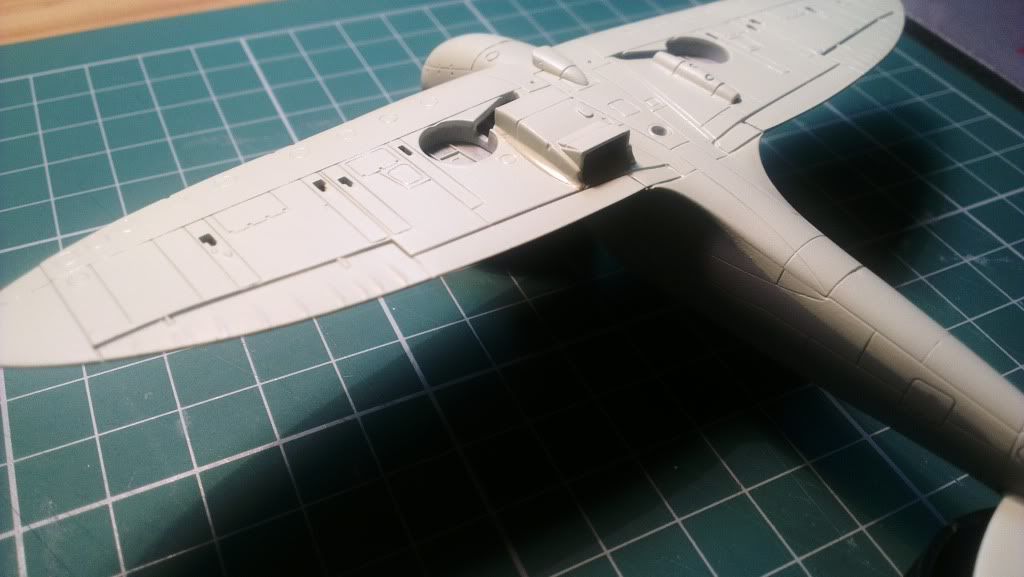
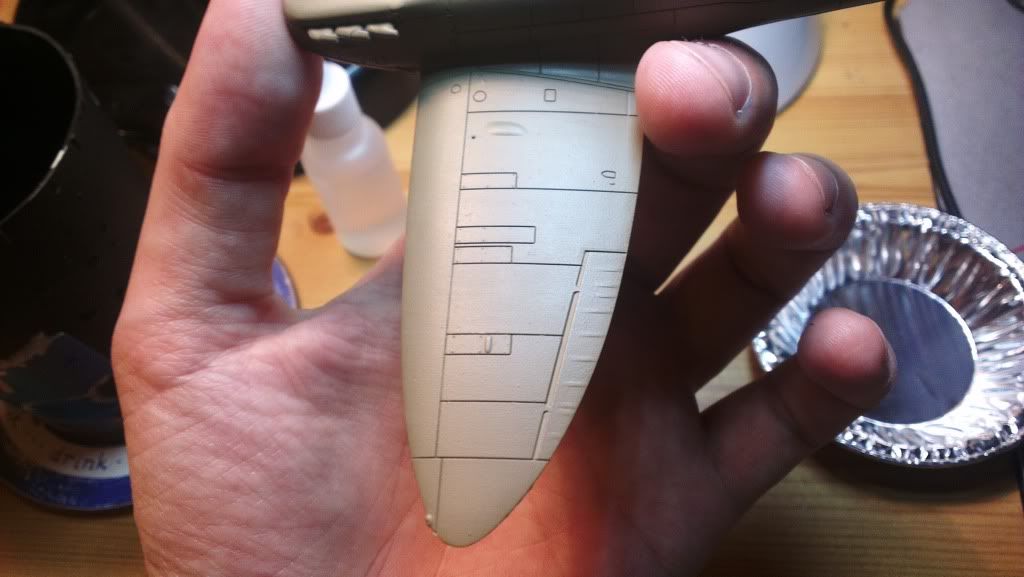
I don't really have a 'stage-by-stage' of the layers as they went down as I got too into painting and found it quite enjoyable, while I was painting the underside RAF Sky I was also watching 'Company of Heroes', it has Vinnie Jones in it and the sniper kid from Expendables 2, quite surprised as it wasn't as bad as I thought it might be. lol.

Image
Image
Image
Image

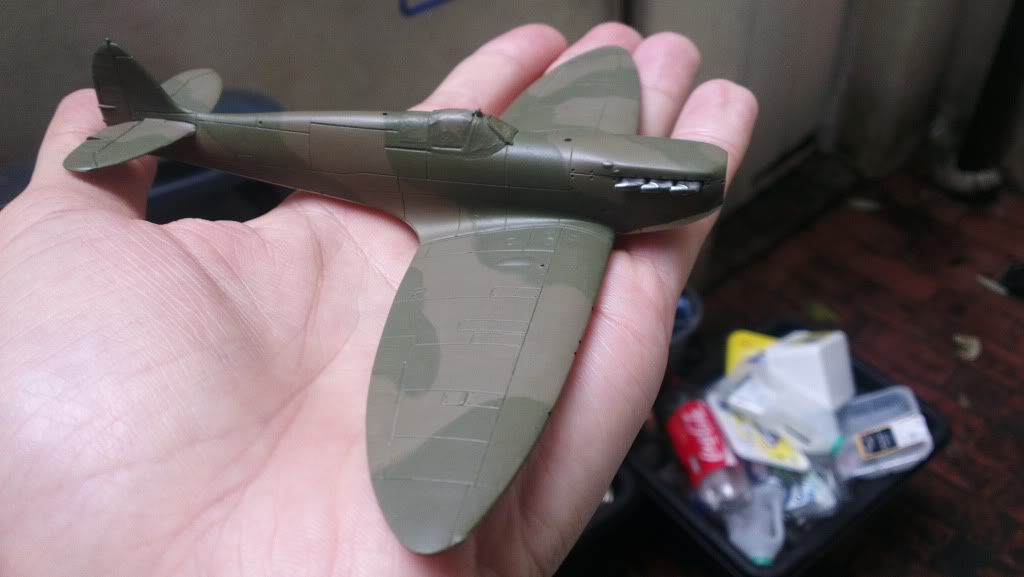
Quite happy with the finish of it, looks pretty smooth for brushed on, but I did use very thin paint and being so light it took a while, but 8-10 coats later and it was nice. It's pretty much the same story for the upper part of the plane, which was painted in RAF Earth Brown, but did require fewer coats to fully cover the model as opposed to the Sky. This allowed me to watch an awesome movie called 'The Wild Geese', if you haven't seen it, get on LoveFilm. :tongue:

Image
Image
Image

The camouflage was the trickiest part of the painting, and this was caused by a dark colour going over a dark colour and using very thin layers. I did this in 2 sittings and I believed it also took about 8 coats of paint, also due to it being done with a brush I could slightly go over my main lines, which caused a slight blury edge so it wasn't so harsh. Here is a pick of the first sitting: (I should also note I was watching 'The Tuxedo' during this stage.)

Image

And after a few more coats the day after I took the Spitfire outside to take the pictures as my slightly yellow light doesn't show the colours properly and being pleased with the model in its painted state I wanted to see it properly. I should also note that I painted the exhausts in citadels boltgun metal over vallejo black, and then gave it a wash of Sepia and Dabad Black from citadel, just for a bit of grime for the time being. (Dirty Harry was my movie for this part of the build. :thumb1: )

Image
Image
Image

On the whole I'm pretty pleased with my first 'proper' painting of aircraft parts, obviously a lot to improve on and it's very time consuming it seems compared to an air brush, but then it relaxes me at the same time and I can watch crappy movies. This is also as far as I have managed to get, the next stage will be doing the wheels, propeller and aerial, hopefully they won't take too long. From there I will give it a coat of Future, add decals and then possibly some pin wash and pastel weathering, although as this is my first build I might keep it 'clean'.

Cheers,
-Draz

Re: Airfix 1/72 Supermarine Spitfire MK1a - First Ever Buil

Posted: Thu Jan 16, 2014 8:42 am
by rm6239
Looking good mate, nice work with the brush.

cheers

Rossco

Re: Airfix 1/72 Supermarine Spitfire MK1a - First Ever Buil

Posted: Thu Jan 16, 2014 10:58 am
by wappynutter
:jd: Amazing brushwork dude.... :clap:

Wish I had the patience to sit and brush so neatly...
.... And while watching "not so great" movies at the same time!!! :lol: :D

Well done mate your finish so far is superb mate.. :th:
Keep it up, look forward to the next update..
:cheers2:

Re: Airfix 1/72 Supermarine Spitfire MK1a - First Ever Buil

Posted: Thu Jan 16, 2014 11:57 am
by Drazimo
Thank you kindly for the nice words, both.

As a youngster I had the patience of a saint, the lost it as I got into my early 20s, now nearing 30 I'm trying to find my way again :-)

-Draz

Re: Airfix 1/72 Supermarine Spitfire MK1a - First Ever Buil

Posted: Thu Jan 16, 2014 5:10 pm
by Raptor
Awesome work so far, nice to see someone doing the same build as me and brush painting too!
Looks like we are neck and neck on our progression.
Truly nice work, love the subtle differences in the paints you chose, may have to give them a try myself.

Re: Airfix 1/72 Supermarine Spitfire MK1a - First Ever Buil

Posted: Thu Jan 16, 2014 5:27 pm
by Joesdad
Really good brushwork Draz, once you get used to Lifecolor the nicer they become I reckon. Just a shame they don't do much in the way of RAF sets.... Keep up the good work mate.

Tim

Re: Airfix 1/72 Supermarine Spitfire MK1a - First Ever Buil

Posted: Thu Jan 16, 2014 8:20 pm
by Nige201980
WOW thats great work with the old hairy stick mate really good mate

Re: Airfix 1/72 Supermarine Spitfire MK1a - First Ever Buil

Posted: Mon Jan 20, 2014 10:56 am
by patrickroos
Wow it came out really nice, good work and impressive brush painting! :thumb2:

I actually choose two Airfix kits as the first builds after +30 years because of the fit issues.
Just to work with fillers, sanding etc. and re-learn, learn.
Had the same fit issue on my 1/48 PR XIX spit, Grand Canyon size gap at the wing root.
At one point I actually doubted if they had packaged the right version wings in the box... :scratch::
A lot of Perfect plastic putty, Mr Surfacer, CA and LOTS of sanding and re-scribing it came out ok.
(And I cheated and pushed the wing roots to the fuse a bit by bending the whole wing up, e.g. a slight increase in dihedral)

Your progressing well and with decals etc Your spit will look the business! :cheers2:

Re: Airfix 1/72 Supermarine Spitfire MK1a - First Ever Buil

Posted: Fri Jan 24, 2014 6:07 pm
by RobertA
Brilliant paintwork!! :)

Re: Airfix 1/72 Supermarine Spitfire MK1a - First Ever Buil

Posted: Sat Jan 25, 2014 6:05 pm
by xXModellerXx93
Looks very good mate. I really like all kind of Spitfires. Keep up the good work :th:

Re: Airfix 1/72 Supermarine Spitfire MK1a - First Ever Buil

Posted: Sat Jan 25, 2014 6:09 pm
by Lee
Looking good bud :th:

Re: Airfix 1/72 Supermarine Spitfire MK1a - First Ever Buil

Posted: Tue Apr 29, 2014 11:27 pm
by Benge
Sorry to bump an old thread, but as im just about to start my first build i enjoyed following this. Would love to see some updated/finished pics if you have them :) really love the paintwork (something I really need to work on) what did you thin it with and to what ratio/consistency?

Thanks

Re: Airfix 1/72 Supermarine Spitfire MK1a - First Ever Build!

Posted: Fri May 22, 2015 12:01 pm
by Homerlovesbeer
Agreed...some finished pics would be great as I'm building this kit currently.

Awesome brush work by the way.......