There are loads of posts regarding white and blue tac leaving a greasy residue on walls after hanging posters and such. Maybe it will evaporate out as it dries??
Just dont panic and wreck all your hard work. You can always strip it all off later if it doesn't dry out even or you can't even out the paint by hand
Maybe some isopropyl alcohol as a test to remove the grease
http://www.intscalemodeller.com/viewtop ... ue&start=0
Trumpeter 1/72 F-100F Super Sabre "Wild Weasel"
-
Twokidsnosleep

- General

- Posts: 18122
- Joined: Thu Aug 07, 2014 4:07 pm
- Location: BC,Canada

Re: Trumpeter 1/72 F-100F Super Sabre "Wild Weasel"
Scott
On, Under or Near the Bench:
American Graffiti Ford Coupe
Headless Horseman...figure sig
1/72 Black Pearl Pirate Ship
On, Under or Near the Bench:
American Graffiti Ford Coupe
Headless Horseman...figure sig
1/72 Black Pearl Pirate Ship


Re: Trumpeter 1/72 F-100F Super Sabre "Wild Weasel"
Had this happen to me but with blu-tac, that's why I started using white-tac, very alarming and I can imagine very frustrating for you. You did mention waiting two hours between coats, perhaps each coat hadn't quite dried. Don't know what to suggest as I ended up stripping my project and starting again.
Either way, I hope you get it sorted out.
From one Weasel builder to another.

Either way, I hope you get it sorted out.
From one Weasel builder to another.
Will
"A thing of orchestrated hell- a terrible symphony of light and flame."
Edward R Murrow
"A thing of orchestrated hell- a terrible symphony of light and flame."
Edward R Murrow


Re: Trumpeter 1/72 F-100F Super Sabre "Wild Weasel"
Time to get up on the horse again. Turned in a 20-page report as the first stage of my final exams. To celebrate, I decided to mask up the plane again!!!

Ive decided to keep the dark green on the aircraft. I will probably start with the brown again, will try to find a darker tint of the tan. Gotta find positives, atleast now I can find even better matching colors! Until next time,
Cheers!

Ive decided to keep the dark green on the aircraft. I will probably start with the brown again, will try to find a darker tint of the tan. Gotta find positives, atleast now I can find even better matching colors! Until next time,
Cheers!
Ludvig
On the bench:
Airfix 1/72 A-4 Skyhawk
Italeri EH-101 Merlin HAS.1 (Whirlybird SIG)
Last one finished:
Bandai 1/72 A-Wing Gallery
On the bench:
Airfix 1/72 A-4 Skyhawk
Italeri EH-101 Merlin HAS.1 (Whirlybird SIG)
Last one finished:
Bandai 1/72 A-Wing Gallery
-
UKguyInUSA

- Second Lieutenant

- Posts: 3429
- Joined: Sun Mar 30, 2014 10:19 pm
- Location: New Hampshire, USA formerly Palm Beach, Florida, USA and Leicestershire, UK (until 1999)
- Contact:
Re: Trumpeter 1/72 F-100F Super Sabre "Wild Weasel"
Oh bugger! Sorry about the mishap with the white-tac....that sucks big time 
I never use white or blue tac, I always create my own paper masks by photocopying the views of the aircraft on the paint guide and blowing them up to actual size of the model. To do that, I measure the wing span, tip to tip on the paint guide, then on the actual model and calculate the difference for scaling on the photo-copier. Then, I do the same with the length of the aircraft. I cut the masks out and use a bit of tape bent around to create "double-sided" tape. The thickness of the tape slightly raises the paper mask from the surface and helps to leave a nice softer demarcation between colors instead of harsh, harder lines.
This is a video on my YouTube channel wherein I demonstrate the above technique.....if you haven't tried it, it might be something for you to try in the future. It's my favorite method...takes a little longer, but the end result is worth the preparation effort
[youtube]E-QF9dU8Ctk[/youtube]
Good luck with the rest of the build....apart from the white-tac issue, she's starting to look sweet! 
Cheers,
Martin
I never use white or blue tac, I always create my own paper masks by photocopying the views of the aircraft on the paint guide and blowing them up to actual size of the model. To do that, I measure the wing span, tip to tip on the paint guide, then on the actual model and calculate the difference for scaling on the photo-copier. Then, I do the same with the length of the aircraft. I cut the masks out and use a bit of tape bent around to create "double-sided" tape. The thickness of the tape slightly raises the paper mask from the surface and helps to leave a nice softer demarcation between colors instead of harsh, harder lines.
This is a video on my YouTube channel wherein I demonstrate the above technique.....if you haven't tried it, it might be something for you to try in the future. It's my favorite method...takes a little longer, but the end result is worth the preparation effort
[youtube]E-QF9dU8Ctk[/youtube]
Good luck with the rest of the build....apart from the white-tac issue, she's starting to look sweet!
Cheers,
Martin
WIP:: Tamiya 1/48 F4U-1A Corsair
Non-WIP::Eduard 1/48 Fokker DVII, Revell 1/32 Arado AR196 and 1/32 BF109G10 Erla,
Non-WIP::Eduard 1/48 Fokker DVII, Revell 1/32 Arado AR196 and 1/32 BF109G10 Erla,
Re: Trumpeter 1/72 F-100F Super Sabre "Wild Weasel"
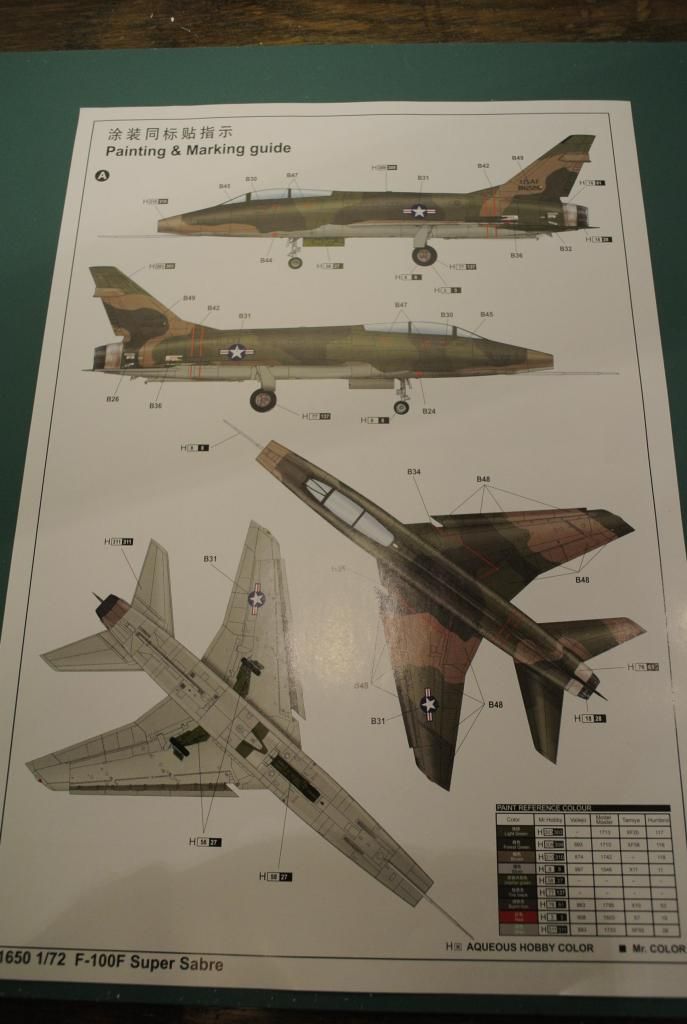
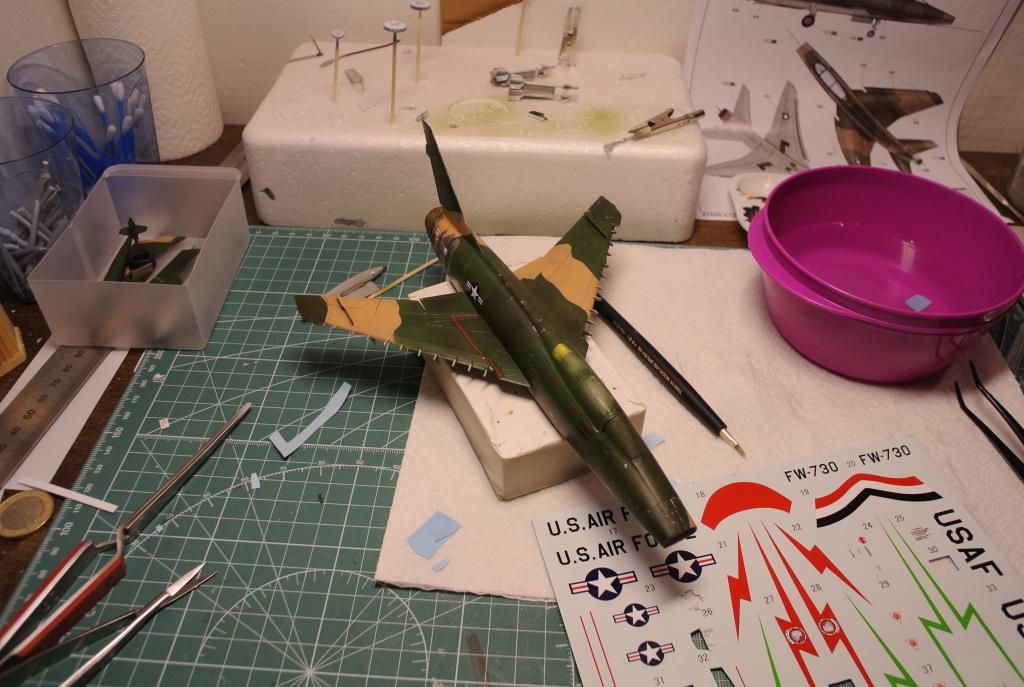
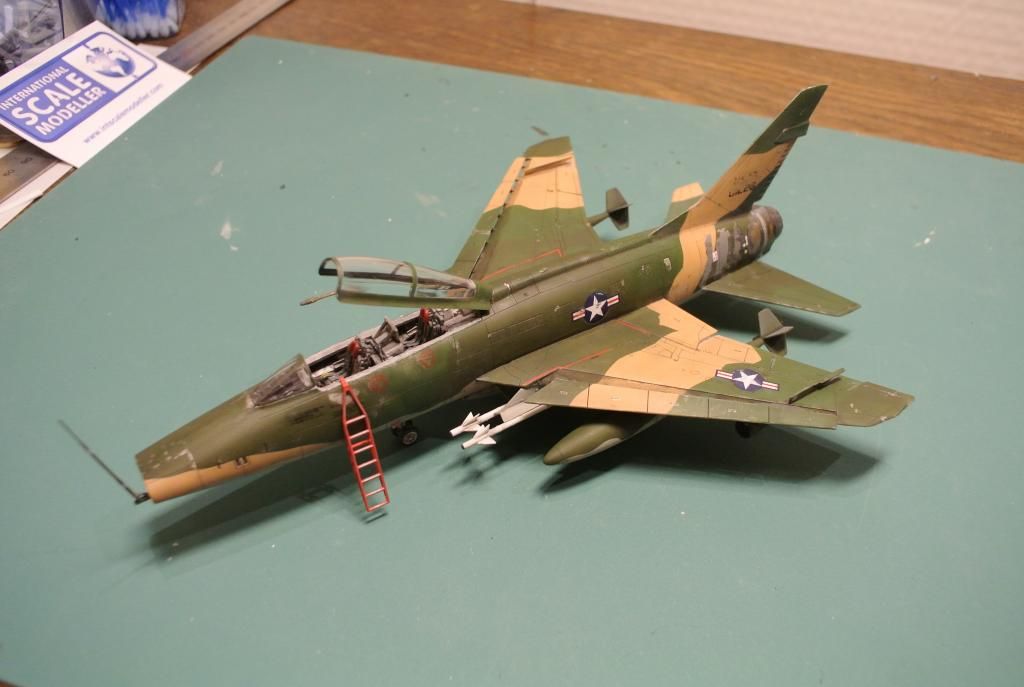
I finally got around to repaint the plane. I decided to find a closer match to the SEA-tan that Ive seen on some photographs. The kit wants you to use a very dark brown, but the majority of photos Ive seen from Vietnam are a much more faded, sandy tan-color.
Heres how the kit wants it to look:
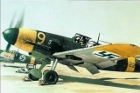
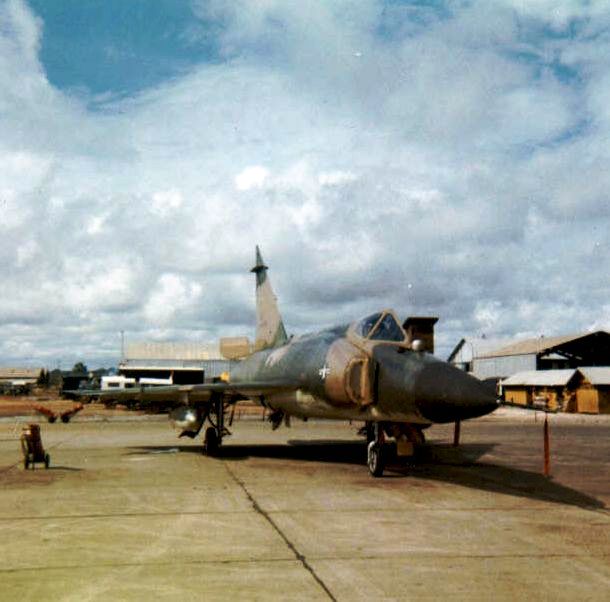
And here are some older photos:


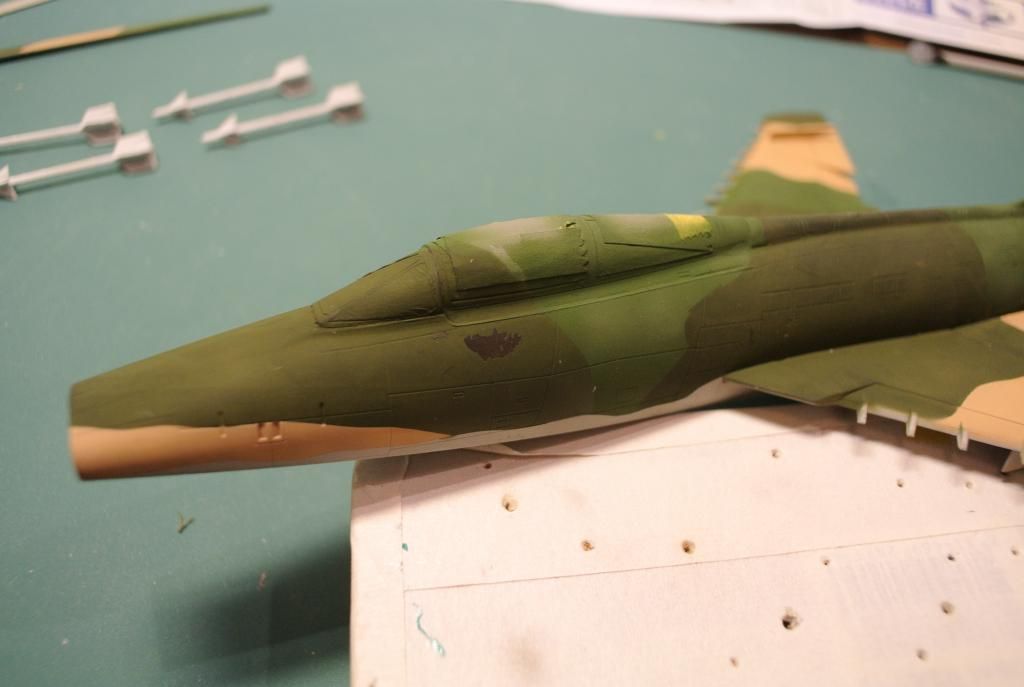
So i took this opportunity to somewhat alter the Tan-color. I added some a more yellow tone to the color and got a more pleasing result. Since I had a darker shade down already, I got an interesting 3d-effect to the paint job, and thats a plus
From the last setback, I was feeling a bit experimental, so I tried my hand at some minor bleaching on the lighter green. The results came out ok, maybe a bit much, but it was a learning experience
The colors I used for this build (not by any means 100% accurate, I just went with what I thought looked good):
Tan = 50%+50% Tamiya XF-59 Desert Yellow + Tamiya XF-15 Flat flesh
Green = Tamiya XF-26 Deep green
Darker green = 75% + 25% Tamiya XF-61 Dark green + Tamiya XF-26 Deep green
Grey = Tamiya XF-80 Royal light gray
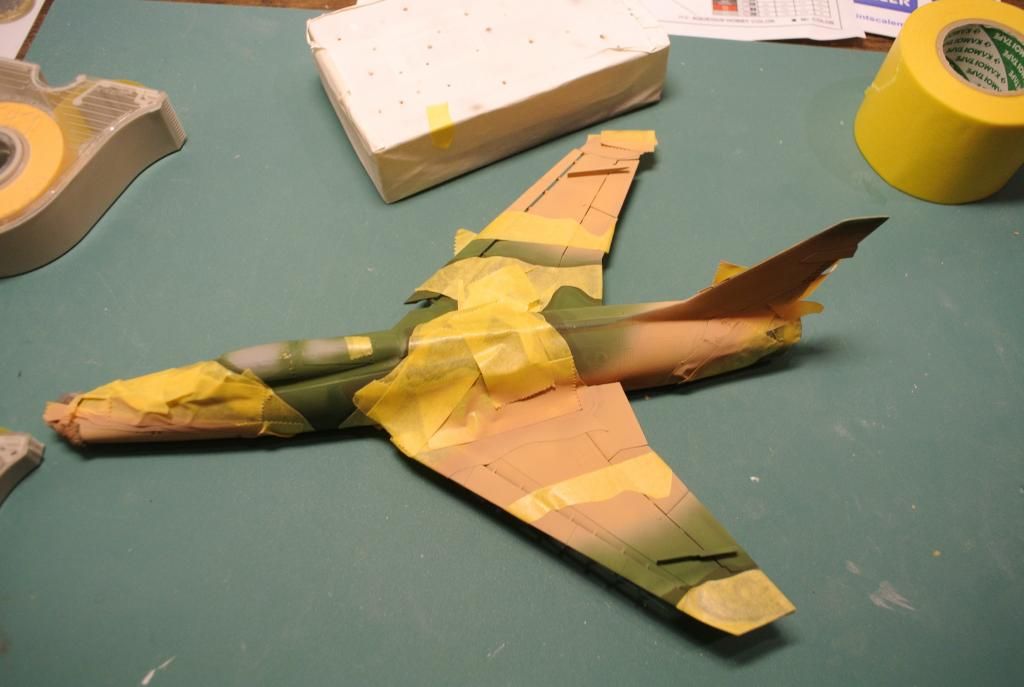
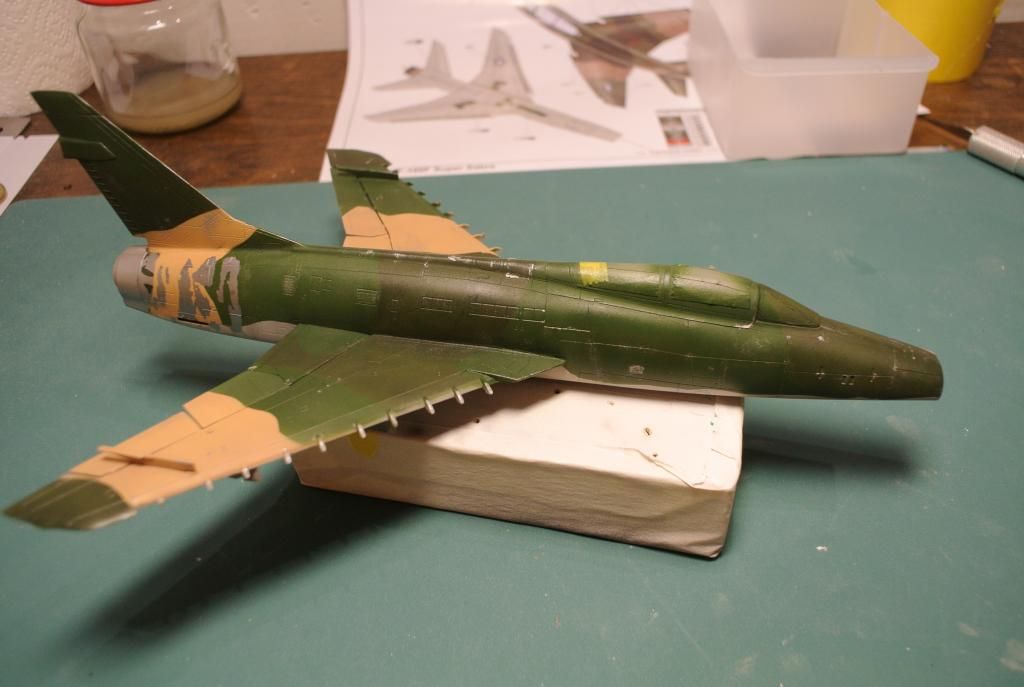
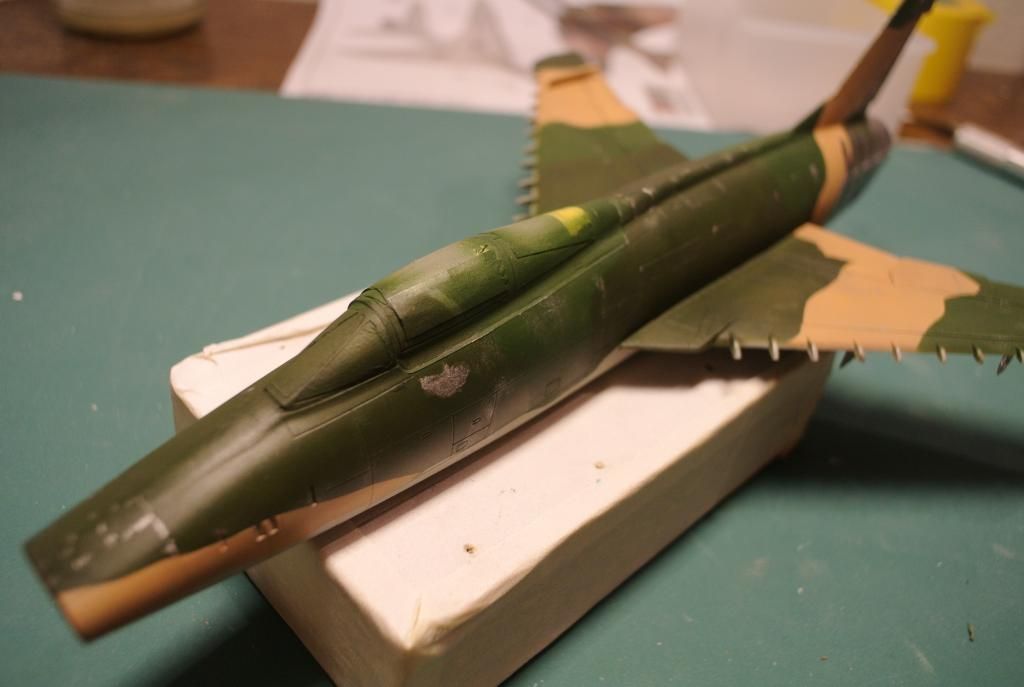
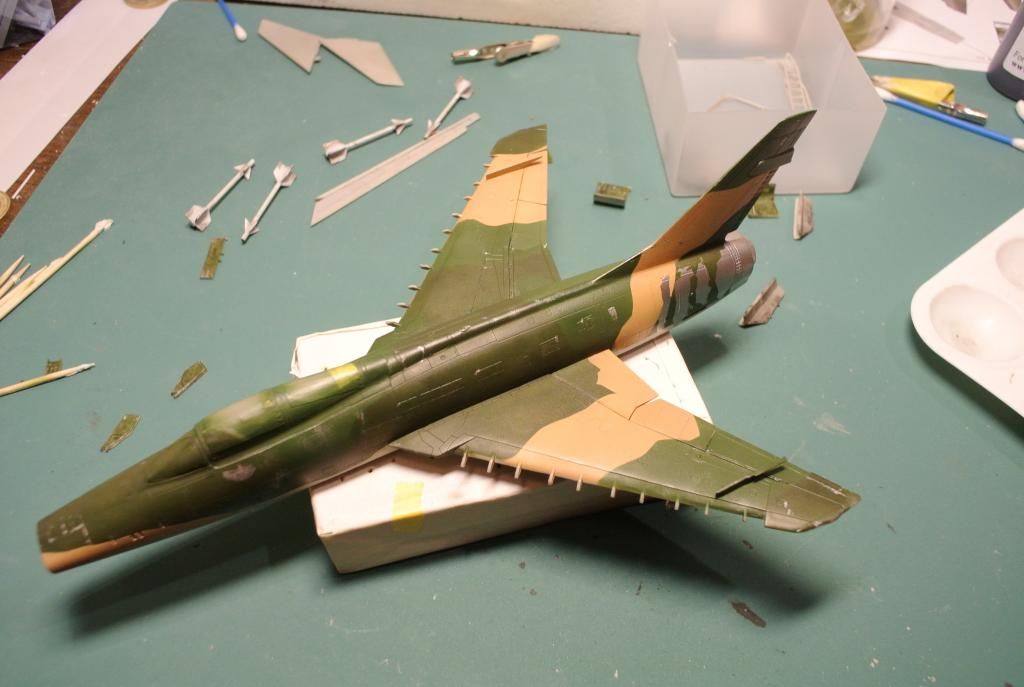
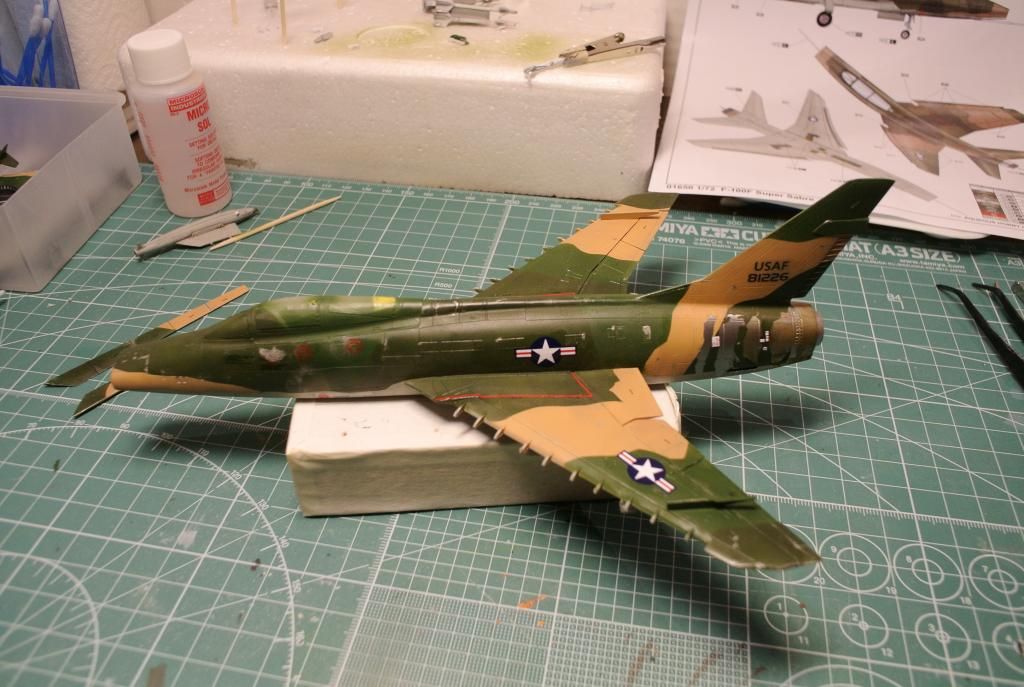
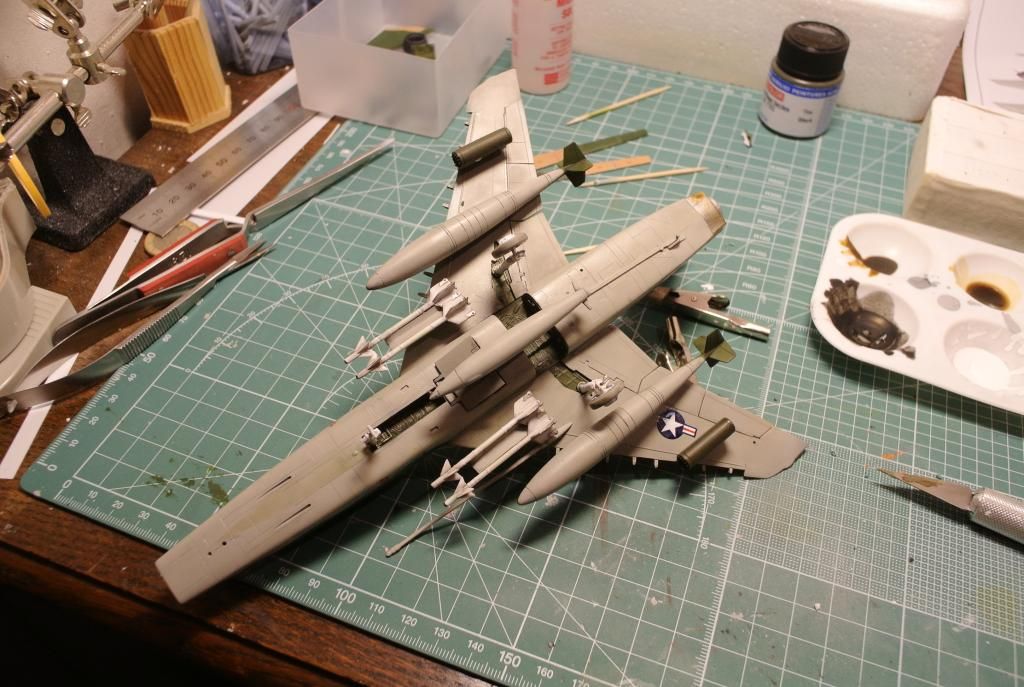
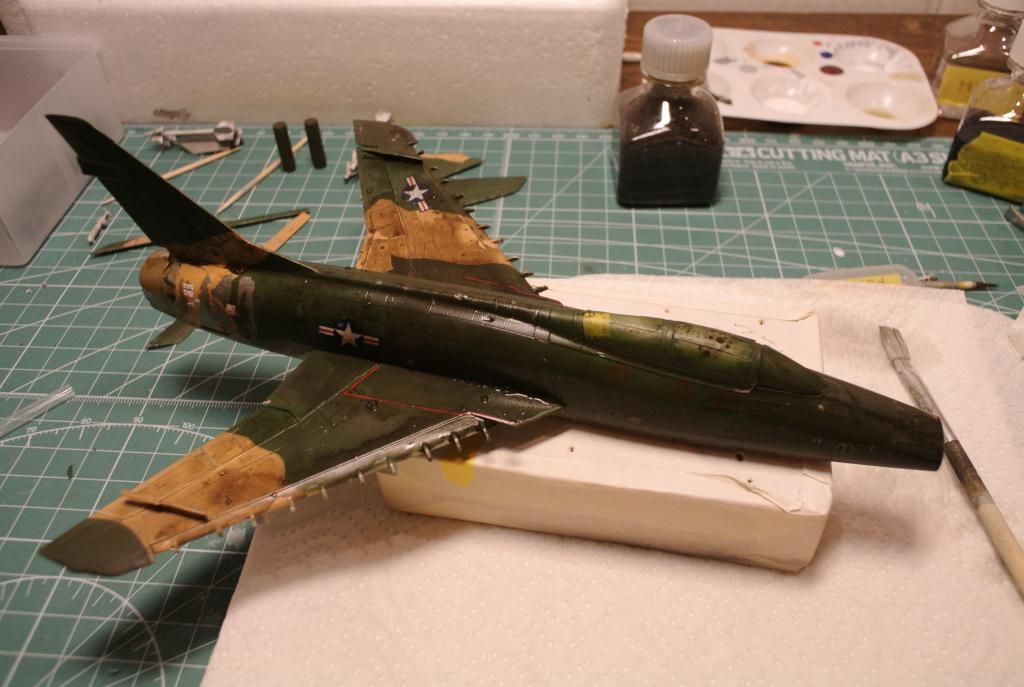
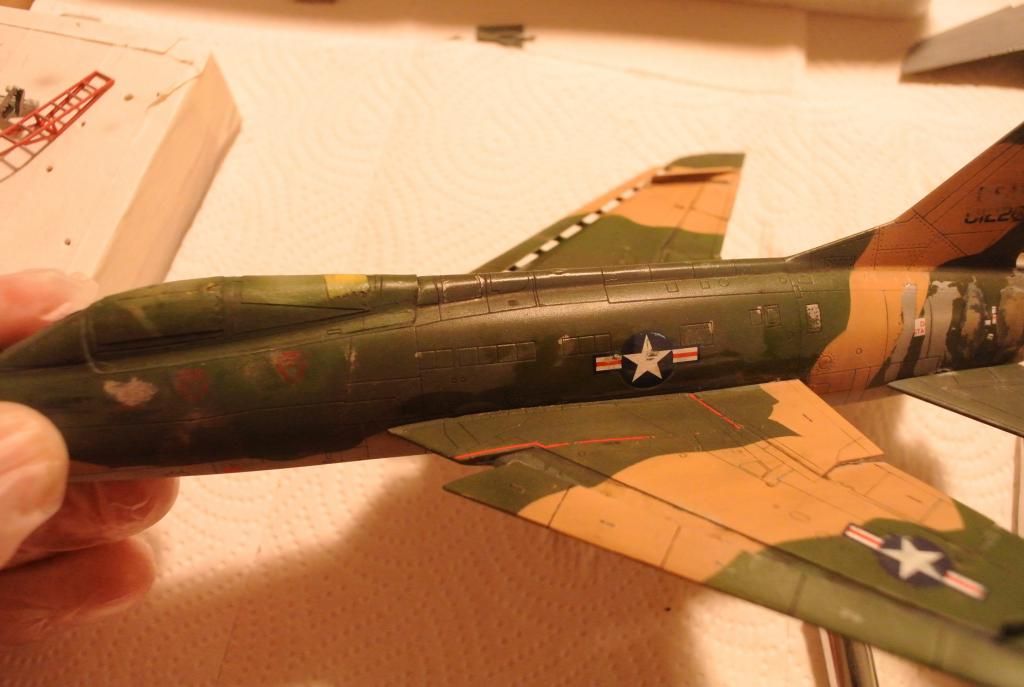
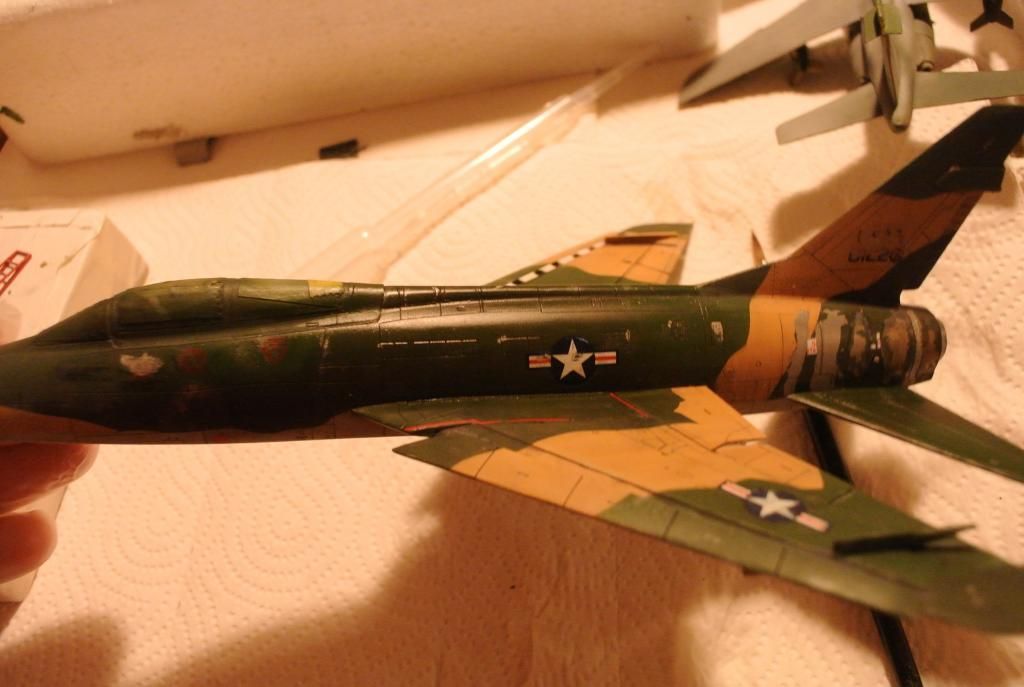
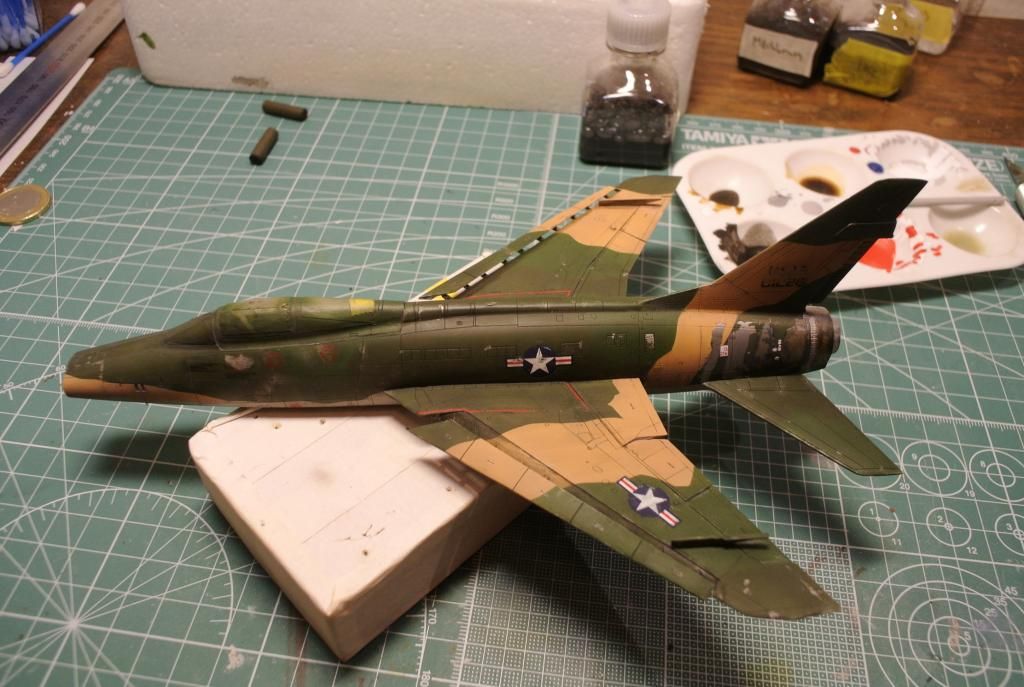
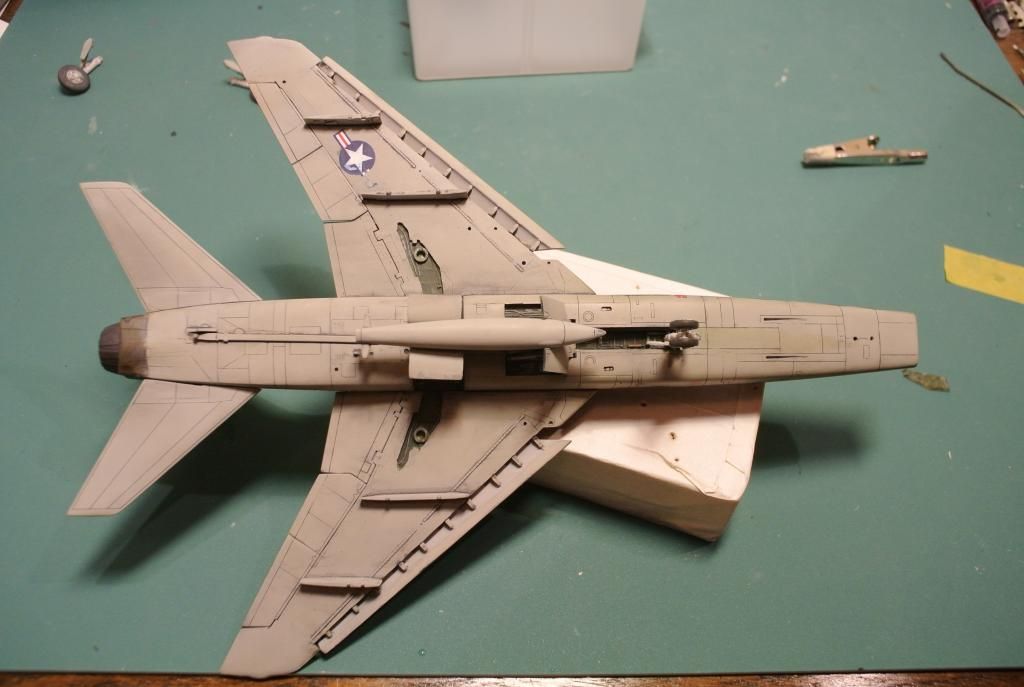
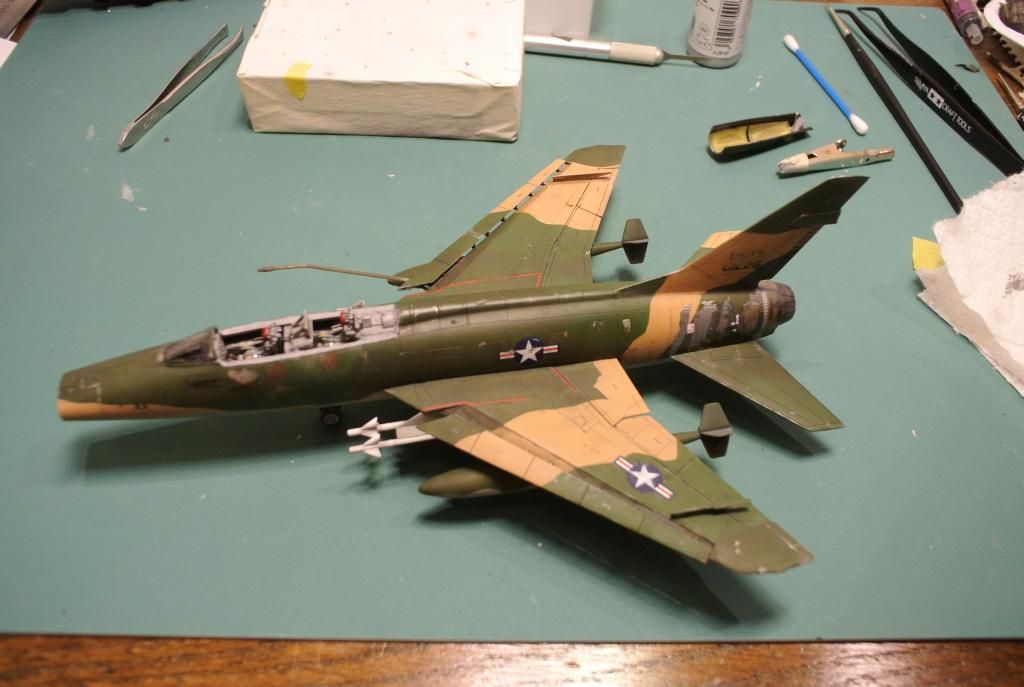
And here is the result:
Sprayed down the tan-shade and here I am masking down for the lighter green.
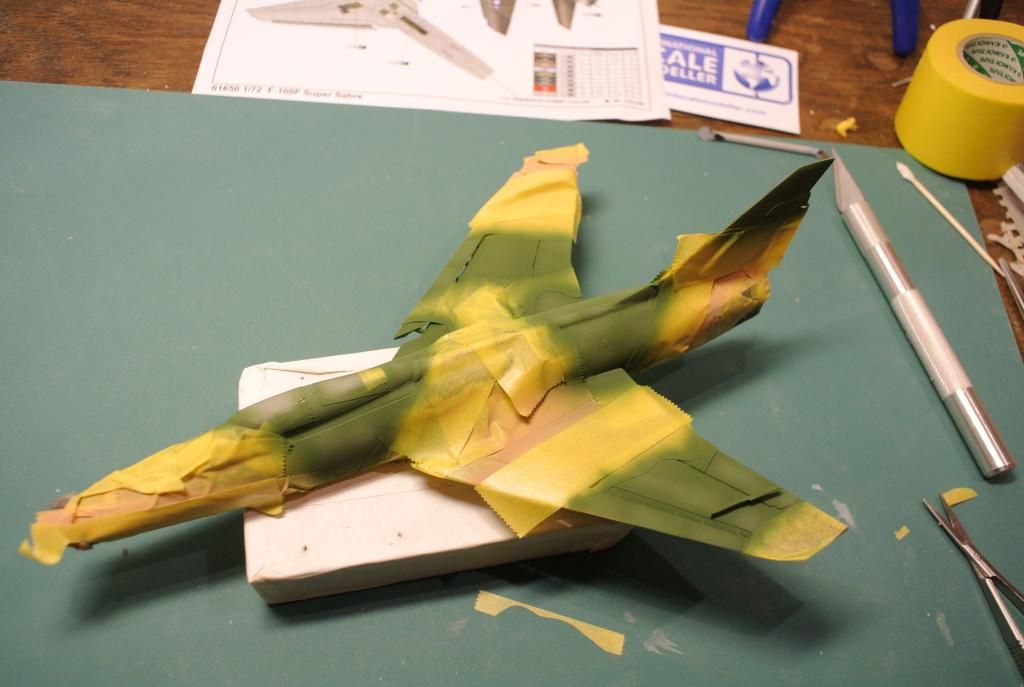
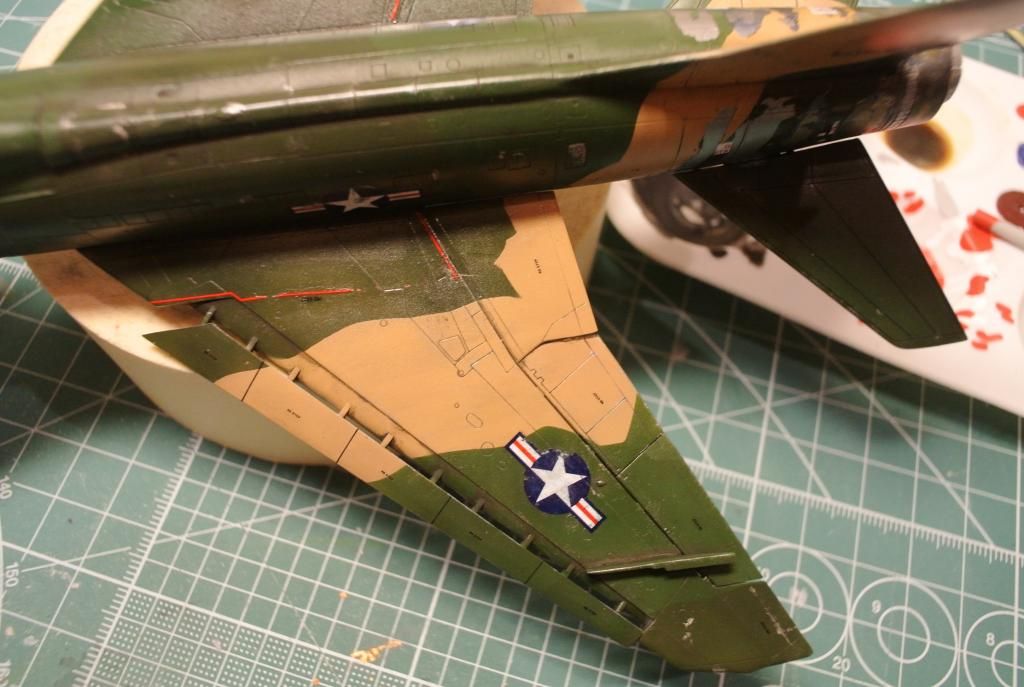
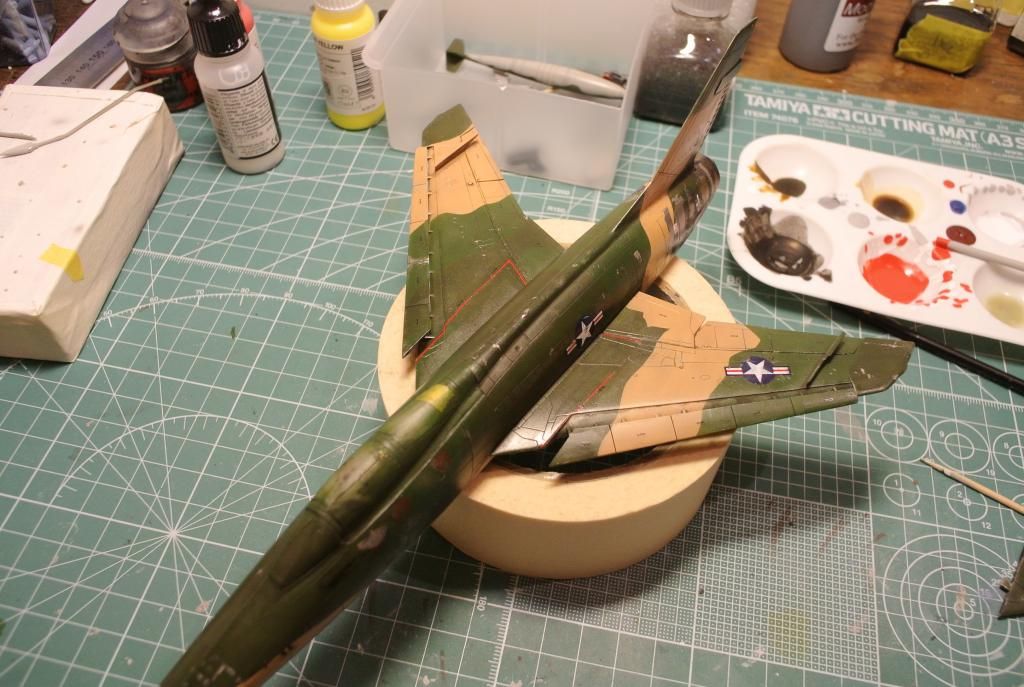
Here its layed down, with some minor bleaching:
Demasked
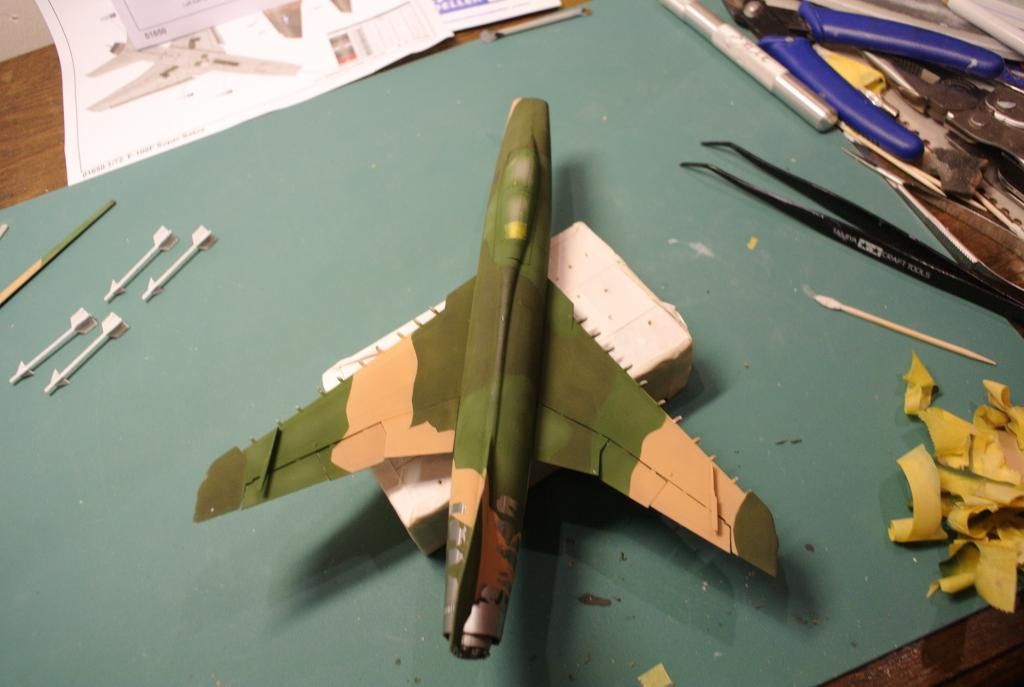
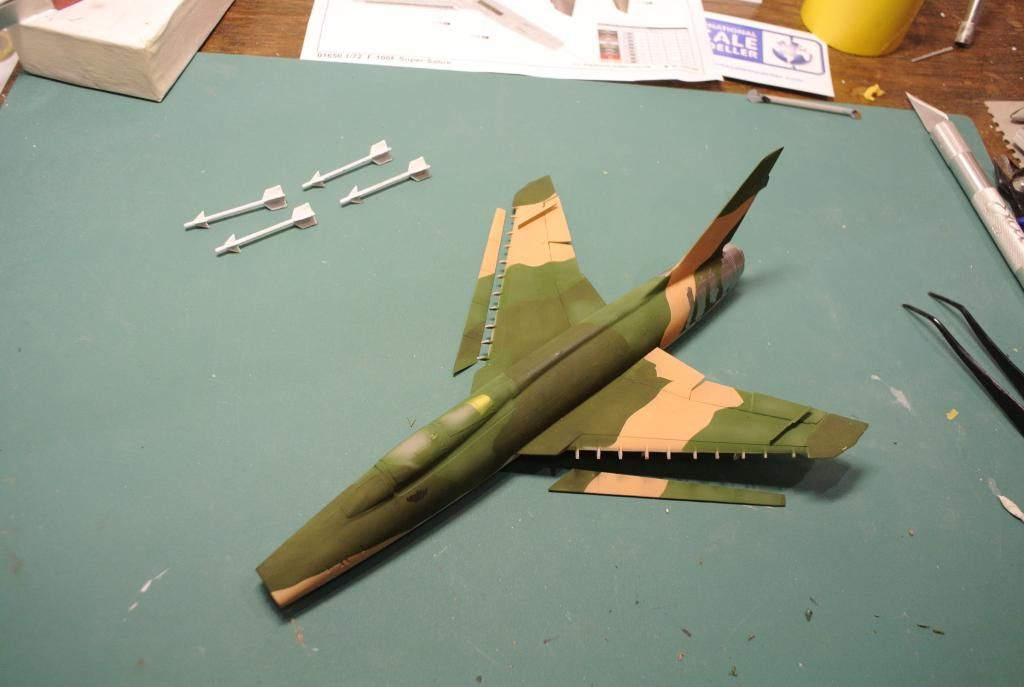
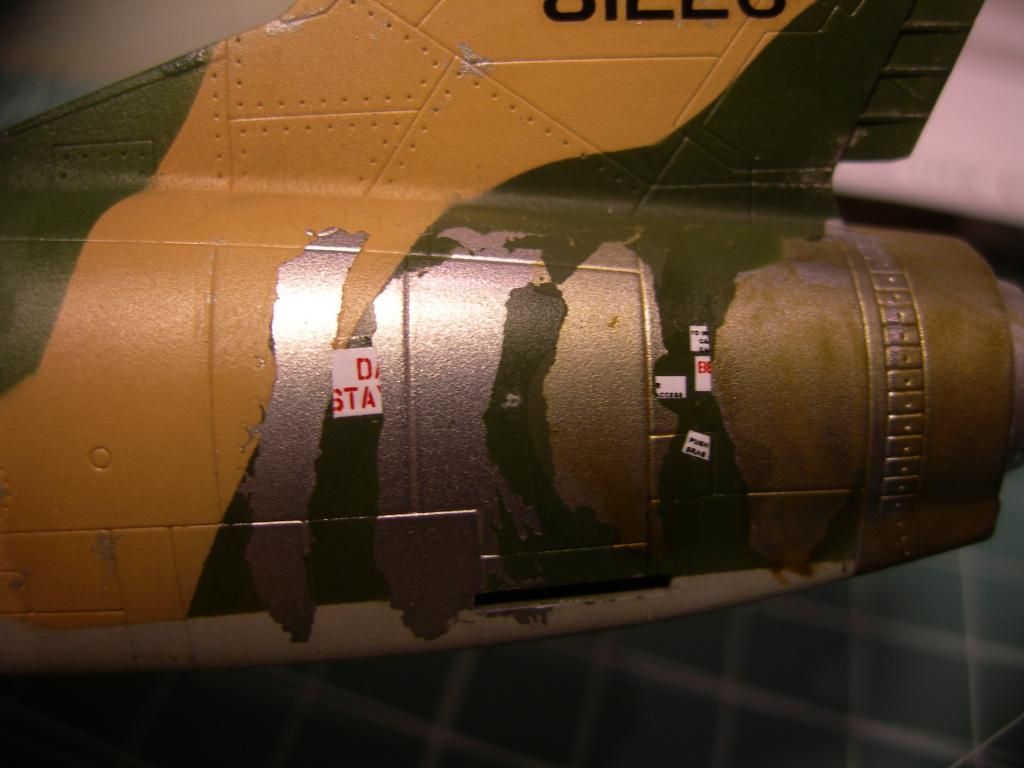
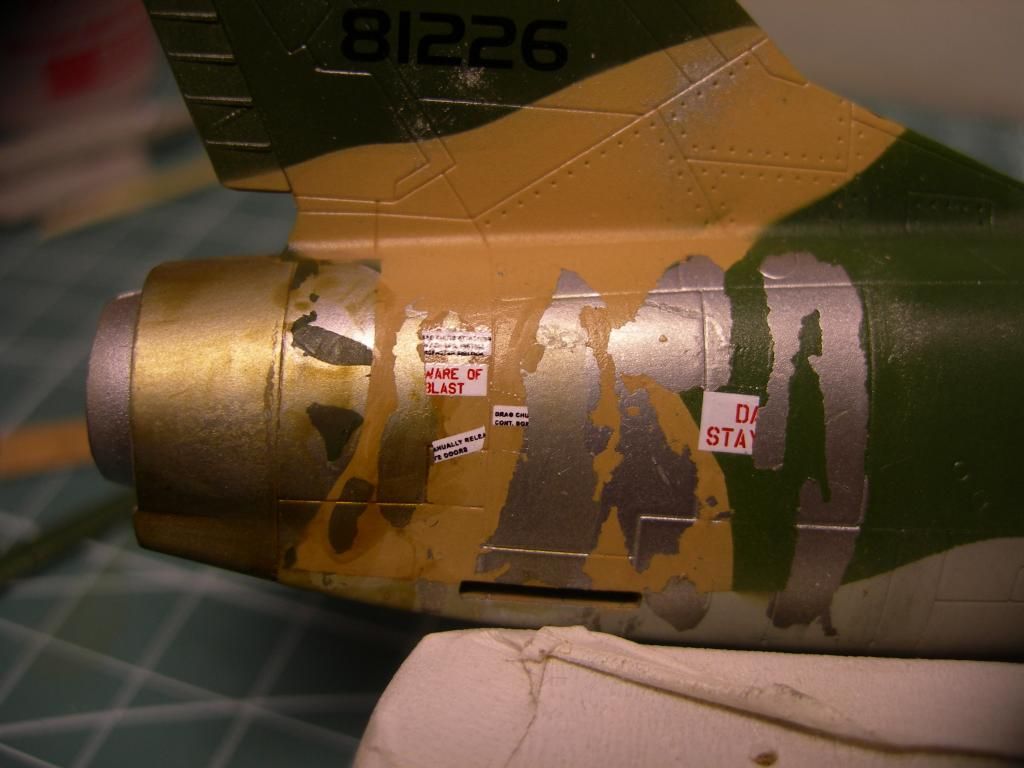
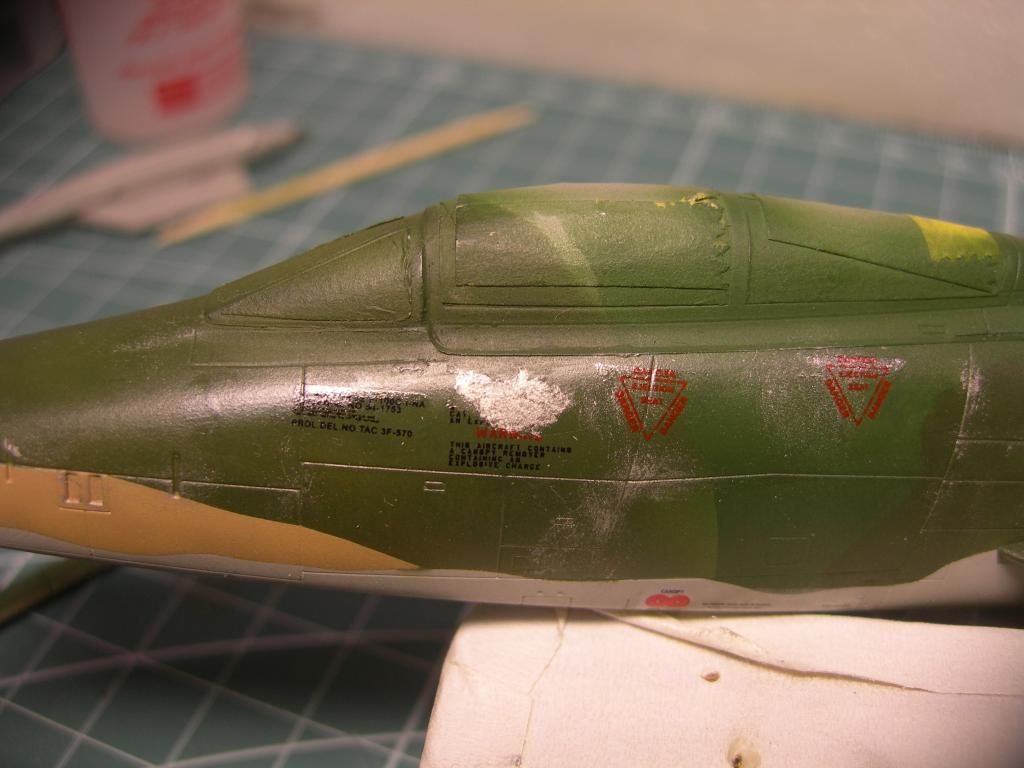
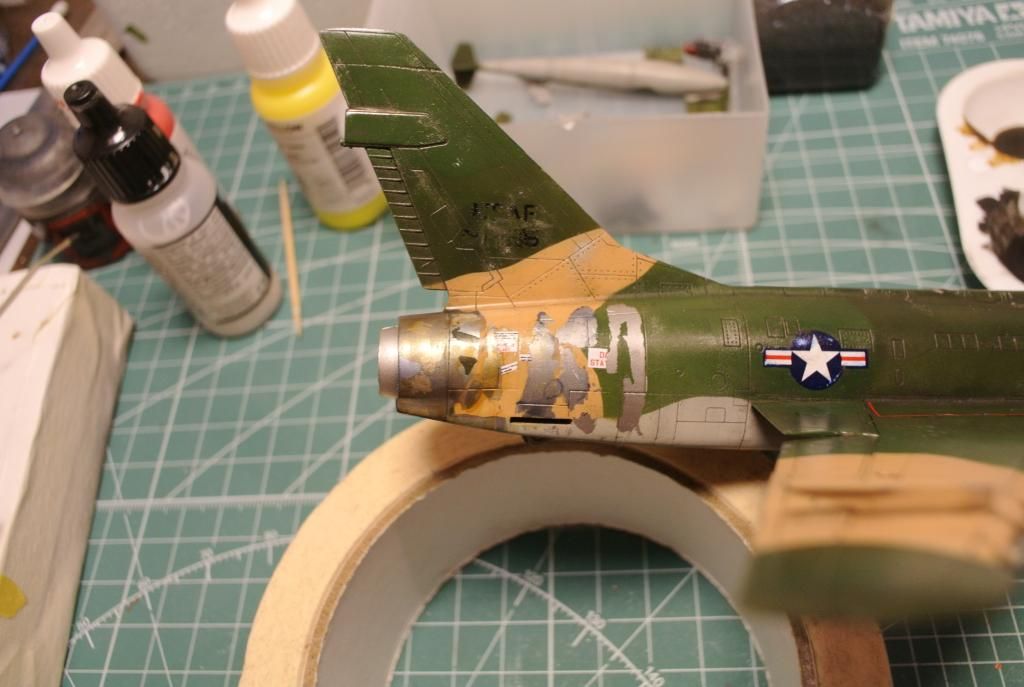
The peeling-effect, not entirely satisfied, but still good enough for a first in my opinion.
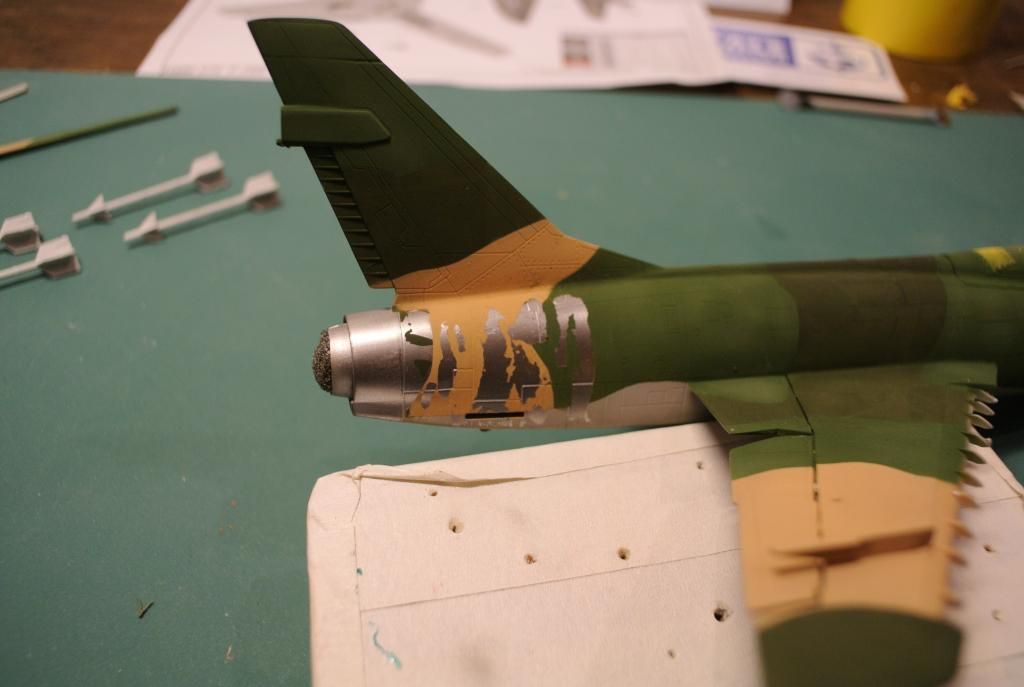
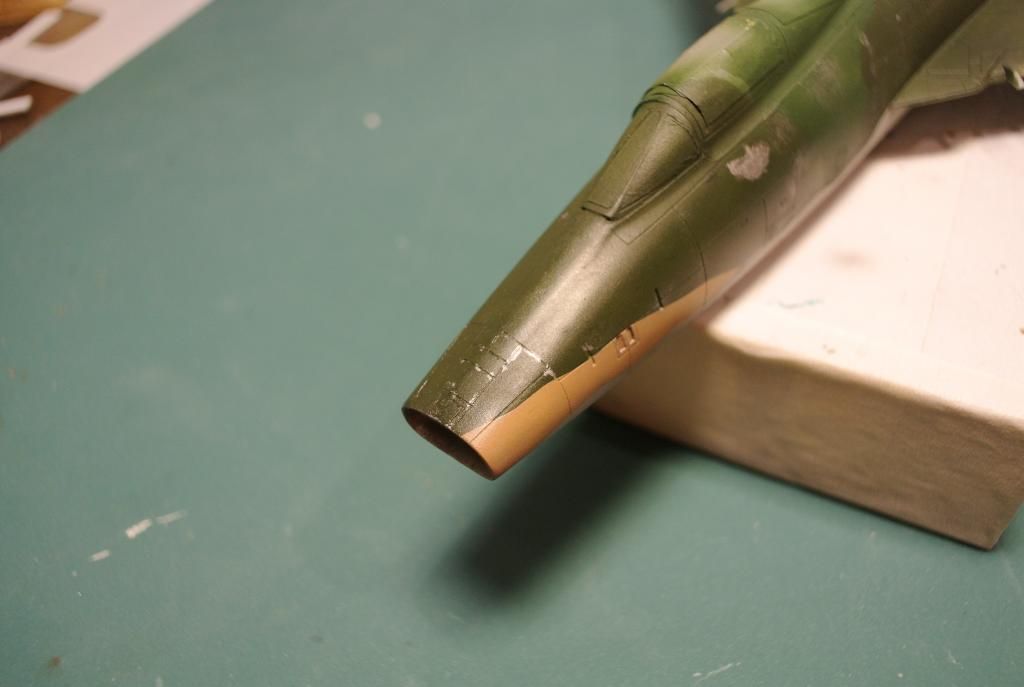
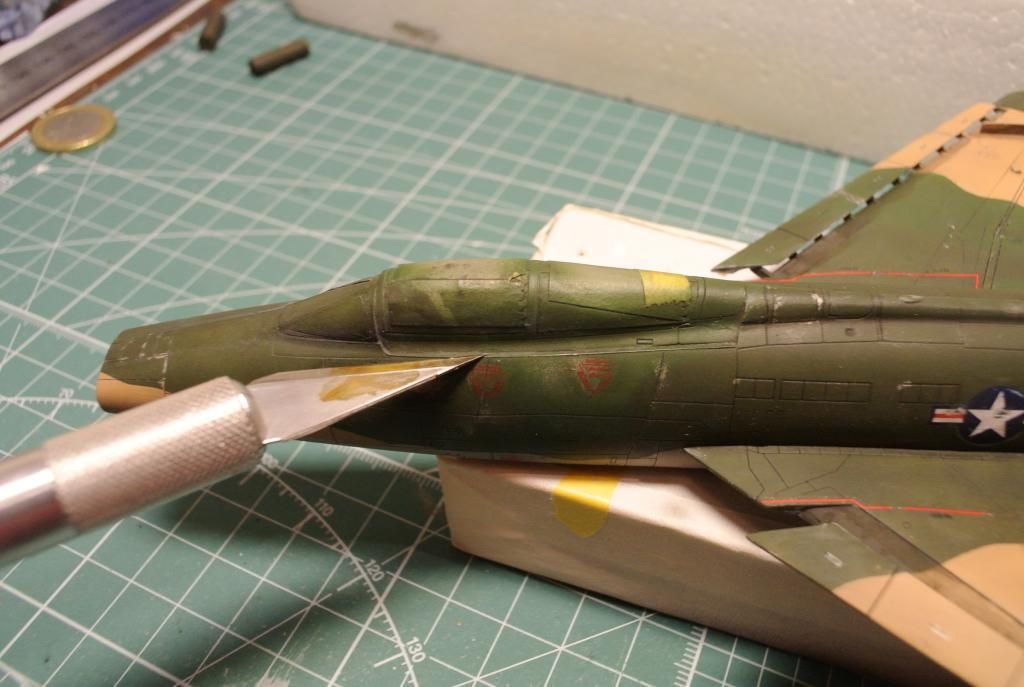
I really did not expect this. When I removed some masking tape, I peeled off, not only the color, but the primer aswell! The black you see, is the black I painted the canopy with. Weird... Still, I will try to turn it into a chipping effect or something, any hints on how?
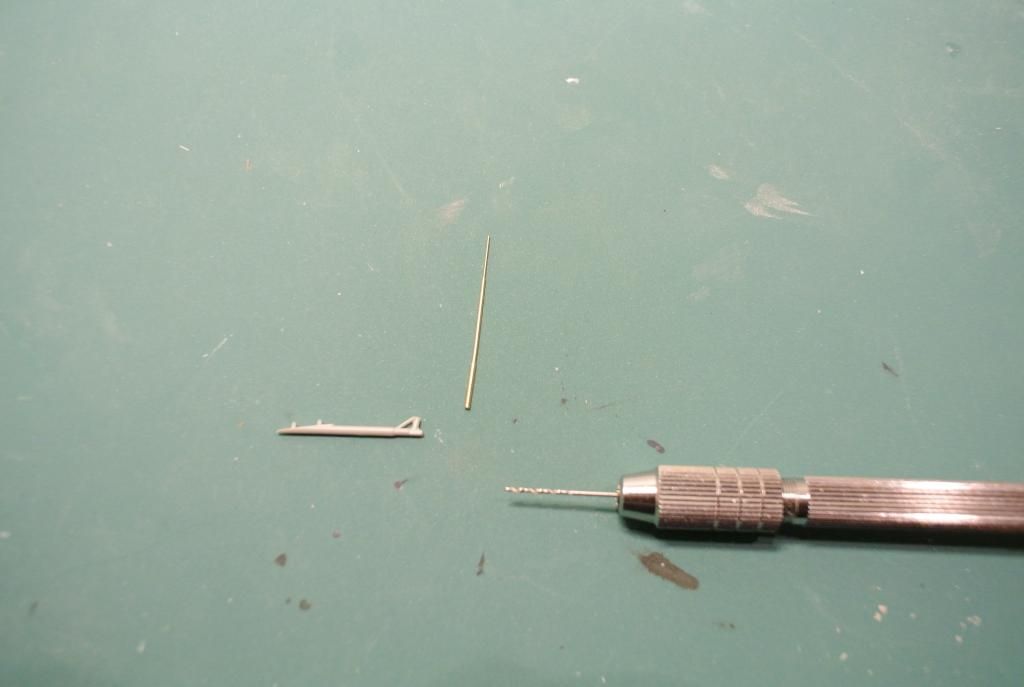
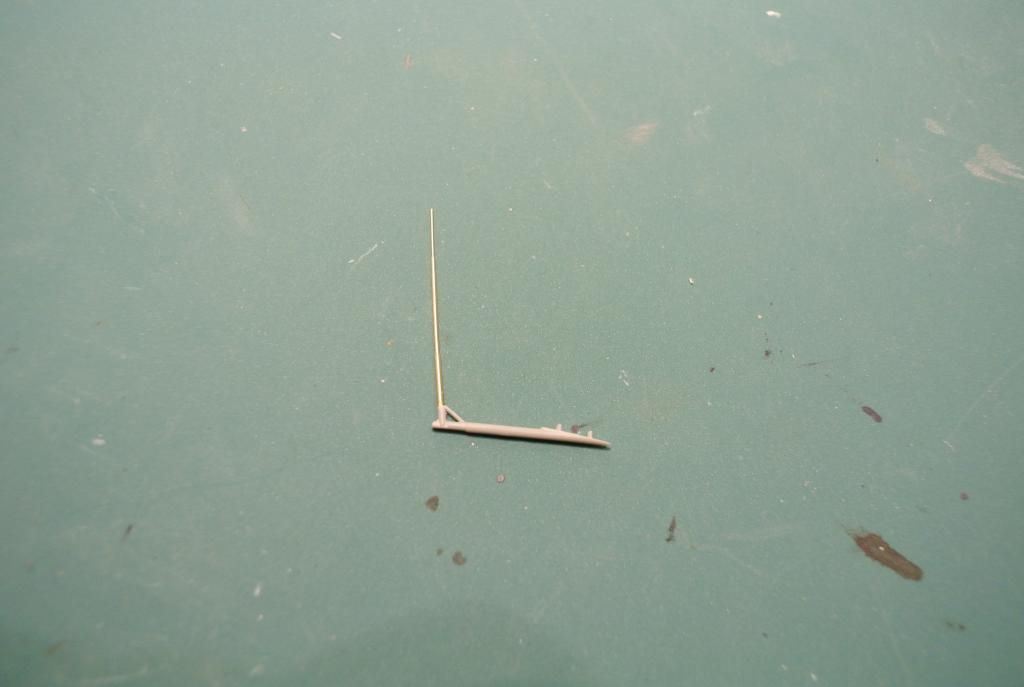
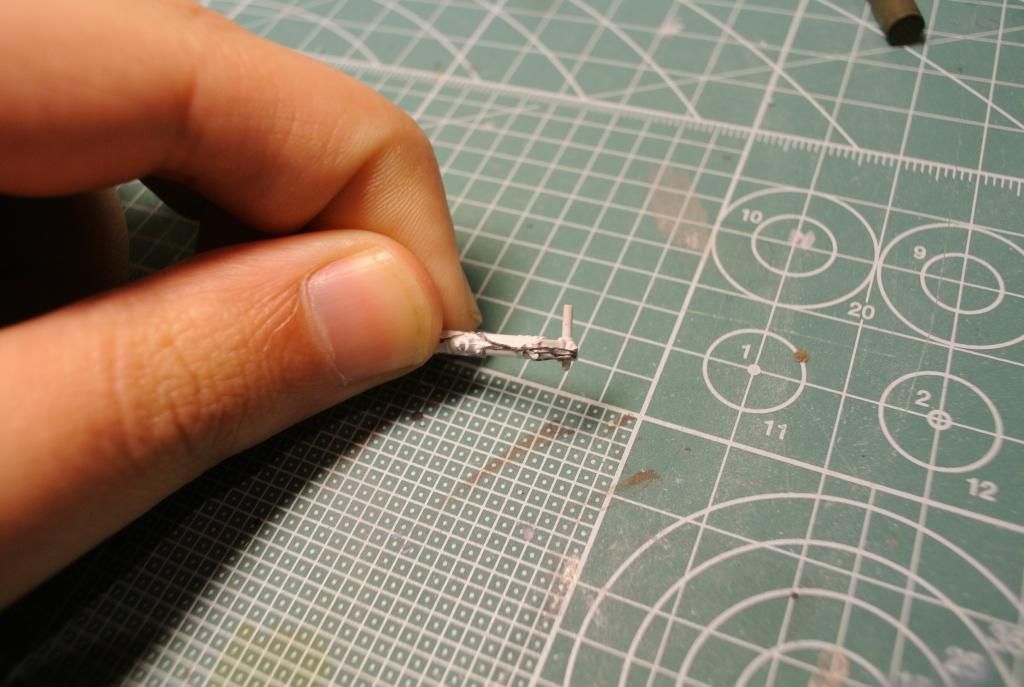
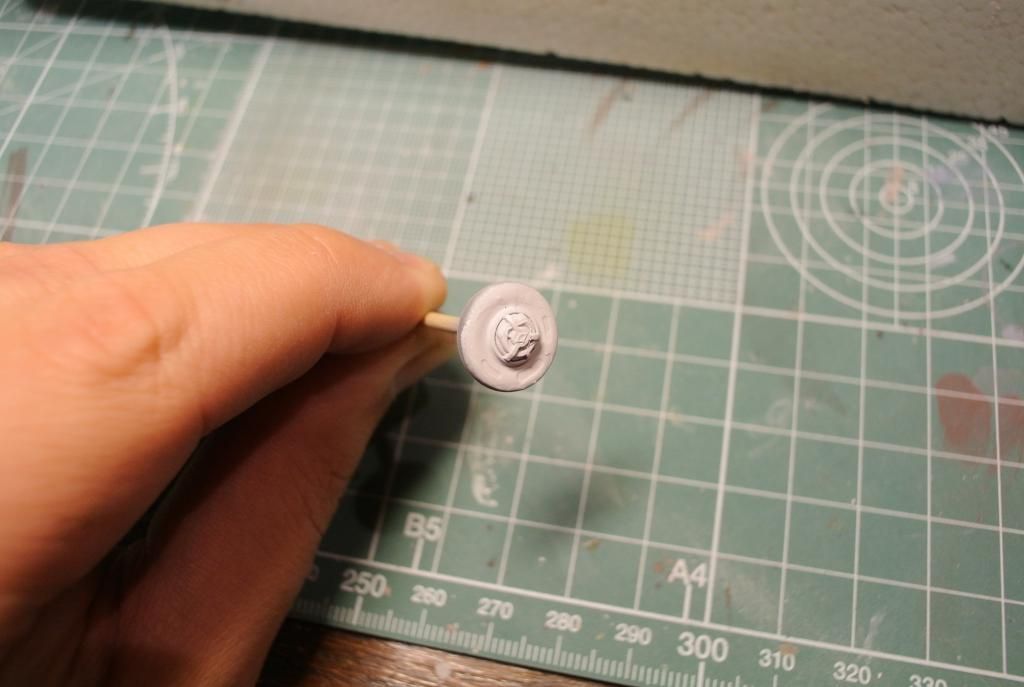
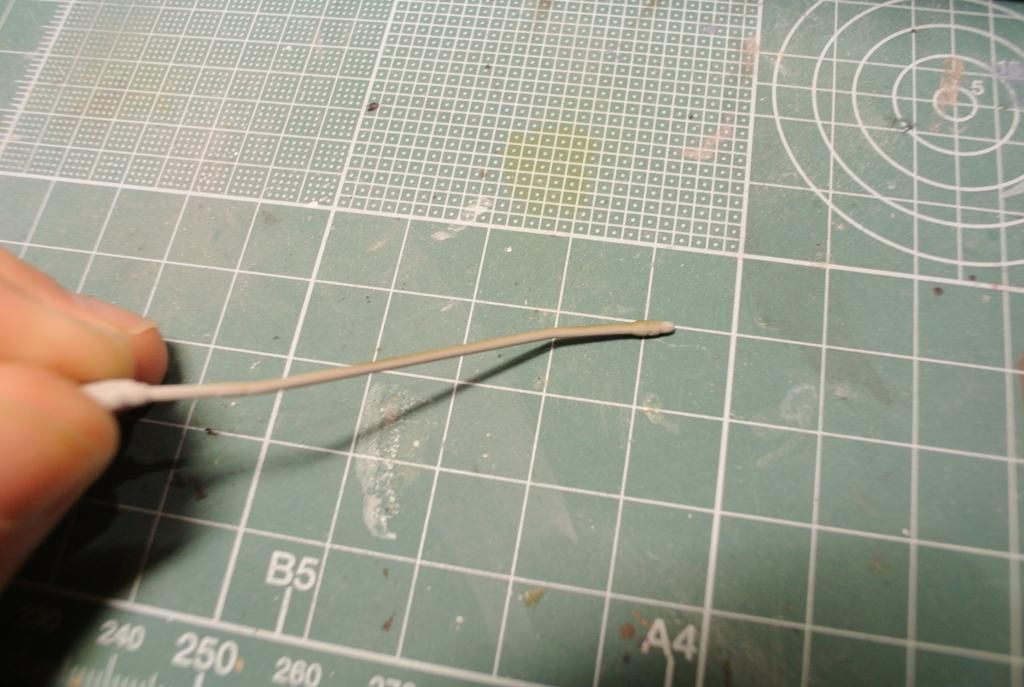
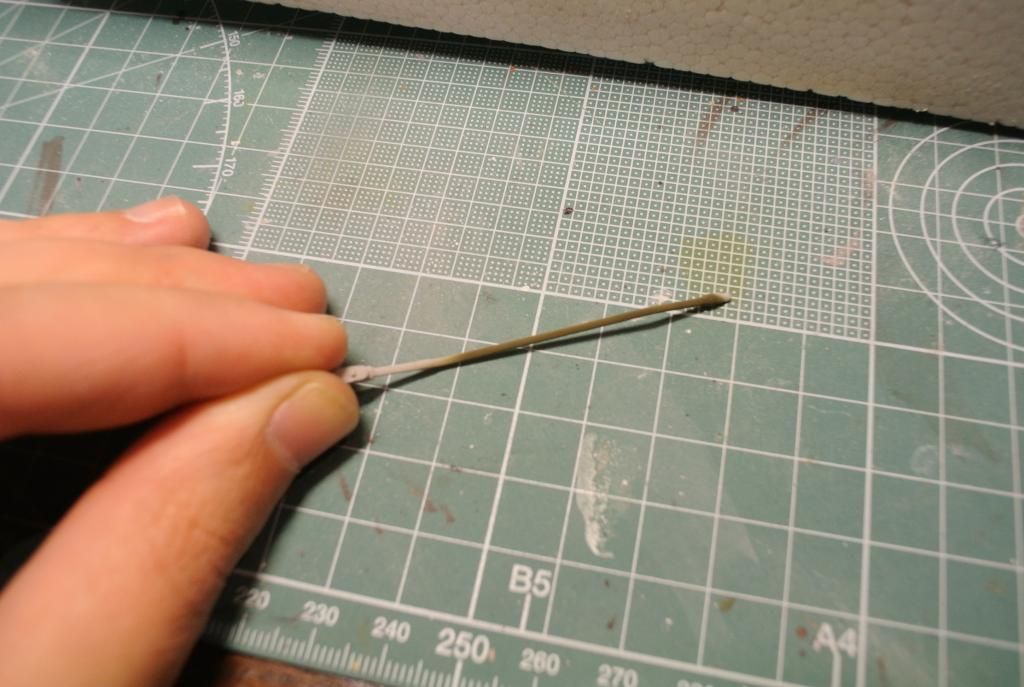
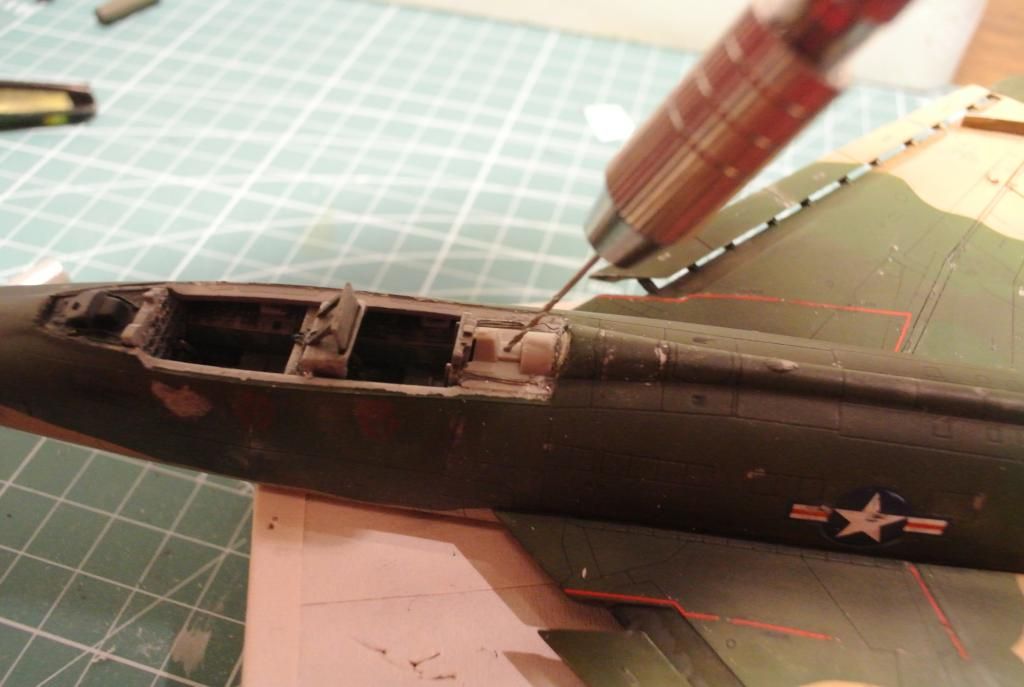
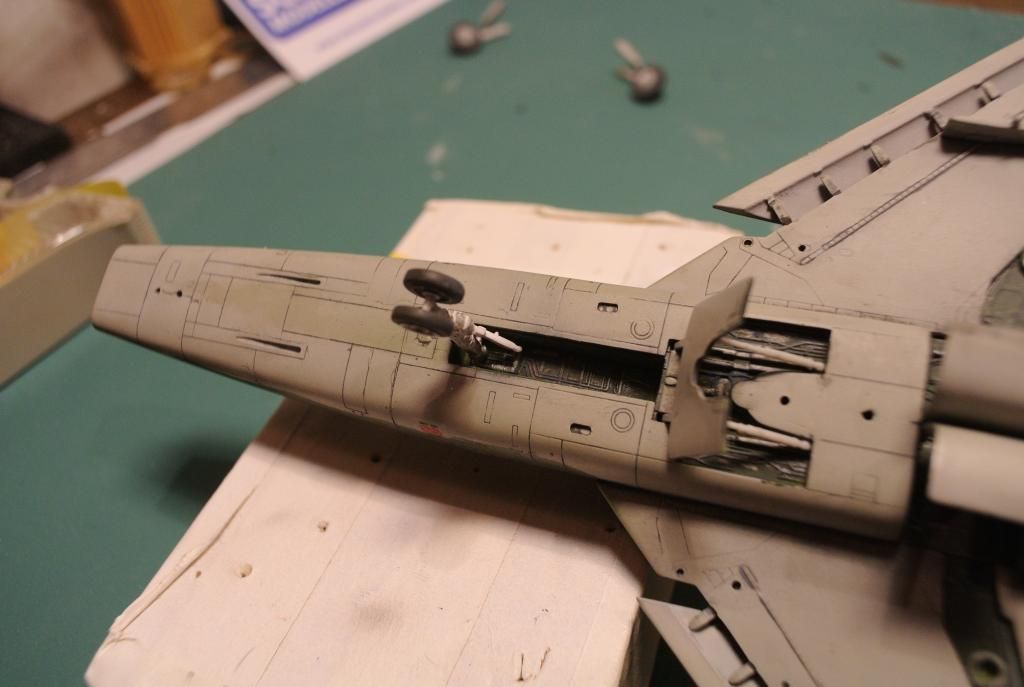
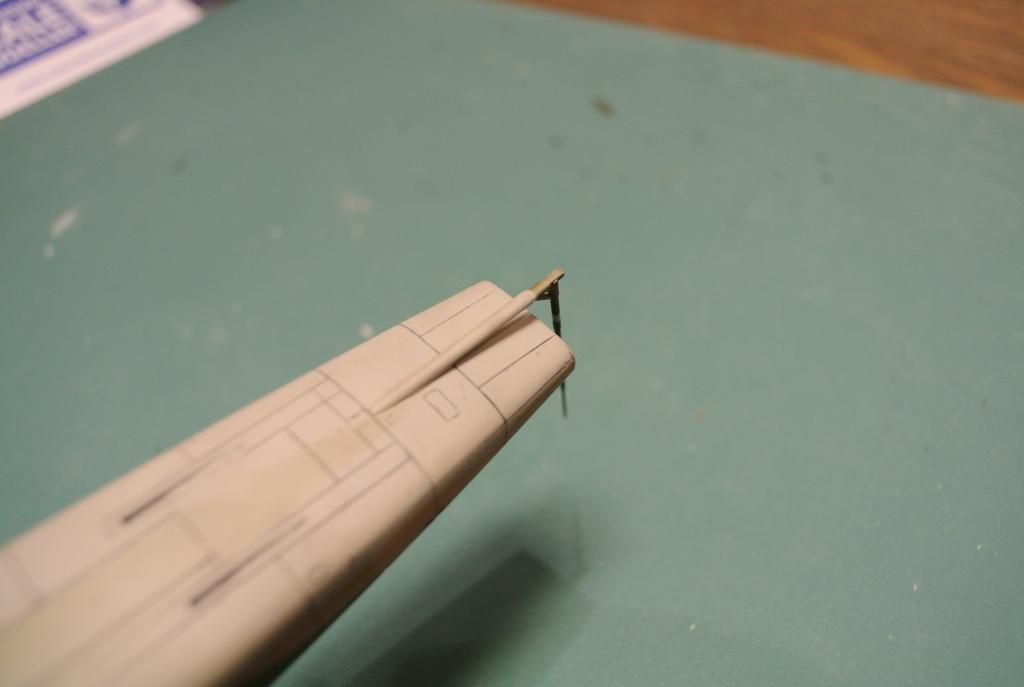
While I waited for an opportunity to paint, I started with the pitot tube. I got an aftermarket pitot tube, but the problem was that its designed for the in-flight-position and not the folded position. Some minor surgery was needed to make it work. Just snapped off a bit so it wouldnt be too long.
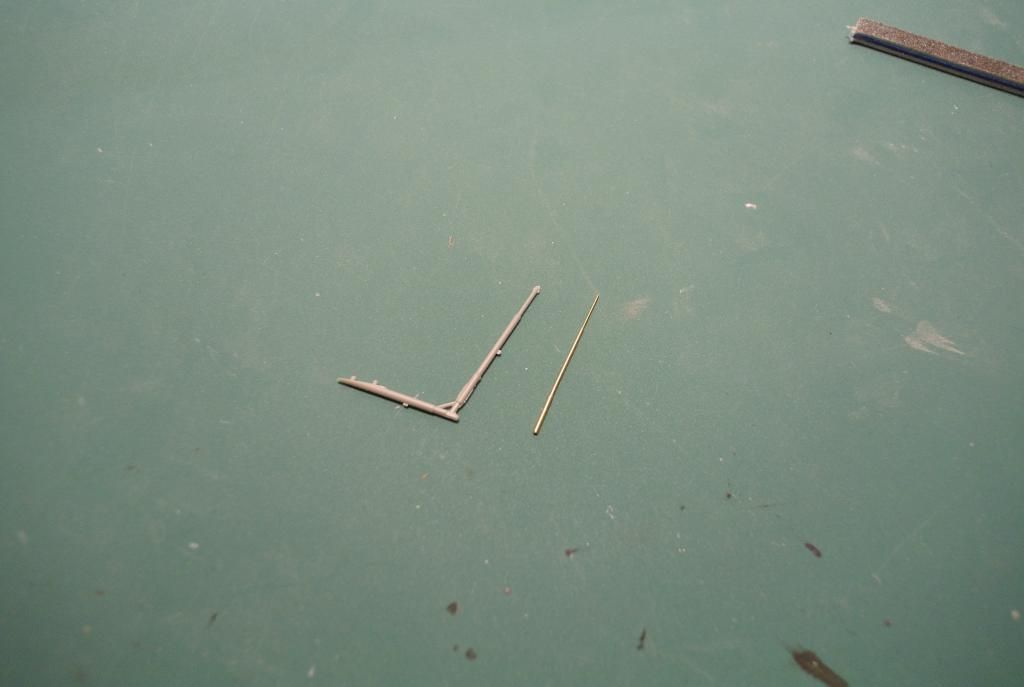
Its still a tiny bit too long, but hey....
Next up is laying down a gloss coat so it becomes handeable since I still have to paint the inside of the wheel wells and stuff. Until next time,
cheers
Heres how the kit wants it to look:

And here are some older photos:
So i took this opportunity to somewhat alter the Tan-color. I added some a more yellow tone to the color and got a more pleasing result. Since I had a darker shade down already, I got an interesting 3d-effect to the paint job, and thats a plus
From the last setback, I was feeling a bit experimental, so I tried my hand at some minor bleaching on the lighter green. The results came out ok, maybe a bit much, but it was a learning experience
The colors I used for this build (not by any means 100% accurate, I just went with what I thought looked good):
Tan = 50%+50% Tamiya XF-59 Desert Yellow + Tamiya XF-15 Flat flesh
Green = Tamiya XF-26 Deep green
Darker green = 75% + 25% Tamiya XF-61 Dark green + Tamiya XF-26 Deep green
Grey = Tamiya XF-80 Royal light gray
And here is the result:
Sprayed down the tan-shade and here I am masking down for the lighter green.

Here its layed down, with some minor bleaching:

Demasked


The peeling-effect, not entirely satisfied, but still good enough for a first in my opinion.

I really did not expect this. When I removed some masking tape, I peeled off, not only the color, but the primer aswell! The black you see, is the black I painted the canopy with. Weird... Still, I will try to turn it into a chipping effect or something, any hints on how?

While I waited for an opportunity to paint, I started with the pitot tube. I got an aftermarket pitot tube, but the problem was that its designed for the in-flight-position and not the folded position. Some minor surgery was needed to make it work. Just snapped off a bit so it wouldnt be too long.

Its still a tiny bit too long, but hey....


Next up is laying down a gloss coat so it becomes handeable since I still have to paint the inside of the wheel wells and stuff. Until next time,
cheers
Ludvig
On the bench:
Airfix 1/72 A-4 Skyhawk
Italeri EH-101 Merlin HAS.1 (Whirlybird SIG)
Last one finished:
Bandai 1/72 A-Wing Gallery
On the bench:
Airfix 1/72 A-4 Skyhawk
Italeri EH-101 Merlin HAS.1 (Whirlybird SIG)
Last one finished:
Bandai 1/72 A-Wing Gallery
-
Twokidsnosleep
- General
- Posts: 18122
- Joined: Thu Aug 07, 2014 4:07 pm
- Location: BC,Canada
Re: Trumpeter 1/72 F-100F Super Sabre "Wild Weasel"
An excellent paint rescue job 
There were so many variations and really beaten up weathered planes in Vietnam, your model looks true to life
....aaaannnndddddd we got an excellent video from MarTin to try out his technique
There were so many variations and really beaten up weathered planes in Vietnam, your model looks true to life
....aaaannnndddddd we got an excellent video from MarTin to try out his technique
Scott
On, Under or Near the Bench:
American Graffiti Ford Coupe
Headless Horseman...figure sig
1/72 Black Pearl Pirate Ship
On, Under or Near the Bench:
American Graffiti Ford Coupe
Headless Horseman...figure sig
1/72 Black Pearl Pirate Ship
Re: Trumpeter 1/72 F-100F Super Sabre "Wild Weasel"
Thanks alot! It did turned out ok after all, too bad all the paint has made my pre-shading session obsolete, but thats life I guessTwokidsnosleep wrote:An excellent paint rescue job
There were so many variations and really beaten up weathered planes in Vietnam, your model looks true to life
....aaaannnndddddd we got an excellent video from MarTin to try out his technique
Ludvig
On the bench:
Airfix 1/72 A-4 Skyhawk
Italeri EH-101 Merlin HAS.1 (Whirlybird SIG)
Last one finished:
Bandai 1/72 A-Wing Gallery
On the bench:
Airfix 1/72 A-4 Skyhawk
Italeri EH-101 Merlin HAS.1 (Whirlybird SIG)
Last one finished:
Bandai 1/72 A-Wing Gallery
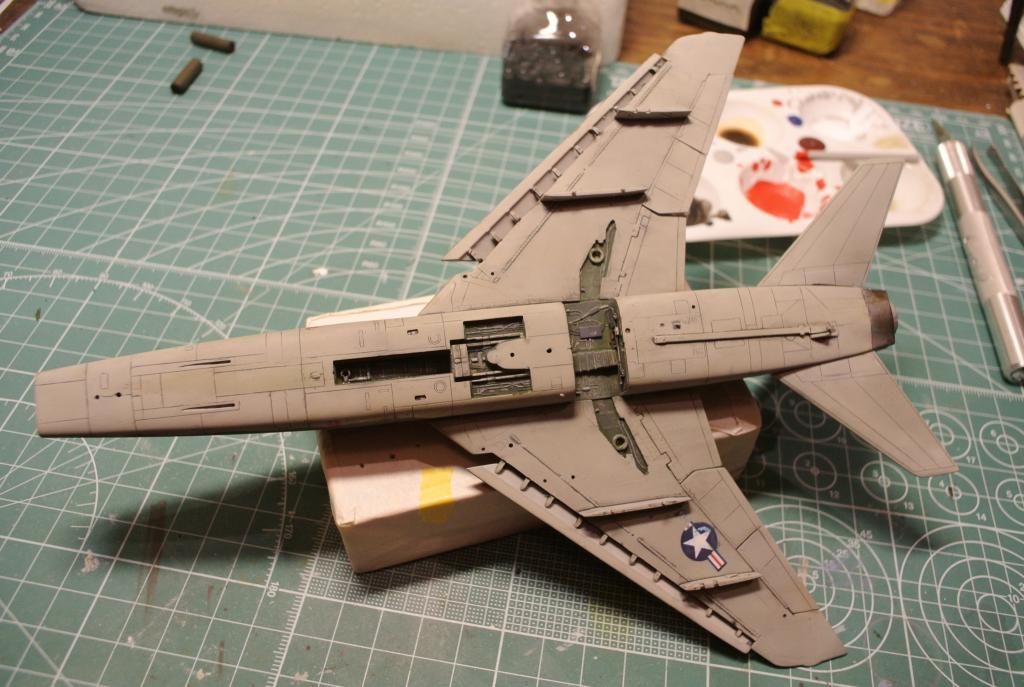
Re: Trumpeter 1/72 F-100F Super Sabre "Wild Weasel"
Got some more work done these couple of days. Im really feeling that this build is at the beginning of the end. It makes me both happy and sad at the same time. It makes me sad cause Ive really enjoyed building this kit and learning about the actual aircraft and its history. It also makes me happy cause it means I can start another kit 
Before we start with the build pics, a word from a very old friend:
Here is the model with some chipping and glosswork.
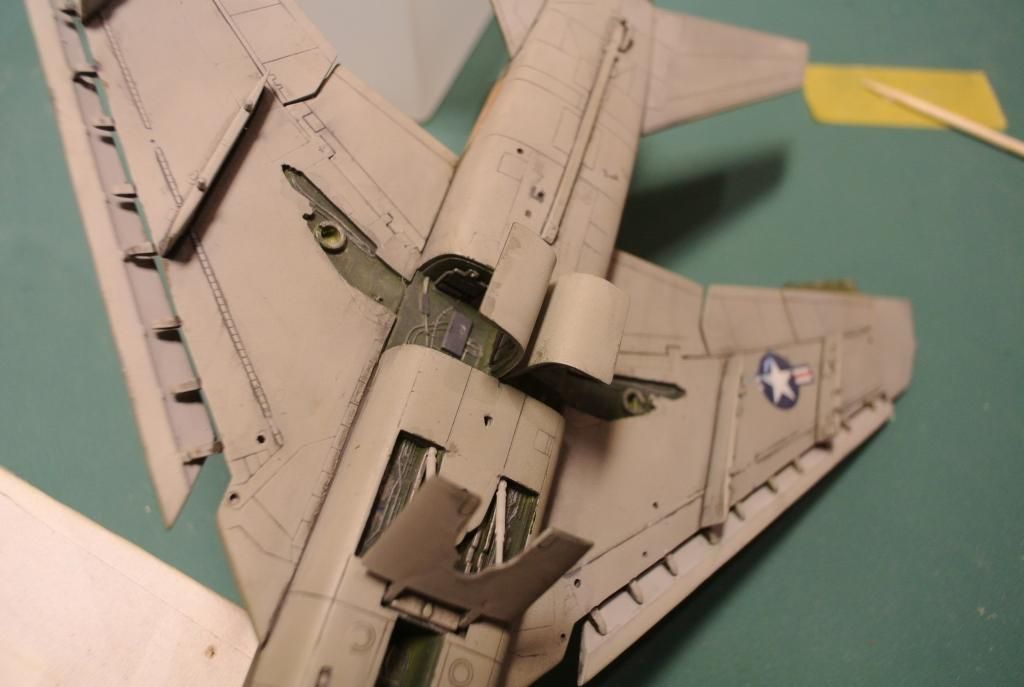
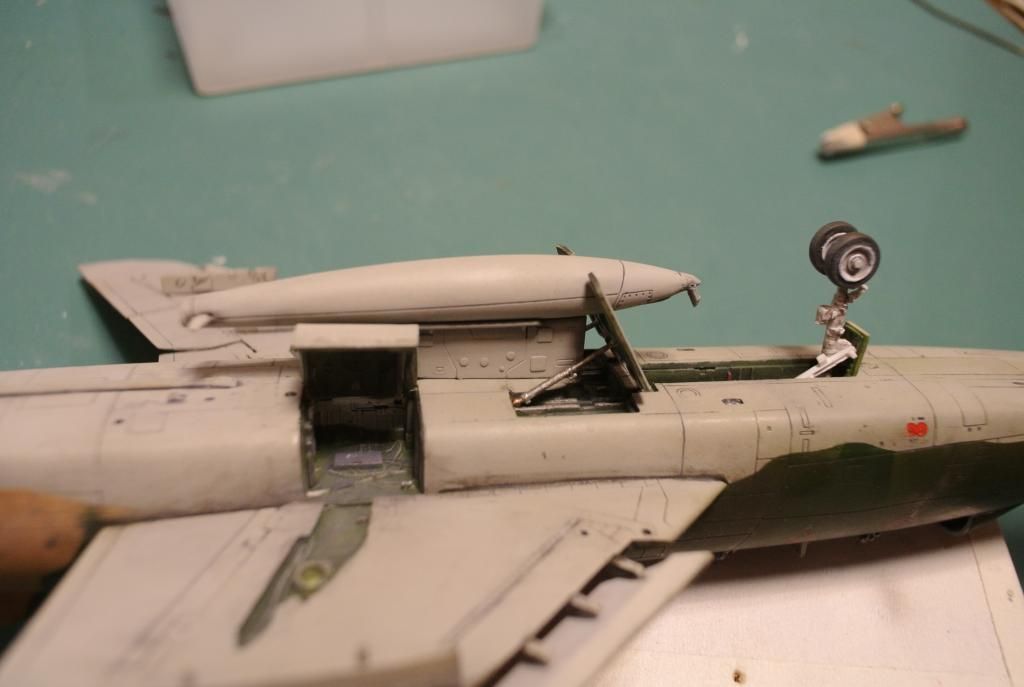
Some other parts got some paint on 'em
Demasking the wheel bays was a pain, had to paint over some left over white tack that just wouldnt budge.
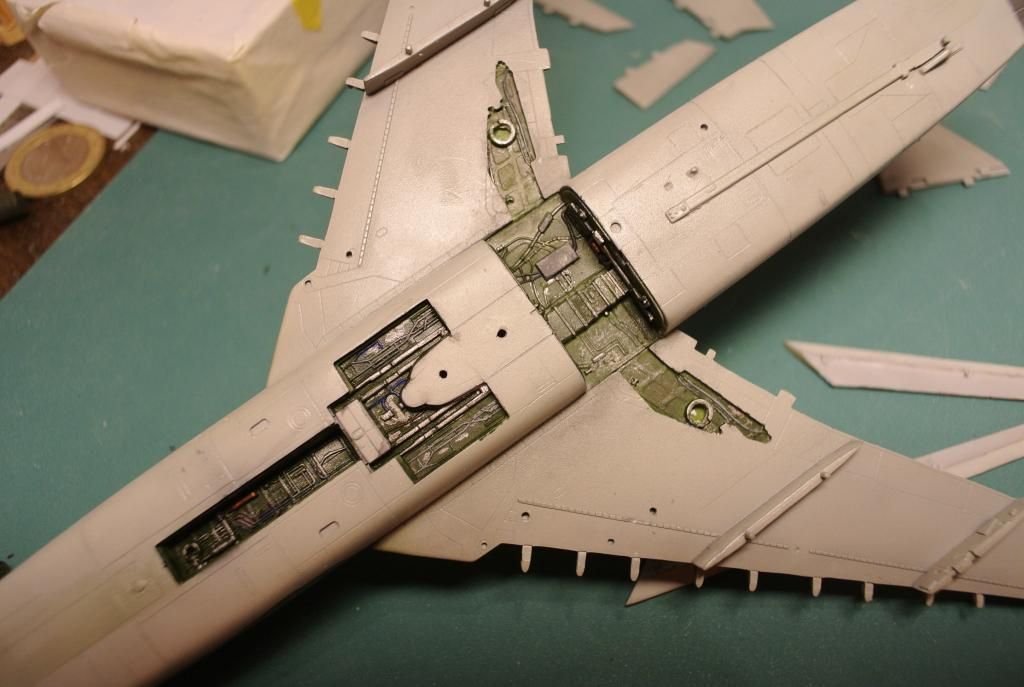
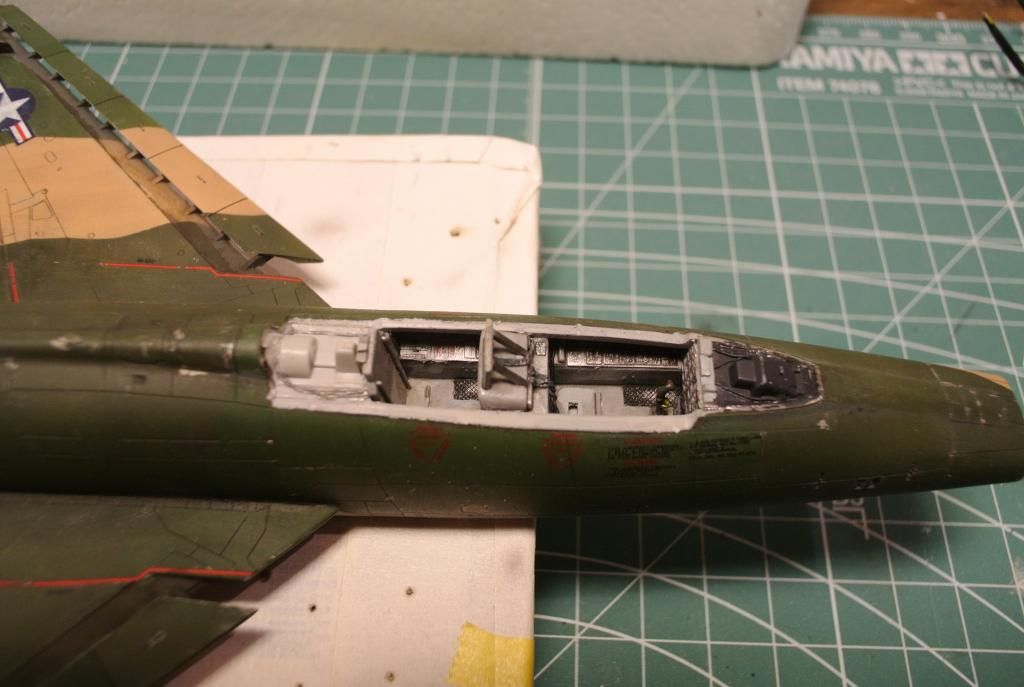
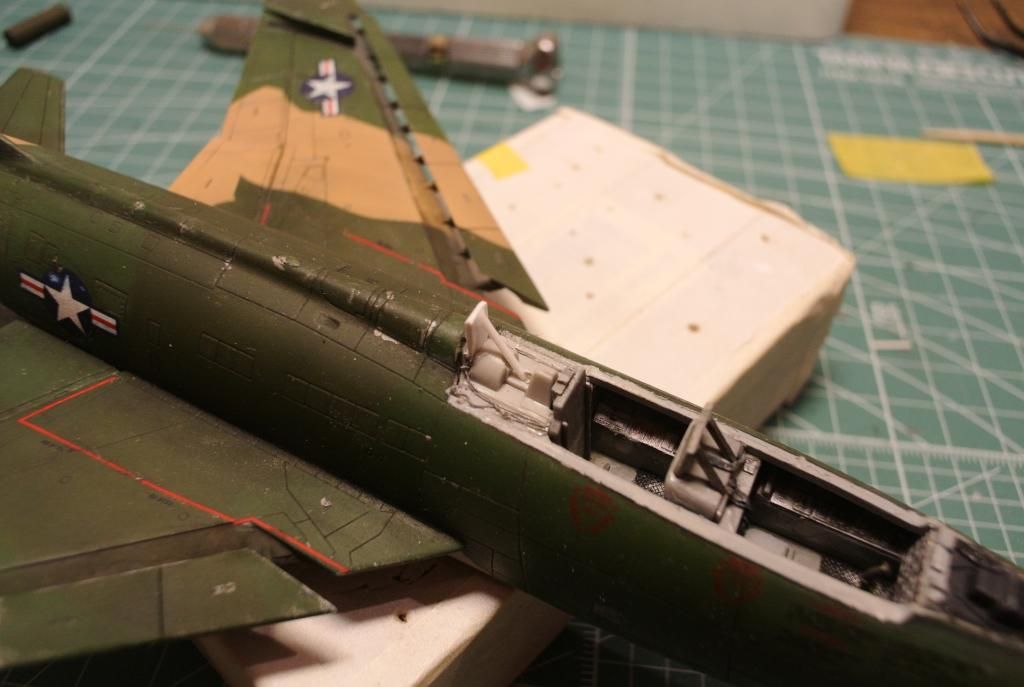
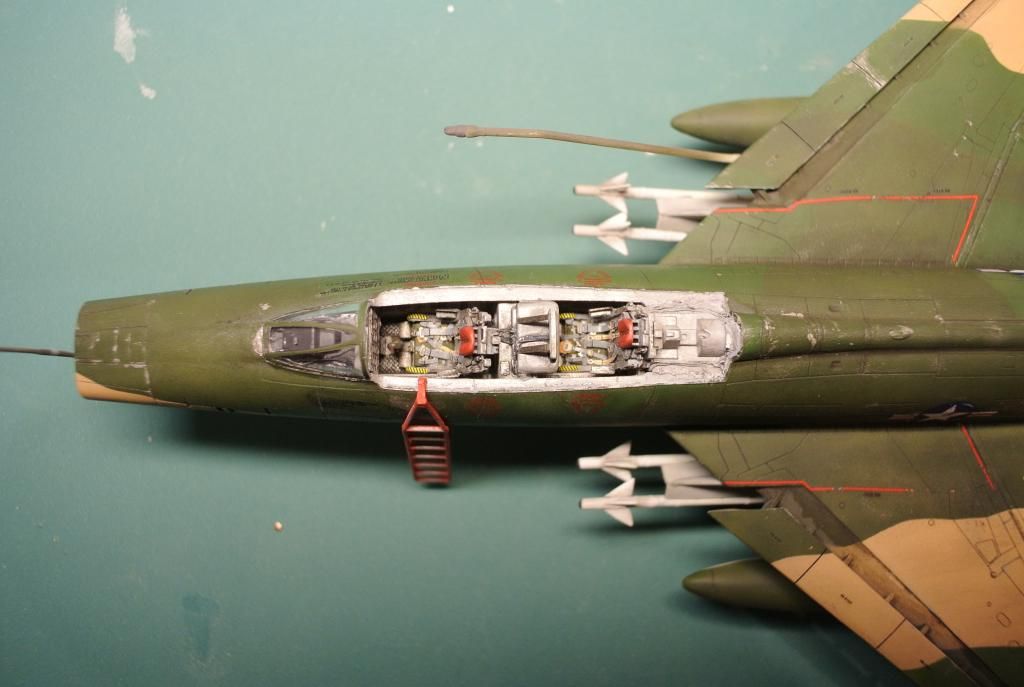
Also started working the interior, like glueing on details and painting the wheel bay details.
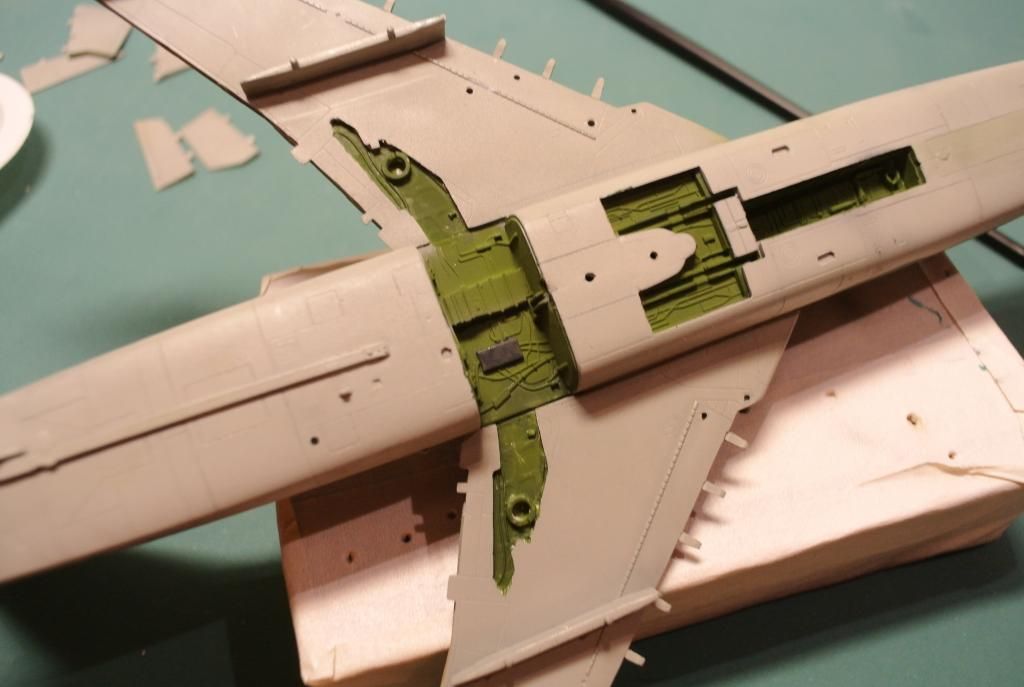
Here is the result painted, and given a nuln-oil wash (citadel) and some dry brushing. Gonna give it a flat-coat when its finished.
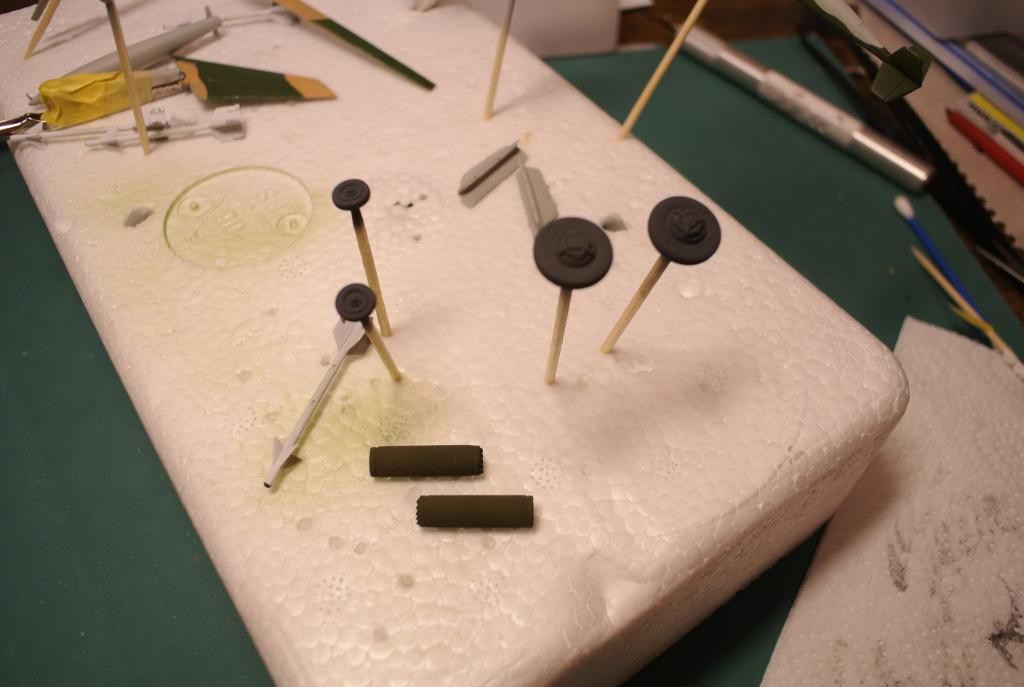
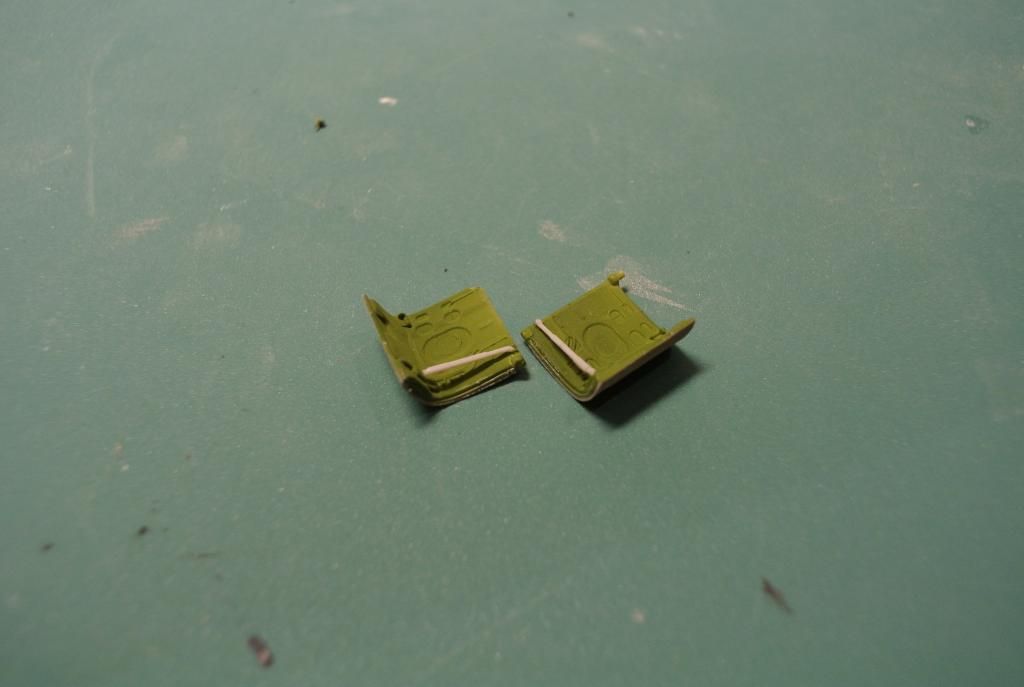
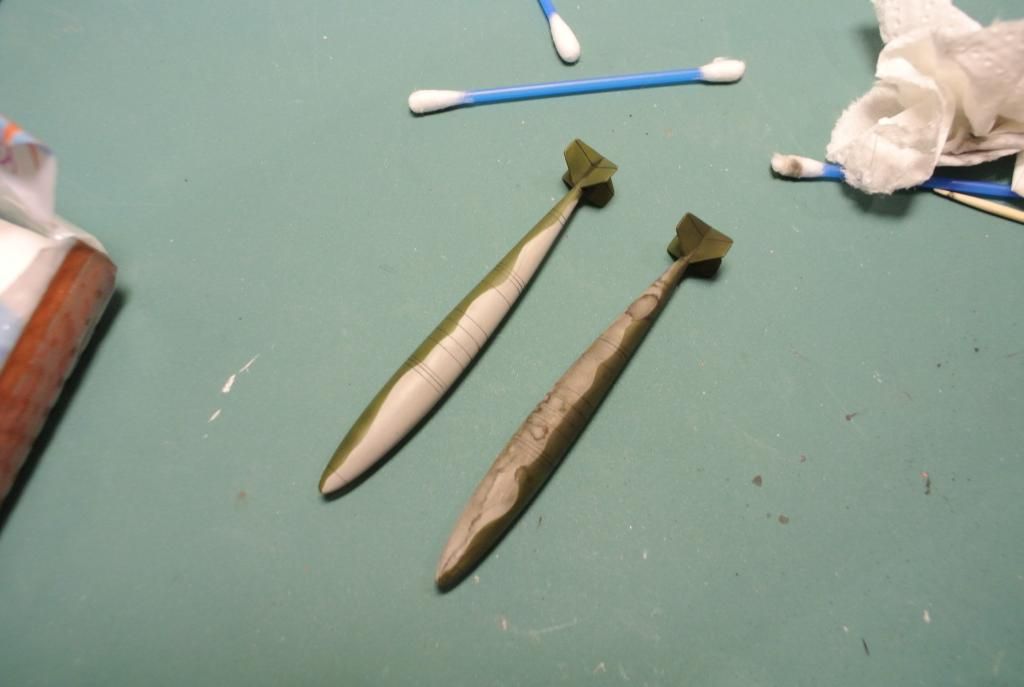
Started weathering other parts like pylons, missiles and drop tanks. I used Flory models black wash for it and I truly adore this stuff on aircraft. I will probably use the Ultimate Dark dirt for the top side, havent decided yet. (Right one hasnt been wipe yet, the left one is finished)
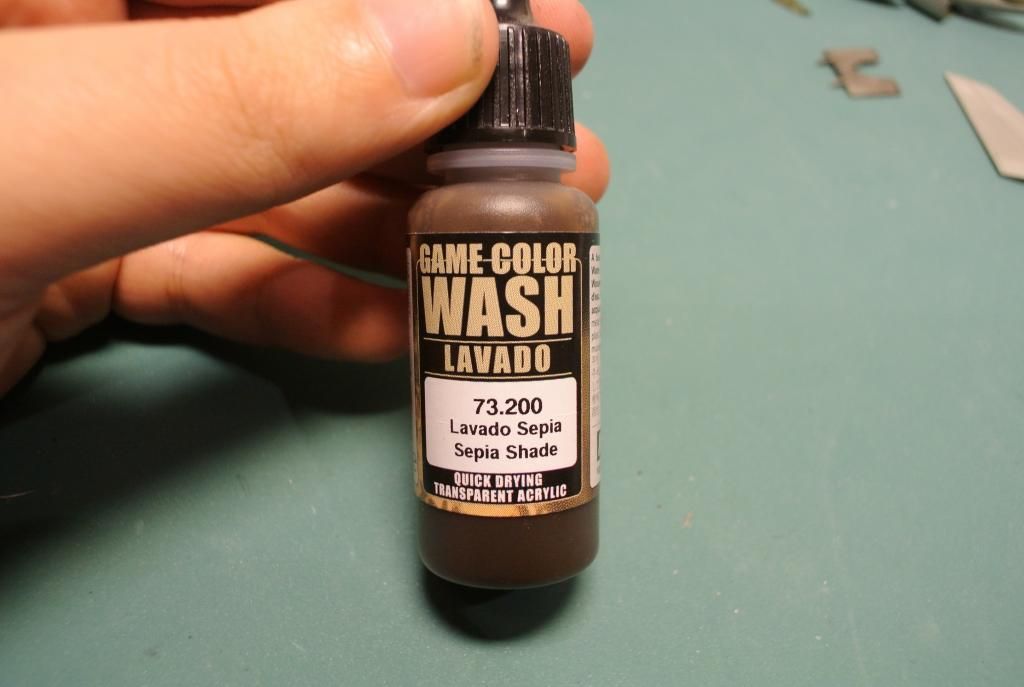
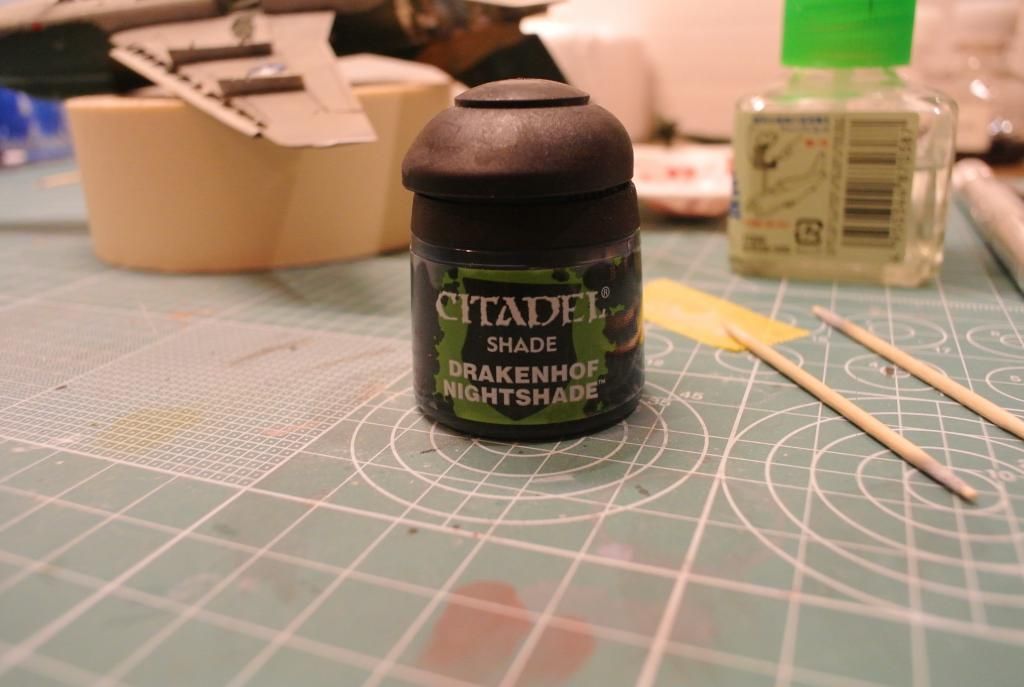
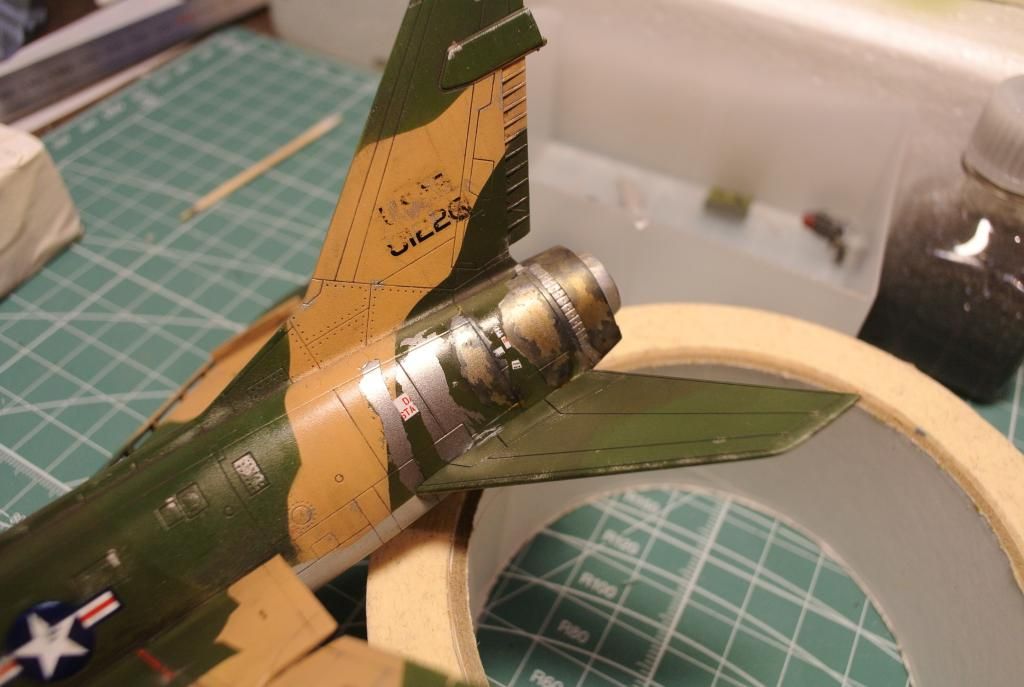
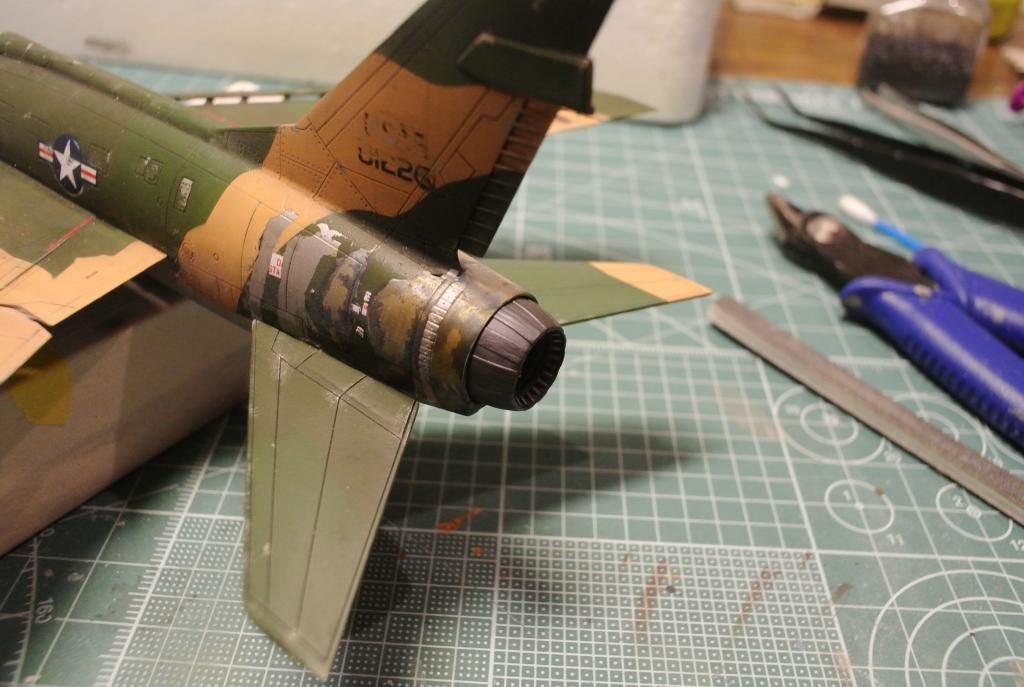
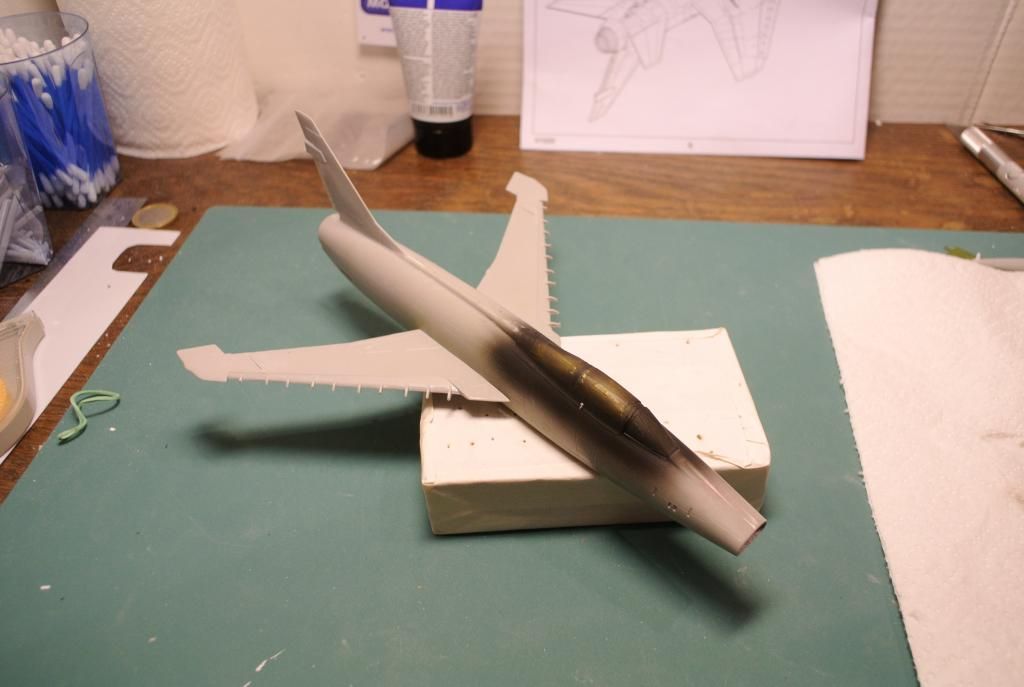
Will try to give the exhaust area a slight "burned" look. To do this I plan to use both Sepia wash(picture) and later on, a blue wash, to get that burned effect. Dont know how it will turned out, im excited
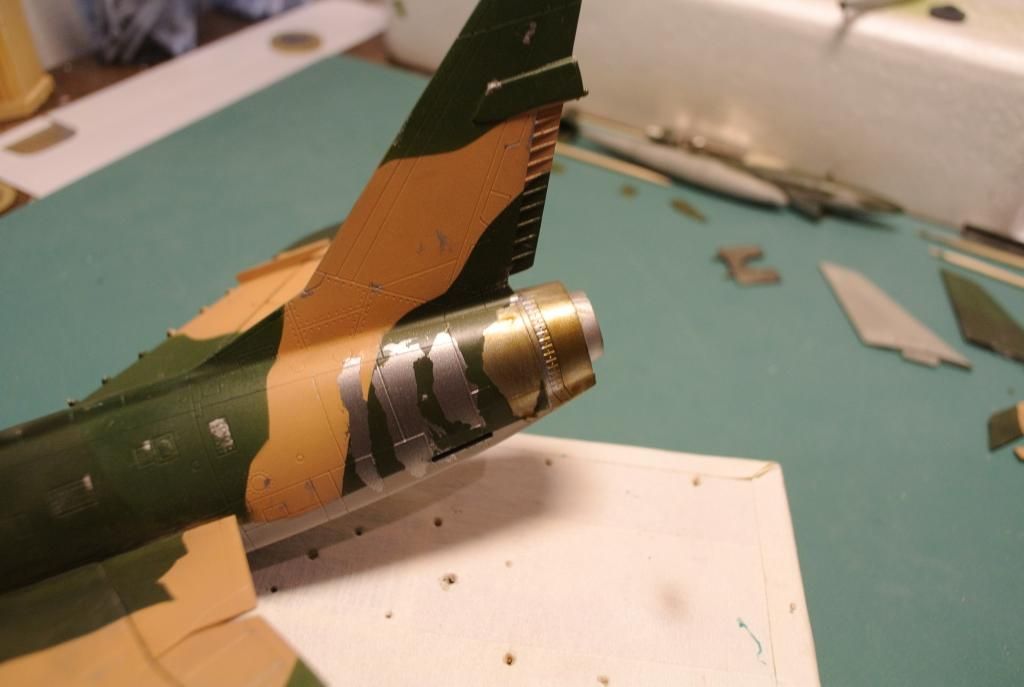
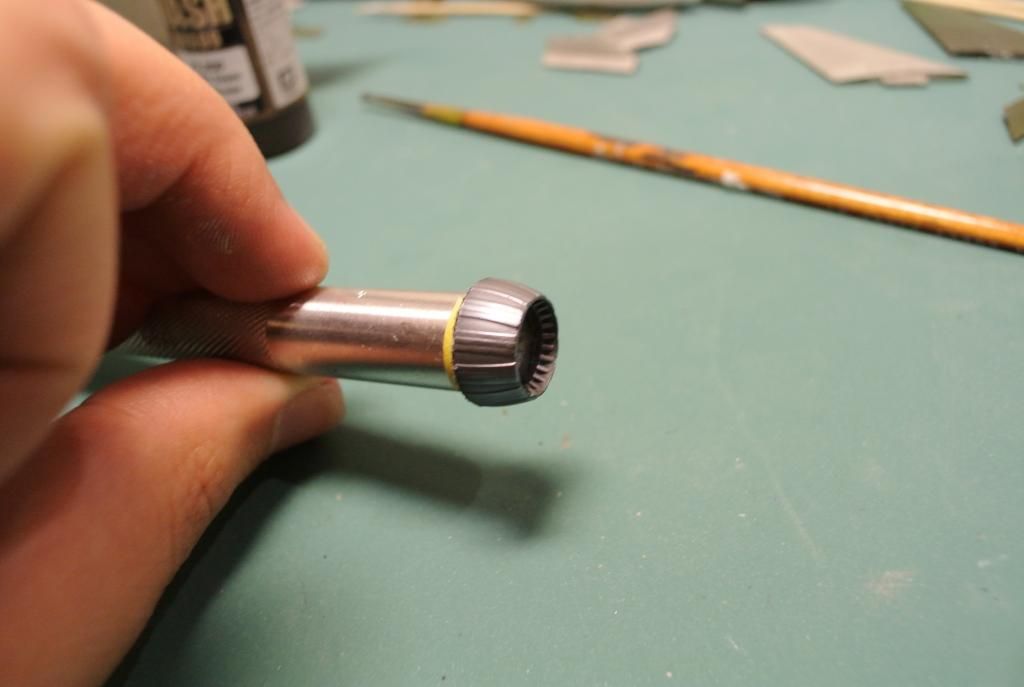
Brush painted the exhaust can with Mr Metal "Iron"
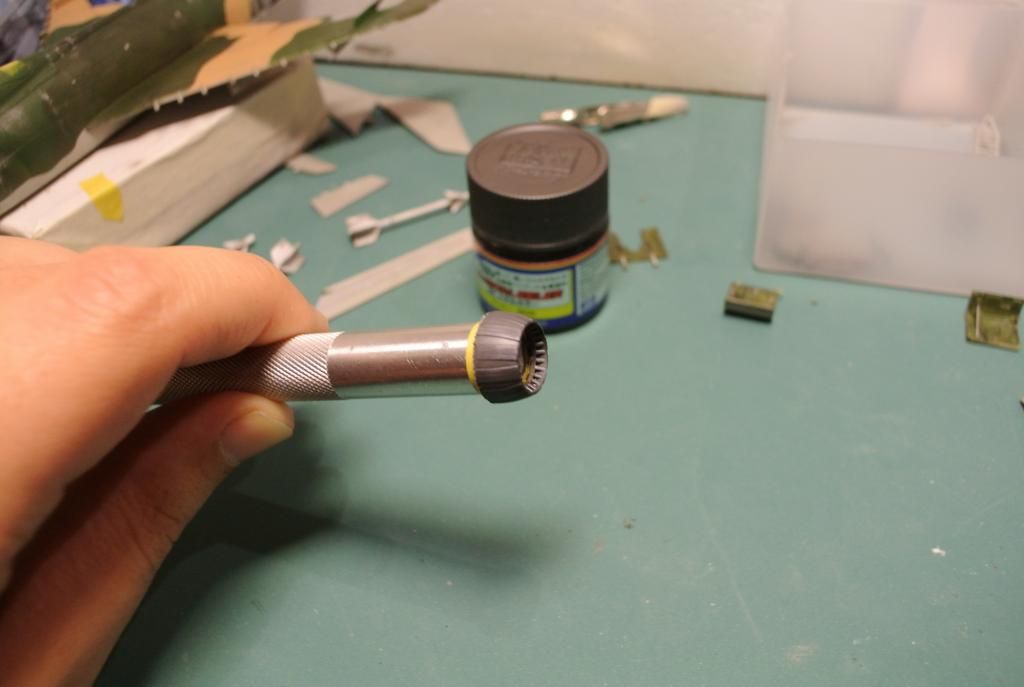
Polished it up and dry brushed with Mr Metal "Chrome". Im very pleased with the result.
Finally, I started gluing on the flaps, might be a bad idea to do this before the wash, but I thought it would take less time to do the wash with them attached, than weathering all the flaps separatly
So, marching on til the end. Tomorrow, I will paint the landing gear and prepare the plane for decaling, cant wait. I appreciate any feedback you can give me! Until next time,
cheers
Before we start with the build pics, a word from a very old friend:
Here is the model with some chipping and glosswork.


Some other parts got some paint on 'em

Demasking the wheel bays was a pain, had to paint over some left over white tack that just wouldnt budge.

Also started working the interior, like glueing on details and painting the wheel bay details.


Here is the result painted, and given a nuln-oil wash (citadel) and some dry brushing. Gonna give it a flat-coat when its finished.

Started weathering other parts like pylons, missiles and drop tanks. I used Flory models black wash for it and I truly adore this stuff on aircraft. I will probably use the Ultimate Dark dirt for the top side, havent decided yet. (Right one hasnt been wipe yet, the left one is finished)

Will try to give the exhaust area a slight "burned" look. To do this I plan to use both Sepia wash(picture) and later on, a blue wash, to get that burned effect. Dont know how it will turned out, im excited


Brush painted the exhaust can with Mr Metal "Iron"

Polished it up and dry brushed with Mr Metal "Chrome". Im very pleased with the result.

Finally, I started gluing on the flaps, might be a bad idea to do this before the wash, but I thought it would take less time to do the wash with them attached, than weathering all the flaps separatly

So, marching on til the end. Tomorrow, I will paint the landing gear and prepare the plane for decaling, cant wait. I appreciate any feedback you can give me! Until next time,
cheers
Ludvig
On the bench:
Airfix 1/72 A-4 Skyhawk
Italeri EH-101 Merlin HAS.1 (Whirlybird SIG)
Last one finished:
Bandai 1/72 A-Wing Gallery
On the bench:
Airfix 1/72 A-4 Skyhawk
Italeri EH-101 Merlin HAS.1 (Whirlybird SIG)
Last one finished:
Bandai 1/72 A-Wing Gallery
-
Twokidsnosleep
- General
- Posts: 18122
- Joined: Thu Aug 07, 2014 4:07 pm
- Location: BC,Canada
Re: Trumpeter 1/72 F-100F Super Sabre "Wild Weasel"
Wheel bays and exhaust look great!
Nice job
Nice job
Scott
On, Under or Near the Bench:
American Graffiti Ford Coupe
Headless Horseman...figure sig
1/72 Black Pearl Pirate Ship
On, Under or Near the Bench:
American Graffiti Ford Coupe
Headless Horseman...figure sig
1/72 Black Pearl Pirate Ship
Re: Trumpeter 1/72 F-100F Super Sabre "Wild Weasel"
Thank you!Twokidsnosleep wrote:Wheel bays and exhaust look great!
Nice job
Ludvig
On the bench:
Airfix 1/72 A-4 Skyhawk
Italeri EH-101 Merlin HAS.1 (Whirlybird SIG)
Last one finished:
Bandai 1/72 A-Wing Gallery
On the bench:
Airfix 1/72 A-4 Skyhawk
Italeri EH-101 Merlin HAS.1 (Whirlybird SIG)
Last one finished:
Bandai 1/72 A-Wing Gallery

Re: Trumpeter 1/72 F-100F Super Sabre "Wild Weasel"
felisbarcinonensis wrote:Great progress!
Ludvig
On the bench:
Airfix 1/72 A-4 Skyhawk
Italeri EH-101 Merlin HAS.1 (Whirlybird SIG)
Last one finished:
Bandai 1/72 A-Wing Gallery
On the bench:
Airfix 1/72 A-4 Skyhawk
Italeri EH-101 Merlin HAS.1 (Whirlybird SIG)
Last one finished:
Bandai 1/72 A-Wing Gallery


Re: Trumpeter 1/72 F-100F Super Sabre "Wild Weasel"
Great progress mate love the weathering of paint near exhaust 
Cheers Gav
On The Bench OK where do I start
On The Bench OK where do I start
Re: Trumpeter 1/72 F-100F Super Sabre "Wild Weasel"
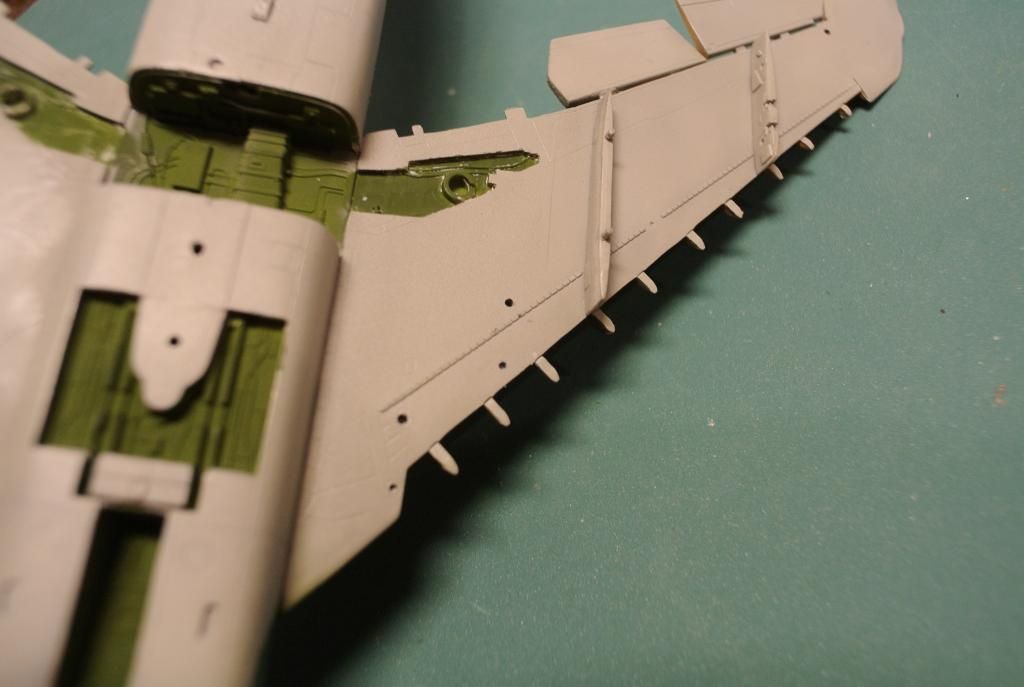
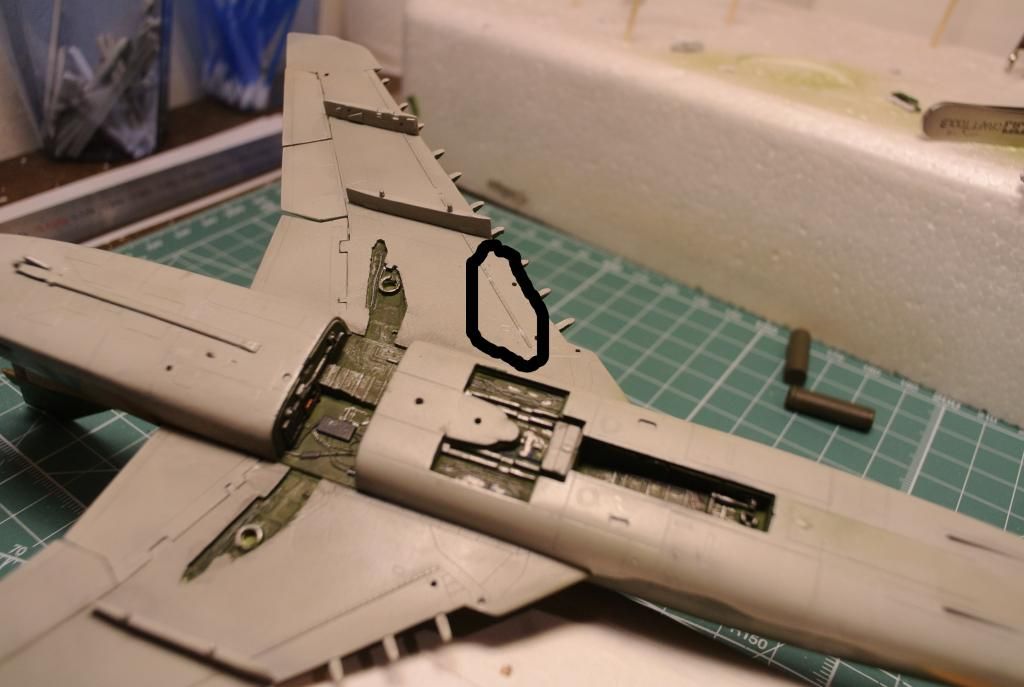
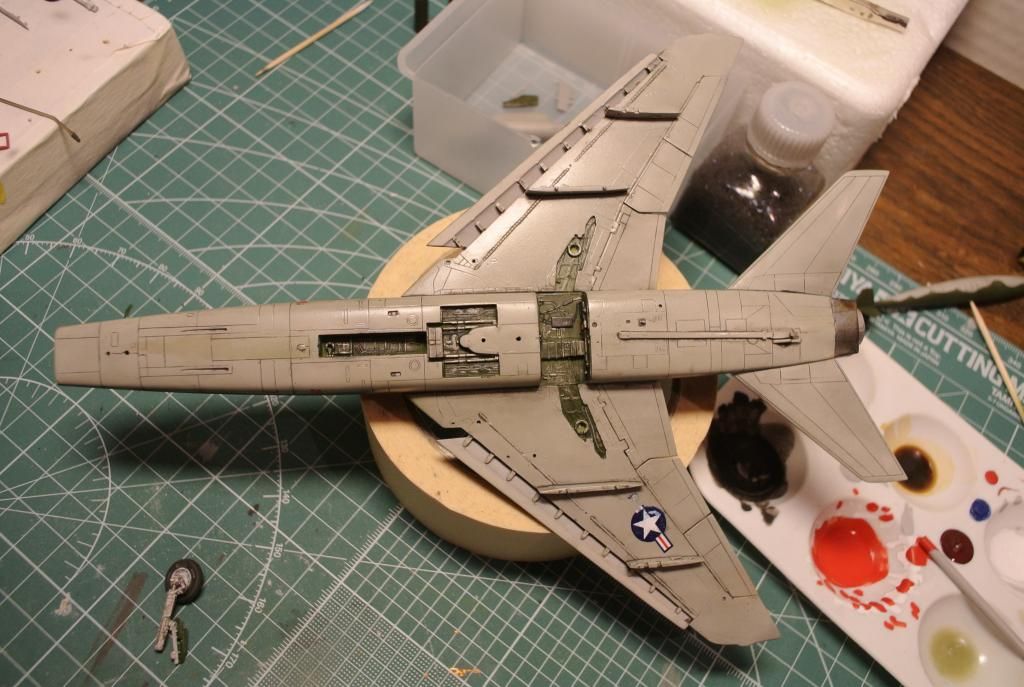
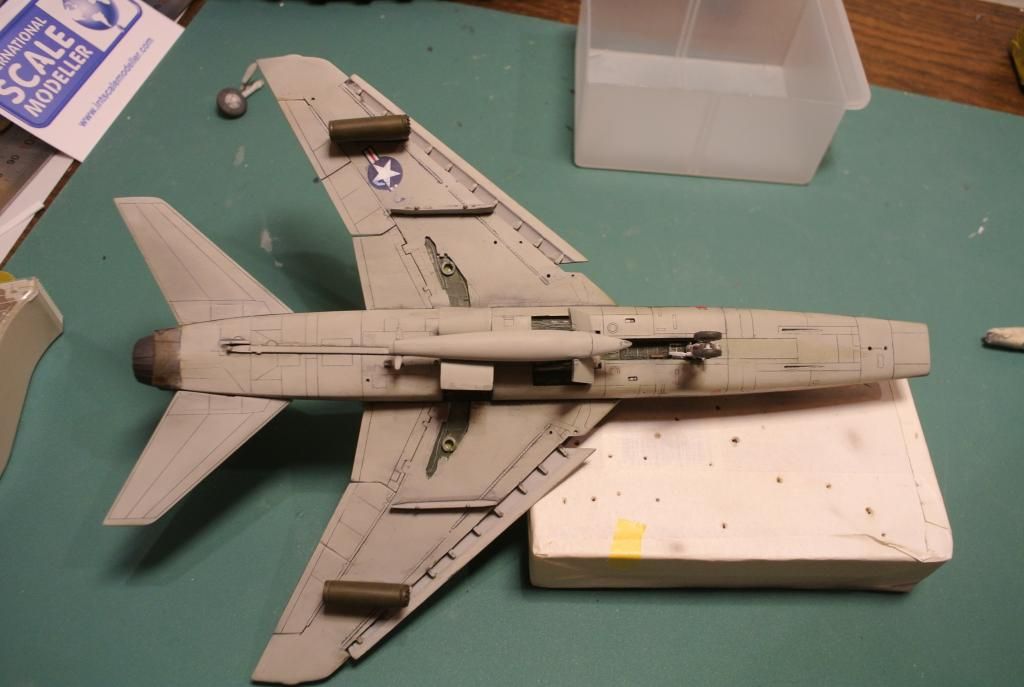
Had to remove some of the raised details to get the pylons to sit correctly.
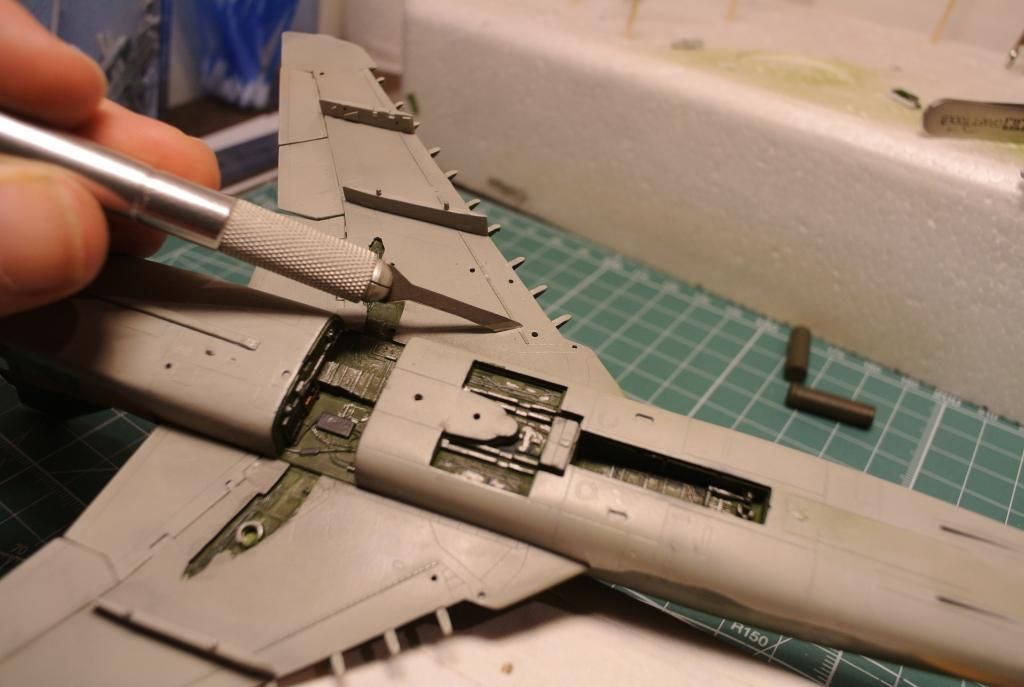
Painted and glossed the landing gear:

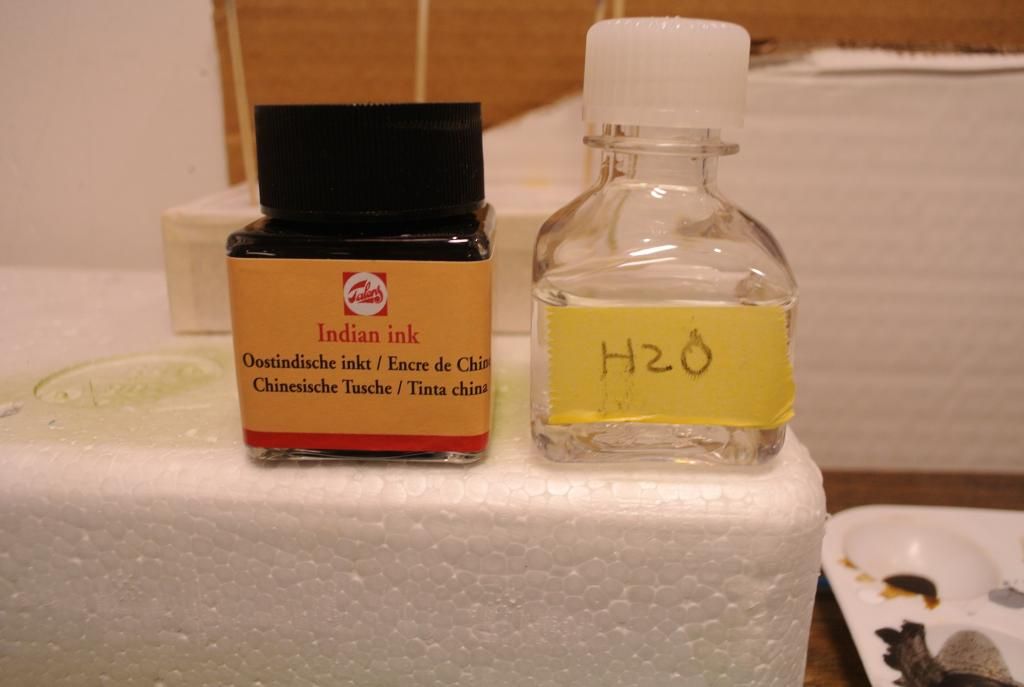
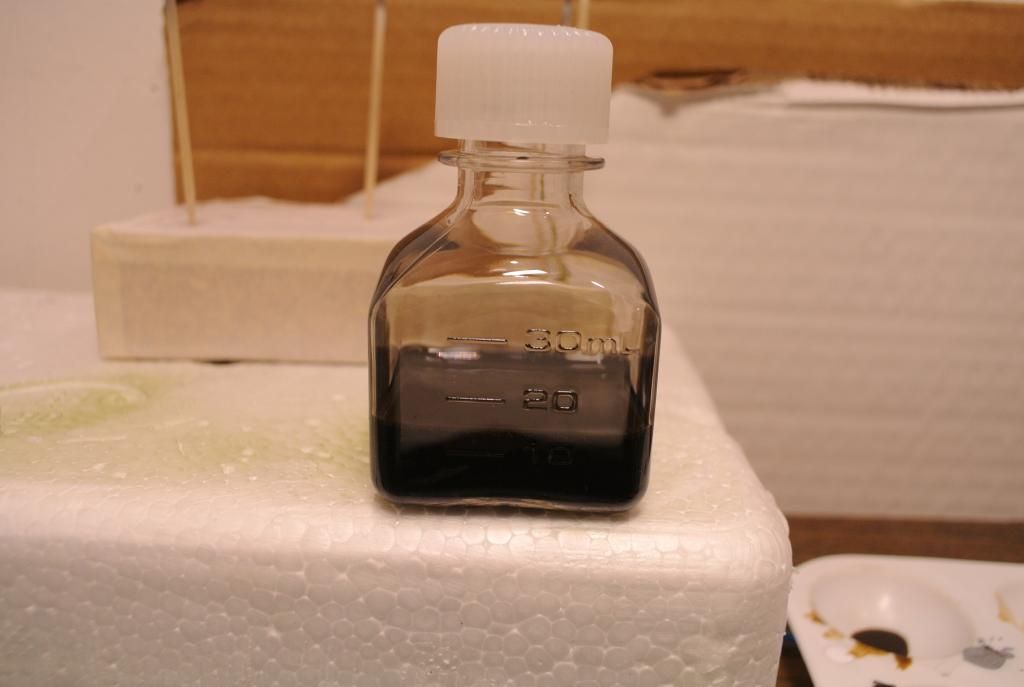
To weather the landing gear and the wheel bays I used this wash consisting of water, indian ink and some flow improver.
Painted the wheels and some bits and bobs.
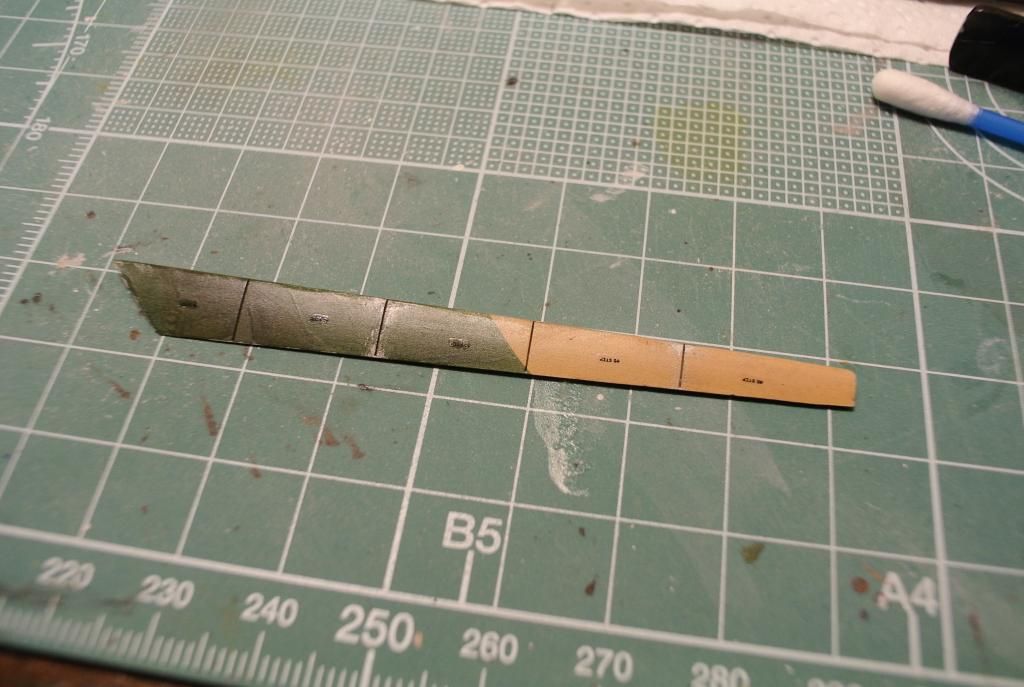
Painted the the refuel-pipe with bottom and top colors.
Decaling
The decaling started. The decals werent great, very glossy with lots of silvering potential.
Stencils on the slats, alot of them...
Decaling finished.
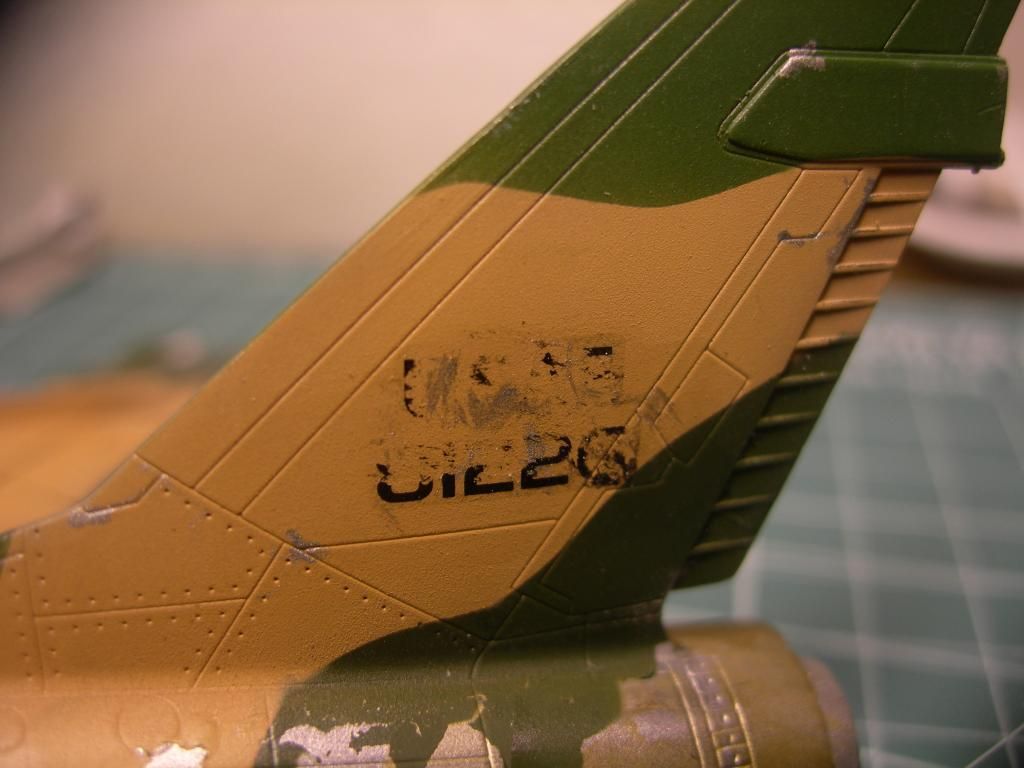
I tried to modify the tail warning signs to align with the peeling.
Also the chipping at the front.
Also weathered the decals a bit. To weather them, and also remove the silvering, I rubbed them slightly with a cotton bud and enamel thinners.
Honestly, I think I went a bit overboard with the weathering of the tail decals.
Dryfitting. I love to dryfit when youre close to the end, it gives you a mojo-boost to push and finish the model when you see the potential. I recommend it when youre stuck on a build.
I used a mix of Flory Wash black and sand. I tried the Ultimate dark dirt, but it was nearly invisible on the green areas, so I needed a little more sting to the panel lines. Might use the Ultimate dark dirt pigments (a decanted and dried version), as a pigment filter on top of everything.
To be continued, until then,
cheers


Painted and glossed the landing gear:


To weather the landing gear and the wheel bays I used this wash consisting of water, indian ink and some flow improver.


Painted the wheels and some bits and bobs.


Painted the the refuel-pipe with bottom and top colors.


Decaling
The decaling started. The decals werent great, very glossy with lots of silvering potential.

Stencils on the slats, alot of them...

Decaling finished.


I tried to modify the tail warning signs to align with the peeling.


Also the chipping at the front.

Also weathered the decals a bit. To weather them, and also remove the silvering, I rubbed them slightly with a cotton bud and enamel thinners.

Honestly, I think I went a bit overboard with the weathering of the tail decals.

Dryfitting. I love to dryfit when youre close to the end, it gives you a mojo-boost to push and finish the model when you see the potential. I recommend it when youre stuck on a build.

I used a mix of Flory Wash black and sand. I tried the Ultimate dark dirt, but it was nearly invisible on the green areas, so I needed a little more sting to the panel lines. Might use the Ultimate dark dirt pigments (a decanted and dried version), as a pigment filter on top of everything.

To be continued, until then,
cheers
Ludvig
On the bench:
Airfix 1/72 A-4 Skyhawk
Italeri EH-101 Merlin HAS.1 (Whirlybird SIG)
Last one finished:
Bandai 1/72 A-Wing Gallery
On the bench:
Airfix 1/72 A-4 Skyhawk
Italeri EH-101 Merlin HAS.1 (Whirlybird SIG)
Last one finished:
Bandai 1/72 A-Wing Gallery
Re: Trumpeter 1/72 F-100F Super Sabre "Wild Weasel"
This build is really in the closing stages.
First of all, here is the result of the wash on the top side of the aircraft. I also attached the slats for good this time... i hope
Also attached the elevators.

Then I used a mix of promodeller gray (75%) and black (25%) wash for the underside.
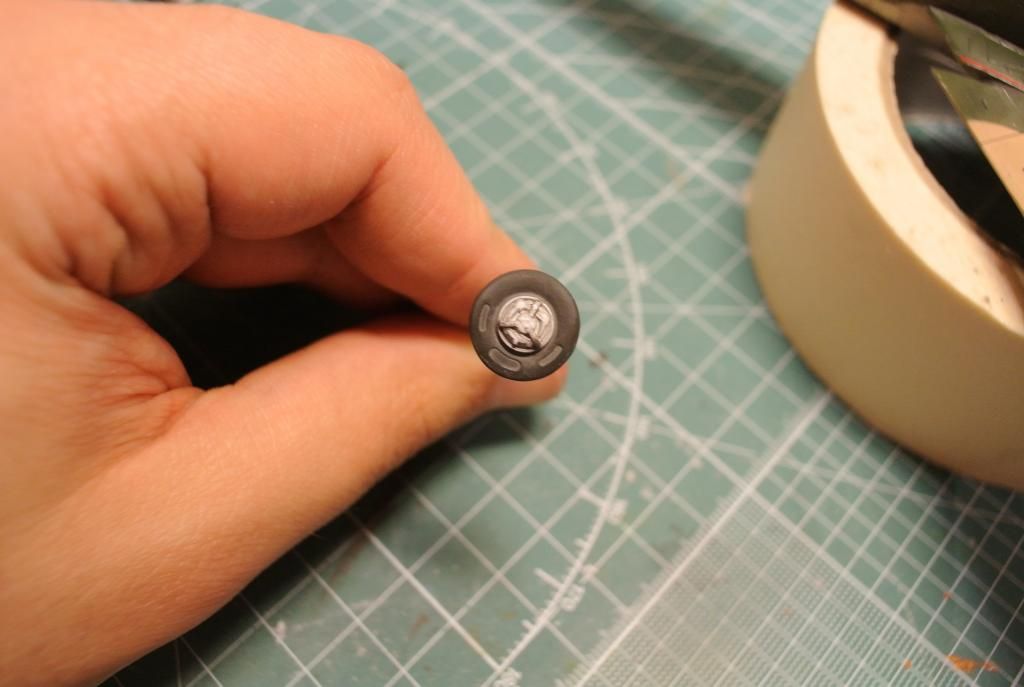
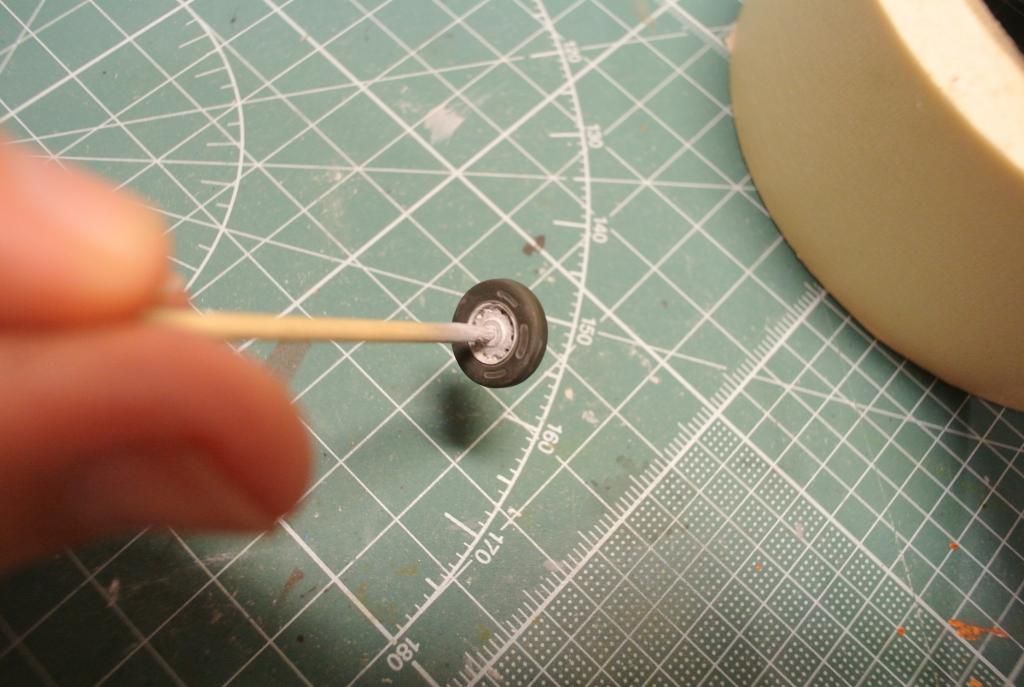
Here is the wheels weathered. I used the ink-wash for the hubs and the grey PM-wash for the tires.
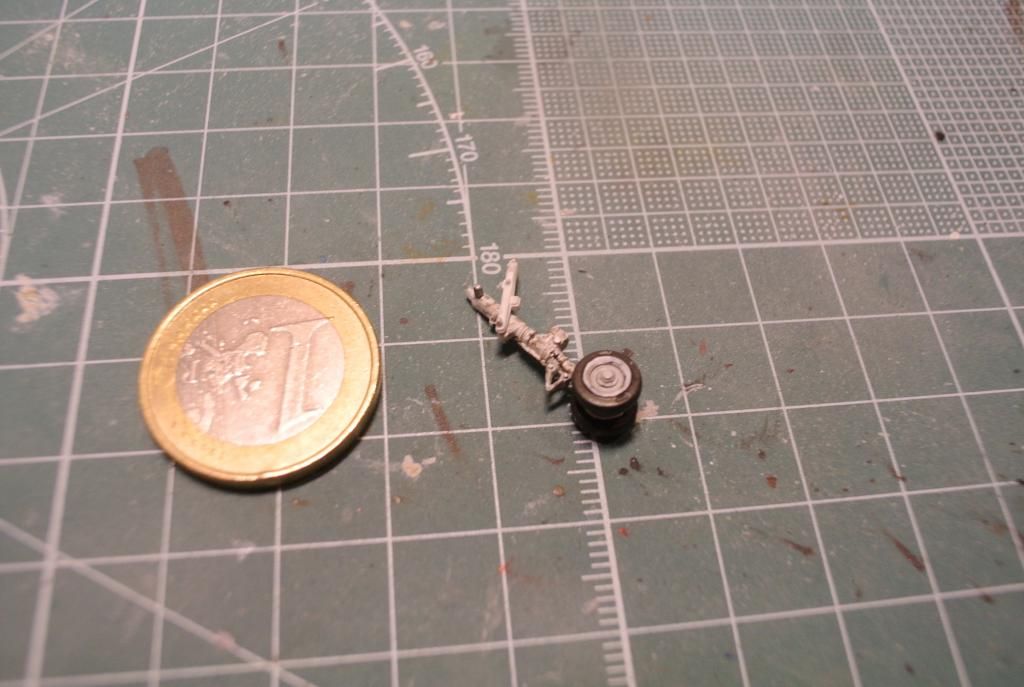
Glued on the tires, and here are the complete landing gears (rear and front)

Also painted and weathered the pitot tube
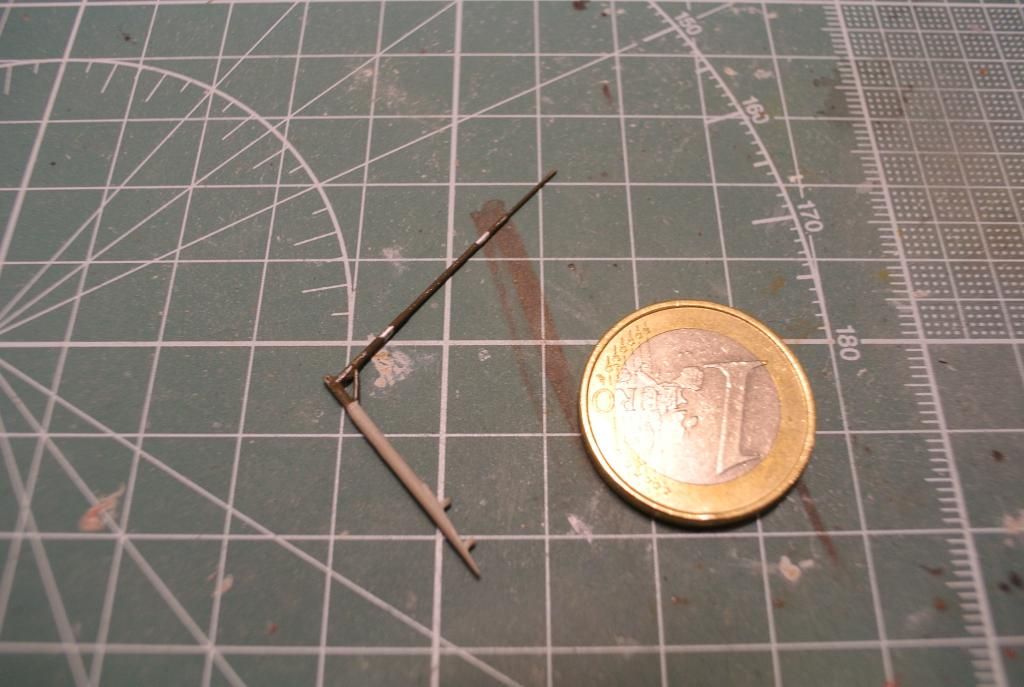
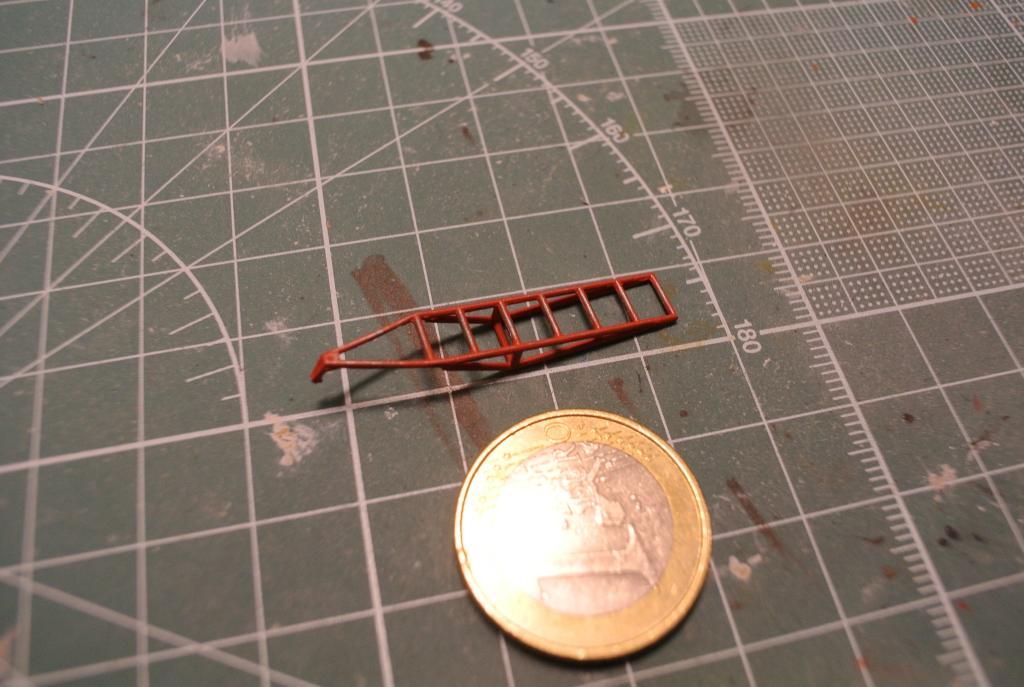
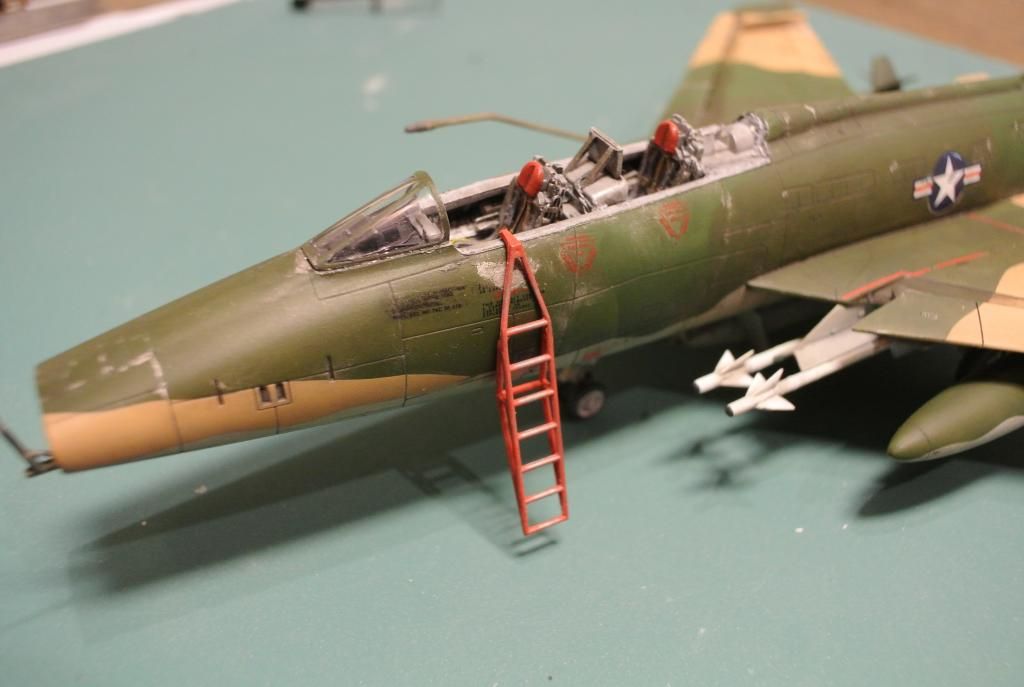
and the access ladder
I also used the citadel "blue" wash for the rear exhaust area to create a burned effect. I let it dry for like 1 minute, then I used a wet cotton bud to "peel" off the wash in places to create clean spots. Dont know if the result is realistic, but I wanted to give it a try.
Tonight, I will cover all the pieces in a flat varnish before I proceed to work with the cockpit. If you dont remember, I will try to pose the canopy as open, and this will require some scratch-building on my part, so that will be interesting. I think I will do that before I attach all the parts for the underside, I havent decided yet. It all depends on how well I succeed on creating a removable canopy, maybe I will just glue it in position and keep it shut Until next time,
cheers
First of all, here is the result of the wash on the top side of the aircraft. I also attached the slats for good this time... i hope


Also attached the elevators.

Then I used a mix of promodeller gray (75%) and black (25%) wash for the underside.

Here is the wheels weathered. I used the ink-wash for the hubs and the grey PM-wash for the tires.


Glued on the tires, and here are the complete landing gears (rear and front)


Also painted and weathered the pitot tube

and the access ladder

I also used the citadel "blue" wash for the rear exhaust area to create a burned effect. I let it dry for like 1 minute, then I used a wet cotton bud to "peel" off the wash in places to create clean spots. Dont know if the result is realistic, but I wanted to give it a try.


Tonight, I will cover all the pieces in a flat varnish before I proceed to work with the cockpit. If you dont remember, I will try to pose the canopy as open, and this will require some scratch-building on my part, so that will be interesting. I think I will do that before I attach all the parts for the underside, I havent decided yet. It all depends on how well I succeed on creating a removable canopy, maybe I will just glue it in position and keep it shut
cheers
Ludvig
On the bench:
Airfix 1/72 A-4 Skyhawk
Italeri EH-101 Merlin HAS.1 (Whirlybird SIG)
Last one finished:
Bandai 1/72 A-Wing Gallery
On the bench:
Airfix 1/72 A-4 Skyhawk
Italeri EH-101 Merlin HAS.1 (Whirlybird SIG)
Last one finished:
Bandai 1/72 A-Wing Gallery
-
planemaker
- Master Sergeant

- Posts: 375
- Joined: Mon Aug 04, 2014 7:33 pm
- Location: Finland
Re: Trumpeter 1/72 F-100F Super Sabre "Wild Weasel"
Nice work so far! Looking forward to see the finish.
Sebastian S.
"You don't know your limits before you tested them."
On the bench:
-Modelsvit 1/72 Tupolev Tu-22KD Blinder (From Russia With Love GB)
-Tamiya 1/20 Lotus 25 Coventry Climax
-Czech Master Resin 1/72 Fokker C.X Finnish version
...and some other stuff too.
Next projects: Waaaayyyy too much!
"You don't know your limits before you tested them."
On the bench:
-Modelsvit 1/72 Tupolev Tu-22KD Blinder (From Russia With Love GB)
-Tamiya 1/20 Lotus 25 Coventry Climax
-Czech Master Resin 1/72 Fokker C.X Finnish version
...and some other stuff too.
Next projects: Waaaayyyy too much!
-
UKguyInUSA
- Second Lieutenant
- Posts: 3429
- Joined: Sun Mar 30, 2014 10:19 pm
- Location: New Hampshire, USA formerly Palm Beach, Florida, USA and Leicestershire, UK (until 1999)
- Contact:
Re: Trumpeter 1/72 F-100F Super Sabre "Wild Weasel"
Great work so far, Ludvig! 
WIP:: Tamiya 1/48 F4U-1A Corsair
Non-WIP::Eduard 1/48 Fokker DVII, Revell 1/32 Arado AR196 and 1/32 BF109G10 Erla,
Non-WIP::Eduard 1/48 Fokker DVII, Revell 1/32 Arado AR196 and 1/32 BF109G10 Erla,
Re: Trumpeter 1/72 F-100F Super Sabre "Wild Weasel"
planemaker wrote:Nice work so far!
Thanks alot guys! Im very thankful for all the kind words so far in this thread!UKguyInUSA wrote:Great work so far, Ludvig!
Ludvig
On the bench:
Airfix 1/72 A-4 Skyhawk
Italeri EH-101 Merlin HAS.1 (Whirlybird SIG)
Last one finished:
Bandai 1/72 A-Wing Gallery
On the bench:
Airfix 1/72 A-4 Skyhawk
Italeri EH-101 Merlin HAS.1 (Whirlybird SIG)
Last one finished:
Bandai 1/72 A-Wing Gallery
-
Twokidsnosleep
- General
- Posts: 18122
- Joined: Thu Aug 07, 2014 4:07 pm
- Location: BC,Canada
Re: Trumpeter 1/72 F-100F Super Sabre "Wild Weasel"
It is looking super
I like what you did with paint, decals, chipping and weathering
I like what you did with paint, decals, chipping and weathering
Scott
On, Under or Near the Bench:
American Graffiti Ford Coupe
Headless Horseman...figure sig
1/72 Black Pearl Pirate Ship
On, Under or Near the Bench:
American Graffiti Ford Coupe
Headless Horseman...figure sig
1/72 Black Pearl Pirate Ship

Re: Trumpeter 1/72 F-100F Super Sabre "Wild Weasel"
Tremedously successful job on the weathering and decal effects. Well done!
Re: Trumpeter 1/72 F-100F Super Sabre "Wild Weasel"
The Final Countdown:
This will the last big update to this build, the reason being its finished It's been a pleasure to get to know the 'Hun' during these past weeks. It's my 8th model since I returned to the hobby and im really liking the improvement from the last couple of builds. It has been a build with many firsts, airbrushing being one and Ive learned more on this build than the previous seven combined. Anyway, here is the last WIP-photos.
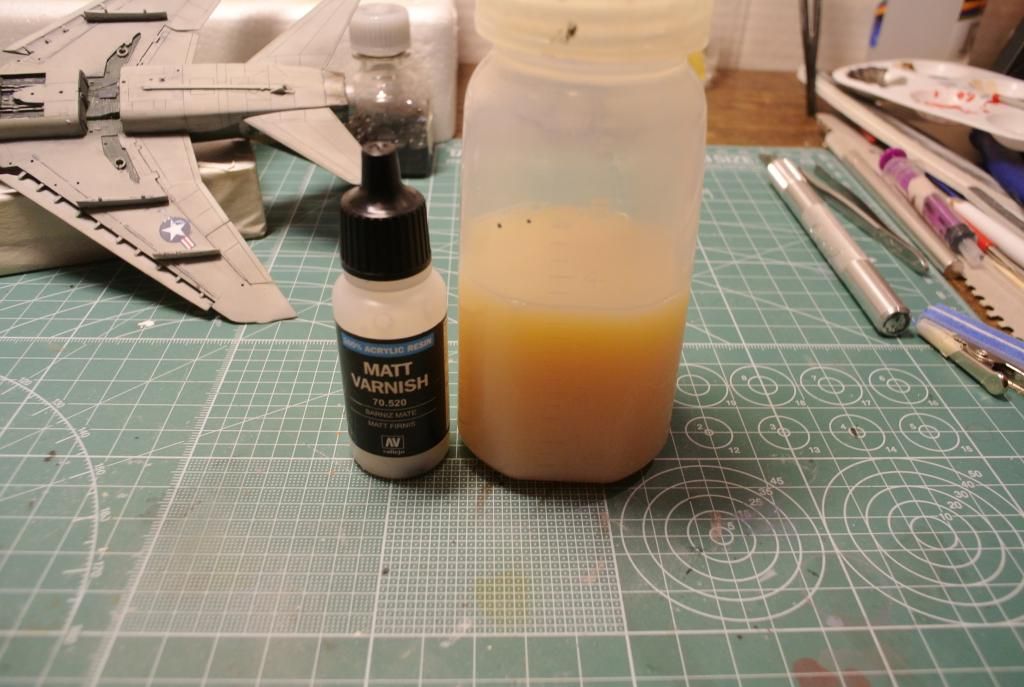
We start with my flat-coat spraying session. I realized I hadnt read enough about doing flat coats. I got some terrible "frosting", meaning the finish was flat, but bluish smoky. It looked truly terrible. I dont know if its visible in these pics, but it wasnt one of those issues you can live with.
So I read about different remedies and the most obvious one was not to spray too close to the surface. This was one of the solutions, the other one was diluting the flat varnish with future/klear/pledge. However, first of all, I had to get rid of the frosting and this might be the most un-orthodox method Ive used during modelling so far. The suggestion was to use olive oil and rub on the frosting. Then you would gently wash it off using a damp paper towel. So, I decided to try it, no matter how strange it sounded. Heres the greasy olive oil.

Here it is with the olive oil washed off, the vibrancy of the colors returned and it was ready to be resprayed.
So this is what I ended up using to flat coat my aircraft. The big bottle is decanted Pledge.
Here is the result.
I still had some frosting under the slats, so I just decided to put a wash over it, it worked fairly well. It still looks discolored, but it passes as a weather effect in my opinion.

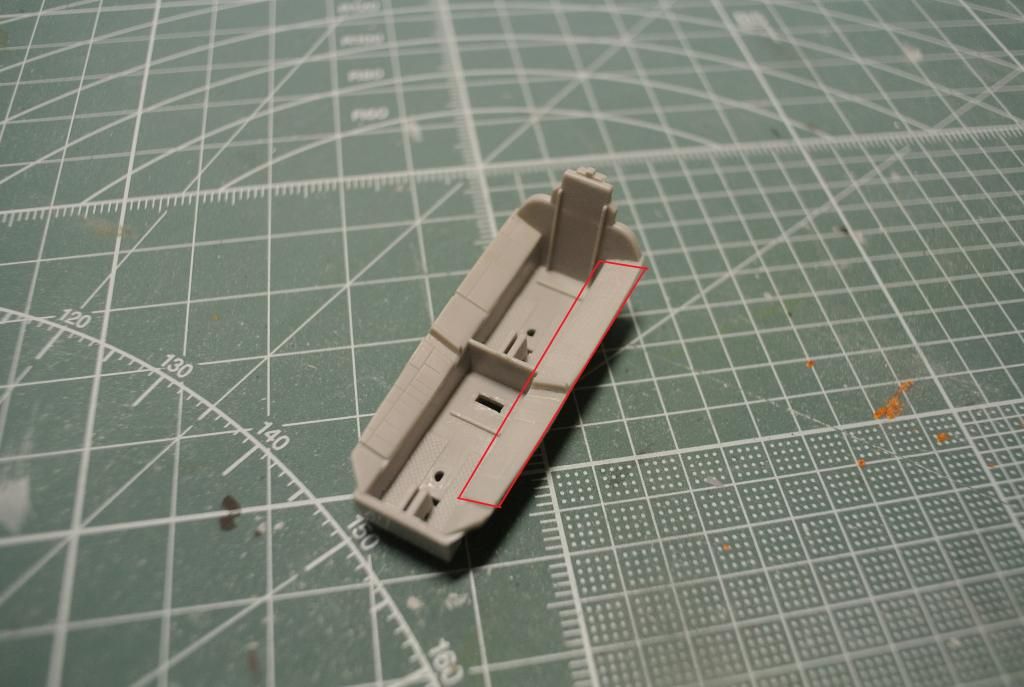
Next up was removing the canopy to add the seats "open canopy-construction".
The front canopy was glued using UV-glue and the rear was glued using PVA. It turned out that the UV-glue wasnt as strong as I had thought and it came off together with the big canopy.
Attached the exhaust.
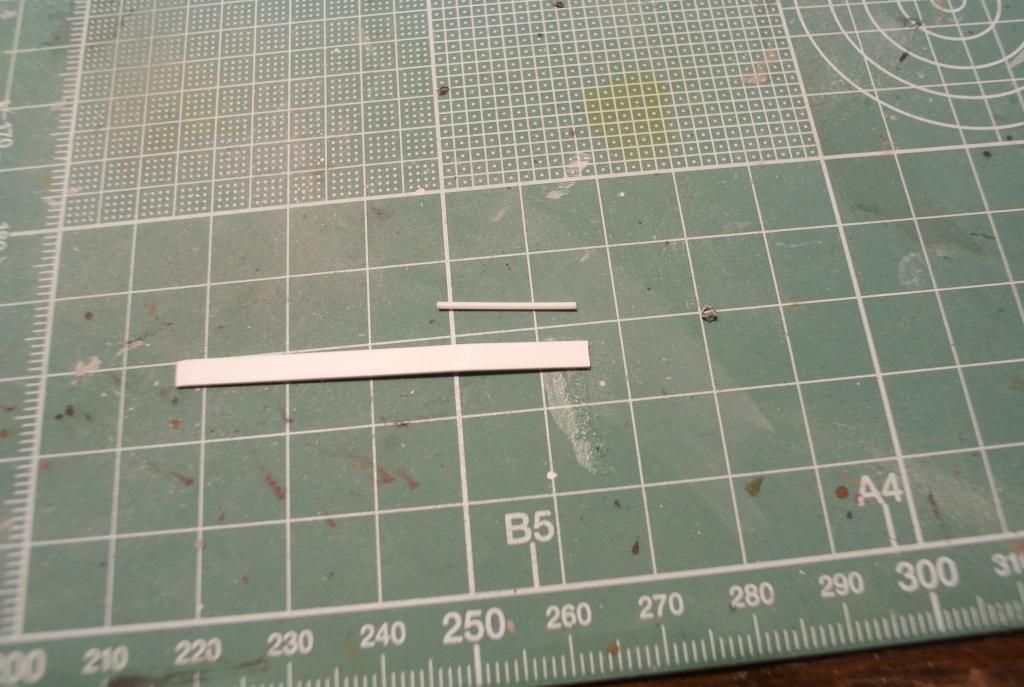
This is what I used for the canopy to stay open.
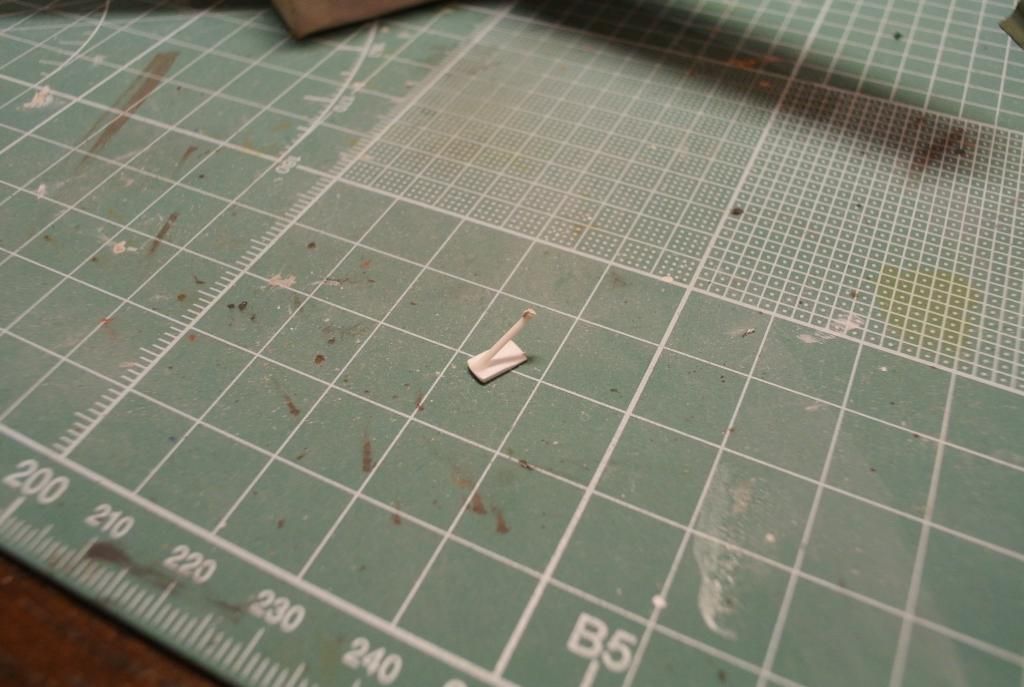
Drilled a little hole for the rod to go into. Not a pretty solution, but still elegant
Dryfitting.
Glued the canopy onto the structure.
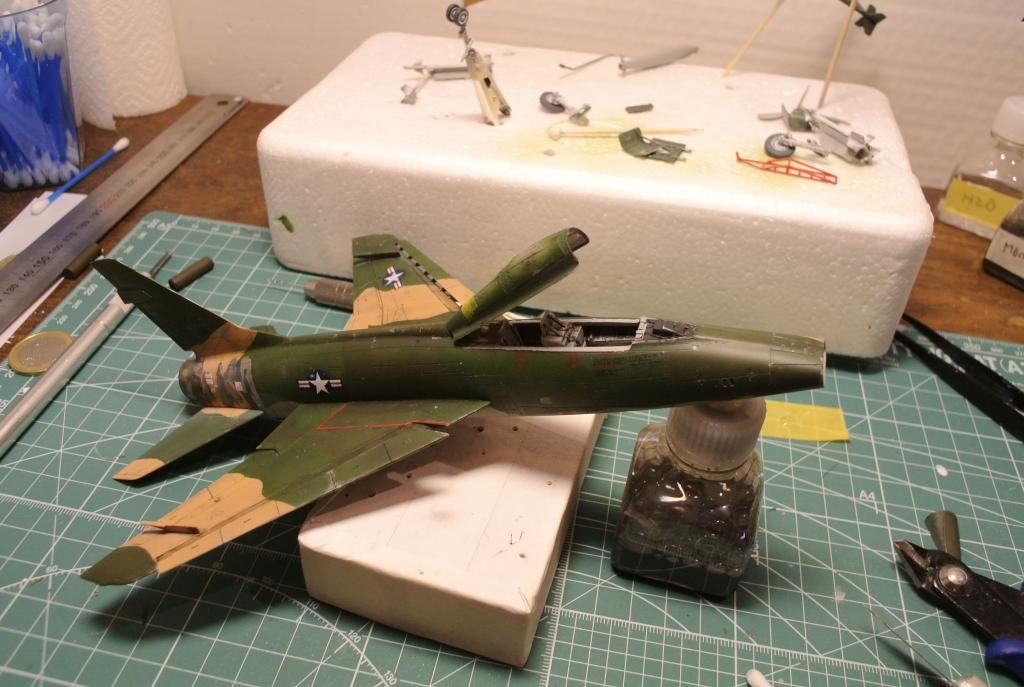
Re-attached the front canopy using Kristal Klear. You can also see that the UV-glue tore off some paint and primer, leaving a blank spot. I decided to try and cover it with a chipping effect.
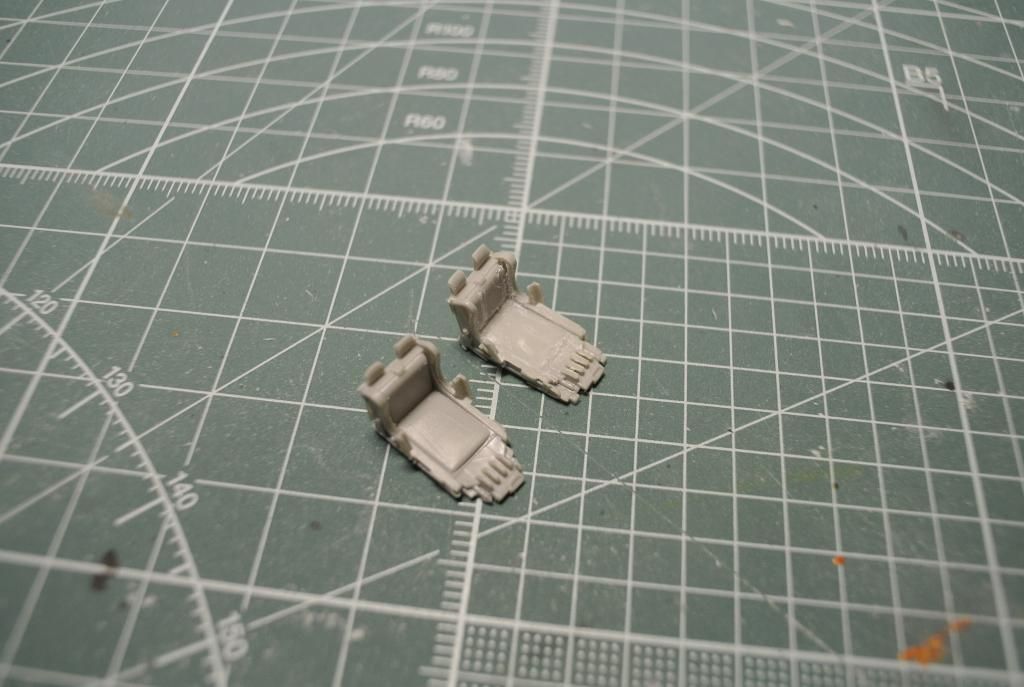
Popped the seats in.
Painted the frame of the cockpit with a light grey.
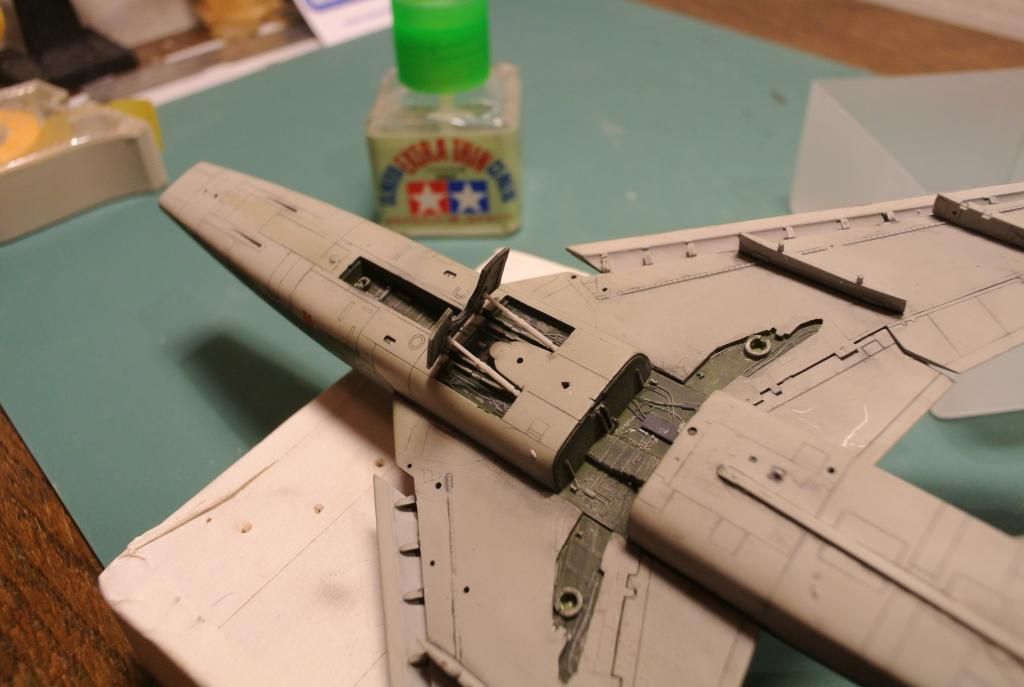
Finally got to start gluing on the parts to the belly. This process was alot quicker than i originally thought it would be. Started with the air brakes as I thought it would be easier to pain the rods when there wasnt anything else in the way.
More stuff.
Added the front landing gear.
Painted the rods and added the ALQ-31 ECM-pod.
Added the rocket pods.
Fuel tanks and refueling system.
Added landing gear and hatches.

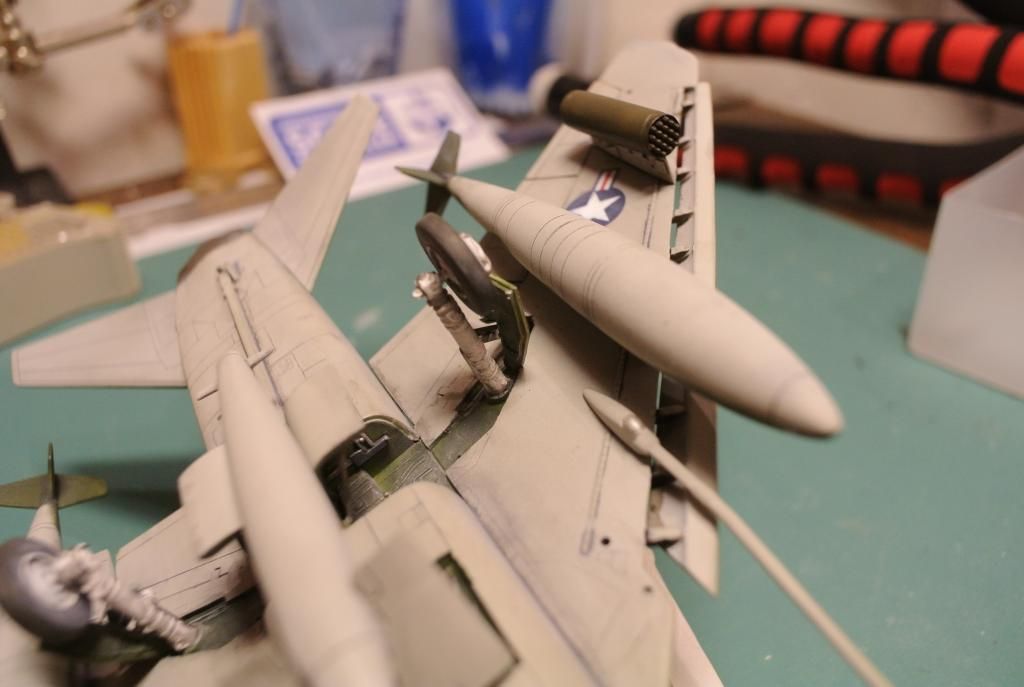
Sidewinders.
Standing on her own legs for the first time. Not much ground clearance but just enough.
Drybrushed the exhaust some more just to make it look more like the reference photos.

Painted my "structure" just so it wouldnt glow white in the eyes of the beholder.

Pitot tube attached with Tamiya Extra Thin.
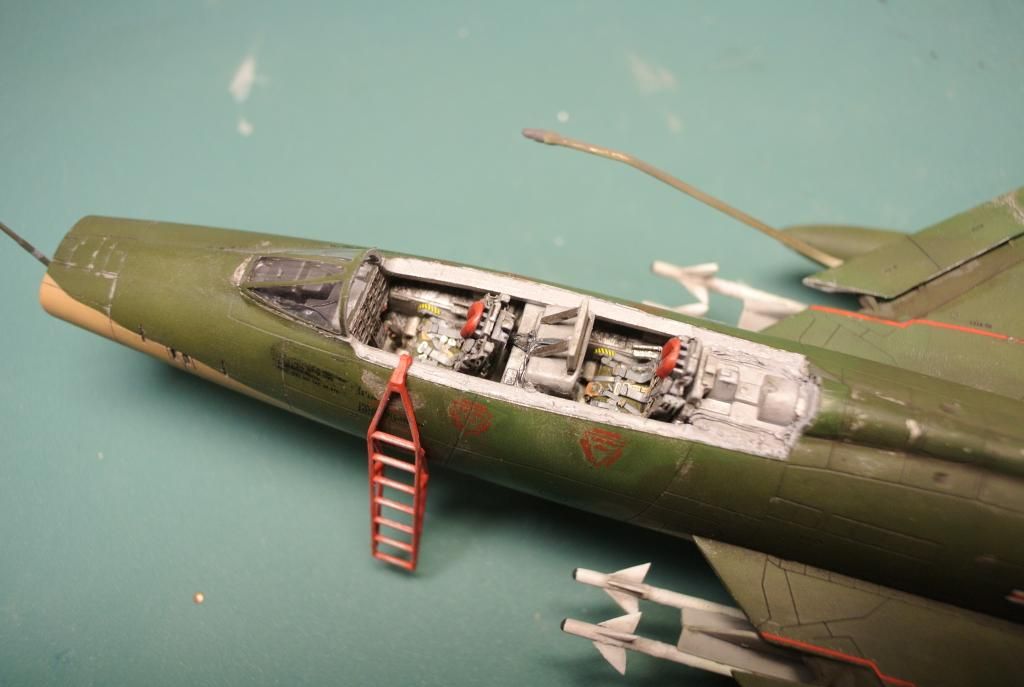
Attached the crew ladder using some Gator Glue.
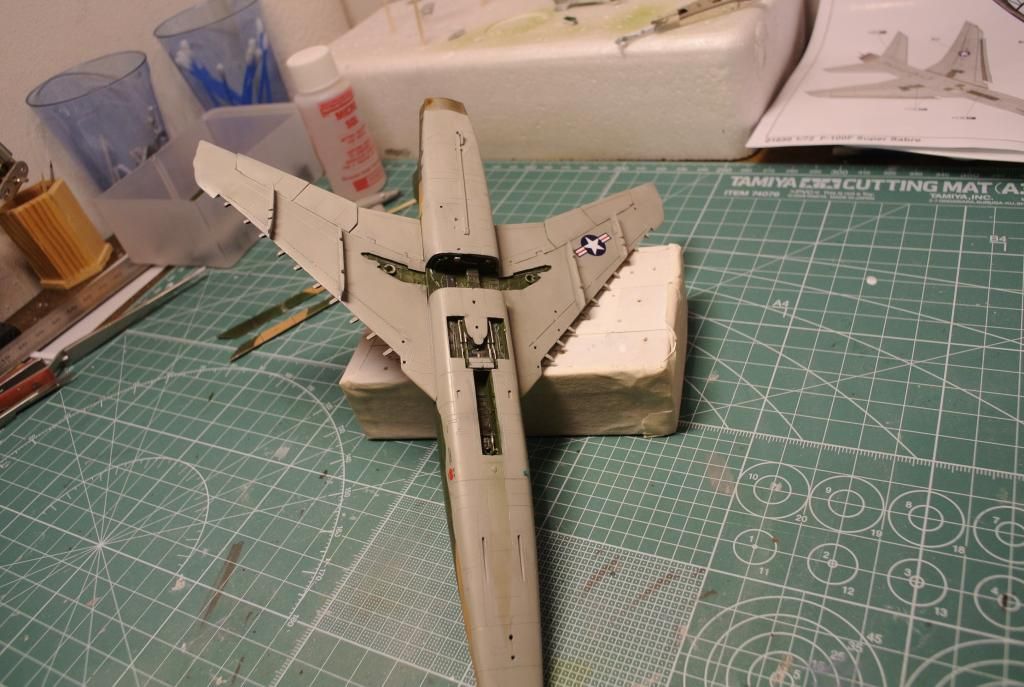
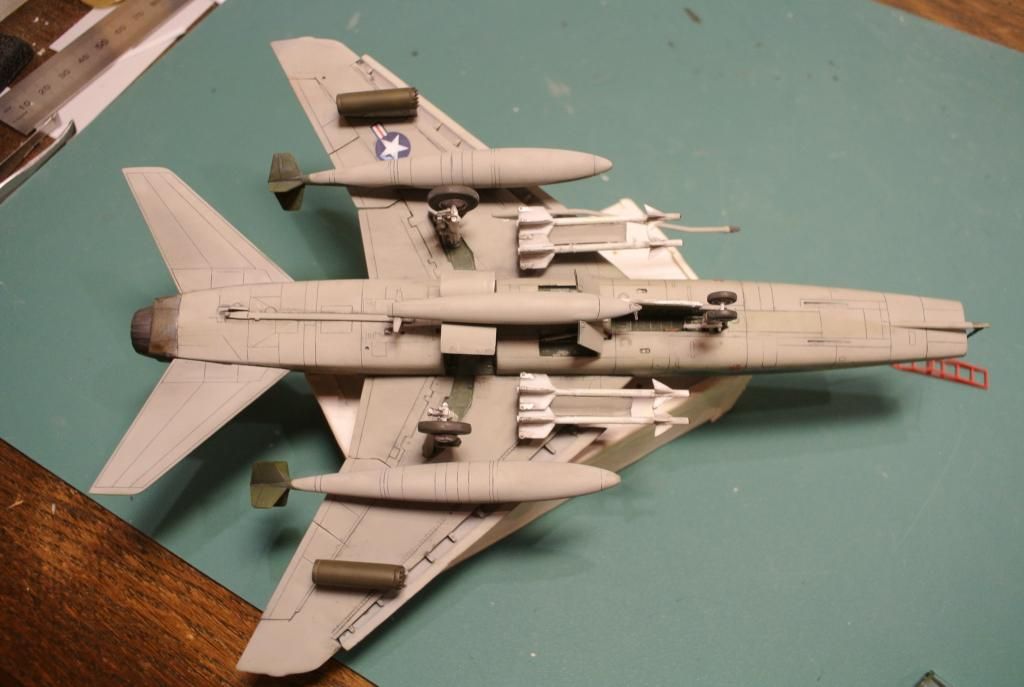
The final finish from below.
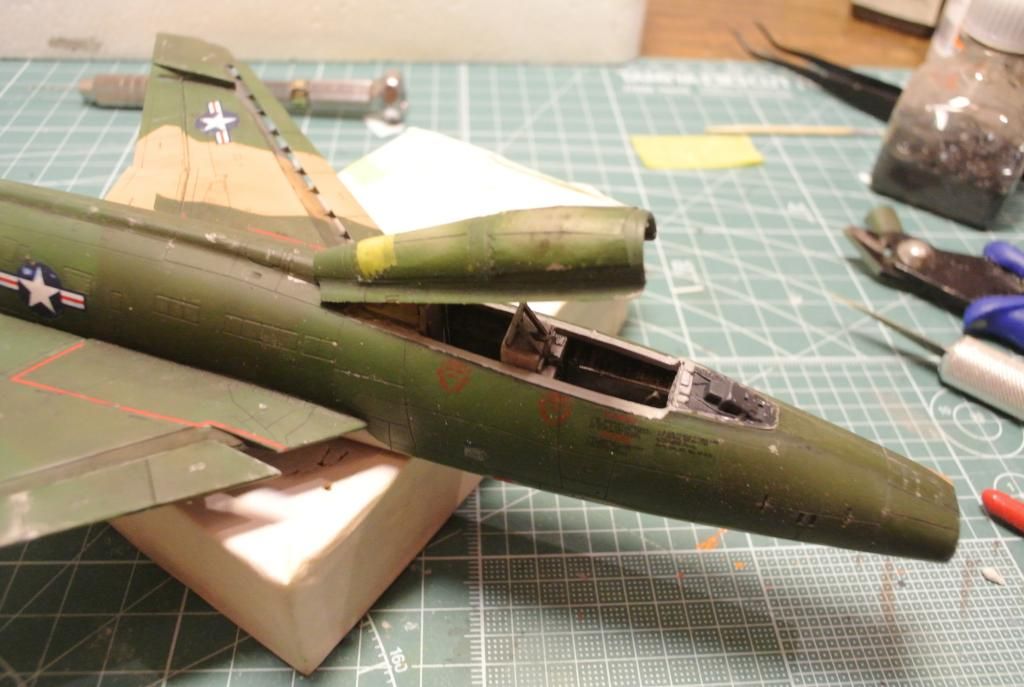
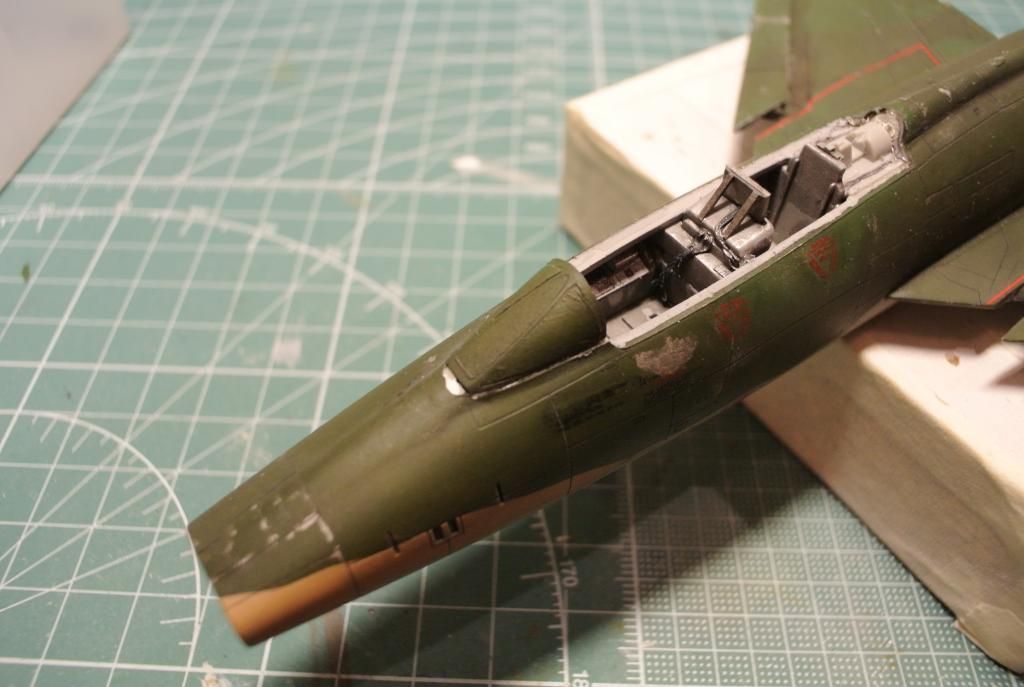
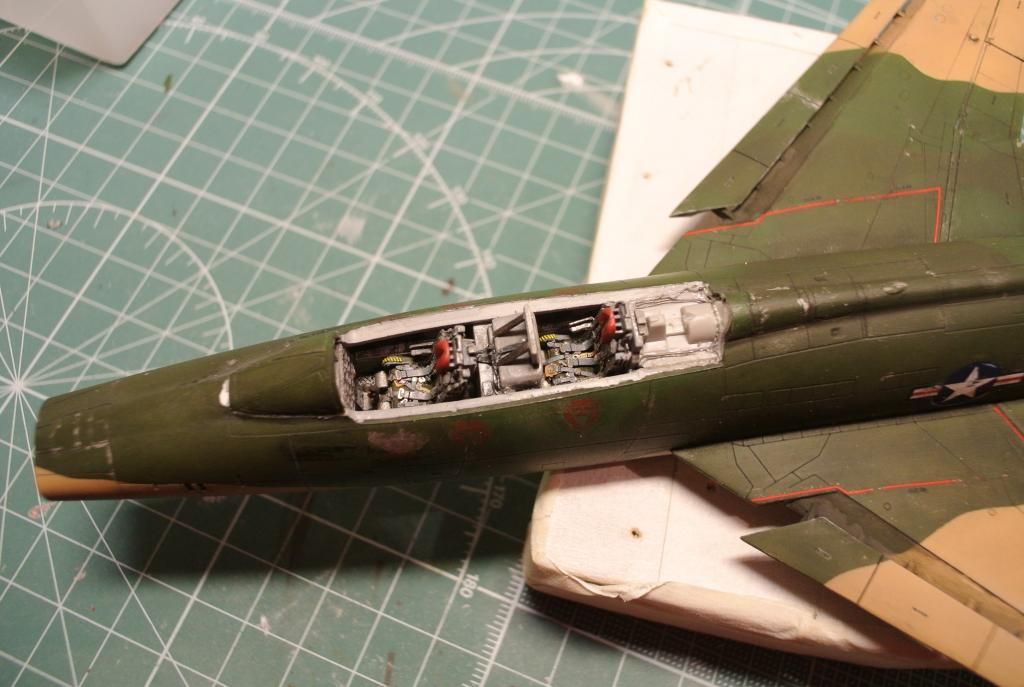
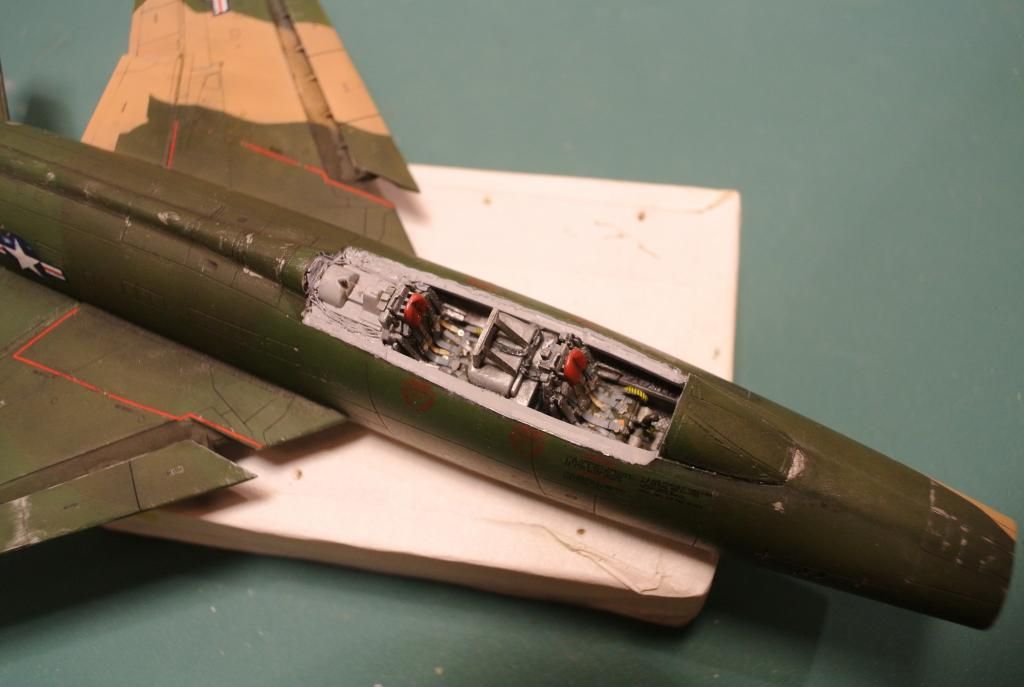
So the cockpit has gone from this:
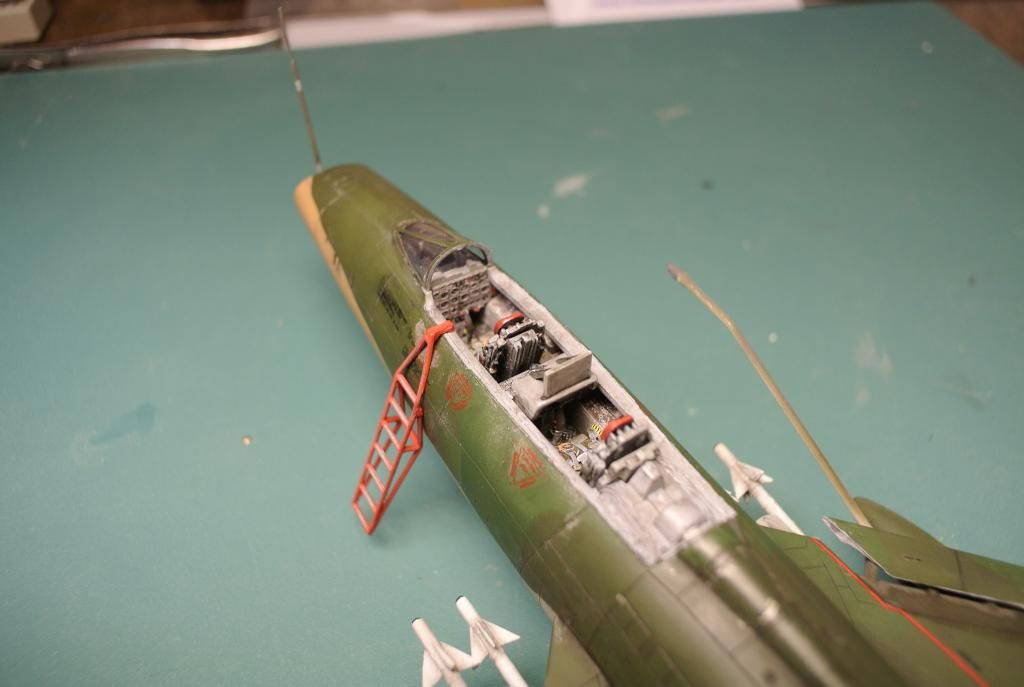
To this cockpit, as it will be seen in the final reveal.
And the rest has gone from this:
To the final result. The canopy is a loose fit, it stays on thanks to a tiny bit of white tack.
Im thinking about doing a simple base for this aircraft for the final reveal. If I decide to do one, I will post pictures of it here. Before I forget I want to do a small shout out to "Twokidsnosleep" for following this build and giving great feedback, and I wanna thank everybody who has encouraged me through this build with your kind words. There has been some bumps on this road (like the "White-tack Disaster") but im very pleased with the result. Until next time,
cheers
This will the last big update to this build, the reason being its finished
We start with my flat-coat spraying session. I realized I hadnt read enough about doing flat coats. I got some terrible "frosting", meaning the finish was flat, but bluish smoky. It looked truly terrible. I dont know if its visible in these pics, but it wasnt one of those issues you can live with.

So I read about different remedies and the most obvious one was not to spray too close to the surface. This was one of the solutions, the other one was diluting the flat varnish with future/klear/pledge. However, first of all, I had to get rid of the frosting and this might be the most un-orthodox method Ive used during modelling so far. The suggestion was to use olive oil and rub on the frosting. Then you would gently wash it off using a damp paper towel. So, I decided to try it, no matter how strange it sounded. Heres the greasy olive oil.

Here it is with the olive oil washed off, the vibrancy of the colors returned and it was ready to be resprayed.

So this is what I ended up using to flat coat my aircraft. The big bottle is decanted Pledge.

Here is the result.


I still had some frosting under the slats, so I just decided to put a wash over it, it worked fairly well. It still looks discolored, but it passes as a weather effect in my opinion.

Next up was removing the canopy to add the seats "open canopy-construction".

The front canopy was glued using UV-glue and the rear was glued using PVA. It turned out that the UV-glue wasnt as strong as I had thought and it came off together with the big canopy.

Attached the exhaust.

This is what I used for the canopy to stay open.


Drilled a little hole for the rod to go into.


Dryfitting.

Glued the canopy onto the structure.

Re-attached the front canopy using Kristal Klear. You can also see that the UV-glue tore off some paint and primer, leaving a blank spot. I decided to try and cover it with a chipping effect.

Popped the seats in.

Painted the frame of the cockpit with a light grey.

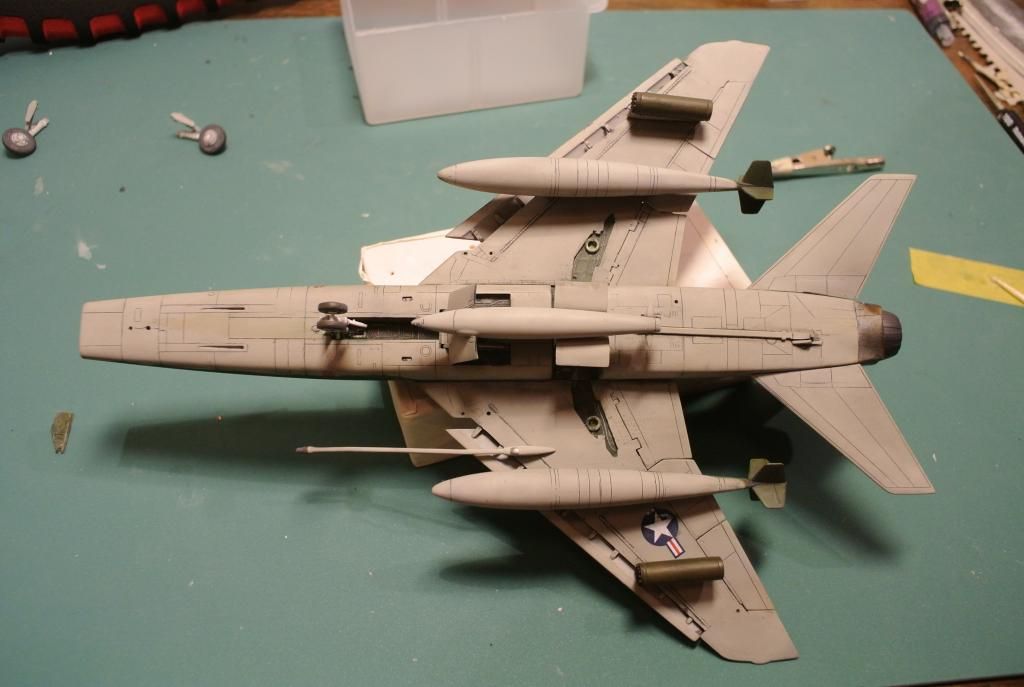
Finally got to start gluing on the parts to the belly. This process was alot quicker than i originally thought it would be. Started with the air brakes as I thought it would be easier to pain the rods when there wasnt anything else in the way.

More stuff.

Added the front landing gear.

Painted the rods and added the ALQ-31 ECM-pod.


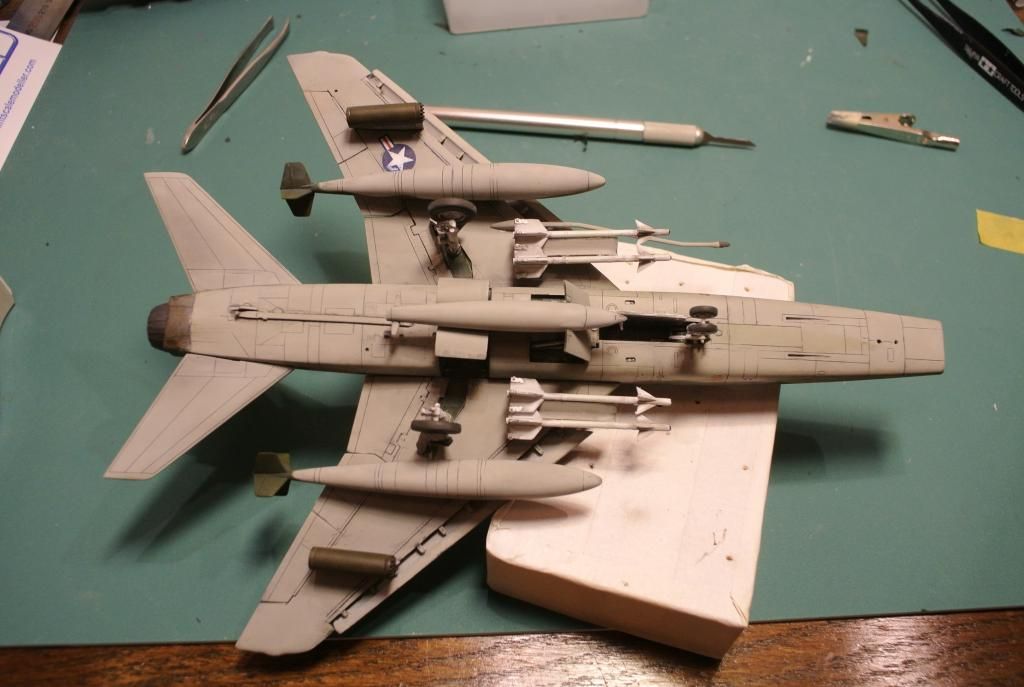
Added the rocket pods.

Fuel tanks and refueling system.

Added landing gear and hatches.


Sidewinders.

Standing on her own legs for the first time. Not much ground clearance

Drybrushed the exhaust some more just to make it look more like the reference photos.

Painted my "structure" just so it wouldnt glow white in the eyes of the beholder.

Pitot tube attached with Tamiya Extra Thin.

Attached the crew ladder using some Gator Glue.

The final finish from below.

So the cockpit has gone from this:


To this cockpit, as it will be seen in the final reveal.


And the rest has gone from this:

To the final result. The canopy is a loose fit, it stays on thanks to a tiny bit of white tack.

Im thinking about doing a simple base for this aircraft for the final reveal. If I decide to do one, I will post pictures of it here. Before I forget I want to do a small shout out to "Twokidsnosleep" for following this build and giving great feedback, and I wanna thank everybody who has encouraged me through this build with your kind words. There has been some bumps on this road (like the "White-tack Disaster") but im very pleased with the result. Until next time,
cheers
Ludvig
On the bench:
Airfix 1/72 A-4 Skyhawk
Italeri EH-101 Merlin HAS.1 (Whirlybird SIG)
Last one finished:
Bandai 1/72 A-Wing Gallery
On the bench:
Airfix 1/72 A-4 Skyhawk
Italeri EH-101 Merlin HAS.1 (Whirlybird SIG)
Last one finished:
Bandai 1/72 A-Wing Gallery
-
felisbarcinonensis

- Command Sergeant Major

- Posts: 860
- Joined: Tue Jun 10, 2014 9:42 pm
- Location: BCN
Re: Trumpeter 1/72 F-100F Super Sabre "Wild Weasel"
Wow! Amazing stuff Love the battered look of it; the bird has been through a lot
Re: Trumpeter 1/72 F-100F Super Sabre "Wild Weasel"
Thanks!felisbarcinonensis wrote:Wow! Amazing stuff
Ludvig
On the bench:
Airfix 1/72 A-4 Skyhawk
Italeri EH-101 Merlin HAS.1 (Whirlybird SIG)
Last one finished:
Bandai 1/72 A-Wing Gallery
On the bench:
Airfix 1/72 A-4 Skyhawk
Italeri EH-101 Merlin HAS.1 (Whirlybird SIG)
Last one finished:
Bandai 1/72 A-Wing Gallery
-
Twokidsnosleep
- General
- Posts: 18122
- Joined: Thu Aug 07, 2014 4:07 pm
- Location: BC,Canada
Re: Trumpeter 1/72 F-100F Super Sabre "Wild Weasel"
Hey thanks man, it was fun watching you build this plane, glad to be of any help
We are on the same learning curve for painting....actually you are way ahead of me now!
We are on the same learning curve for painting....actually you are way ahead of me now!
Scott
On, Under or Near the Bench:
American Graffiti Ford Coupe
Headless Horseman...figure sig
1/72 Black Pearl Pirate Ship
On, Under or Near the Bench:
American Graffiti Ford Coupe
Headless Horseman...figure sig
1/72 Black Pearl Pirate Ship
Re: Trumpeter 1/72 F-100F Super Sabre "Wild Weasel"
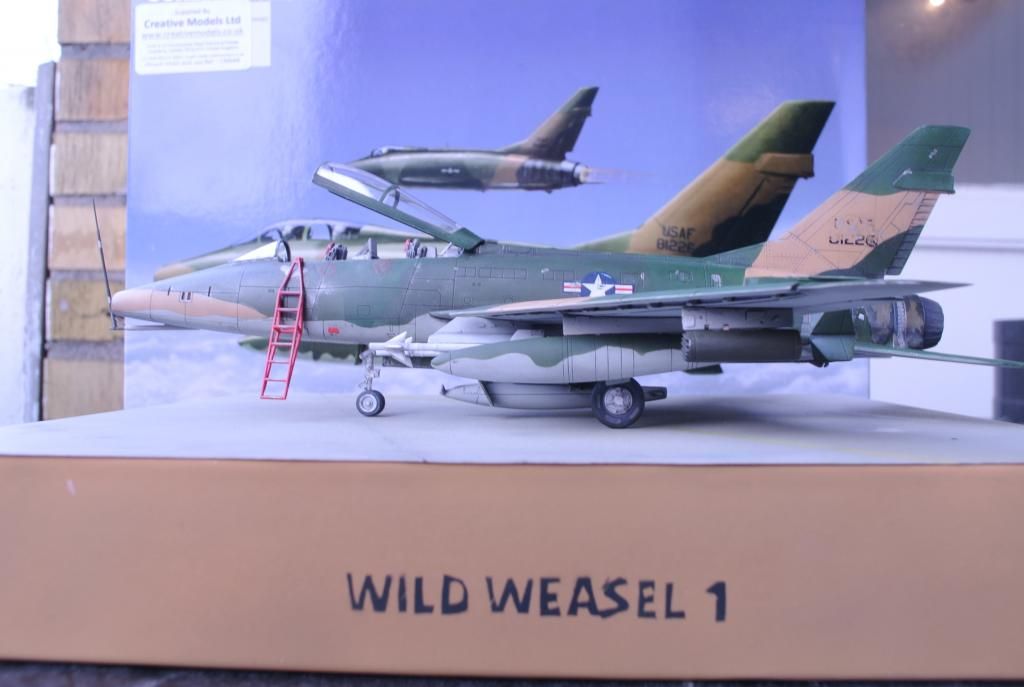
Ok, so I've decided to build a simple base consisting of some concrete tiles, and maybe some yellow lines.
I found some photographs of the airfield from where the individual ( F-100F-20-NA "Wild Weasel-I" No. 58-11226) flew the first successful Wild Weasel-operation. Its the Korat TFAB in Thailand. I will use these photographs as reference for the base.


The concrete look very yellowish to me, but I cant decide if thats cause of the photographs or the actual weathering effect. What do you guys think? Im thankful for all the feedback you can give me. Until next time,
cheers
I found some photographs of the airfield from where the individual ( F-100F-20-NA "Wild Weasel-I" No. 58-11226) flew the first successful Wild Weasel-operation. Its the Korat TFAB in Thailand. I will use these photographs as reference for the base.
The concrete look very yellowish to me, but I cant decide if thats cause of the photographs or the actual weathering effect. What do you guys think? Im thankful for all the feedback you can give me. Until next time,
cheers
Ludvig
On the bench:
Airfix 1/72 A-4 Skyhawk
Italeri EH-101 Merlin HAS.1 (Whirlybird SIG)
Last one finished:
Bandai 1/72 A-Wing Gallery
On the bench:
Airfix 1/72 A-4 Skyhawk
Italeri EH-101 Merlin HAS.1 (Whirlybird SIG)
Last one finished:
Bandai 1/72 A-Wing Gallery
-
DBMiller

- Chief Warrant Officer 3

- Posts: 2223
- Joined: Mon Jan 06, 2014 8:10 pm
- Location: Guilford, Vermont, USA

Re: Trumpeter 1/72 F-100F Super Sabre "Wild Weasel"
-
SyntaxModels

- First Sergeant

- Posts: 538
- Joined: Mon Sep 22, 2014 8:34 am
- Location: Melbourne, Victoria, Australia
Re: Trumpeter 1/72 F-100F Super Sabre "Wild Weasel"
I can't believe I only saw this build thread today! 
You did amazing Ludvig! This is a model to be very proud of, a sure Hangar Queen! Can't wait to see the dio/base done mate! I'm sure it'll be stunning as the rest of this build has been!
Keep it up mate!
You did amazing Ludvig! This is a model to be very proud of, a sure Hangar Queen! Can't wait to see the dio/base done mate! I'm sure it'll be stunning as the rest of this build has been!
Keep it up mate!
- Leo
My Motto: "Eh, that'll do, wait a minute, this is my model I can do whatever the hell I want with it! Yes that's a good excuse!"
Visit my YouTube Channel!
https://www.youtube.com/channel/UCKvbyv ... DwSd88cMYg
My Motto: "Eh, that'll do, wait a minute, this is my model I can do whatever the hell I want with it! Yes that's a good excuse!"
Visit my YouTube Channel!
https://www.youtube.com/channel/UCKvbyv ... DwSd88cMYg
Re: Trumpeter 1/72 F-100F Super Sabre "Wild Weasel"
Very kind words, I thank you for them!SyntaxModels wrote:I can't believe I only saw this build thread today!
You did amazing Ludvig! This is a model to be very proud of, a sure Hangar Queen! Can't wait to see the dio/base done mate! I'm sure it'll be stunning as the rest of this build has been!
Keep it up mate!
This thread has over 900 views, that's amazing!
Ludvig
On the bench:
Airfix 1/72 A-4 Skyhawk
Italeri EH-101 Merlin HAS.1 (Whirlybird SIG)
Last one finished:
Bandai 1/72 A-Wing Gallery
On the bench:
Airfix 1/72 A-4 Skyhawk
Italeri EH-101 Merlin HAS.1 (Whirlybird SIG)
Last one finished:
Bandai 1/72 A-Wing Gallery
Re: Trumpeter 1/72 F-100F Super Sabre "Wild Weasel"
So I decided to make a simple base for this aircraft. The base is almost finished, just need to flat-coat it. I will wait with the final pics of the base until the final reveal of the aircraft, wich I will shoot tomorrow. The base took like 3 hours to make, drying times and everything else included, so its pretty basic in my opinion.
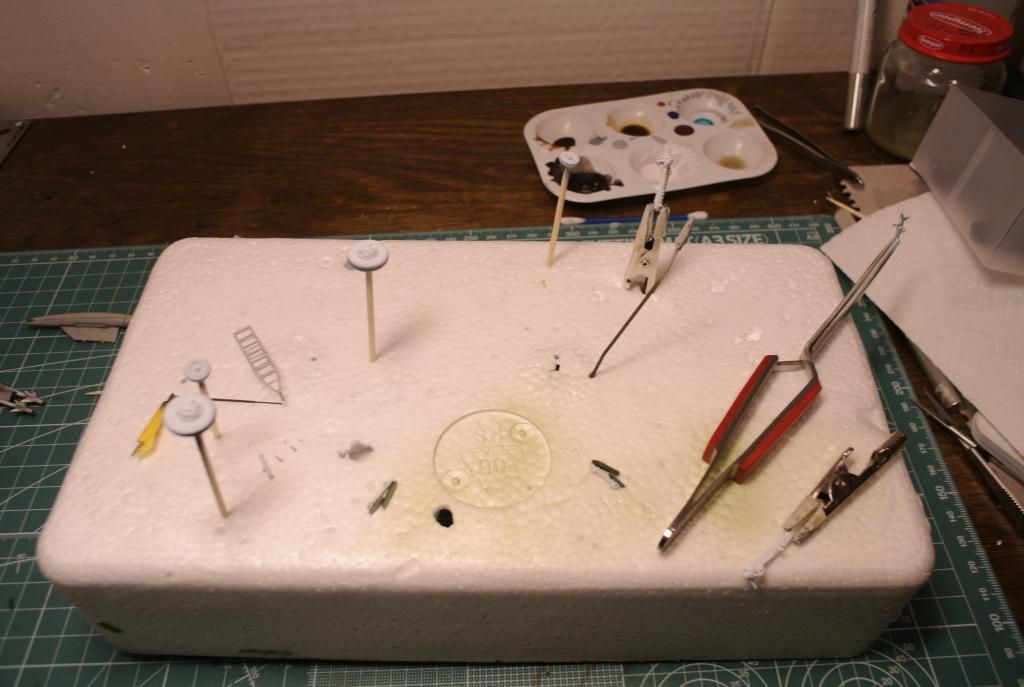
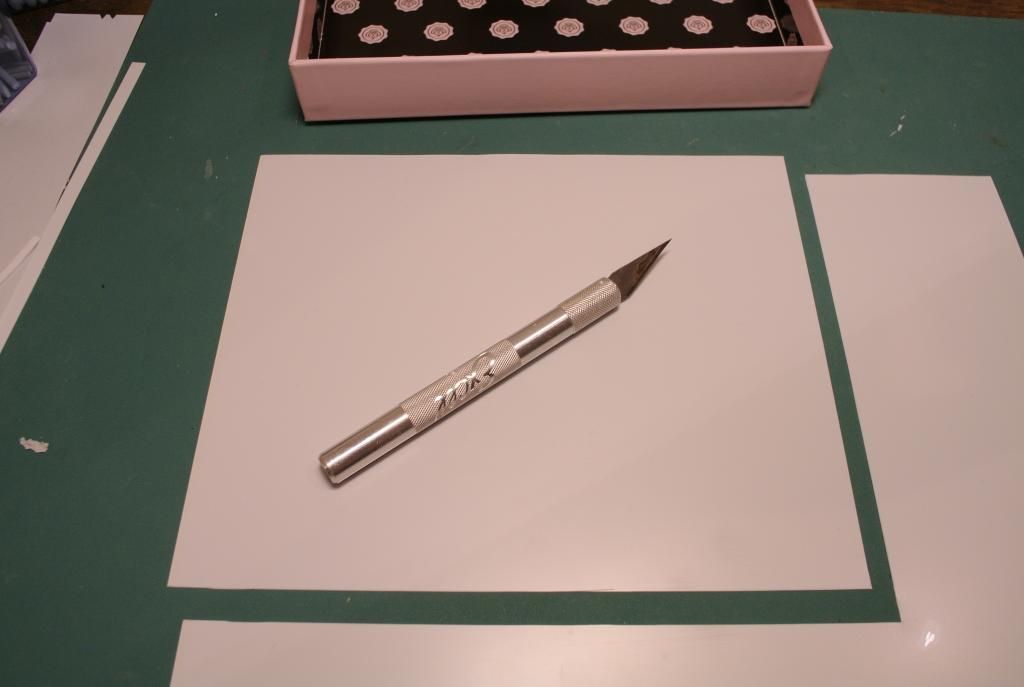
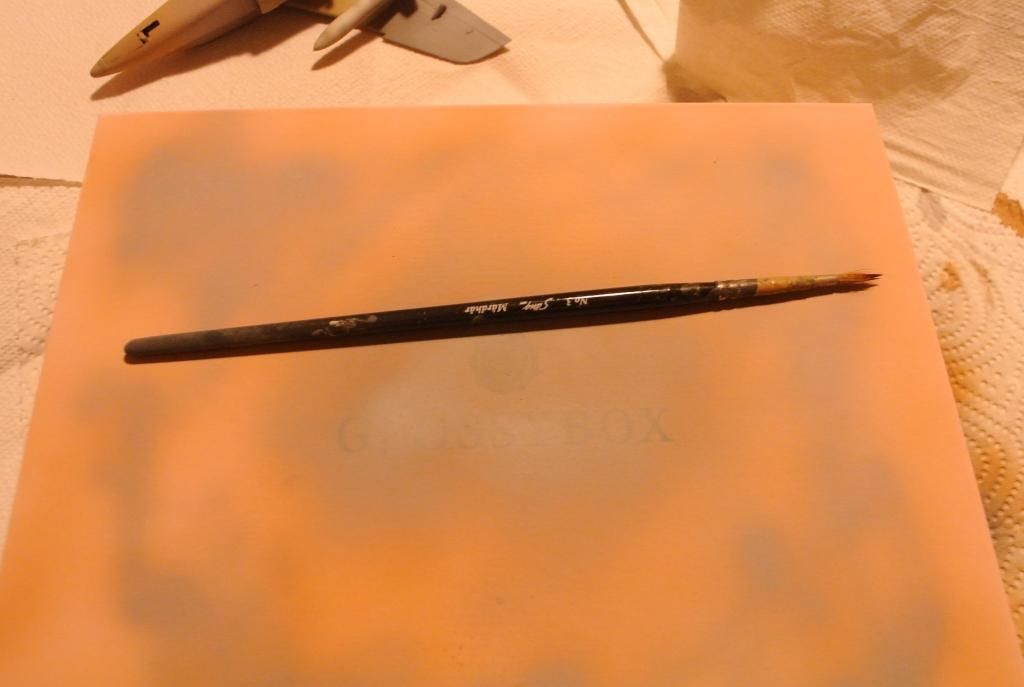
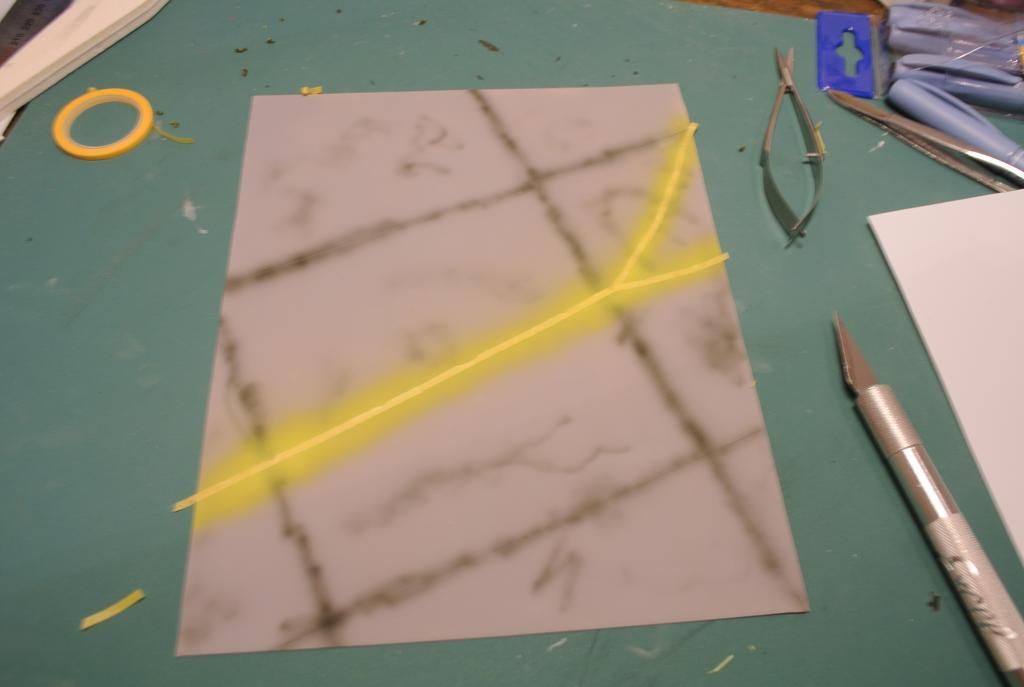
If you wonder why there is brushes, knives and other stuff at the photos, its cause my camera had trouble focusing on the sheet itself.
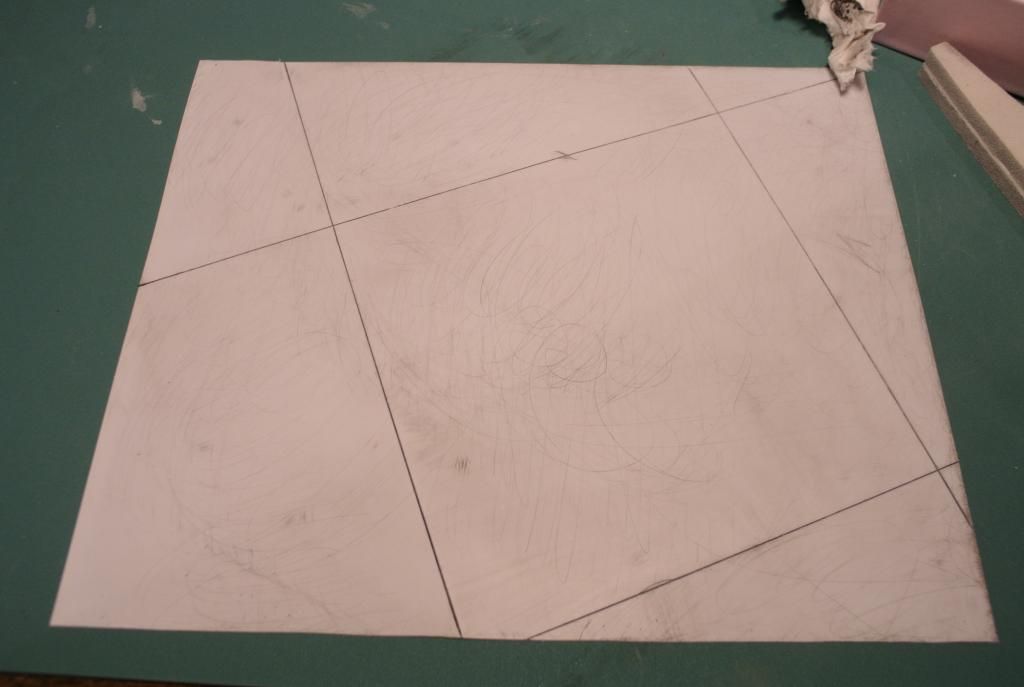
Here is the materials, a lid of a Glossybox, and a sheet of plasticard.

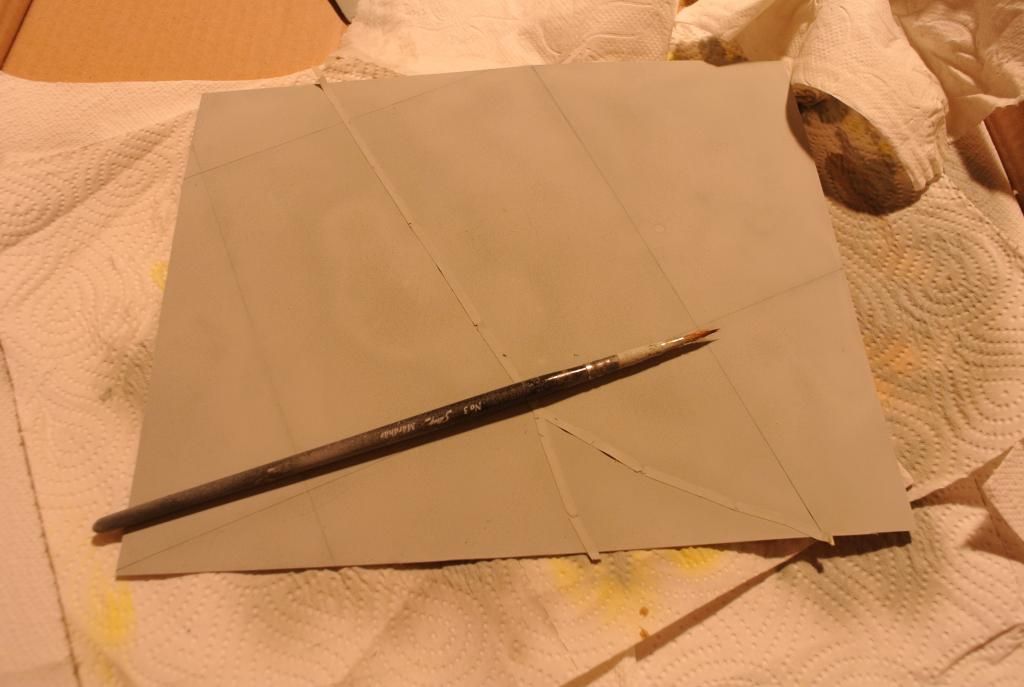
Careful cutting with the blade
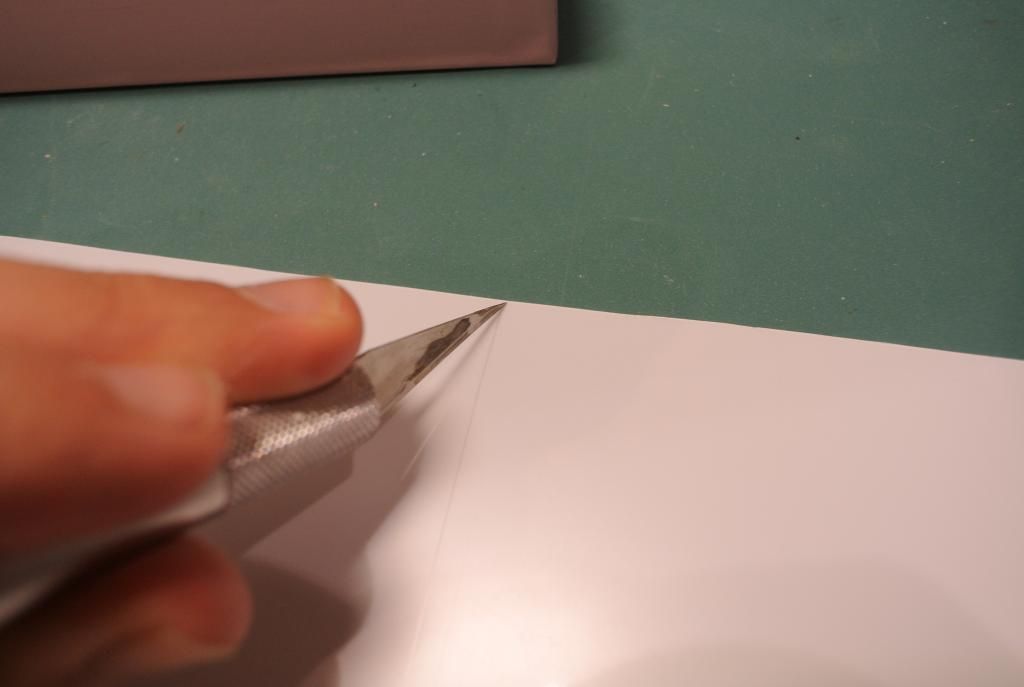
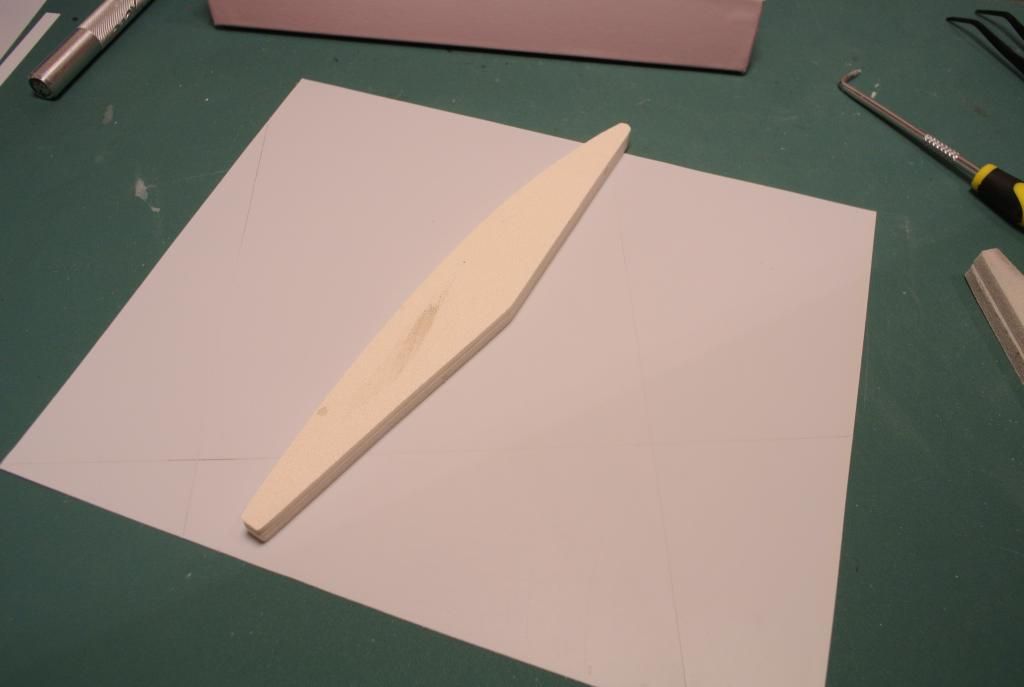
I scribed the tile lines and gave the surface a nice scratch, first with a rough sander and then a very smooth sander to make the scratches very fine.
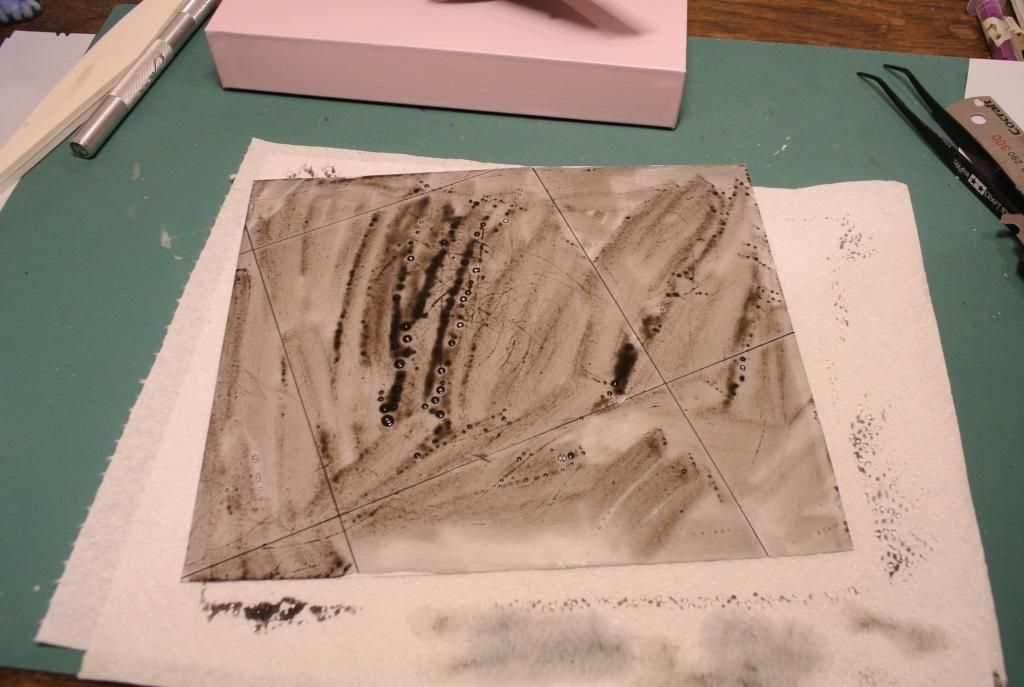
I then used a sludge wash to see if the lines and scratching was sufficient.
Primed, I also sprayed some primer on the logo to prevent any shine through.
I wanted some text on the base but I didnt want it to be "perfect printed text" and I havent got a printer, so I had to improvise. I wanted the text to have a painted-on look like if a sergeant went to a couple of privates and said(In a broad southern american accent): "I want these words painted on this wall, soldiers" Privates: "How do you want us to do that, sir?" Sergeant: "I dont care how you do it, I just want it done!"
The problem is that i'm not a very talented painter/drawer, so I kinda cheated
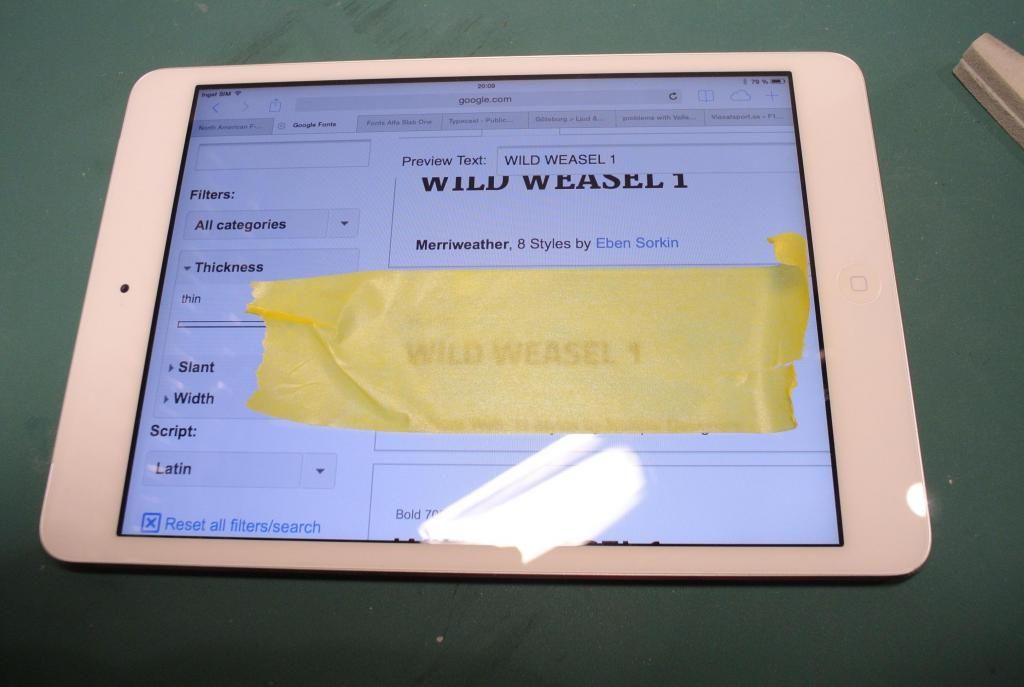
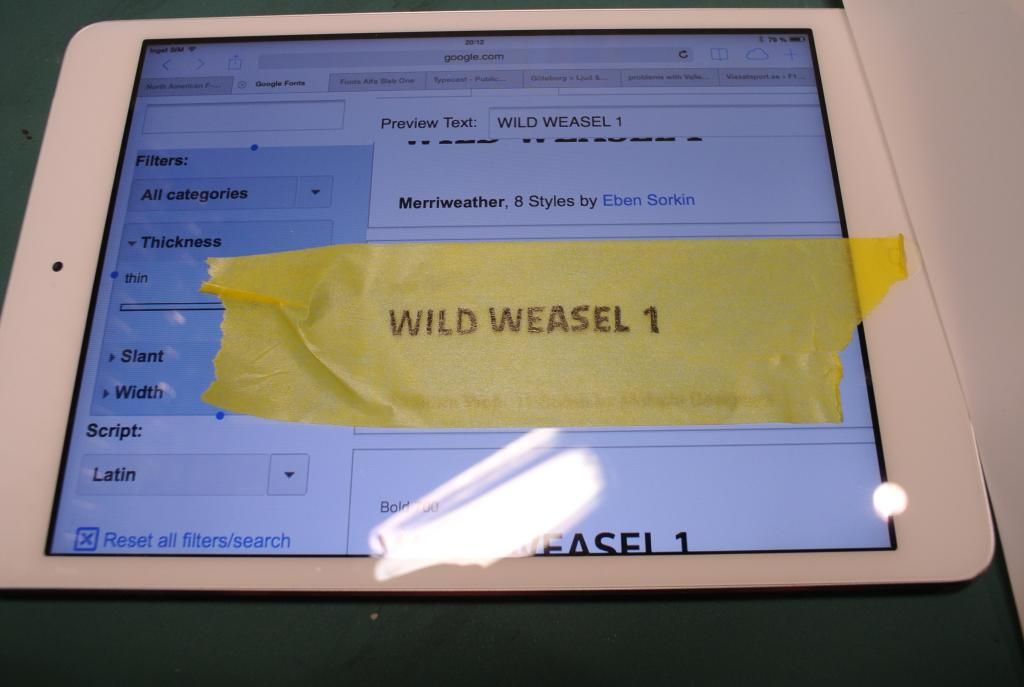
I then cut out the letters
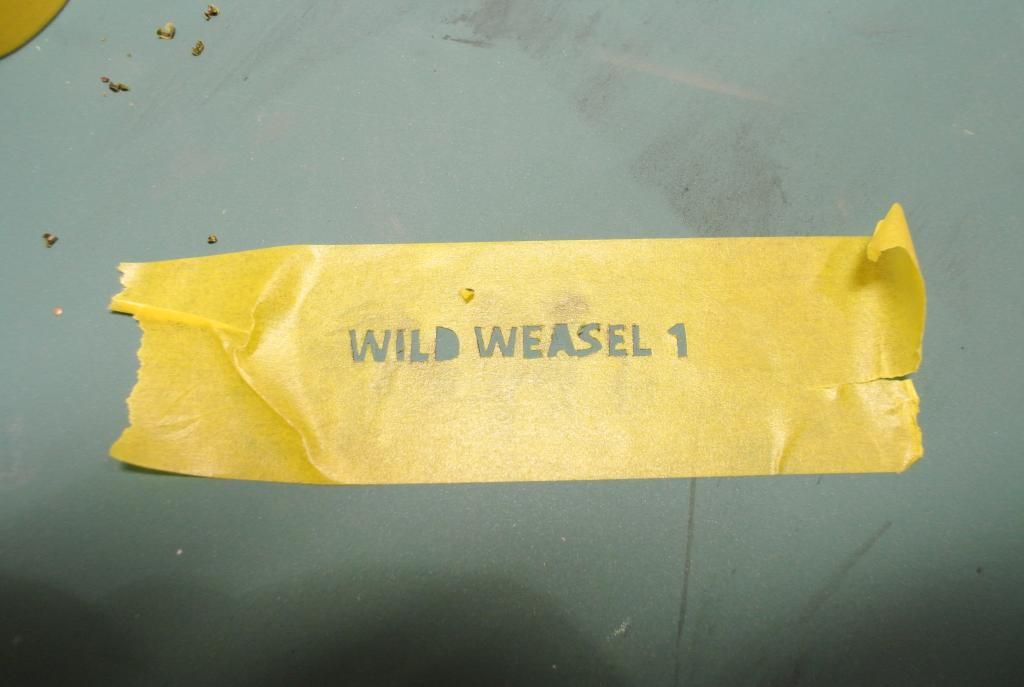
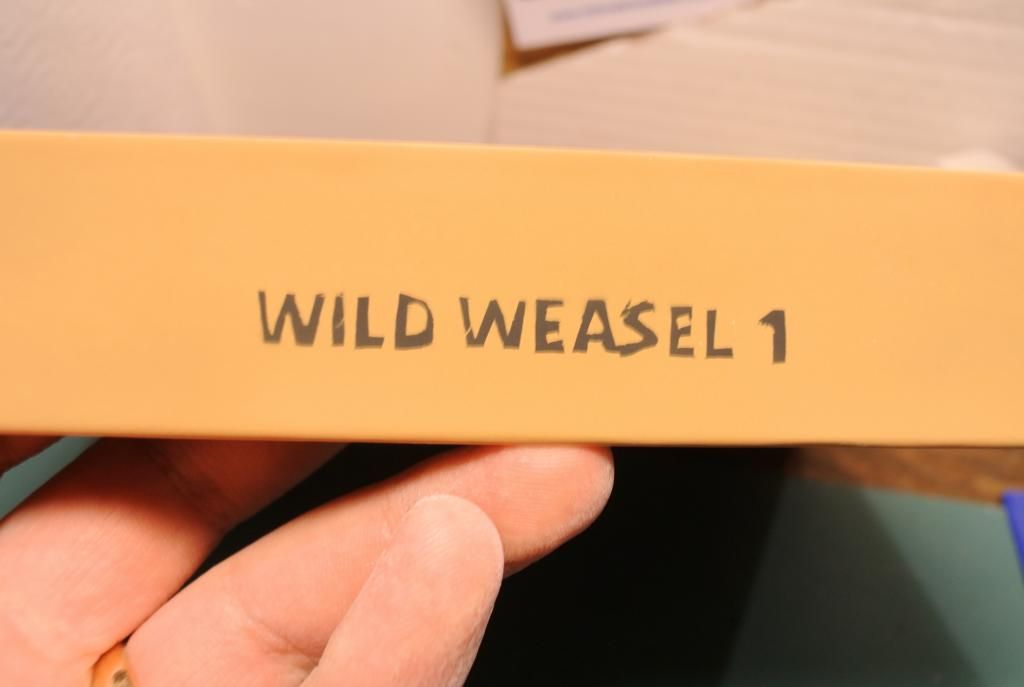
Then I just sprayed it on.
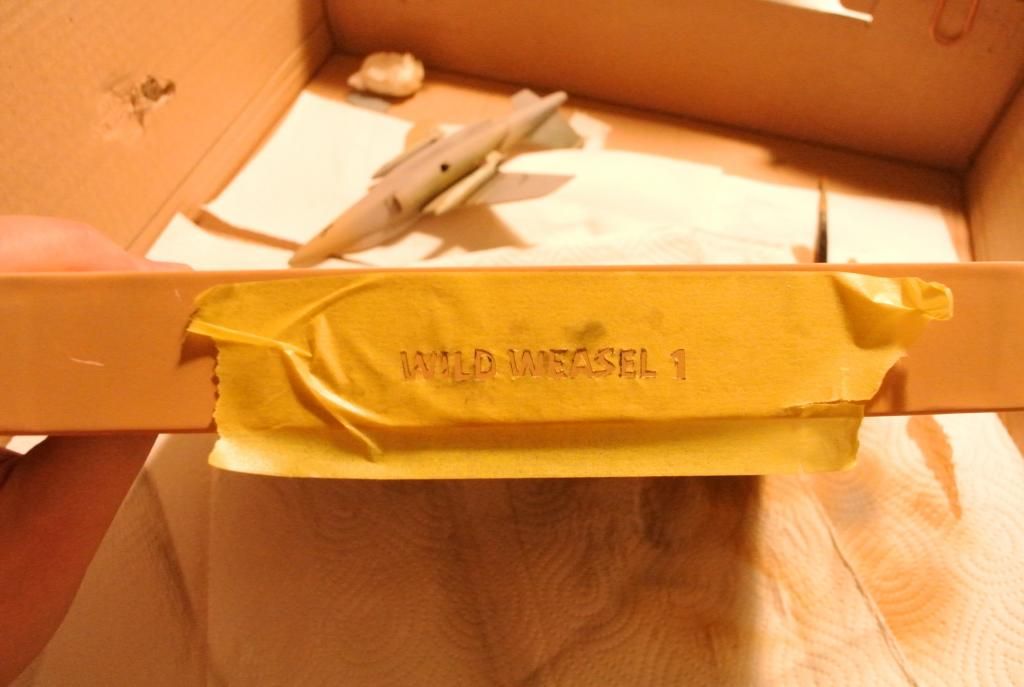
Im not entirely satisfied with the effect as it still has some bleed through, but it does the job.
Preshaded the details
Sprayed down some yellow lines with Vallejo model color, bleh, not very nice to spray.
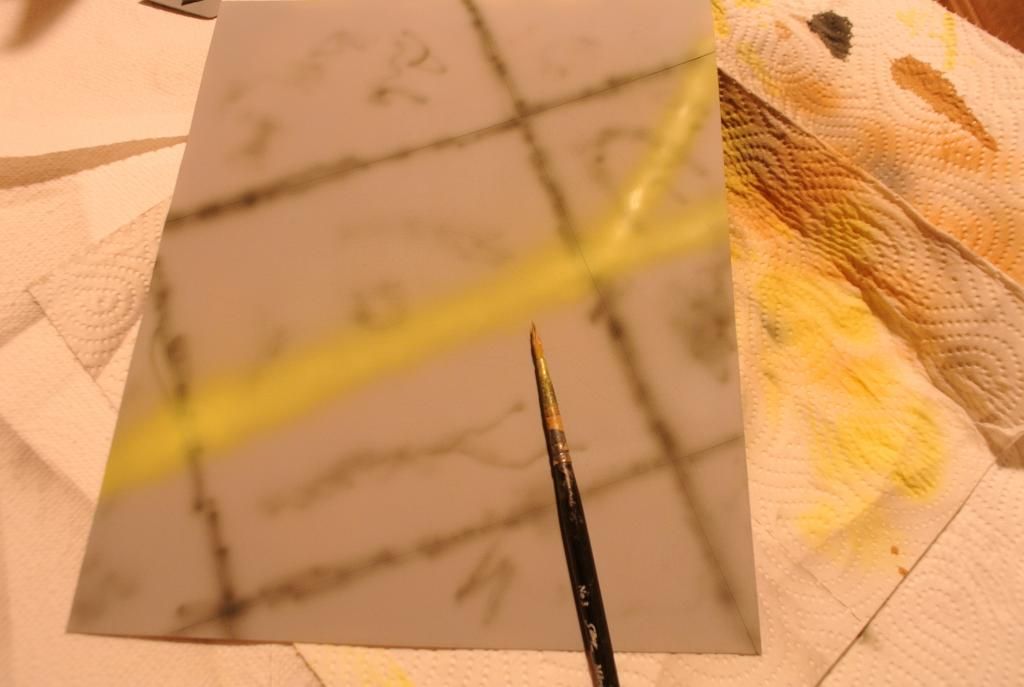
Masked the lines up
Sprayed some Royal light grey over everything.
And you'll have to wait til tomorrow (maybe tonight) for the final reveal of the base and the aircraft. Until next time,
cheers
If you wonder why there is brushes, knives and other stuff at the photos, its cause my camera had trouble focusing on the sheet itself.
Here is the materials, a lid of a Glossybox, and a sheet of plasticard.

Careful cutting with the blade


I scribed the tile lines and gave the surface a nice scratch, first with a rough sander and then a very smooth sander to make the scratches very fine.

I then used a sludge wash to see if the lines and scratching was sufficient.


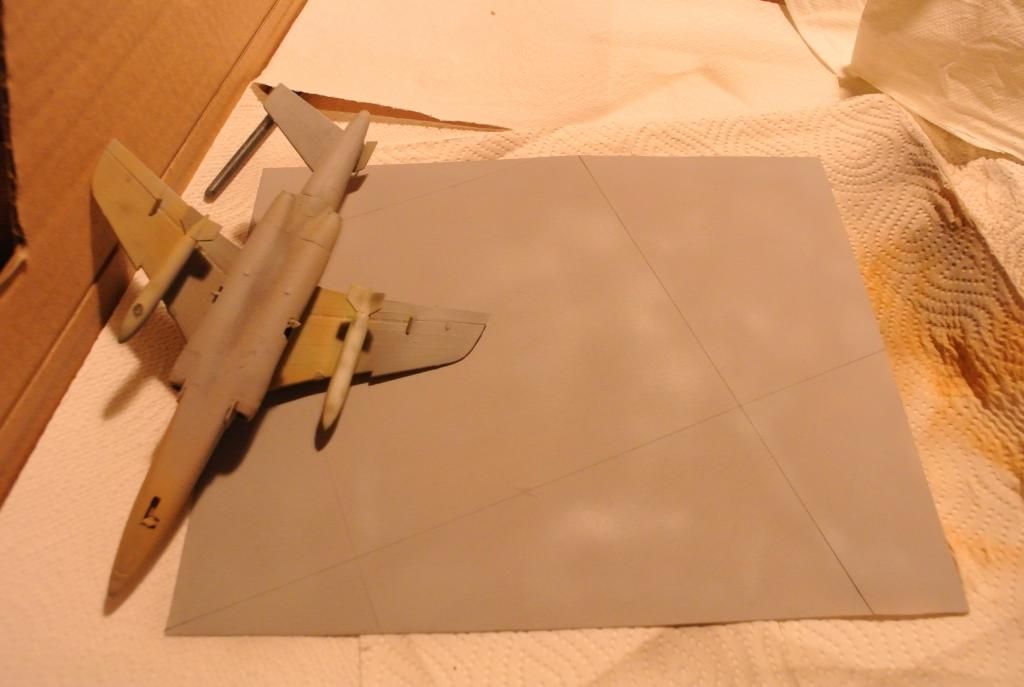
Primed, I also sprayed some primer on the logo to prevent any shine through.


I wanted some text on the base but I didnt want it to be "perfect printed text" and I havent got a printer, so I had to improvise. I wanted the text to have a painted-on look like if a sergeant went to a couple of privates and said(In a broad southern american accent): "I want these words painted on this wall, soldiers" Privates: "How do you want us to do that, sir?" Sergeant: "I dont care how you do it, I just want it done!"
The problem is that i'm not a very talented painter/drawer, so I kinda cheated


I then cut out the letters

Then I just sprayed it on.

Im not entirely satisfied with the effect as it still has some bleed through, but it does the job.

Preshaded the details
Sprayed down some yellow lines with Vallejo model color, bleh, not very nice to spray.

Masked the lines up

Sprayed some Royal light grey over everything.

And you'll have to wait til tomorrow (maybe tonight) for the final reveal of the base and the aircraft. Until next time,
cheers
Ludvig
On the bench:
Airfix 1/72 A-4 Skyhawk
Italeri EH-101 Merlin HAS.1 (Whirlybird SIG)
Last one finished:
Bandai 1/72 A-Wing Gallery
On the bench:
Airfix 1/72 A-4 Skyhawk
Italeri EH-101 Merlin HAS.1 (Whirlybird SIG)
Last one finished:
Bandai 1/72 A-Wing Gallery


Re: Trumpeter 1/72 F-100F Super Sabre "Wild Weasel"
Awesome stuff Ludvig. Strugling and working your way through the problems of the build has been great learning for me. Im sure it has made the build all the more memorable for you too
Great idea about the base too
Great idea about the base too
Kane "grover" Milne - Auckland, New Zealand
"I ate all the pies. They were awesome!"
"I ate all the pies. They were awesome!"


Re: Trumpeter 1/72 F-100F Super Sabre "Wild Weasel"
Did I give this weasel the weasel-approval already? Because it absolutely deserves it! Awesome build buddy!
You put the whole display base idea back in my head....
Can't wait for the final reveal
You put the whole display base idea back in my head....
Can't wait for the final reveal
"Never hire a ferret to do a weasels job" - Louie the Lizzard
projects:
Phantoms. Lots of them! and some other flying and tanking machines
projects:
Phantoms. Lots of them! and some other flying and tanking machines
Re: Trumpeter 1/72 F-100F Super Sabre "Wild Weasel"
Cheers man! Nice to know my Weasel is Weasel-approvedTheWeasel wrote:Did I give this weasel the weasel-approval already? Because it absolutely deserves it! Awesome build buddy!
You put the whole display base idea back in my head....
Can't wait for the final reveal
Could'nt leave you with that tease you got in the last photo! So I took some additional photos for the loyal followers of this thread
Before I sealed in the colors, I applied a thin brown filter to make it look a bit dirtier. I then glossed and applied my PM wash-mix with black and brown. And here it is.

Happy with the model, happy with the base

Until next time,
Ludvig
On the bench:
Airfix 1/72 A-4 Skyhawk
Italeri EH-101 Merlin HAS.1 (Whirlybird SIG)
Last one finished:
Bandai 1/72 A-Wing Gallery
On the bench:
Airfix 1/72 A-4 Skyhawk
Italeri EH-101 Merlin HAS.1 (Whirlybird SIG)
Last one finished:
Bandai 1/72 A-Wing Gallery
-
felisbarcinonensis
- Command Sergeant Major
- Posts: 860
- Joined: Tue Jun 10, 2014 9:42 pm
- Location: BCN
Re: Trumpeter 1/72 F-100F Super Sabre "Wild Weasel"
Wow! Looks great! So real; Eye candy, man!!
-
Twokidsnosleep
- General
- Posts: 18122
- Joined: Thu Aug 07, 2014 4:07 pm
- Location: BC,Canada
Re: Trumpeter 1/72 F-100F Super Sabre "Wild Weasel"
Oh I like that base a lot, really completes things
Scott
On, Under or Near the Bench:
American Graffiti Ford Coupe
Headless Horseman...figure sig
1/72 Black Pearl Pirate Ship
On, Under or Near the Bench:
American Graffiti Ford Coupe
Headless Horseman...figure sig
1/72 Black Pearl Pirate Ship
-
SyntaxModels
- First Sergeant
- Posts: 538
- Joined: Mon Sep 22, 2014 8:34 am
- Location: Melbourne, Victoria, Australia
Re: Trumpeter 1/72 F-100F Super Sabre "Wild Weasel"
Oh my god mate, that is stunning, a sure model to be proud of!
- Leo
My Motto: "Eh, that'll do, wait a minute, this is my model I can do whatever the hell I want with it! Yes that's a good excuse!"
Visit my YouTube Channel!
https://www.youtube.com/channel/UCKvbyv ... DwSd88cMYg
My Motto: "Eh, that'll do, wait a minute, this is my model I can do whatever the hell I want with it! Yes that's a good excuse!"
Visit my YouTube Channel!
https://www.youtube.com/channel/UCKvbyv ... DwSd88cMYg
Re: Trumpeter 1/72 F-100F Super Sabre "Wild Weasel"
Ok, so I made a video reveal/summary of this model, another first You can see it in the reveal thread and the link is:
HERE
My firsts for this build:
Airbrushing
SEA camo
Eduard PE set for cockpit
Using mr metal buffables
Using liquid masks
W(S)hite tack masking
Using ink-wash
Aftermarket pitot tube
Weathering decals
Pre-shading
Bleaching
Open canopy
Creating burned effects
Using filters
Using UV-glue
As you can see, I learned alot during this build and I want to seize the opportunity to thank everyone who followed, left feedback and encouraged during this build. The support you offer is invaluable. Until next time and next build,
cheers

Ludvig
On the bench:
Airfix 1/72 A-4 Skyhawk
Italeri EH-101 Merlin HAS.1 (Whirlybird SIG)
Last one finished:
Bandai 1/72 A-Wing Gallery
On the bench:
Airfix 1/72 A-4 Skyhawk
Italeri EH-101 Merlin HAS.1 (Whirlybird SIG)
Last one finished:
Bandai 1/72 A-Wing Gallery
