Clayton mate ,I'm have never build a model or painted one in my life !
However I have built a few Star Wars wearable coustumes , like Stormtoopers, a Republic Commmando and recently Death Watch Mando which needed a paint job and airbrushing ,so I bought one and I got hooked and wanted to do more.
This build then came along and I was like YES , and then I saw foxx's YouTube and I was like Whoop Whoop, this guy knows what he is doing , so I followed.
I am just going to copy everything Foxx does, and fingers crossed I can achieve something similar.
So Foxx lad , I have one thing to ask mate !! KISS
Which means Keep It Simple Stupid for us novices.
I know I said fantastic in FB but mate this is epic and I am up for the challenge along with Clayton
Foxx's and ClaytonDJ's DeAgostini Millennium Falcon Builds WIP
-
Stefan8271
- Private

- Posts: 16
- Joined: Sat Feb 14, 2015 12:35 pm
-
modelmakingguru

- Corporal

- Posts: 76
- Joined: Mon Jan 26, 2015 12:58 pm
- Contact:
Re: Foxx's and ClaytonDJ's DeAgostini Millennium Falcon Builds WIP
No problem. Glad it's helpful and I fully intend to aim it at the beginners 

Der Fuchs ist schlau und spielt dumm, aber Foxx ist einfach dumm.
-
Stefan8271
- Private
- Posts: 16
- Joined: Sat Feb 14, 2015 12:35 pm
Re: Foxx's and ClaytonDJ's DeAgostini Millennium Falcon Builds WIP
Now that I've picked my jaw up off the floor after seeing your Fine Molds build, I'd like to pick your brain (hmm, a lot of picking seems to be going on here) about the battle damage you did. Since it is about your Fine Molds build and not the DeAgostini build, (I'm currently building their San Felipe) is there a more appropriate place to address you?
Thanks,
Steve
Thanks,
Steve
Steve
Re: Foxx's and ClaytonDJ's DeAgostini Millennium Falcon Builds WIP
Answering your statement about removing the wash, yes, the wash does come off a gloss surface easier. If I want a really dirty grimy look, I use it over a flat surface. For a cleaner or for darkening the recessed areas, I use it over a gloss.
The door and seats came out great. The use of the Scotch Brite for mottling is a great idea. I've been using pieces of an artists sponge and was never really happy with the result.
I look forward to your continued work and further great ideas. No pressure
Steve
The door and seats came out great. The use of the Scotch Brite for mottling is a great idea. I've been using pieces of an artists sponge and was never really happy with the result.
I look forward to your continued work and further great ideas. No pressure
Steve
Steve
-
Stefan8271
- Private
- Posts: 16
- Joined: Sat Feb 14, 2015 12:35 pm
Re: Foxx's and ClaytonDJ's DeAgostini Millennium Falcon Builds WIP
Whoop whoop !!
Paints arrived this evening , so time for some Primeing !
Paints arrived this evening , so time for some Primeing !
-
modelmakingguru
- Corporal
- Posts: 76
- Joined: Mon Jan 26, 2015 12:58 pm
- Contact:
Re: Foxx's and ClaytonDJ's DeAgostini Millennium Falcon Builds WIP
Pssh, it's all about the Falcon, and no doubt I'll use similar techniques on the big bird anyway, so feel free to ask on here.SteveLow wrote:Now that I've picked my jaw up off the floor after seeing your Fine Molds build, I'd like to pick your brain (hmm, a lot of picking seems to be going on here) about the battle damage you did. Since it is about your Fine Molds build and not the DeAgostini build, (I'm currently building their San Felipe) is there a more appropriate place to address you?
Thanks,
Steve
Der Fuchs ist schlau und spielt dumm, aber Foxx ist einfach dumm.
-
modelmakingguru
- Corporal
- Posts: 76
- Joined: Mon Jan 26, 2015 12:58 pm
- Contact:
Re: Foxx's and ClaytonDJ's DeAgostini Millennium Falcon Builds WIP
It's not actually Scotch Brite but the top of a dishwashing brillo pad, but I guess Scotch Brite would do exactly the same (although a pack of 12 brillo pads from the local pound shop is a much cheaper optionSteveLow wrote:Answering your statement about removing the wash, yes, the wash does come off a gloss surface easier. If I want a really dirty grimy look, I use it over a flat surface. For a cleaner or for darkening the recessed areas, I use it over a gloss.
The door and seats came out great. The use of the Scotch Brite for mottling is a great idea. I've been using pieces of an artists sponge and was never really happy with the result.
I look forward to your continued work and further great ideas. No pressure
Steve
Der Fuchs ist schlau und spielt dumm, aber Foxx ist einfach dumm.
-
modelmakingguru
- Corporal
- Posts: 76
- Joined: Mon Jan 26, 2015 12:58 pm
- Contact:
Re: Foxx's and ClaytonDJ's DeAgostini Millennium Falcon Builds WIP
Yes, Lord Vader. I've reached the main power generators. The shield will be down in moments. You may start your priming.Stefan8271 wrote:Whoop whoop !!
Paints arrived this evening , so time for some Primeing !
Der Fuchs ist schlau und spielt dumm, aber Foxx ist einfach dumm.
Re: Foxx's and ClaytonDJ's DeAgostini Millennium Falcon Builds WIP
From what I can see of the battle damage, you didn't just take a motor tool and start grinding. There seems to be structures in the damage. Like parts of things from the interior that survived the breech. Also, it seems you went deeper then the thickness of the plastic, unlike the others I've seen.Pssh, it's all about the Falcon, and no doubt I'll use similar techniques on the big bird anyway, so feel free to ask on here.
Would you have the time to give a brief talk about how you did it? Lastly, would you know how DeAgostini is handling the damage? Just curious.
Thanks,
Steve
Steve
Re: Foxx's and ClaytonDJ's DeAgostini Millennium Falcon Builds WIP
[
The dollar (pound) store. Why didn't I think of that? I've even gone with my wife.
It's not actually Scotch Brite but the top of a dishwashing brillo pad, but I guess Scotch Brite would do exactly the same (although a pack of 12 brillo pads from the local pound shop is a much cheaper option
The dollar (pound) store. Why didn't I think of that? I've even gone with my wife.
Steve
-
modelmakingguru
- Corporal
- Posts: 76
- Joined: Mon Jan 26, 2015 12:58 pm
- Contact:
Re: Foxx's and ClaytonDJ's DeAgostini Millennium Falcon Builds WIP
LOL, here's my exact process: I took a motor tool and started grindingSteveLow wrote:From what I can see of the battle damage, you didn't just take a motor tool and start grinding. There seems to be structures in the damage. Like parts of things from the interior that survived the breech. Also, it seems you went deeper then the thickness of the plastic, unlike the others I've seen.Pssh, it's all about the Falcon, and no doubt I'll use similar techniques on the big bird anyway, so feel free to ask on here.
Would you have the time to give a brief talk about how you did it? Lastly, would you know how DeAgostini is handling the damage? Just curious.
Thanks,
Steve
Honestly, most of the little blasts are just small dings added into the surface with a little hand drill (a non-Dremel dremel), usually the litel ball-ended tool. During painting I make the Starship Filth drybrushing expand them out a little to give that blasted look.
As for the big gash underneath I drew a shape on the hull before painting, then just drilled it out. I can't remember exactly but I think I used the ball-ended bit for get the basic shape including the OOPS I DRILLED THROUGH THE HULL bit, and then used either the little cone ended bit or the pointy bit to carve the jaggedy edges or widen the holes roughly. All in all took me about an hour for all the drilling. If there are little things that look like structures underneath then that's a happy accident of either little bits of plastic shaving sticking out ( I didn't clean up the damaged areas after they were drilled) or a stray eyelash or some crap that inevitably gets on my models and hides from view until I notice it in a close up picture. Godammit.
Not a very exciting method but hopefully a hint that you can get really terrific results with little or no experience, no real planning or careful work, just think "screw it!" and dive in and see what happens (that's about 80% of my building technique. The other 20% includes coffee, bitching at the manufacturer and panicking). This is only the second time I have drilled a model like that, and the last one was also a 1/72 FM Falcon.


Der Fuchs ist schlau und spielt dumm, aber Foxx ist einfach dumm.
Re: Foxx's and ClaytonDJ's DeAgostini Millennium Falcon Builds WIP
Thank you for taking the time to write and post how you handled the damage. I'm building this for a friend and coupled with the fact this kit is, in essence no longer around, replacement parts are probably like trying to find the Ark without Indiana Jones. I wanted to go into this with some sort of definite game plan so I hopefully don't do something irreversible. Also, I am trying to avoid those "if only I had thought of that before" situations too. Yea, I know, happens every build. lol While you say you pretty muck tackled this with a "spray and pray" attitude, your approach shows more detailing with how you ground out the blasts. More interesting then the ones I've seen before.
So don't discount your abilities as a muse. I've taken new found inspiration from your work and will be firing up the Keurig, keeping the kids out of ear shot and tackling my own blasts this weekend.
Steve
So don't discount your abilities as a muse. I've taken new found inspiration from your work and will be firing up the Keurig, keeping the kids out of ear shot and tackling my own blasts this weekend.
Steve
Steve
Re: Foxx's and ClaytonDJ's DeAgostini Millennium Falcon Builds WIP
Mr Foxx,
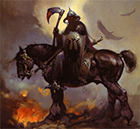
Look what the postman brought me today....my £5.10 collection of Star Wars vehicles to practice my airbrushing.
Came from a very grimy galaxy far, far, away (Liverpool to be precise!)

In the immortal words of young Skywalker..."What a heap of junk!". Do you know what flavour of Falcon this is?
It's all yellow and smelly - previous owner sat in it smoking I think!

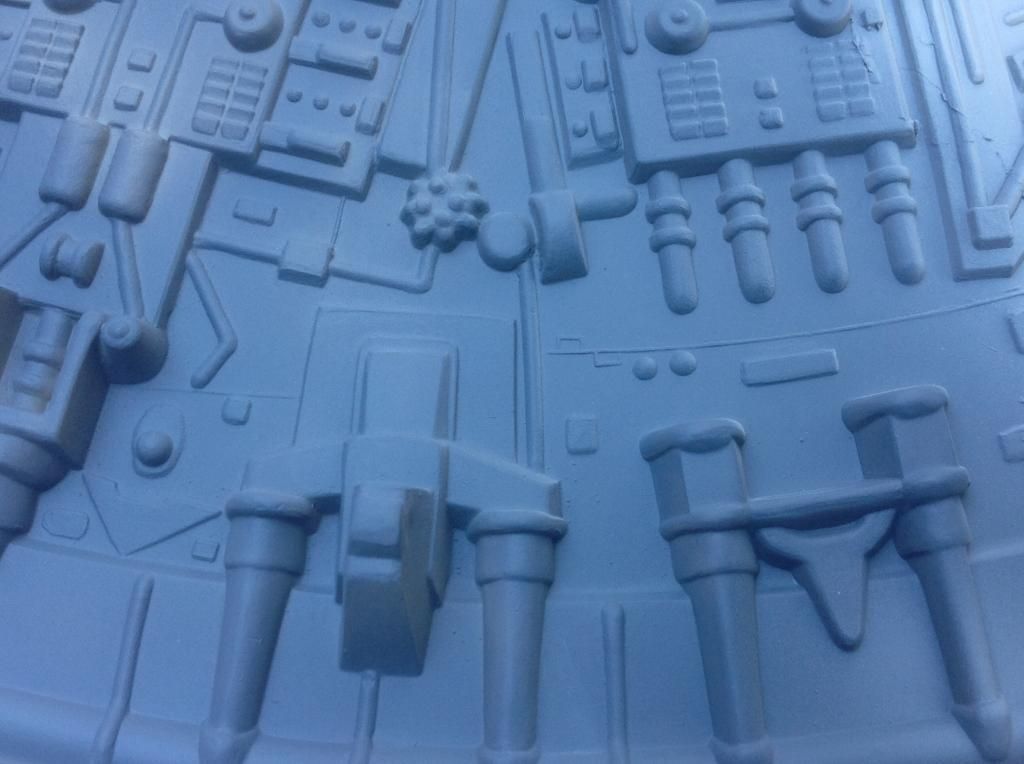
Stickers for rear engines - but some detailing on the sides, top and underside to practice on...
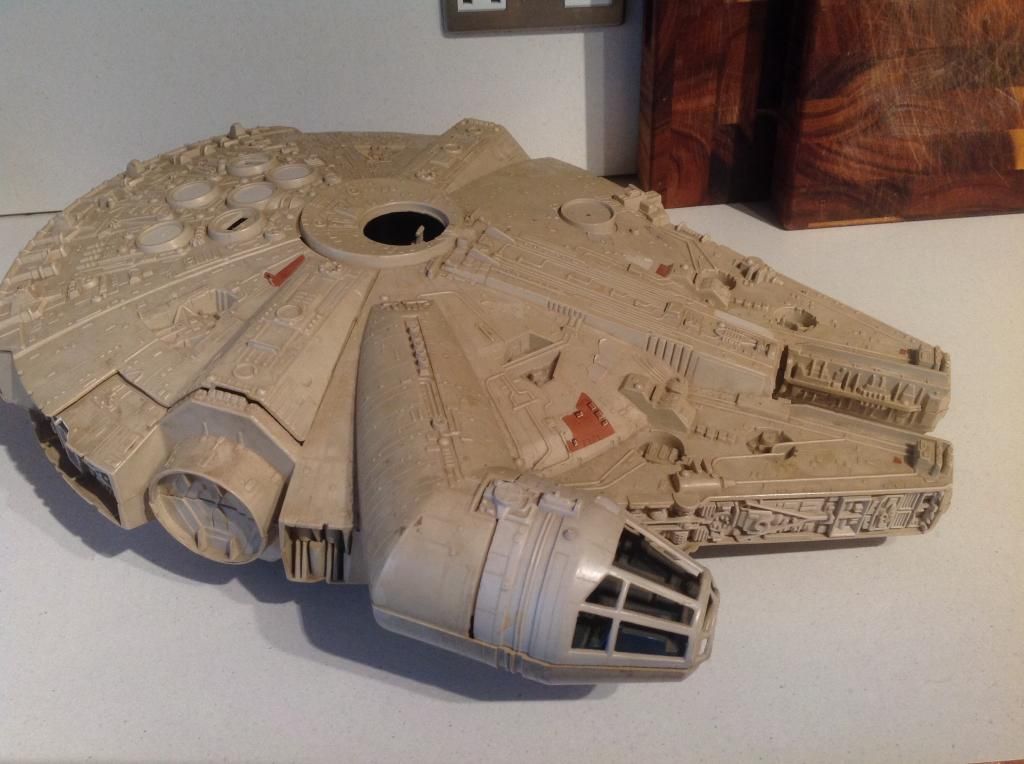
A look inside reveals real starship filth!

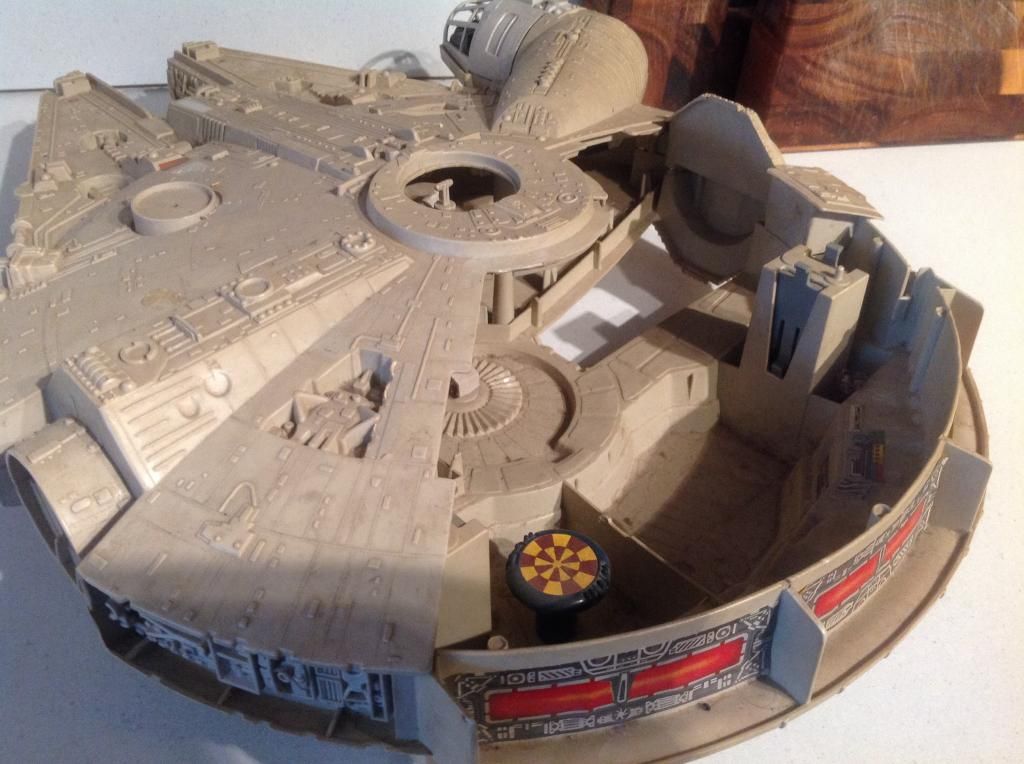
Also came with this strange bird-looking thing...
One of these...


And this grotesque looking thing that will have to go straight in the bin or be cut up for use in something else!

I'm sure you'll be able to tell me the manufacturer and year of this heap of junk?
Will all need a good clean-up first - I'm not spraying my new acrylic paints onto these grimey surfaces.
Look what the postman brought me today....my £5.10 collection of Star Wars vehicles to practice my airbrushing.
Came from a very grimy galaxy far, far, away (Liverpool to be precise!)
In the immortal words of young Skywalker..."What a heap of junk!". Do you know what flavour of Falcon this is?
It's all yellow and smelly - previous owner sat in it smoking I think!
Stickers for rear engines - but some detailing on the sides, top and underside to practice on...
A look inside reveals real starship filth!
Also came with this strange bird-looking thing...
One of these...
And this grotesque looking thing that will have to go straight in the bin or be cut up for use in something else!
I'm sure you'll be able to tell me the manufacturer and year of this heap of junk?
Will all need a good clean-up first - I'm not spraying my new acrylic paints onto these grimey surfaces.
-
Stefan8271
- Private
- Posts: 16
- Joined: Sat Feb 14, 2015 12:35 pm
Re: Foxx's and ClaytonDJ's DeAgostini Millennium Falcon Builds WIP
Update, my paints arrived so i have done as much as i can now until next issues and foxx's guidance .
First the Priming

then the Shadowing

then the top coat. hopefully you can see the shadow affect

i have done this with all outer shell parts
Prime

Sorry forgot to take picture of shadowing
but this is them all finished with top coat

Cockpit
Primed entrance and exit, and seats

front seats and entrance/exit colored khaki

front seats weathering with deck tan and the same done with entrance/exit

front seats and entrance/exit a slight wash and shading


rear seats
Primed

then covered in aluminum and sprayed with hair spay , for a seal , so i can chip later

black
seat covers , a mix of tan and Khaki cream , then weathered in dark Bown and black and then chipping of the black area

this is the reference for the back seats

Cockpit
floor and middle console , primed and covered with a German grey for the floor and black for console , on the floor i will weather with engine oil grease

side panels and front panels primed and covered in black


front panel decal put on and i blacked out the horrible white on the edge of the decal

steering handles, two little red dots put on for the lights

all put together as per the magazine

my version as per Foxx's tutorial


as you can see i have added a little more detail, need few more paint colors to enhance.
this was what i was going off

First the Priming

then the Shadowing

then the top coat. hopefully you can see the shadow affect

i have done this with all outer shell parts
Prime

Sorry forgot to take picture of shadowing
but this is them all finished with top coat

Cockpit
Primed entrance and exit, and seats

front seats and entrance/exit colored khaki

front seats weathering with deck tan and the same done with entrance/exit

front seats and entrance/exit a slight wash and shading


rear seats
Primed

then covered in aluminum and sprayed with hair spay , for a seal , so i can chip later

black

seat covers , a mix of tan and Khaki cream , then weathered in dark Bown and black and then chipping of the black area

this is the reference for the back seats

Cockpit
floor and middle console , primed and covered with a German grey for the floor and black for console , on the floor i will weather with engine oil grease

side panels and front panels primed and covered in black


front panel decal put on and i blacked out the horrible white on the edge of the decal

steering handles, two little red dots put on for the lights

all put together as per the magazine

my version as per Foxx's tutorial


as you can see i have added a little more detail, need few more paint colors to enhance.
this was what i was going off

Re: Foxx's and ClaytonDJ's DeAgostini Millennium Falcon Builds WIP
Stevan,
Very impressive buddy - I'm a way off this yet. One thing I have done is drill small holes in the barrels of the quad cannons - seen this on another post and it adds a touch of realism - though I'm sure the Foxx's paint work will achieve the same result - just bored and needed to do something with my drill bits!
Dave
-
Stefan8271
- Private
- Posts: 16
- Joined: Sat Feb 14, 2015 12:35 pm
Re: Foxx's and ClaytonDJ's DeAgostini Millennium Falcon Builds WIP
Dave that's is something I may do myself, what size drill bit did you use ?
Re: Foxx's and ClaytonDJ's DeAgostini Millennium Falcon Builds WIP
I marked the centre point with the point of a craft knife, started the indentation with a 0.8mm bit then opened it up with a 1 mm bit. I'll post a photo tomorrow to show what it looks like.
Dave
Dave
Re: Foxx's and ClaytonDJ's DeAgostini Millennium Falcon Builds WIP
Here you go Stefan - the quad cannons with the barrels drilled out a bit. Not perfectly uniform - but good enough - should be quite nice when painted up to look battle weathered...

-
Stefan8271
- Private
- Posts: 16
- Joined: Sat Feb 14, 2015 12:35 pm
Re: Foxx's and ClaytonDJ's DeAgostini Millennium Falcon Builds WIP
Ooooooooohhhhhh nice, now where is my drill
Re: Foxx's and ClaytonDJ's DeAgostini Millennium Falcon Builds WIP
Slowly does it - you only get one chance to find the middle or thereabouts...and if it doesn't turn out to your liking then you can still pick up issue 1 and some additional cannons for a second chance.
-
modelmakingguru
- Corporal
- Posts: 76
- Joined: Mon Jan 26, 2015 12:58 pm
- Contact:
Re: Foxx's and ClaytonDJ's DeAgostini Millennium Falcon Builds WIP
Apologies, not been on in a few days, been mad busy!
Clayton - the toys are AWESOME! I'd forgotten what shape the toy Falcon used to be. I have one too, but I have been...ahem..."weathering" it... in the garden. Under a shed, to be precise. For about thirty years...

The odd looking ship is Boba Fett's Slave 1 - it may be knackered but it wil be a perfect test bed for Maskol paint chipping practice - here's what it's supposed to look like. The chipped paint all over it will use the same technique as the coloured panels on the Falcon's hull, so it will be good practice getting the effect on the toy

Also, really nice work on the turret. I know EXACTLY whose videos you were watching I doubt I'll be able to get them looking nice and neat like that myself, which is why I am procrastinating on that bit...
Stefan - as I said on the Facebooks, your work has come out AWESOMELY and it's very impressive. Great work. It's nice to see the in-progress shots too, looks like you have everything under control. Well done!
At this point I am hoping I don't screw something up that I don't realise later on, as I'll have a load of people following me and making the same mistakes
As for me, well, haven't gotten a whole lot done. I am sitting on the cockpit a bit as I know there are more stickers to come and I don't want to paint something only to find it will be covered up, so I have painted the side walls German Grey and have added a little black stripe at the top. I'm really struggling to find any pictures that show ALL the different areas in the cockpit to make it accurate, so I am at this point resigned to going with what I can find and making it look good enough for me. Also the sidewalls don't seem accurate at all in terms of greebles, so I'l just stick to making what we have look interesting.

I've also primed half the cockpit tubery (and I don't know why because in the video I clearly state I am waiting for the add-on greebles to go onto them before painting, and then prime the damn thing anyway) and started the filling process to sort out the battle damage on the lower half. There are not many reference pics around of that damage, so I plumped to fill it from the inside so that I can drill into the hull a little more and deepen it. What is on there looks terrible but it is not far off, it just needs to stop looking like a popped blister...
I could of course fill from the outside, but I have seen tell that there will be horrendous light leak issues from the lighting in the tube, so I figured best to work inside so that I can create a pseudo-hole without actually creating an actual hole that lets light out.

I also haven't glued the tube together yet, and I won't do until I am sure there is nothing left to do inside it (I assume we'll need to have access into it for the lighting wiring etc. so I'd rather leave permanent fixing till the last possible minute).
One handy tip - the tubes are a tight fit, so you might want to widen the receiving holes for the fixing posts with a knife blade, just a little, if you intend to glue it later. That way it can come apart without risking breakage.
Anyhoo, I have completed part 4 of the video build, which covers all this and inlcudes a ten-minute waffle on what too look for in an airbrush for any of you who have never used one before but are thinking about getting one for this model (I recommend it for best results). It also includes an intro to Milliput filler.
Enjoy!
Clayton - the toys are AWESOME! I'd forgotten what shape the toy Falcon used to be. I have one too, but I have been...ahem..."weathering" it... in the garden. Under a shed, to be precise. For about thirty years...
The odd looking ship is Boba Fett's Slave 1 - it may be knackered but it wil be a perfect test bed for Maskol paint chipping practice - here's what it's supposed to look like. The chipped paint all over it will use the same technique as the coloured panels on the Falcon's hull, so it will be good practice getting the effect on the toy
Also, really nice work on the turret. I know EXACTLY whose videos you were watching
Stefan - as I said on the Facebooks, your work has come out AWESOMELY and it's very impressive. Great work. It's nice to see the in-progress shots too, looks like you have everything under control. Well done!
At this point I am hoping I don't screw something up that I don't realise later on, as I'll have a load of people following me and making the same mistakes
As for me, well, haven't gotten a whole lot done. I am sitting on the cockpit a bit as I know there are more stickers to come and I don't want to paint something only to find it will be covered up, so I have painted the side walls German Grey and have added a little black stripe at the top. I'm really struggling to find any pictures that show ALL the different areas in the cockpit to make it accurate, so I am at this point resigned to going with what I can find and making it look good enough for me. Also the sidewalls don't seem accurate at all in terms of greebles, so I'l just stick to making what we have look interesting.
I've also primed half the cockpit tubery (and I don't know why because in the video I clearly state I am waiting for the add-on greebles to go onto them before painting, and then prime the damn thing anyway) and started the filling process to sort out the battle damage on the lower half. There are not many reference pics around of that damage, so I plumped to fill it from the inside so that I can drill into the hull a little more and deepen it. What is on there looks terrible but it is not far off, it just needs to stop looking like a popped blister...
I could of course fill from the outside, but I have seen tell that there will be horrendous light leak issues from the lighting in the tube, so I figured best to work inside so that I can create a pseudo-hole without actually creating an actual hole that lets light out.
I also haven't glued the tube together yet, and I won't do until I am sure there is nothing left to do inside it (I assume we'll need to have access into it for the lighting wiring etc. so I'd rather leave permanent fixing till the last possible minute).
One handy tip - the tubes are a tight fit, so you might want to widen the receiving holes for the fixing posts with a knife blade, just a little, if you intend to glue it later. That way it can come apart without risking breakage.
Anyhoo, I have completed part 4 of the video build, which covers all this and inlcudes a ten-minute waffle on what too look for in an airbrush for any of you who have never used one before but are thinking about getting one for this model (I recommend it for best results). It also includes an intro to Milliput filler.
Enjoy!
[youtube]l1bU8YGPlgQ[/youtube]
Der Fuchs ist schlau und spielt dumm, aber Foxx ist einfach dumm.
Foxx, ClaytonDJ & Stefan's DeAgostini Millennium Falcon Builds WIP
Mr Foxx,
Thanks - glad you like the look of the quad cannons. Should I glue the cannons into the housing before I prime the complete unit - or prime the pieces individually then fit and glue them together?
I watched your latest instalment this afternoon - and the FB updates where you've added detail to the cockpit side panels - all looking very sweet. Pleased to see that the Chinese meal didn't keep you away from the bench too long!
Really pleased that Stefan's has joined the build - and impressed by the quality of his work.
I've been looking at various screen shots of the cockpit seats - and am confused by the different colours of the captain's chair! In some it looks primarily green (you have used khaki as the base colour) whilst in others it looks more brown/dark tan - I'm guessing this is because the screen shots are from different movies where different versions of the Falcon were used. Is the De Agostini replica of the prop used in ROTJ?
To bring my own touch to this I'm thinking of experimenting and using a lighter base colour to start with and darkening it with washes and weathering. I'm assuming I can strip it all off and start again if it doesn't look right?
Keep up the good work Sir
Dave
I've given the Star Wars toys a good clean and they're looking a lot better - let the airbrush practice commence!
-
modelmakingguru
- Corporal
- Posts: 76
- Joined: Mon Jan 26, 2015 12:58 pm
- Contact:
Re: Foxx's and ClaytonDJ's DeAgostini Millennium Falcon Builds WIP
To be honest, reference pictures are only good to a certain degree - in terms of colouring, they are all but useless. Different cameras and lighting setups, developing and printing processes and the fact they have been compressed into digital formats all mean that an item can look different colours in different pictures. To that end I'm not getting TOO super-obsessive abnout colourts, it's more a case of pick an image and stick to it. I'm pretty sure the DeAG chair colours are based on NOTHING THAT EXISTED EVER ANYWHERE apart from in the mind of someone at DeAg who was perhaps not sober at the time.
For the cannons it's up to you - gluing the, in would not be a problem although drybrushing raised detail would be easier if they were separate. The trick with this painting lark is to try and plan ahead what you can build into discrete sub-assemblies without knackering your ability to paint and weather them. You kind of have to think in the future in three dimensions. Which is pretty much science.
Your plan for the seats is a sound plan and is sometimes the way I do it. Light colour first, then darken everywhere, finished off with a highlight dry brush or pastel dry brush coat to bring back the raised edges and make everything pop. The way I show is only my method - there are probably a million other ways to do it, and experimenting is half the fun. If it all goes to pot you can always repaint it, or strip it and start again (however, I have never had to strip paint so I can't suggest what is good for that apart from Carson Paint KIller, which takes paint off anything but is not the cheapest and might need a hunt online to find).
Der Fuchs ist schlau und spielt dumm, aber Foxx ist einfach dumm.
Re: Foxx's and ClaytonDJ's DeAgostini Millennium Falcon Builds WIP
Mr Foxx,
Good point about it being easier to dry brush them when they are separate - it was watching your last video and the point about lugs being harder to push in once painted that got me thinking about assembly before painting - but in hindsight probably best to paint and weather first then assemble.
Ordered some reverse tweezers today (like the one you used to hold the Brillo for mottling the cockpit door and seats). A certain model supplier wanted £15 for one - I found 2 for £4 from am on-line hardware store. Somebody is making a lot of money re-branding tools!
Issue 6 comes with greeblies - and issue 7 has the main quarter floor and semi-circular seat.
Still not plucked up the courage to paint anything with the airbrush yet - but intend using the rattle cans to prime the hull pieces soon - and having a practice with the airbrush on the cleaned up Star Wars toys. Airbrush cleaner at the ready...!
-
modelmakingguru
- Corporal
- Posts: 76
- Joined: Mon Jan 26, 2015 12:58 pm
- Contact:
Re: Foxx's and ClaytonDJ's DeAgostini Millennium Falcon Builds WIP
HEY GUYS - SUPER IMPORTANT. If you are following my DeAg tutorial vids (modelmaking.guru) then you may want to avoid the filler method I used in episode 4 (on the cockpit tube) for the time being. Someone has pointed out that there may be an internal corridor going in there, based on the blueprints you got in issue 1. Now, it looks like it may not reach all the way down to where I have filled so may be fine, but if you want to be extra safe hold off doing that part for now. You can always come back to it later, once you know where the internal corridor goes. As for me, if it causes a problem I'll just have to forget about it for now and if worst comes to worst drill away at it to make sure parts inside fit. We shall see.
Clayton - cool on the tweezers, I got my reverse grip ones from a local model shop for £4, online they were more like £10
ALSO GREEBLES YAY about time. I like me greebles, I do. mmmmmm greebles
Quit fussing and just airbrush some stuff already! It's good fun and not at all scary once it stops being scary
Der Fuchs ist schlau und spielt dumm, aber Foxx ist einfach dumm.
Foxx, ClaytonDJ's & Stefans' DeAgostini Millennium Falcon Builds WIP
Fussing over - and to hell with the toys - do it like you mean it! I'm going to give the airbrush its first outing to prime some stuff. I'm going to use the Badger grey primer, play with it a bit then if all goes OK I'll use it to prime some of the Falcon pieces.
Foxx, ClaytonDJ's & Stefan's DeAgostini Millennium Falcon Builds WIP
All connected up and blowing air nicely - now where's the blu tack and cocktail sticks. This feels like preparing Falcon pieces for some kind of ritual torture...

And if it goes reasonably well I'll have a go at covering some of the hull pieces...


And the cannon turret (still haven't glued the centre piece back in!)..

Wish me luck!
And if it goes reasonably well I'll have a go at covering some of the hull pieces...
And the cannon turret (still haven't glued the centre piece back in!)..
Wish me luck!
Re: Foxx's and ClaytonDJ's DeAgostini Millennium Falcon Builds WIP
OK - after a few compressor overheats and much twiddling of the screw on the end of the airbrush it started to behave. Didn't realise that you had to release the trigger once you'd started!!! Anyhow, eventually found myself quite enjoying it and decided to prime some of the Falcon pieces...in for a penny in for a pound (well £900 anyway).....let me know what you think - and please don't be gentle - if doing them again will result in a better finished product then now's the time to do so. If they look OK to you - then I'll prime the quad cannons and have a go at pre-shading the hull pieces next.
Captain's Chairs

Passenger Chairs
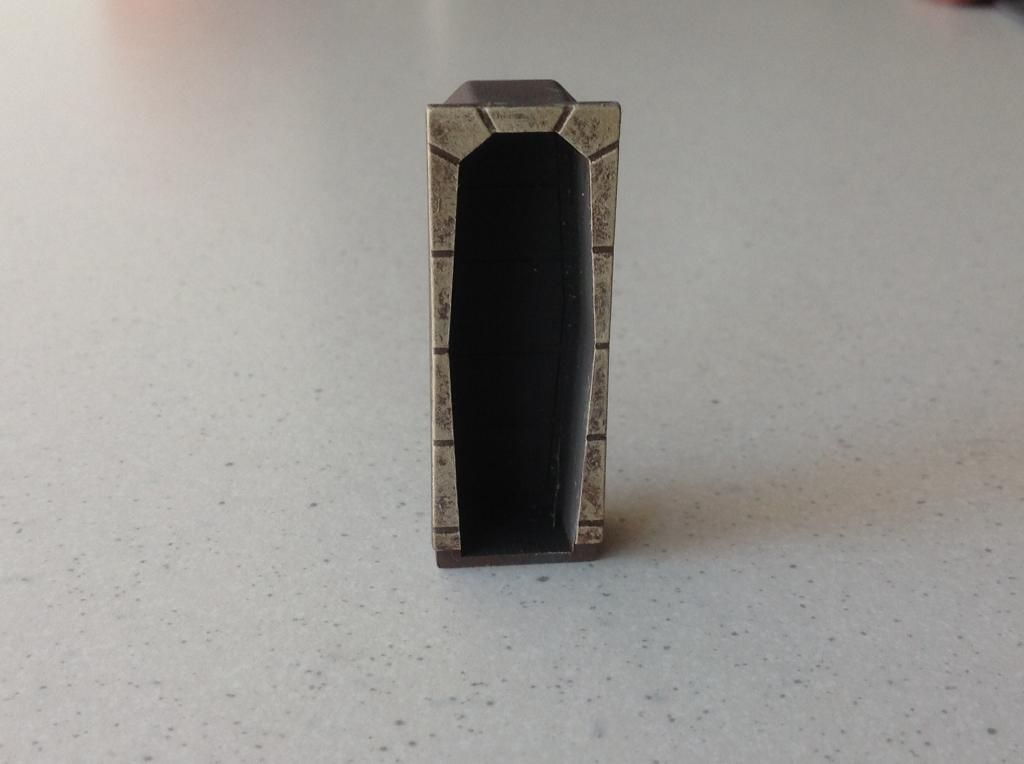
Cockpit Doorway
Cockpit Main Console
Console Side Pieces

Gun Turret

And a couple of hull pieces..

Captain's Chairs
Passenger Chairs
Cockpit Doorway
Cockpit Main Console
Console Side Pieces
Gun Turret
And a couple of hull pieces..
-
modelmakingguru
- Corporal
- Posts: 76
- Joined: Mon Jan 26, 2015 12:58 pm
- Contact:
Re: Foxx's and ClaytonDJ's DeAgostini Millennium Falcon Builds WIP
Yay! FINALLY! Nice job amigo, welcome to the world of airbrushing!
Some smaller compressors can overheat if they're used for too long, mine is about half an hour.
Looks like you got the hang, the primer is nice and even and no clumping. The only thing I would say is that the dark colour might change the tone of your basecoats (because it is a light coloured ship and colours come out differently when there is s dark colour underneath). You may find that it cools or blues the base colour a little so you'll need to experiment a bit. On the plus side you won't need to pre-shade as you can just apply the basecoat and let the primer act as a pre shade colour. ILM used to spray their models black first for the same effect. I would try your base colour mix one one panel to see how it comes out and see if you need to adjust the colour mix to compensate. If you don't like it, you could swap to a lighter white or light grey primer for future pieces
Der Fuchs ist schlau und spielt dumm, aber Foxx ist einfach dumm.
Re: Foxx's and ClaytonDJ's DeAgostini Millennium Falcon Builds WIP
Thanks...a tad cautious at first but it felt quite comfortable once I got going and the hang of it.
The Badger 'grey' primer is quite dark - but I also bought the white primer so I could mix the primer a shade lighter rather than the basecoat - what do you think? I assume I can apply another coat of lighter primer or would I need to clean the dark off first?
Given that we will be painting over 2 years I just need to get the 'mix' right for consistency - be that primer or the d
Quite fancied trying the pre-shading with black on the panel lines and panel edges - is it worth trying a black pre-share on this dark primer or do you think it would have little effect?
I guess I can crack on painting the seats and other interior parts anyway.
Dave
Re: Foxx's and ClaytonDJ's DeAgostini Millennium Falcon Builds WIP
Mr Foxx
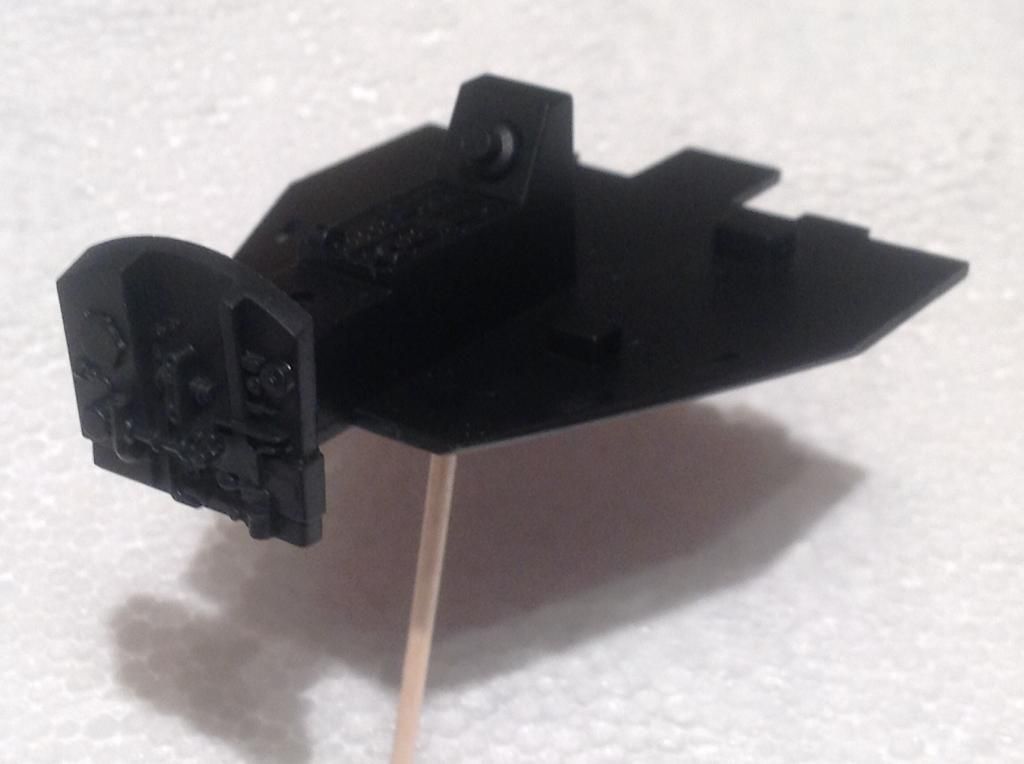
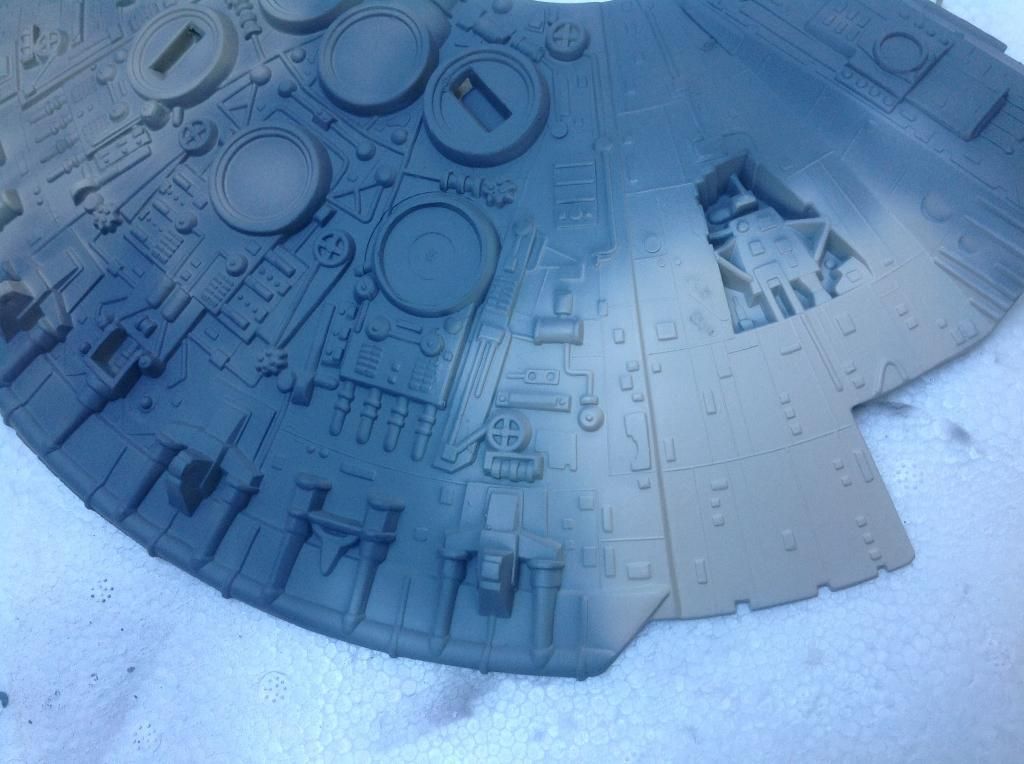
Thought I'd see what the base coat looks like on top of the Badger (dark) grey primer...but didn't want to mess about with the Falcon pieces too much - so applied a coat of the Badger primer to the 'toy' Falcon back end!
Then my first use of my cheap/free airbrush with acrylic paint. Mixed up some of the basecoat using your 4:1 mix of flat white and deck tan. Had to play about with thinners (X20-A) - ended up using the same amount as flat white - so mix became 4:1:1. How does this sound? I've no idea what size airbrush nozzle is! (I'll dig out the manual and have a look).
I sprayed this mix of basecoat/X20-A onto a panel or two of the toy piece - and left the primed area visible so that you can see the contrast. No pre-shading used...this is just top coat mix on top of the dark grey Badger primer. Let me know what you think - focus is the colour rather than the quality of the paintjob (surface of the toy aren't great and I've done nothing to improve them besides a good wash and rinse with washing up liquid).
I might use another panel on the toy MF to try a pre-shade then a basecoat of the same mix - just to see if the pre-shading shows through/has any effect.
Dave
Re: Foxx's and ClaytonDJ's DeAgostini Millennium Falcon Builds WIP
This time I've applied the same Badger grey primer back over the toy MF backend that I painted earlier - pleased how the primer covered the topcoat - this primer is good stuff even if it's a shade darker than the Tamiya grey primer. So the piece is back grey primer all over...

Then tried my hand at this pre-shading lark - as you can see heavy on the right hand side and lighter/finer on the left hand side. Really just playing with the airbrush which isn't a bad thing - and gives me two different looks for the pre-shading. Which do you think will provide the better result?
Have to admit that apart fro the obvious panel lines and panel edges, I'm not sure what else I should be pre-shading - is it where shadows are expected which will be around every single 'raised' piece?

I'm not sure whether its the jet back pre-shading or the light I've taken the photo in but the grey primer looks decidedly lighter in colour - are my eyes playing tricks on me or is this what pre-shading does?
Next I've mixed some more of the 4:1:1 basecoat and sprayed over the pre-shaded piece - surprised t how much paint this eats. If you look closely enough I do believe there are shades in there (and I deliberately made sure that I covered the basecoat evenly - apart from the inlaid piece).
So what does the Foxxman think? I know this is only the toy MF panel and not the real Falcon - but need a steer on whether to stay with the Badger primer (it does go down really nicely - I'm even picking the language up!) or if the pre-shading isn't strong enough then I'll need to switch to the Tamiya rattle can primer for the real Falcon.
Really enjoyed playing with the airbrush this afternoon - and quite pleased with the results - can only imagine how much easier/better it would be if I invested in a Harder & Steenbeck airbrush and a compressor that delivers regular and consistent airflow/pressure.
Dave
Then tried my hand at this pre-shading lark - as you can see heavy on the right hand side and lighter/finer on the left hand side. Really just playing with the airbrush which isn't a bad thing - and gives me two different looks for the pre-shading. Which do you think will provide the better result?
Have to admit that apart fro the obvious panel lines and panel edges, I'm not sure what else I should be pre-shading - is it where shadows are expected which will be around every single 'raised' piece?
I'm not sure whether its the jet back pre-shading or the light I've taken the photo in but the grey primer looks decidedly lighter in colour - are my eyes playing tricks on me or is this what pre-shading does?
Next I've mixed some more of the 4:1:1 basecoat and sprayed over the pre-shaded piece - surprised t how much paint this eats. If you look closely enough I do believe there are shades in there (and I deliberately made sure that I covered the basecoat evenly - apart from the inlaid piece).
So what does the Foxxman think? I know this is only the toy MF panel and not the real Falcon - but need a steer on whether to stay with the Badger primer (it does go down really nicely - I'm even picking the language up!) or if the pre-shading isn't strong enough then I'll need to switch to the Tamiya rattle can primer for the real Falcon.
Really enjoyed playing with the airbrush this afternoon - and quite pleased with the results - can only imagine how much easier/better it would be if I invested in a Harder & Steenbeck airbrush and a compressor that delivers regular and consistent airflow/pressure.
Dave
Re: Foxx's and ClaytonDJ's DeAgostini Millennium Falcon Builds WIP
Decided to glue the centre back into the gun turret. Used Tamiya thin cement and a few mini clamps to hold it together while the glue sets - but I notice there are a few areas around the edge where fine gaps are visible - which will definitely allow light through if the inside of the turret is lit. Will paint address this or should I try and fill the gaps with something like milliput?

Re: Foxx's and ClaytonDJ's DeAgostini Millennium Falcon Builds WIP
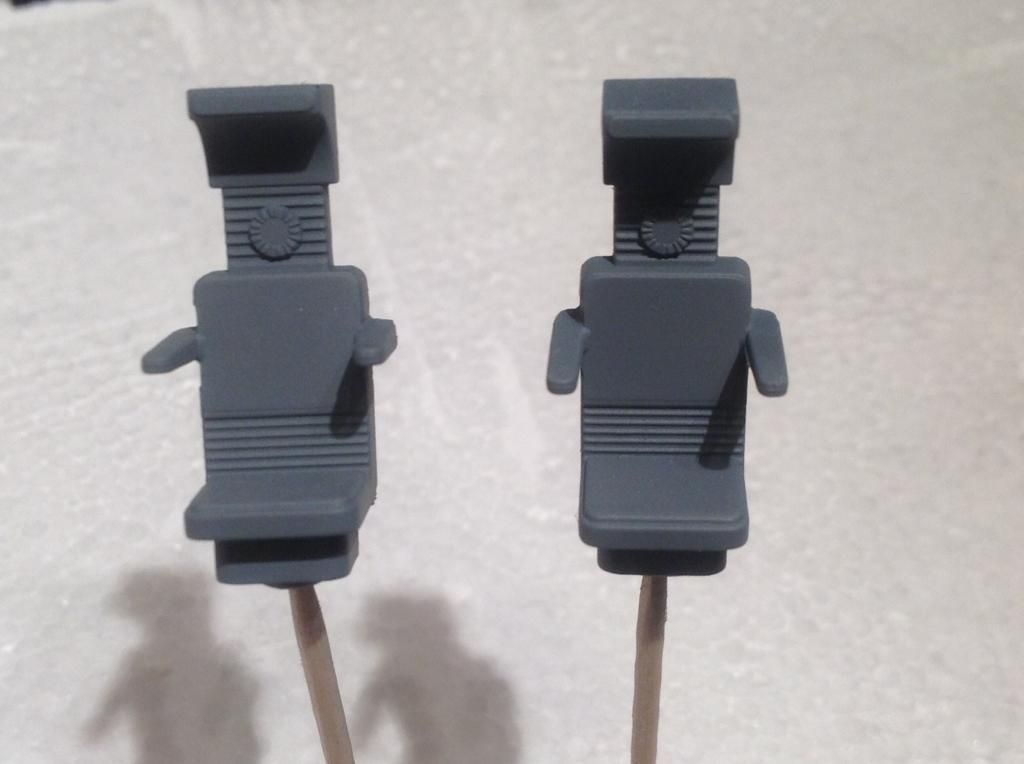
Have decided to continue playing with the airbrush and paint the cockpit seats. Put down a coat of Tamiya Flat Aluminium onto the rear passenger seats.....first go had a few accumulations of paint - looked like too much paint (I know "too eager Amigo - practice more patience!"). I let them dry out, gently sanded the lumps from the surface and had another go. Look a tad better this time. There are a few minor blemishes but these add to the distressed look! Given that we will be applying hairspray!, a coat of black then chipping the black away I'm not too uncomfortable with how these look.

Expert eye and comments welcomed as ever...
Expert eye and comments welcomed as ever...
Re: Foxx's and ClaytonDJ's DeAgostini Millennium Falcon Builds WIP
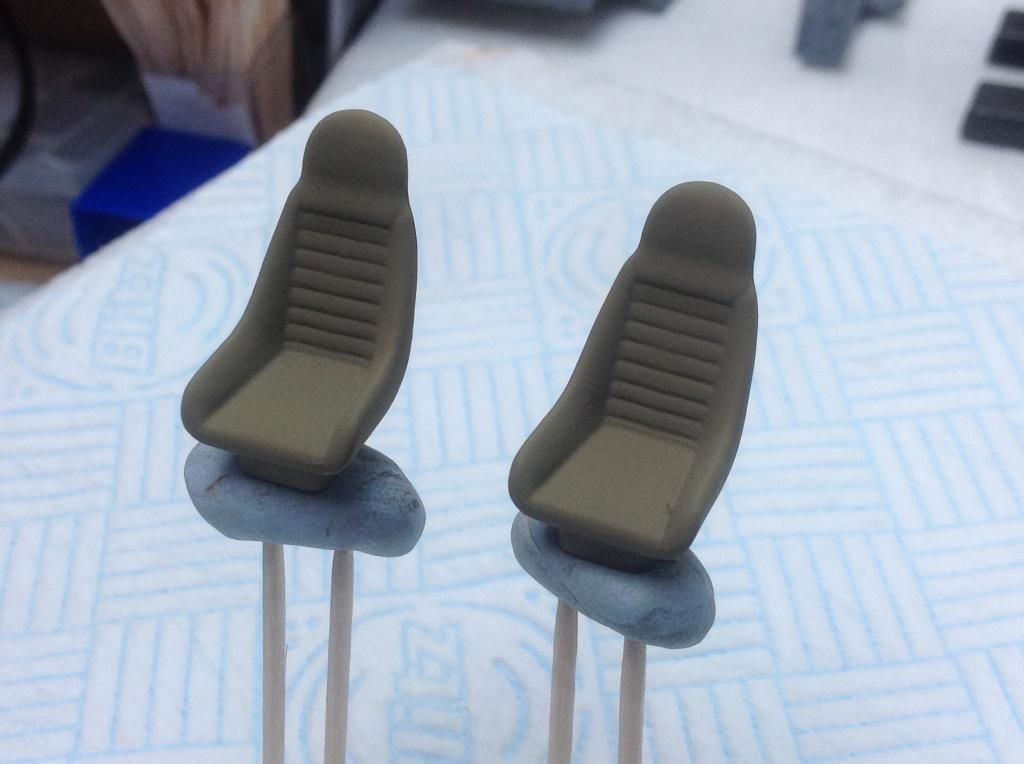
Moved on to the Cockpit Captain's chairs...single coat of Tamiya Khaki to begin with...will need to re-watch the Foxx video to recall what's next - some sort of weathering required and mottling was it?
Re: Foxx's and ClaytonDJ's DeAgostini Millennium Falcon Builds WIP
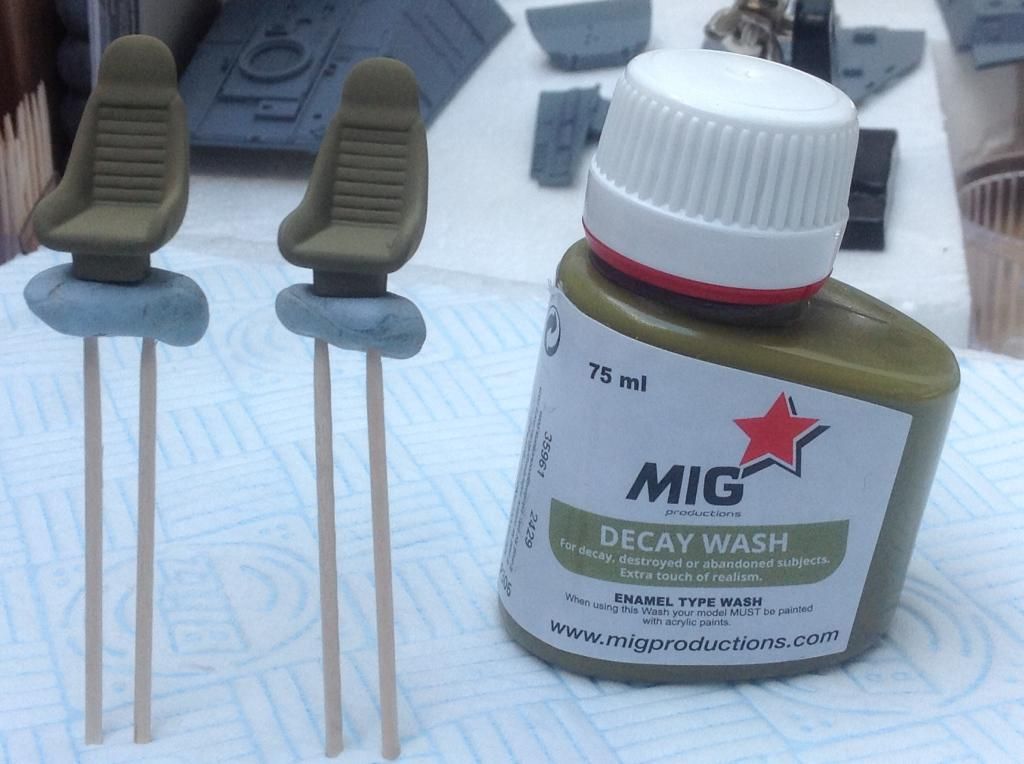
Amongst my gathering I've got a MIG 'decay' wash - which colour-wise isn't far off the khaki acrylic used on the pilot/co-pilot chairs. Is this a candidate for weathering them? And if so, at what stage and how. Pack instructions say you apply it with a soft brush then remove excess with water on cotton bud.
Re: Foxx's and ClaytonDJ's DeAgostini Millennium Falcon Builds WIP
Mr Foxx,
Sorry to be a tease but I am unable to walk into WH Smith's and come out without buying the issue on sale in store - even though the same issue will arrive as part of my subscription! Seeing the next 4 issues available in the shops before receiving them via the subscription is plain cruel - should be the other way around (subscribers get them before they are available in the shops).
Anyhow, unable to help myself (need some sort of therapy) I have now added issues 7 and 8 to my collection - preview below of what we get in:
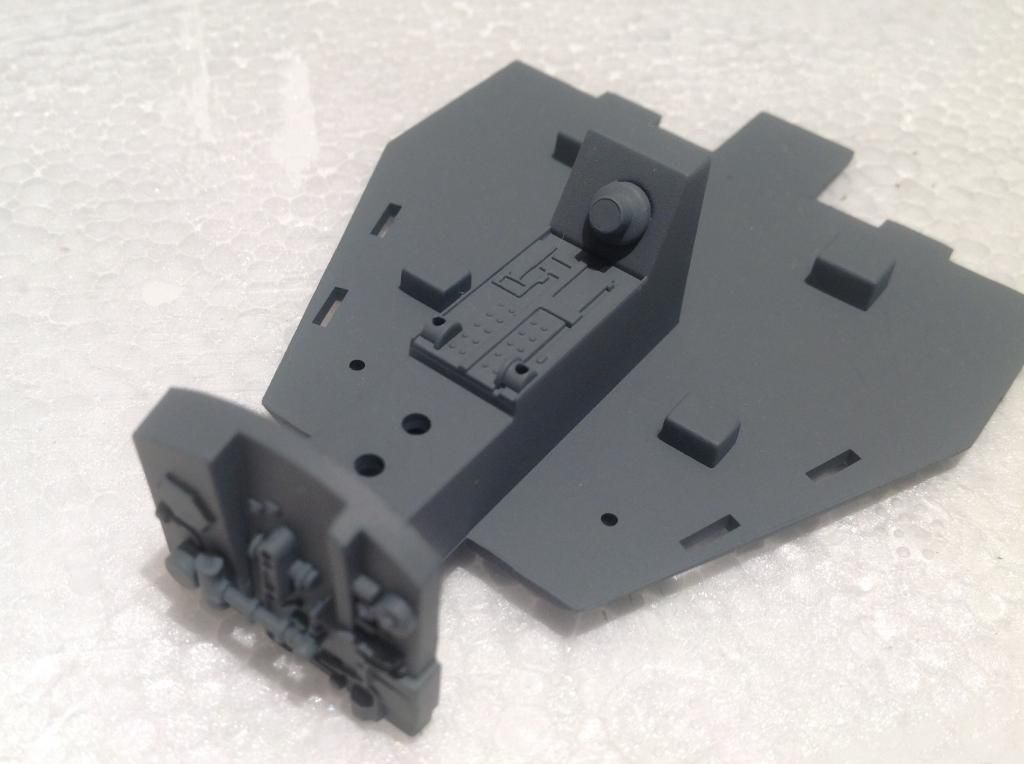
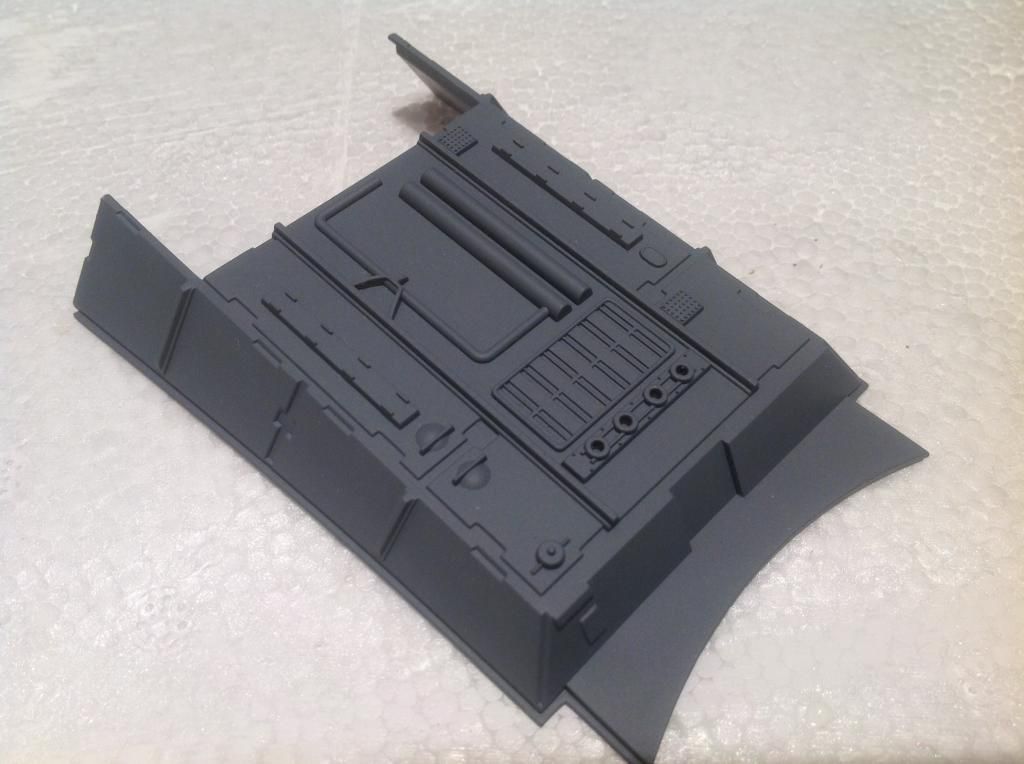
Issue 7 (main hold floor and passenger seating parts)

And issue 8 (technical station, main hold walls and remaining passenger seating parts).Also includes some very basic guides and suggestions for painting, dry brushing and weathering!
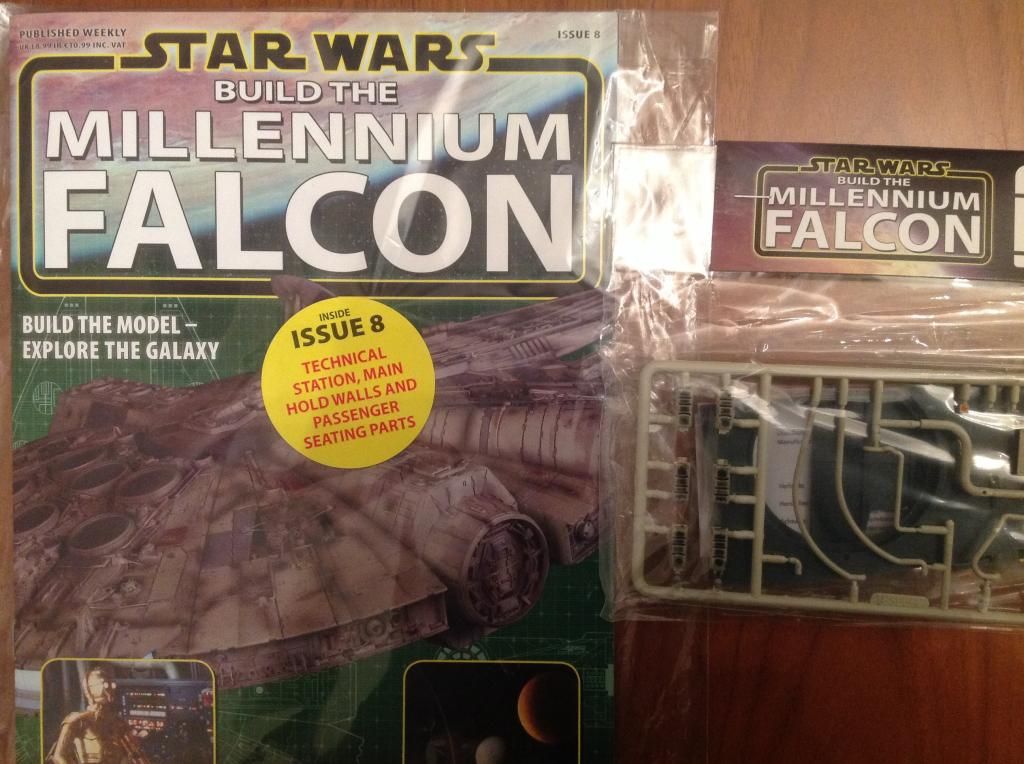
At this rate I'm going to have to build 2 Falcons!
Dave
Sorry to be a tease but I am unable to walk into WH Smith's and come out without buying the issue on sale in store - even though the same issue will arrive as part of my subscription! Seeing the next 4 issues available in the shops before receiving them via the subscription is plain cruel - should be the other way around (subscribers get them before they are available in the shops).
Anyhow, unable to help myself (need some sort of therapy) I have now added issues 7 and 8 to my collection - preview below of what we get in:
Issue 7 (main hold floor and passenger seating parts)
And issue 8 (technical station, main hold walls and remaining passenger seating parts).Also includes some very basic guides and suggestions for painting, dry brushing and weathering!
At this rate I'm going to have to build 2 Falcons!
Dave
Re: Foxx's and ClaytonDJ's DeAgostini Millennium Falcon Builds WIP
Latest addition to my weathering stocks...

-
Stefan8271
- Private
- Posts: 16
- Joined: Sat Feb 14, 2015 12:35 pm
Re: Foxx's and ClaytonDJ's DeAgostini Millennium Falcon Builds WIP
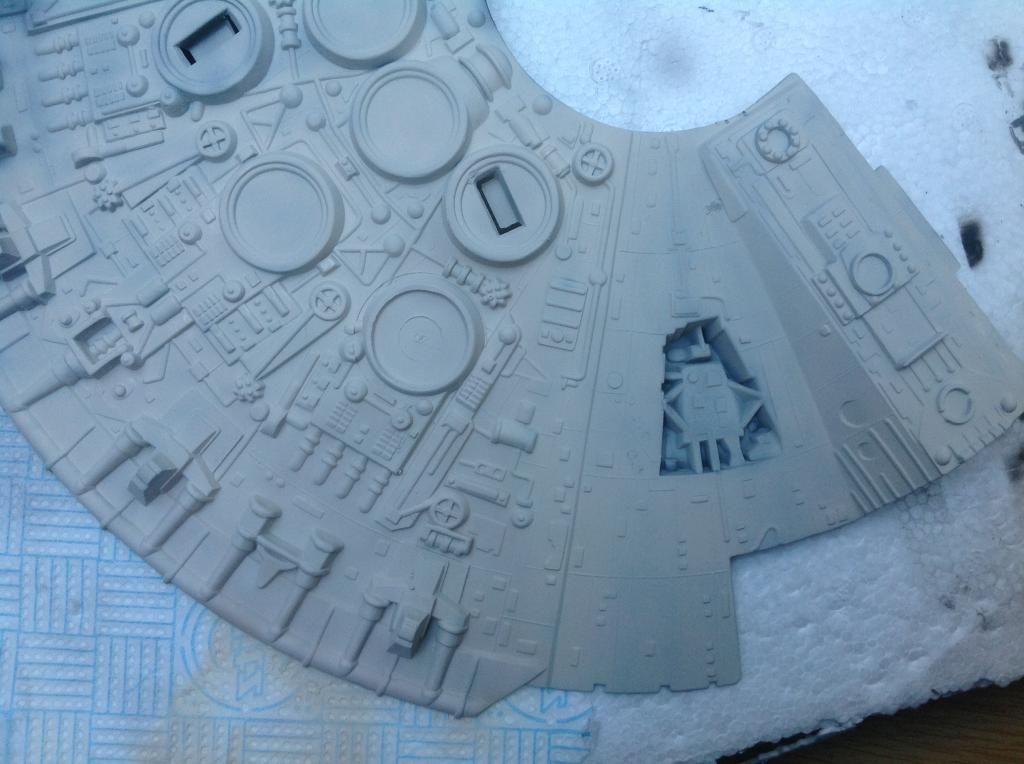
Post arrived with , 7, 8 and 9 , cool. Lots of little parts and sanding, the little parts are very flimsy and two broke, but no fear a bit of glue fixed them. I have most things ready for priming , but I am, going to wait to see how Foxx, sees the colours.
I think the seat area , walls and floor will be German grey ?
Seats are not a bad colour but I think the shade can be better, so will see what Foxx thinks.
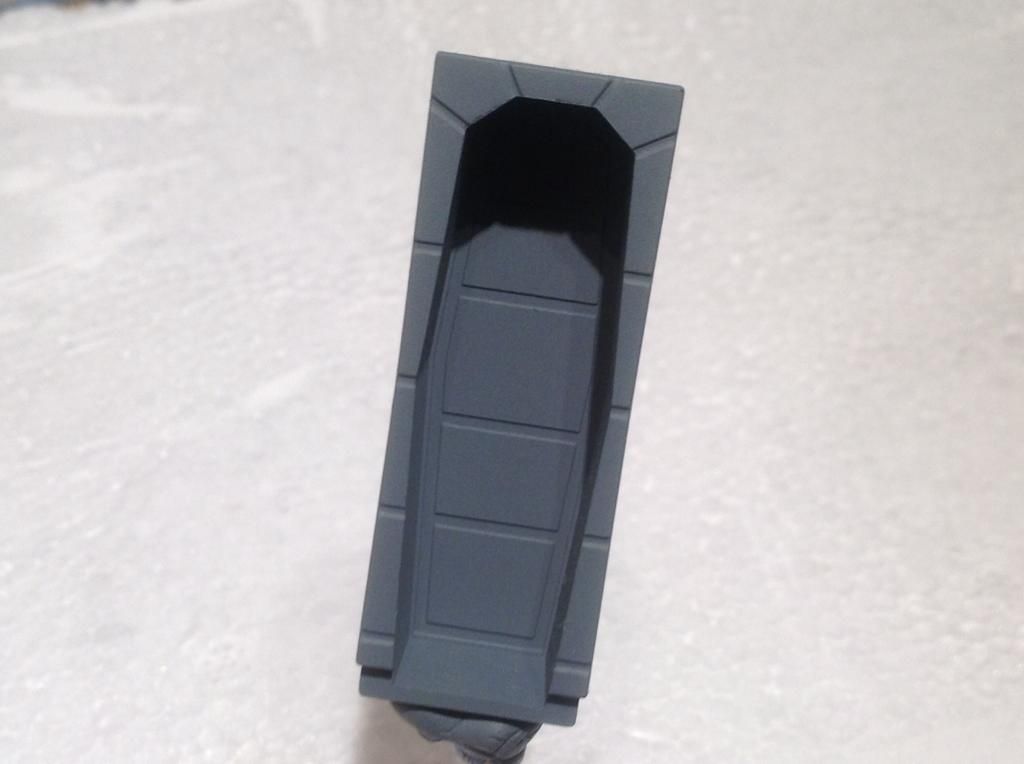
The arch way into the corridor the cream covers actually look a decent match, maybe need to be slightly lighter ?
I think the seat area , walls and floor will be German grey ?
Seats are not a bad colour but I think the shade can be better, so will see what Foxx thinks.
The arch way into the corridor the cream covers actually look a decent match, maybe need to be slightly lighter ?
Re: Foxx's and ClaytonDJ's DeAgostini Millennium Falcon Builds WIP
I've been building bedroom wardrobes all week so not done any more (except buy some more paints and bits 'n bobs). Intend making a start on the old German Grey later this week (so the cockpit doorway, console sides and the cockpit floor), will hairspray/paint the passenger seats (ready for distressing) and add some lightening/mottling to the pilot/co-pilot seats). Big steer needed from the Foxx on the primer - specifically whether the Badger grey is too dark and needs mixing/lightening to really show up the pre-shading....but he's working on a commission build and that must come first.
Re: Foxx's and ClaytonDJ's DeAgostini Millennium Falcon Builds WIP
Tamiya German Grey applied to the cockpit doorway, main console and sides...not easiest job in the world given that my primer is dark grey to begin with - but doesn't look that bad though.


Re: Foxx's and ClaytonDJ's DeAgostini Millennium Falcon Builds WIP
For the cockpit doorway I think next job is to paint the facing panels flat brown (but will double-check the Foxx video to be sure) then apply some tan stippling with brillo scoring pad. The console sides need masking off and flat black applied to top halves.
Re: Foxx's and ClaytonDJ's DeAgostini Millennium Falcon Builds WIP
Low and behold - look what I found in WH Smith's today - Issue 9! Still no sign of my subscription issues - so just had to buy it!

Re: Foxx's and ClaytonDJ's DeAgostini Millennium Falcon Builds WIP
Following Foxx's instructional video I've masked off the top half of the console side panels and sprayed the top half XF-1 flat black.

Hope the masking tape comes away cleanly!
Hope the masking tape comes away cleanly!
Re: Foxx's and ClaytonDJ's DeAgostini Millennium Falcon Builds WIP
Gently does it - peeling the masking tape back on itself (whilst praying!)

Voila!
Voila!
Re: Foxx's and ClaytonDJ's DeAgostini Millennium Falcon Builds WIP
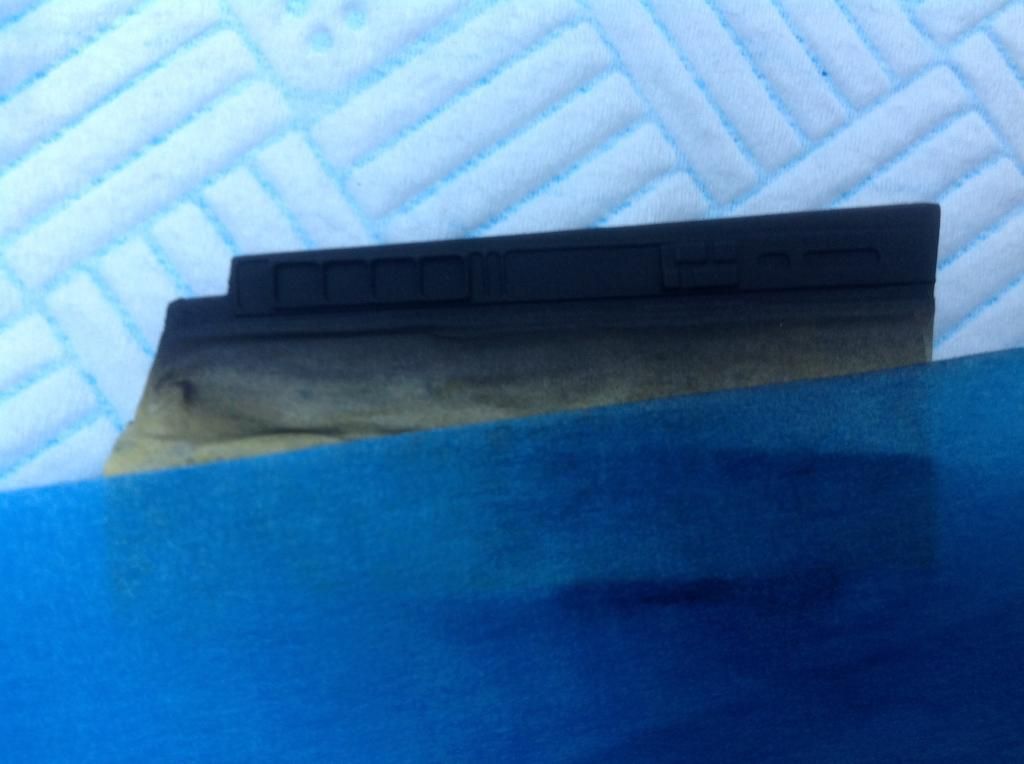
Flat brown painted onto the cockpit doorway panels...

This needs stippling with tan or buff I'll need to check!) using the brillo scourer pad
This needs stippling with tan or buff I'll need to check!) using the brillo scourer pad
Re: Foxx's and ClaytonDJ's DeAgostini Millennium Falcon Builds WIP
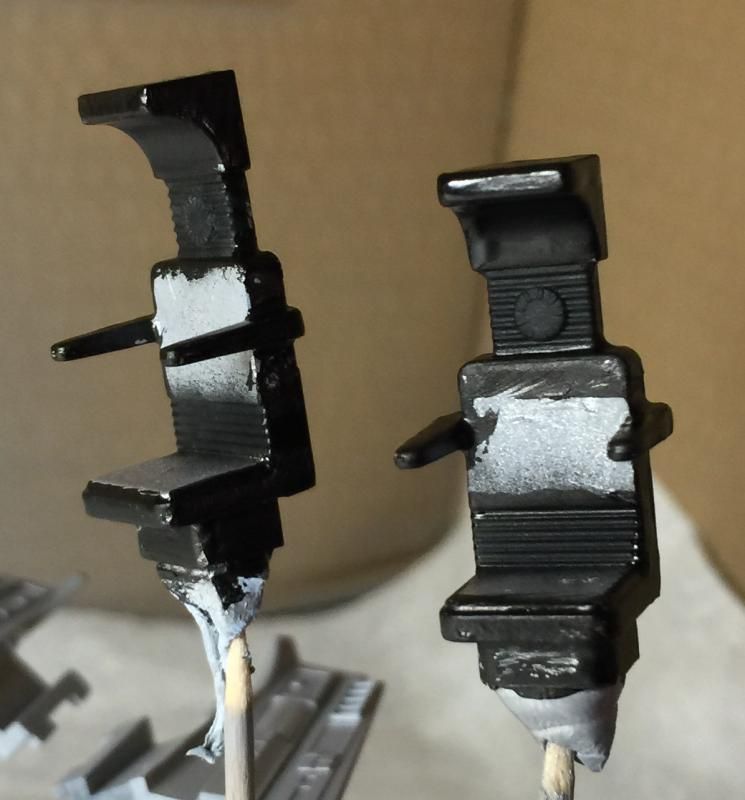
Hairspray applied to passenger seats to seal in the flat aluminium...then a coat of gun metal/flat black to give them an anthracite shiny black look!
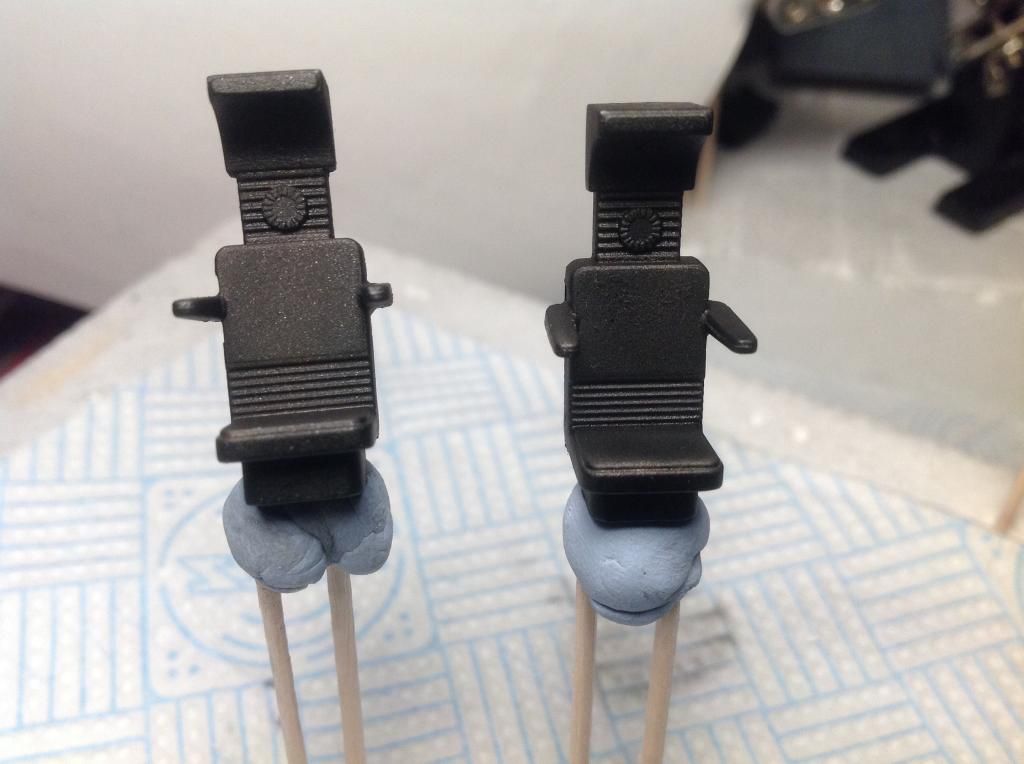
Need to add rubber black to the 'lined' parts of the seats and khaki on the seat cushions...
Need to add rubber black to the 'lined' parts of the seats and khaki on the seat cushions...
Re: Foxx's and ClaytonDJ's DeAgostini Millennium Falcon Builds WIP
OK - been doing some more work on the cockpit seats and doorway.
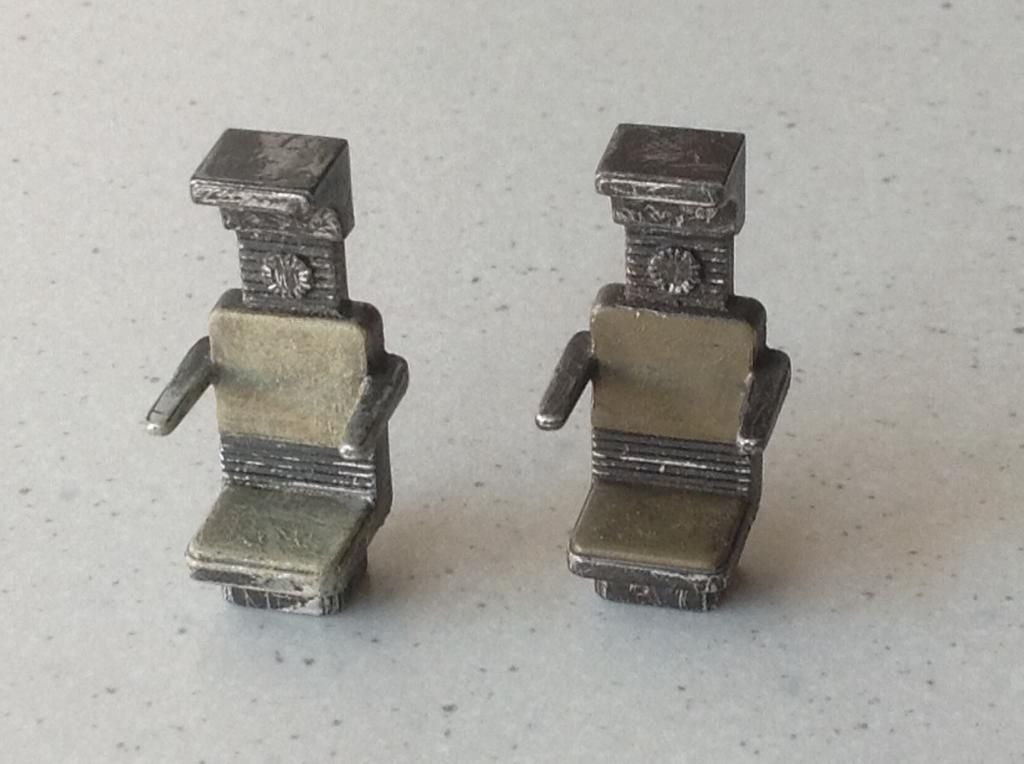
The pilot and co-pilot seats have been painted khaki then speckled with deck tan using the scourer. I then gave them a wash with the MIG decay and Ultimate dirt - before using a drybrush with deck tan to bring back some highlights. No pastels used yet to blend them but not looking to bad me thinks.

The passenger seats have been chipped - hope I haven't overdone it (but perhaps my Falcon has had more of a thrashing than others!). The cushions painted khaki, both given a Ultimate dirt wash then one slightly highlighted with deck tan speckling. Again no pastels used yet...but comments welcome.

The doorway was painted flat brown then speckled with the deck tan before a Ultimate dirt wash - then lightly dry brushed with deck tan to lighten it a shade (don't want my Falcon looking too grubby!)
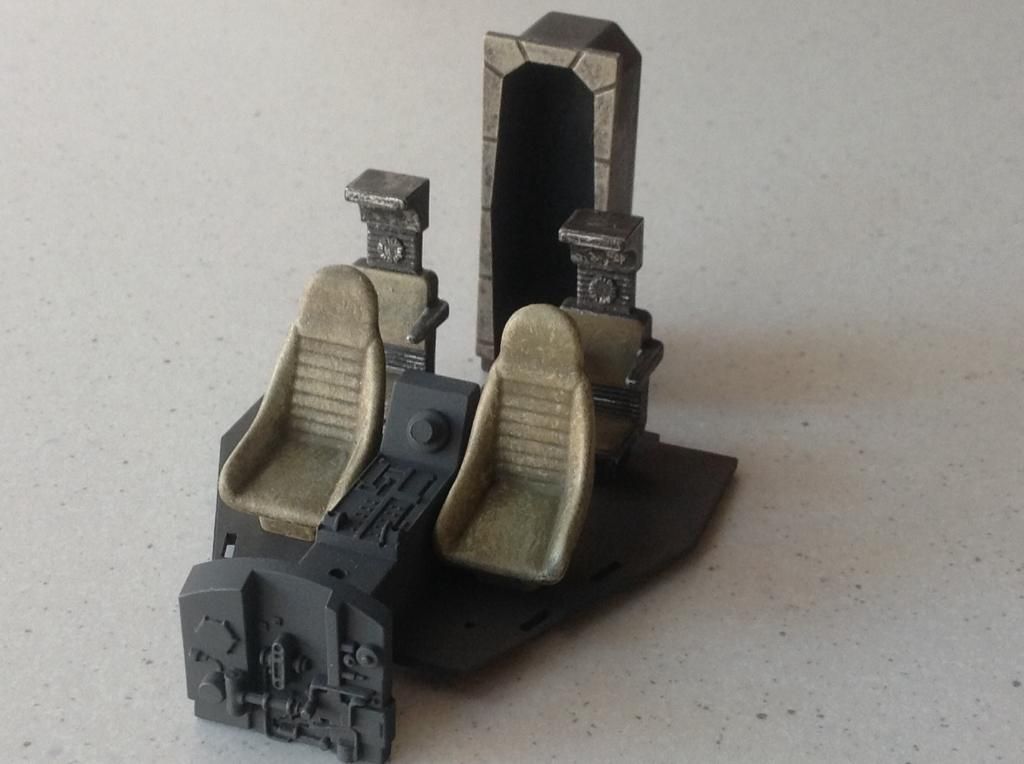
Still some shading and blending to do - but put together on the cockpit floor (which has also had a Ultimate dirt wash) I think it's beginning to take shape.

The pilot and co-pilot seats have been painted khaki then speckled with deck tan using the scourer. I then gave them a wash with the MIG decay and Ultimate dirt - before using a drybrush with deck tan to bring back some highlights. No pastels used yet to blend them but not looking to bad me thinks.
The passenger seats have been chipped - hope I haven't overdone it (but perhaps my Falcon has had more of a thrashing than others!). The cushions painted khaki, both given a Ultimate dirt wash then one slightly highlighted with deck tan speckling. Again no pastels used yet...but comments welcome.
The doorway was painted flat brown then speckled with the deck tan before a Ultimate dirt wash - then lightly dry brushed with deck tan to lighten it a shade (don't want my Falcon looking too grubby!)
Still some shading and blending to do - but put together on the cockpit floor (which has also had a Ultimate dirt wash) I think it's beginning to take shape.
Re: Foxx's and ClaytonDJ's DeAgostini Millennium Falcon Builds WIP
OK fellas - so what do we do with the cockpit console and front bit? Mines currently just been primed and given a coat of German Grey.
