German recon unit at the Siegfried line

Post Reply
User avatar
MarkVerploeg
Major
Major
Posts: 4837
Joined: Wed Oct 16, 2013 12:21 am
Location: Oss, Noord Braband The Netherlands
Netherlands

German recon unit at the Siegfried line

Post by MarkVerploeg »

hi guys
so as my other entry is rather small (SAS Jeep) and i can't continue on it as i can't paint at the moment because of technical problems (broken parts)
and to be honest this idea was my Original plan to enter

so the plan is to make a recon group that consists of 2 vehicles , a sd.kfz. 250/9 Neu recon half track and the sd.kfz.234/1 schwerer panzerspahwagen
wich is a 8 wheeled heavy armored car
the diorama is supossed to have several features like trees wich i have already and the boxes they are in have been collecting dust for a few years now so i think it is time to use them and i plan on making dragons theeth tank obstacles and those high triangle anti tank walls wich where placed at either side of a road to stop tanks from passing through
they could climb them but they would reveal the bottom of the tank wich is a easy target for a hidden Pak40 or some similar weapon

i will try to make a layout with some older kits i have made wich are similar to the 2 kits i will be making for this entry to see how much space i have on the base and wich ideas i can actually get in the diorama and wich i will have to leave off

so for the first part of the build i will be building this kit
Image
this is a older dragon kit wich according to the box is from 1999
so it older then the best kits dragon made and to be honest this kit shows it's age a bit but the photo's of the box content will show that

Image
when you pop the lid this is what you see in this rather thin box (it is lower then the boxes they use now)

and the sprues
Image
sprue a

Image
sprue b ,you get 4 of these

Image
sprue c

Image
sprue d
up to now they are all basic sd,kfz 250 sprues

Image
sprue h wich is for the turret

Image
a driver and transmission box

Image
some very old wallpaper thickness decals and i didn't know dragon ever used this mesh but when i first opened the kit i found these 2

Image
the istruction sheet is basicly the same as the ones you get these days

Image
because of the mesh that was in the kit i ordered this eduard set for it
the only reason was that i didn't want to use the mesh on the turret but this set wss the same price as the turret upgrade set from another brand so i decided to get this one

Image
the content of the pe set

Image
sorry for the glare
but i will replace the kit barrel with this AFV club barrel that i have left

and that is about everything i have for now
i made a small start a week ago but lost intrest in the kit after 45 minutes so i packed it back up and worked on something else
but i started building this today and made some progres
i still need to look for some more information about all the aspects of the build but it makes more sense to me if i add the vehicle information when i do a update about the vehicle rather then in this intro

so i hope my idea makes sense but if not i will make a update tomorrow anyway and bash together that layout that i mentionned before to give a idea of what i am going for with this build
so stay safe and happy modelling
cheers Mark
On the bench
GB builds
1/35 Trumpeter M1132 ESV

Personal builds
1/35 Hobby Boss M1070 tractor with M1000 semi trailer and Meng M1A2 TUSK II Abrams
1/35 Takom V2 rocket with the Meillerwagen and SS100 tractor
User avatar
rwsmith14
Sergeant Major of the Army
Posts: 1277
Joined: Thu Jun 05, 2014 1:24 am
Location: Aledo, TX, USA
United States of America

Re: German recon unit at the Siegfried line

Post by rwsmith14 »

Looking forward to it, Mark !! :thumb2:
Image
User avatar
MarkVerploeg
Major
Major
Posts: 4837
Joined: Wed Oct 16, 2013 12:21 am
Location: Oss, Noord Braband The Netherlands
Netherlands

Re: German recon unit at the Siegfried line

Post by MarkVerploeg »

Thanks RW
I will post a update as soon as i can
On the bench
GB builds
1/35 Trumpeter M1132 ESV

Personal builds
1/35 Hobby Boss M1070 tractor with M1000 semi trailer and Meng M1A2 TUSK II Abrams
1/35 Takom V2 rocket with the Meillerwagen and SS100 tractor
User avatar
MarkVerploeg
Major
Major
Posts: 4837
Joined: Wed Oct 16, 2013 12:21 am
Location: Oss, Noord Braband The Netherlands
Netherlands

Re: German recon unit at the Siegfried line

Post by MarkVerploeg »

hi guys
i think it is time for the first update of this build
the build is going fine and i actually am about to finish building the sd.kfz. 250/9
the work has stopped at the point where i need to paint and weather the interior but like i mentionned before i need a new airbrush nozzle as i managed to crack or break them all and the shop owner is on vacation untill next week
but then again it doesn't stop me from building the kits and do as much as possible untill i get the new parts

so first a small introduction about the sonderkraftfahrzeug 250

the sd.kfz. 250 was designed in the 1930's as a small half track wich was to be used as a armored personel carrier
the most of these vehicles found their way to the recconnaisance units of the several panzer divisions as the larger sd.kfz.251 could move 8 troops instead of the 4 that could be moved with the sd.kfz 250
but the vehicle was not written off just yet
because of the high max.speed and good off road preformance it was used for other tasks
like with a lot of German vehicles they had sub variants
with the sd.kfz they had 12 different versions ranging from a apc (sd.kfz.250/1) to mobile command centers like the Greif from field marshall Rommel
there was a modernizing of this vehicle in 1943 , this was a major overhaul of the vehicle and design of the upper half of the vehicle was the biggest change
the Original design consisted of 19 armor plates and was given the name alt (old) after the redesign and the new version was called neu (new)
this version was build up with only 9 armorplates wich drasticly reduced the time it takes to build the vehicle as everything was simplyfied
the entire range of the sd.kfz.250 had this overhaul but all the versions where still produced after small changes
there where 2 special versions of the old model that where not called 250 but where known as the sd.kfz252 and 253
these where a ammo transport (252) and a observation vehicle (253)
the sd.kfz 250 remained in production untill the end of the war and was generally used as a support vehicle as no version was suited to fight against heavy vehicles like tanks but they still fulfilled a important role as support vehicles
a fun little fact about this vehicle is that there where no Ausf.A and B and so on
the only 2 main versions where known as the alt and the neu unlike the bigger brother the sd.kfz251 wich and A,B,C and D versions

and some specs of the basic model

crew: 2+4 infantry ,the 250/9 had a crew of 4
length : 4,56 meters
width : 1,945 meters
height : 1,66 meters
weight : 5,800 tons
max. speed : 76 km/h (road speed)
range : 180 to 200 km
preformance 100 bhp or 73KW
armor 5,5mm up to 14,5mm
powerplant Maybach HL42 TRKM 6 cylinder inline water cooled petrol engine


Image
a sd.kfz.250/1 alt , the basic model of the sd.kfz.250 range

Image
a sd.kfz.250/1 neu the redesigned version from 1943 untill the end of the war

as for the sd.kfz.250/9
this was the second version designed for recon tasks
the older version was armed with a single mg34 and had the large frame antenna on the roof
the 9th version was better armed and unlike the other versions (except the 253) it was a closed vehicle for the most part as the turret was covered with mesh screens and not armor plating
the armament consists of a mg42 and a kwk 38 2cm cannon
that is the vehicle version of the better known flak38 but unlike the flak the kwk has a small 10 round magazine instead of the regular 20 rounds for the flak guns
this was done due to the lack of room in the turret
the turret was a design that was used more often as various vehicles have these turrets
they can be found on the sd.kfz.234/1 , sd.kfz.222 and the Aufklarungspanzer 38t
but other then the addition of the turret it is basicly the same as the regular version
these vehicles where assigned to the recon units of the Panzer divisions where they where used as scouts and often operated in groups
allthough they are armed the usual tactic was to fall back once they where spotted
the relative thin armor that could only stop small arms fire and the 2cm cannons limitations where no match for a tank so it was safer to retreat then to try and take out enemy armor with these vehicles

and here are some examples of the sd.kfz 250/9
Image

Image
as you can see there was no room for tall guys in these things

and now for the build
Image
work starts with the wheels

Image
and some more wheels
there are not that many on there so it was done in no time

Image
then you get to build the hull tub
in 1999 there was no slide molding so no 1 piece hull either :mrgreen:

Image
the swing arms for the suspension where next to be installed

Image
the axle and the torsion bars for the front where easy to assemble and where made up from 4 parts instead of the redesigned ones we see in dragon half tracks these days (they all share the same design or look)

Image
steering bar was added

Image
the road wheels had a small seamline but a sanding stick removes them with a few passes

Image
then the work moves to the interior
the first parts of the pe set are glued on

Image
the rear of the interior floor

Image
these covers over the axle where a bit of a challegnge but it does lok nice when they are in there
to bad you won´t see later on

Image
the interior floor was glued in place

Image
the firewall was build up
nothing special here but i had to remove the molded on pedals/controls as they where blocking the floor plate wich needs to be glued on to this

Image
everything is installed

Image
the right side of the hull
the pe set adds a lot of things on the interior that the kit doesn´t

Image
the left hand side
the 2 gasmask cans are from my spares box all the other parts are either fully made of pe or addapted parts from the kit

Image
the sides are glued on
this is the point where i stop glueing parts on
well only on the outside but to be able to paint everything i can´t put the upper part of the hull and the roof on there just yet
they can be constructed but painting is slwing it all down for now

and that is all i have for now
i am a bit further in the build at the moment but i didn´t upload the new photo´s yet and this update is big enough already
i don´t want you to fall asleep while you are reading this :tongue:
but i think i am ready for a new update soon and if i manage to build the entire vehicle before i go shopping for ab parts i will start on the sd.kfz.234/1 to keep me busy
so i hope you like it and untill next time
cheers Mark
On the bench
GB builds
1/35 Trumpeter M1132 ESV

Personal builds
1/35 Hobby Boss M1070 tractor with M1000 semi trailer and Meng M1A2 TUSK II Abrams
1/35 Takom V2 rocket with the Meillerwagen and SS100 tractor
User avatar
fly1ngdutchm4n
First Lieutenant
First Lieutenant
Posts: 3554
Joined: Fri Aug 09, 2013 11:17 pm
Location: Hoogerheide The Netherlands
Netherlands

Re: German recon unit at the Siegfried line

Post by fly1ngdutchm4n »

Looking really good so far Mark :th:
I like all PE you added so far, It gives the model great details.
Very nice kit by the looks of it.
I know what you mean about waiting with glueing the roof on, I have the same with my Dragon Sd.Kfz 251/22 Halftrack that is on the shelf of doom somewhere waiting to be dusted of.
Anyway, Keep up the good work Mark, you're on the right path here! :cheers2:
Build what you love, Love what you build
User avatar
Nev
Warrant Officer
Warrant Officer
Posts: 1582
Joined: Fri Sep 26, 2014 10:22 am
Location: Kent
Great Britain

Re: German recon unit at the Siegfried line

Post by Nev »

Hi mate making a cracking start to this build! The PE really sets it off :cheers2:

I managed to get myself a hold and fold a week ago so hoping to do more PE on my builds, excited to be following your build :thumb2:
On the Bench...
1/35 TAKOM Mark. IV Heavy Battle tank
User avatar
MarkVerploeg
Major
Major
Posts: 4837
Joined: Wed Oct 16, 2013 12:21 am
Location: Oss, Noord Braband The Netherlands
Netherlands

Re: German recon unit at the Siegfried line

Post by MarkVerploeg »

Thank you very much Frans
The pe set was a great to work with
I started the other kit for this build yesterday so i only need to take some time to make a update and a new intro for the sd.kfz.234/1
I don't have a pe set for that one though but the kit has some pe for the important parts like the turret covers
I hope to have the updates up soon
Cheers
On the bench
GB builds
1/35 Trumpeter M1132 ESV

Personal builds
1/35 Hobby Boss M1070 tractor with M1000 semi trailer and Meng M1A2 TUSK II Abrams
1/35 Takom V2 rocket with the Meillerwagen and SS100 tractor
User avatar
MarkVerploeg
Major
Major
Posts: 4837
Joined: Wed Oct 16, 2013 12:21 am
Location: Oss, Noord Braband The Netherlands
Netherlands

Re: German recon unit at the Siegfried line

Post by MarkVerploeg »

Thanks Nev
I have a hold and fold myself but i don't use it as much as i thought i would when i bought it
It still is a nice tool to have and it helped with several parts like hinges and S shaped parts
But i still use a pair of pliers for most parts
On the bench
GB builds
1/35 Trumpeter M1132 ESV

Personal builds
1/35 Hobby Boss M1070 tractor with M1000 semi trailer and Meng M1A2 TUSK II Abrams
1/35 Takom V2 rocket with the Meillerwagen and SS100 tractor
User avatar
MarkVerploeg
Major
Major
Posts: 4837
Joined: Wed Oct 16, 2013 12:21 am
Location: Oss, Noord Braband The Netherlands
Netherlands

Re: German recon unit at the Siegfried line

Post by MarkVerploeg »

hi guys
so it is time for a new update , this time i will finish constructing the sd.kfz.250/9
i will get new ab parts tomorrow so i will get painting when i have completed the interior of the second kit for this build

so here i the progres so far

Image
after the lower hull work continues with the build up of the fenders
the pe gives much more detail then the kit parts

Image
the other fender
you can chose the headlight you want on this vehicle in the kit
there is a bosch headlight wich is seen on almost all german vehicles and there is the notek light
with the kit they have the same position on the fender but the pe set provides a extended mount wich was mounted on the front of the fender
i picked this option because the vehicle already has 2 small headlights so i didn't see much use for the bosch light

Image
then it was time for the rear plate and a few photo etch to replace the kit parts

Image
the door received pe aswell
the cage on the inside serves to hold the first aid kit wich was to be glued on the door without any details so the pe was a good addition

Image
the inside

Image
the stowage boxes received new hinges wich had a bit more detail then the kit part
there where parts for the locks and chains but i think i would have damaged the part if i tried to remove the styrene details so i didn't use those

Image
then the fenders and stowage boxes where added to the hull

Image
the other side after the fenders where added

Image
the front plate and the suspension guard (a curved plate under the front plate) where added

Image
the upper hull had some ugly details wich i removed
later i added the small eyelets wich where used to add camouflage
the larger hooks on the front and back where optional but i decided they would be a nice extra detail

Image
then it was time for the guns
there are a few photo etch for this step like the shell casing tubes wich guide the shells into a box underneath the mount

Image
same step but the other side of the part
this is before the guns are mounted on the large mount

Image
not much difference but here the guns are glued on the large mount

Image
here the guns are placed on the turret ring
as you can see i drilled the front and rear of the telescopic sight
this is just a small thing to do but it looks much better then a flat front
when it is painted black i will add a drop of water effects by Vallejo in the hole
this will give a shine and depth to it wich will look like a piece of glass

Image
from the other side again
i needed to add the seats and radio at this point

Image
the turret was finished with the upper part

Image
the seat and radio i mentioned before

Image
the cages that form the roof of the turret

Image
the stowage boxes where added to the rear of the turret
i added a Aber German 2 meter antenna wich by now is standard for me when i build a German armored vehicle

Image
all the major parts together
they will be glued once the interior is finished

Image
from the rear

and that is all i have for now
i like the Eduard photo etch set wich works better then i expected as it was kind of cheap
but still the parts where easy to bend into shape and are nicely detailed
so the next thing for this build will be the construction of the sd.kfz 234/1
once that reached the point where the interior is ready i will start painting both the vehicles and later i will finish building the 234
so i hope you like it so far and untill next time
cheers Mark
On the bench
GB builds
1/35 Trumpeter M1132 ESV

Personal builds
1/35 Hobby Boss M1070 tractor with M1000 semi trailer and Meng M1A2 TUSK II Abrams
1/35 Takom V2 rocket with the Meillerwagen and SS100 tractor
User avatar
panzerman
Sergeant
Sergeant
Posts: 151
Joined: Sat Jun 01, 2013 3:31 am
Location: Glen Burnie, Maryland

Re: German recon unit at the Siegfried line

Post by panzerman »

Your build of the SdKfz.250 is progressing nicely. The after market goodies are really enhancing the kit. Keep having fun.
Bill.
Image
User avatar
MarkVerploeg
Major
Major
Posts: 4837
Joined: Wed Oct 16, 2013 12:21 am
Location: Oss, Noord Braband The Netherlands
Netherlands

Re: German recon unit at the Siegfried line

Post by MarkVerploeg »

Thank you very much Bill
It was needed in my opinion and i usually replace the barrels on a flak gun as the muzzles look bad most of the time
On the bench
GB builds
1/35 Trumpeter M1132 ESV

Personal builds
1/35 Hobby Boss M1070 tractor with M1000 semi trailer and Meng M1A2 TUSK II Abrams
1/35 Takom V2 rocket with the Meillerwagen and SS100 tractor
User avatar
MarkVerploeg
Major
Major
Posts: 4837
Joined: Wed Oct 16, 2013 12:21 am
Location: Oss, Noord Braband The Netherlands
Netherlands

Re: German recon unit at the Siegfried line

Post by MarkVerploeg »

hi guys
well as the first vehicle is finished up to the point of painting i can go on ith the second vehicle for this build
this will be the sd.kfz.234/1 schwere panzerspäh wagen (heavy armored reconaissance vehicle)
i will post a intro for the vehicle and the sprueshots in this post and do the actual build in other post as it would be a huge post if i did all of that in one single post

so here is some information about the sd.kfz.234/1

first some specs

crew : 4
lenght : 6.02 m
width : 2.36 m
height : 2.10 m
weight : 10.500 kg (approx.)
engine : tatra 103 V12 diesel engine
power : 210 bhp
top speed : 85 kmph
range : 1000 km
primary weapon : 2 cm kwk 38 cannon
secondary weapon : 7,92 mm MG34 or 7,92 MG42

history
the entire sd.kfz 234 range (4 versions) where designed to replace the older 8 wheeled sd.kfz 231 series wich had become out dated since the introduction in the mid 1930's
the sd.kfz.234 series design stages began in 1940 and the first vehicles entered service in September 1943
the vehicle is a 8x8 design wich means all of the 8 wheels are powered
a intresting part of the design is that it has 2 steering wheels and all wheels can be steered
this gives the vehicle a impressive mobility and helped in so called shoot and scoot situations where the vehicle falls back right after it fires it's gun
this is further improved by the high speed it can reach when driving in reverse due to multiple reverse gears
if this kind of tactic is preformed by the crew the back facing driver will be responsible for pulling the vehicle back out of harms way

the vehicles where assembled by different factories but they where actually produced by 3 factorie wich all had their own resonsibility in producing their part of the vehicle
the chassis was made by Büssig-NAG
the armored body was made by Deutsche Edelstahlwerke in Krefeld
and finally the turret was produced by Daimler Benz
the Original order was to have a full scale production of 1500 vehicles of each version
in the end the grand total was about 1500 vehicles of all 4 versions combined

so here are some pictures of the sd.kfz.234/1
Image
as you can see the gun was able to be pinted almost straight up and used against aircraft
the problem however was that the turrret turns too slow to allow for succesfull anti aircraft fire
besides the slow turning the magazines for the gun only have 10 rounds instead of the 20 round magazines found on the flak 38 wich is basicly the same gun with a different mount

Image
lots of storage room in the huge fenders ( a womans dream, mobile storage space :mrgreen: )


there where 3 other versions aswell

the 234/2
Image
armed with a fully clsed turret houssing a 5cm tank gun
the gun is similar to the one from early Panzer III tanks allthough it has the addition of a muzzle to decrease recoil in the small turret

the 234/3
Image
armed with a forward facing 7.5 cm L/24 gun
this gun hd a very limited traverse range wich mens that the vehicle has to be aimed t the target and the gunner can then aim and adjust the last bit before the shot
this gun was also found in the StuG III ausf. A up to ausf. E and the Panzerkampfwagen IV ausf.A up to ausf. F1

the 234/4
Image
this version was the most powerfull when it comes to the gun
it has a Pak 40 7.5 cm anti tank gun wich was mounted on a frame that wwas build inbetween the roof and floor plates of the interior
sometimes refered to as a Pakwagen this was a better solution in making the Pak 40 mobile then the rather desperate idea of mounting the same gun in the sd.kfz.250 half track (wasn't a great idea)


so ith the history lesson out of the wway
here is the kit i will be building
Image
the boxart

Image
what is inside the box when i firt opened it (one of the rare times i didn't open it before)

Image
upper hull and fenders

Image
wheels and suspension , you get 3 of these

Image
more suspension stuff , 2 of these are needed

Image
various items

Image
main parts for the lower hull

Image
turret parts

Image
gun parts

Image
star antenna

Image
small items and tools

Image
the dragon card with 2 frets of pe , 2 decal sheets and metal width indicators

well then that is all i have for now
i hope to get back to you all with the build update as soon as i can
cheers Mark
On the bench
GB builds
1/35 Trumpeter M1132 ESV

Personal builds
1/35 Hobby Boss M1070 tractor with M1000 semi trailer and Meng M1A2 TUSK II Abrams
1/35 Takom V2 rocket with the Meillerwagen and SS100 tractor
User avatar
MarkVerploeg
Major
Major
Posts: 4837
Joined: Wed Oct 16, 2013 12:21 am
Location: Oss, Noord Braband The Netherlands
Netherlands

Re: German recon unit at the Siegfried line

Post by MarkVerploeg »

hi guys
so it is update time
this time i will deal with the build of the 234/1
to be honest it is pretty far in the weathering stages right now and the figures are painted already (still need a wash) so in terms of putting up the updates i am falling behind but luckily the build is going fast enough to finish in time

as for this kit , it goes together like you would expect from a Dragon kit
the only parts that require some attention are the large fenders wich have to be glued on while you put pressure on them
if you don't they will bend outward and reveal some nasty gaps between the hull and fender
but it is fixed with some strong masking tape or large F clamps ( i really need some of those)

but here is the build up of the 234/1
Image
i the first step you need to add the flange that connects the 2 halfs of the lowest part of the hull

Image
all of this is used to build up the suspension and axles

Image
first bits are added

Image
steering parts that will connect to the wheel hubs are next

Image
then the top swing arms and hinges are added

Image
same step but this is from underneath the hull

Image
the leafsprings are added

Image
so with the rather labor intensive suspension behind us you can start to build up some parts of the interior
i later found out that the interior is far from complete
it lacks a radio and ammo rack for the gun
i found 1 photo of the interior online and used that to check if i should scratch build something that coul be visible from above when you look inside the vehicle
that wasn't the case so i decided to leave it like it is in the box

Image
here is the partialy build up interior
the steering wheels and seats will be painted seperate

Image
and the forward looking drivers workspace

Image
once the interior is at this point you need to glue the upper and lower part of the lwer hull together
once that is dry and set you need to attach the steering arms

Image
some bump stops are added on one side of each suspension arm

Image
the view ports on the upper hull where placed
i Always find them a little fiddly to put together but they fit good
i decided that as the diorama scene is in a resting setting the viewports could be opened up as i think it looks more intresting then closed

Image
here it is on the inside

Image
when the interiors of both vehicles where ready i primed them with ammo grey primer
the interior color is a mix of Tamiya flat white and dark yellow
i mixed them in about a 4:1 ratio to get a off white wich resembles the creme white/creme weiss of the real vehicles
it looks white though but when i sprayed some on a white sheet of paper i noticed the difference
then i painted the gasmask cans with Vallejo german grey as a basecolor
the fire extinguisher is painted with Vallejo red

Image
the gasmask cans where drybrushed with Vallejo german field grey WWII

Image
the seats where painted in Vallejo leather brown and dry brushed with Vallejo yellow ochre for some worn spots

Image
a better view of the "worn"spots on the seats

Image
the steering wheels of both vehicles where painted with Vallejo black

Image
once all the seperate parts where painted i used a piece of sponge to make chipping effect on the interior
my paints of choise for this are Vallejo modelcolor german camo black brown and Ammo for Mig chipping color
these 2 colors are about the same so i use what ever is closest to me and easiest to pick of the shelf

Image
once everything is painted i sprayed on 2 thin coats of Alclad aqua gloss
once that was dry i used Ultimate light dirt wash to highlight the interior details a bit and to get the floof panels a bit dirty

Image
after a little bit of cleaning they looked like this
they where then flat coated with AK ultra matte varnish

Image
the last bits and bobs where glued in place

Image
with the interior done you can button up the hull and glue on the fenders

Image
i added a small detail in the form of a electric wire for the headlight (wire is next to the horn)
i used a bit of 0.5mm leadwire for this nd glued it on the light's base and folded it around the fender

Image
the front part is finished up with the width indicators and the large bumper

Image
the bracket for the spare wheel was added
you can choose if you want to add this part or leave it off all together
ofcourse you can add just the bracket and leave the spare wheel off too

Image
the exhaust mufflers where added

Image
all the tools and brckets for the jerrycans are next
i want to paint the jerrycans seperate as i think this is easier
besides that if i remeber correctly the kit supplied straps for the jerrycans have a poor fit and they are rather thick so i will make some out of tape and wire or with leadfoil to replace them

Image
the other side

Image
so with the hull basicly complete (only the wheels are missing) you can get to work on the turret

it starts with the mount for the weapons and gunsight

Image
then the KWK 38 is put in place

Image
the seats and steering wheel of the turret are next

Image
the cleaned up turret armor
it still looks a bit thick to me but i wasn't planning on sanding it down

Image
the gunmount was placed on the turret ring

Image
the mesh covers for the turret where put together

Image
the MG42 was added once the turret was put together
i added a drum magazine from the spares box for a bit of added detail

Image
the mesh screens where put in place

Image
some brass antennas where added
the 2 mtr antenna is from Aber and the star antenna is from orange hobby

Image
the fully build up model before painting

Image
as one of the last steps you can put these massive wheels together

Image
and finally the jerrycans
you get pe for 6 of them but you get 9 cans
i will put the ones without the pe in the spares box once they are painted and weathered

and that is all i have for now
as you can see in one of the last pics it is a pretty nicely detailed kit
i liked building it allthough it is a shame the interior is incomplete

so i hope to be back with a new update very soon
untill next time and thanks for stopping by
cheers, Mark
On the bench
GB builds
1/35 Trumpeter M1132 ESV

Personal builds
1/35 Hobby Boss M1070 tractor with M1000 semi trailer and Meng M1A2 TUSK II Abrams
1/35 Takom V2 rocket with the Meillerwagen and SS100 tractor
User avatar
rwsmith14
Sergeant Major of the Army
Posts: 1277
Joined: Thu Jun 05, 2014 1:24 am
Location: Aledo, TX, USA
United States of America

Re: German recon unit at the Siegfried line

Post by rwsmith14 »

The suspension looks great.

Mark, are those the kit Tires?.. if they are... they look impressive !
Image
User avatar
MarkVerploeg
Major
Major
Posts: 4837
Joined: Wed Oct 16, 2013 12:21 am
Location: Oss, Noord Braband The Netherlands
Netherlands

Re: German recon unit at the Siegfried line

Post by MarkVerploeg »

Thanks RW
Yes those are the kit tyres
The detail on them is very good and the ones that will be used are uild up of only 4 parts the spare one 3
So not those things where you have to glue 8 discs together to make 1 wheel
They did need some presure when i glued them though as a few where a little bend but nothing serious
On the bench
GB builds
1/35 Trumpeter M1132 ESV

Personal builds
1/35 Hobby Boss M1070 tractor with M1000 semi trailer and Meng M1A2 TUSK II Abrams
1/35 Takom V2 rocket with the Meillerwagen and SS100 tractor
User avatar
MarkVerploeg
Major
Major
Posts: 4837
Joined: Wed Oct 16, 2013 12:21 am
Location: Oss, Noord Braband The Netherlands
Netherlands

Re: German recon unit at the Siegfried line

Post by MarkVerploeg »

Hi guys
So with the end of this SIG coming closer by the minute
I thought it was time to do some updates as i am nearly done with the build but the groundwork of the diorama is still drying a bit
So while that is happening i will do those updates
For this one i will do the painting and weathering of the vehicles

Image
I don't have step by step photo's of the camoscheme
But the base is mr hobby aqueous H403 dark yellow
The dark green and red brown are both feom tamiya and where dulled down with buff color to make them look more fades
I didn't do any form of pre shading or panelfading on them as i thought the weathering would do enough this time

Image
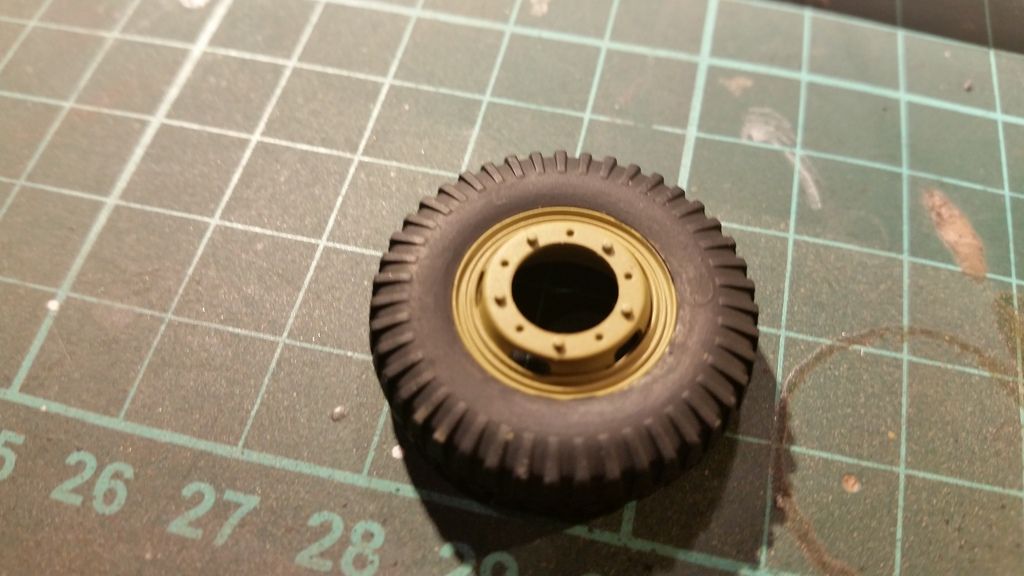
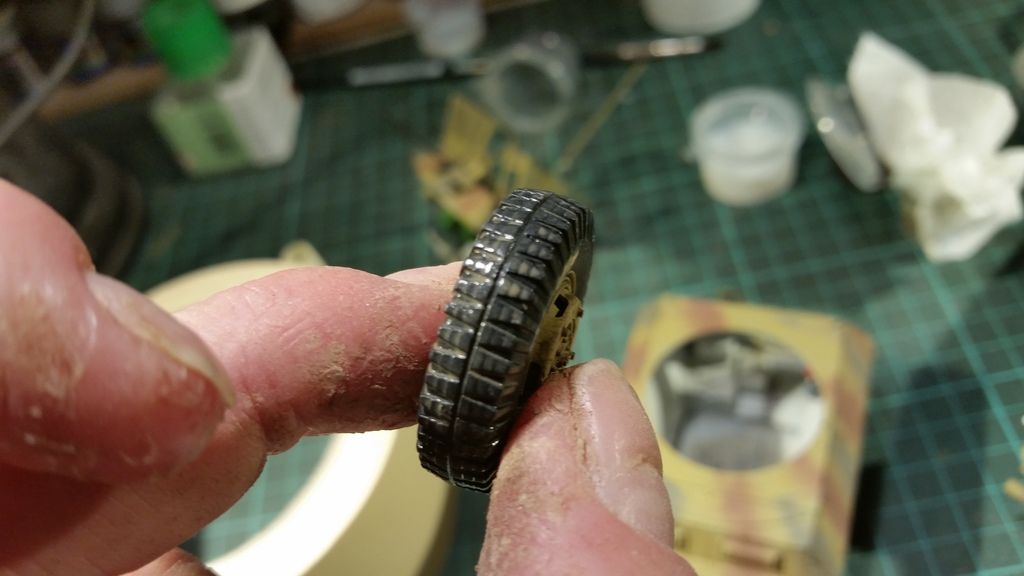
To start the detail painting i began with the wheels and tyres
The wheels are in the basecolor of the vehicle and the tyres are painted with a 4:1 mix of vallejo black and german grey to make this very dark grey color wich is nearly black

Image
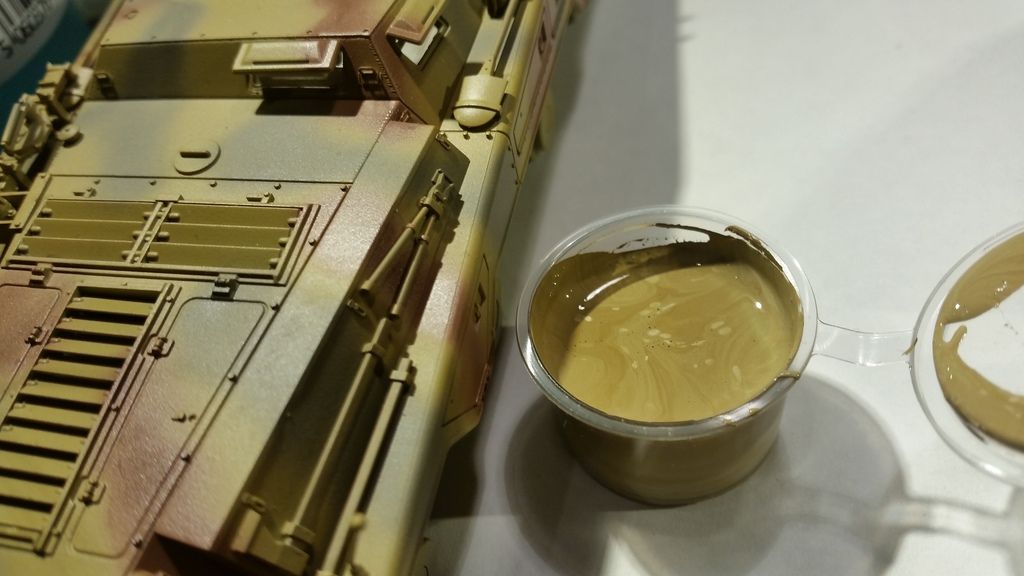
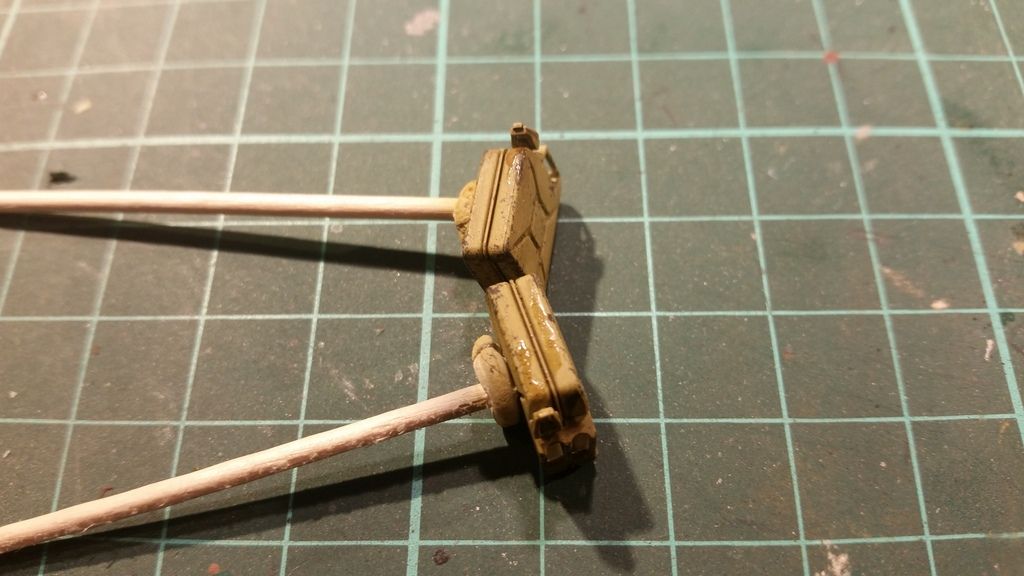
I then started with the tools
I always begin with the handles
As a basecolor i make a mix of Vallejo English uniform and white in a 4:1 ratio
As it is hard to see on the vehicle i placed the cup of pai t next to it so you get an idea of the color

Image
To make them look like they have a woodgrain and a laquered finish i use vallejo smoke
This is applied in a similar way as you would do with dru brushing but i leave more on the brush so i can drag the paint over the tool handle

Image
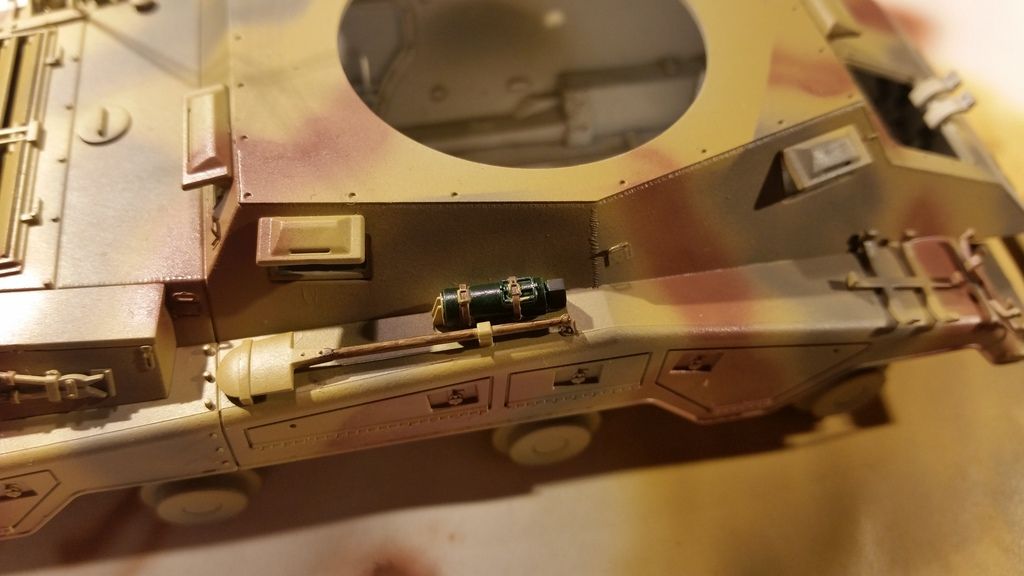
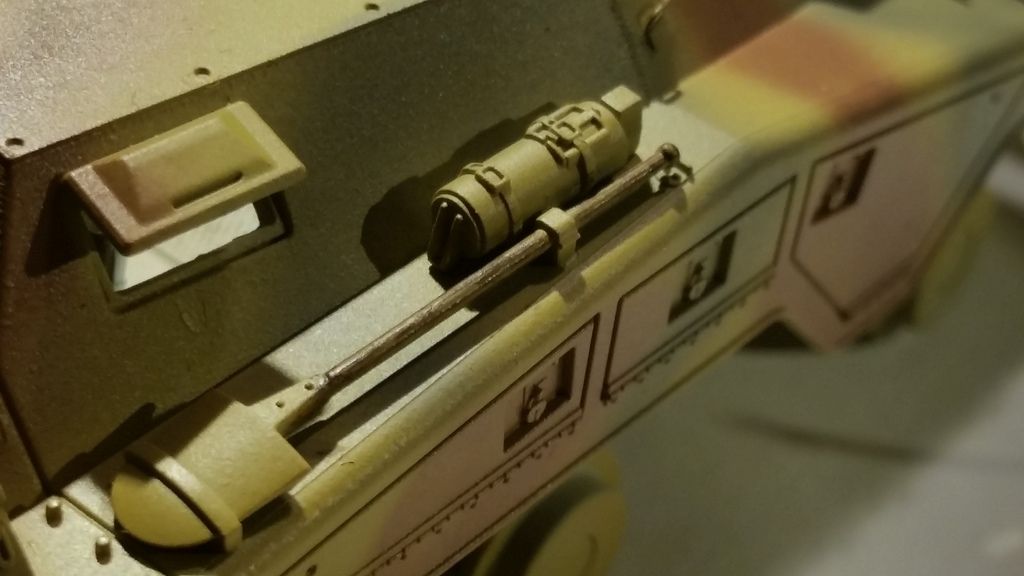
While the tools where drying i painted the fire extinguishers with vallejo military green
The straps that hold them in place are painted with vallejo leather brown

Image
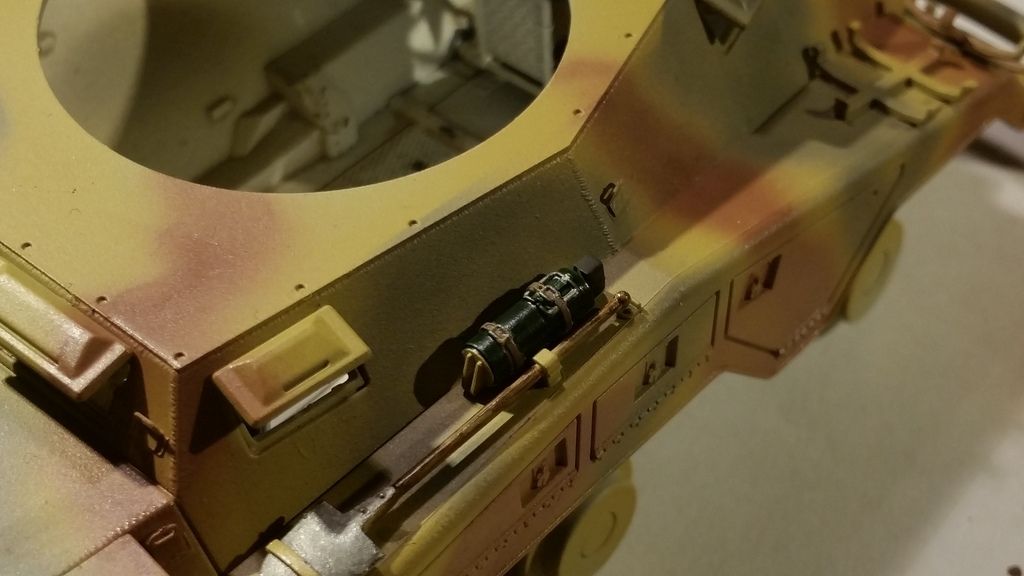
The straps where finished by painting the buckles with mr metal color stainless steel
The head of the fire extinguishers where painted wuth the same paint as i used on the tyres

Image
The metal parts of the tools where also painted with the mr metal color stainless steel to finish them

Image
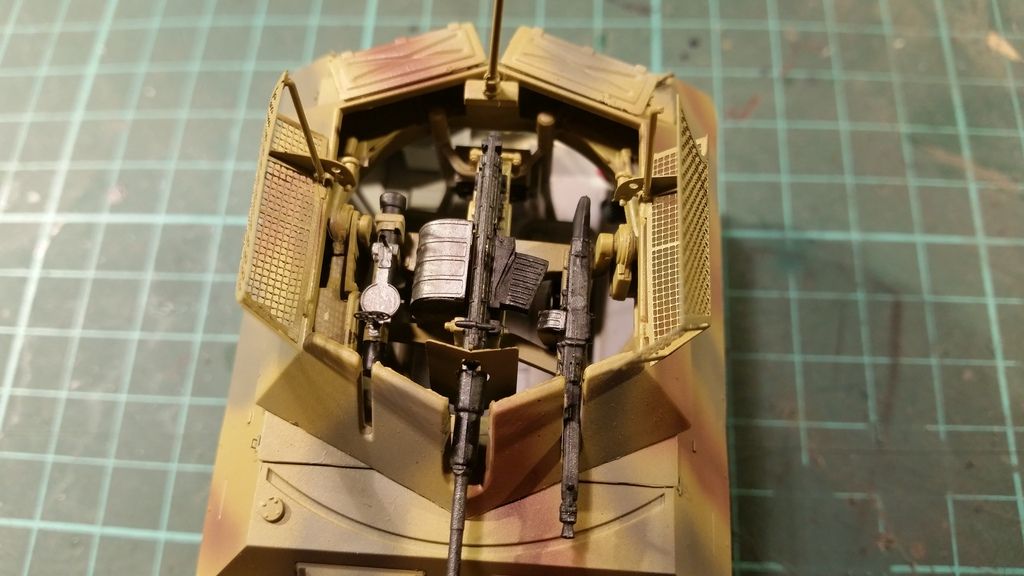
The 2cm cannons and the MG42 where painted with mr metal color dark iron and slightly vuffed around the raised details
The covers that are mounted next to the guns are painted in the stainless steel color and where also slightly buffed

Image
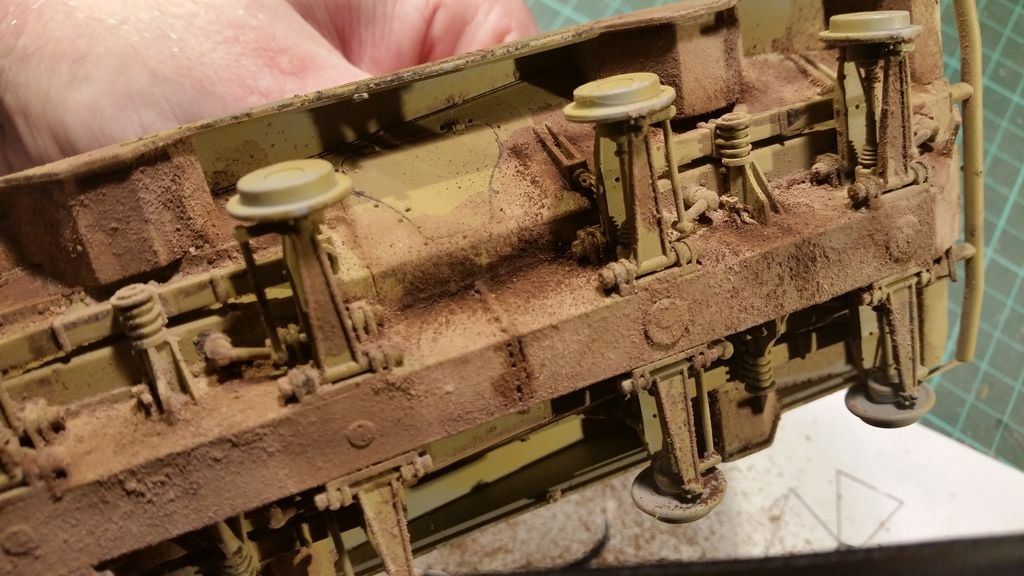
To complete the interior work i sprayed the lower parts of the turret with the same creme weiss as i used for the rest of the interior
The radio has some vallejo red and white on it to make it look a bit more intresting
The shell casing boxes are painted with vallejo german camo bright green

Image
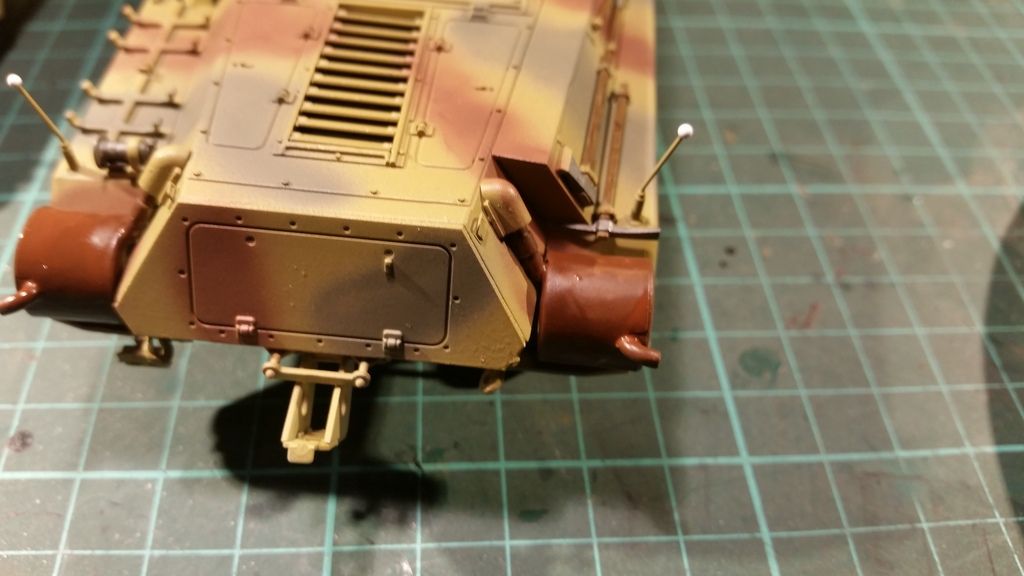
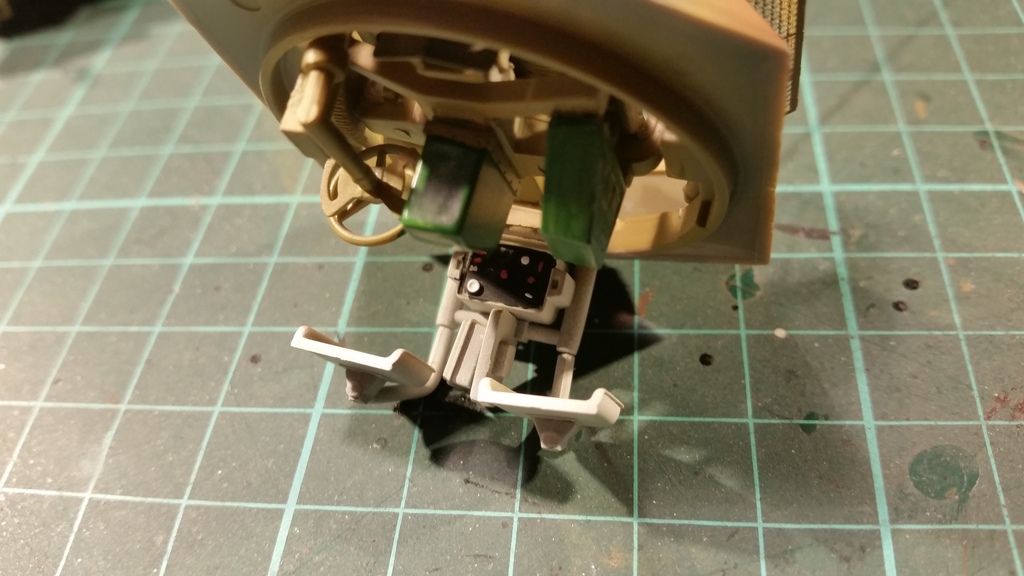
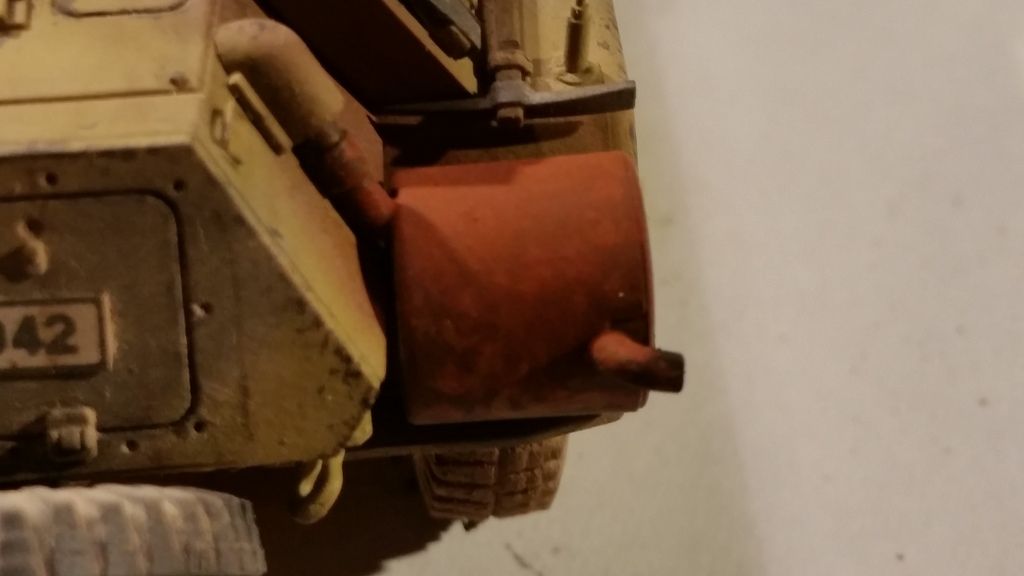
Since all the other painting jobs where done i started working on the exhausts
I use 3 colors from the Ammo for Mig range
This is the first one and it is old rust

Image
I then stippled the second color on them
This is dark rust
I try to make it look as random as i can so it will look better in the end

Image
And the last color was added in the same way as the second
This time i used medium rust
At this point is looks very unrealistic but it only serves as a base for the pigments later on

Image
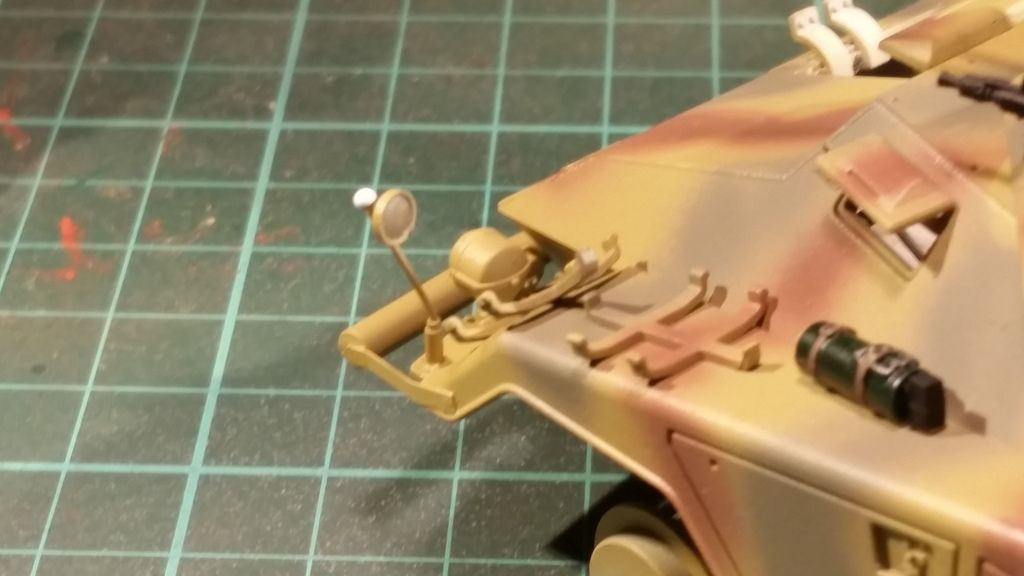
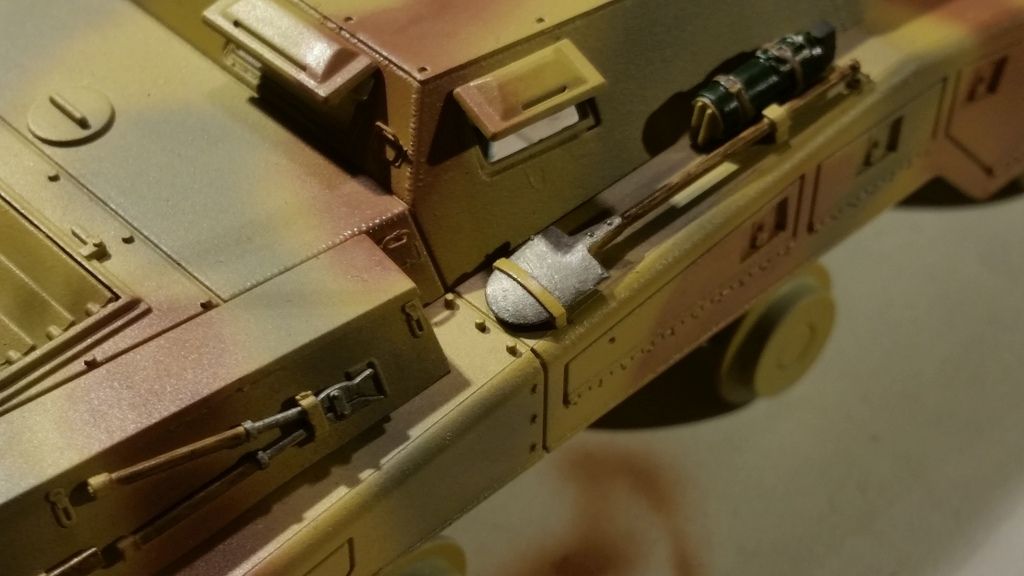
The mirror is painted with mr metal color chrome silver
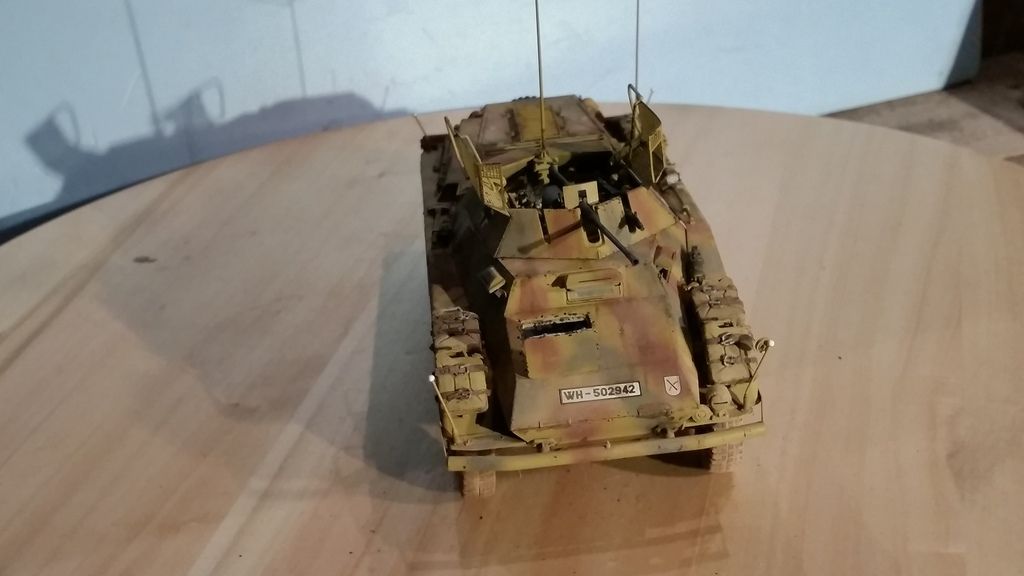
And the heads of the width indicators where painted white as that seemed to be the most common color used by German forces

Image
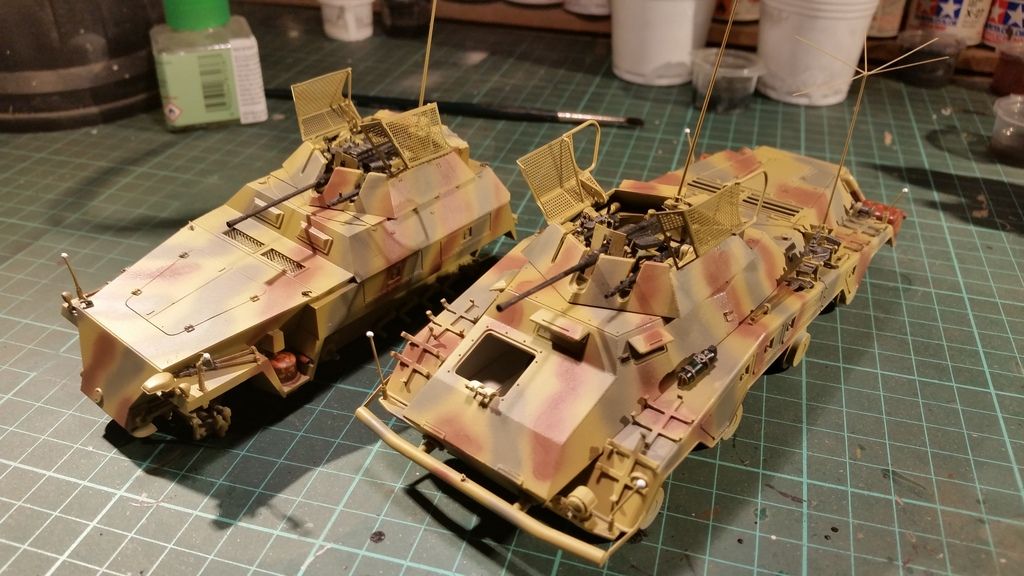
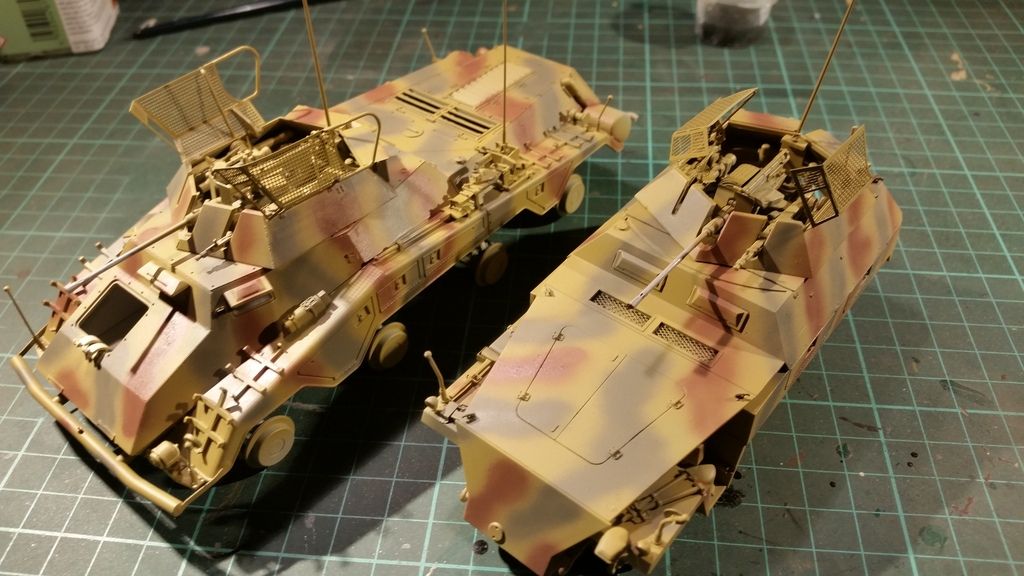
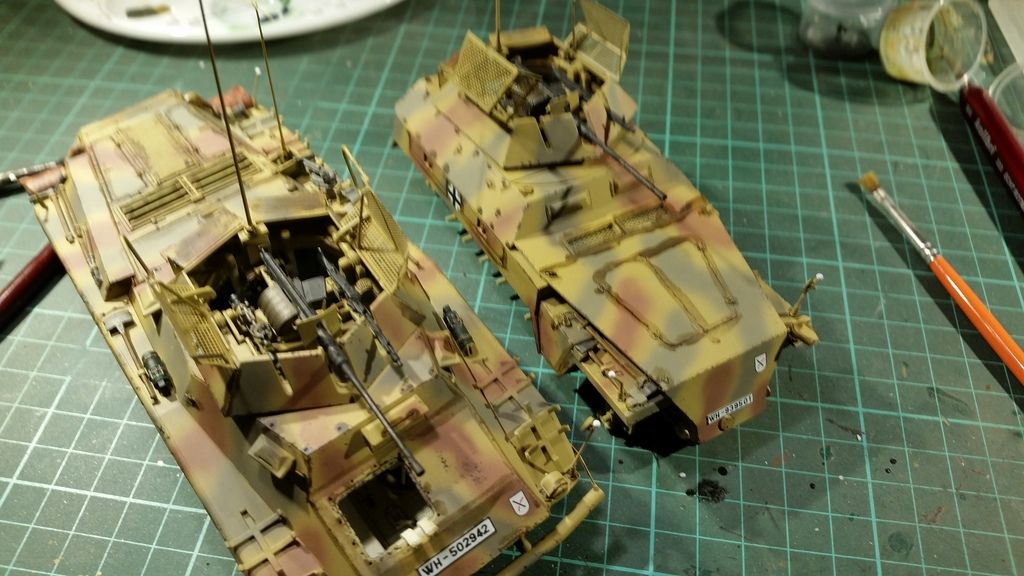
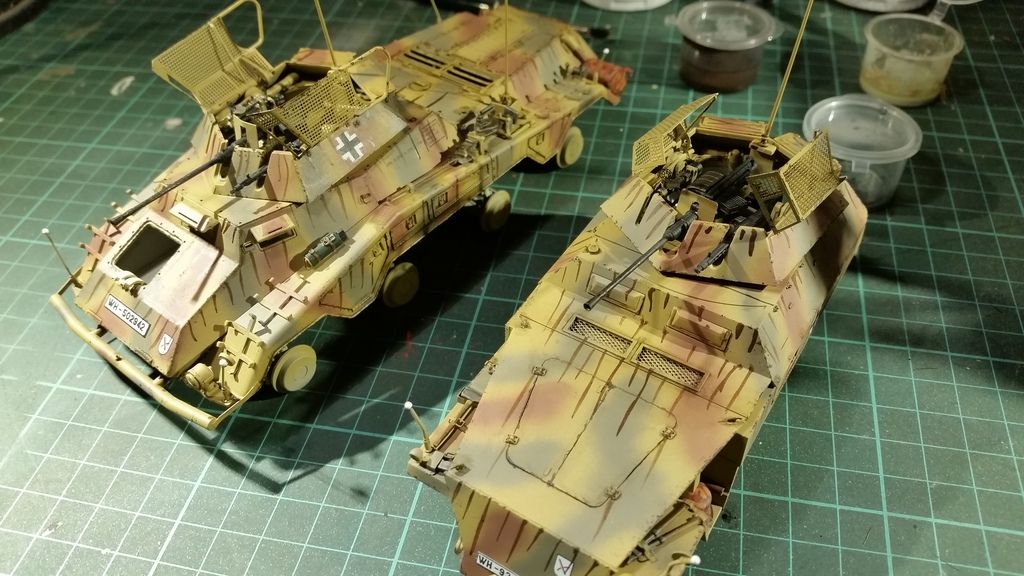
Here are the vehicles after the painting stages

Image
After a coat of vallejo satin varnish i applied the decals
For armor i prefer satin varnish over the now very popular Alclad aqua gloss as this varnish is just as strong but is easier to cover later on to get a flat finish
With the help of some microscale micro sol the decals went on without any problem

Image
I then started to add chipping
I used both a fine brush and a sponge where possible
I used vallejo german camo black brown for this

Image
The wheels also received some chipping

Image
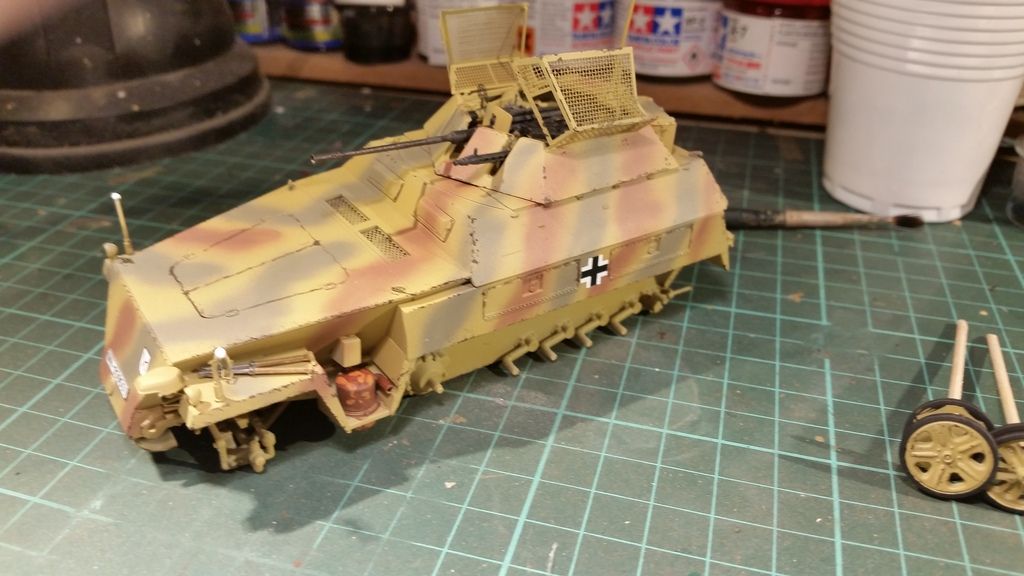
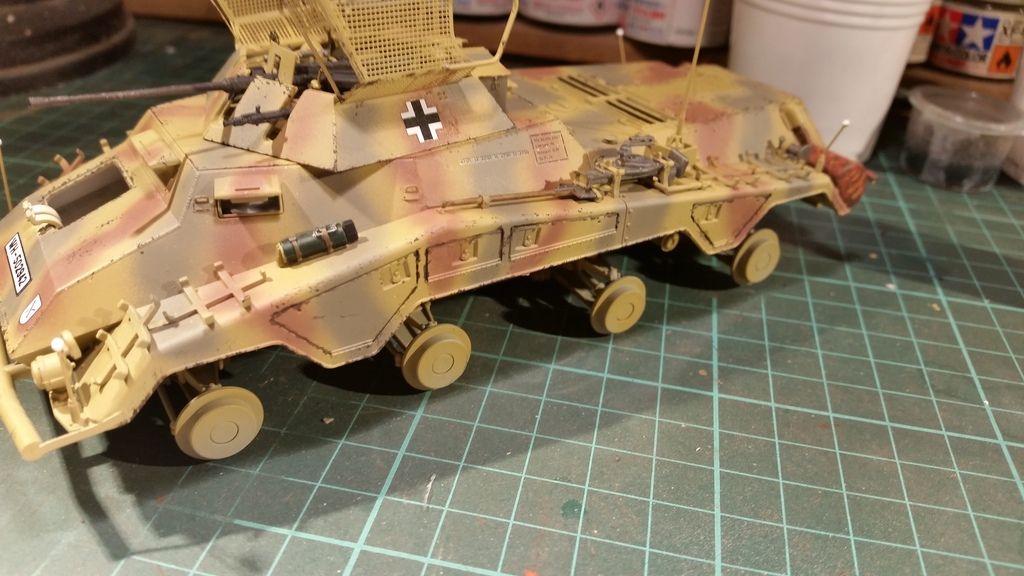
Just to show you guys the half track at this point of the build
It has all the same things to it as the 234

Image
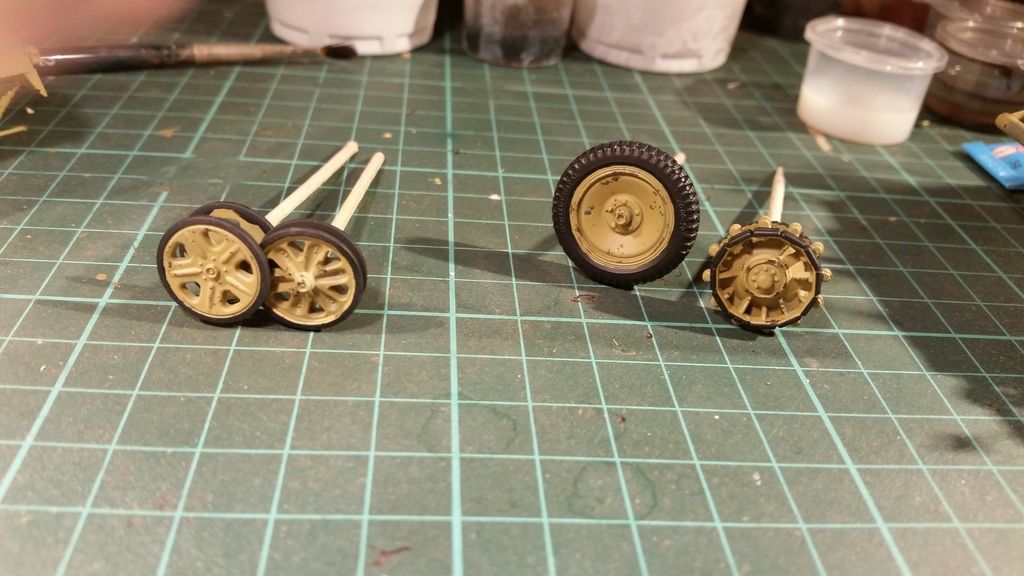
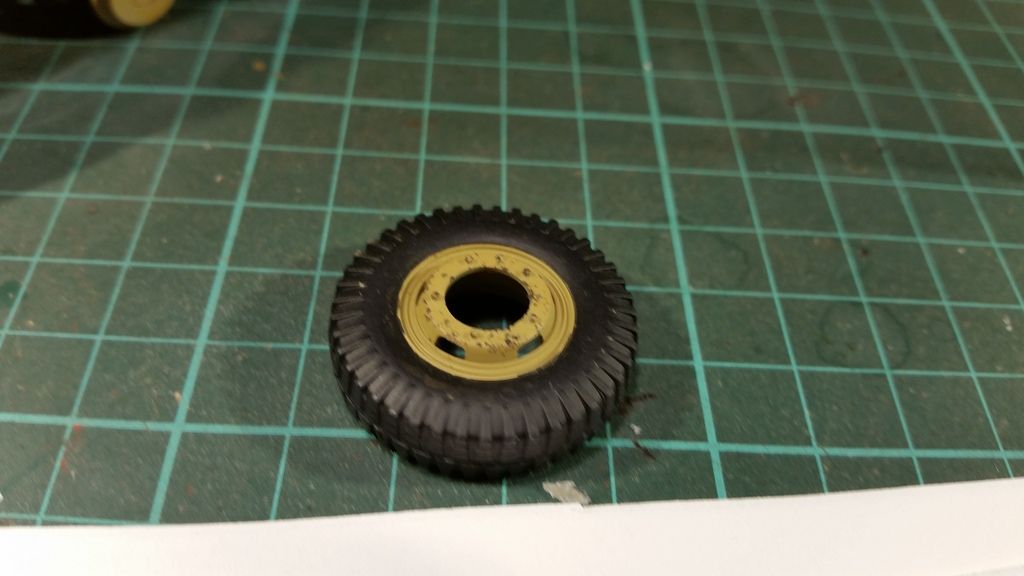
The wheels of the half track

Image
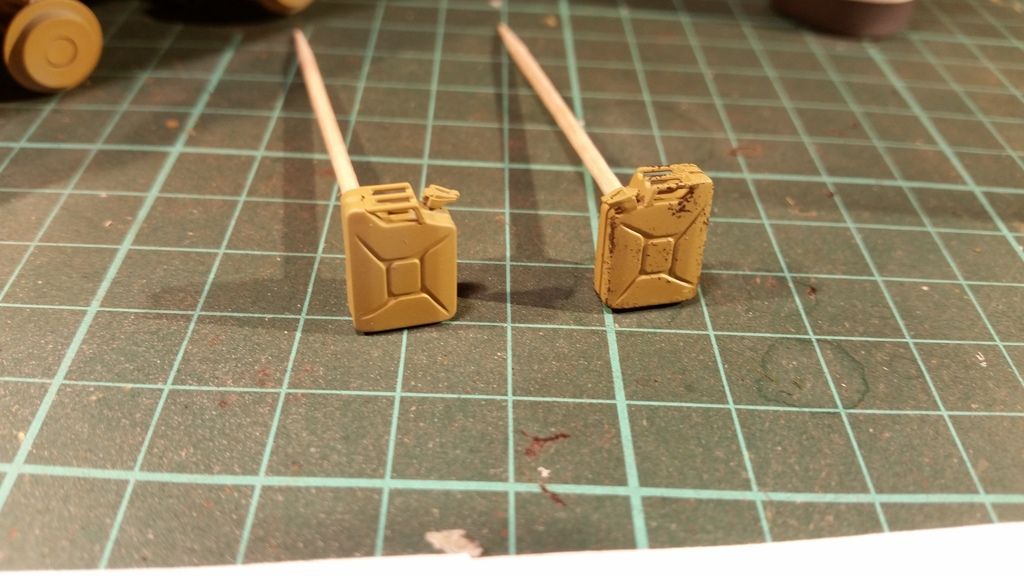
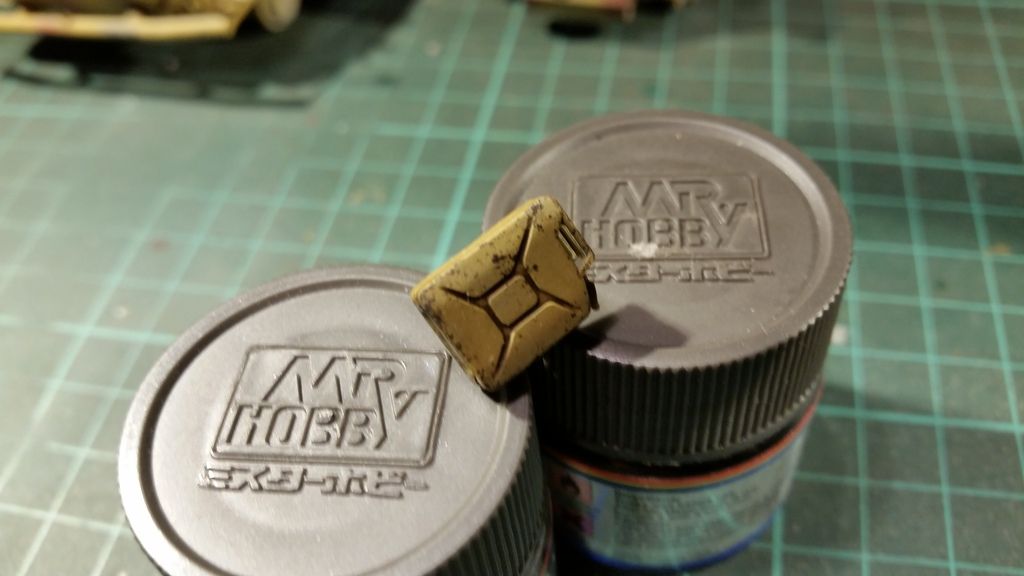
And while i was at it here are the jerrycans
Both in the base color and with paintchipping

Image
After the chipping was done i gave the models another coat of the satin varnish
And once that was dey i applied AK DAK wash on all the raised details and panel lines
I left it around the raised details like bolts and rivets but all other excess wash was removed with a brush moistened with thinner and some toiletpaper ( unused ofcourse :mrgreen: )

Image
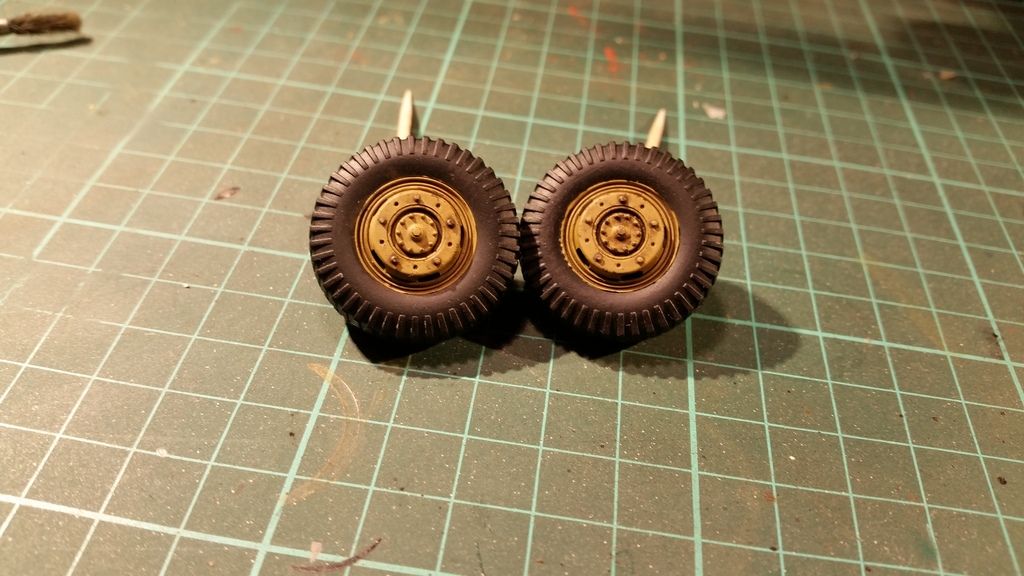
The same wash was used on the wheels

Image
And the jerrycans

Image
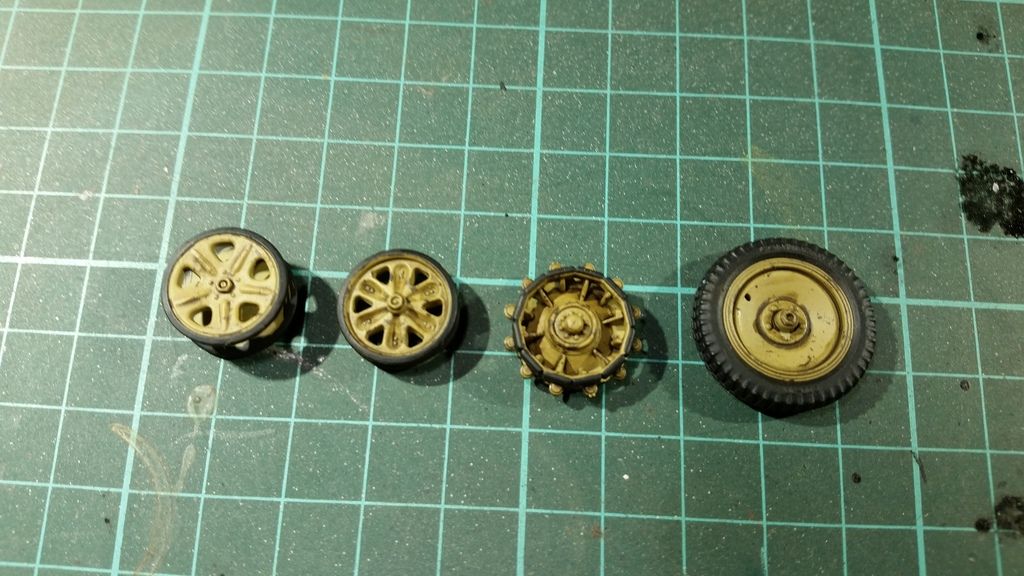
And on the half tracks running gear

Image
I then started working on the streaking effect
You can do this with oil paints and with pre made streaking grimes
I used the AK streaking grime for dark yellow vehicles as this is a dark brown
I applied small stripes on all the vertical parts of the vehicles
And left them to dry for about 30 to 60 minutes

Image
Then using a flat brush and thinner you can make them thinner and transparent untill they are less visible
It depends on your own taste how far you remove them and in this build i removed most of the streaking to leave only very thin streaks of dirt on the surfaces

Image
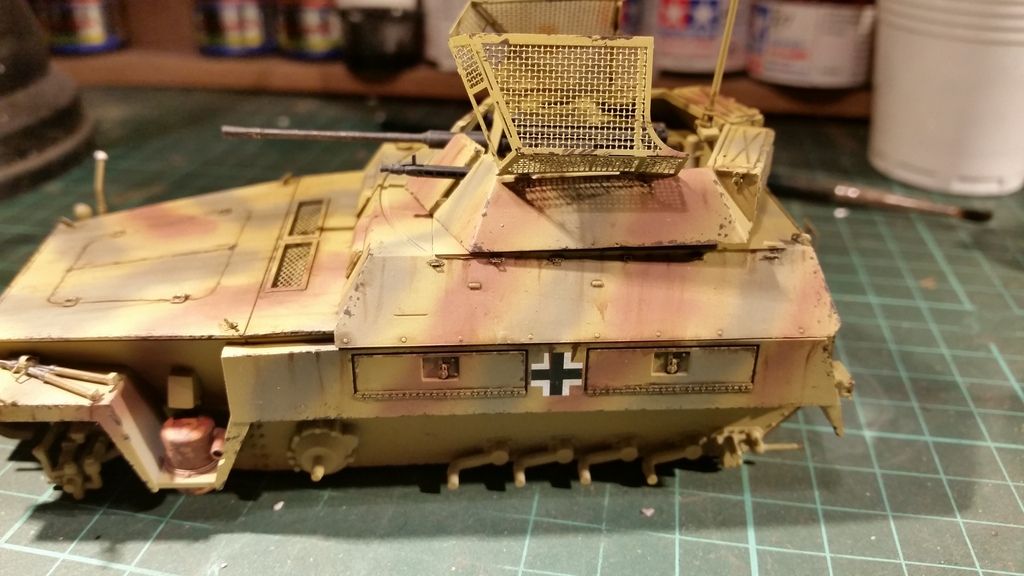
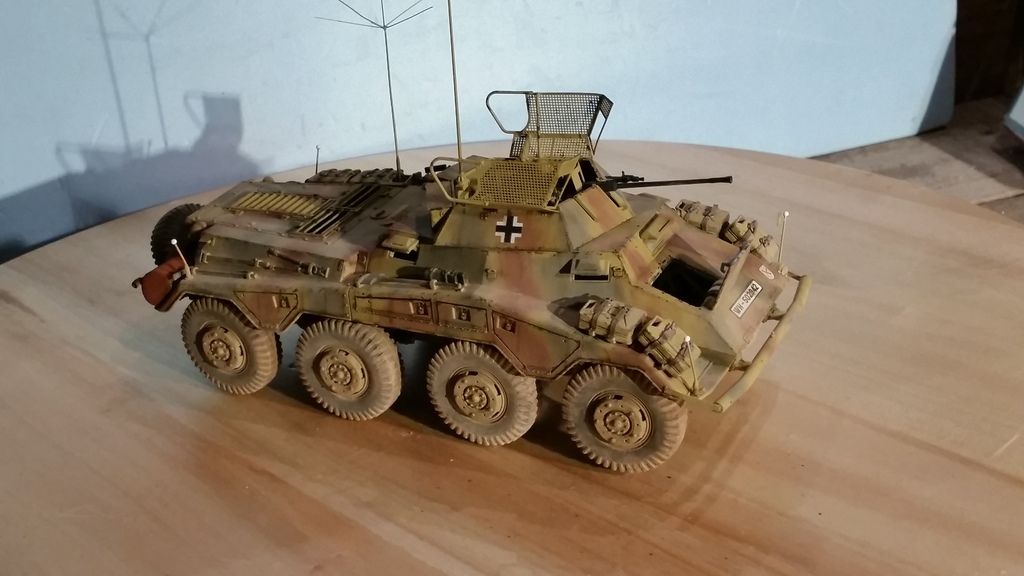
Herr you can see the end result a bit better

Image
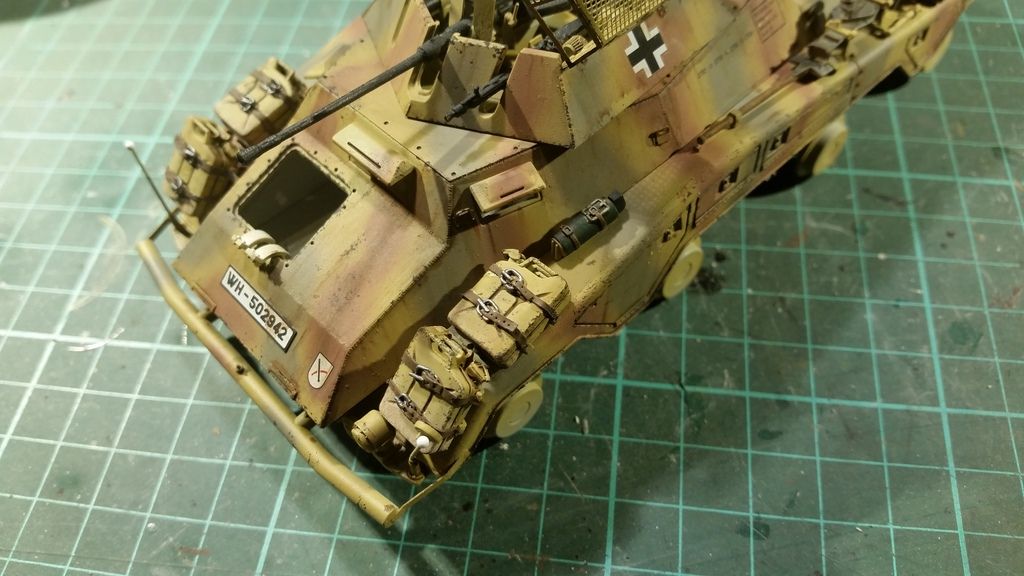
And the streaking effects on the 234

Image
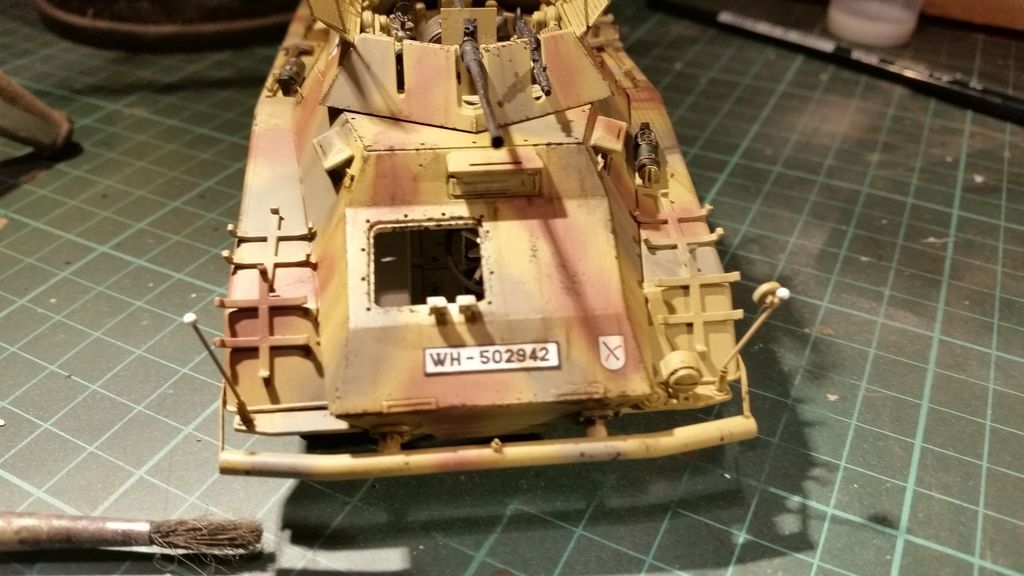
And as i was far too lazy to slap on a decal number plate with individual numbers i picked some Eduard pre printed photo etch plates and glued those on the vehicles

Image
Only a few spots of rust where added
I used Mig production light rust effects for this
For those who don't know this product it is a rust colored wash

Image
I then had a little shocker
I didn't like the thick and ugly straps for the jerrycans that where in the kit
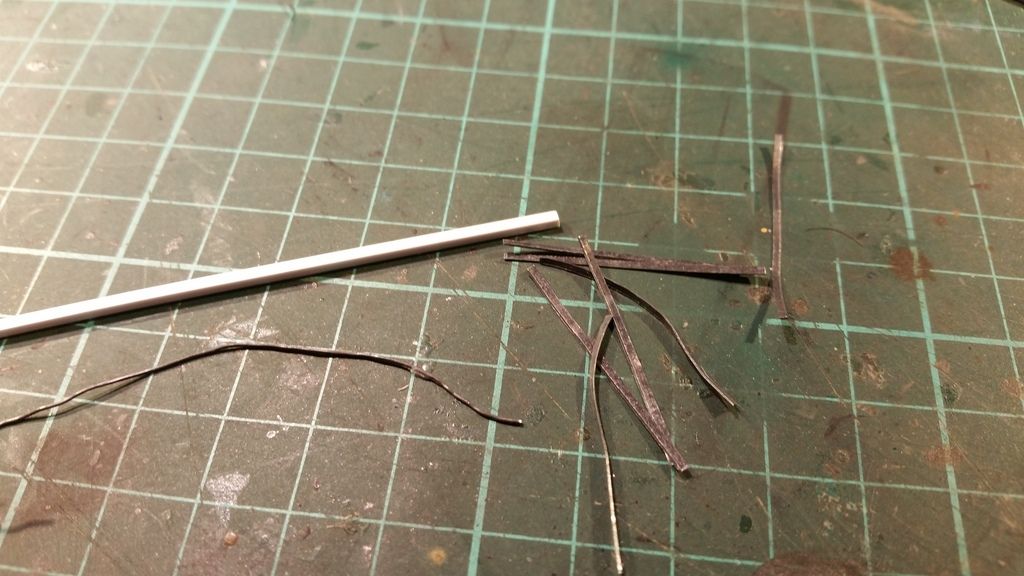
So i had to make some of my own
I used lead wire and lead foil that i have cut into strips
The square stryren rod is to shape the leadwire

Image
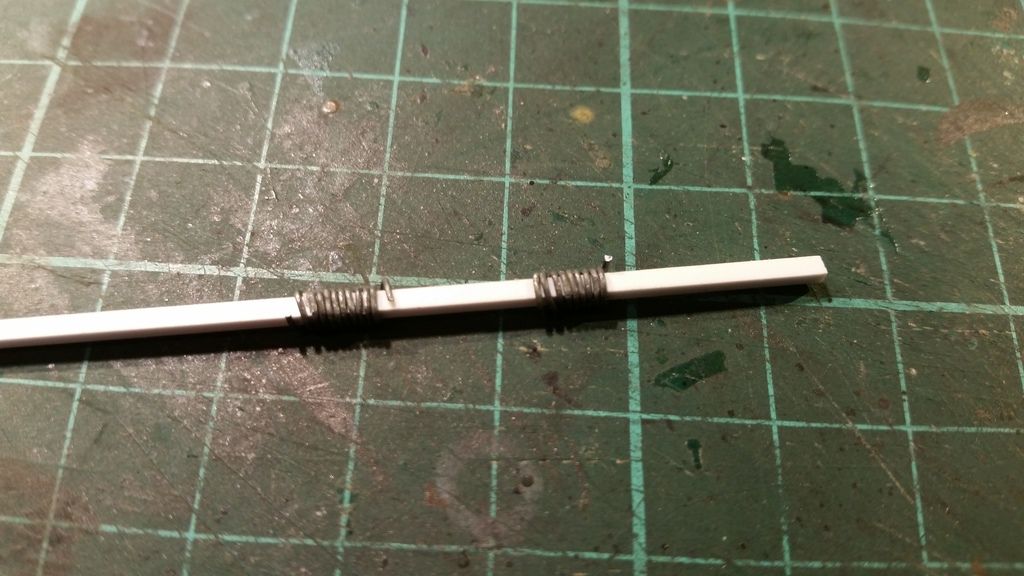
I rolled the wire around the rod to make a square spiral

Image
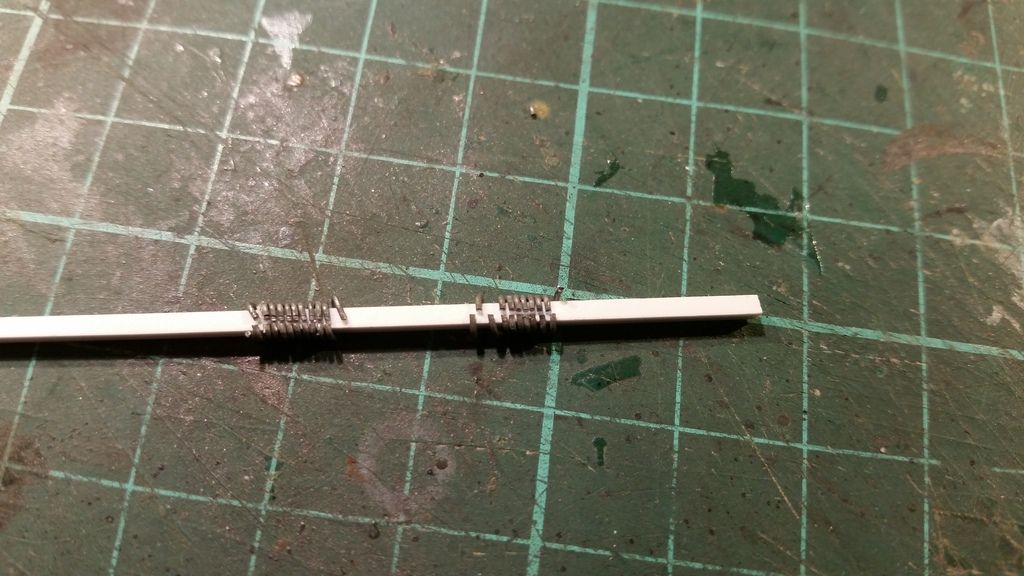
I then cut them in the middle to get individual buckles

Image
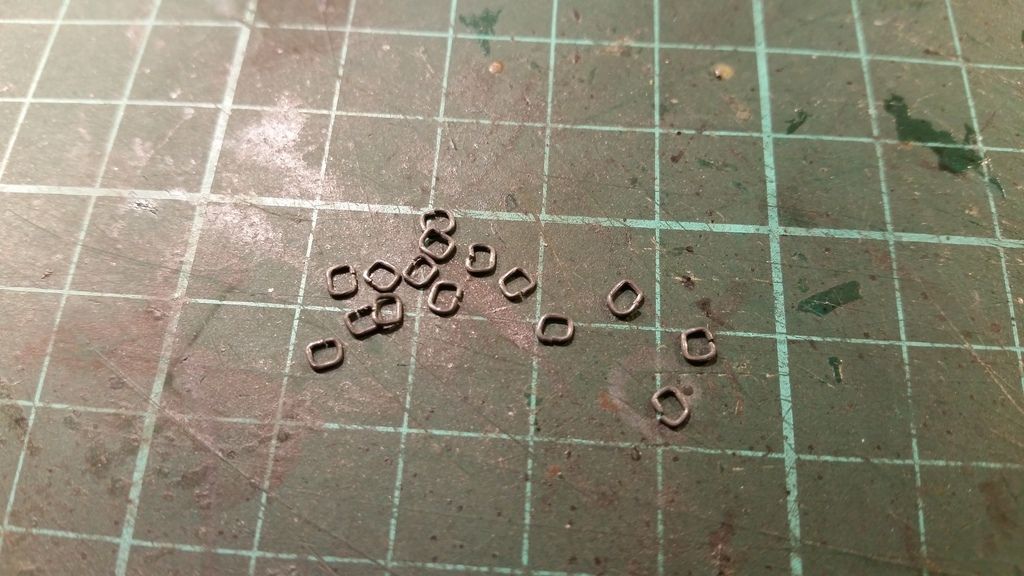
This is how they look when you remove them from the rod

Image
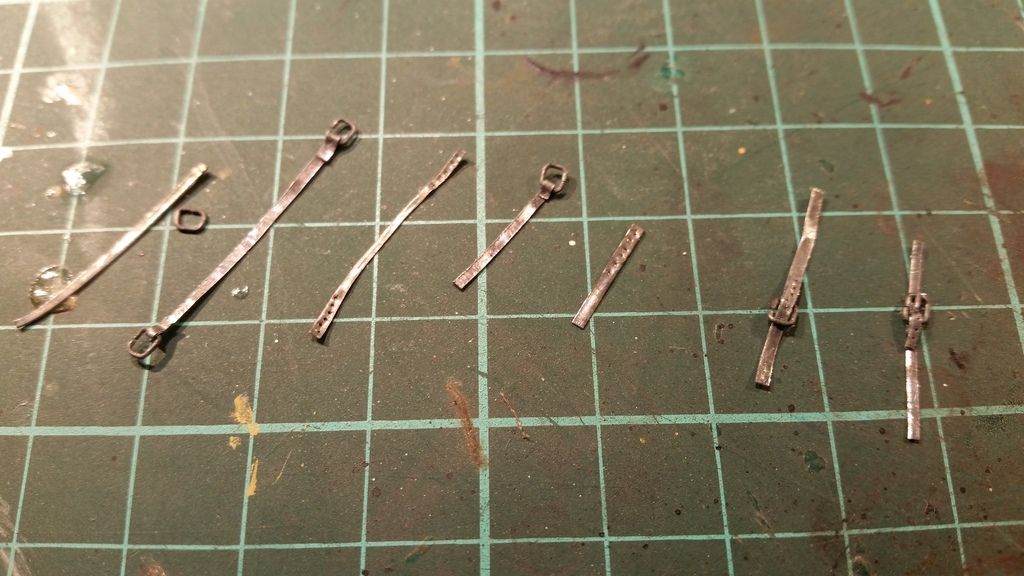
Here are all the steps
I made small holes in 1 strip for each strap to resemble the holes for the locking pin
The other strip was pulled through the buckles and folded and glued together

When both sides are ready i glued them together and added a.small pin to finish them

Image
Just before i glued the jerrycans in the holder i added a small streak of fuel residue with the help of AK fuel stains

Image
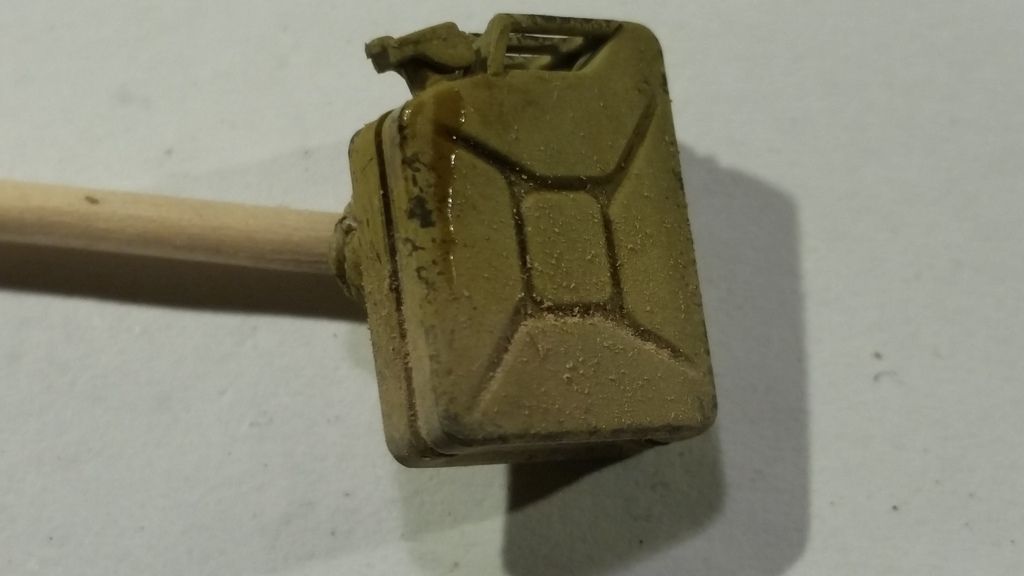
To finish the jerrycans i added some dust on the lower part of each can
Now they are ready to go on the vehicle

Image
Here they are placed

Image
And the straps where fitted
They are painted with vallejo leather broen and mr metal color stainless steel like the other ones on the vehicles

Image
Once all the paints on the vehicles where dry i sprayed them with AK ultra matte varnish wich i hardly thin at all and in this way 1 coat will do most of the times
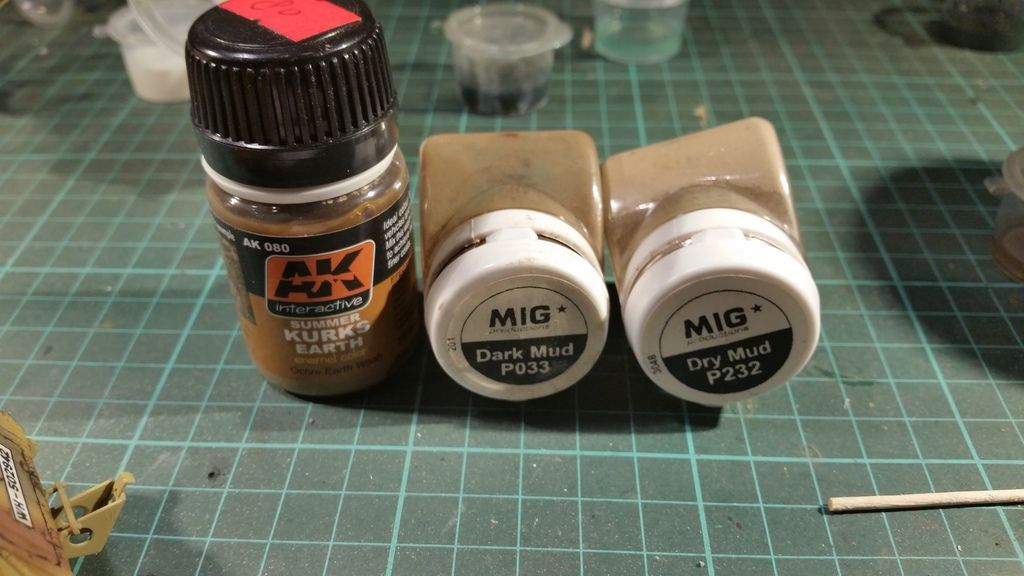
Then i started to prepare for the mud and dust effects
I used these 3 products for them

Image
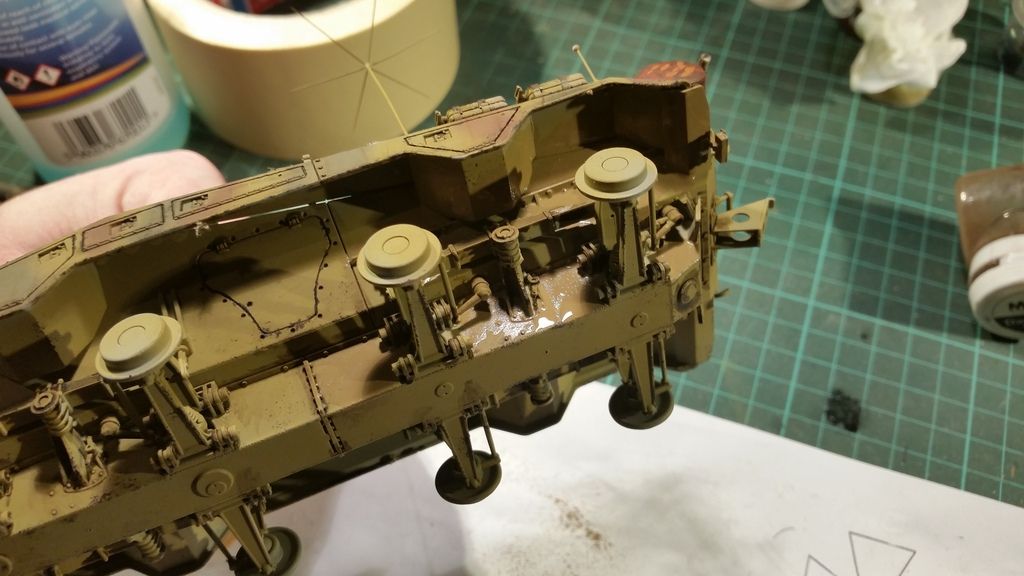
First i brush the Kursk earth effects on the hull
This serves as a glue for the pigments

Image
While that was still wet i added the pigments
I used the dry mud for the most parts and in some corners and recessed areas i used the darkmud to make it look like that was still wet

Image
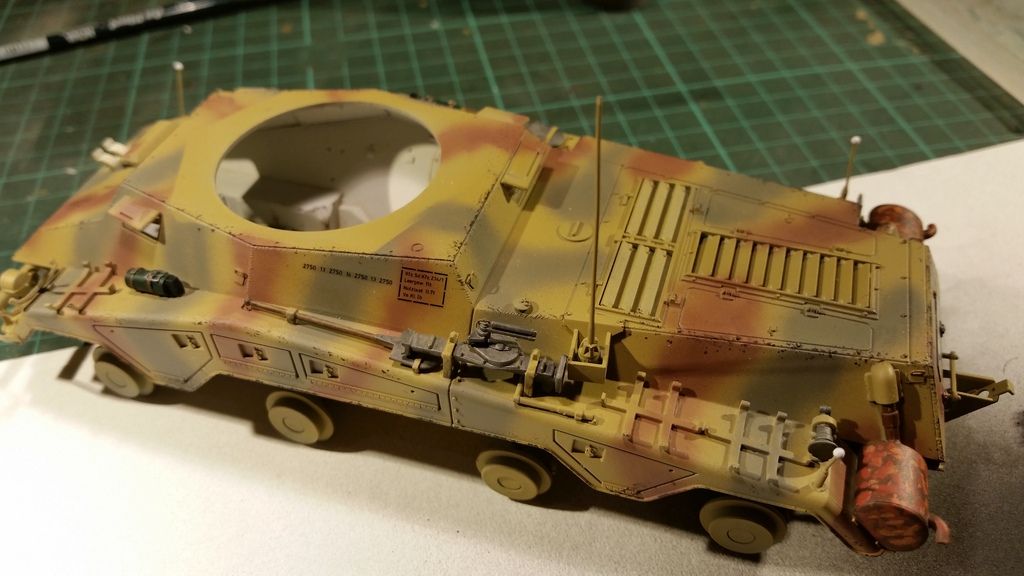
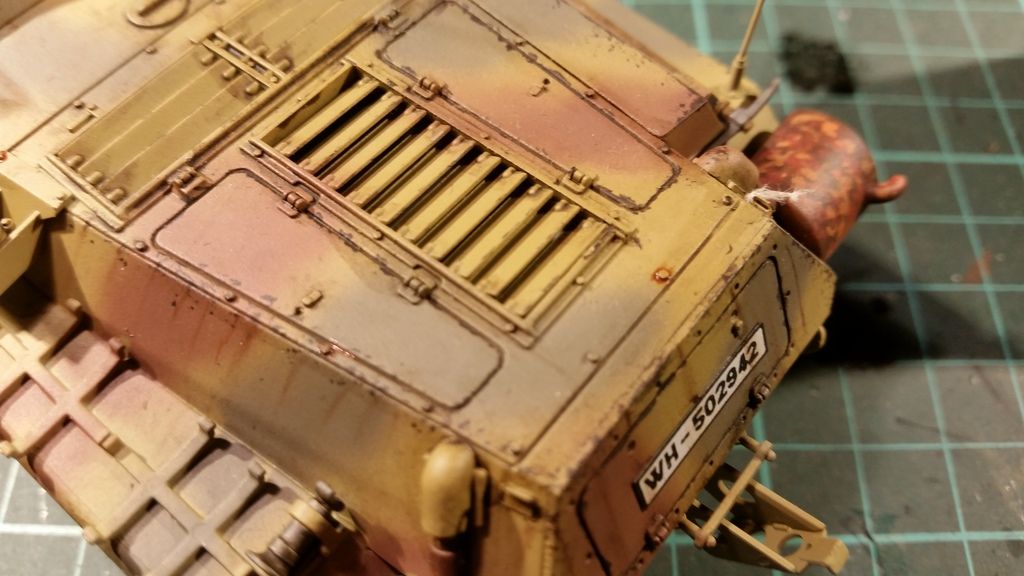
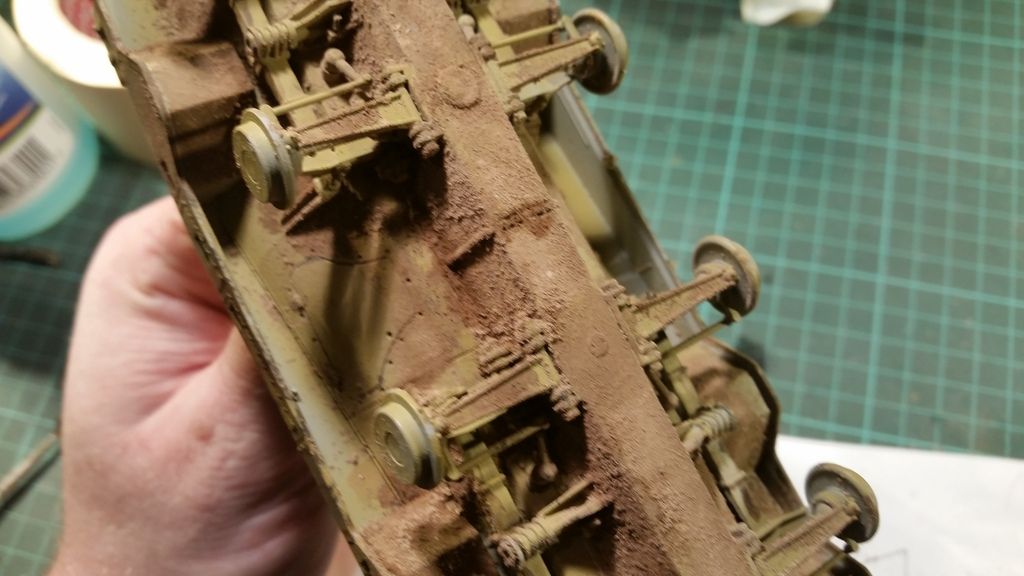
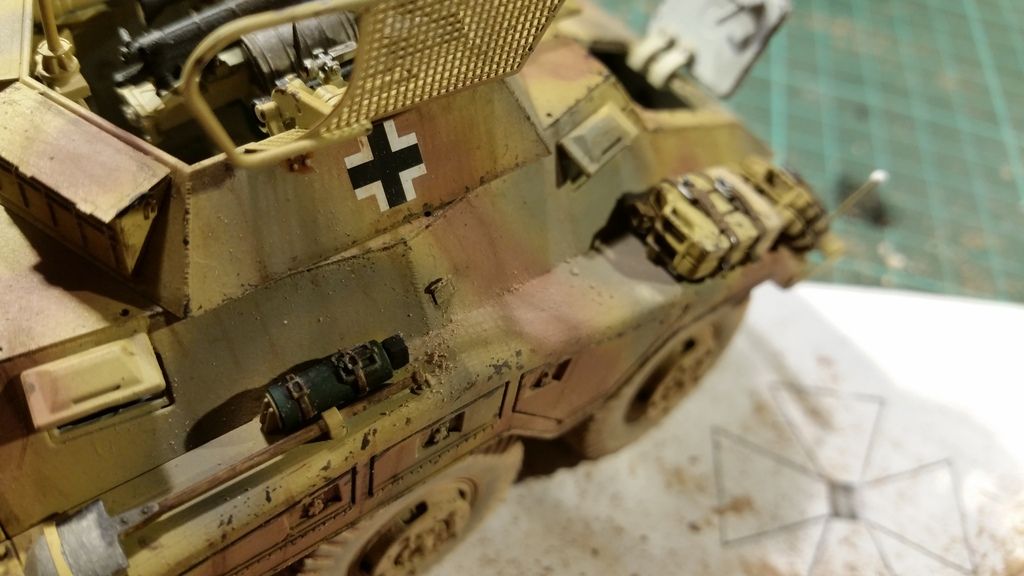
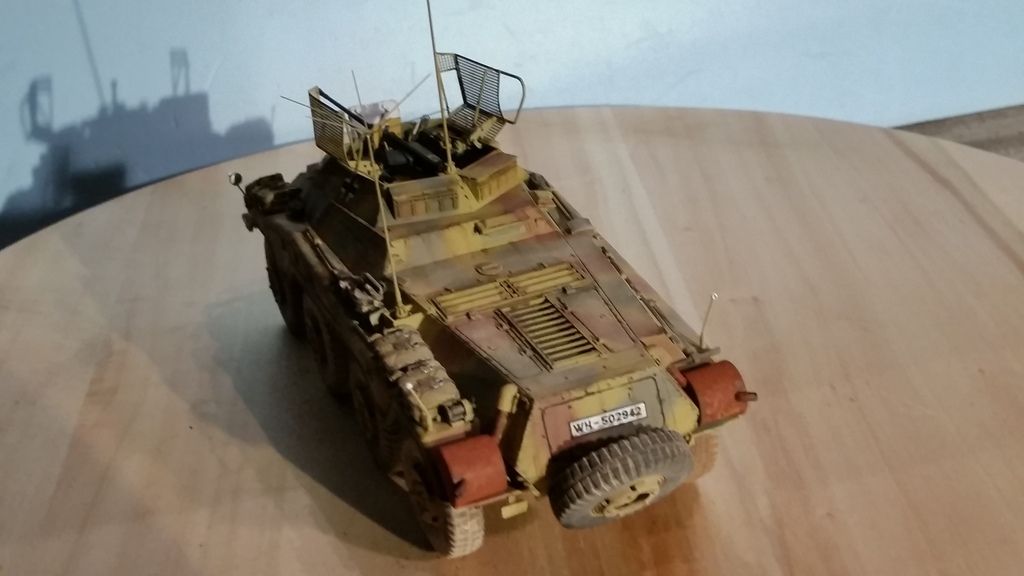
A better view of the entite hull of the 234

Image
The wheels where given the same treatment but this time i replaced the AK product with Ultimate light dirt wash
This was done to test if i could actually use it for things like this as i haven't used the Ultimate washes that much at this point

Image
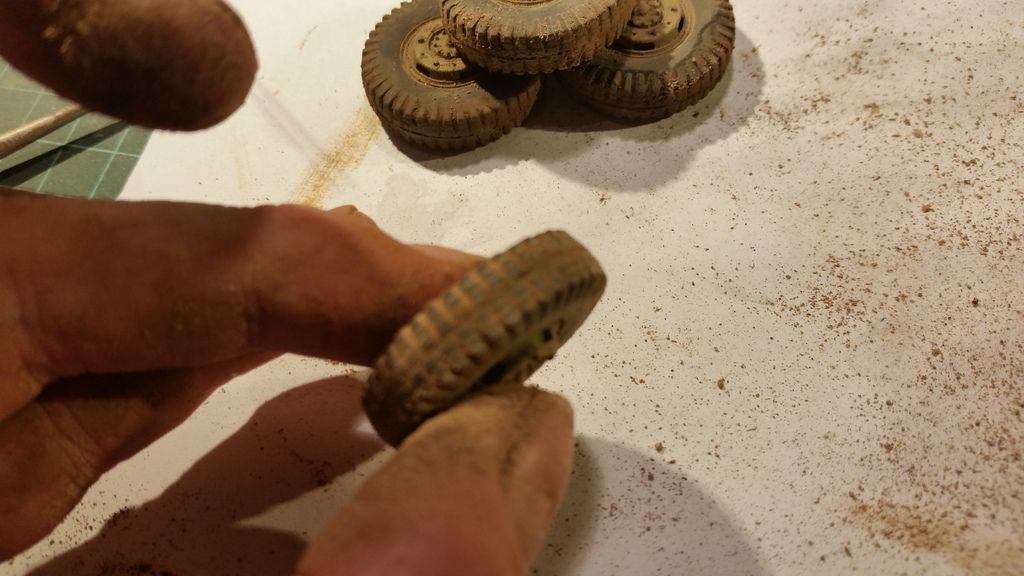
They where then covered with the same pigments as before

Image
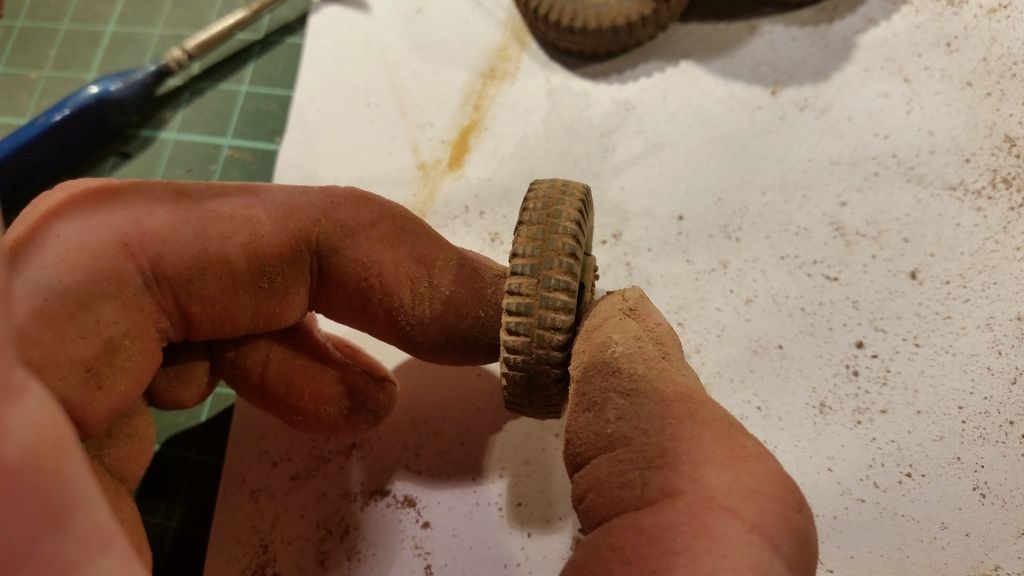
I rubbed of the excess pigments with a old brush

Image
And the sides where cleaned a bit too
And this is how i finished the wheels

Image
I forgot the photo for the tracks but i don't have any big secret on how i made them
They where primed in Ammo grey primer and then painted black
The metal was brush painted with mr metal color dark iron and then buffed a bit
They where then glued on the vehicle and received some pigments to blend them in with the rest

Image
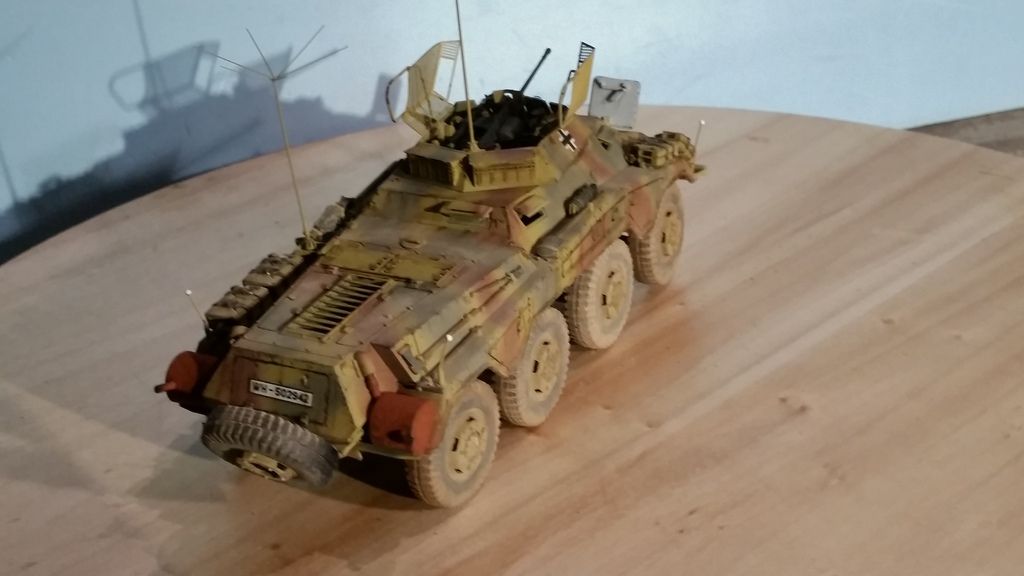
This is how the 234 looks with the massive wheels installed
After i made this photo i decided that it needed some more pigments on the sides so i added those later

Image
I dusted the fenders flat surfaces with the dry mud pigments

And that was the complete rub down on how i painted and weathered these vehicles

Image
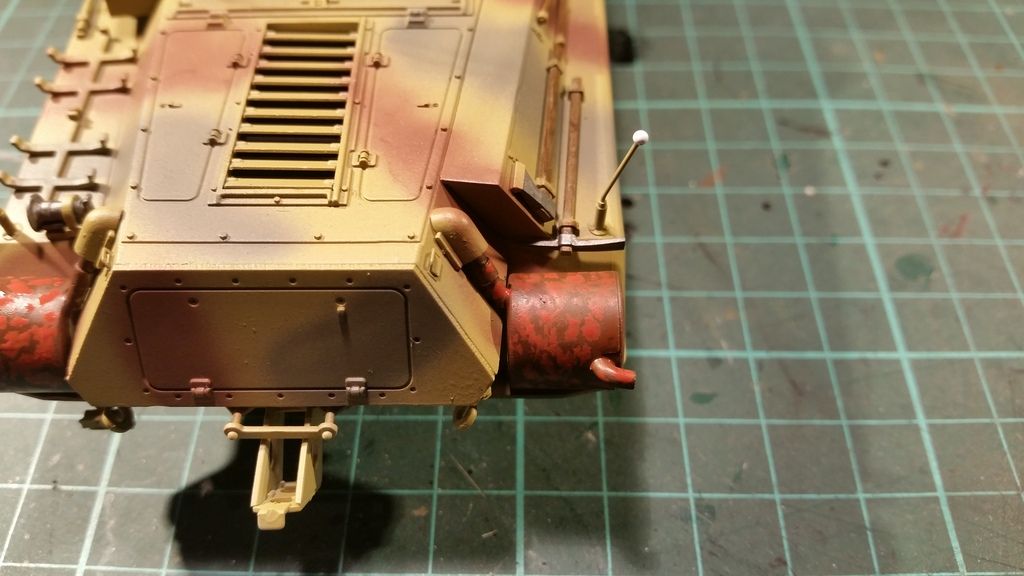
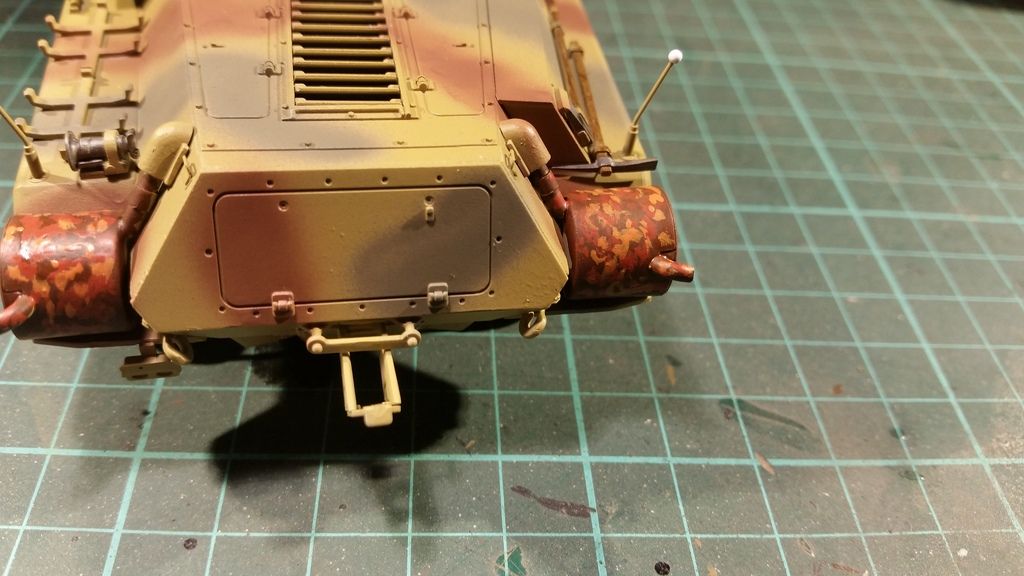
I then added mig prod. railroad rust to the exhausts
As you can see there is some tonal variation in them allthough not as much as i hoped for
The tips where dusted with a little bit of black smoke pigment for the soot

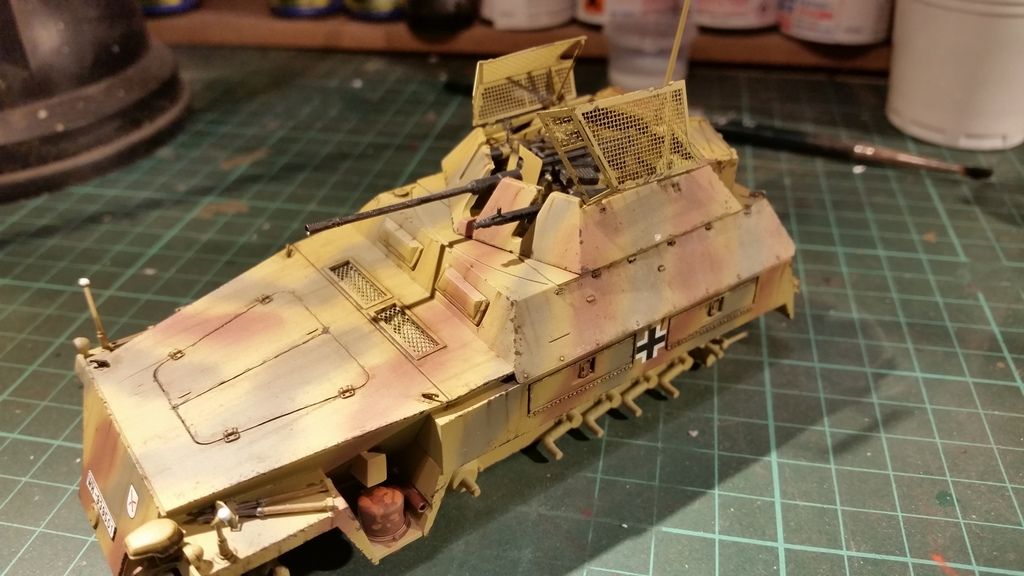
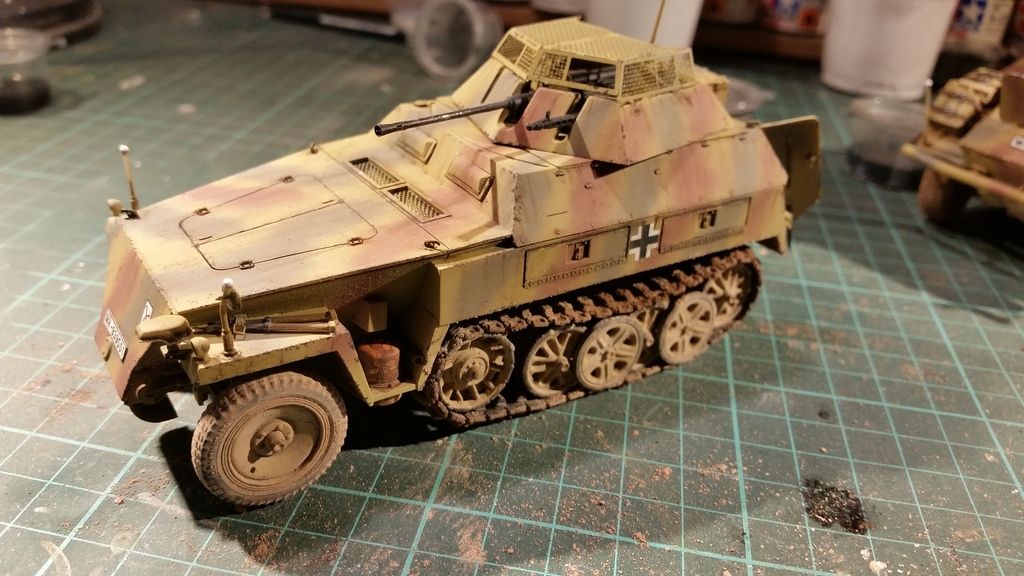
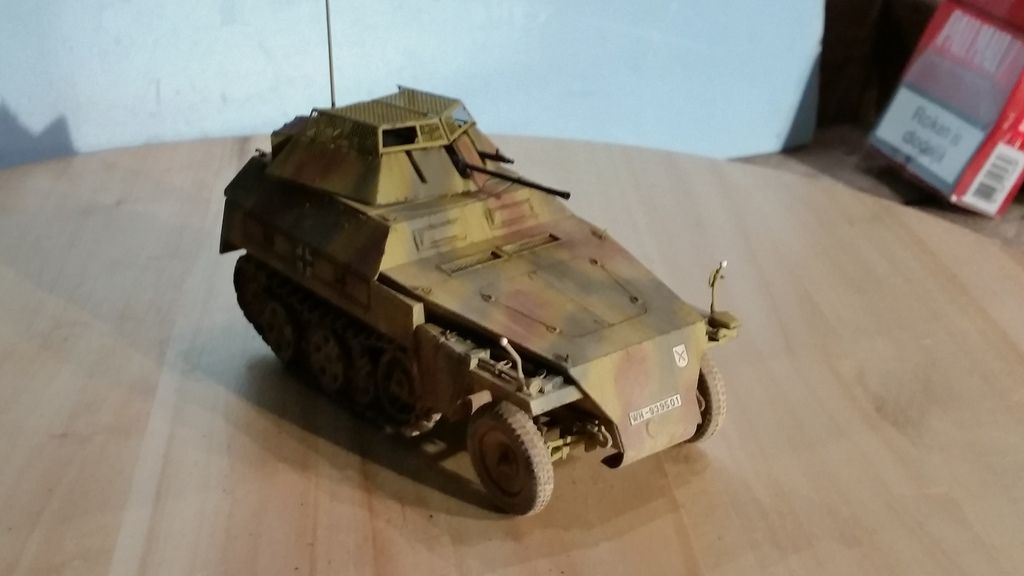
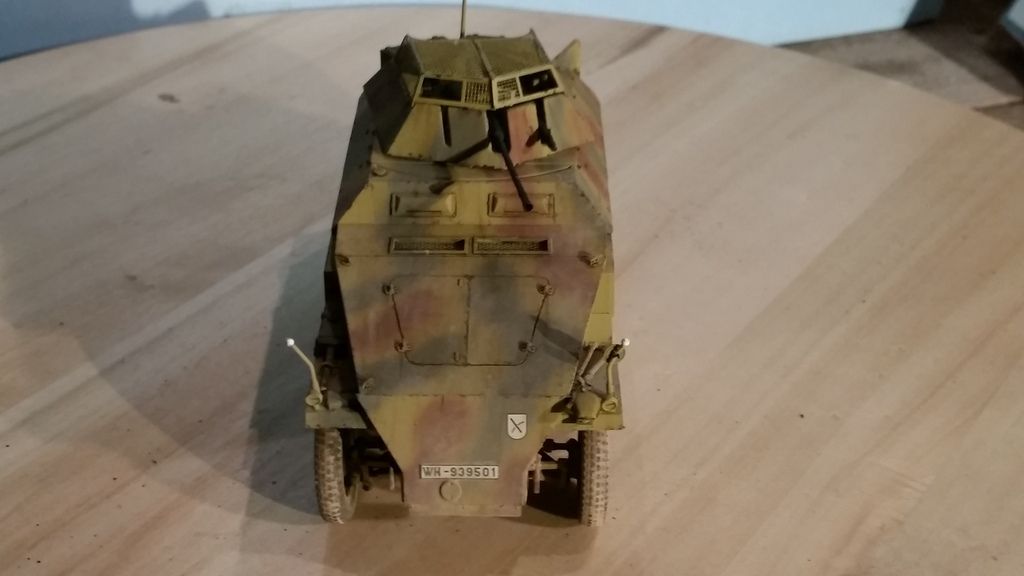
I now have a small mini reveal on the 2 vehicles and then call this update done

First up the sd.kfz. 250/9
Image

Image

Image

Image

Image

Image

Image

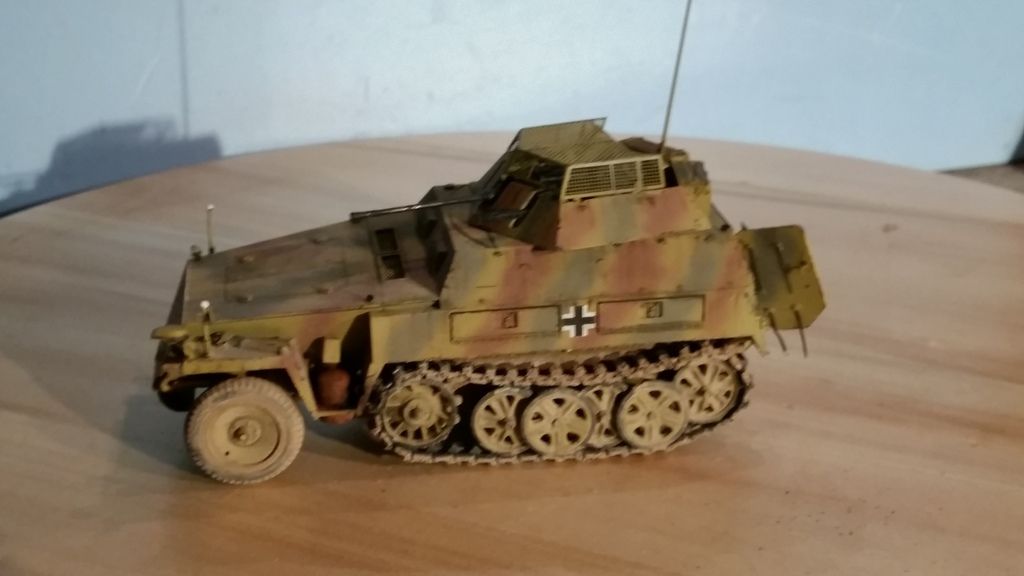
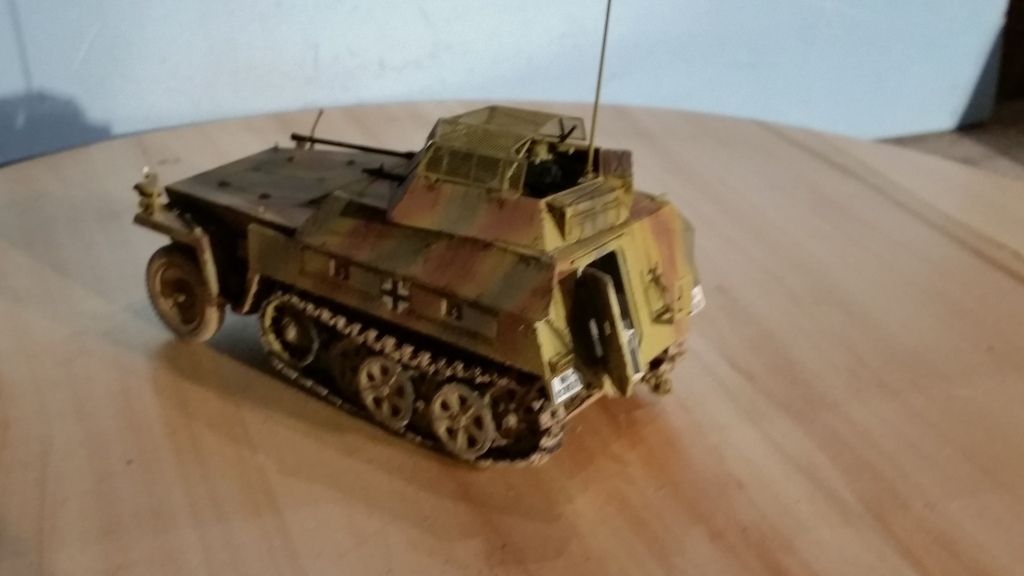
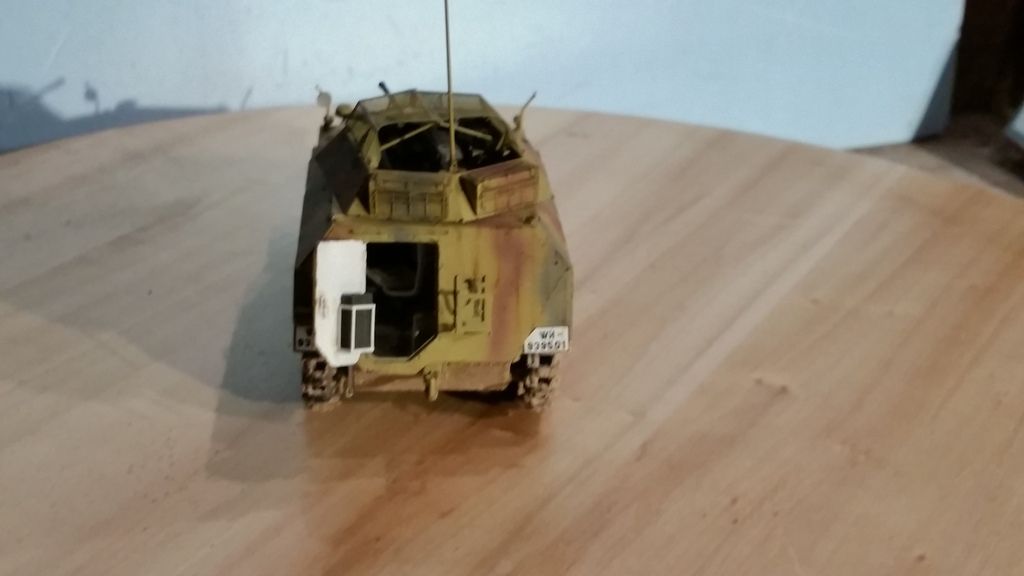
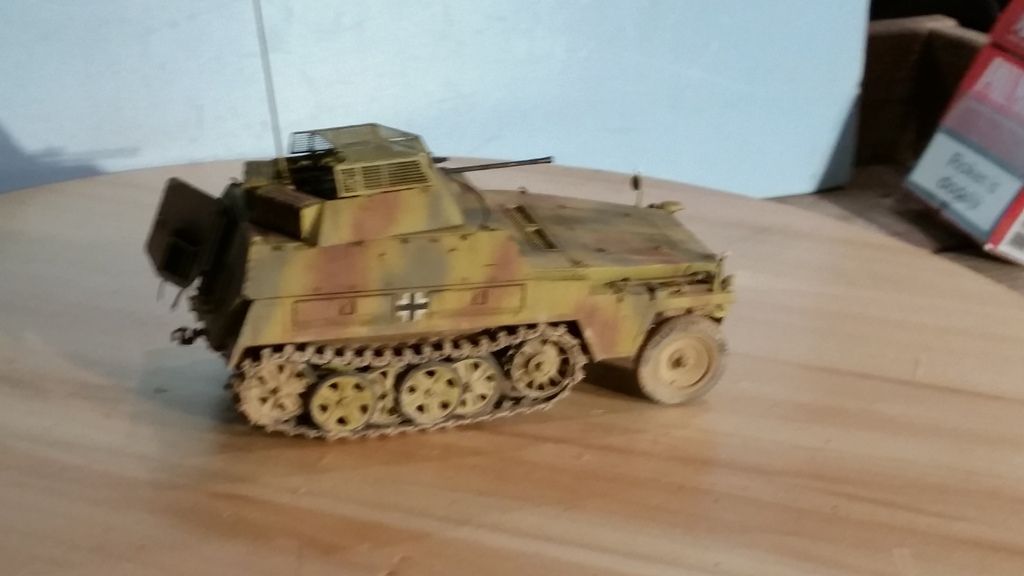
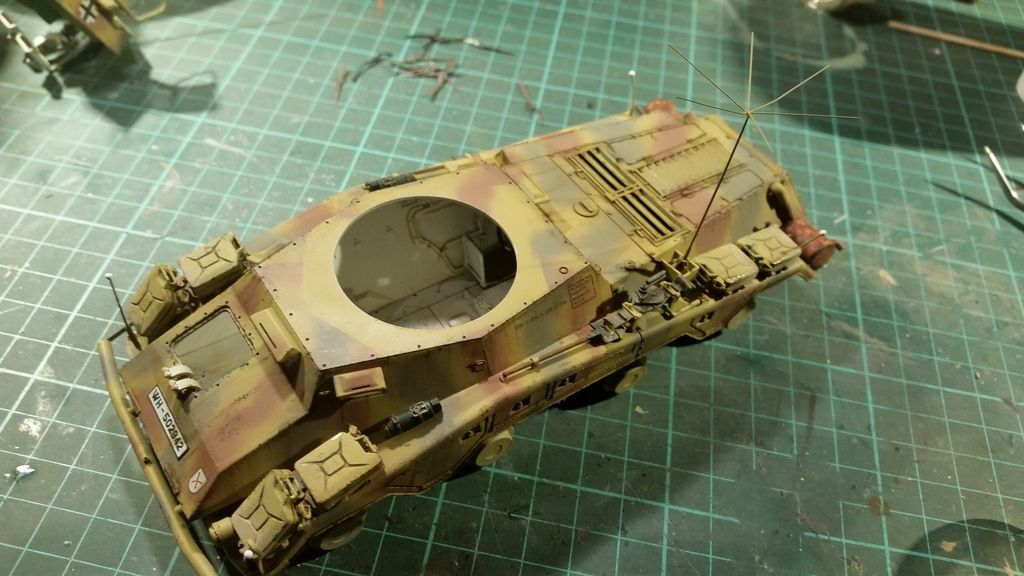
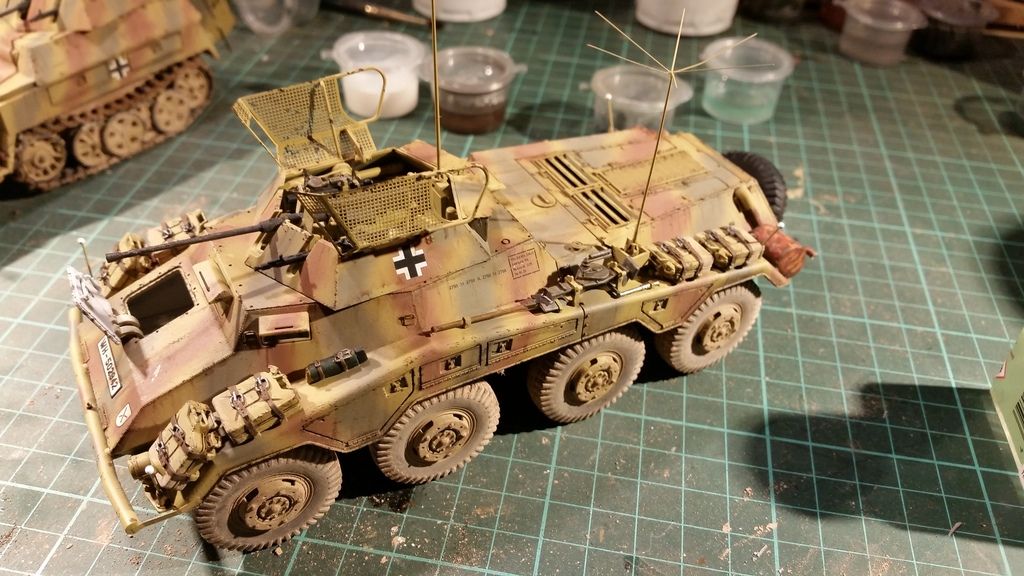
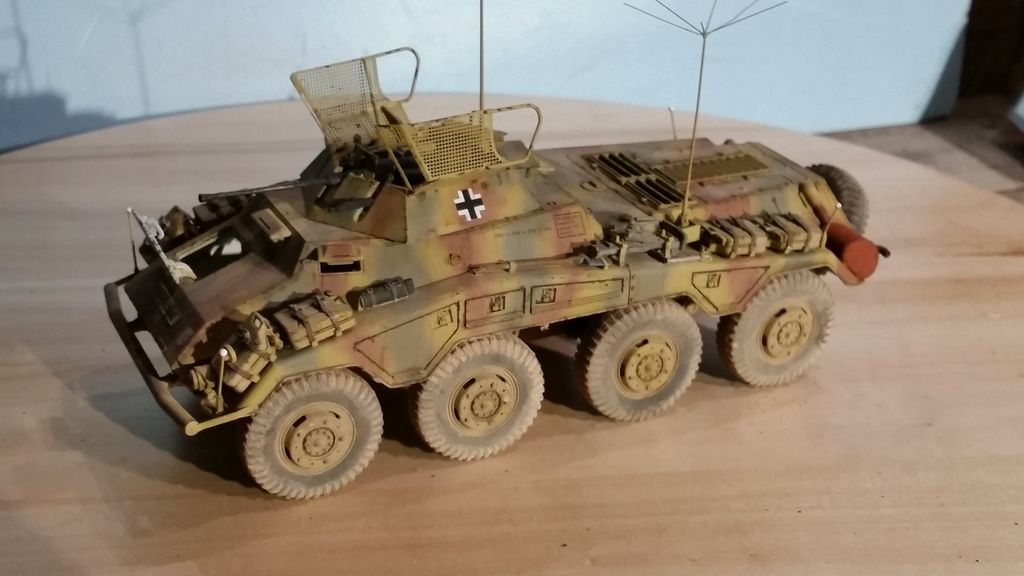
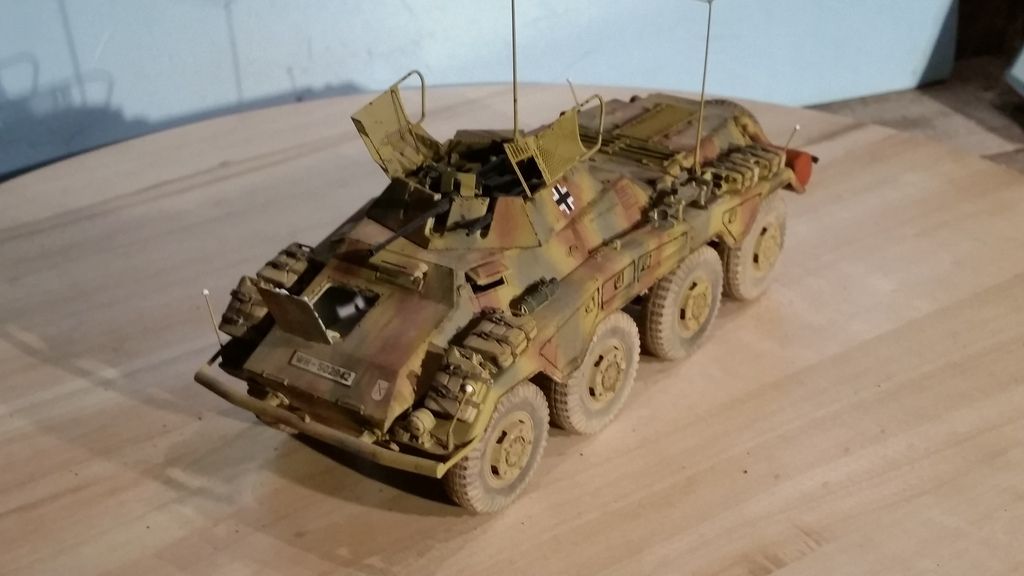
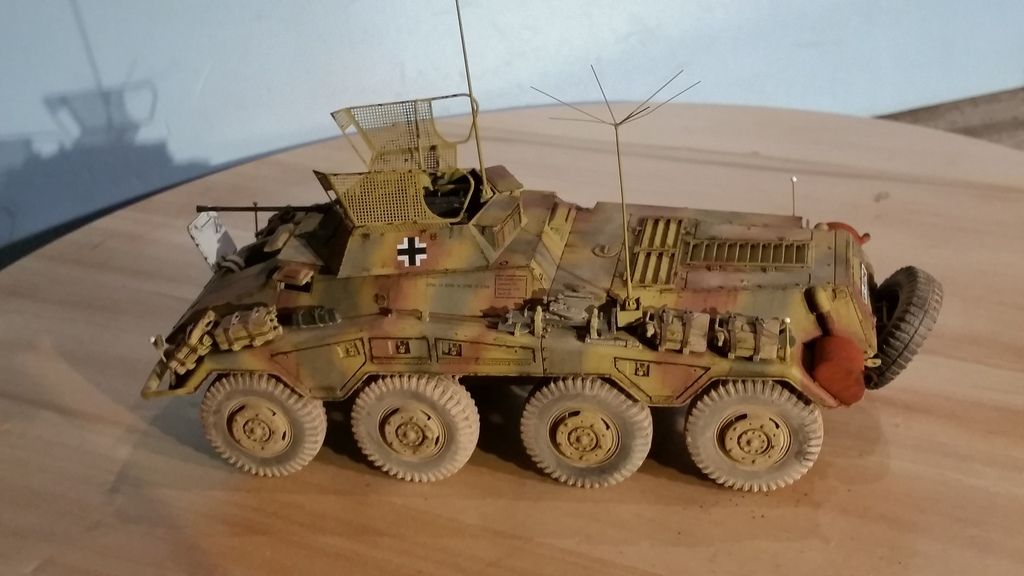
And the sd.kfz. 234/1
Image

Image

Image

Image

Image

Image

Image

So that is all i have for now

I hope you like it and be prepared i will be bothering you guys some more the upcoming day while i finish this build and my other entry in the sig
Happy modelling
Cheers Mark
Last edited by MarkVerploeg on Wed Sep 30, 2015 11:06 am, edited 1 time in total.
On the bench
GB builds
1/35 Trumpeter M1132 ESV

Personal builds
1/35 Hobby Boss M1070 tractor with M1000 semi trailer and Meng M1A2 TUSK II Abrams
1/35 Takom V2 rocket with the Meillerwagen and SS100 tractor
User avatar
MarkVerploeg
Major
Major
Posts: 4837
Joined: Wed Oct 16, 2013 12:21 am
Location: Oss, Noord Braband The Netherlands
Netherlands

Re: German recon unit at the Siegfried line

Post by MarkVerploeg »

hi there
me again as i am still waiting for a lot of photo's to be uploaded i thought i could do the update for the figures while i wait

so since the vehicles where ready i loked through my stash to see wich figures i could use
and since i have build a decent amount of those cyber hobby orange boxes i still have a few figure sets laying around that have no box
so i tossed them in a big box and taped the instruction on the figure bag

and after a little search i found these 2 sets
Image
both are a bit older but the figures looked good enough to me
they are all in warmer clothing so it fits my idea of a late 1944 setting as the last parts of the Siegfried line where taken in late Novermber and early December ,just 2 weeks before the Battle of the Bulge
1 of these sets is supossed to be kampfgruppe peiper set so that will work out great for this

Image
here they are all build up
the bodies loked okay but i found the heads a bit soft so i replaced them all with heads from a Verlinden prod. value pack
it contains 25 heads wich are all different and i think it costs about 10 or 15 euro's so lot cheaper then the ones you can find from Hornet allthough those look very good

Image
so to start the painting proces i primed them with Vallejo black primer
i do want to note 1 thing: the method for figure painting i use comes from the osprey bok called modelling Waffen SS figures
allthough i never had the same results as the writer i am happy with the ones i do manage to produce and i don't see myself as a figure painter as i only add figures to a build if i need them to help with the overall story
but it is a good book for those who want to get more information about figure painting and SS troops especially and it is not very expensive either

Image
the first color i used is white
i paint in the eyes and then dry brush the rest of the heads and hands to mark the highlights and it is a base for the next colors

Image
next is a second dry brushing
but this time with the basecolor of the flesh tones
i mixed Vallejo Sunny skin tone and salmon rose in a 1:1 mix

Image
i then added a wash made from English uniform ,flat brown , vermillion and the basecolor in a 2:2:1:5 mixing ratio
this was then thinned with some Ultimate thinner and applied on the figures
this layer is to make the edges between the shadows and the flesh color a bit softer

Image
i then added some highlights to the faces

Image
i decided i could color in the eyes for a change
this looks bad at the moment but i will paint over a part of the eyes to make the eyelids and to make them eye into a regular size

Image
here they look a bit better
i also add a layer of candy apple brown patina wash
this is used in ceramic painting as a weathering agent
but it gives a natural sheen to flesh tones so i am using it for a number of years now as a finishing touch

Image
it is this stuff
as you can see the bottle is being used for quite a while now

Image
Image
i then painted the hair
but i can't tell you wich colors i have used as i forgot to write it down and i have no clue as to wich ones i used :wall:

Image
the uniforms where painted with a 2:1 mix of Vallejo german camo dark green and field grey

Image
the highlights on the uniforms where made with Vallejo german uniform
it is a good color for highlighting the uniforms but personally i think it is too bright as a basecolor for this

Image
there where 2 guys that had this kind of jacket
i painted it with English uniform and added a drop of white for the highlight color

Image
the uniform shirts where painted with Vallejo field grey
i also added this to the figures where you cn see the collar sticking out of the jacket

Image
the shoes and boots where painted with Vallejo black

Image
and small things like the shoulder patches where painted

Image
and with the addition of a little bit of mig prod. dry mud pigment i called them ready for the diorama

and that was it for now
i will make a final update tomorrow where i will cover the building of the base and how i made the dragons teeth tank obstacles
untill next time
cheers Mark
On the bench
GB builds
1/35 Trumpeter M1132 ESV

Personal builds
1/35 Hobby Boss M1070 tractor with M1000 semi trailer and Meng M1A2 TUSK II Abrams
1/35 Takom V2 rocket with the Meillerwagen and SS100 tractor
User avatar
MarkVerploeg
Major
Major
Posts: 4837
Joined: Wed Oct 16, 2013 12:21 am
Location: Oss, Noord Braband The Netherlands
Netherlands

Re: German recon unit at the Siegfried line

Post by MarkVerploeg »

hi guys
so this is the final update for this build
this time i will try to explaint what i did with the base and the home made dragons teeth

so why not start with those dargons teeth tank obstacles

Image
i went only to find more about these things and then i added scale model to the search
i thought i would get a link to a webshop that sells kits of these things
but the very first link was to a modelling blog (forgot wich one)
there is a complete explanation on how he made them using plaster and cardboard paper
it has a picture on there that has these drawings wich are the size and shape for a mold of these obstacles
just copy and paste it and print them
i used the program "paint" to get them printed

Image
i transfered the drawings to a sheet of styrere and cut them into individual sheets to make the cutting easier
please note that i use styrene sheet instead of the recomended cardboard paper

Image
they where cut out
not the most enjoyable bit as i worn out 2 blades of my knife making 20 of these
i kept 1 of each size as a template for future builds

Image
i then made a shallow cut along the folding point of each mold

Image
carefull bending of the mold sides
make sure you don't move them too much but they do have to get close enough to get them glued

Image
here is one finished mold
i used ca glue to speed up the proces but regular modelling glues and cement would work just as good

Image
a overview of the steps

Image
i filled the molds with plaster
when i mixed the plaster i used water and some Vallejo black primer to give the plaster a grey color
this one is already popped out of the mold and to give it a little bit of texture i pulled a sanding stick over the surface

Image
all of them together
i dry brushed them with Vallejo modelcolor sky grey as it still was too smooth for the next steps

Image
here i have 1 dry brushed block and the other has a wash on it
i used Ultimate concrete wash for it
it also helps to get more color variation on them allthough at this point it was still wet

Image
once it dried it looked like this
you can see the wash changed the look

Image
i then did more dry brushing with the sky frey as pigments still didn't stick to the surface

Image
and finlly with mig prod. concrete pigments on them
i think they are ready for use at this point

so at this point everything i want to use is ready
that is usually the point that i start working on the base

Image
i have the lower part that is pre made by me
i made 10 a few years ago and i still used but because i was in a rush back then i used nails to add the wooden strips
so i had to use some filler to get them smooth
the upper half is just a square box made with balsa wood of 5mm in thickness

Image
i then painted the outside with black paint and used some sheets of foamcore plate to raise the inside
i do this so i don't have to use a massive amount of sand to fill it all up
and the raised part actuall makes things look better
if you keep everything low it doesn't catch your eye that fast

Image
i then made a test setup to see if everything will fit
i don't think i mentionned this before but the trees i will be using are from Model scene
they actually look very good and they are not overly expensive

Image
this is what i use to make the soil
birdcage sand , water , white glue , a small bucket and some spatula's to mix and apply the sand

Image
once the sand mix was made and poured in to the diorama i add a second layer of sand
this time i used the same mix of sand ,glue and water but i also add some acrylic paint to it
i used raw umber and vandyke brown paints to give the sand some color
then i used the actula models to make some track and wheels marks in the soil
and the trees and figures where put in place

Image
i used this kind of stuff for the small plants that are growing on the forrest floor
i simly cut of the smaller branches and use those

Image
i the background you can see those branches that i use to make the underbrush near the trees

Image
here i added some pigments to the soil
i used mig productions dry and dark mud to make this color
i didn't mix them but used them seperate and work over the previous layer
they kind of mix that way but you still keep some different tones throughout the entire groundwork

Image
i used some autumn leaves from Joefix studios to scatter around on the ground
as it should be a forrest there should be some trees nearby that have leaver and loose them during fall

Image
i then put the vehicles back in place and called this build finished

and that is about all i have for this build
i hope you like it and that i was able to explain everything but if not let me know and i will give it another try
thanks for stpping by
cheers , Mark
On the bench
GB builds
1/35 Trumpeter M1132 ESV

Personal builds
1/35 Hobby Boss M1070 tractor with M1000 semi trailer and Meng M1A2 TUSK II Abrams
1/35 Takom V2 rocket with the Meillerwagen and SS100 tractor
User avatar
demarcation
Command Sergeant Major
Posts: 960
Joined: Wed May 13, 2015 11:34 pm
Location: Denmark
Denmark

Re: German recon unit at the Siegfried line

Post by demarcation »

Looks fantastic mate, brilliant work!!! :jd: :th: :clap:
:cheers2:

//Anders
User avatar
MarkVerploeg
Major
Major
Posts: 4837
Joined: Wed Oct 16, 2013 12:21 am
Location: Oss, Noord Braband The Netherlands
Netherlands

Re: German recon unit at the Siegfried line

Post by MarkVerploeg »

Thank you very much
Glad you like it
It is over at the reveal section aswell in case you want to have a look
Those pics are a bit better then the indoors pics i used here
On the bench
GB builds
1/35 Trumpeter M1132 ESV

Personal builds
1/35 Hobby Boss M1070 tractor with M1000 semi trailer and Meng M1A2 TUSK II Abrams
1/35 Takom V2 rocket with the Meillerwagen and SS100 tractor
User avatar
hansolo
Warrant Officer
Warrant Officer
Posts: 1524
Joined: Mon Jun 17, 2013 12:36 pm
Location: Amsterdam
Contact:
Netherlands

Re: German recon unit at the Siegfried line

Post by hansolo »

Damn Mark!

How come I haven't seen this thread before!!?? :wtf: :oops:

It's very late now, but still; Awesome work mate!! Great thread and lots of brilliant creative ideas! :bow:: :bow::

Cheers
Cheers
Hansolo

May the sprue be with you. :th:
User avatar
MarkVerploeg
Major
Major
Posts: 4837
Joined: Wed Oct 16, 2013 12:21 am
Location: Oss, Noord Braband The Netherlands
Netherlands

Re: German recon unit at the Siegfried line

Post by MarkVerploeg »

Tuank you very much Han
Well you have seen the dio in real life
Too vad it didn't win anything at the SMC but then again i had no chance with the entries there
On the bench
GB builds
1/35 Trumpeter M1132 ESV

Personal builds
1/35 Hobby Boss M1070 tractor with M1000 semi trailer and Meng M1A2 TUSK II Abrams
1/35 Takom V2 rocket with the Meillerwagen and SS100 tractor
Post Reply

Return to “Builds”