Hanomag SdKfz 251/1

All your build threads here...

Moderator: T3hGuppy

Post Reply
User avatar
MassterOzymandias
Corporal
Corporal
Posts: 81
Joined: Tue May 12, 2015 5:22 am
Location: México
Contact:

Hanomag SdKfz 251/1

Post by MassterOzymandias »

Hello everyone. Since I was a child I loved the Tamiya kits. Here in México it was not common to find them among other brands like Airfix, Lodela, Necomisa, Monogram, etc thirty years ago. That's why I was fascinated to see the models coming in the old catalogs. So, the Tamiya kits will always have a place on my stash.
It is with pleasure that I present to you from my stash the classic Hanomag SdKfz 251/1 in 1/35 scale.

The box art
Image

Content
Image

Image

The hull and the tracks
Image

Wheels
Image

Chasis and board
Image

Fences, doors and small parts
Image

Figures (5) with arms and gear
Image

Decals with six options:
Stalingrad campaign 1942
-14 Panzerdivision
-16 panzerdivision
-24 Panzerdivision
AfrikaKorps 1942
-15 Panzerdivision
-21 Panzerdivision
Eastern Front 1942-1943
-Grossdeutschland Division
Image

Then, let's start with the fun!

Greetings from México!
José
User avatar
MassterOzymandias
Corporal
Corporal
Posts: 81
Joined: Tue May 12, 2015 5:22 am
Location: México
Contact:

Re: Hanomag SdKfz 251/1

Post by MassterOzymandias »

Historical overview

Sonderkraftfahrzeug 251 is one of the most famous halftracks on the warfare history. Manufactured by Hanomag, the image of this vehicle is associated with the blitzkrieg almost from the beginning of the WWII with the first models in Poland and France campaigns. The C model (the model of this kit) was put to production at the end of 1940 until the spring of 1943 when the D model appear. A few vehicles of this model saw action on the Balcans but in Operation Barbarossa gain a place on the world imaginary about the war.

Image

In the german offensive of 1942 the Panzergrenadiers regiments that took part on the advance toward the Caucassus and Stalingrad were equipped with this vehicle. Likewise, the vehicle was sent as reinforcement in Africa for the offensive that led to the battle of El Alamein in the autumn. On these days the main armament for the 251/1 were two MG34.

Image

So far the historical overview. The time has come to determine the scenario and the unit of the vehicle. First of all, I will make a diorama with this kit. The easiest descicion are the Battle for Stalingrad but I've seen many models with this decoration. I liked the idea of AfrikaKorps scenario but the figures do not help me with that because the uniform is more appopriate for the european front.
It was until I noticed a piece that I took my decision: The MG42 firing on the front position. In Stalingrad were few MG42's but not so many for carry them on the vehicles with fire support role. On the African scenario the problem was the same.

Image

So, with this issue I took the descicion locate the vehicle in 1943 with the Grossdeutschland División in Kursk.
This motorized Infantry división was reorganizated on a Panzergrenadier division with new vehicles and equipment. So, the idea of one SdKfz 251/1 Ausf. C with a MG42 fits perfectly with that.

Image

According to Wikipedia: "The 1st Battalion of Grenadier Regiment GD was re-equipped at this time (1943) with a handful of Sd Kfz 251 vehicles, mainly command vehicles but also some troop carriers (SPW), and by the fighting at Kharkov, the battalion under Major Otto-Ernst Remer was fully mechanized in 83 Sd.Kfz 251s. The Füsilier Regiment did not receive SPWs until the spring of 1944."

Image

Well. Let's do it!

Greetings from México!
José
User avatar
Lysus
Captain
Captain
Posts: 4562
Joined: Fri Dec 18, 2015 11:37 pm
Location: Seattle, US
United States of America

Re: Hanomag SdKfz 251/1

Post by Lysus »

Ok, let's do!

Bold scheme you're going for.

:pop:
Backlog Progress: |||||||||||||||-------|----------|----------| 26/80
On the bench: Hasegawa 1/72 Tatiana's Vanship
Last Completed: Bandai HGUC Geara Zulu // Hasegawa 1/48 J2M3Raiden Prisoner of War
User avatar
MassterOzymandias
Corporal
Corporal
Posts: 81
Joined: Tue May 12, 2015 5:22 am
Location: México
Contact:

Re: Hanomag SdKfz 251/1

Post by MassterOzymandias »

Lysus wrote:Ok, let's do!

Bold scheme you're going for.

:pop:
Thanks Lysus. The scheme is very attractive and it is not very common to see it in this kit. I hope that the final result is well.

Greetings from México :cheers2:
User avatar
MassterOzymandias
Corporal
Corporal
Posts: 81
Joined: Tue May 12, 2015 5:22 am
Location: México
Contact:

Re: Hanomag SdKfz 251/1

Post by MassterOzymandias »

Well, the work today was fast. Let me show you! :th:

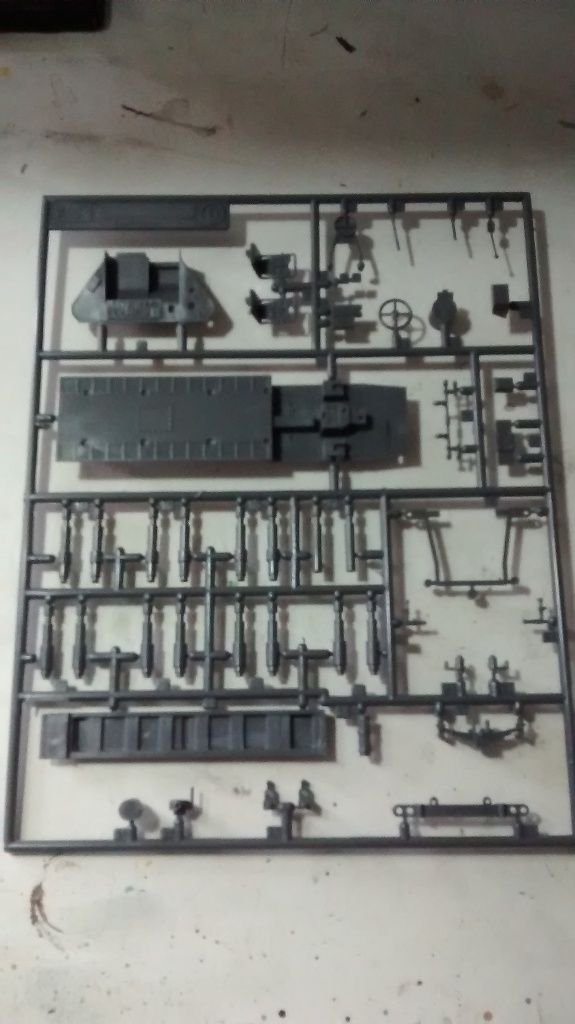
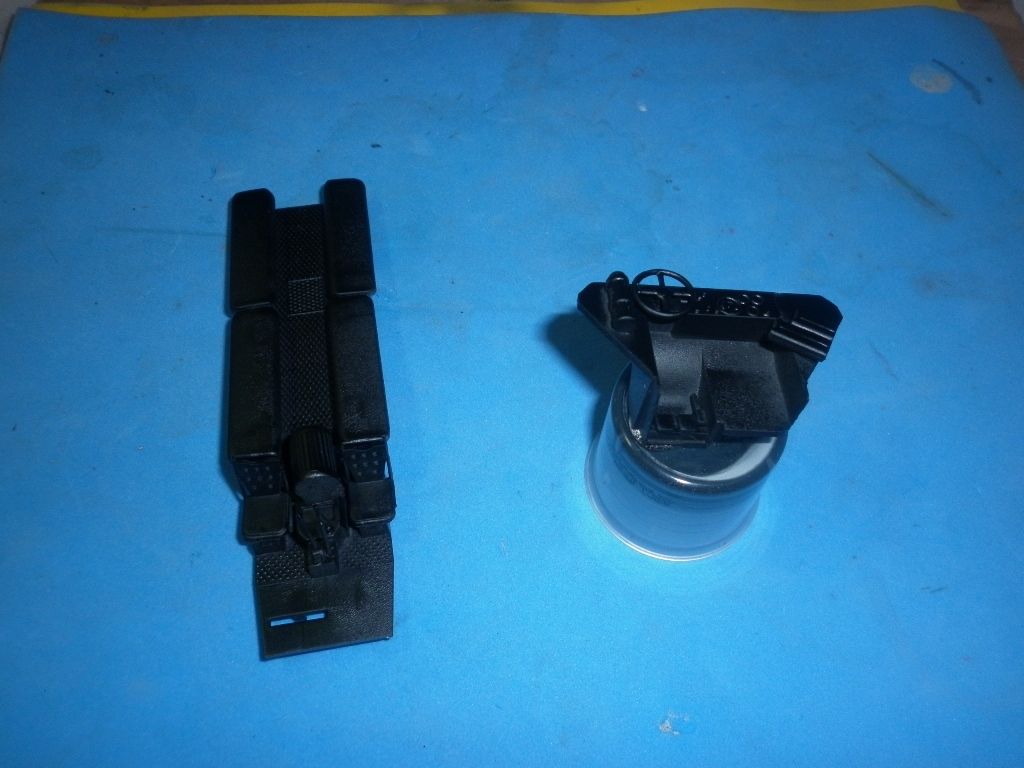
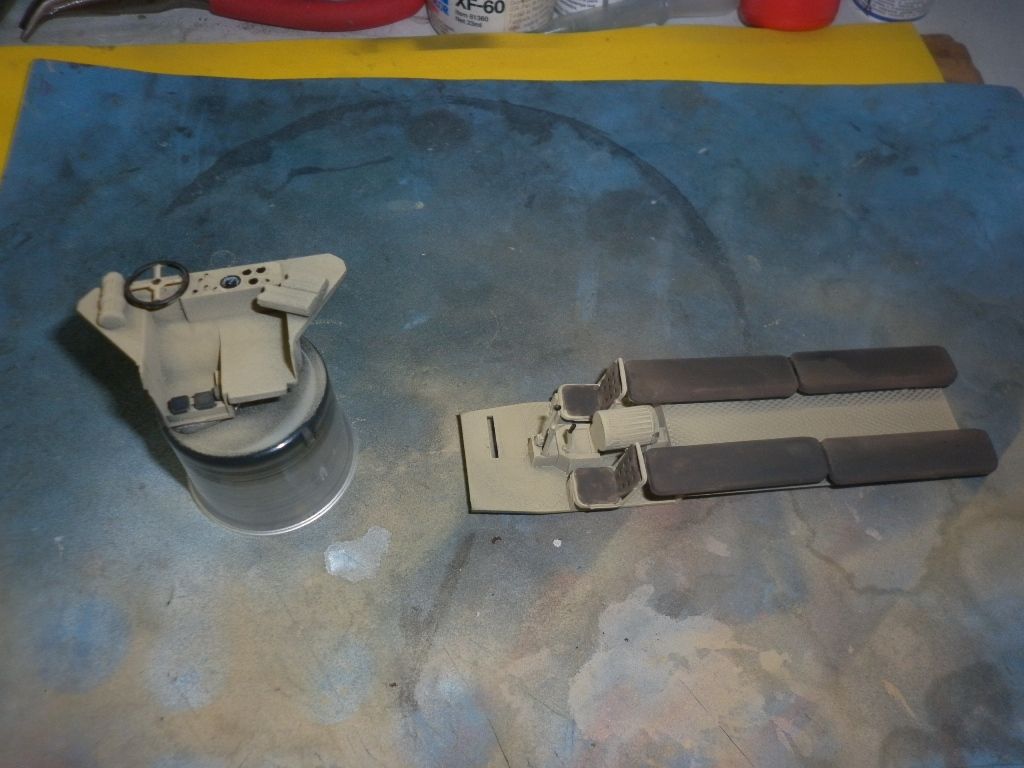
I started the build with the water tank (used only on the 251/8 ambulance version) and the panel board as is in steps one and two of the instructions.
Image

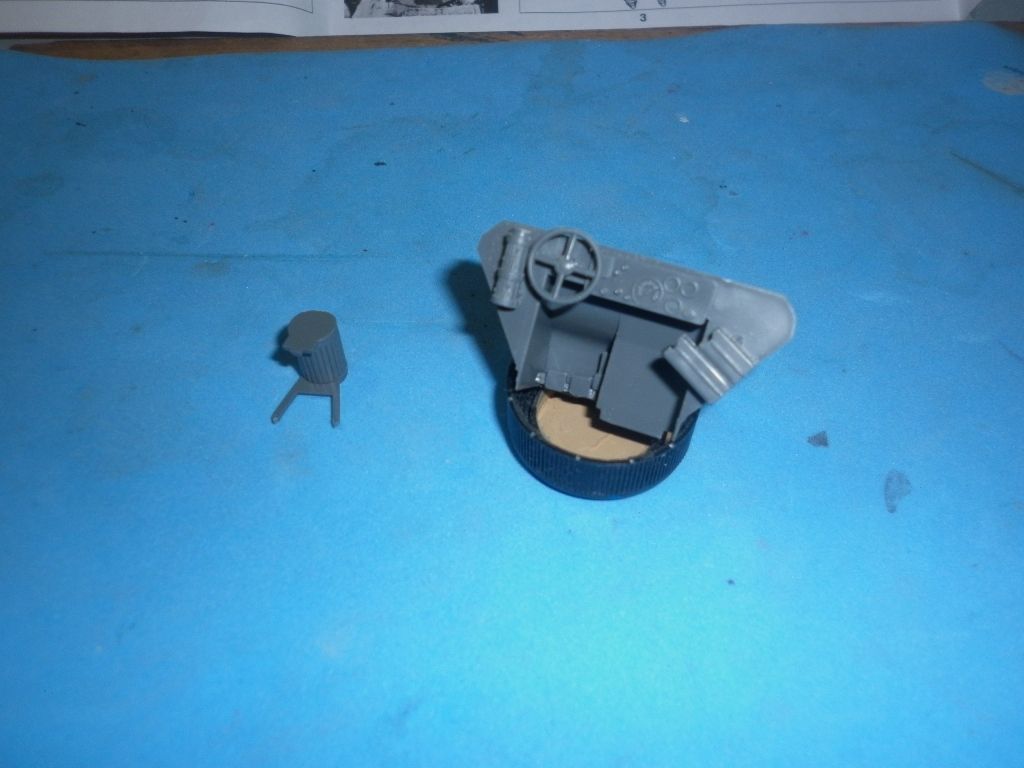
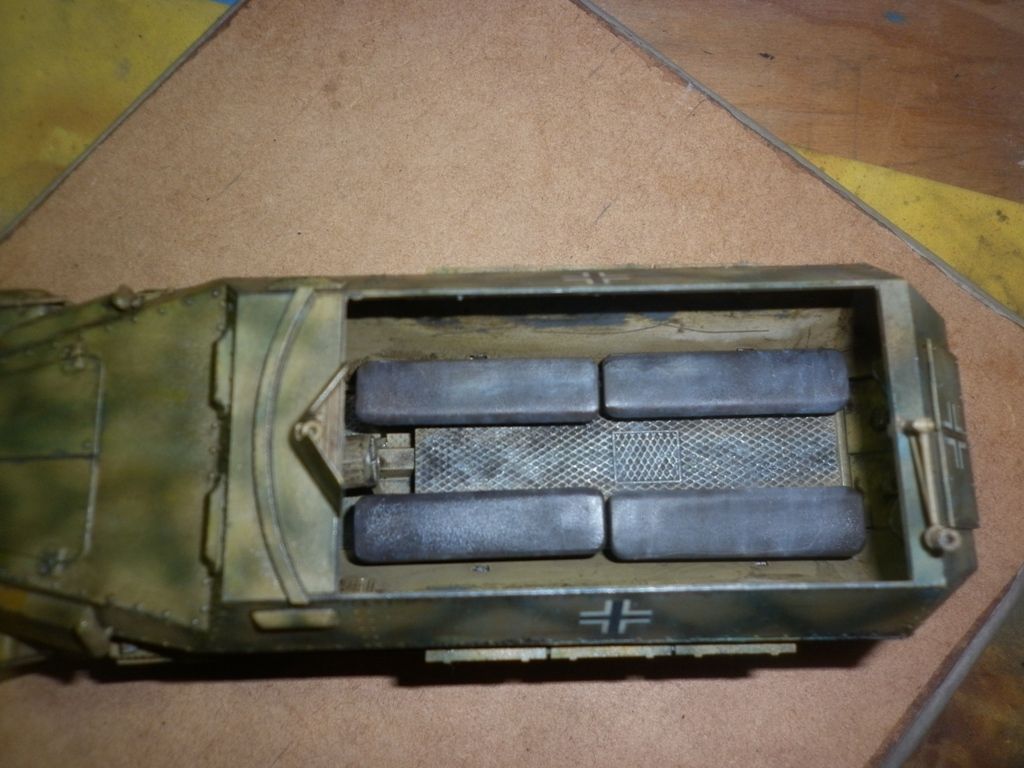
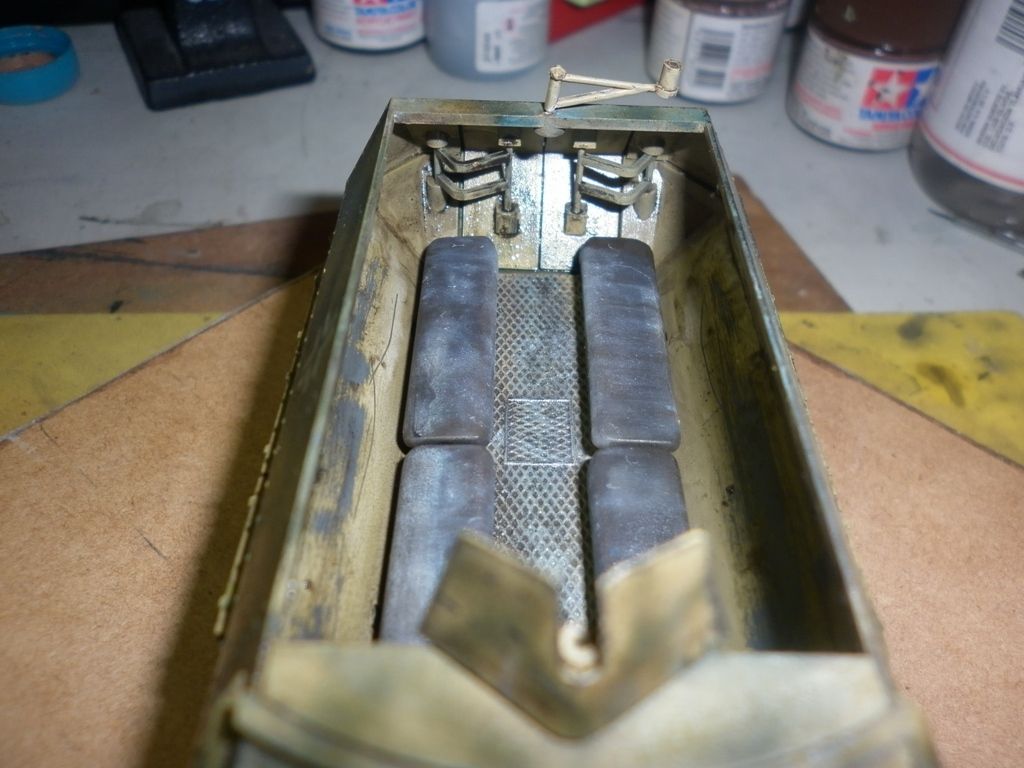
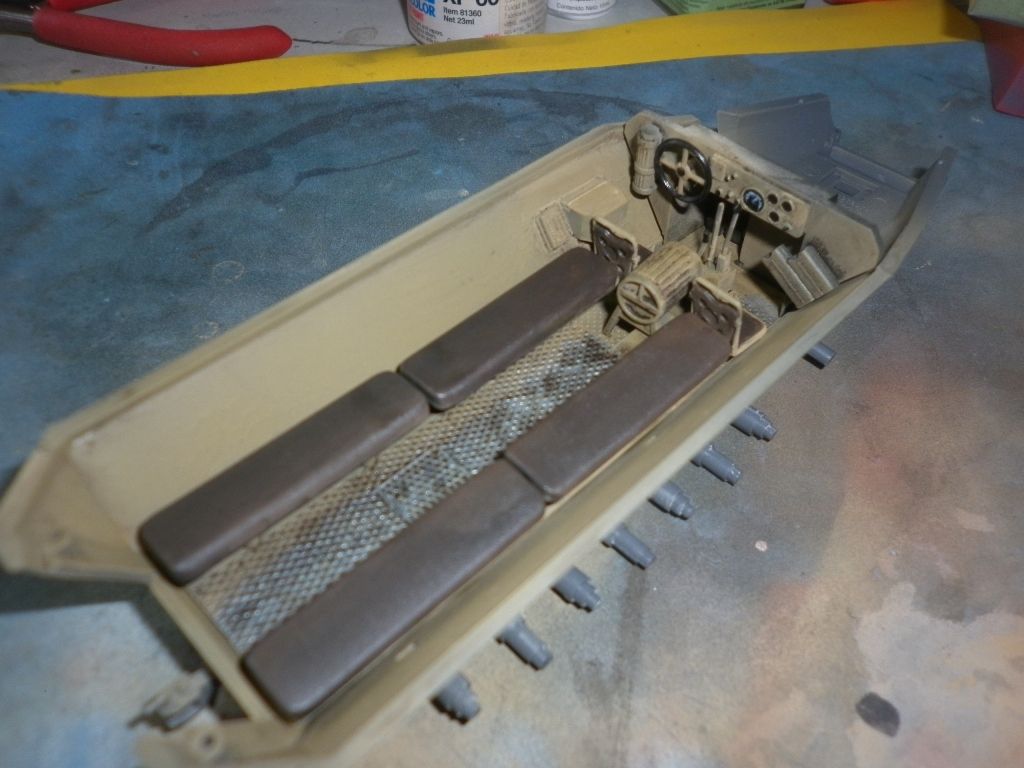
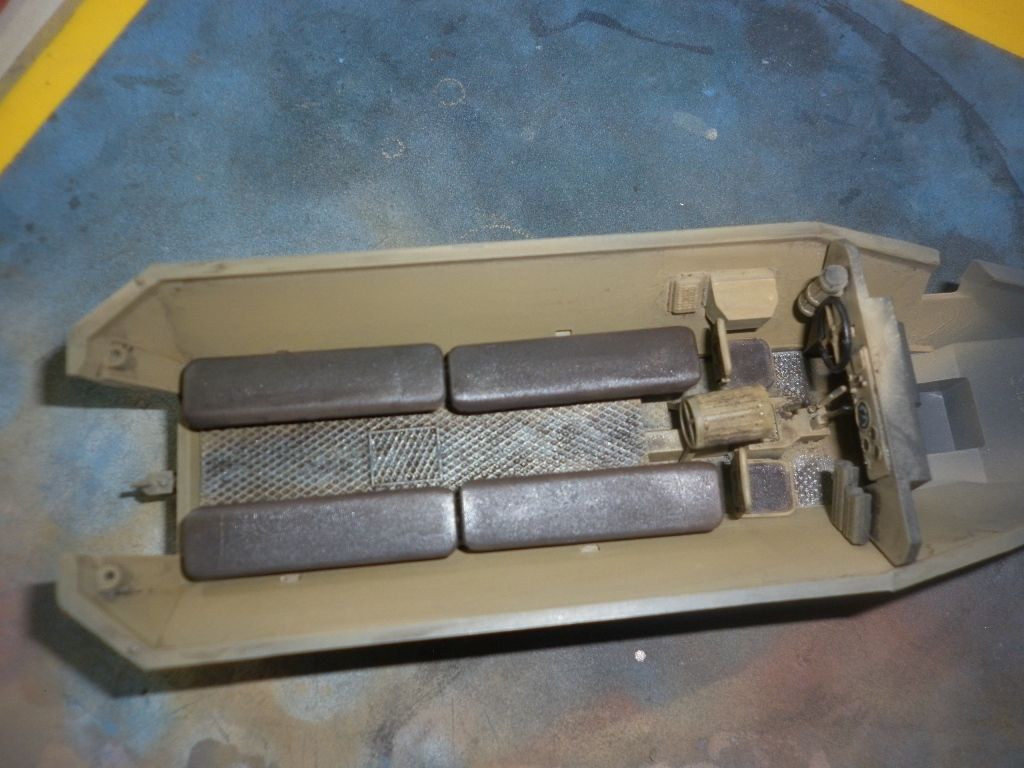
Then I continued with the interior, the seats, the floor and the gear lever along with the brake.
Image

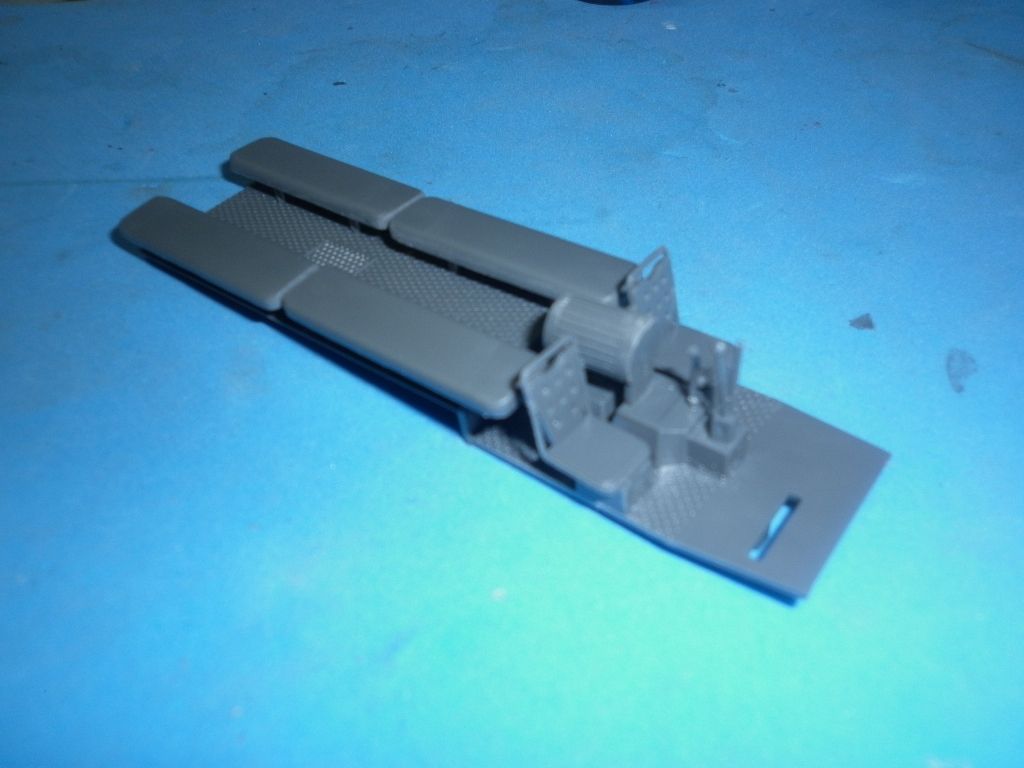
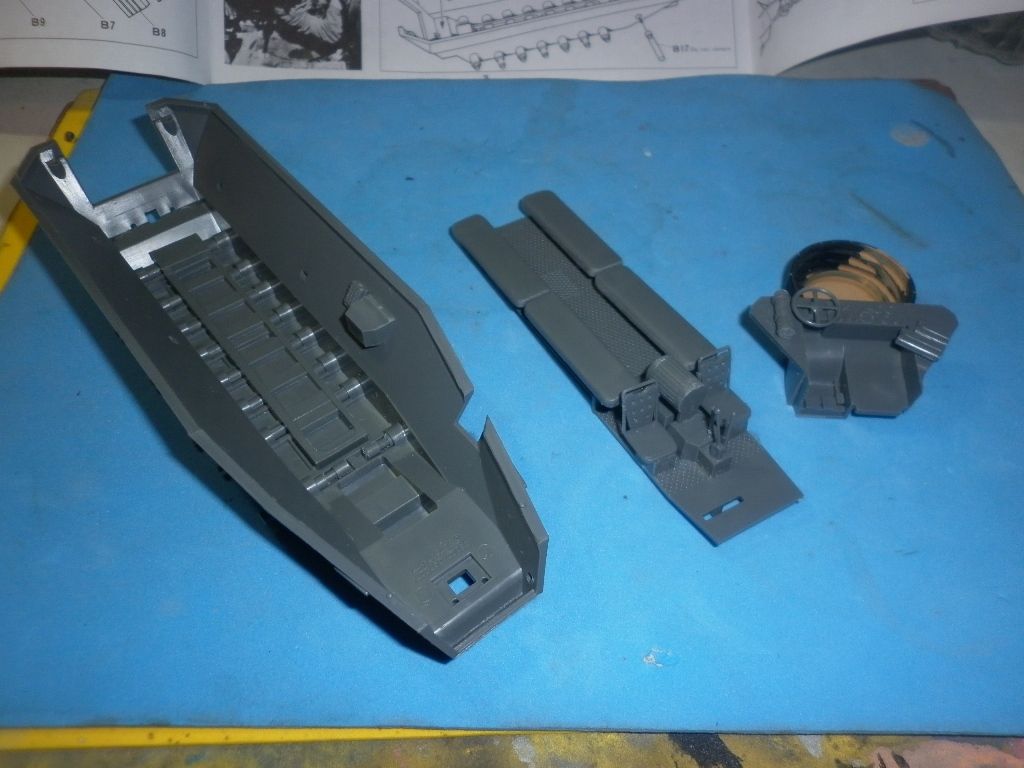
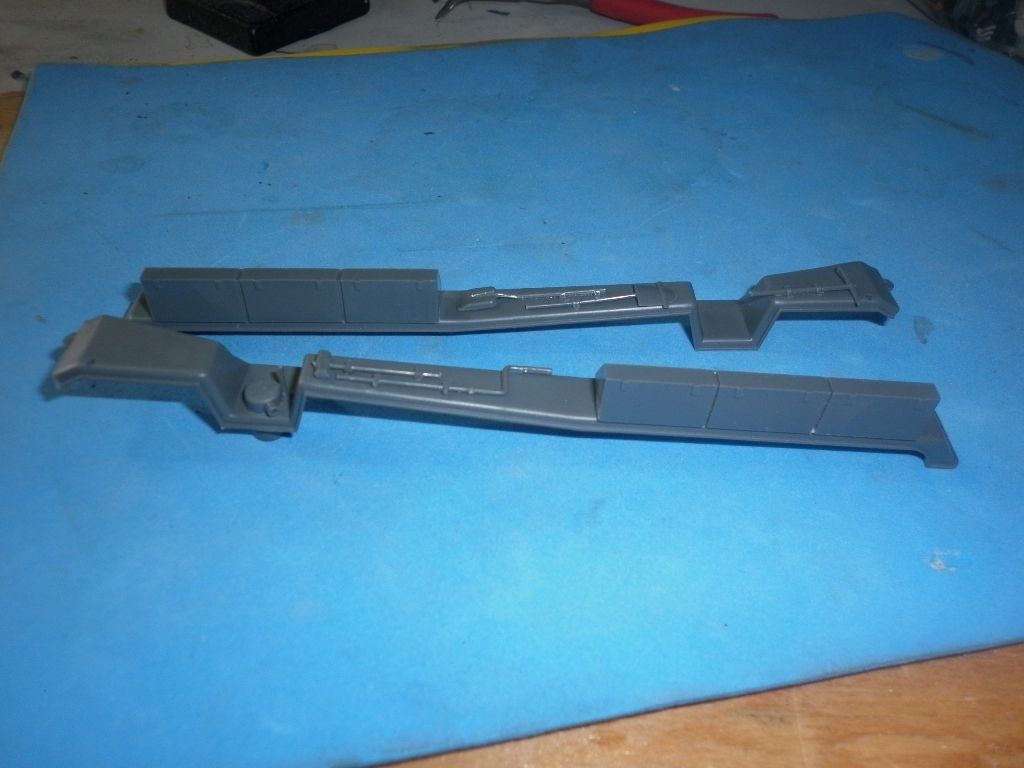
The shafts and the hull fix with no problem. So, these parts was ready.
Image

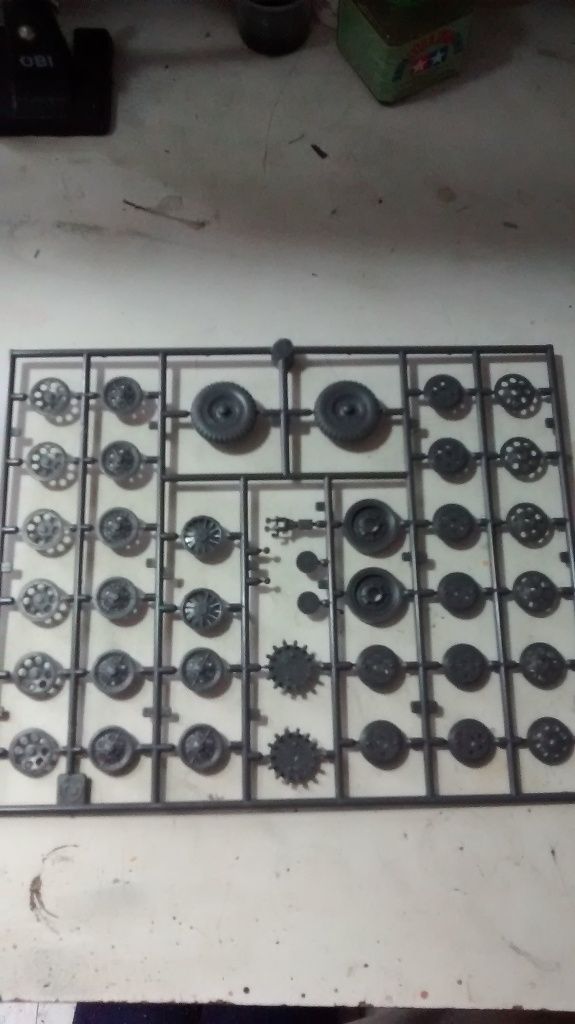
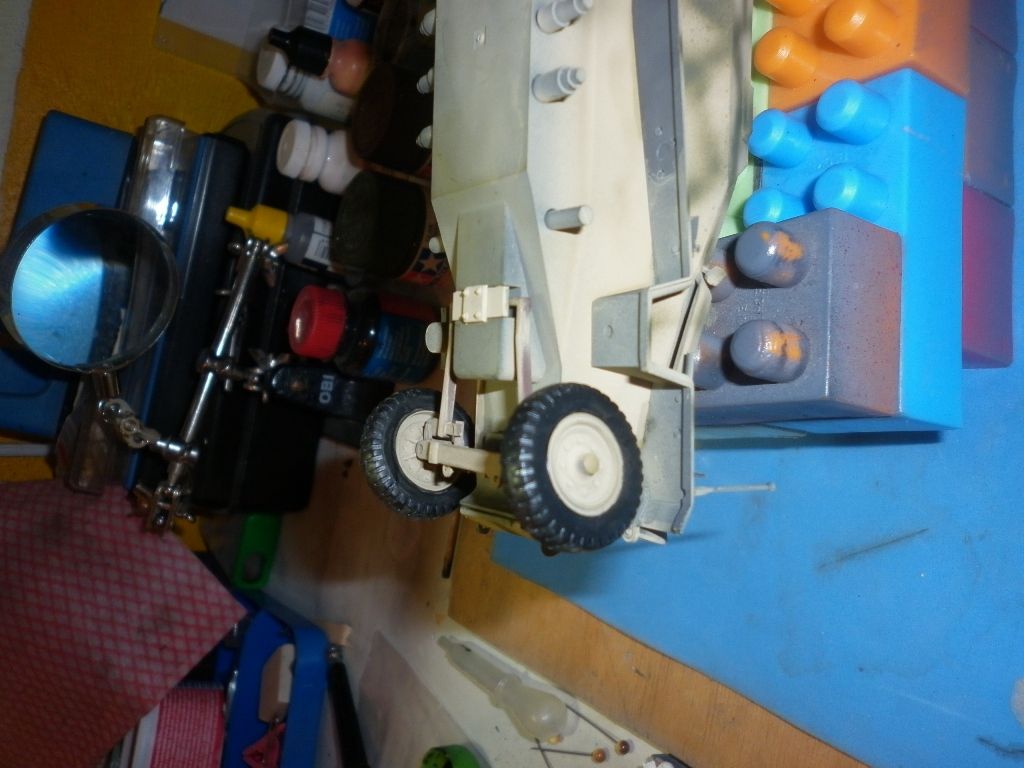
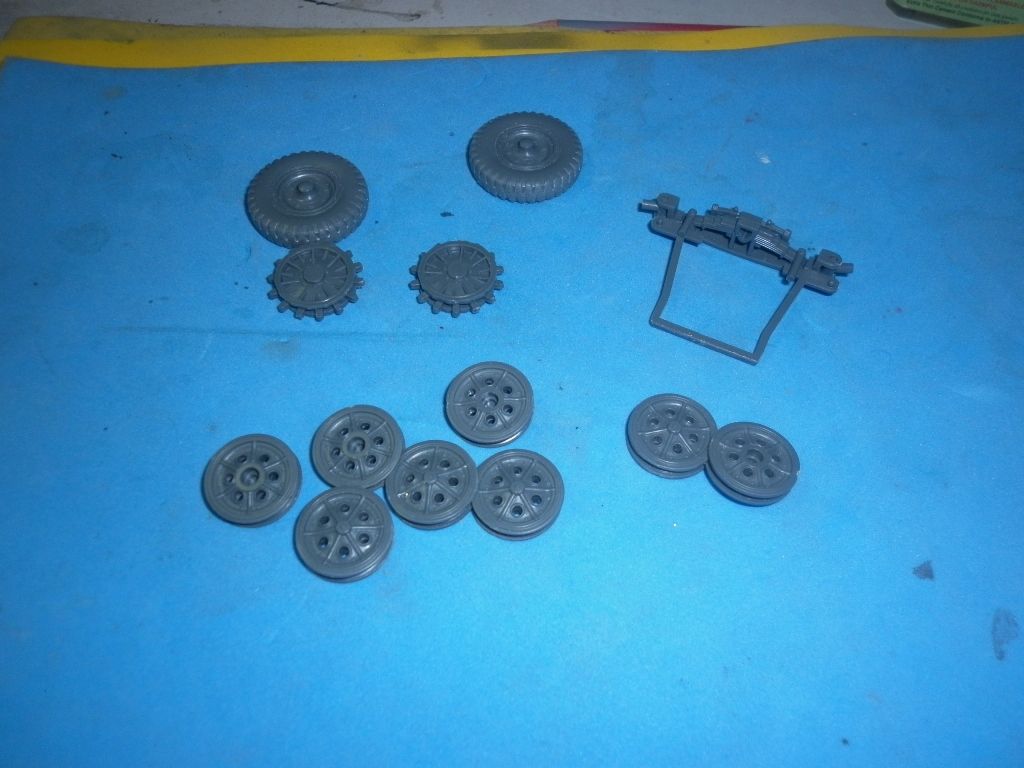
The wheels parts (right) and complete (left)
Image

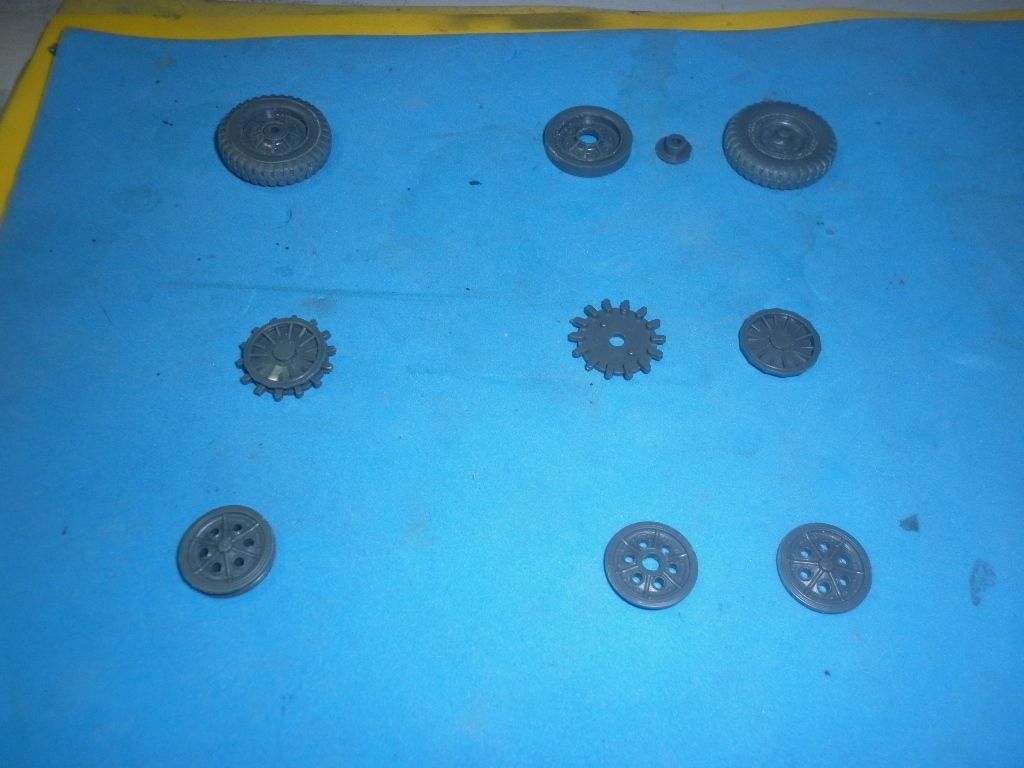
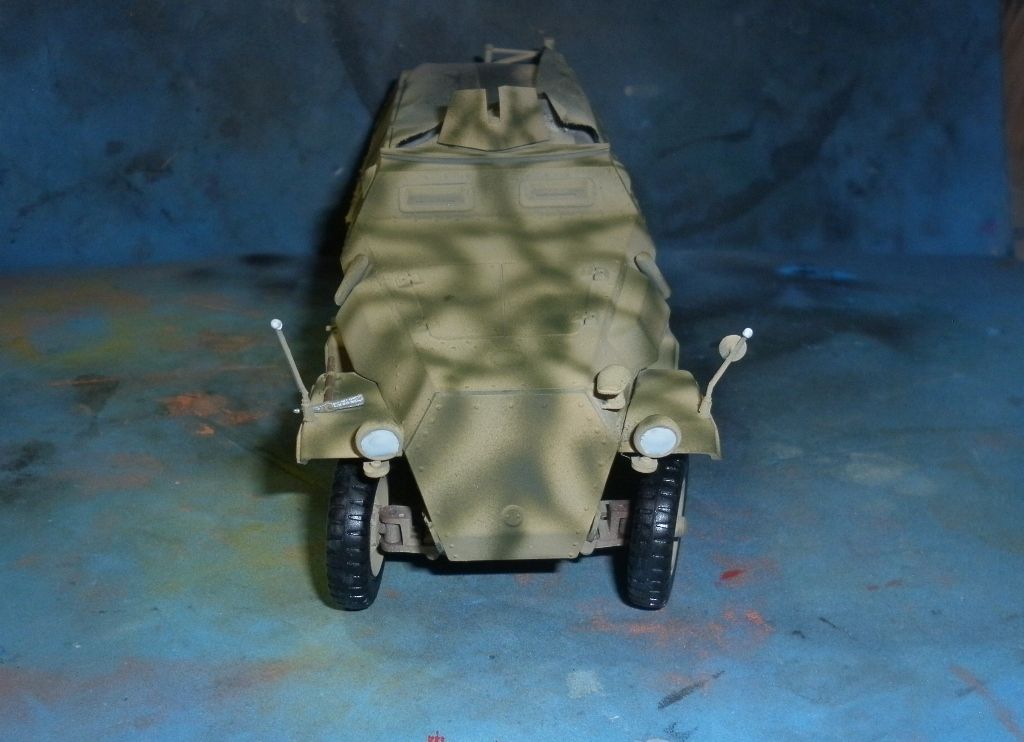
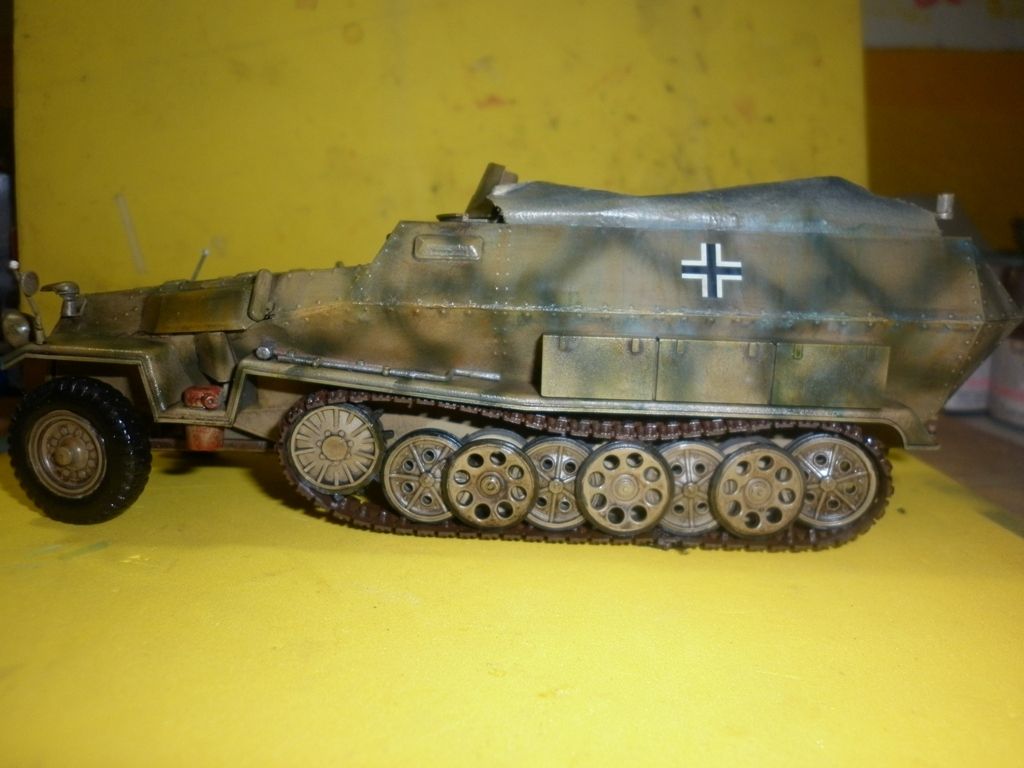
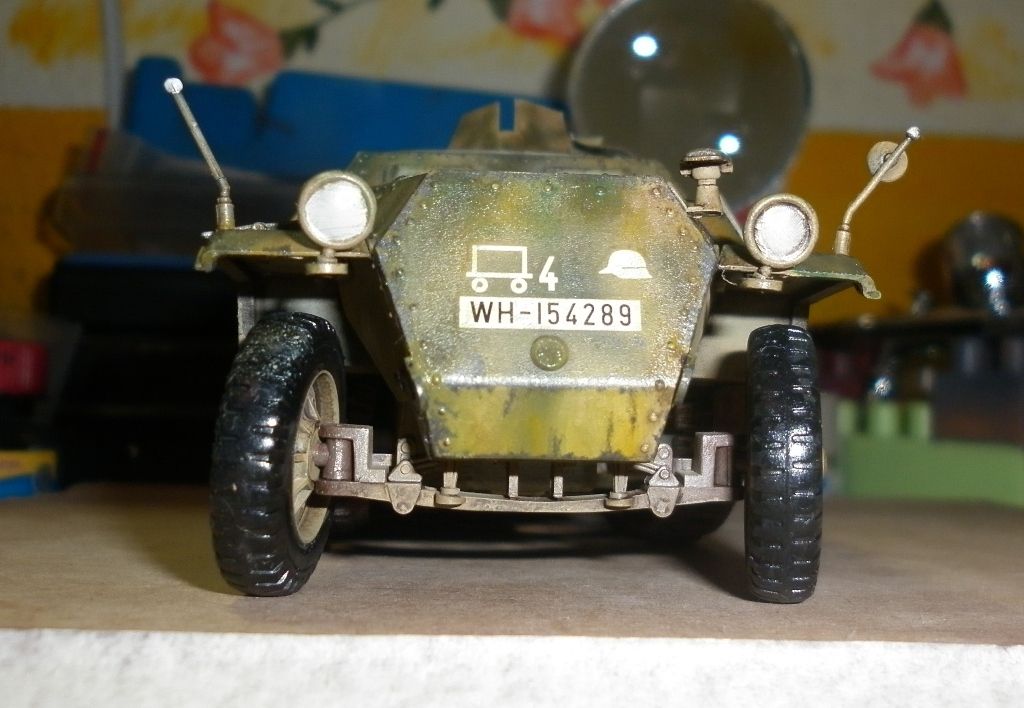
The front axle is very easy to build along with the sprockets and the road wheels
Image

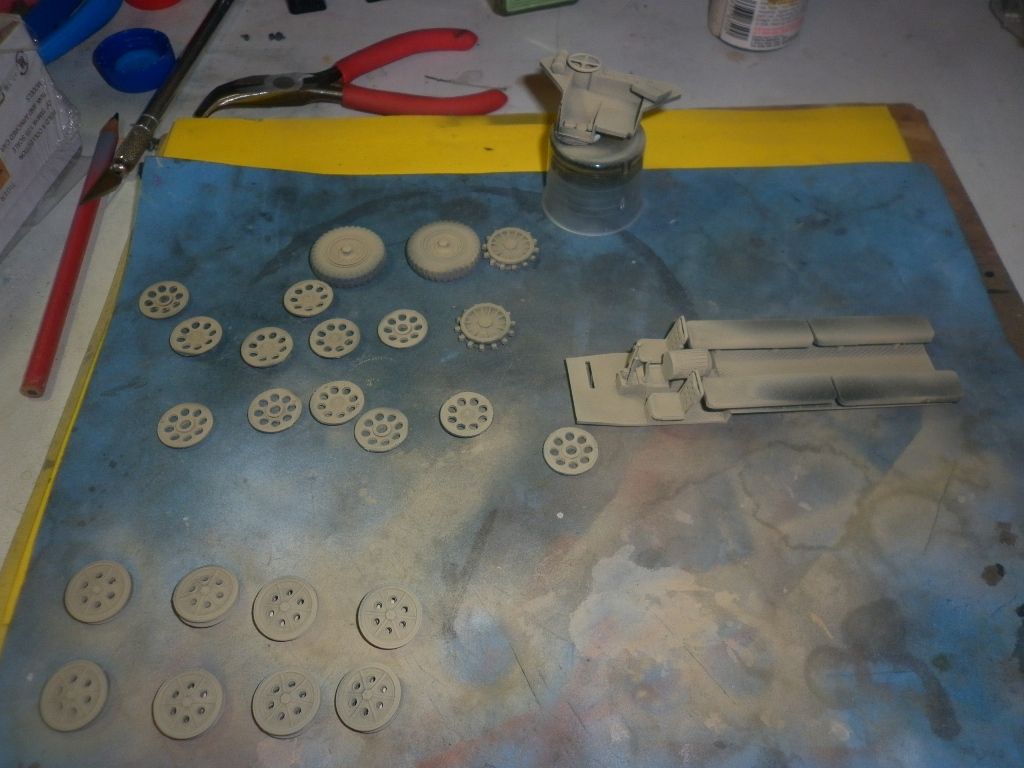
Before fix them, I primed the panel and the interior with Tamiya XF-1 Flat Black in my airbrush
Image

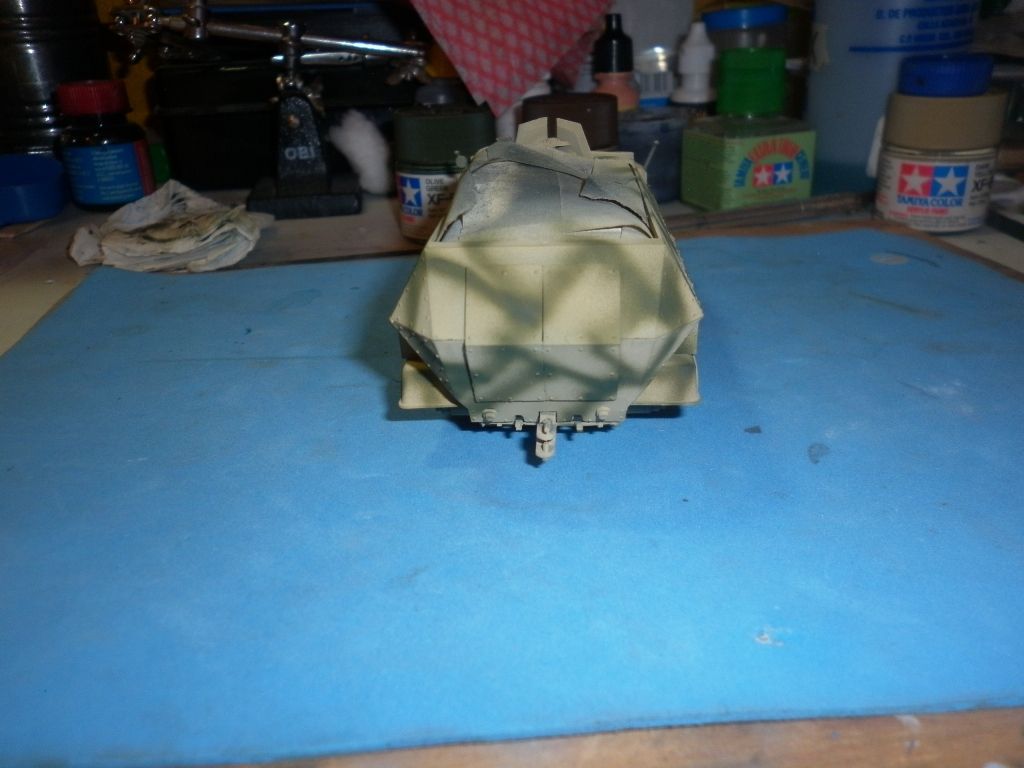
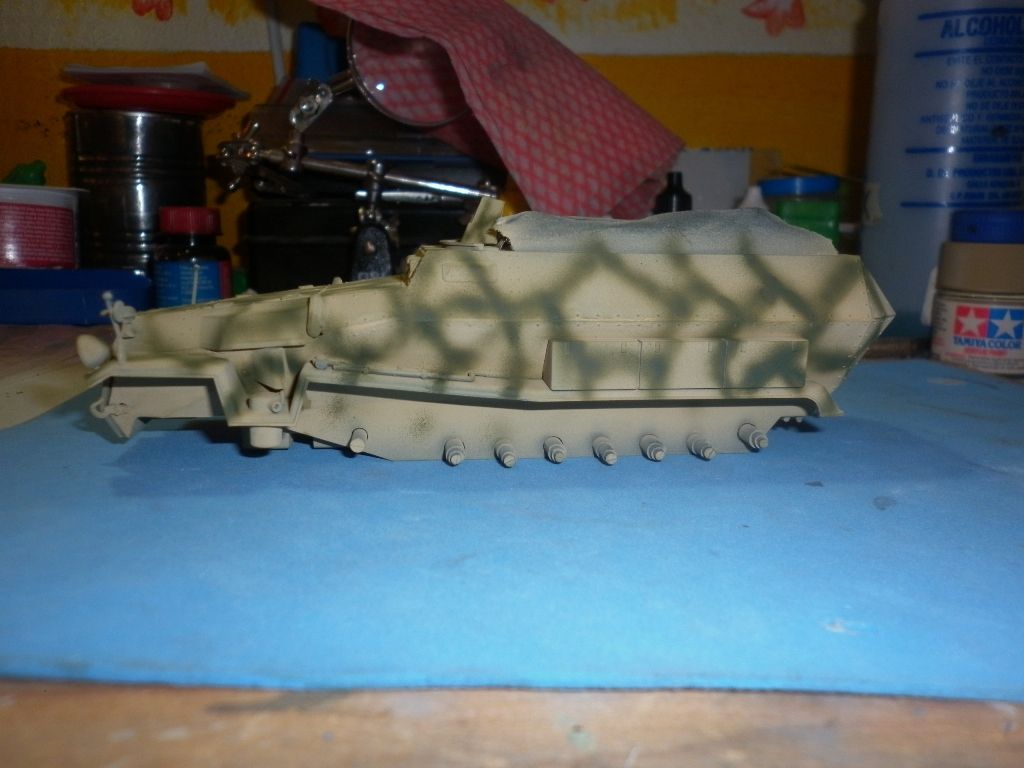
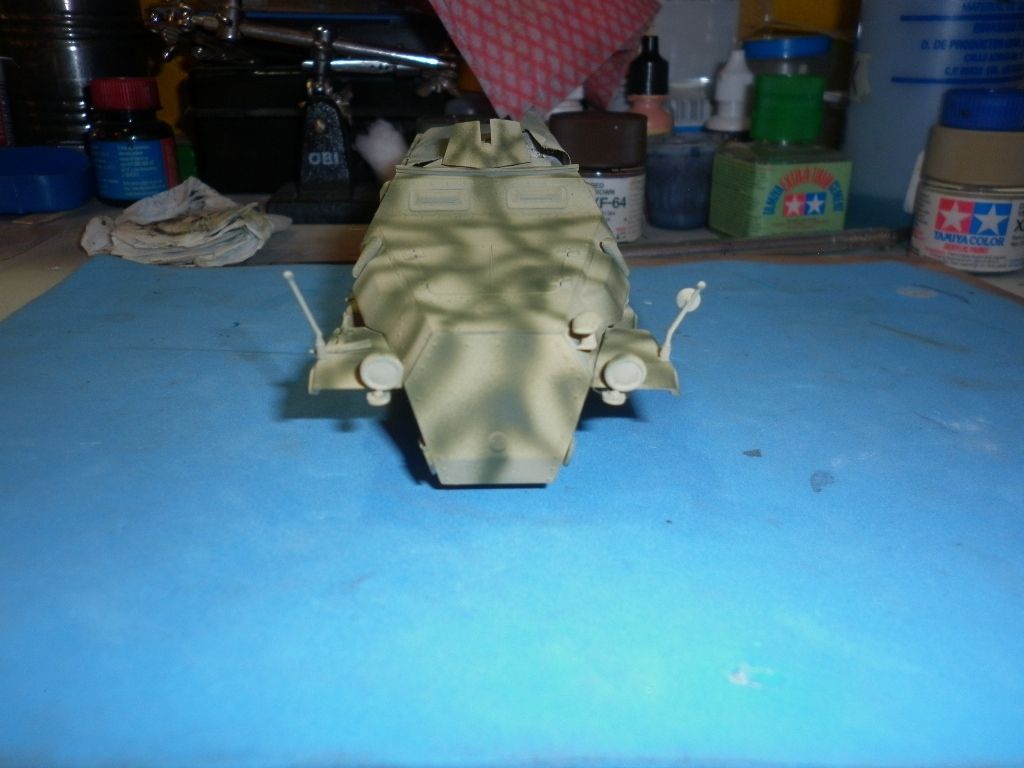
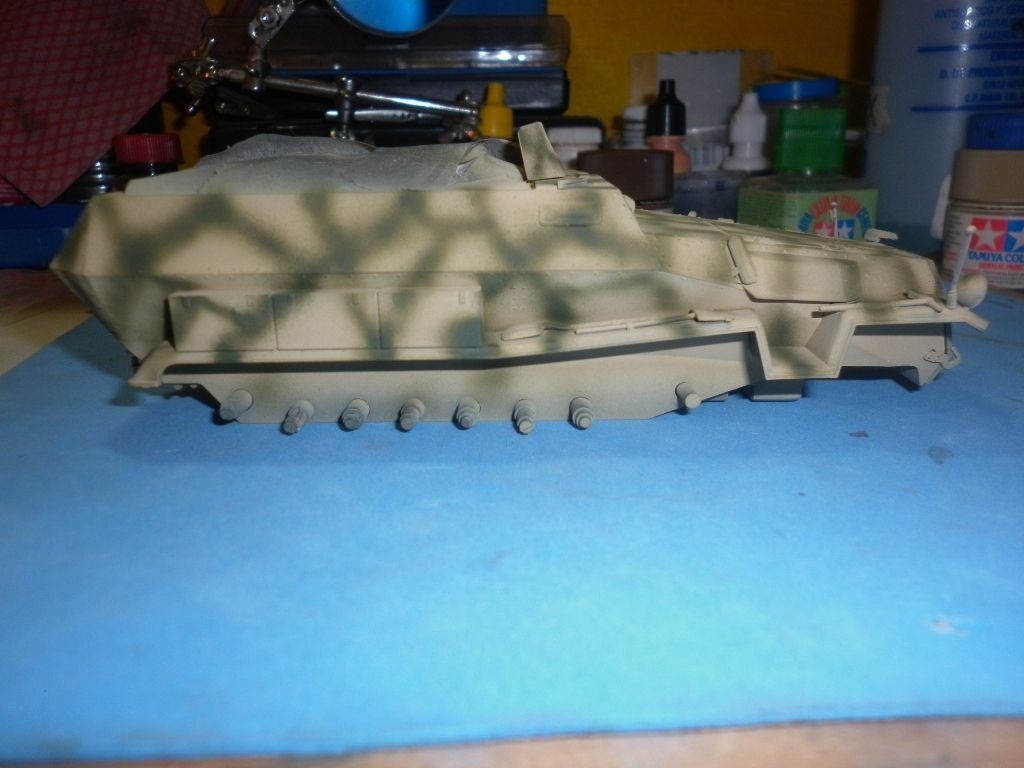
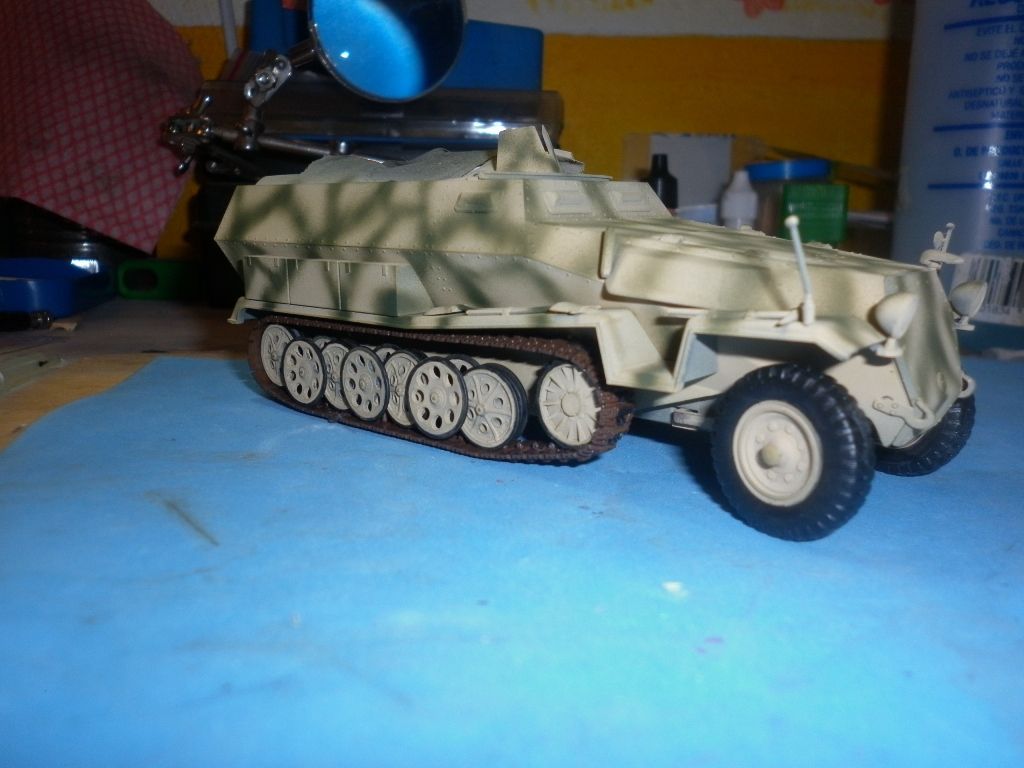
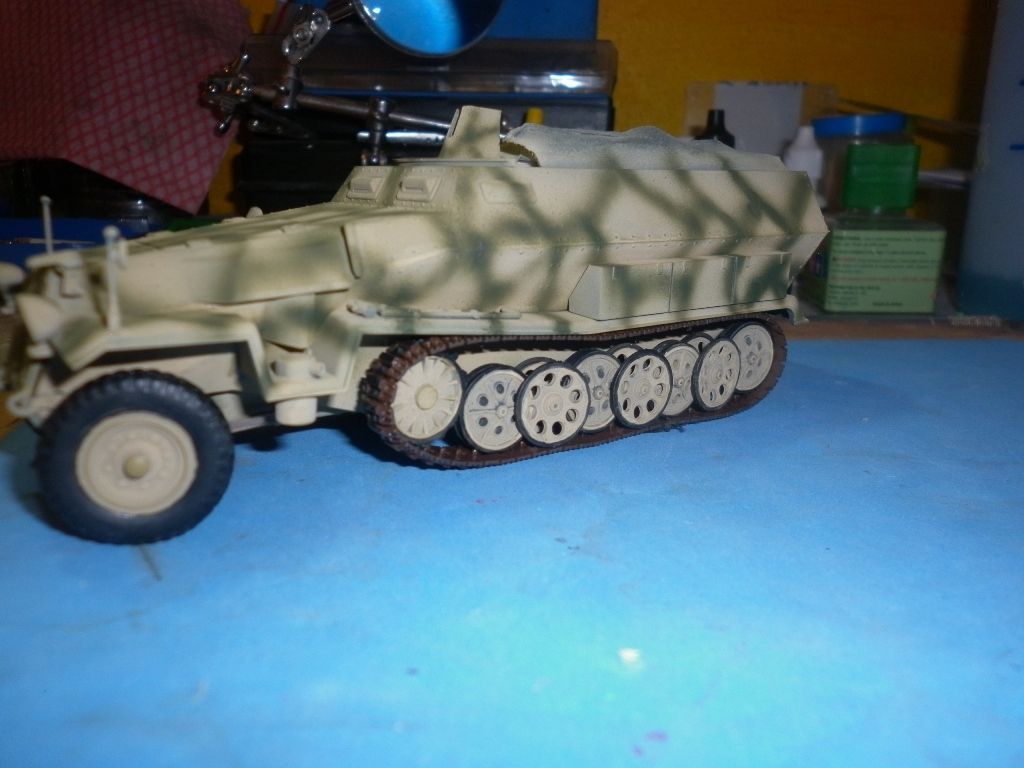
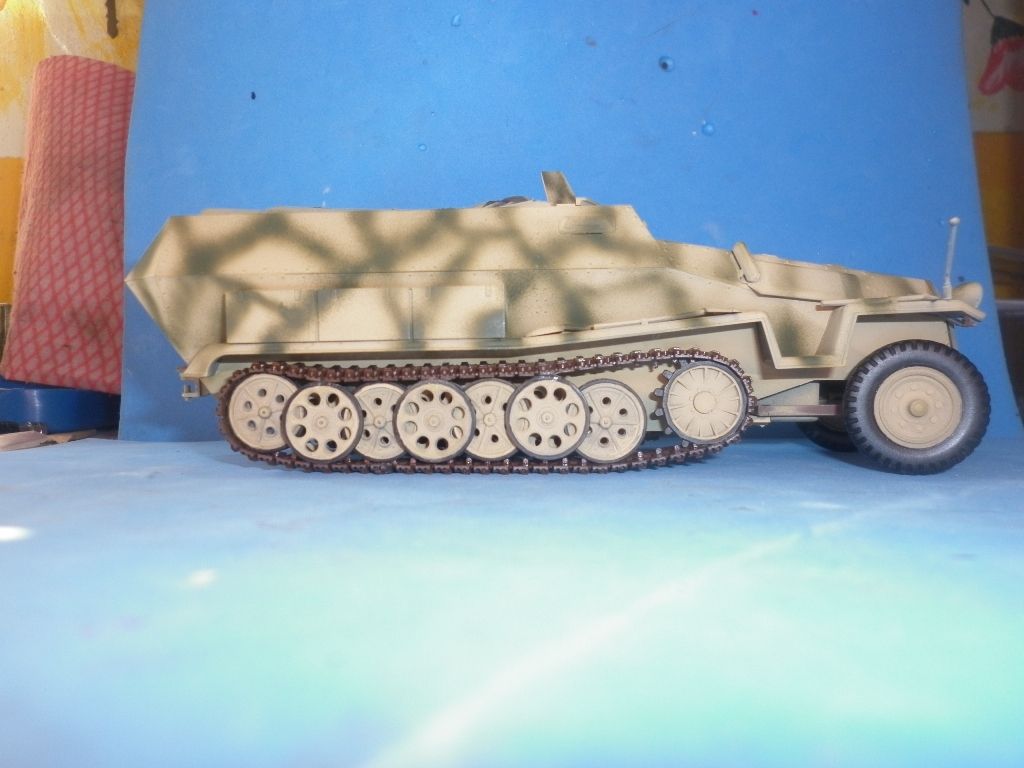
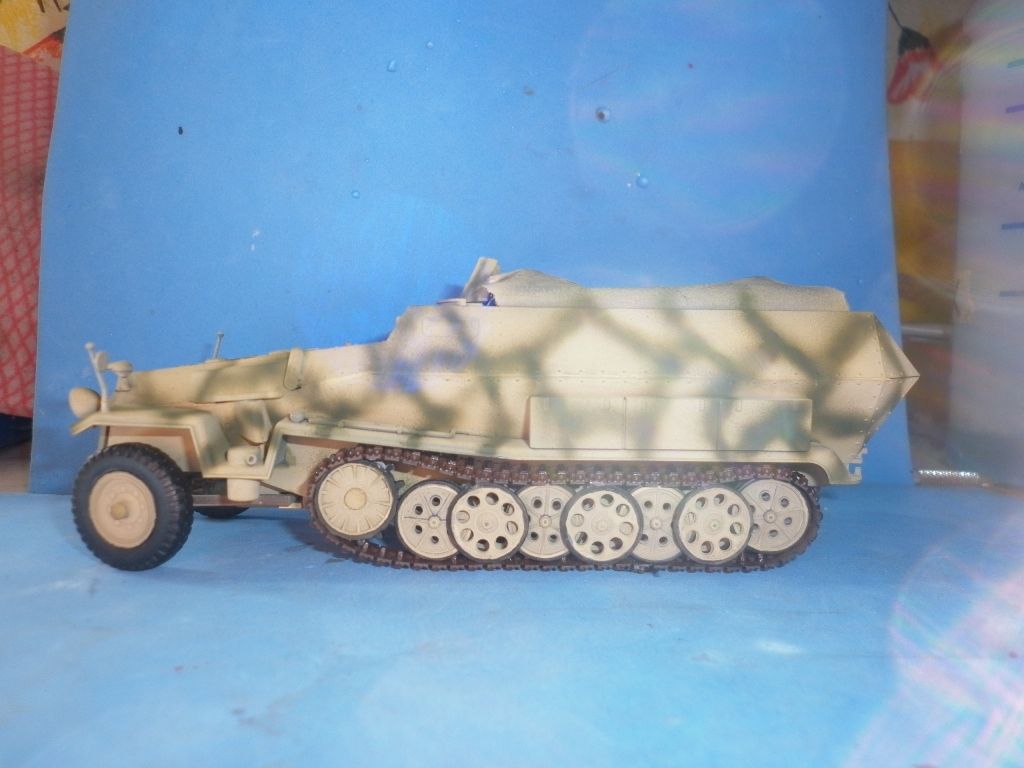
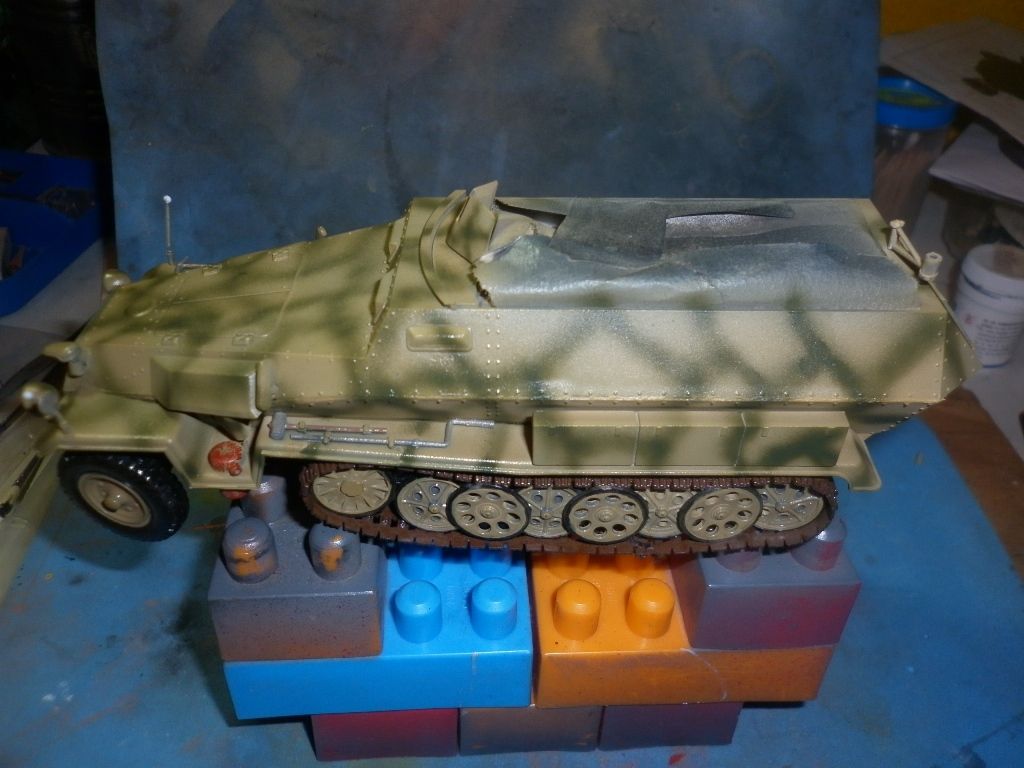
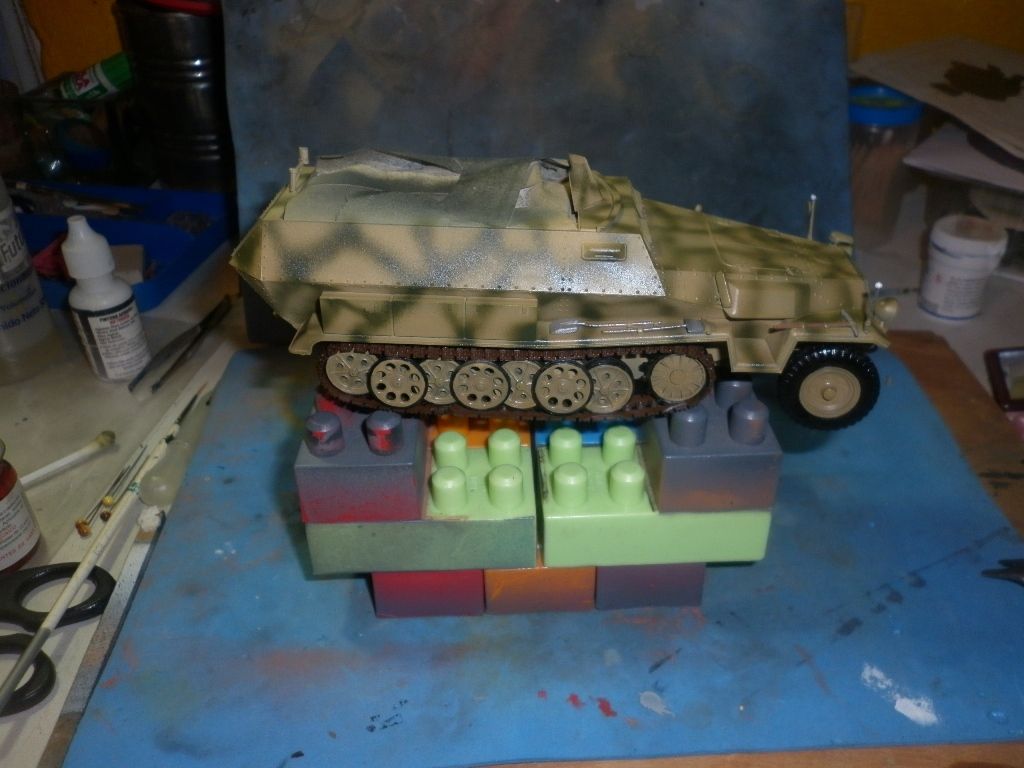
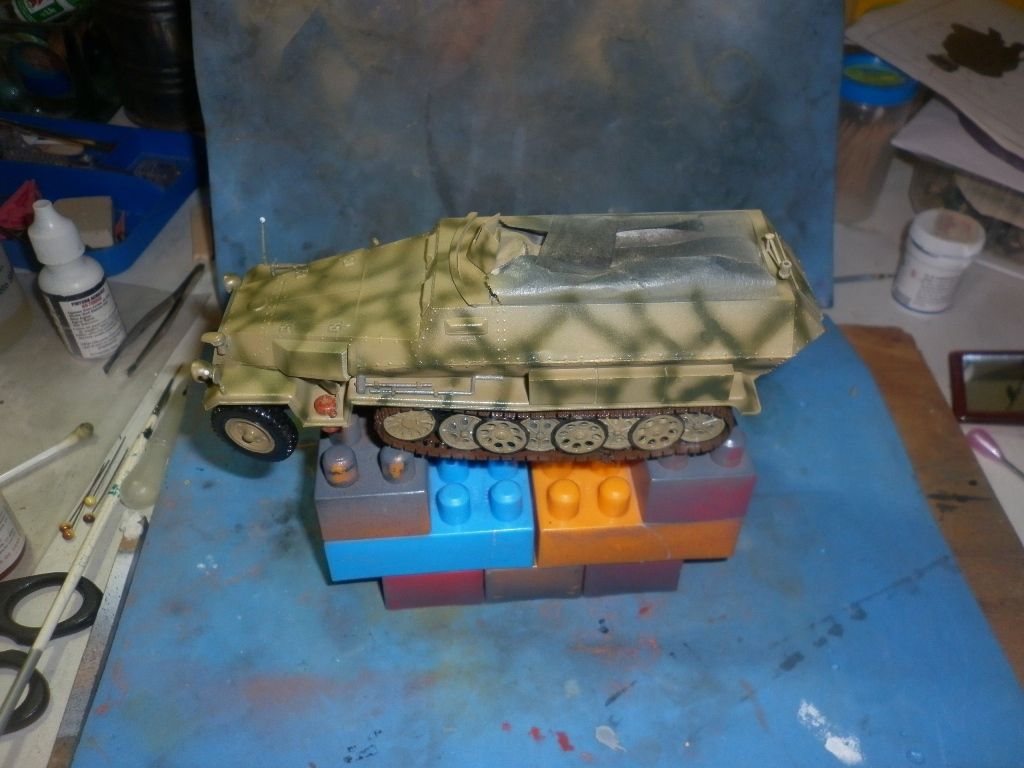
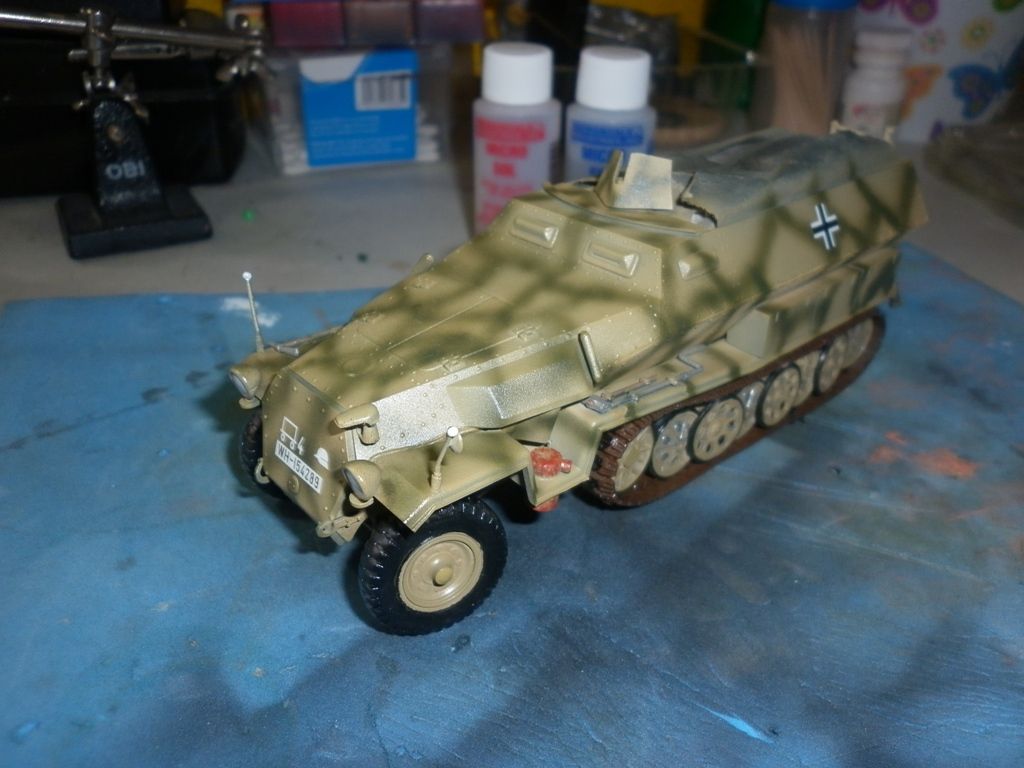
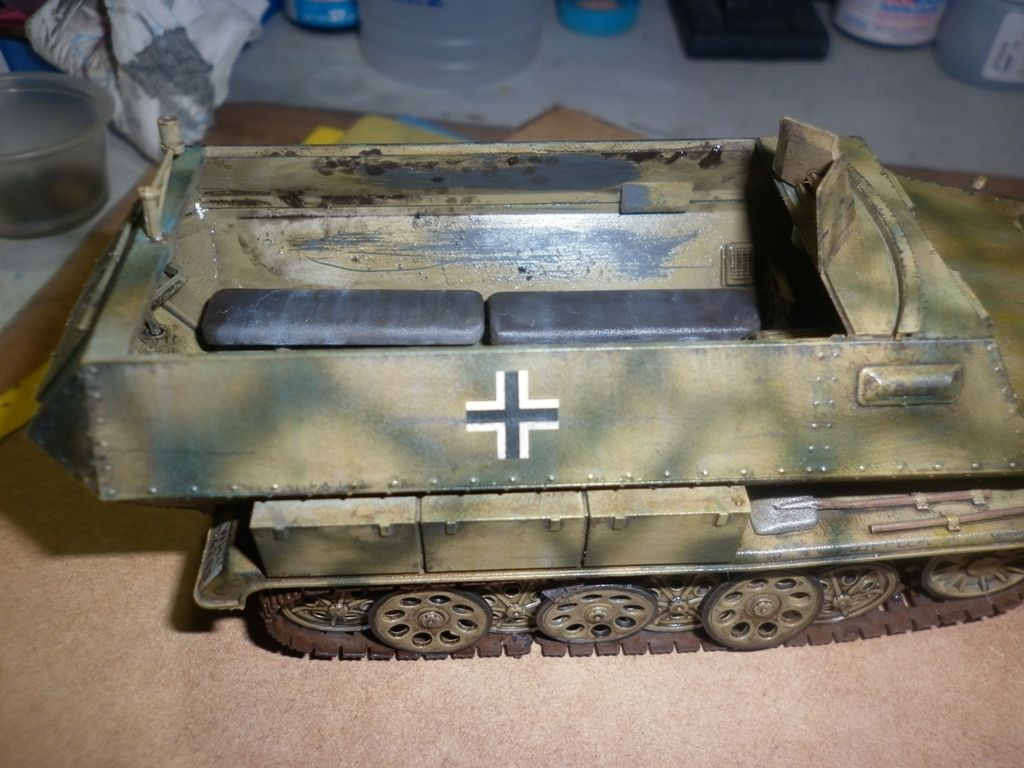
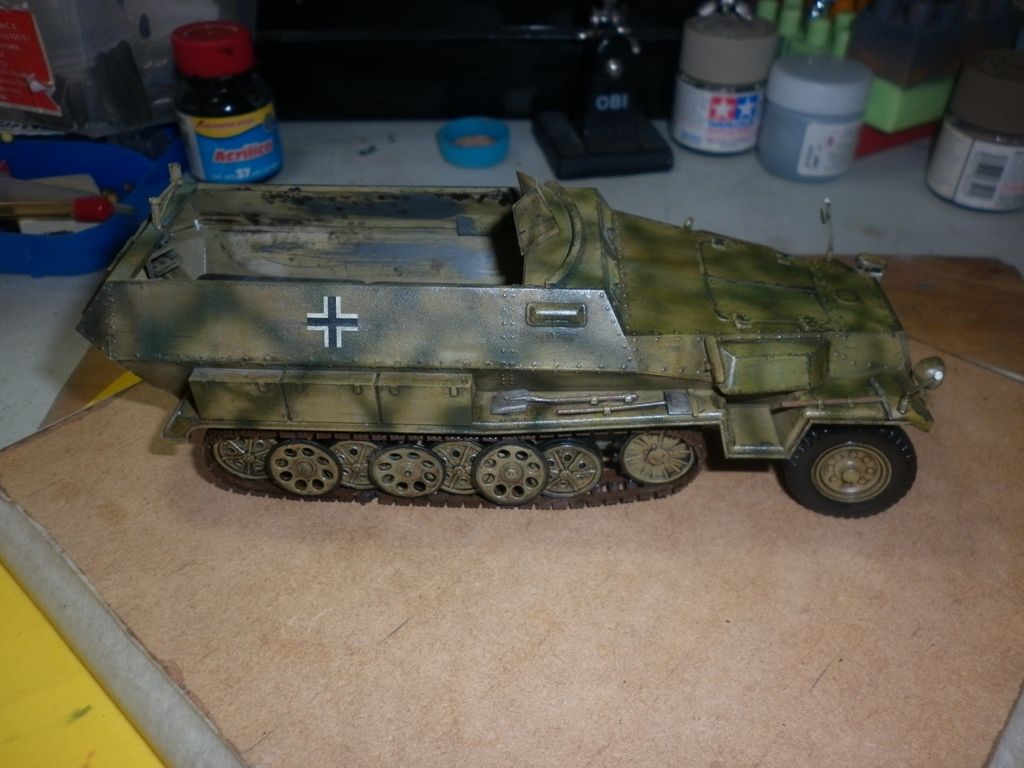
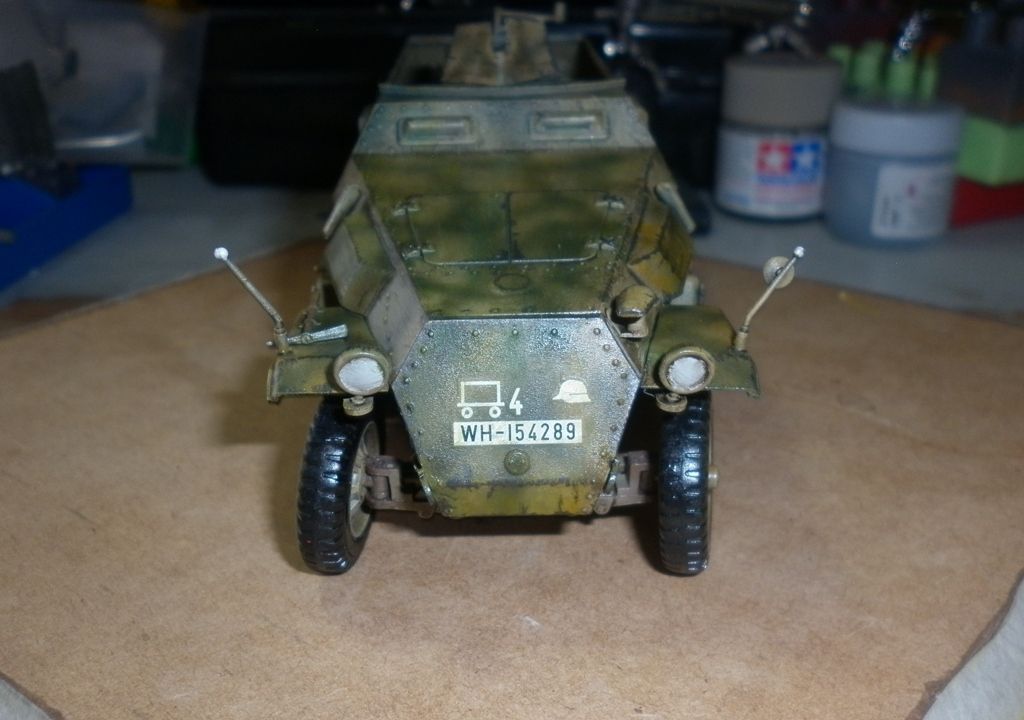
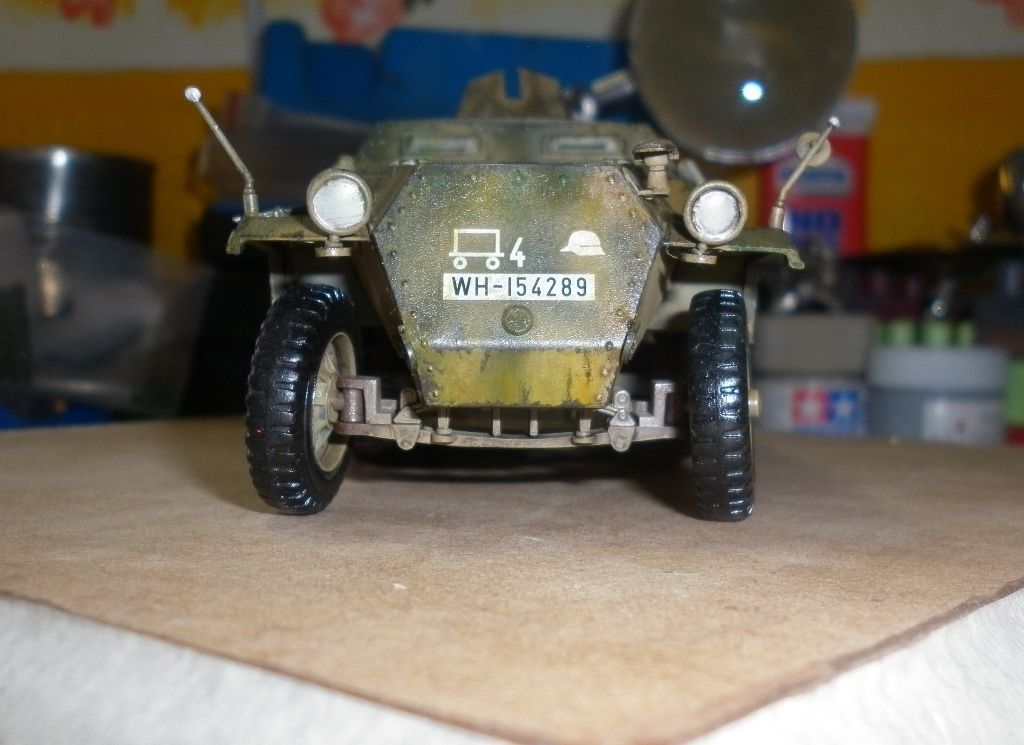
After that the base color was Tamiya XF-60 Dark Yellow. I also took the opportunity to paint wheels. I try to make shadows effect in some areas.
Image

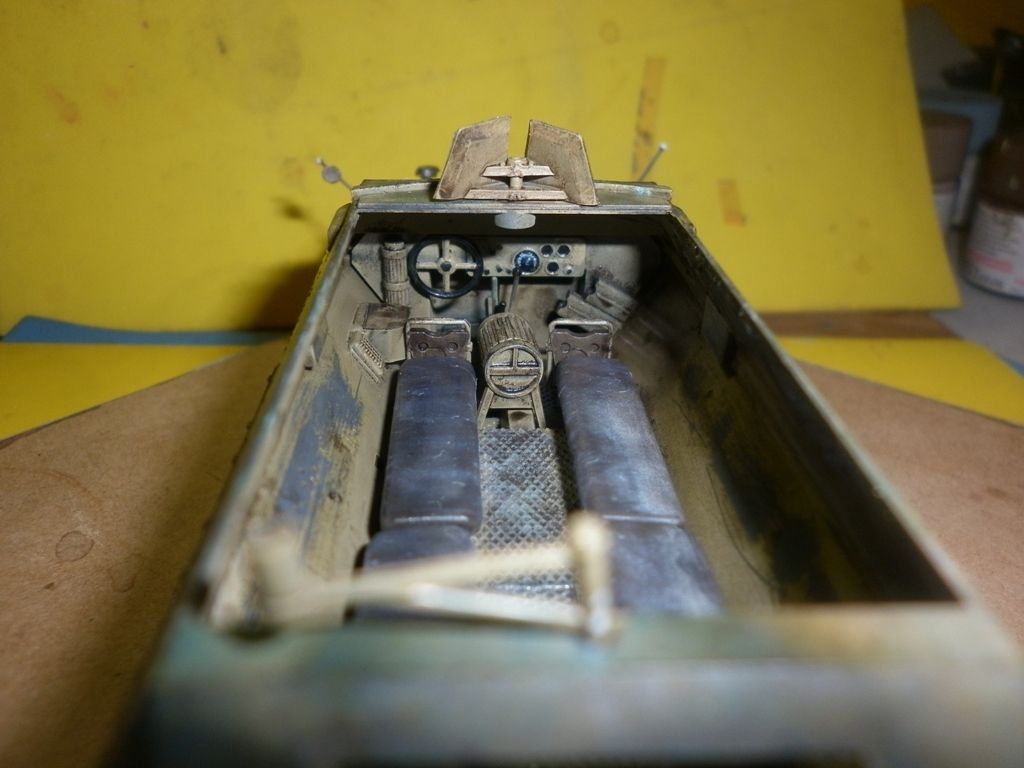
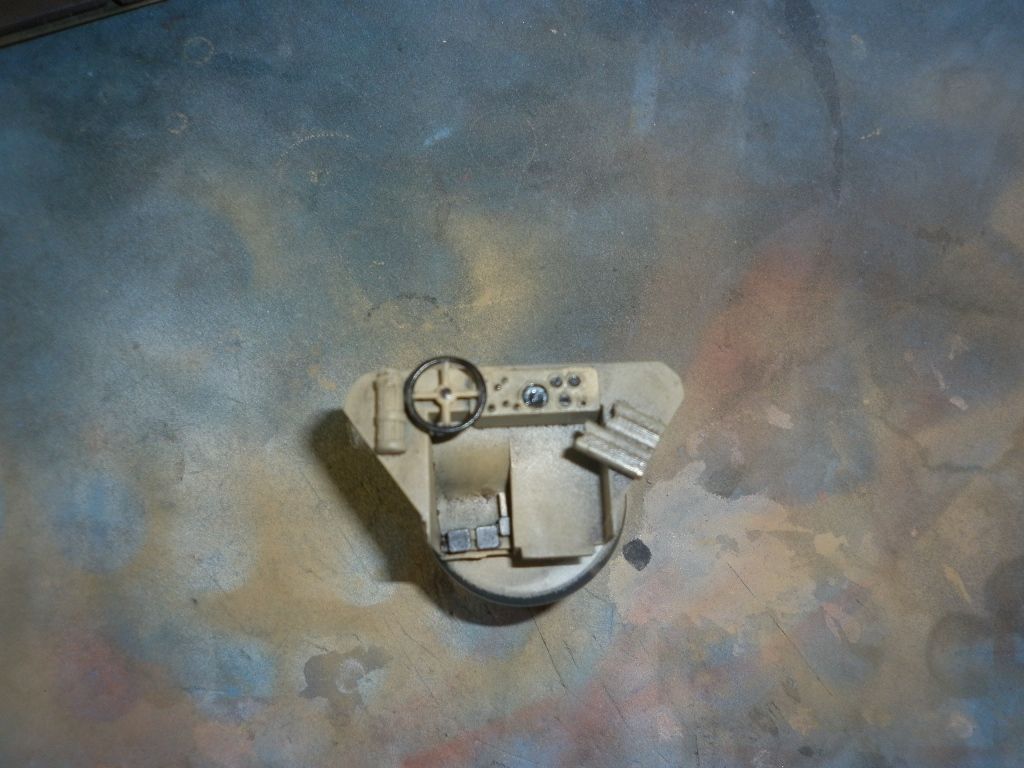
I paint with brush the seats with Tamiya XF-64 in 75% and XF-1 Flat Black in 25%. The meters were paint with Flat Black and a soft movement with drybrush with XF-2 Flat White. The steering wheel was paint with Flat Black also the pedals and the tip of the gear lever.
Image

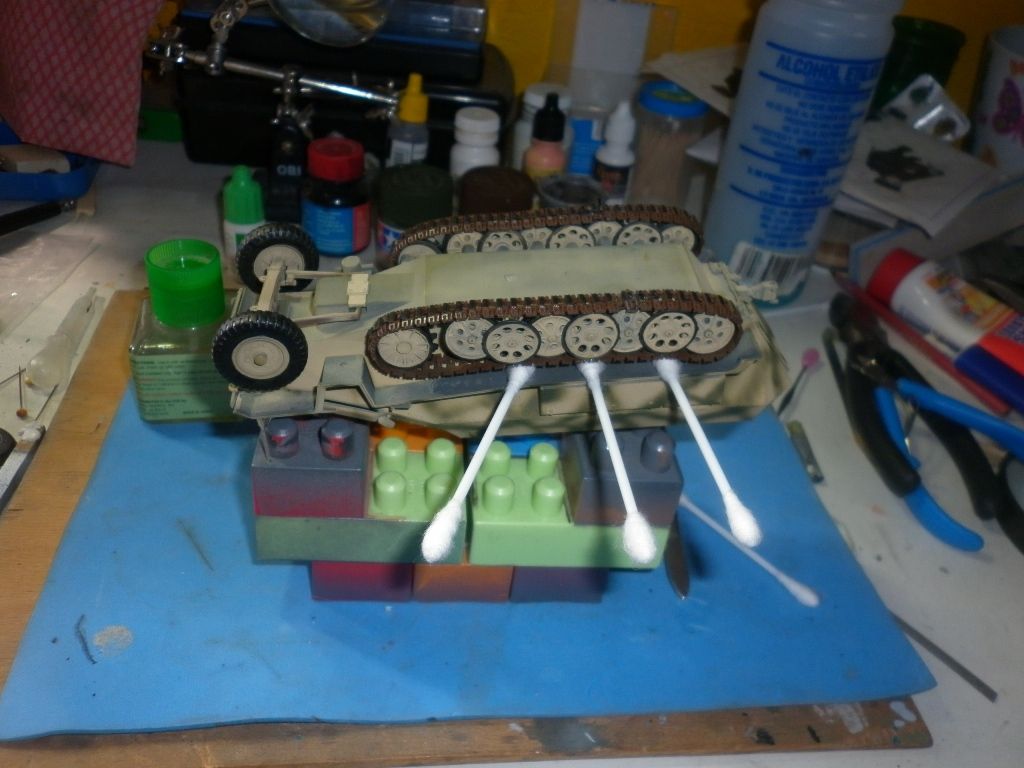
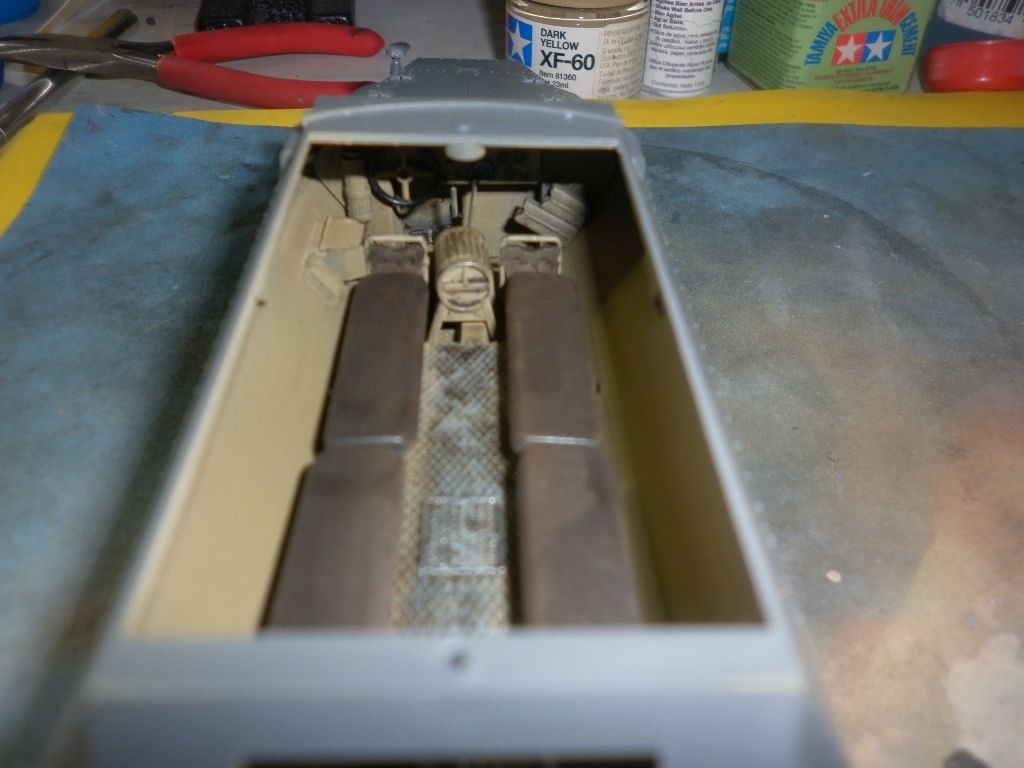
I put Tamiya XF-66 Light Grey in a Q-tip and paint the floor for a worn out effect. After that I pass a drybrush with Tamiya X-11 Silver Chrome in the center of the floor.
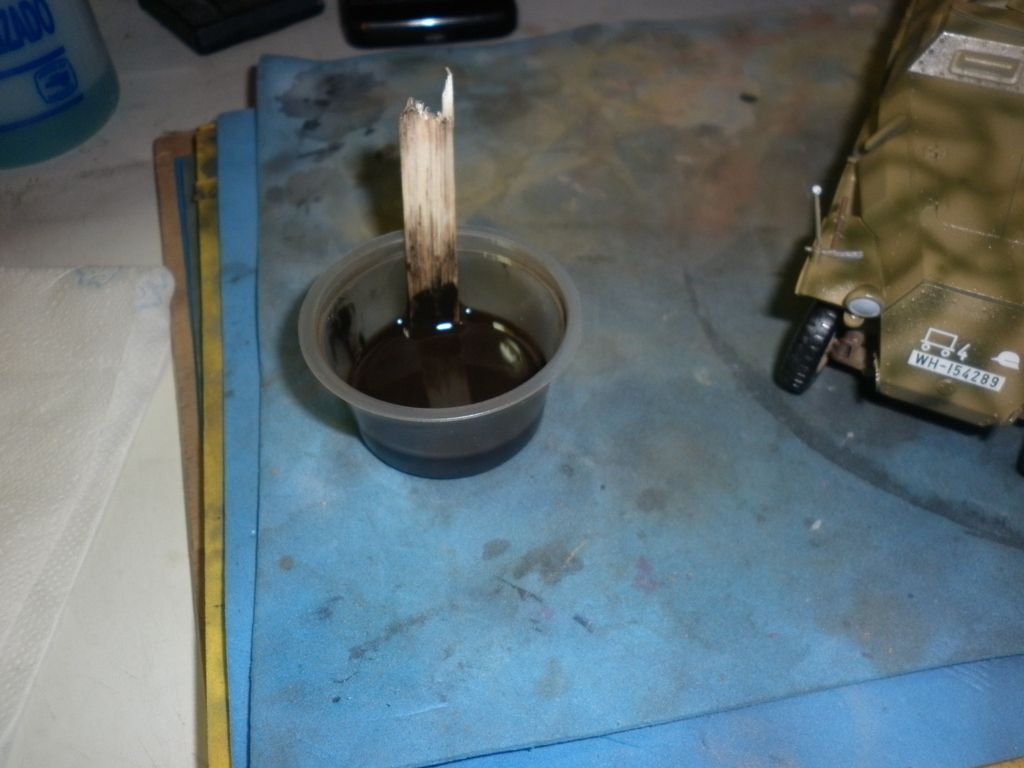
I protect the pieces with a coat of Future wax. When were dry I made a mix with black and raw umber oil paints 50-50 and thinner them with white spirit for make a wash. I applicated it with a brush and clean the excess with a paper towel. I like the result.
Image

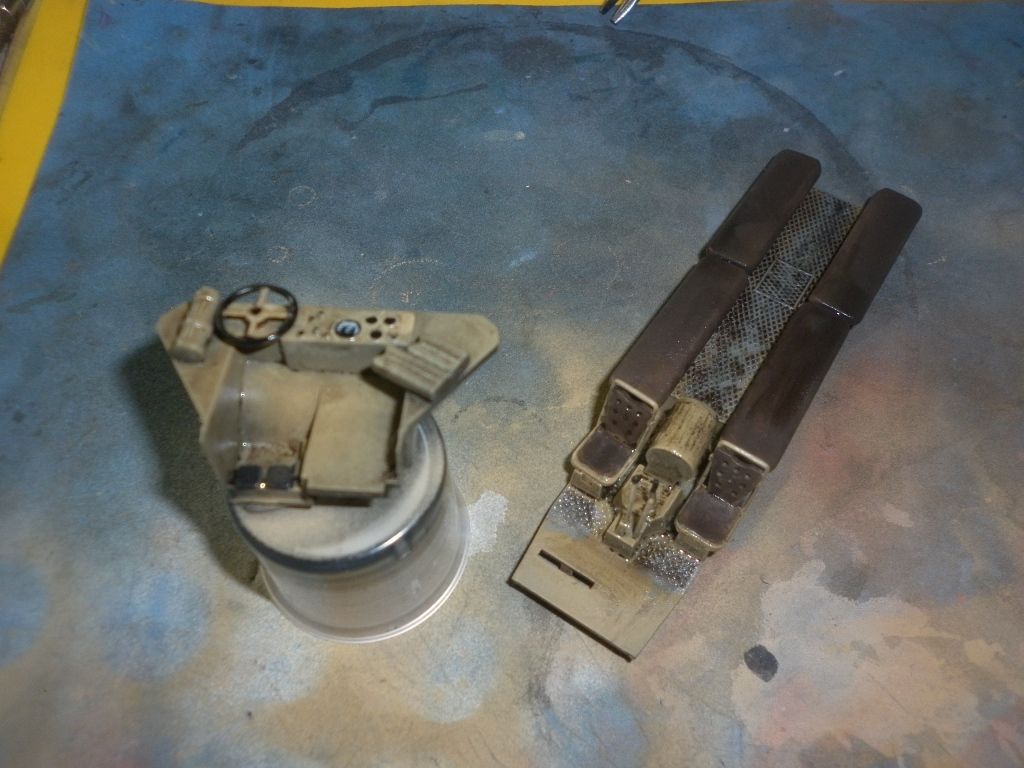
I put a drop of Future on the meters like glass.
Image

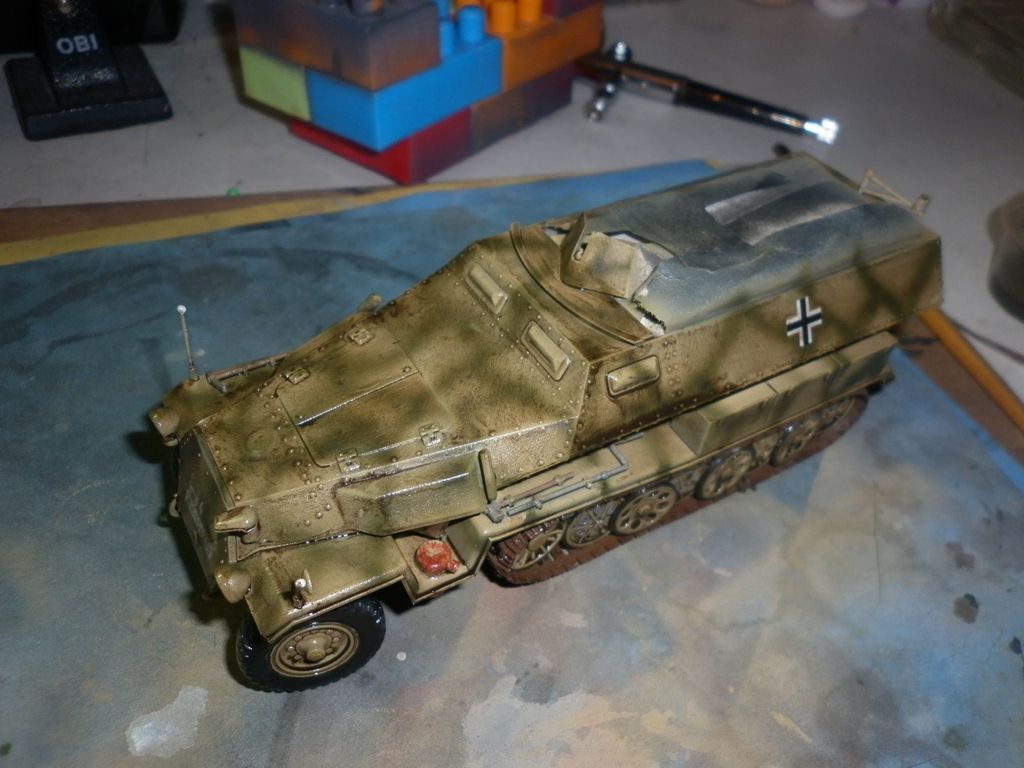
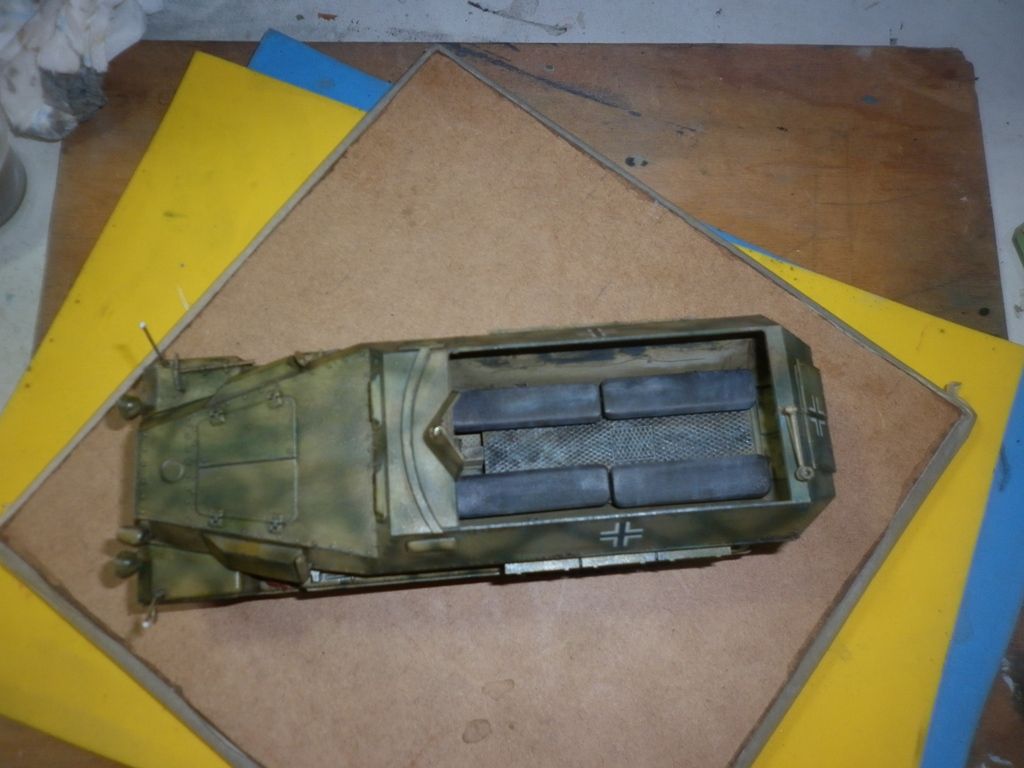
I like the wash finish. Is very contrasting with the colors and the floor. What do you think?
Image
Image

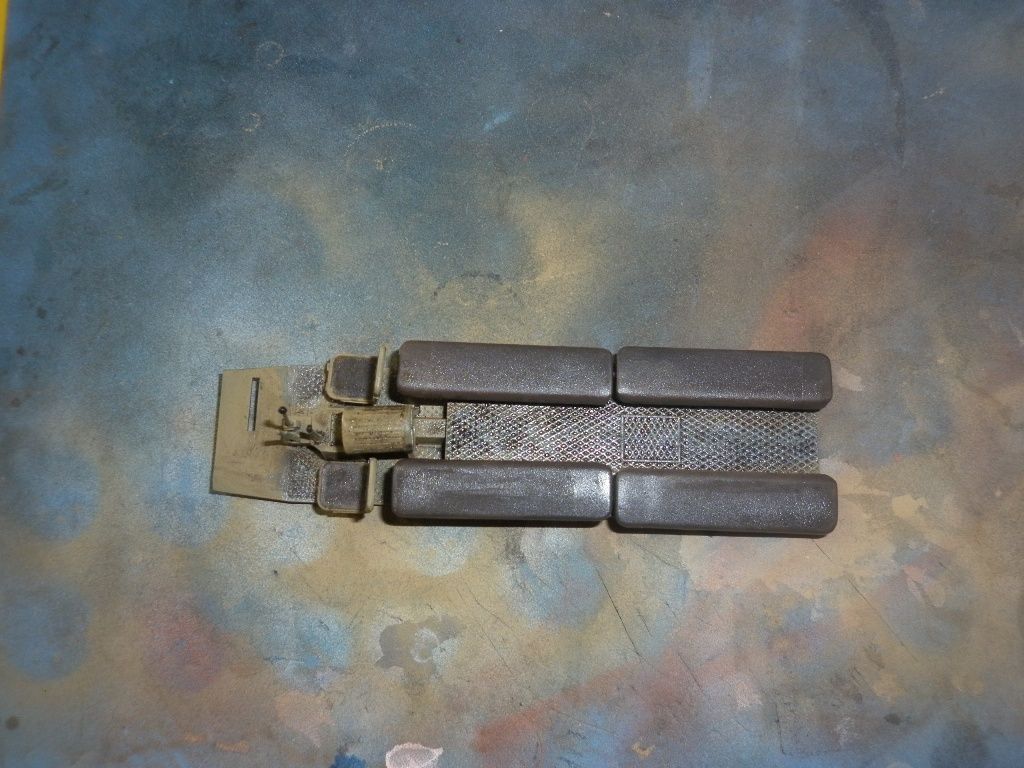
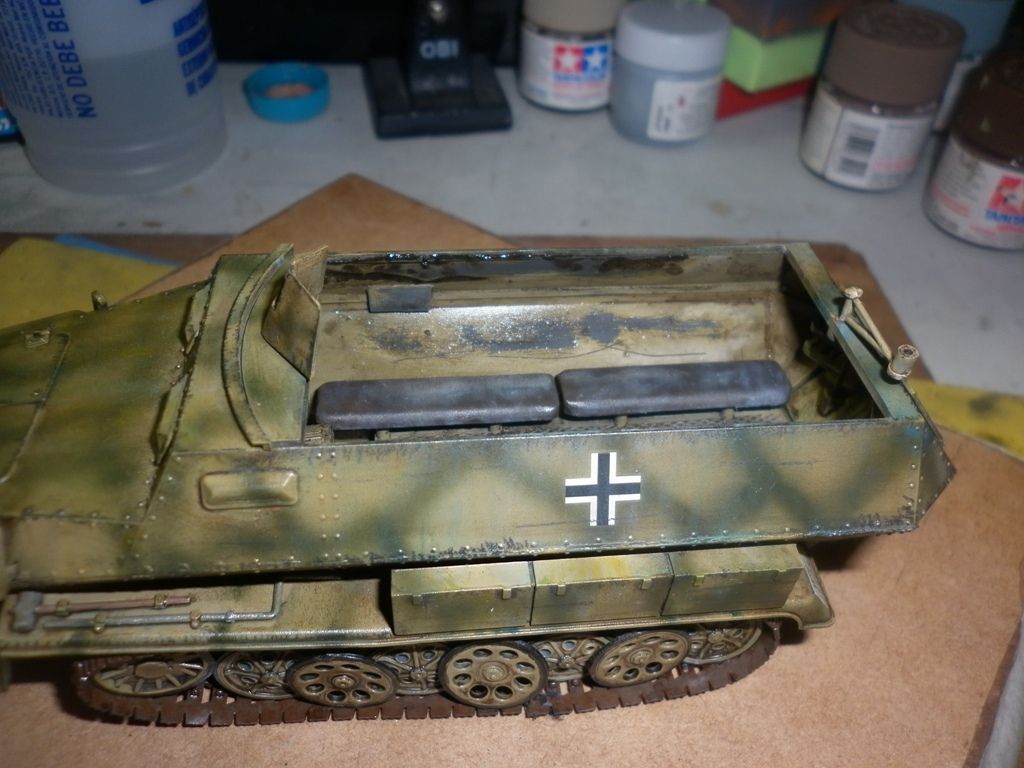
The interior was paint with Dark Yellow and washed with the same mix of oil paints.
Image
Image

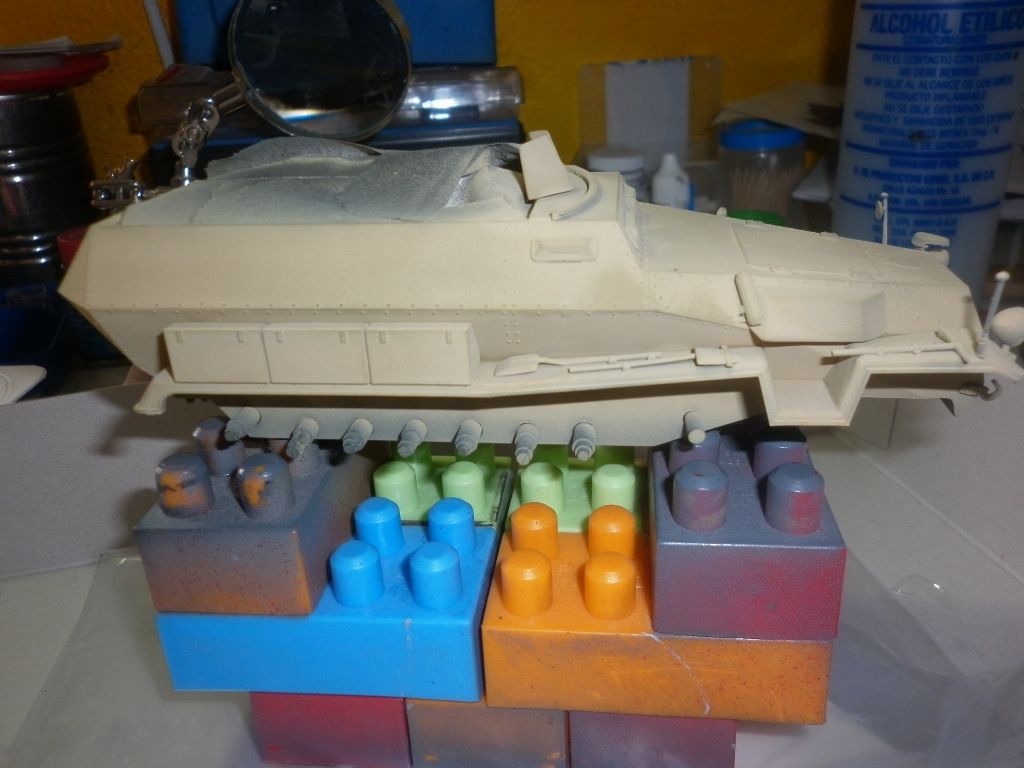
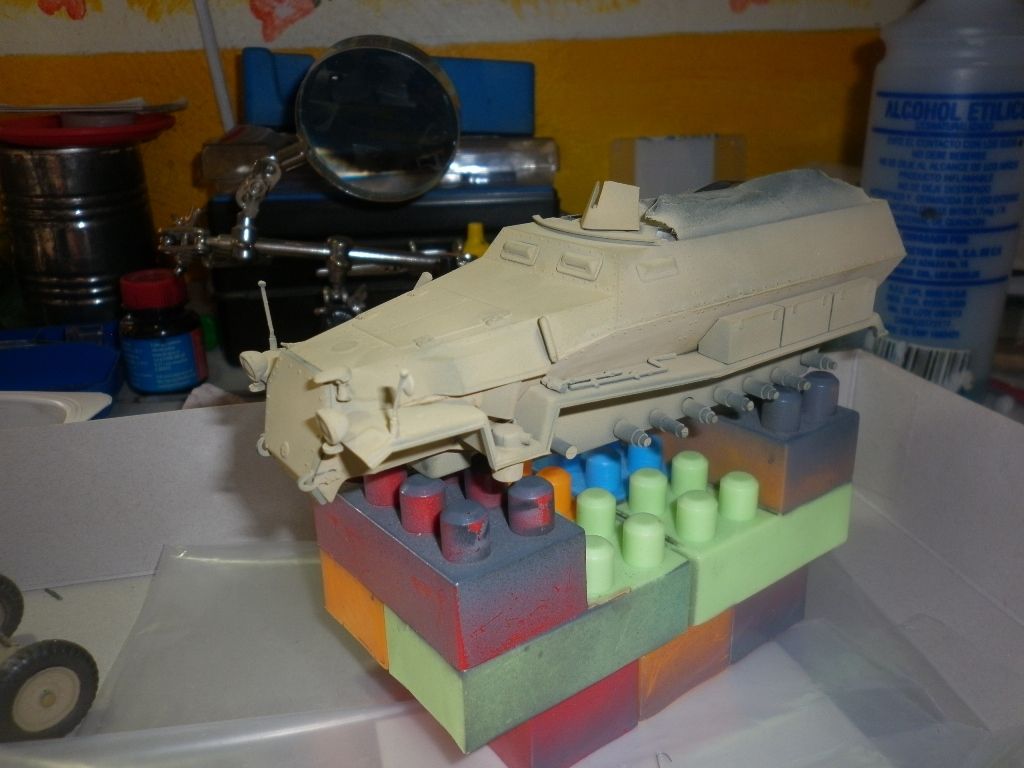
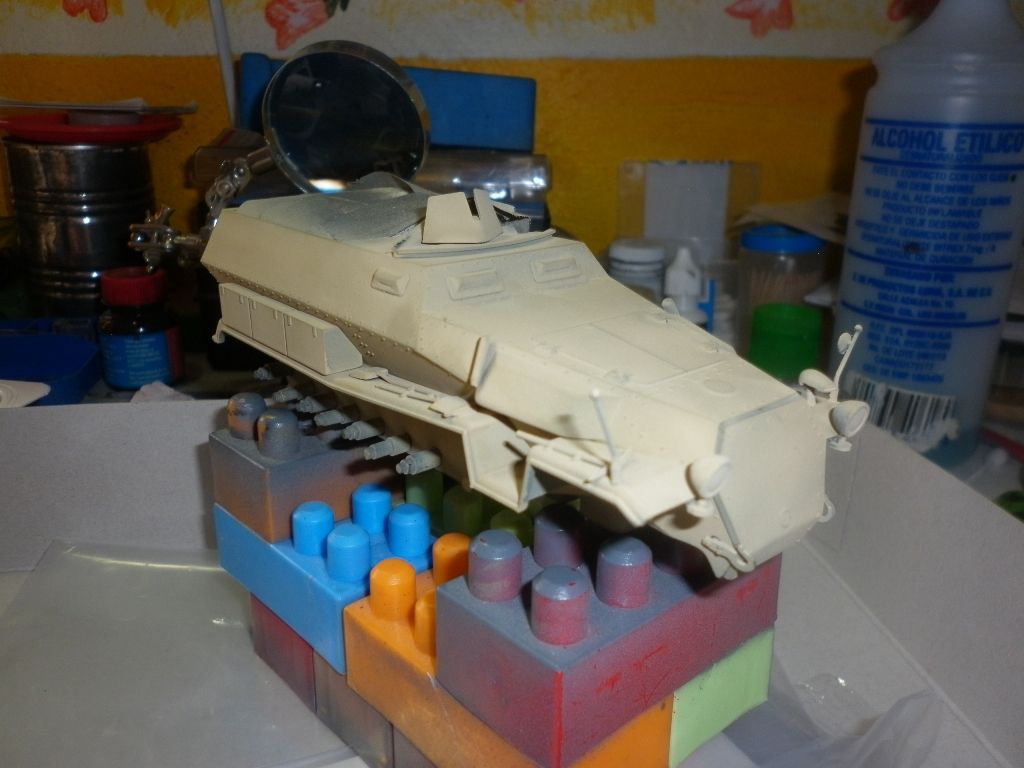
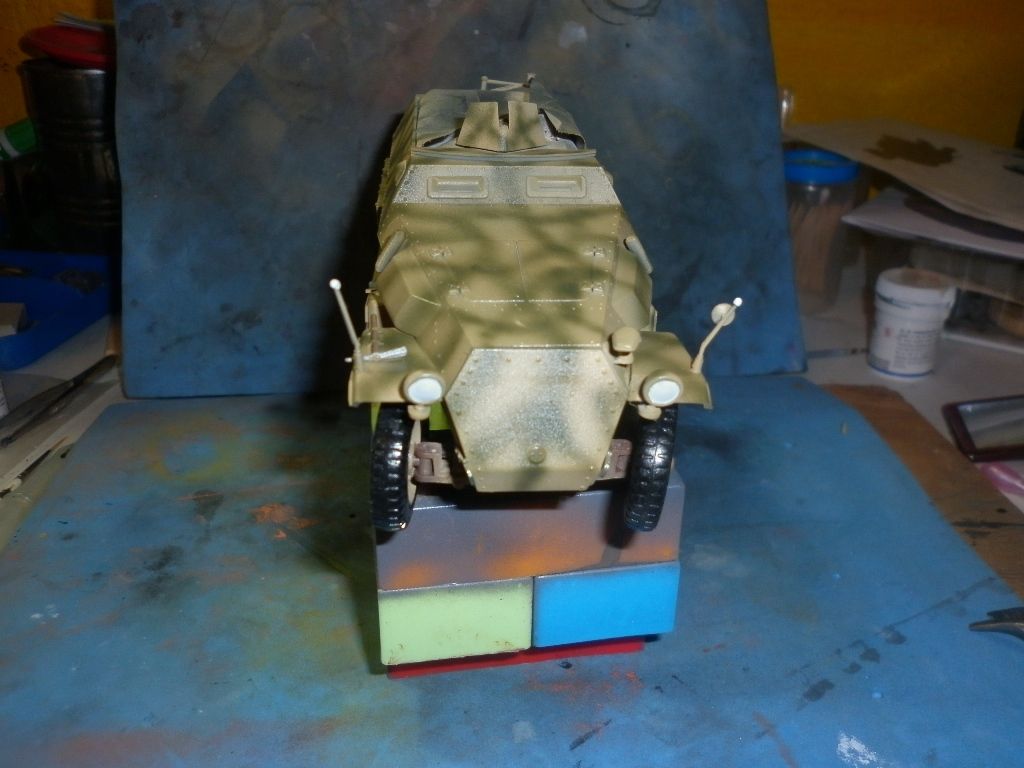
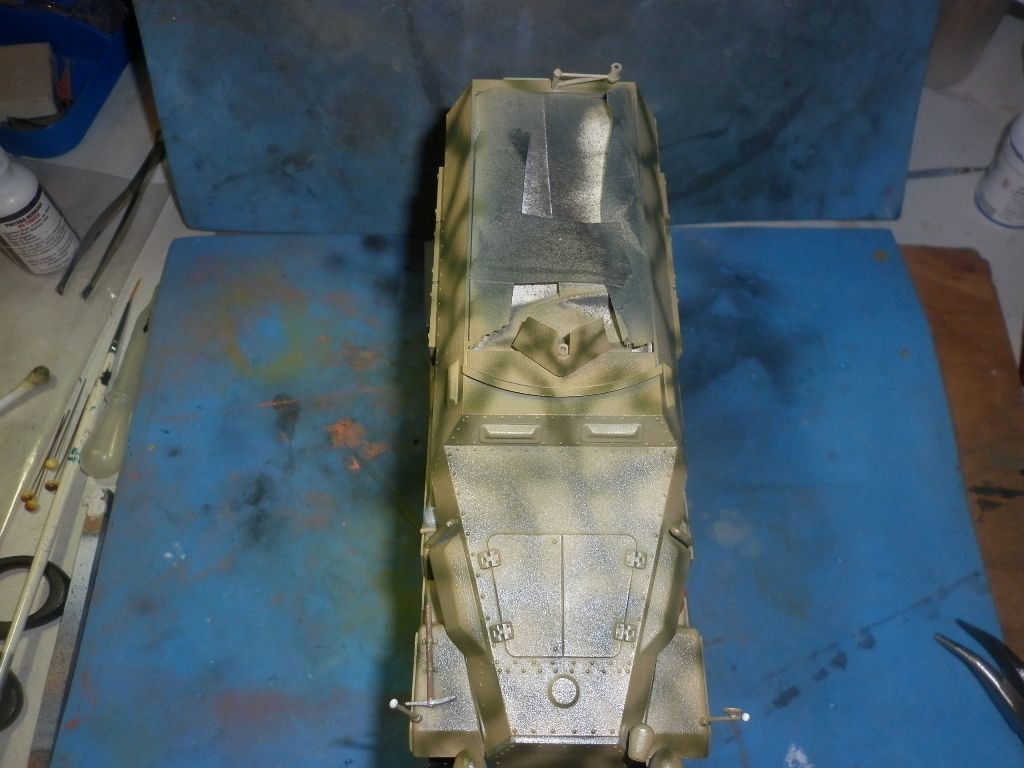
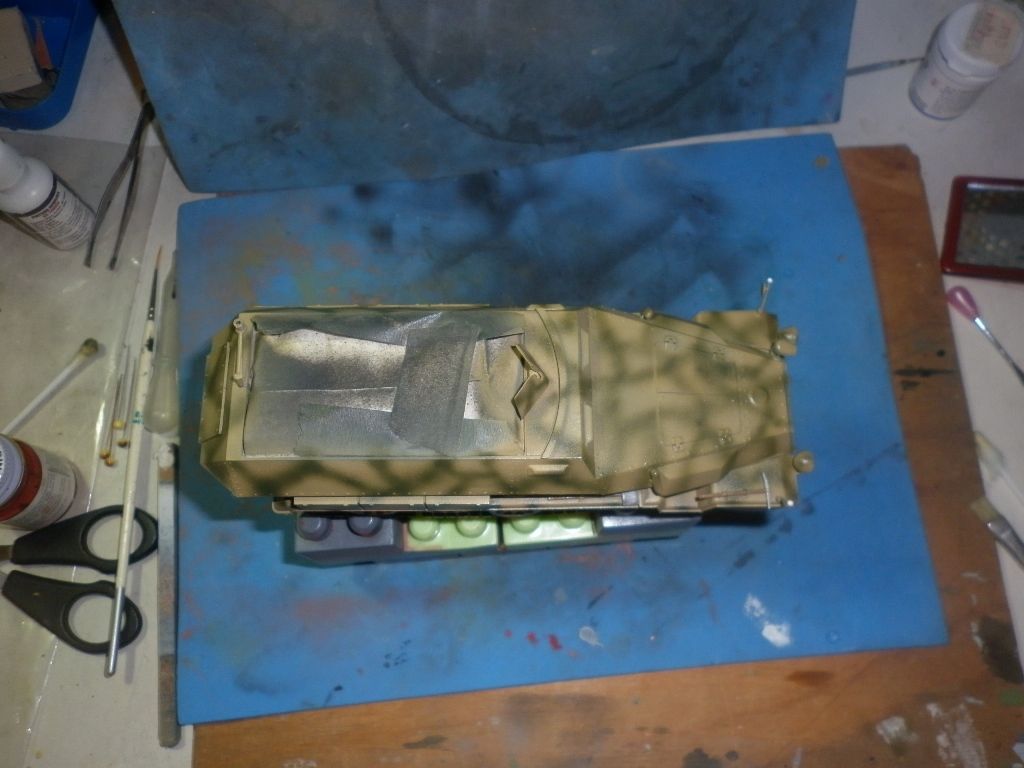
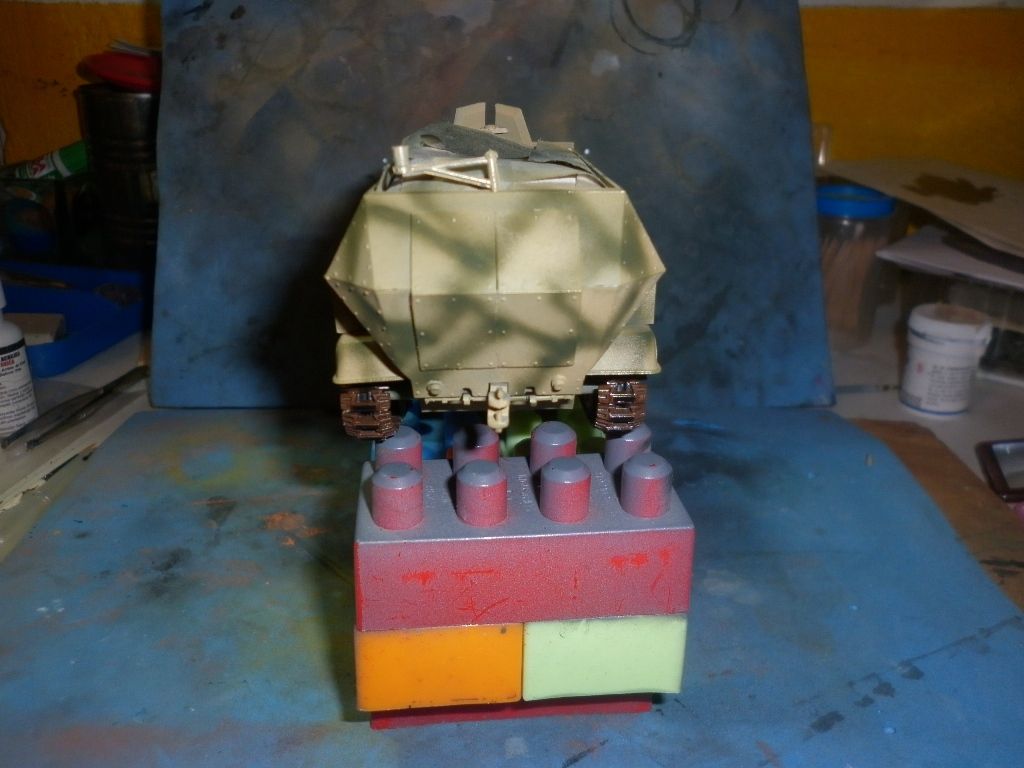
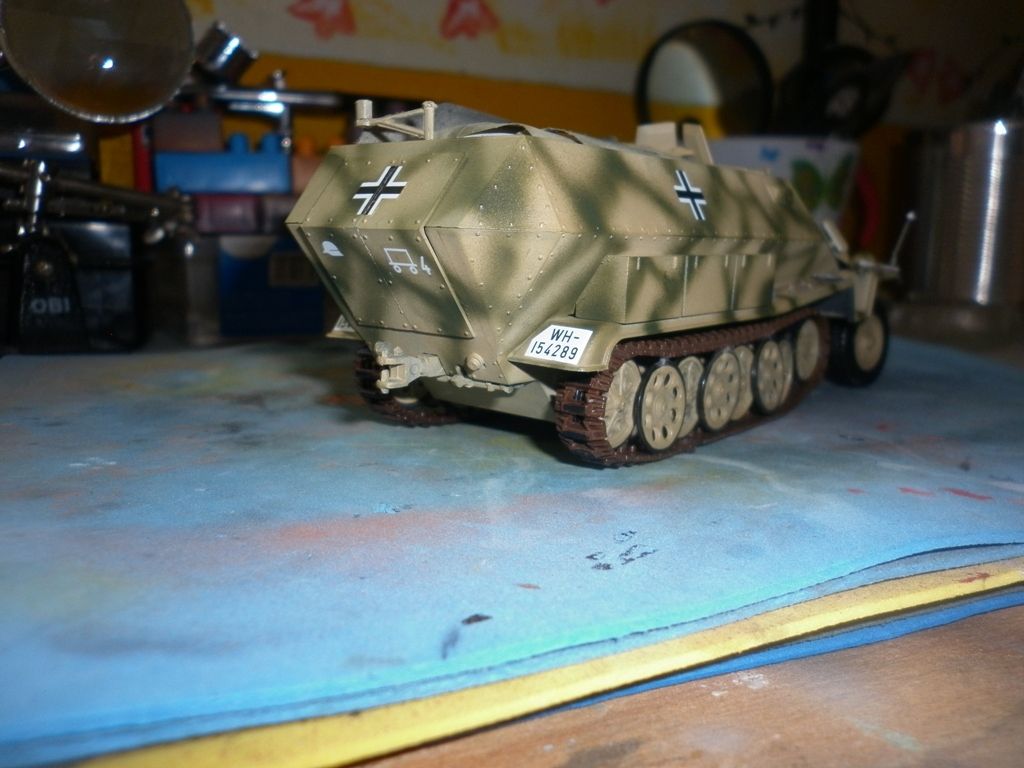
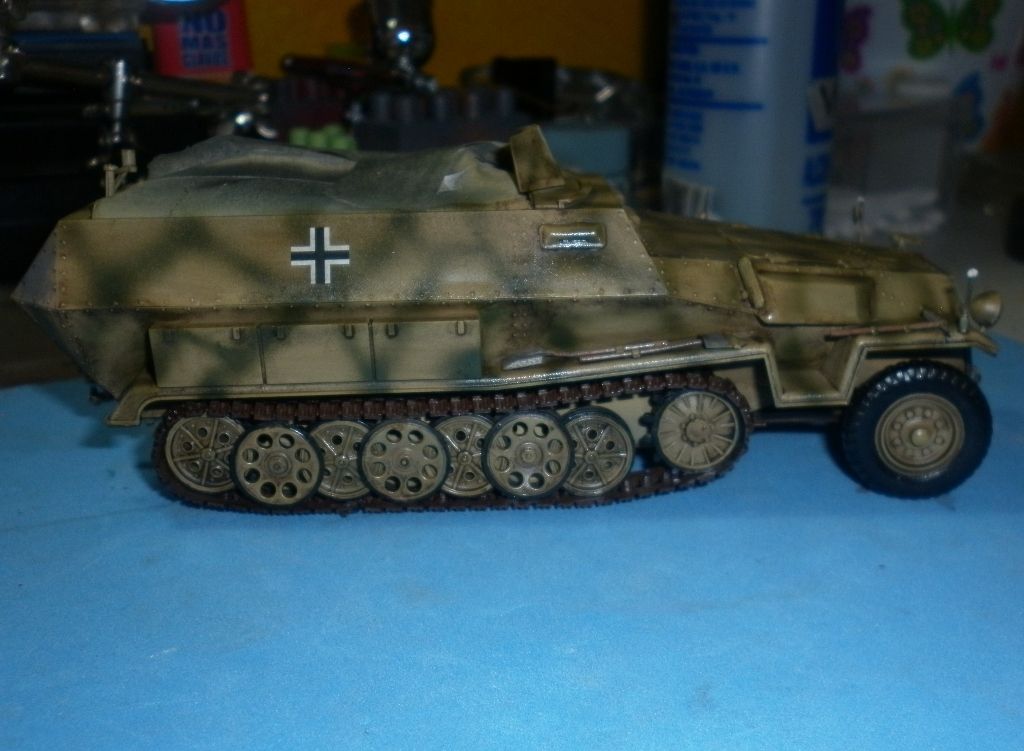
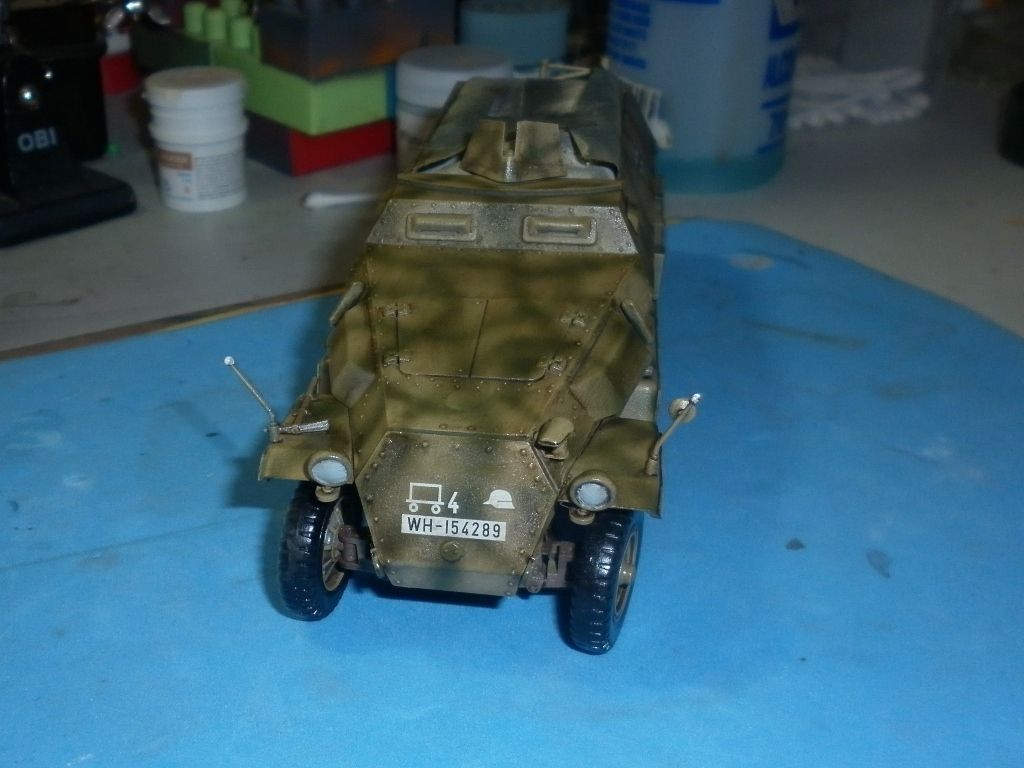
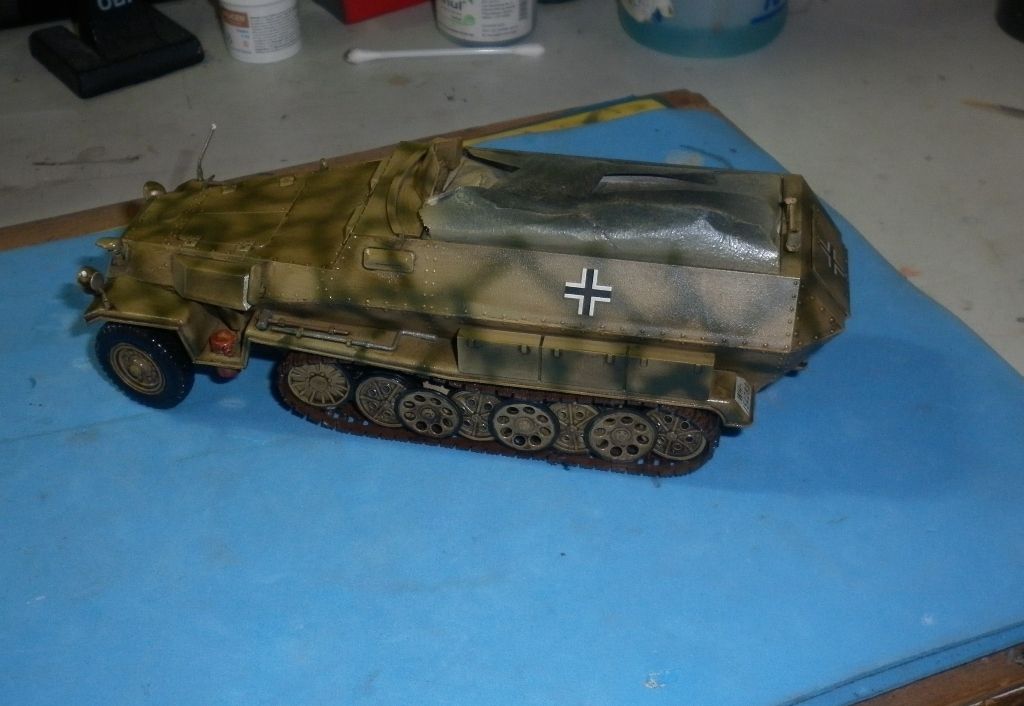
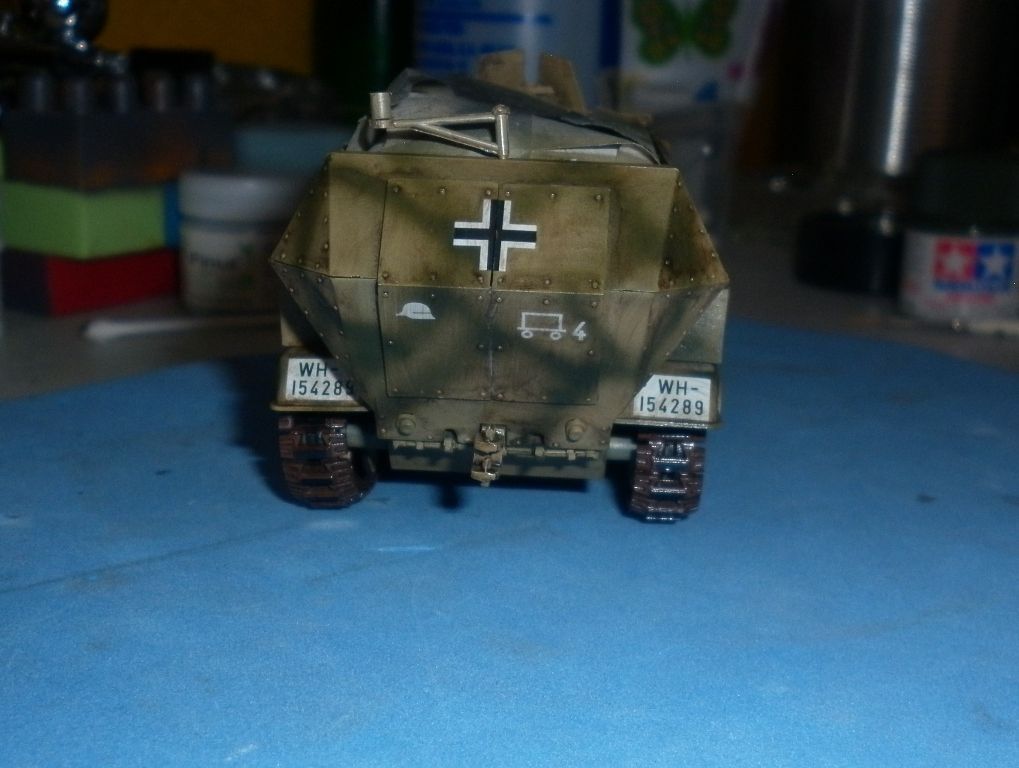
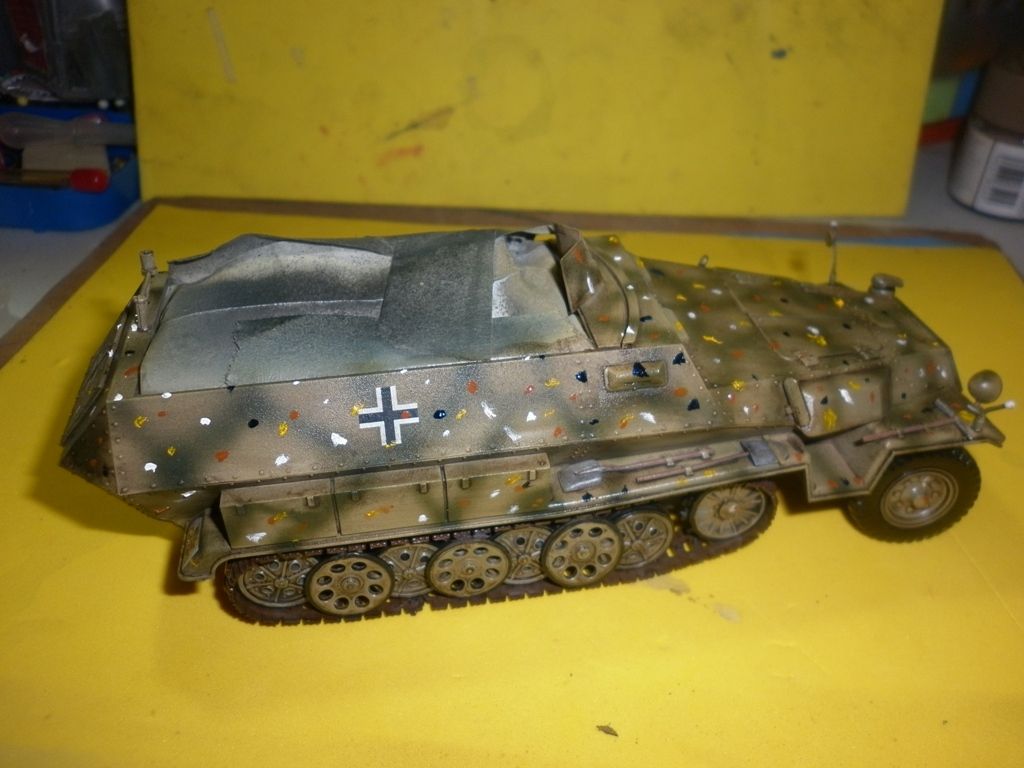
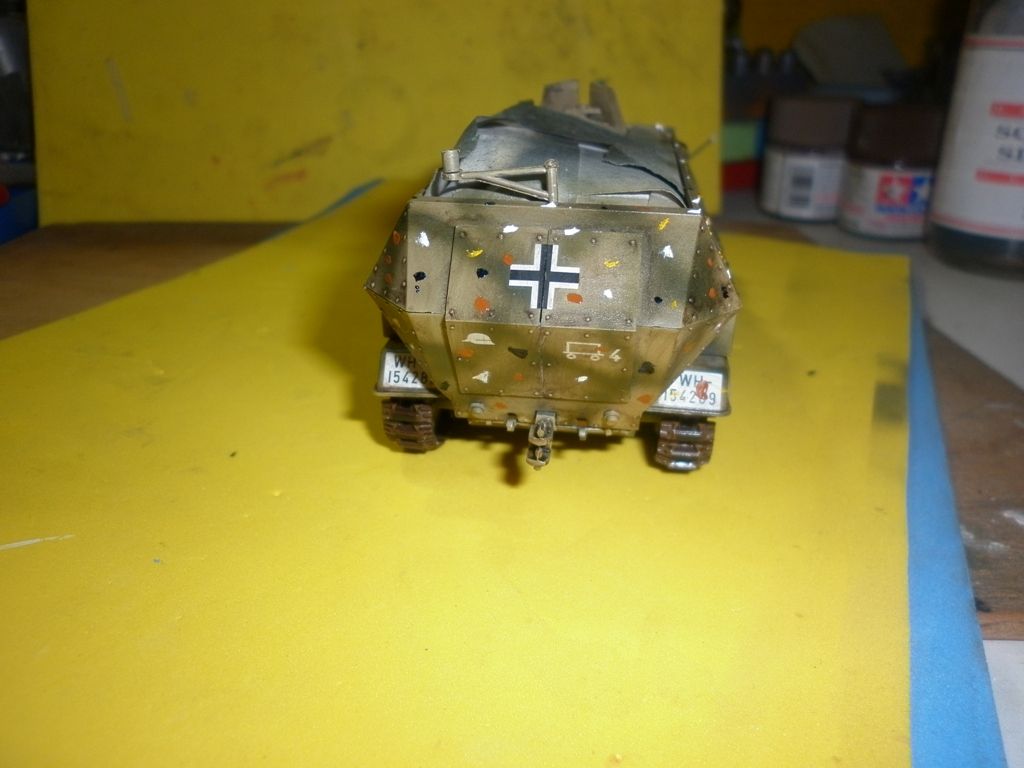
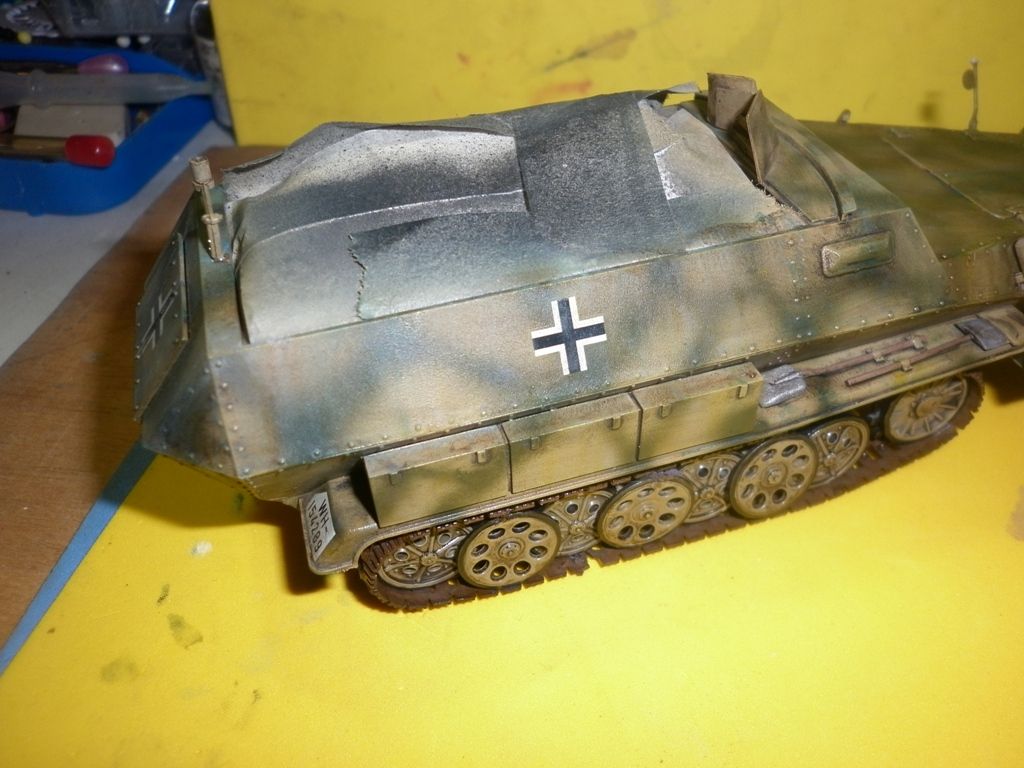
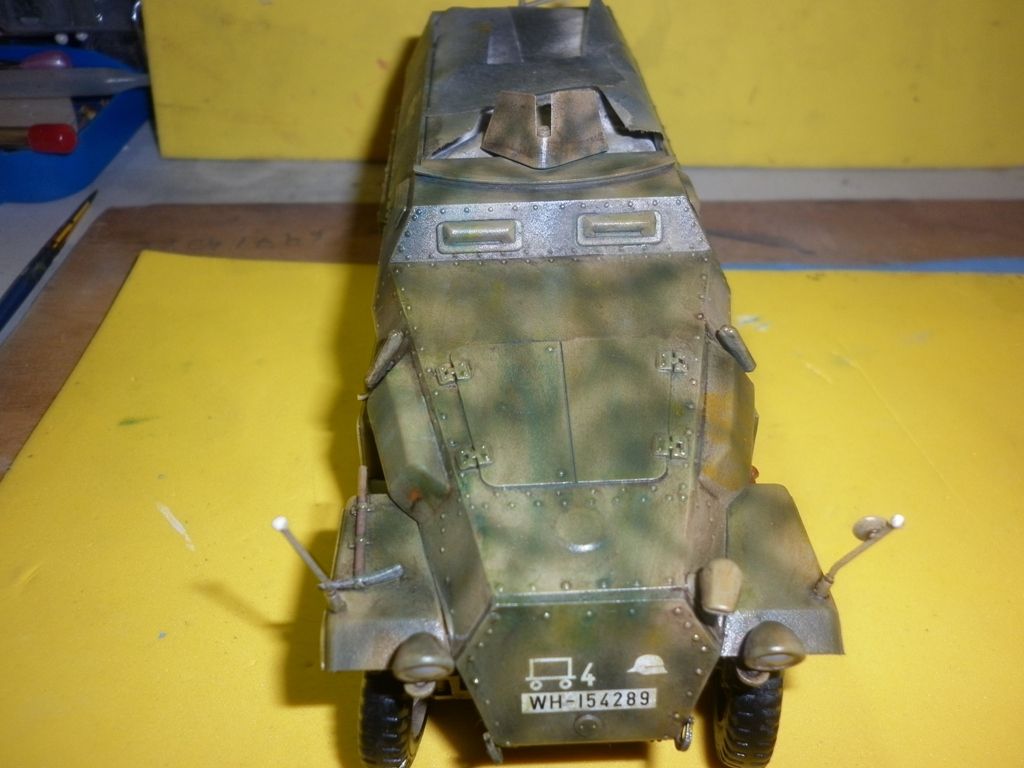
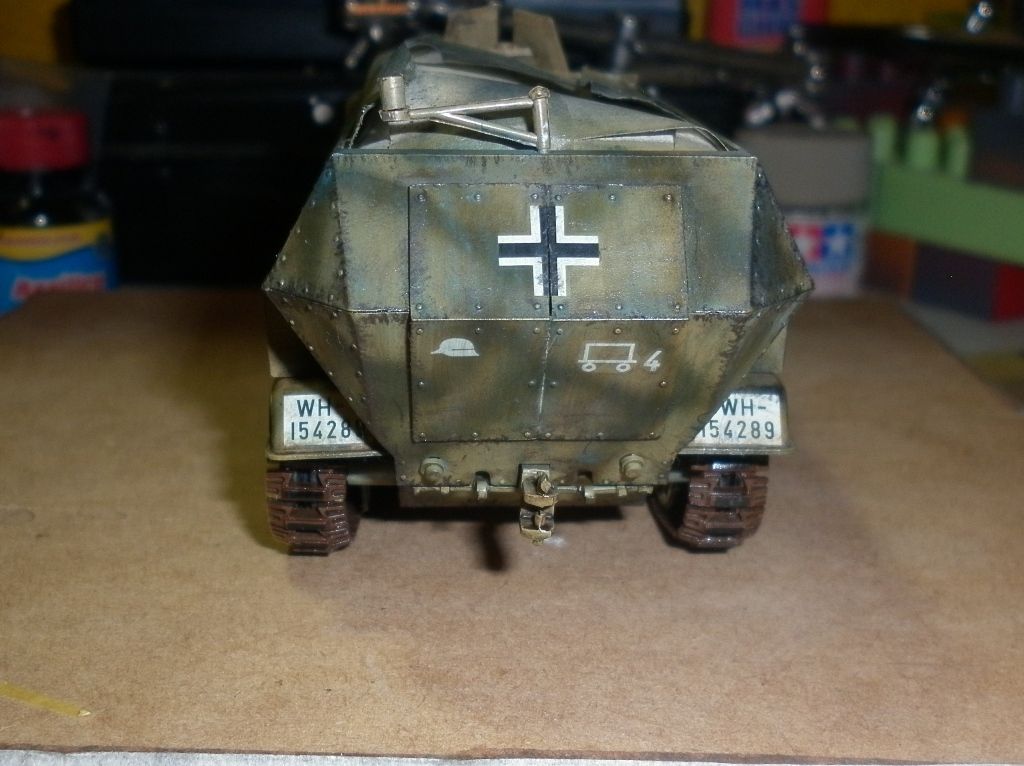
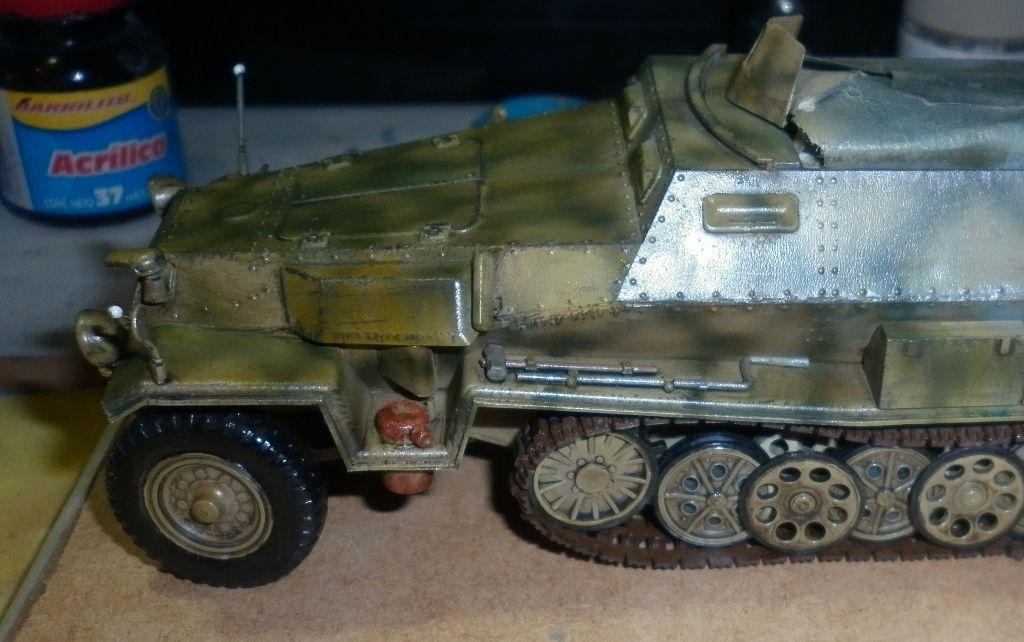
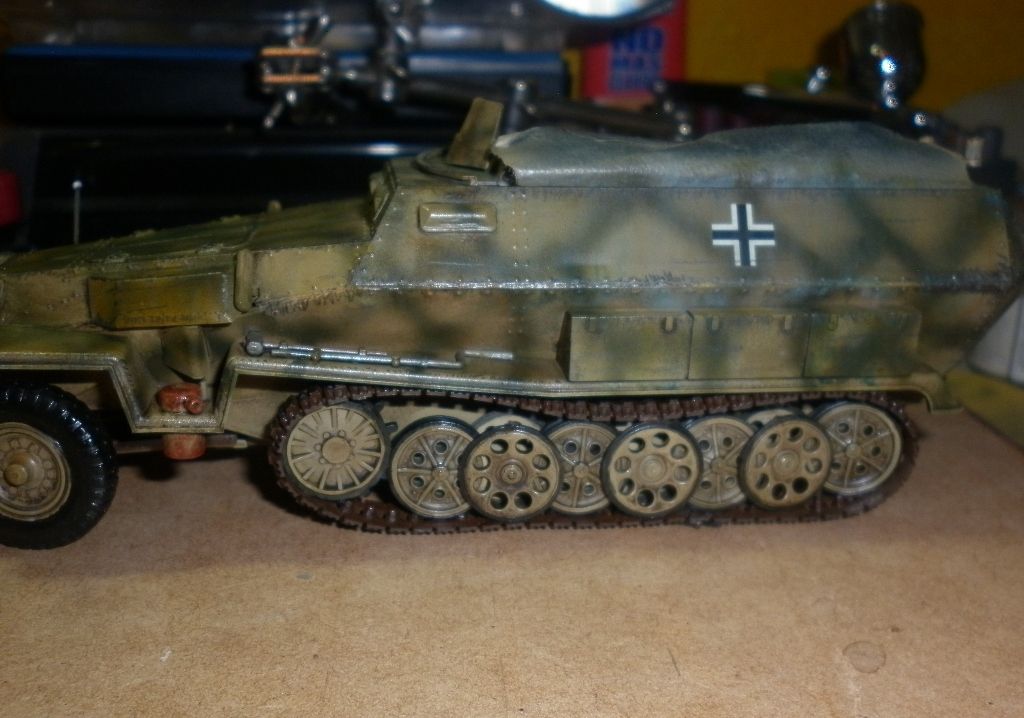
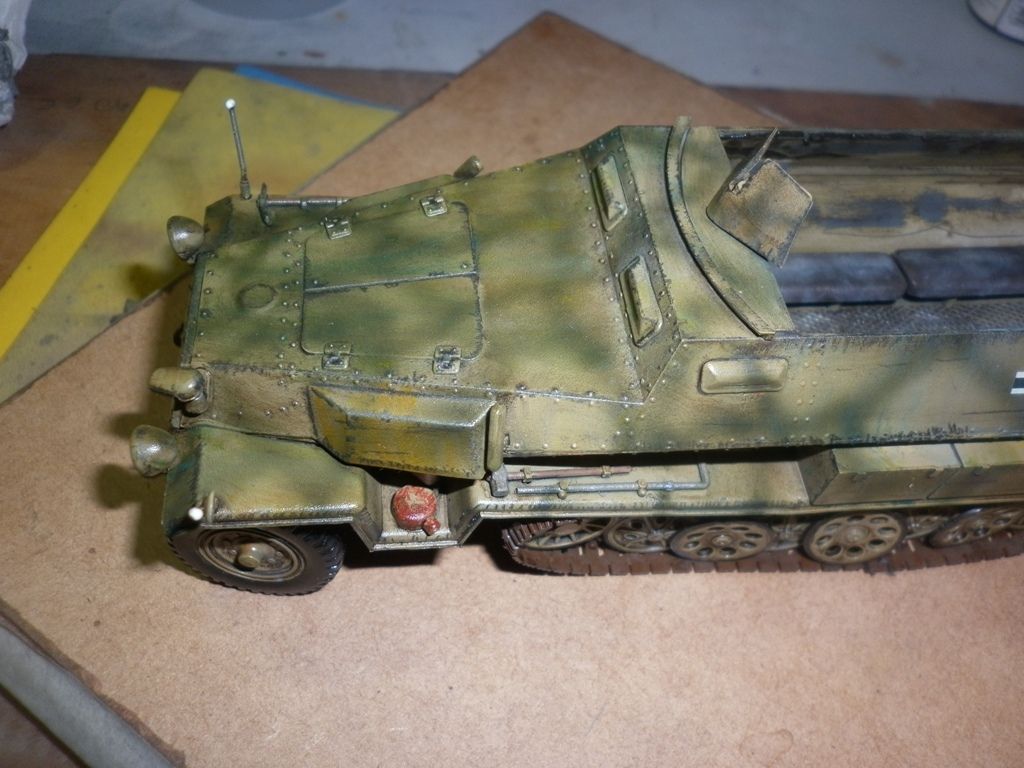
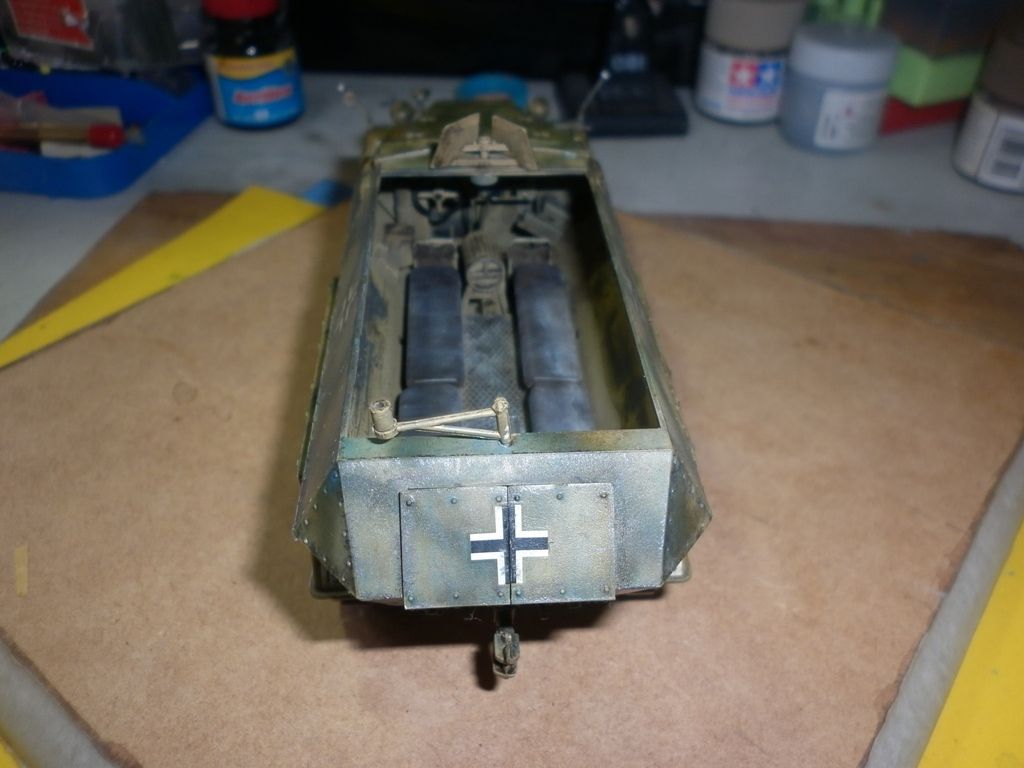
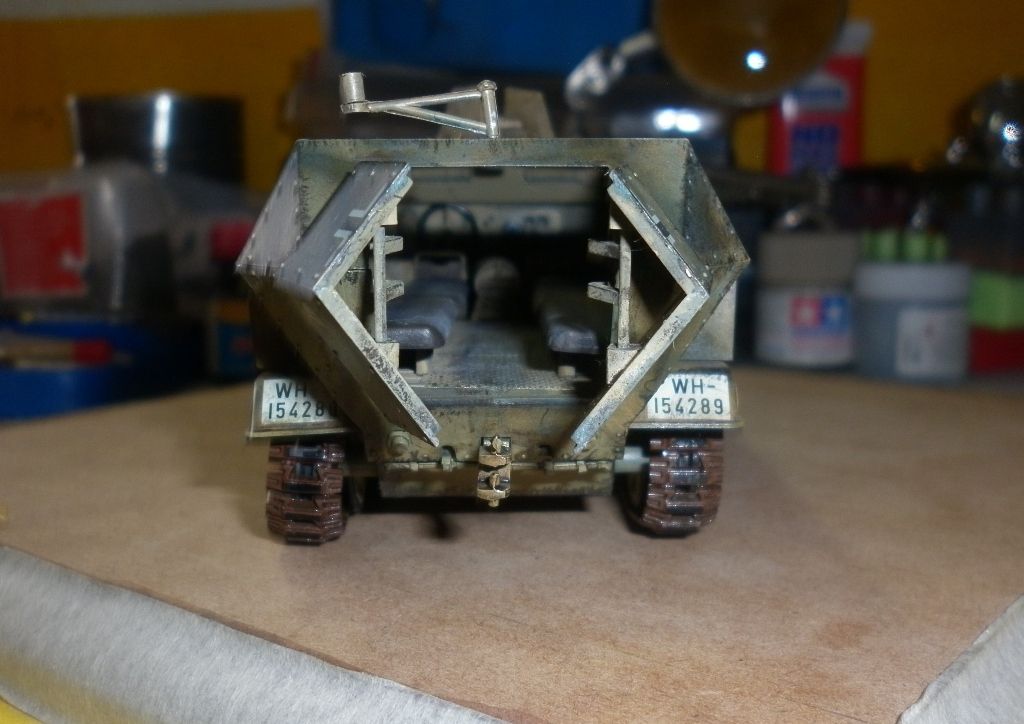
I put the upper hull for the camera ;)
Image

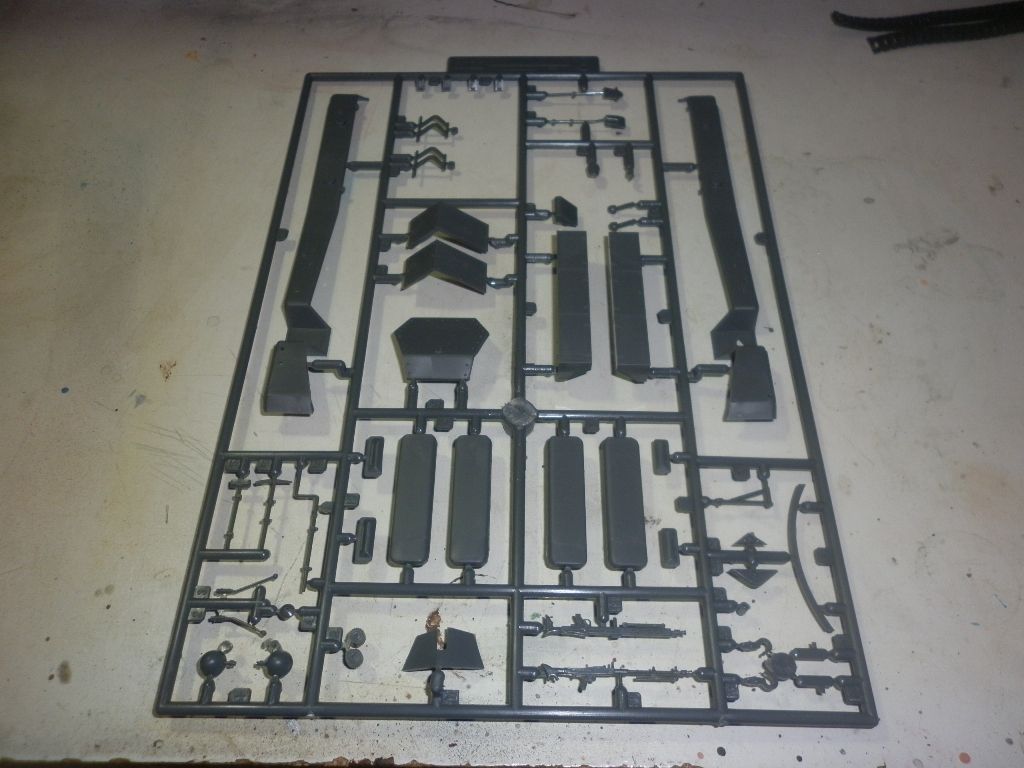
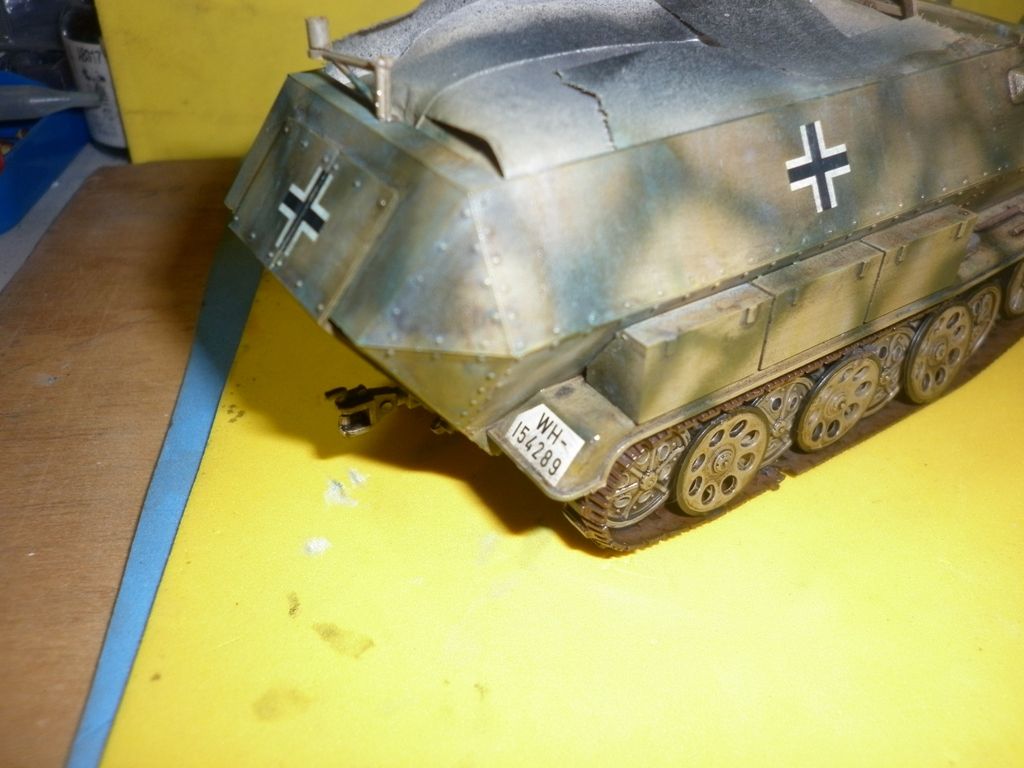
The rear hatch with its pieces. Is very tricky put them on the hull by the way.
Image

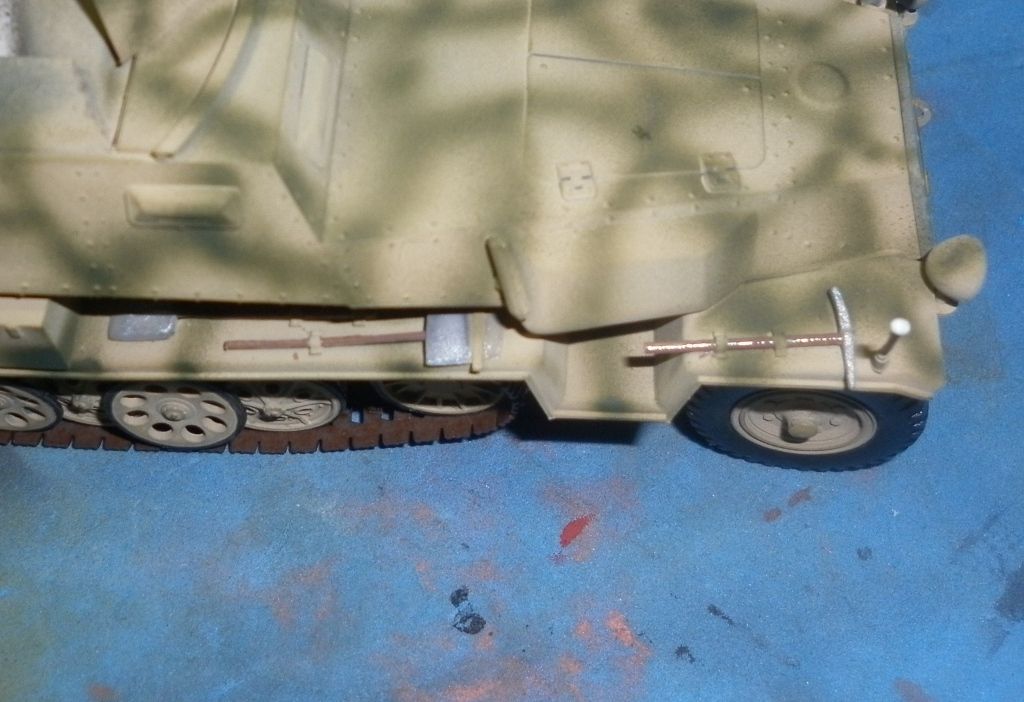
The fences are complete with the tools, muffler and boxes.
Image

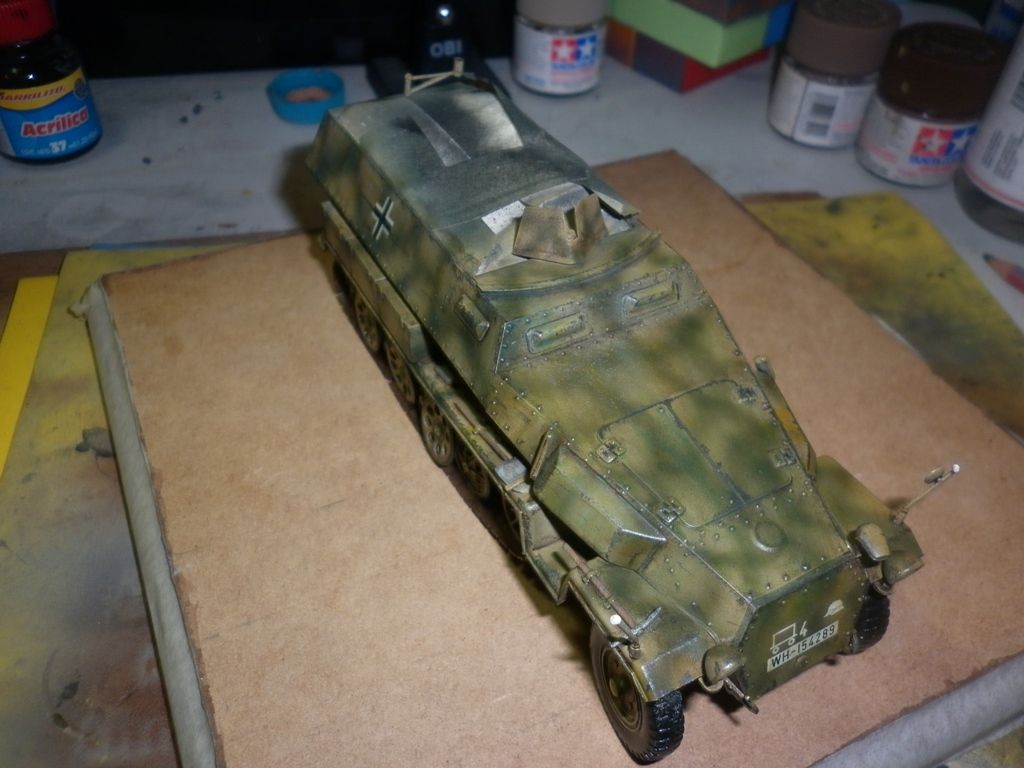
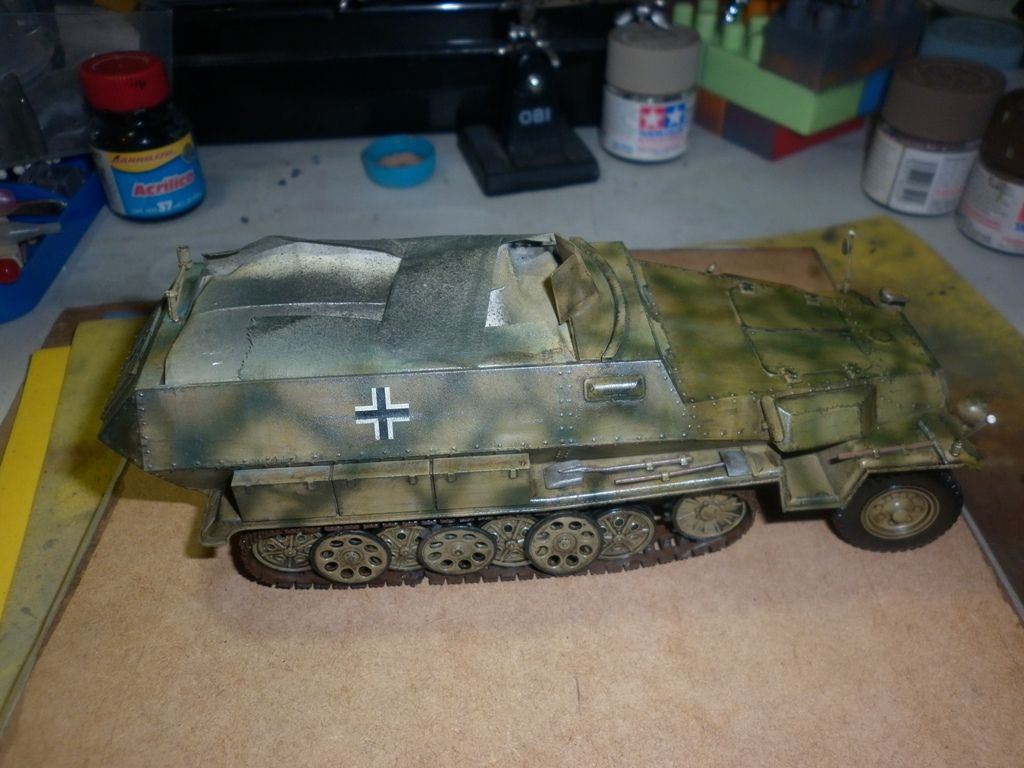
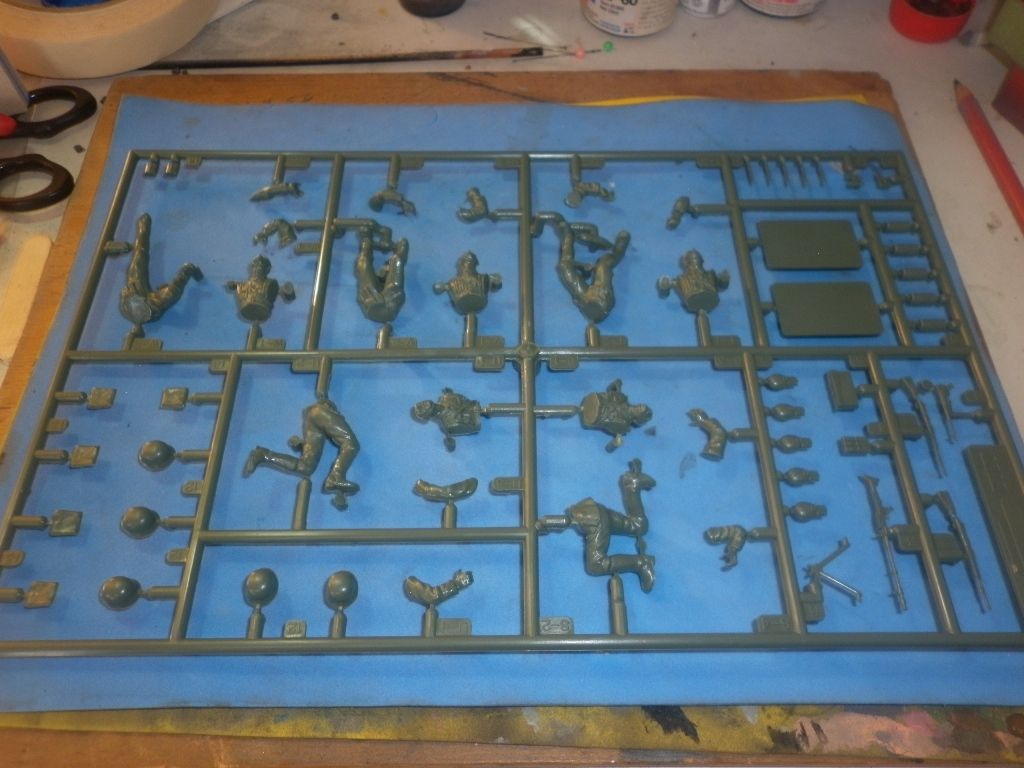
The pieces are ready for the primer and the paint work.
So far the work today. The next step will be exciting with the airbrush into action.

See you. Greetings from México
José :thumb1:
User avatar
MassterOzymandias
Corporal
Corporal
Posts: 81
Joined: Tue May 12, 2015 5:22 am
Location: México
Contact:

Re: Hanomag SdKfz 251/1

Post by MassterOzymandias »

Ok, Let's continue with the project.

I put a coat of primer on the rubber tracks with XF-66 Light Grey. After that I put a coat of XF-64 Red Brown. The pads were paint with XF-1 Flat Black.

Image

Image

Image

It's time for the base color on the vehicle. I haven't a pic of the primer but was XF-1 Flat Black. The base paint was XF-60 Dark Yellow over all the model with a light pass on the under zones

Image

Image

Image

The camo pattern was a very free style airbrush. The color was XF-58 Olive Green.

Image

Image

Image

Image

The fron axle was put on its site. I paint it with XF-64 Red Brown first and a light pass of XF-60 Dark Yellow for a worn out effect

Image

I put the rubber tracks.
Look them! They are floating!
:crazy:

Image

Image

With super glue drops on the wheels and the little help from swabs pressing the tracks the view is different now. Not a complete sagging effect but it's enough for me.

Image

Image

Image

The tools were paint with a mix of X-11 Silver Chrome and XF-66 Light Grey in 1:1 and the handles with XF-52 Flat Earth

Image

The exhaust was paint with the base color but I made a chipping with Gama Color 20 Rojo Oxido applied with sponge

Image

The lights were paint with MIG 211 Medium Grey and the tips of width feelers with XF-2 Flat White

Image

At last, the required coat of Future wax. The model is ready for the next stage: Decals and weathering

Image

Image

Image

Image

Image

Image

Image

See you. Greetings from México
José :thumb1:
User avatar
Lysus
Captain
Captain
Posts: 4562
Joined: Fri Dec 18, 2015 11:37 pm
Location: Seattle, US
United States of America

Re: Hanomag SdKfz 251/1

Post by Lysus »

Some great info here, and your camo work looks excellent. I also really like your paint stand.

Excuse me while I rummage through the kid's toy chest...
Backlog Progress: |||||||||||||||-------|----------|----------| 26/80
On the bench: Hasegawa 1/72 Tatiana's Vanship
Last Completed: Bandai HGUC Geara Zulu // Hasegawa 1/48 J2M3Raiden Prisoner of War
User avatar
MassterOzymandias
Corporal
Corporal
Posts: 81
Joined: Tue May 12, 2015 5:22 am
Location: México
Contact:

Re: Hanomag SdKfz 251/1

Post by MassterOzymandias »

Lysus wrote:Some great info here, and your camo work looks excellent. I also really like your paint stand.

Excuse me while I rummage through the kid's toy chest...

He he, In fact I did the "support" for my airbrush but works well for the paint stage :lol:

Thanks Lysus.
User avatar
MassterOzymandias
Corporal
Corporal
Posts: 81
Joined: Tue May 12, 2015 5:22 am
Location: México
Contact:

Re: Hanomag SdKfz 251/1

Post by MassterOzymandias »

The update video on my YouTube channel
English subtitles avalaible!

[youtube]PPdZ1QH9pRY[/youtube]
User avatar
MassterOzymandias
Corporal
Corporal
Posts: 81
Joined: Tue May 12, 2015 5:22 am
Location: México
Contact:

Re: Hanomag SdKfz 251/1

Post by MassterOzymandias »

¡The time has come for decals!

Image

Before put them, I do not wanted to make a random choice. It was decided that would be the Grossdeutschland division since the start of the project.
But I researched the issue further. I found information about the 1st battalion (On my second post of this tread I mentioned that was the only battalion with half-tracks at the time of the battle of Kursk). The information is on this website http://members.shaw.ca/grossdeutschland/ in the section "Panzergrenadier Division Grossdeutschland Order of Battle 1943".

This screenshot shows that the 4th company was a Machine Gun company with three platoons: the HQ, mortar and light infantry support. Eureka! Here's my subject!

Image

Then the vehicle belongs to the third platoon (Light Infantry support) of the fourth company (machine guns) located on the first battalion of grenadiers. The figures help with this idea.

I also noticed that some models of other brands that bring Grossdeutschland division decals show licence plates numbers beginning with 154-----. With the information on this website I could confirm this http://www.network54.com/Forum/47207/me ... L,POL,SS+)

Then I have to use the licence plate that begin with 154----

So, lets put the decals!

After the coat of Future wax, I put Microset to prepare the surface. The selected decals were immersed in water for 30 seconds and positioned with a brush on the surface. The rear balkenkreuz was cut in half with my hobby knife because the doors will be open.
After 5 minutes, I applied Microsol for soft them. 10 minutes later, I sprayed a coat of Future. This is the result.

Image

Image

Image

I hope my Hanomag look good. Not bad considering that there has been some historical sense with the kit decals.

See you. Greetings from México
José :thumb1:
User avatar
MassterOzymandias
Corporal
Corporal
Posts: 81
Joined: Tue May 12, 2015 5:22 am
Location: México
Contact:

Re: Hanomag SdKfz 251/1

Post by MassterOzymandias »

Here the progress so far witht this funny model.

I made a mix of 50% Raw Umber and 50% Black oil paints diluted in odorless turpentine for wash the model.

Image

Image

Image

Image

Image

Image

After dry, the model was ready for other weathering phase. I put dots of next oil paints: yellow, titanium white, prussian blue and burnt sienna. I'd pass a brush moisted in turpentine for fading effects.

Image

Image

Image

Image

Image

Image

Image

Image

The chipping was made with mix of 85% Tamiya XF-1 Flat Black and 15% MIG 204 Medium Gunship Grey. In some areas I marked the chips with HB pencil.

Image

Image

Image

Image

Image

Image

When I removed the masking tape I made more weathering. With a brush moisted in alcohol I made chipping effects in the interior showing the panzer grey original color. A some scratch were made with the tweezers tip. The rust effect was made with the mix of oil paint that I used for wash. The seats were fadding with titanium white oil paint.

Image

Image

Image

Image

Image

Image

Image

After 24 hrs. drying, this halftrack is almost ready for the diorama.

Image

Image

Image

Image

Image

Image

Image

Image

It's enough for weathering effects with oils. A dust effects with acrylics and pigments remains to be done but I'll when preparing the diorama base.

The figures will be in the next step

See you. Greetings from México
José :thumb1:
User avatar
MassterOzymandias
Corporal
Corporal
Posts: 81
Joined: Tue May 12, 2015 5:22 am
Location: México
Contact:

Re: Hanomag SdKfz 251/1

Post by MassterOzymandias »

Let's see the progress with the figures.

No much to tell about the figures. The five soldiers have equipment for their support role but not for trenchworks like shovels, mess kit and zeltbahns.

Image

These classic Tamiya molds need a bit of filler on the armpits and waists but is fine.

Image

Image

Image

The complete figures with grey primer

Image

I painted the base color of the flesh with Vallejo 71076 Skin tone. The uniforms were painted with Tamiya XF-65 Field Grey.

Image

The complete paintwork. As you can see, the collars, helmets, gas mask cans, shoulder pads and cuff tittles were painted with XF-58 Olive Green. The arms were painted with Red Brown and a mix of Flat Black and Silver Chrome. The bag was painted with XF-59 Desert Yellow. The straps were painted with XF-57 Buff and the canteens with XF-52 Flat Earth. The strips on the collars and shoulders were painted with Flat white.

Image

Image

Image

Image

This is the work so far.
See you. Greetings from México
José :thumb1:
User avatar
Lysus
Captain
Captain
Posts: 4562
Joined: Fri Dec 18, 2015 11:37 pm
Location: Seattle, US
United States of America

Re: Hanomag SdKfz 251/1

Post by Lysus »

MassterOzymandias wrote:Let's see the progress with the figures.

Image
MEDIC!

Figures look really good, man. All the clothing and details look like they were factory painted, super impressive! :th:
Backlog Progress: |||||||||||||||-------|----------|----------| 26/80
On the bench: Hasegawa 1/72 Tatiana's Vanship
Last Completed: Bandai HGUC Geara Zulu // Hasegawa 1/48 J2M3Raiden Prisoner of War
User avatar
MassterOzymandias
Corporal
Corporal
Posts: 81
Joined: Tue May 12, 2015 5:22 am
Location: México
Contact:

Re: Hanomag SdKfz 251/1

Post by MassterOzymandias »

Lysus wrote:
MassterOzymandias wrote:Let's see the progress with the figures.

Image
MEDIC!

Figures look really good, man. All the clothing and details look like they were factory painted, super impressive! :th:
Thanks my friend!
User avatar
MassterOzymandias
Corporal
Corporal
Posts: 81
Joined: Tue May 12, 2015 5:22 am
Location: México
Contact:

Re: Hanomag SdKfz 251/1

Post by MassterOzymandias »

The last pics of the day.

After a coat of Future, decals on the helmets and wash, here are the figures.

Image

Image

Time for work on the diorama base.

See you!
User avatar
panzerman825
Corporal
Corporal
Posts: 70
Joined: Thu Jan 19, 2017 10:23 am
Location: Maryland, USA
Contact:
United States of America

Re: Hanomag SdKfz 251/1

Post by panzerman825 »

Great job on this classic Tamiya kit. I think everybody has built this kit growing up. Curious to see the finish.
Bill
Image
Bissyboat
Sergeant Major of the Army
Posts: 1254
Joined: Sun Jan 05, 2014 9:49 pm
Location: Norway

Re: Hanomag SdKfz 251/1

Post by Bissyboat »

Cracking job on the Hanomag and troops with their classic Tamiya look. :thumb2:
Where`s my dinghy?
Post Reply

Return to “Builds”