1:72 DML Mi 28 Havoc

Post Reply
gosselin2112
Sergeant Major
Sergeant Major
Posts: 655
Joined: Mon May 27, 2013 2:18 am
Location: Manchester, Newhampshire USA

1:72 DML Mi 28 Havoc

Post by gosselin2112 »

Well, here I am, back in the ISM GB saddle. I just recently acquired this kit at a local model show. I believe it is a copy of the Italeri Mi-28, as I have seen the same cover art with the Italeri name. I wonder if DML made any improvements on the kit. Here is the review of the contents:

Image

The molds look pretty good for a kit of the early 1990s. Recessed panel lines with almost no ejection pin marks on noticeable surfaces. Well, I did find two small ones. I'll talk about those later on.
Image

Image

Image

The canopy looks pretty sweet. No ejection pin marks and scratched. Should be a clean assembly process. "Should" is the operative word here ;) In model building anything can happen.
Image

Oh, this time I am guarding my canopy from the carpet monster. I am locking my baby in this tin can just to be extra safe. I swear, I have gnomes living in my home. I am always losing pieces to my model :doh:
Image

Okay, ready or not, here I go! A little eye candy reference to get the model mojo flowing.
Image

What can we expect from this build thread? I've already started assembly and will have pics posted soon. Like my Avenger (RIP), I will have some brass tubing to replace the chin gun. I'm even considering doing the same for the rockets, however, I am concerned about weight issues. We will see.

Model On! :hi:
spruecutter
Sergeant Major
Sergeant Major
Posts: 664
Joined: Tue Jun 18, 2013 12:06 am
Location: Deeside, UK

Re: 1:72 DML Mi 28 Havoc

Post by spruecutter »

:thumb1: Watching with interest. I like the camo scheme on this one, should look great when it's done
gosselin2112
Sergeant Major
Sergeant Major
Posts: 655
Joined: Mon May 27, 2013 2:18 am
Location: Manchester, Newhampshire USA

Re: 1:72 DML Mi 28 Havoc

Post by gosselin2112 »

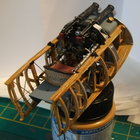
Well. . . Dragon never fails to deliver a complex model kit, even at 1:72 scale :crazy: I'm not complaining, I'm glad to be on a styrene quest (of sorts). I tossed and turned last night in bed while debating whether or not to crew my Mi-28. In the end, I decided that I would not only put the crew in the cockpit, but I would also depict my whirley bird in flight. I never seem to lack ambition when model building :tongue:

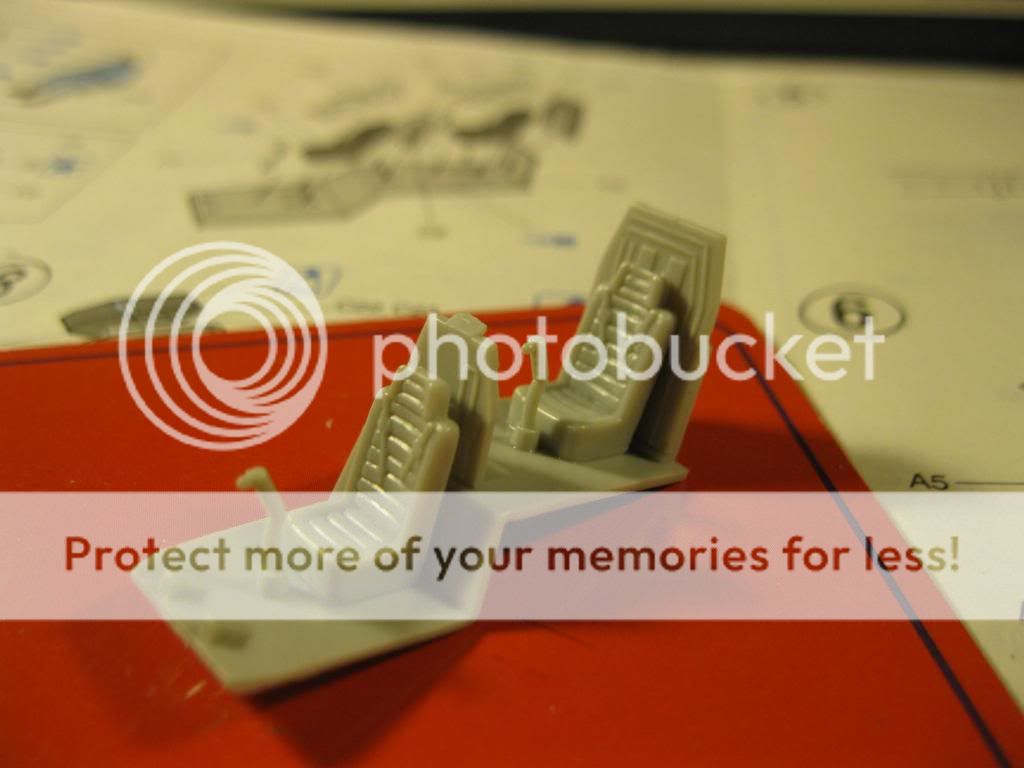
The cockpit at present. I shaved off the raised detail of the instrument panels, as I will be using the decals. I figured that if I shaved the stuff off, I wouldn't have to arm wrestle with setting solution. And, hey, once that canopy comes on, there won't be much to see.
Image

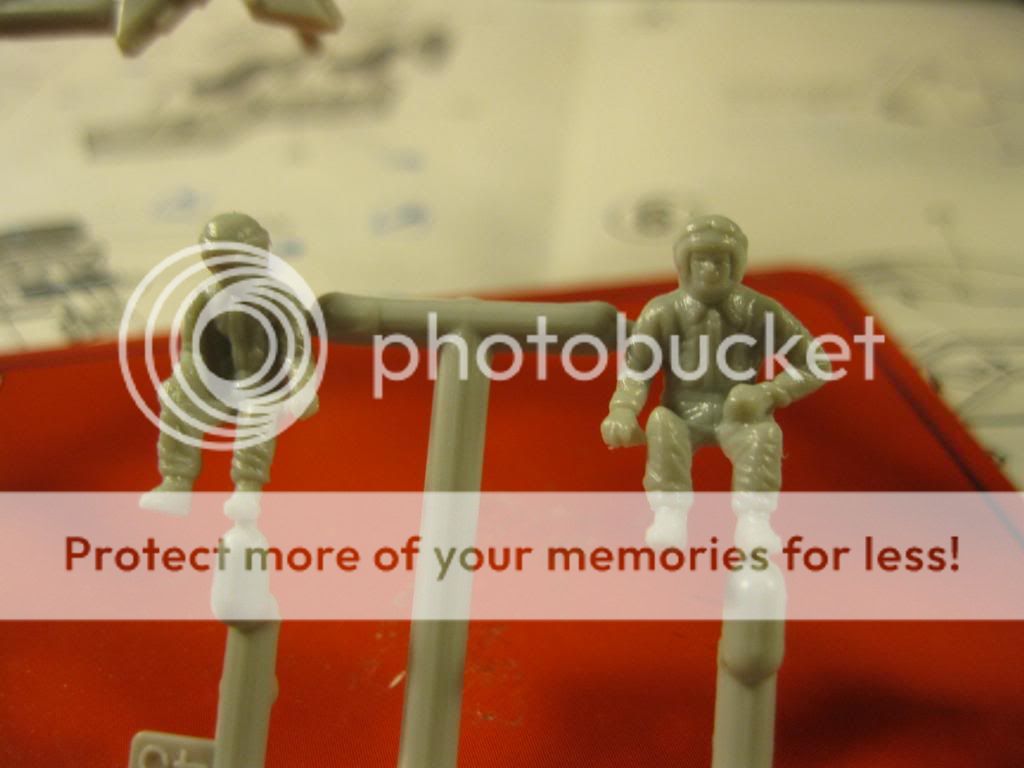
The crew look a little crude. Nothing that a little paint and a wash won't fix. I would really appreciate it if anyone has any pics of a Russian flight suit looks like. Yes, this is a plead for help :roll:
Image

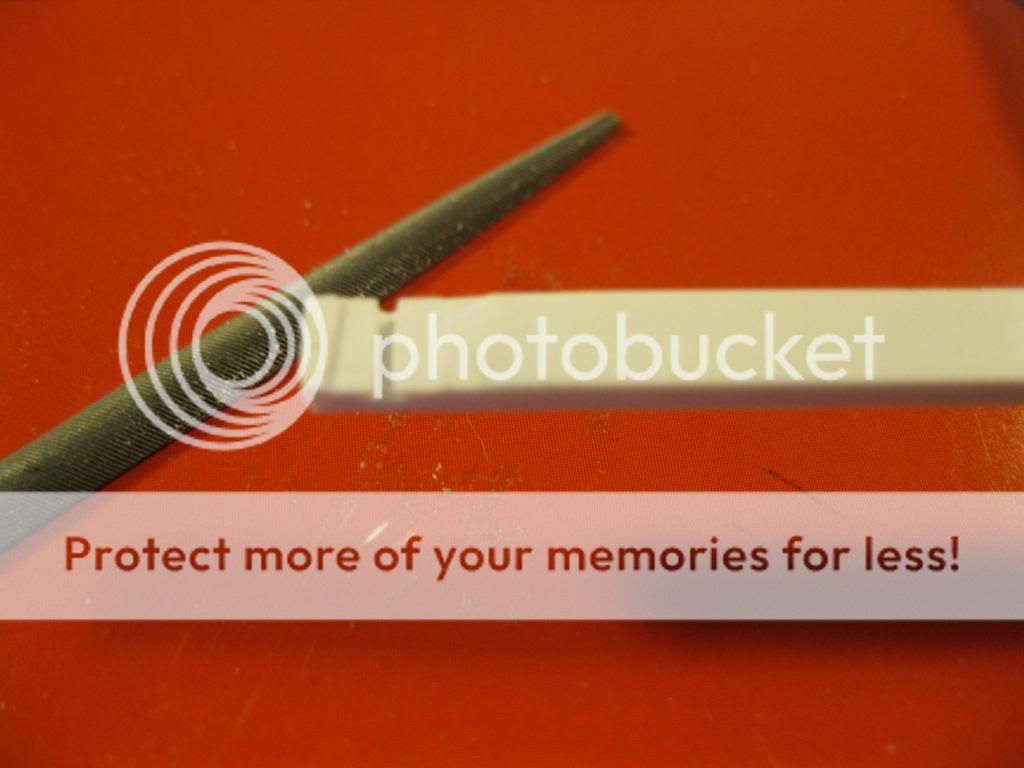
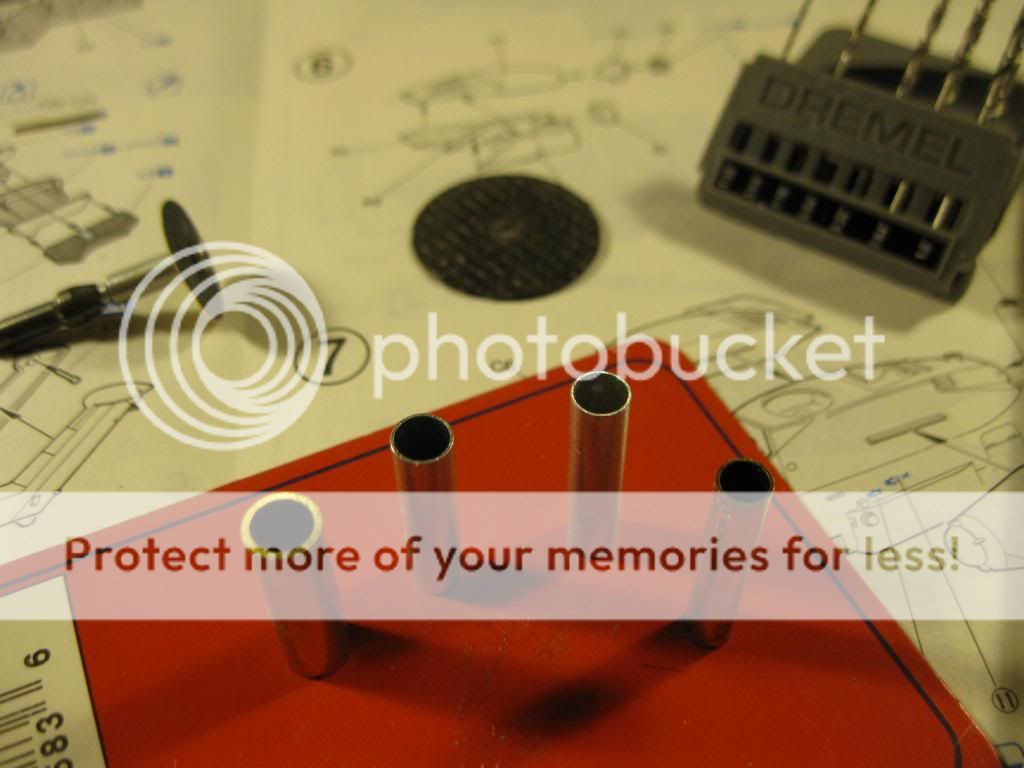
This is the stock barrel for the chin gun. It is really flimsy and bent. I highly doubt it will survive for any length of time after construction and visits to the shows. So. . . let us begin improving the little guy. Below it is brass tubing that will replace it.
Image

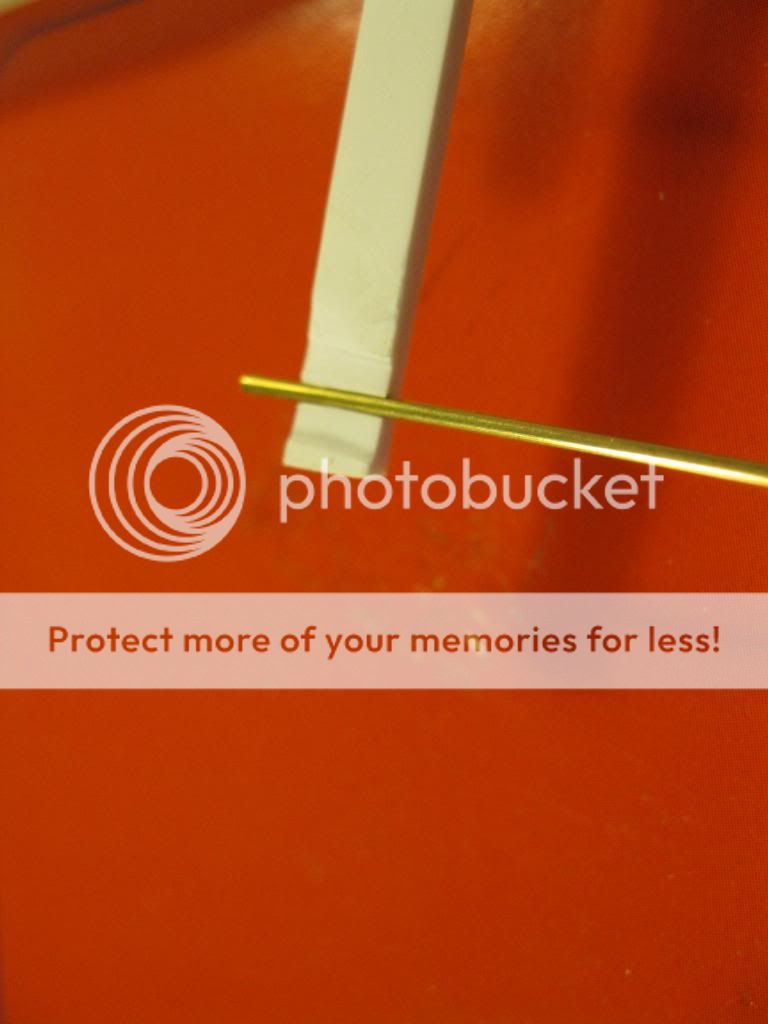
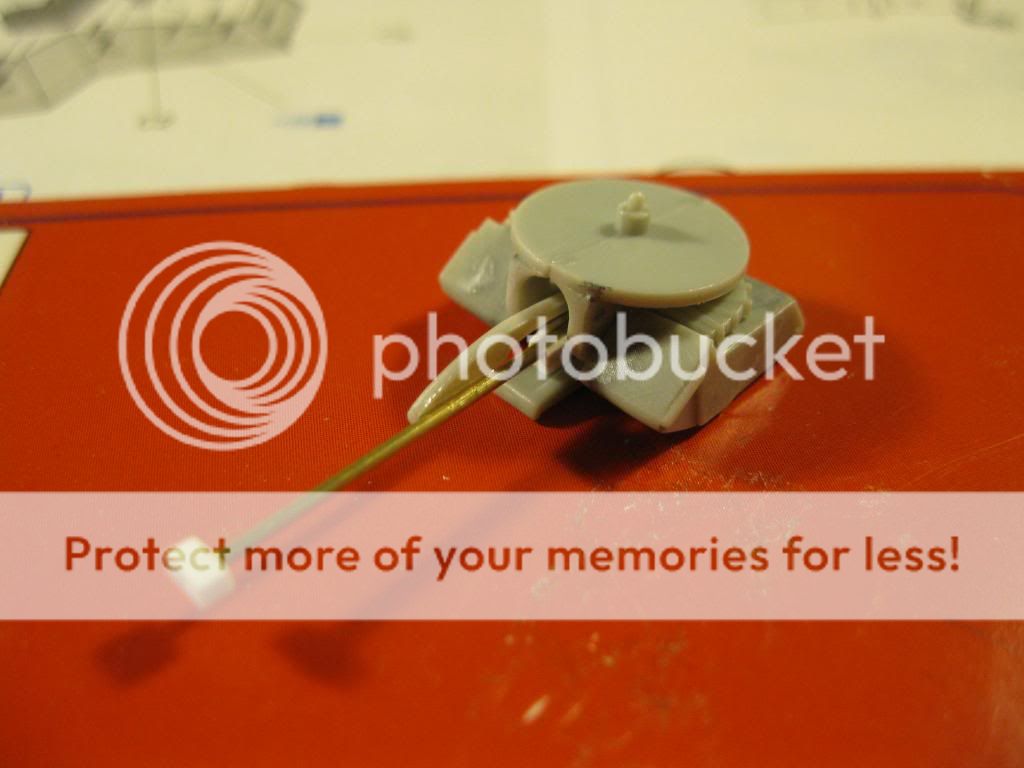
I really wasn't too sure how to go about it. It's not a straight drill hole and insert operation. I wanted to incorporate the saddle below the barrel. To do this I took out some styrene (.080 X.125 I think), drilled a whole, and then filed away almost half the circle.
Image

A nice clean fit.
Image

The muzzle break thing was constructed using a similar method as above.
Image

Assembling the chin gun was a bit fiddly :crazy: Lots of little parts (that only Dragon can do) that need a lot of dry fitting and patience. Oh, and don't forget all the filling. The ammo cases on both sides of the gun were awful. So a filling I went. Here is the finished result. Just a few touch ups to go.
Image

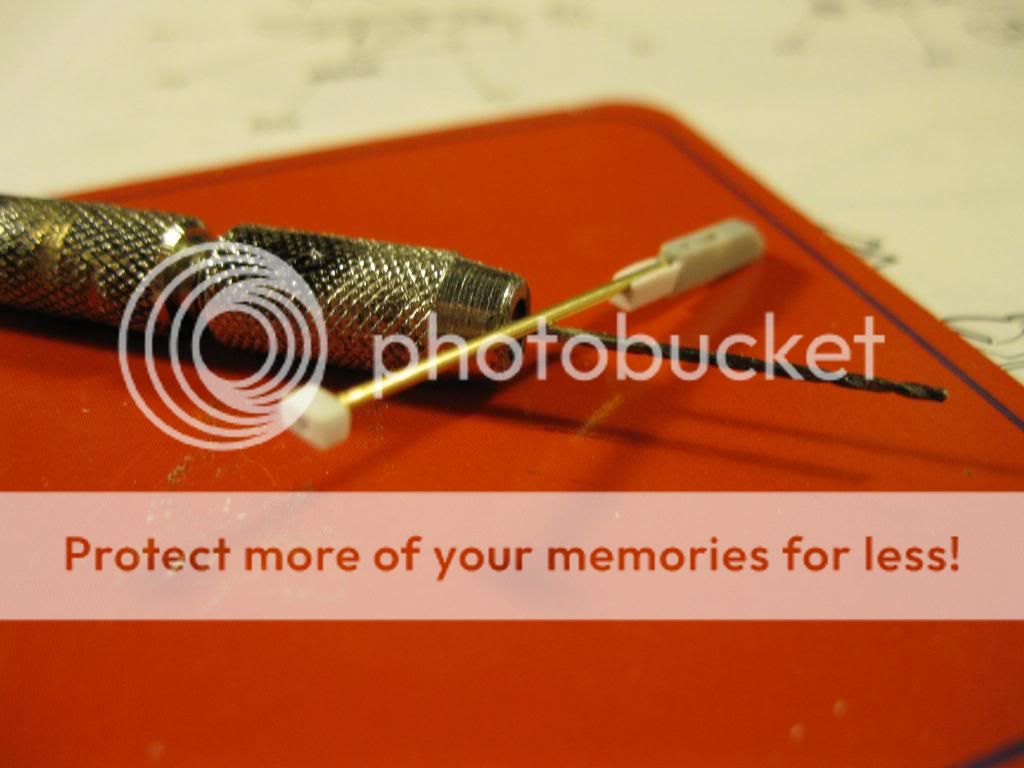
Tomorrow I am off to find a piece of dowel that will fit one of these cuties. I hope to use the aluminum over the brass, as I don't need any more weight in my bird. Still haven't quite figured out how I will install the tubing. I have plenty of time to think about it before I close the fuselage. This is going to be a whirleybird on a stick.
Image

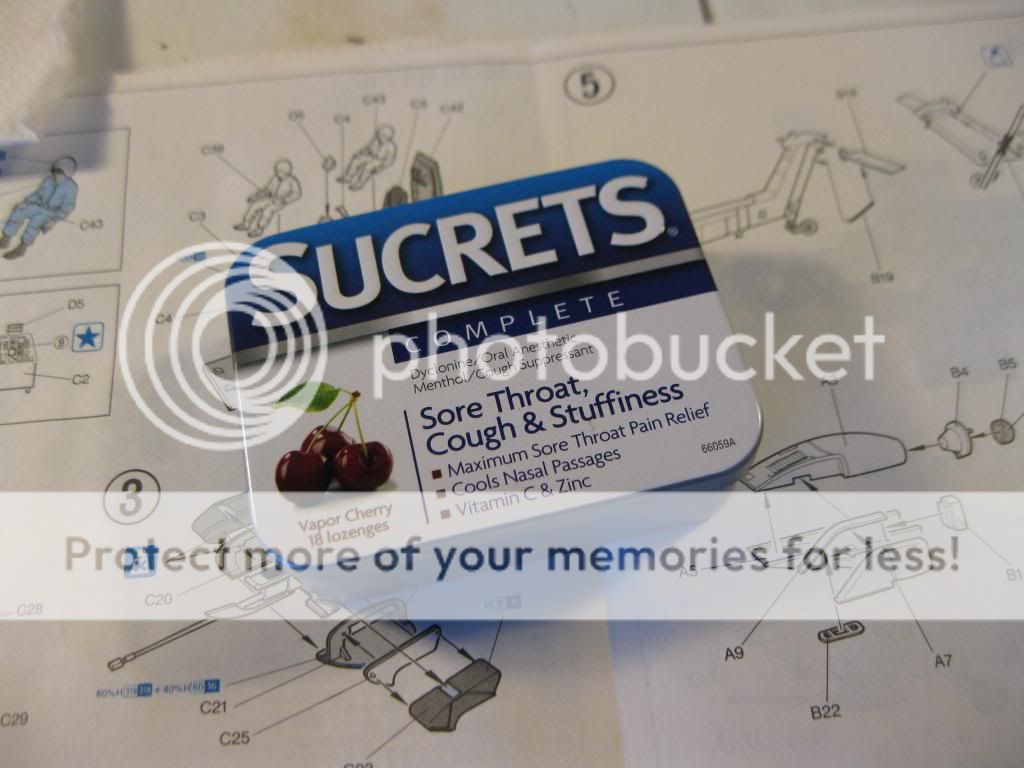
Okay, put all my little guys in their anti carpet monster/ gnome thievery container.
Image

Will post more soon . . . :hi:
User avatar
Nige201980
Captain
Captain
Posts: 4095
Joined: Wed Jun 05, 2013 9:30 am
Location: Doncaster South Yorkshire UK
Contact:

Re: 1:72 DML Mi 28 Havoc

Post by Nige201980 »

WOW Russ looking great mate love the gun.
http://www.youtube.com/channel/UCy-TGcs5u_ZXSZ9kObNfsPg


On the go at the Mo

Quite a few :banana:
User avatar
fly1ngdutchm4n
First Lieutenant
First Lieutenant
Posts: 3554
Joined: Fri Aug 09, 2013 11:17 pm
Location: Hoogerheide The Netherlands
Netherlands

Re: 1:72 DML Mi 28 Havoc

Post by fly1ngdutchm4n »

Awesome! :th:
Great scratch building :bow::
Build what you love, Love what you build
gosselin2112
Sergeant Major
Sergeant Major
Posts: 655
Joined: Mon May 27, 2013 2:18 am
Location: Manchester, Newhampshire USA

Re: 1:72 DML Mi 28 Havoc

Post by gosselin2112 »

I thought my cockpit was ready for the paint booth today, but I noticed that the pilot's instrument panel was going to have some nasty gaps where it meets the fuselage wall. I didn't like that at all. I am concerned about it being visible through the canopy. I could have easily passed over it, however, I love a good challenge.

I decided to move the instrument panel forward, flush with the edge. The original location slots required lots of TLC, and I wasn't in the mood to dance. Once installed, I glued a back support. To the right of the panel I will add some milliput. To the left I am placing styrene strips, making it flush with the panel.

Image

All flush. I will allow the glue to dry overnight. Tomorrow I will remove the excess styrene and trim to fit against the fuselage wall. Once this is complete, I can continue with the painting of the cockpit.

Image

The turbine (I guess that's what their called) were loaded with seam lines and gaps. Filled most of them with slightly thinned Tamiya Basic Putty, except where you see the off colored yellow where I had to use Milliput. I left one without putty to let you all see the delightful gaps :geek:

Image

Still have a few more issues to fix with these guys. I'll talk about those during my next update.
Image

So far, so good. I am enjoying this build. There have been a few unexpected hurdles, but nothing that has been keeping me away from staying on task. I am amazed at how quickly she is coming along. This is something quite foreign to me.

See you next time. . . :hi:
Last edited by gosselin2112 on Wed Oct 16, 2013 1:57 pm, edited 1 time in total.
User avatar
DC87
Chief Warrant Officer 2
Posts: 1799
Joined: Wed Jun 05, 2013 7:16 pm
Location: Exeter, Devon, UK
England

Re: 1:72 DML Mi 28 Havoc

Post by DC87 »

Masterclass already Russ :clap: . That box art Is just awesome . Superb work on the barrel, seems the previous pilot decided to ram the tank instead of use the gun .
Dan C

Filling the workbench with:
Sopwith Snipe late post war
WW1 RFC SE5a

WW1-1/32 Snipe
Workbench gets full with models being built - Buys another workbench!

Image
BALTA1
Private
Private
Posts: 15
Joined: Sat Sep 28, 2013 8:28 pm
Location: Plainfield, IL

Re: 1:72 DML Mi 28 Havoc

Post by BALTA1 »

Great job so far! Looking good!
gosselin2112
Sergeant Major
Sergeant Major
Posts: 655
Joined: Mon May 27, 2013 2:18 am
Location: Manchester, Newhampshire USA

Re: 1:72 DML Mi 28 Havoc

Post by gosselin2112 »

Ha ha ha, Dan
Yeah, I think the brass tube would do a better job with ramming a tank :)
gosselin2112
Sergeant Major
Sergeant Major
Posts: 655
Joined: Mon May 27, 2013 2:18 am
Location: Manchester, Newhampshire USA

Re: 1:72 DML Mi 28 Havoc

Post by gosselin2112 »

The following data is from Wikipedia. I will write up a more comprehensive description of the Mi-28 Havoc later on. I find this helicopter quite fascinating, as I know little about any helicopter. I imagine I will be building more whirleybirds down the road.

Mi-28 Havoc

General characteristics:
Crew: 1 pilot (rear), 1 navigator/weapons operator (front)
Length: 17.01 m (55 ft 10 in)
Rotor diameter: 17.20 m (56 ft 5 in)
Height: 4.70 m (15 ft 5 in)
Disc area: 232.35 m² (2,501 ft²)
Empty weight: 8,600 kg (18,960 lb)
Loaded weight: 10,700 kg (23,590 lb)
Max. takeoff weight: 11,500 kg (25,350 lb)
Powerplant: 2 × Klimov TV3-117VMA turboshaft, 1,636 kW (2,194 shp) each
Performance
Maximum speed: 320 km/h (172 knots, 199 mph)
Cruise speed: 270 km/h (145 knots, 168 mph)
Range: 435 km (234 nmi, 270 mi)
Combat radius: 200 km (108 nmi, 124 mi); with 10 min loiter and 5% reserves
Ferry range: 1,100 km(593 nmi, 683 mi)
Service ceiling: 5,700 m (19,000 ft)
Rate of climb: 13.6 m/s (2,677 ft/min)

Armament:
Guns: 1× chin-mounted 30 mm Shipunov 2A42 cannon with 250 rounds (±110° horizontal fire)
Hardpoints: Two pylons under each stub wing to mount bombs, rockets, missiles, and gun pods. Main armament configurations include:
16 Ataka-V anti-tank missiles and 40 S-8 rockets, Or
16 Ataka-V anti-tank missiles, and 10 S-13 rocket, Or
16 Ataka-V anti-tank missiles, and two 23 mm Gsh-23L gun pods with 250 rounds each.
Other ordnance: 9K118 Sheksna and 9A-2200 anti-tank missiles, 8 Igla-V and Vympel R-73 air-to-air missiles, 2 KMGU-2 mine dispensers
gosselin2112
Sergeant Major
Sergeant Major
Posts: 655
Joined: Mon May 27, 2013 2:18 am
Location: Manchester, Newhampshire USA

Re: 1:72 DML Mi 28 Havoc

Post by gosselin2112 »

Today I began finishing the turbine vent things (my helicopter vocabulary is poor). The only problem was adding on the final piece (see the pic below). There are some nasty gaps, as the stock piece clearly doesn't extend all the way across. What to do. . . :scratch::
Image

So. . . this is my big idea. I will glue a strip of styrene across the bottom. Once it dries over night, I will cut out the holes and trim to fit. Once installed I will fill in the gaps. It's a long shot, but I am confident of success.
Image

Before anything else, I painted the inside of the vent flat black. Once the piece goes on, it will be quite difficult to paint inside.
Image

The cockpit has received a trim and a filling, and will be ready for painting once the putty hardens.
Image

Started working on the rocket pods (nothing like getting a little ahead). I decided against using any brass tubing, as this just seemed over the top. Besides, the weight and gravity would not be working in my favor. Instead, I hollowed out the front tubes with the tip of my blade. Surprisingly, I have no holes in my fingers! The left one is not drilled to show a comparison.
Image

I haven't decided what to do about the rear rocket pods. I am thinking of drilling out the holes, just to add a little detail. I painted the inside of the pods black just in case I do decide to follow through with the drilling. Again, it serves to create shadow.
Image

Plenty of filling ahead once I finish assembling the rocket pods.
Image

Big day tomorrow. Painting the cockpit, the crew, and assembling the fuselage. Big fun!
User avatar
fly1ngdutchm4n
First Lieutenant
First Lieutenant
Posts: 3554
Joined: Fri Aug 09, 2013 11:17 pm
Location: Hoogerheide The Netherlands
Netherlands

Re: 1:72 DML Mi 28 Havoc

Post by fly1ngdutchm4n »

Awesome progress :th: Like those rocket pods! Good choiche drilling them out.
Have fun with the cockpit! :dance:
Build what you love, Love what you build
User avatar
Rob
Chief Warrant Officer 2
Posts: 1892
Joined: Thu Aug 29, 2013 5:02 pm
Location: Kent, UK

Re: 1:72 DML Mi 28 Havoc

Post by Rob »

Great stuff
User avatar
T3hGuppy
Second Lieutenant
Second Lieutenant
Posts: 3467
Joined: Wed Jun 12, 2013 11:20 pm
Location: Bournemouth, UK
Contact:
Great Britain

Re: 1:72 DML Mi 28 Havoc

Post by T3hGuppy »

Nice progress dude.
On the bench

Too much to list. !!


Youtube channel:https://www.youtube.com/user/bnealuk
gosselin2112
Sergeant Major
Sergeant Major
Posts: 655
Joined: Mon May 27, 2013 2:18 am
Location: Manchester, Newhampshire USA

Re: 1:72 DML Mi 28 Havoc

Post by gosselin2112 »

Today I installed the aluminum shaft into the fuselage. I never done this before, so I kept my fingers crossed. I first placed the shaft in the fuselage to get a general idea as to how I wanted it positioned. I didn't want my whirlybird just flying straight - I wanted to add some drama to the flight. I angled the shaft slightly rearwards.
Image

I then marked the angle with a black marker and began cutting. Trimmed it smooth with files.
Image

I capped off the shaft with a piece of styrene CA glued to the end.
Image

A little file work to smooth everything flush.
Image

Installation complete. . . 8-)
Image

Now for the hard part. I had to drill out my entry hole for the dowel. I began by drilling 3 pilot holes. Afterwards I began carving out the hole with my blade (a sharp one). Once the hole was large enough, I began using circular files until I was flush with the aluminum shaft.
Image

A helicopter on a stick!
Image

The cockpit fuselage had a few pesky ejection pin marks.
Image

Once those were out of the way, I began putting down some paint. I used black to ensure all the nooks and crannies remain subdued.
Image

The next part is to finish the cockpit and crew. Not a whole lot of detail inside, but enough to make me want to put a little effort. Hey, my crew will be in there for what might be a very long time. Might as well make it comfortable for them :)

Until next time. . . :hi:
gosselin2112
Sergeant Major
Sergeant Major
Posts: 655
Joined: Mon May 27, 2013 2:18 am
Location: Manchester, Newhampshire USA

Re: 1:72 DML Mi 28 Havoc

Post by gosselin2112 »

THE Mi-28 (According To Russ)

All my sources have been taken from the internet. Seeing that the Mi-28 is still considered a relatively new piece of Russian military hardware, sources vary from one place to another. Most noticeably in dates and production figures.

The Mi-28 HAVOC (NATO report name) is an anti-tank attack helicopter. It is a weapon similar to the United States Hughes AH-64 Apache. In the early 1980s, the Mi-28 was developed side by side with the Ka-50 single seat, twin rotor attack helicopter. Unfortunately, the Ka-50 proved to be superior to the Mi-28 during testing trials. Despite its shortcomings, the Mi-28 was approved for continual development. In 1987 it entered into production as the Mi-28A, and made its public debut at the Paris Airshow in 1989. Production did not last, as the Mi-28 was limited to only daylight operations.

With the fall of the Soviet Union, opportunities became available to the new and improved Mi-28N. This variant now had the ability to operate in both day and night operations. The N is identifiable by the radome over the the main rotor mast. The new Russian government was highly in favor of the Mi-28 over the Ka-50. It was cheaper to produce, and could adapt more easily to the changing combat conditions of the modern world. The Mi-28 was officially introduced to the Russian Air Force on October 5, 2009. It costs roughly $15-16 million to manufacture. Currently Russia has about 50 units at their disposal, with the hopes of having 70 units by 2015.

The Mi-28 is currently being used by Russia and Kenya, however, offers have been made to the following countries: North Korea, Iraq, India, Algeria, and Venezuela.

That's all for now. I'll do a short description of the Mi-28's firepower later on.
spruecutter
Sergeant Major
Sergeant Major
Posts: 664
Joined: Tue Jun 18, 2013 12:06 am
Location: Deeside, UK

Re: 1:72 DML Mi 28 Havoc

Post by spruecutter »

That's a smart solution for the stand :thumb2:
gosselin2112
Sergeant Major
Sergeant Major
Posts: 655
Joined: Mon May 27, 2013 2:18 am
Location: Manchester, Newhampshire USA

Re: 1:72 DML Mi 28 Havoc

Post by gosselin2112 »

Build progress has been slowing down (did I just say that? LOL). Can't really move forward until the cockpit is finished. I managed to find a solution to those vents. After gluing the styrene down, I began drilling a series of holes with my rotary (Dremel) tool. I then began cutting out a larger hole, similar to how I installed the shaft in the fuselage. After that it was all needle files. The funny part was that one side needed an extra layer of styrene!
Image

When drilling the holes, it is best to have something to use as a backboard. In this case, I used a piece of scrap pine wood board.
Image

The fit is a lot better now. Once the glue dries overnight, it will be ready to receive a dollop of filler.
Image

I haven't painted a 1/72 scale figure in a very long time. This was a lot of fun. Not too sure what a Russian helicopter flight suit looks like, so I had to improvise. All they need is a coat of gloss and a wash. Maybe some highlight . . . :think:
Image

It is my hope to have the fuselage all together for tomorrow. Then on to the exterior!
User avatar
DC87
Chief Warrant Officer 2
Posts: 1799
Joined: Wed Jun 05, 2013 7:16 pm
Location: Exeter, Devon, UK
England

Re: 1:72 DML Mi 28 Havoc

Post by DC87 »

Great progress, brilliant work on improving those intakes :th: .
Dan C

Filling the workbench with:
Sopwith Snipe late post war
WW1 RFC SE5a

WW1-1/32 Snipe
Workbench gets full with models being built - Buys another workbench!

Image
gosselin2112
Sergeant Major
Sergeant Major
Posts: 655
Joined: Mon May 27, 2013 2:18 am
Location: Manchester, Newhampshire USA

Re: 1:72 DML Mi 28 Havoc

Post by gosselin2112 »

Aaah. . . that's what those things are called. Thanks, Dan, for improving my helicopter vocabulary.

:cheers2:

Russ.
gosselin2112
Sergeant Major
Sergeant Major
Posts: 655
Joined: Mon May 27, 2013 2:18 am
Location: Manchester, Newhampshire USA

Re: 1:72 DML Mi 28 Havoc

Post by gosselin2112 »

Cockpit is as ready as I can make it for final closing. The crew came out pretty well. I used a sludge wash instead of the traditional oil wash. I was curious to find out how it works on small details. I was delighted to see that it came out all right.
Image

The cockpit also received an experimental sludge wash, followed with a wash/filter of vallejo black wash. I then highlighted and painted the seat belts.
Image

After installing the crew I realized that it may have been a mistake on my part, as I didn't bother checking if the fuselage halves would be impeded. Luckily, everything just fell in place, though the gunner's right shoulder just barely rubs against the wall. Maybe he has an itch?
Image

Connecting the fuselage came together pretty well. There will be some minor filling of the seams, but that is to be expected. Clamping is going to be a two stage process. First, will be ensuring that the main body gets connected. Second, will be clamping the nose, which is having some closer issues.
Image

I think it is all down hill from here. Well, at least for assembly. Never quite can tell what will happen with the paint job.

Model On! :cheers2:
User avatar
DC87
Chief Warrant Officer 2
Posts: 1799
Joined: Wed Jun 05, 2013 7:16 pm
Location: Exeter, Devon, UK
England

Re: 1:72 DML Mi 28 Havoc

Post by DC87 »

Looks the business so far, good work - I like the sound of 'experimental sludge wash' :lol:
Dan C

Filling the workbench with:
Sopwith Snipe late post war
WW1 RFC SE5a

WW1-1/32 Snipe
Workbench gets full with models being built - Buys another workbench!

Image
User avatar
Lysion
Sergeant
Sergeant
Posts: 136
Joined: Sun Jul 07, 2013 10:32 am
Location: Sweden

Re: 1:72 DML Mi 28 Havoc

Post by Lysion »

Great figures there, looks like its building up nicely!
User avatar
jmar829
Sergeant
Sergeant
Posts: 155
Joined: Wed Aug 21, 2013 6:06 pm
Location: Bloomington, IN, U.S.A.

Re: 1:72 DML Mi 28 Havoc

Post by jmar829 »

Good work!
If you're going through hell...keep going.
–Winston Churchill


:fly2:
BALTA1
Private
Private
Posts: 15
Joined: Sat Sep 28, 2013 8:28 pm
Location: Plainfield, IL

Re: 1:72 DML Mi 28 Havoc

Post by BALTA1 »

Great progress!
spruecutter
Sergeant Major
Sergeant Major
Posts: 664
Joined: Tue Jun 18, 2013 12:06 am
Location: Deeside, UK

Re: 1:72 DML Mi 28 Havoc

Post by spruecutter »

The figures really give a sense of scale to this. :thumb2:
User avatar
FatFingaz
Sergeant
Sergeant
Posts: 100
Joined: Mon Aug 19, 2013 7:39 am
Location: London, UK
England

Re: 1:72 DML Mi 28 Havoc

Post by FatFingaz »

Just catching up on builds Russ and this looks awesome! :thumb2:
longlance67
Warrant Officer
Warrant Officer
Posts: 1371
Joined: Fri Aug 16, 2013 5:22 pm
Location: Galway, Ireland

Re: 1:72 DML Mi 28 Havoc

Post by longlance67 »

Great work Russ,

all those little details your putting into this kit will make it shine :th:


great stuff,


Shane
On the Bench:
Trumpeter Stryker ESV
Hobby Boss 1/48 F18 Hornet
1/72 Dragon King Tiger with Zimm
28mm Napoleonic project
28mm Norman Conquest of Ireland painting project

My Channel:
http://www.youtube.com/user/longlance67
JDMMODELS
Corporal
Corporal
Posts: 90
Joined: Sun May 26, 2013 3:27 pm
Location: NS, Canada

Re: 1:72 DML Mi 28 Havoc

Post by JDMMODELS »

Very nice work so far Russ!! :cheers2:
gosselin2112
Sergeant Major
Sergeant Major
Posts: 655
Joined: Mon May 27, 2013 2:18 am
Location: Manchester, Newhampshire USA

Re: 1:72 DML Mi 28 Havoc

Post by gosselin2112 »

Managed to find a little extra time to work on my Mi-28. Much to my surprise, I found a delightful gap (on the right). Why do they show up in all the wrong places? :crazy:
Image

I installed some more brass tube. This will allow me to take off the rotor when the model is in storage or going to a show. The rotor blade has some issues. Wasn't expecting an "S" curve. Looks like I'll be doing a little heat forming to bring it back to normal. :tongue:
Image

Let's talk firepower.

The Mi-28 is equipped with a chin-mounted 30 mm Shipunov 2A42 autocannon. The cannon is select fire, and has a dual-feed, which allows for a cyclic rate of fire between 200 rounds per minute to 550 rounds per minute. Its effective range varies from 1500 meters for ground vehicles to 2,500 meters for air targets. Rounds from High Explosive Incendiary (HEI) to Armour-Piercing Discarding Sabot (APDS) can be used. Stated penetration for the 3UBR8 is 25 mm of RHA at 1,500 meters.
Image

One common Mi-28 armament are a pair of 8 Ataka missile racks along with 2 B-13L rocket pods, each able to carry 5 S-13 rockets. Other rocket options include two B-8 rocket pods, each able to carry up to 20 S-8 rockets.
Image

There are four variants of the Ataka missile for different tasks. The 9M120 Tandem High Explosive Anti-Tank (HEAT) warhead variant is used against tanks fitted with Explosive Reactive Armor (ERA), its penetrative ability is stated at 800 mm Rolled Homogeneous Armour (RHA).[8] The 9M120F Thermobaric variant is used against infantry, buildings, bunkers, and caves. The 9M120O expanding rod warhead variant is used against other helicopters. All the variants have a range of 6 km. The 9M120M improved version has a longer range (8 km) and better penetration (900 mm of RHA).[9] All of the variants use SACLOS missile guidance.

The S-8 and S-13 rockets used by the Mi-28 are usually unguided. In the most common configuration, one can expect 40 S-8 rockets or 10 S-13 rockets. Both rockets have their variants, from HEAT warheads to a Thermobaric warhead. The S-8 has a shorter range and smaller warhead than the S-13, but compensates with numbers. Currently, the Russian Air Force are upgrading their S-8 and S-13 rockets to laser guided[10] missiles with the proposed Ugroza ("Menace") system. Rockets upgraded under Ugroza would receive designations S-8Kor and S-13Kor, respectively.

So. . . this is what it all looks like in styrene. :pistols:
Image

I thought I was getting close to the paint booth. Not likely. Back to filling and sanding :roll:
longlance67
Warrant Officer
Warrant Officer
Posts: 1371
Joined: Fri Aug 16, 2013 5:22 pm
Location: Galway, Ireland

Re: 1:72 DML Mi 28 Havoc

Post by longlance67 »

Very nice details mate :cheers2:
On the Bench:
Trumpeter Stryker ESV
Hobby Boss 1/48 F18 Hornet
1/72 Dragon King Tiger with Zimm
28mm Napoleonic project
28mm Norman Conquest of Ireland painting project

My Channel:
http://www.youtube.com/user/longlance67
User avatar
Nige201980
Captain
Captain
Posts: 4095
Joined: Wed Jun 05, 2013 9:30 am
Location: Doncaster South Yorkshire UK
Contact:

Re: 1:72 DML Mi 28 Havoc

Post by Nige201980 »

great work Russ this is going to look mean with all those weapons
http://www.youtube.com/channel/UCy-TGcs5u_ZXSZ9kObNfsPg


On the go at the Mo

Quite a few :banana:
User avatar
JayCub
Command Sergeant Major
Posts: 907
Joined: Mon Oct 21, 2013 11:58 pm
Location: Wicklow Ireland

Re: 1:72 DML Mi 28 Havoc

Post by JayCub »

Great build information and photographs, i like how this is coming together and the tips are invaluable.
gosselin2112
Sergeant Major
Sergeant Major
Posts: 655
Joined: Mon May 27, 2013 2:18 am
Location: Manchester, Newhampshire USA

Re: 1:72 DML Mi 28 Havoc

Post by gosselin2112 »

Well, I decided to take care of that bent rotor blade, using the heat forming method (boiling water). Took me a long time to find a suitable household item that had the shape I needed. Surprisingly, I use it all the time - a toothbrush! :tongue: I just taped the blade along the curve of the handle. Just submerse it in boiling water for about 10 seconds.
Image

My only problem was that it wouldn't fit in the pot. So I cut the handle off. Now I have a new tool to add to my workbench. It was time for a new brush anyway.
Image

With the blade repaired, I was able to get the rotor assembled. This is certainly becoming a filler project, as I have more gaps to fill on all the blades.
Image

That's all for now. I would like to thank everyone for the comments and encouragement along the way. This has been a fun project.

:hi:
User avatar
Radzy
Command Sergeant Major
Posts: 750
Joined: Sun Jun 16, 2013 9:57 pm
Location: Warsaw, Poland

Re: 1:72 DML Mi 28 Havoc

Post by Radzy »

It's ... rolling in hot... using military slang :)

Great progress Russ and this boiling water can make a really good effects on sagging rotor blades.
Used it on my Mi-4 (tip came from ChancerNW) and maybe slightly overdone, bot looks real :)

Cheers,
Radek
WIP:
Tamiya 1:72 F4U-1 Corsair Birdcage
----------------------
My Portfolio
My YouTube Channel
User avatar
fly1ngdutchm4n
First Lieutenant
First Lieutenant
Posts: 3554
Joined: Fri Aug 09, 2013 11:17 pm
Location: Hoogerheide The Netherlands
Netherlands

Re: 1:72 DML Mi 28 Havoc

Post by fly1ngdutchm4n »

Awesome!
Great progress, and very good tip on the boiled water technique! :th:
Build what you love, Love what you build
User avatar
panzerman
Sergeant
Sergeant
Posts: 151
Joined: Sat Jun 01, 2013 3:31 am
Location: Glen Burnie, Maryland

Re: 1:72 DML Mi 28 Havoc

Post by panzerman »

Havoc is coming along nicely......nice work on the blade drooping.
Bill.
Image
Post Reply

Return to “Builds”