Page 1 of 1

Spitfire PR.IG -1/48

Posted: Thu Jul 02, 2015 1:25 am
by mincemeat
Hey Fellas,

Here it is, my first time building in a GB! Finally a GB lined up with what I wanted to do, when I wanted to do it!

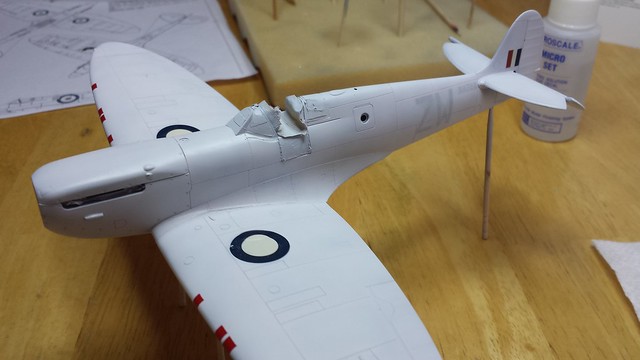
I'm going to be converting the awesome Tamiya 1/48 Mk I Spitfire into the camoutint pink PR.IG. I'm going to be dedicating this build to my wife, as she loves the elegance of the Spitfire and would love to see the pink version. Like the handful of models before it, it will be a model of firsts. It will be my first time dealing with PE (I've got the Eduard set currently on its way from Australia), making major modifications to a kit, first time using after market decals, almost first time with resin parts and a first time making a simple dio base. The only thing that isn't a first time is the kit. I know it goes together like a dream so that will help. On the previous Spitfire I used Ultracast exhausts, which is an absolute must over the kit exhaust if you were to upgrade anything.

Here are some pics. Unfortunately, my Ultracast guy isn't answering my calls. I'm currently waiting on the seat, control surfaces and exhaust. I called and spoke with him 4 weeks ago. Thankfully I haven't paid, so if I don't hear back soon, I'll look elsewhere. That's my tale of woe. On to the pictures.

The kit box.

ImageKit by Iggy Pants, on Flickr

Parts.

ImageKit by Iggy Pants, on Flickr

Kit instructions.

ImageKit by Iggy Pants, on Flickr

Some resin conversion parts, courtesy of a very friendly Spitfire enthusiast that I met at my local modelling club free of charge. Thanks Mr. D!

ImageKit by Iggy Pants, on Flickr

Hopefully I'll be able to start soon. I'll give Ultracast guy one more week.

Re: Spitfire PR.IG -1/48

Posted: Thu Jul 02, 2015 9:01 am
by Nige201980
good luck mate looking forward to seeing it come together.

Re: Spitfire PR.IG -1/48

Posted: Fri Jul 03, 2015 8:15 am
by Andreas
That looks like a nice bit of kit. Can't wait to see how it turns out. Good luck!

Re: Spitfire PR.IG -1/48

Posted: Fri Jul 03, 2015 8:37 am
by Willem
Nice subject mate.

Looking forward to seeing the build.

:cheers2:

Re: Spitfire PR.IG -1/48

Posted: Fri Jul 03, 2015 1:32 pm
by heel
Very nice. What kind of references are you using as I'm not familiar with this version?

Re: Spitfire PR.IG -1/48

Posted: Fri Jul 03, 2015 2:13 pm
by martin57
nice kit, going to be nice when you have done . :cheers2:

Re: Spitfire PR.IG -1/48

Posted: Fri Jul 03, 2015 4:42 pm
by mincemeat
Hey Everyone,

Thanks a lot for the encouragement. I hope it comes out as well as I'm envisioning and your well wishes anticipate. I seem to have an audience now, so the pressure is on!
heel wrote:Very nice. What kind of references are you using as I'm not familiar with this version?
Heel, I am mostly going off of other PR.IG builds I've seen and what was given to me by the friendly Spitfire enthusiast. I think I'll primarily be using the Airwaves set AES48067 from Hannants for the conversion.

I don't know what book this came from but it was given to me with the other reference materials.

Imageimg20150703_11031663 by Iggy Pants, on Flickr

It has two cameras under the fuselage and one oblique camera on the side. I don't really care for the decals that I have at the moment, so I will be looking into getting something else. The big point of contention was "How pink was it?" I'm of the opinion that it was nearly white but had as much red to be a hint or mere reference that a pink hue exists.

Re: Spitfire PR.IG -1/48

Posted: Fri Jul 03, 2015 6:22 pm
by Nev
Can't go wrong with a reccie spit! :thumb2: Good luck with your build mate :cheers2:

Re: Spitfire PR.IG -1/48

Posted: Sun Jul 12, 2015 12:59 am
by mincemeat
Hi Guys,

Unfortunately my interior parts have not yet arrived, so I'm pretty limited on what I can start at the moment. I do have the Airwaves conversion kit for the PR.IG and I'll be walking you through that today.


Before we get started, in case there are any new people to the hobby watching this thread, always wear a mask and/or gloves when cutting or sanding resin. I like to put down a damp paper towel to catch the dust. I've heard resin dust described as; "microscopic shards in your lungs."

ImageResin parts by Iggy Pants, on Flickr


Here is the stock fuselage half from the kit. This will be my first time slicing and dicing into a fuselage for the sake of conversion.

ImageResin parts by Iggy Pants, on Flickr


With a sharp hobby knife, I sliced out the door. As you can see, the knife wandered a bit and I cut the bottom of the door frame. The first thing I did and I messed it up! :wall: I put a touch of Extra Thin on the cut, gave the large cut a nudge, some light sanding and you hardly know it was ever there.

ImageResin parts by Iggy Pants, on Flickr


I took the dial calipers today, that I had to re-learn to read, and located the center of the panel for the oblique camera.

ImageResin parts by Iggy Pants, on Flickr


I indented the center of the panel with a hobby knife, so when I used the pin vise it wouldn't slip off the mark when I started drilling. I started with a small hole and worked my way up to the largest bit I have. Which unfortunately, was too small. The resin camera lens outside diameter is much bigger.

ImageResin parts by Iggy Pants, on Flickr


This is the next problem I ran into. Since I centered the hole on the panel, I was limited in the size I could make because of the fuel tank. If I didn't make it bigger you couldn't make out the camera lens, but if I made it too big you would see the fuel tank.

ImageResin parts by Iggy Pants, on Flickr


Time for some serious cuttin'!

ImageResin parts by Iggy Pants, on Flickr


I trimmed a little off the back end that no one will ever see....well, except for you guys....and the rest of the Interwebs....crap.

ImageResin parts by Iggy Pants, on Flickr


With that trim, I was able to make the camera hole quite a bit larger.

ImageResin parts by Iggy Pants, on Flickr


"Wait. You said that you used your largest bit!?" Yes, I did. But alas my skeptical friends, I used "More Power!"

ImageResin parts by Iggy Pants, on Flickr


It was not my preferred method and a lot could have gone wrong, but it didn't. If you ever need to resort to this, bear these things in mind. A fast drill will bore cleaner. Go from the outside in, that way the fraying and curling around the hole perimeter will occur on the inside.


Now at least the outside diameter of the camera lens is the same as the hole. I'm not sure how I will mount the camera yet, but here is a dry fit. Which is the wrong way according to the instructions.

ImageResin parts by Iggy Pants, on Flickr


I'm considering making the hole a touch bigger, but I'm not so sure. The current hole diameter is 0.123".

ImageResin parts by Iggy Pants, on Flickr


On to the underside cameras. There is a fair bit of cutting that needs to take place. Here I'm sizing up the wings for modification.

ImageResin parts by Iggy Pants, on Flickr


I made some initial cuts on the fuselage.

ImageResin parts by Iggy Pants, on Flickr


All cleaned out, just like a colonoscopy prep.

ImageResin parts by Iggy Pants, on Flickr


Dry fit. There are some gaps and things that will need to be addressed. I'm thinking about trying Milliput epoxy putty to fill the cracks and help shape the transition. If this is the wrong route, please let me know.

ImageUnderside cameras by Iggy Pants, on Flickr

ImageUnderside cameras by Iggy Pants, on Flickr

ImageUnderside cameras by Iggy Pants, on Flickr


Here is where she sits at the moment. I can't do much more until the cockpit stuff comes in.

ImageResin parts by Iggy Pants, on Flickr


As an experiment I wanted to see if Kristal Klear would cover a whole this large, and you know what? It does! I rinsed it off as soon as I took the picture.

ImageResin parts by Iggy Pants, on Flickr


Of course I realized afterward that I had some extra pieces to test the Kristal Klear method. The top hole, was thickly applied. The bottom was more precise with a reasonable amount.

ImageResin parts by Iggy Pants, on Flickr


After about an hour, the bottom hole started to clear. Within three hours it was clear. It's been six hours and the top hole is still not clear yet.

ImageResin parts by Iggy Pants, on Flickr


Wasn't much of a post of anything exciting, but I definitely did some new stuff today. Thanks for looking in!

Re: Spitfire PR.IG -1/48

Posted: Sun Jul 12, 2015 4:31 pm
by planemaker
Looks like it's gonna be an interesting build, good luck with it. :thumb2: Will be following this one!

Just as a tip, you should be careful when masking up the Kristal Klear, it peels of really easily.

Re: Spitfire PR.IG -1/48

Posted: Sun Jul 12, 2015 4:37 pm
by mincemeat
planemaker wrote:Looks like it's gonna be an interesting build, good luck with it. :thumb2: Will be following this one!

Just as a tip, you should be careful when masking up the Kristal Klear, it peels of really easily.
Thanks for the tip. I didn't leave the Kristal Klear on the fuselage. I poked my test piece with a toothpick and it feels elastic-y. I'll be using Kristal Klear as the final step in the project.

Re: Spitfire PR.IG -1/48

Posted: Tue Jul 14, 2015 12:13 pm
by patrickroos
Cool build, good luck with the resin conversions, always a challenge... :tongue:

Looks great so far :th:

:cheers2:

Re: Spitfire PR.IG -1/48

Posted: Sun Jul 19, 2015 4:26 am
by mincemeat
Finally, my interior parts finally arrived this week and I was able to really get started. Here's what I have accomplished so far.

The resin exhausts and blunt spinner I'll be using. This Spitfire may not bee 100% accurate, but try finding definitive information on these. The community can't even agree on shades of any given color.

ImageInterior prepping by Iggy Pants, on Flickr


The Mk I PE and resin seat.

ImageInterior prepping by Iggy Pants, on Flickr


Here is a great comparison. If you were get any aftermarket parts for the Tamiya Spitfire, go with the seat and exhausts.

ImageInterior prepping by Iggy Pants, on Flickr


The blunt spinner vs the kit spinner.

ImageInterior prepping by Iggy Pants, on Flickr


The shaft on the props are really nicely defined in the resin.

ImageInterior prepping by Iggy Pants, on Flickr


The plain Jane interior.

ImageInterior prepping by Iggy Pants, on Flickr


Here is the first piece of photo etch I have ever attempted to bend. Unfortunately I don't have a fancy dancy PE bender station.

ImageInterior prepping by Iggy Pants, on Flickr


But I do have two razor blades, a CD case and some tape!

ImageInterior prepping by Iggy Pants, on Flickr


Check out Roosevelt's earring. This was the first piece that I snipped off the PE tree and was about to put it on when...."ping" off the tweezers. After 20 minutes of crawling around on the carpet, I gave up and went to bed. When I arrived home from work the next day, before I even changed I was addicted to searching again. I found it stuck to the underside of a piece of tape on the cutting mat!

ImageInterior prepping by Iggy Pants, on Flickr


Now that I have PE, I will cut off the chunky rudder control.

ImageInterior prepping by Iggy Pants, on Flickr


All gone. The re-scribe job isn't the best, but if I fill it and attempt to re-scribe, I think the potential to make it worse is fairly great. I'm just going to leave it. One thing I picked up in my travels was adding a touch of Extra Thin to a re-scribe. It softens the new line.

ImageInterior prepping by Iggy Pants, on Flickr


Starter blister to go with the blunt spinner.

ImageInterior prepping by Iggy Pants, on Flickr


On the open door option, they have this piece that sticks out at a right angle. Presumably, to keep it from being flush with the fuselage.

ImageInterior prepping by Iggy Pants, on Flickr


I wasn't having any of that, so I sanded it off.

ImageInterior prepping by Iggy Pants, on Flickr


I super glued the fuel tank with some Bob Smith medium CA glue. Now the fuselage isn't closing well.

ImageInterior prepping by Iggy Pants, on Flickr


I did some serious shaving to the tank on the un-glued side to get the fuselage to close up. I did notice as well that the fuel tank isn't exactly straight across either. I'm betting on the fact that most people won't look as close as I do.

ImageInterior prepping by Iggy Pants, on Flickr


Now that the tank is in, the camera position wasn't centered on the hole I made. I took a measurement with my calipers and stacked up some strip stryene, glued with Extra Thin as a shim. I sanded it down for the best fit. I love my dial calipers and measure everything with them now.

ImageInterior prepping by Iggy Pants, on Flickr


Since CA glue sticks pretty darn fast, I used Kristal Klear to stick it and position the camera before super gluing. I added the CA glue. Here is a pic before I messed it up by fudging with it. Nearly stuck the camera between my thumb AND index finger. After some fussing and choice words, I got it back in place and hit it with more CA glue.

ImageInterior prepping by Iggy Pants, on Flickr


Exterior view of the camera in it's position.

ImageInterior prepping by Iggy Pants, on Flickr


Here is the aftermath. I wasn't shy about the CA glue, as I only have PVA in between the shim and the camera and you won't be seeing it all closed up.

ImageInterior prepping by Iggy Pants, on Flickr


Ready for priming. I opted not to include the armor behind the seat, because; 1) they wanted the PR's to go fast, 2) not to engage an enemy ever, 3) reduce weight and 4) get better fuel consumption because they had a small tank.

ImageInterior prepping by Iggy Pants, on Flickr

ImageInterior prepping by Iggy Pants, on Flickr

ImageInterior prepping by Iggy Pants, on Flickr


Thanks for looking in. Hopefully I can get this done by September 30. Constructive feedback is always welcome.

Re: Spitfire PR.IG -1/48

Posted: Sun Jul 26, 2015 9:14 pm
by mincemeat
I got the interior done, slow progress. Don't know if I'll finish by the end of the SiG.

Interior primed.

ImagePrimed and painted interior by Iggy Pants, on Flickr

ImagePrimed and painted interior by Iggy Pants, on Flickr

ImagePrimed and painted interior by Iggy Pants, on Flickr


Painted with Model Master Acryl RAF Interior Green.

ImagePrimed and painted interior by Iggy Pants, on Flickr

ImagePrimed and painted interior by Iggy Pants, on Flickr

ImagePrimed and painted interior by Iggy Pants, on Flickr

Bits picked out with different blacks.

ImagePrimed and painted interior by Iggy Pants, on Flickr

ImagePrimed and painted interior by Iggy Pants, on Flickr

Dials didn't come out the way I imaged them, even using a toothpick. But picking out some things with color really adds to it.

ImagePrimed and painted interior by Iggy Pants, on Flickr


Seat got hit with Tamiya hull red from a lacquer rattle can, because that's what I have.

ImagePrimed and painted interior by Iggy Pants, on Flickr

The back of the seat is flat black. Then I lightened the black with white and put a little highlight on for ware. Don't know if it really worked.

ImagePrimed and painted interior by Iggy Pants, on Flickr

Painted the straps Tamiya Buff. I thinned the paint and added Flow-aid to retard drying. Not the smoothest paint to brush with but it worked out okay.

ImagePrimed and painted interior by Iggy Pants, on Flickr

ImagePrimed and painted interior by Iggy Pants, on Flickr

Added silver detail with Model Master Acryl.

ImagePrimed and painted interior by Iggy Pants, on Flickr

ImagePrimed and painted interior by Iggy Pants, on Flickr

Glossed with Alclad Aqua Gloss.

ImagePrimed and painted interior by Iggy Pants, on Flickr

Washed with a mix of black and brown oil paint.

ImagePrimed and painted interior by Iggy Pants, on Flickr

Cleaned up.

ImagePrimed and painted interior by Iggy Pants, on Flickr

ImagePrimed and painted interior by Iggy Pants, on Flickr

After the I flat coated with AK's Ultra flat varnish, I took a superfine applicator and added Aqua Gloss to the glass dials to make them reflect.

ImagePrimed and painted interior by Iggy Pants, on Flickr

I needed some way to mount the seat. I used strip styrene to stick in the hole and mount the seat to that. With some sanding, it got to size.

ImagePrimed and painted interior by Iggy Pants, on Flickr

ImagePrimed and painted interior by Iggy Pants, on Flickr

ImagePrimed and painted interior by Iggy Pants, on Flickr

ImagePrimed and painted interior by Iggy Pants, on Flickr

ImagePrimed and painted interior by Iggy Pants, on Flickr

ImagePrimed and painted interior by Iggy Pants, on Flickr

ImagePrimed and painted interior by Iggy Pants, on Flickr

ImagePrimed and painted interior by Iggy Pants, on Flickr

ImagePrimed and painted interior by Iggy Pants, on Flickr

Finished interior.

ImagePrimed and painted interior by Iggy Pants, on Flickr

Glued up.

ImagePrimed and painted interior by Iggy Pants, on Flickr

ImagePrimed and painted interior by Iggy Pants, on Flickr

I filled the gun ports with Mr. Dissolved Putty as the final paint job will have the the red gun covers.

ImagePrimed and painted interior by Iggy Pants, on Flickr


Elevator before cutting apart.

ImagePrimed and painted interior by Iggy Pants, on Flickr

I used a combo of a razor saw but mostly a lot of passes with a hobby knife to separate. I also marked them so I know which one goes with which and what side.

ImagePrimed and painted interior by Iggy Pants, on Flickr


When the elevator is fixed in position I wanted to make sure it was done equally on both and at the correct angle. So I pulled out the old protractor and did some figurin'.

ImagePrimed and painted interior by Iggy Pants, on Flickr

I wanted a 30 degree down angle, so I created a 150 degree obtuse angle. If this is wrong please let me know now before I glue things together.

ImagePrimed and painted interior by Iggy Pants, on Flickr

I cut out three.

ImagePrimed and painted interior by Iggy Pants, on Flickr

I used a hot needle to pierce through all three triangles in sheet styrene.

ImagePrimed and painted interior by Iggy Pants, on Flickr

Now the elevators will both be at the correct angle when they get glued together.

ImagePrimed and painted interior by Iggy Pants, on Flickr

The vacuformed canopy. My first time dealing with these, so I was nervous. I outlined where I thought the edges were with a Gundam marker. Then I cut it out with a hobby knife.

ImagePrimed and painted interior by Iggy Pants, on Flickr

It was a bit rough, so I sanded the edges with a medium sander.

ImagePrimed and painted interior by Iggy Pants, on Flickr

ImagePrimed and painted interior by Iggy Pants, on Flickr

ImagePrimed and painted interior by Iggy Pants, on Flickr

I'm currently working on cleaning up the seams on the wings and fuselage and planning the other little bits. The underside camera resin part has got me a bit nervous.

Re: Spitfire PR.IG -1/48

Posted: Sun Jul 26, 2015 11:23 pm
by Avgas
Some lovely detailing in the cockpit. Looking great so far.

Re: Spitfire PR.IG -1/48

Posted: Sat Oct 17, 2015 3:26 pm
by mincemeat
Did I miss the deadline????? :scratch:: :scratch:: Oh well, I guess I'll keep posting just because.

Some stuff I picked up for this round of work.
ImageSome long awaited progress by Iggy Pants, on Flickr

I was able to pick up these half round strips at my local hobby store. Well, actually it's just one strip. As I was looking at the stock at my local hobby shop, I noticed this package was supposed to contain five strips but it only contained one. Someone had pushed the other strips out of the bottom seam. I took it up to the register and I got the last strip for free. I can't stand thieves, but man, it really worked in my favor. I only needed the one strip anyway. It was cut to length and cemented to the elevators.
ImageSome long awaited progress by Iggy Pants, on Flickr

I took a razor saw and cut notches for the hinges.
ImageSome long awaited progress by Iggy Pants, on Flickr

I then took some strip styrene, cut it to size and glued it into place.
ImageSome long awaited progress by Iggy Pants, on Flickr

The rough hinges. They will be sanded down and rounded prior to attachment.
ImageSome long awaited progress by Iggy Pants, on Flickr

I made some modifications to my jig since the last post. I glued the jig to a sheet of styrene and added a back plate for support. I taped it to the cutting mat so it wouldn't slide around and I also used a piece of double sided tape to hold the horizontal stabilizer in place as the elevator was glued on.
ImageSome long awaited progress by Iggy Pants, on Flickr


ImageSome long awaited progress by Iggy Pants, on Flickr

On to the cockpit. After some test fits, I realized that the rear bulkhead needed to be 90º to the floor. It's not obvious per the directions. I had to un-glue the seat because when the bulkhead was at 90º, the strap pulled away from it. So it would have been weird to have a seat belt that was coming off the rear of the seat attaching to nothing.
ImageSome long awaited progress by Iggy Pants, on Flickr

After I sprayed flat black on all the seams, I found areas that needed some more filler. I used Mr. Dissolved putty to do that.
ImageSome long awaited progress by Iggy Pants, on Flickr

Seams were sanded down again and with the help of some embossing tape, the seam lines that should be present were re-scribed.
ImageSome long awaited progress by Iggy Pants, on Flickr

I primed and sprayed RAF Interior green on the front area to prepare to place the canopy, or can of peas.
ImageSome long awaited progress by Iggy Pants, on Flickr

Instrument panel in place.
ImageSome long awaited progress by Iggy Pants, on Flickr

It doesn't look too shabby in there.
ImageSome long awaited progress by Iggy Pants, on Flickr

Wings glued on and taped while the glue sets.
ImageSome long awaited progress by Iggy Pants, on Flickr

Here's one of the areas I was frightened of. The major resin enhancement. It was super glued in place.
ImageSome long awaited progress by Iggy Pants, on Flickr

I taped it up in preparation for gap filling.
ImageSome long awaited progress by Iggy Pants, on Flickr


ImageSome long awaited progress by Iggy Pants, on Flickr

I used Milliput superfine white putty. I pushed it in the gaps and smoothed it with a wet finger or some metal smoothing tool I have.
ImageSome long awaited progress by Iggy Pants, on Flickr


ImageSome long awaited progress by Iggy Pants, on Flickr

While it was still damp I decided to take the tape off. I figured it would be easier and I can address some issues while it is still malleable.
ImageSome long awaited progress by Iggy Pants, on Flickr


ImageSome long awaited progress by Iggy Pants, on Flickr


ImageSome long awaited progress by Iggy Pants, on Flickr


I'll have to build up some additional courage to sand all this down so it will blend together. Now you're all up-to-date. Hopefully it will be close to complete by the end of the year. Thanks for looking and as always comments, constructive or otherwise are wilkommen.

Re: Spitfire PR.IG -1/48

Posted: Sat Oct 17, 2015 6:29 pm
by jbellos1
This is AWESOME! Keep going. That oblique camera in the fuselage came out saaaweeet! Looks like all your hard work is paying off. Thanks for sharing!

Re: Spitfire PR.IG -1/48

Posted: Tue Oct 20, 2015 1:28 am
by mincemeat
jbellos1 wrote:This is AWESOME! Keep going. That oblique camera in the fuselage came out saaaweeet! Looks like all your hard work is paying off. Thanks for sharing!
Hey Jon! Thanks for commenting! It was a little nerve racking with that one, that was not my preferred method making for the oblique camera hole for sure. I now need to fix some boo boos with re-scribing then I can re-re-scribe and hopefully I can start moving along again. But a pin works great for adding back rivets.

Re: Spitfire PR.IG -1/48

Posted: Sat Jan 30, 2016 4:33 pm
by mincemeat
Just when you thought this post was dead. So it's been a couple of weeks since the last update. Guess what? Still not done but I'm a lot closer now. I've kept a more detailed story on my blog but I'll give you the highlights.


The seat is sitting too high for the rear canopy, so I had to use a vacu-formed one and work it down. This was the third and last one I had. I ruined the first two. :wtf:

ImageCanopy woes by Iggy Pants, on Flickr


Masking the center canopy was a huge PIA due to the curves and the bubbles on the side. I used Maskol to fill in the gaps.

ImagePrep for priming by Iggy Pants, on Flickr


Bottom resin piece on, cleaned up, wings attached, getting the oil cooler and radiator painted and attached.

ImagePrep for priming by Iggy Pants, on Flickr

ImagePrep for priming by Iggy Pants, on Flickr

ImagePrep for priming by Iggy Pants, on Flickr


PE for the actuator on the rudder. I cut the plastic chunk off months ago.

ImagePrep for priming by Iggy Pants, on Flickr


Attached modified elevators.


ImagePrep for priming by Iggy Pants, on Flickr


Clear parts on.

ImagePrep for priming by Iggy Pants, on Flickr

Attached resin spinner to kit spinner shaft.

ImagePrep for priming by Iggy Pants, on Flickr


Ready for priming.

ImagePriming by Iggy Pants, on Flickr

ImagePriming by Iggy Pants, on Flickr

ImagePriming by Iggy Pants, on Flickr


Used AK Grey primer.


ImagePriming by Iggy Pants, on Flickr


ImagePriming by Iggy Pants, on Flickr


ImagePriming by Iggy Pants, on Flickr


A pesky hole that wouldn't stay filled.

ImagePriming by Iggy Pants, on Flickr

The paints.

ImagePriming by Iggy Pants, on Flickr

ImagePriming by Iggy Pants, on Flickr

I added too much Red to the white to get a real "bordello pink" as my old man used to say (using the cleaned up version). I fail most color tests but got a waiver from the FAA as having "defective color vision". Yay me! In the end I had the wife present and mixed the "bordello pink" with white to have a more subtle pinkish hue.

In an effort to pre-shade, which was useless in the end, I sprayed white inside of the panels.

ImageTerrible pre-shading by Iggy Pants, on Flickr


Then bordello pink on the lines.

ImageTerrible pre-shading by Iggy Pants, on Flickr

ImageTerrible pre-shading by Iggy Pants, on Flickr

ImageTerrible pre-shading by Iggy Pants, on Flickr


The Final color.

ImagePink trials by Iggy Pants, on Flickr


Parts

ImagePink! by Iggy Pants, on Flickr


The Pink!


ImagePink! by Iggy Pants, on Flickr

ImagePink! by Iggy Pants, on Flickr

ImagePink! by Iggy Pants, on Flickr

ImagePink! by Iggy Pants, on Flickr

Masking for painting. Calipers are a must for modelling!

ImagePost painting and decals by Iggy Pants, on Flickr

ImagePost painting and decals by Iggy Pants, on Flickr

ImagePost painting and decals by Iggy Pants, on Flickr

Let's not take chances!

ImagePost painting and decals by Iggy Pants, on Flickr


Just used Guards Red. Probably not right but oh well.

ImagePost painting and decals by Iggy Pants, on Flickr


Tada! My paint needed to be a bit thicker. I didn't get perfect straight lines. Next time.

ImagePost painting and decals by Iggy Pants, on Flickr

ImagePost painting and decals by Iggy Pants, on Flickr

Prop tippies. Same deal, paint needed to be a bit thicker.

ImagePost painting and decals by Iggy Pants, on Flickr

ImagePost painting and decals by Iggy Pants, on Flickr

ImagePost painting and decals by Iggy Pants, on Flickr


That's it for this time. Not only was the paint hard to mix, it was hard for me to see going down. I had to go by wetness in the light as my main indicator. Thanks for looking.

Re: Spitfire PR.IG -1/48

Posted: Sat Jan 30, 2016 7:15 pm
by Smiffy
Great work so far, really looking forward to seeing the completed Spitfire :th:

Re: Spitfire PR.IG -1/48

Posted: Mon Mar 21, 2016 2:29 am
by mincemeat
Well, it never turns out how you expect. At least not for me at this point. Let's see the decals.

Here are the decals I used. Looks like I need to build more Spitfires!

ImagePost painting and decals by Iggy Pants, on Flickr

ImagePost painting and decals by Iggy Pants, on Flickr

Had some silvering on the serial numbers and there's a hair on the "ZW" I can't get rid of! :bash:

ImagePost painting and decals by Iggy Pants, on Flickr

ImagePost painting and decals by Iggy Pants, on Flickr

Some tearing.

ImageWeekend bonanza by Iggy Pants, on Flickr

Mixed some Vallejo flat black and flat blue and did a little touch up.

ImageWeekend bonanza by Iggy Pants, on Flickr

Used my calipers and cut out some "Z" masks to hide some silvering with some airbrush work.

ImageWeekend bonanza by Iggy Pants, on Flickr

ImageWeekend bonanza by Iggy Pants, on Flickr

But look what happened to my custom mix of paint. FUUUUUUUUUUUUUUU.................

ImageWeekend bonanza by Iggy Pants, on Flickr

So I tried to add thinner to re-constitute. Well, my airbrush kept clogging because of all the little B@#$%d particles. The job got done ok, not great or as controlled as I would have liked, but oh well. I think I'm going to be done with Model Master paints.

Some exhaust work with base and pigments.

ImageWeekend bonanza by Iggy Pants, on Flickr


Ready to receive a wash of Ultimate Dark Dirt. THis could go great or very very badly.

ImageDark dirt wash by Iggy Pants, on Flickr

All in. I did test a small section on the bottom and it turned out ok, so I took the plunge.

ImageDark dirt wash by Iggy Pants, on Flickr

Topside.

ImageDark dirt wash by Iggy Pants, on Flickr

ImageDark dirt wash by Iggy Pants, on Flickr

ImageDark dirt wash by Iggy Pants, on Flickr


I did end up having some problem spots. May be attributed to not a smooth surface, especially near the wing roots. There were also a number of areas that the wash left a stain that I can't get off. Not sure if it's a gloss coat problem but the area in the center of the stain and around it cleaned up, leaving a ring. I'm taking some of the roughness due to the AK Primer (I'm done with that) and the Model Master paint. The Red I used to make the pink that went into the pot of white is extremely thick/gummy, which is better after thinning but I've not seen anything like it before. Which is probably part of the reason for my odd paint coagulation problem with the custom mix. I've since sprayed things with Badger primer and Akan paint, far superior than AK and Model Master in their respective areas.

I also have some odd yellowing discoloration that's very faint on the topside. I used Alclad Aqua Gloss so I don't think I could have rubbed that vigorously. It is what it is at this point. Deep breath......let it go........ :wall:

Re: Spitfire PR.IG -1/48

Posted: Sat Apr 02, 2016 3:37 pm
by mincemeat
Done. Did I make the deadline????

Image0330162041c by Iggy Pants, on Flickr

Image0330162042d by Iggy Pants, on Flickr

Image0330162042a by Iggy Pants, on Flickr

Image0330162041a by Iggy Pants, on Flickr

Image0330162040e by Iggy Pants, on Flickr

Image0330162040b by Iggy Pants, on Flickr

Image0330162040a by Iggy Pants, on Flickr

Image0330162042 by Iggy Pants, on Flickr

Image0330162041e by Iggy Pants, on Flickr

Re: Spitfire PR.IG -1/48

Posted: Sat Apr 02, 2016 4:04 pm
by Willem
That looks really good mate. Love the colour.

:cheers2:

Re: Spitfire PR.IG -1/48

Posted: Mon Apr 04, 2016 12:52 am
by mincemeat
Willem wrote:That looks really good mate. Love the colour.

:cheers2:
Thanks for looking in Will! :th: If compared against a white background in real life, there is a pink hue. If I do it again, I'll go a touch pinker I think. :think: