Page 1 of 1
Fading colours
Posted: Wed Mar 02, 2016 12:15 am
by Sty190
Hello there,
I haven't really found much about this topic, so I'd hoped you could possibly help me out:
I'm currently building an X-Wing on which I'm picking out individual panels:
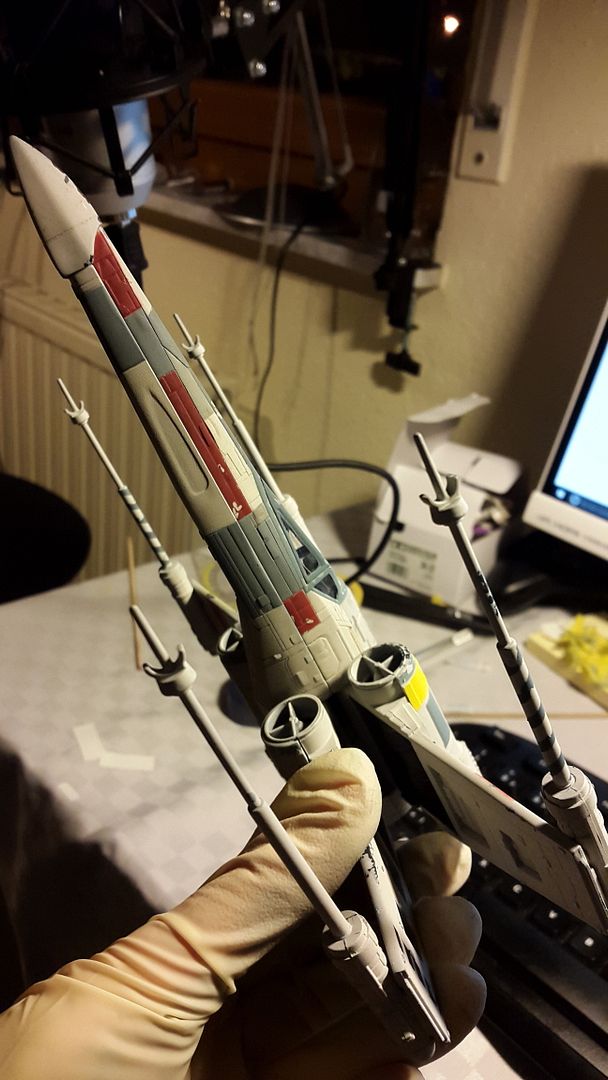
Now I have googled reference pictures and build threads a lot and I came across this:

Which in the end turned out like this:

I was wondering how that guy managed to tone the blueish panels down to contrast less to the base colour.
Thanks in advance!
Re: Fading colours
Posted: Wed Mar 02, 2016 2:11 am
by JimJ
Oils can be used to fade colors........thin a bit with odorless thinner, then kind of a "wax on" - "wax off " kind of a thing. The only thing is, play with the technique on scrap first until you get a feel for it. Seal model with dull coat first, then put it on lightly with a brush or sponge, and take off with Q-tips. The oil gives you quite a bit of time to work with it.
I'd say in this instance an off white or real light tan color. Let the oil dry for about two days, then dullcoat.
Re: Fading colours
Posted: Wed Mar 02, 2016 5:59 pm
by Sty190
Alright, thanks a bunch Jim! I just bought some white and ivory oils, hope that'll do. How long should I wait before wiping it off? And how much should I thin it? And do I try to take it off mechanically with a dry Q-tip or do I dip it in thinner first?
Re: Fading colours
Posted: Wed Mar 02, 2016 6:55 pm
by JimJ
I used to use the oils for this purpose on "N" scale model RR cars, and that was the first step in the weathering process. It is transferable to almost any scale.
I'll try to give as concise directions as I can........haven't done it in awhile.
*** WORK ON A SCRAP PIECE OR "TEST SUBJECT" FIRST TO FAMILIARIZE YOURSELF WITH THE PROCESS............it's not hard, and you will work out the "kinks" to your own satisfaction in no time.
First, seal the model with a coat of "Dullcote" (brand of your choice) - gives the model protection from solvent used to thin oil paint.
Squeeze out about a dime size (or smaller) blob of the color you wish to use on a piece of paper towel, let it set for about fifteen minutes to adsorb the excess oil in the paint.
Then, on a small piece of glass (easy to clean & reuse), mix the oil with "Winsor & Newton" Sansodor thinner (what I use-available @ "Hobby Lobby").
Thin the oil paint to about the consistency of unthinned Tamiya acrylic paint, maybe a bit thinner (this is not really critical - you thin mainly for ease of application - you can decide for yourself how thick/thin you like to work with). You are basically applying a "haze" coat, which you will shortly remove, so don't go too thick.
Do sections of the model at a time.......put the oil on, let it dry for a short time, then remove with a dry Q-tip ( I use the stiffer pointed Q-tips used for make-up, etc. They don't leave as much fuzz behind). Be prepared, you will use a LOT of Q-tips (LOL).
( "Wax on, Wax off " )
You will see that it leaves a white haze........thereby "fading" the original color. Work at it a bit, to smooth out the effect, and go on to another section. You can kind of match the color of oils to the paint you wish to "fade" - (light gray on black, etc. - just a matter of experimentation).
The oil gives you a good bit of "work time", so you have time to smooth it out nicely & remove streaks, etc.
When you are satisfied, let the model dry for AT LEAST two to three days - oil paint takes a long time to cure. Re-coat with coat of "Dullcote" (brand of your choice) and you have "faded" paint. You can then proceed to use other weathering techniques over this.
I use oils almost exclusively for weathering effects on my models, as I found it the easiest to work with & modify - ( one of the real reasons is that I always got SO frustrated trying to figure out the correct mix for "acrylic" washes.....could never seem to get them right ).
You can thin oils to almost the consistency of water & they still work great as pin washes, streaking effects, etc.
Another trick is to put small dots of oil paint on your model where you want "streaks" to start, then drag a brush wet with "Winsor & Newton" Sansodor thinner vertically down the side of the model for "streaks".
Hope this helps..........
Re: Fading colours
Posted: Thu Mar 03, 2016 4:56 pm
by Sty190
Oh, I didn't expect an entire tutorial, great stuff!
I shall give it a go as soon as I can find the time!
Hope this helps..........
Absolutely, thanks a lot for the guide!
Re: Fading colours
Posted: Thu Mar 03, 2016 6:05 pm
by JimJ
Someone passed in on to me & made my life a lot easier, so it's the least I can do

.................
Re: Fading colours
Posted: Thu Mar 03, 2016 6:30 pm
by 1001kjk
Thanks Jim J interesting stuff I'll give it a go
Re: Fading colours
Posted: Thu Apr 14, 2016 4:04 am
by digger303
I would like to add a company called true earth uses resins to get various shading effects as well , is water based,takes less time to do, and has a reasonable working time.
Re: Fading colours
Posted: Thu Apr 14, 2016 4:31 am
by Vleugelmoer
Washes, filters and knocking the color back by mixing in some white also give a faded look to the paint. Chipping and scratching effects give a battered and beat up look to the paint. Like always practice on some scrap plastic or an old model before committing to the real deal
Happy modeling and keep sticking styrene
Paul


