Page 1 of 1

1:32 Revell F-4E Late 32nd TFS Soesterberg AB The Netherlands

Posted: Mon Sep 26, 2016 5:36 pm
by Vleugelmoer
For my entry on this SIG I will be building the following aircraft. Mc Donnell Douglas F-4E Block 60 MSN 4801 USAF Reg 74-0650 mid to late 1978. It will be finished in the livery of the 32nd Tactical Fighter Squadron of the 32nd Tactical Fighter Wing based out of Soesterberg (Camp New Amsterdam) The Netherlands. The 32nd TFS operated the F-4 from 1969, when it replaced the F-102 Delta Dagger until 1978, when it on its turn was replaced by the F-15A Eagle. I chose this subject for several reasons: First of all I spent my late youth and teens living under the flightpath of the long runway at Soesterberg Airbase; Secondly My father was stationed at the airbase as a leason officer and thirdly I was inspired to go into aviation by watching the aircraft fly in and out of Soesterberg.

Here are a color and black and white photograph of the aircraft I will be building for this build.

Image

Image

The kit I will be using for this build will be the 1:32 Revell F-4F WTD61 "Test Flight" kit number 04895.

Image

The aftermarket conversion and detail parts going into the build.

Image


The aftermarket conversion and detail parts include:

Decals:

Dutch Decals DD32018 "Soesterberg Eagles" F-86F Sabre, F-4E Phantom II
IsraDecals IAF-40 RF-4 Phantom Stencils for camouflaged aircraft (Will also get the IAF-39 F-4E specific sheet)

White Metal / Turned brass:

Scale Aircraft Conversions 32039 F-4 Phantom Landing Gear
Master Models AM-32-029 M61A1 Vulcan Gun Barrels
Master Models AM-32-044 Pitot Tube for long nose Phantoms
Master Models AM-32-084 Static Dischargers

Masks:

Eduard JX501 Useful Areas Mask F-4 Phantom
Eduard JX004 Canopy Mask F-4 Phantom

Photo-Etch:

Eduard 32073 F-4E Exterior
Eduard 32074 F-4E Armerment
Eduard 32501 Remove Before Flight
Eduard 32503 F-4E Interior
Eduard 32509 F-4 Placards
Eduard 32531 F-4 Formation Lights

Resin:

Eduard Brassin 632001 Martin Baker Mk7 For F-4C/D/E/F/G
Eduard Brassin 632005 F-4C/D/E/F/G Wheels
Eduard Brassin 632083 AIM-9B Sidwinder (New Tool Aug 2016)
Eduard Brassin 632084 AIM-7E Sparrow (New Tool Aug 2016)
GT Resin Seamless Intakes F-4 USAF
GT Resin Slat Wing Set Including TISEO
GT Resin ARN 101 Conversion Super Set Including Exhaust, Cockpit, Corrected Fin Cap and Nose
GT Resin F-4 Belly Strap
GT Resin F-4 Combat Camera's

Plastic:

Revell plastic slotted Stabilizer / Elevators.

Writing it down like this its some list. However as the basic kit is a F-4F (German Export version of the F-4E) there are some differences. As this particular aircraft flew with the 32nd TFS until 1978 when it was transferred to the 480 TFS of the 52nd Tactical Fighter Wing at Spangdahlem Germany. Before the aircraft was transferred however the aircraft underwent the ARN 101 conversion to bring the Block 60 F-4E Phantom into the digital era. During this modification programme the concerns over the strength of the wing where also addressed by fitting a Belly Strap to the bottom side of the wing. Although I haven't found any photographic evidence the aircraft flew in 32nd TFS colors for about 3 weeks before It was flown over to its new Squadron. I have this information from former 32nd TFS and USAFE personell that where involved with the implementation of the modification and transfer on the aircraft.

Here is photo of the same aircraft 74-0650 MSN 4801 after the ARN 101 modification now in Spangdahlem colors. The photo was taken during the 25th anniversary of the Phantom at the RIAT (Royal International Air Tattoo) at RAF Green Common in 1983.

Image

The "Doghouse" and other antenna's fitted during the ARN 101 modification can be clearly seen on the spine of the aircraft.

More history of the 32nd TFS and the F-4E comming up in future posts so stay tuned right here.

As always happy modeling and keep sticking styrene.

Paul J (The Other One)

Re: 1:32 Revell F-4E Late 32nd TFS Soesterberg AB The Netherlands

Posted: Mon Sep 26, 2016 7:02 pm
by Joesdad
Good Lord :jd:

Re: 1:32 Revell F-4E Late 32nd TFS Soesterberg AB The Netherlands

Posted: Tue Sep 27, 2016 1:08 am
by Lysus
So much STUFF!

Gonna make my OOB look like a toy. Well, in my case it practically is, but still...

:pop: at the ready!

Re: 1:32 Revell F-4E Late 32nd TFS Soesterberg AB The Netherlands

Posted: Tue Sep 27, 2016 4:16 am
by rwsmith14
should be Fun !!!!

Re: 1:32 Revell F-4E Late 32nd TFS Soesterberg AB The Netherlands

Posted: Tue Sep 27, 2016 5:11 am
by kprice52001
That Looks AMAZING! :crazy:

I cant wait to see the progress!

Re: 1:32 Revell F-4E Late 32nd TFS Soesterberg AB The Netherlands

Posted: Wed Sep 28, 2016 6:50 pm
by Spook
That's going to be an awesome build :jd:

Re: 1:32 Revell F-4E Late 32nd TFS Soesterberg AB The Netherlands

Posted: Thu Sep 29, 2016 8:01 am
by Vleugelmoer
Thanks for showing interest in this build. I hope I can keep you entertained over the coming months with this build.

Re: 1:32 Revell F-4E Late 32nd TFS Soesterberg AB The Netherlands

Posted: Thu Sep 29, 2016 11:34 pm
by Twokidsnosleep
A big girl with lots of extra jewelry...my kind of build :pop:

Re: 1:32 Revell F-4E Late 32nd TFS Soesterberg AB The Netherlands

Posted: Fri Sep 30, 2016 12:23 am
by Vleugelmoer
Twokidsnosleep wrote:A big girl with lots of extra jewelry...my kind of build :pop:
:cheers2: Scott, I'm building this to remind me of the carefree day's as a kid. Which has inspired me to go into aviation as an adult. I'm also building it as a sort of hommage to my old man who was supposed to turn 70 this year had he not passed away in 06 6 months before he was supposed to retire from the Dutch Air Force.

Re: 1:32 Revell F-4E Late 32nd TFS Soesterberg AB The Netherlands

Posted: Fri Sep 30, 2016 12:26 am
by Twokidsnosleep
I really like that last photo's colour scheme and the grey shark mouth
Gonna be fun build to watch :bow::

Re: 1:32 Revell F-4E Late 32nd TFS Soesterberg AB The Netherlands

Posted: Fri Sep 30, 2016 12:38 am
by Vleugelmoer
Twokidsnosleep wrote:I really like that last photo's colour scheme and the grey shark mouth
Gonna be fun build to watch :bow::
That is the color scheme it got after it was transfered to its new squadron in Germany unfortunately. Mine will be in the South East Asia scheme as seen in the first two pictures. Which is a bit odd as the aircraft spent most of it's operational life in Europe before it was fazed out and flow to AMARC at Davis Monthon AFB in the 1990's where it still remains to this date in the rows and rows of decommissioned F-4's. I just had a look on the website of AMARC and as of the 16 of September of this year she is still parked in row 24 on the East RIT. It arrived at AMARC on the 20th of June 1991. After a short stint with the 35th TFW at George AFB CA USA.

Re: 1:32 Revell F-4E Late 32nd TFS Soesterberg AB The Netherlands

Posted: Fri Sep 30, 2016 5:09 pm
by Vleugelmoer
As with all SIG's and GB's the kit has to be in a un-started condition. So here are my photo's of the sprues to prove it is.

Image
The opened Box.

Image
A snapshot of the sprue map in the instructions.

Image
The clear parts.

Image
The rear fuselage halves.

Image
Inboard wings and stabilizers.

Image
Outer wings and corrected ejection seats.

Image
Intakes, exhaust and external fuel tank.

Image
Landing gear, internal engine and other assorted parts.

Image
Armament.

Image
External stores.

Image
Forward fuselage parts.

Image
These parts where only loosely attached or already off the sprue. luckily only two will actually be needed.

Image
The two enormously huge decal sheets to make the kit version. The white foamboard is 70 cm wide. :jd:

Now that the official bit is over. Let the fun Begin.

I was also able to do a bit more research into this particular aircraft. I found out that my normally reliable source of phantom information was mistaken in the time the ARN 101 modification was performed. I finally found a photo of the aircraft in late 1979 in the colors of it's new squadron at Ranstein AFB Germany, and it was clear as day no humped back. It did sport a new paint scheme in wich the SEA camouflage was now a full wrap round. But I will do a complete post on that at a later date.

that's all for now.

Paul J (The Other One)

Re: 1:32 Revell F-4E Late 32nd TFS Soesterberg AB The Netherlands

Posted: Fri Sep 30, 2016 5:32 pm
by Twokidsnosleep
Great looking kit
Nice toes as well, trimmed nails no schmutz...at least not socks and sandals ;)

Re: 1:32 Revell F-4E Late 32nd TFS Soesterberg AB The Netherlands

Posted: Fri Sep 30, 2016 5:41 pm
by Vleugelmoer
Twokidsnosleep wrote:Great looking kit
Nice toes as well, trimmed nails no schmutz...at least not socks and sandals ;)
It was the only way I could get it in shot without having to hang the sheets on the wall. the large one is roughly the size of an A2 sheet.

Re: 1:32 Revell F-4E Late 32nd TFS Soesterberg AB The Netherlands

Posted: Fri Sep 30, 2016 6:10 pm
by Twokidsnosleep
Just hassling you
I have to watch out for my toes AND my gut when I take photos like that

Re: 1:32 Revell F-4E Late 32nd TFS Soesterberg AB The Netherlands

Posted: Sat Oct 01, 2016 12:02 pm
by Vleugelmoer
As promised here's an in depth post on the history of the aircraft I am building for this SIG.

This particular aircraft had a longish operational life span from 1974 until 1991 when it was decommissioned.

The aircraft's first operational posting was with the 32nd Tactical Fighter Squadron (USAFE) at Soesterberg AB The Netherlands. This will be the aircraft that I will be portraying in this build. It flew there from 1974 until mid / late 1978.

Image
74-0650 taxing back after another successful mission mid / late 1978

After its posting in The Netherlands the aircraft moved to Germany. To the 86th Tactical Fighter Wing at Ramstein AFB. This is in contrary to previous information I had received from a retired USAFE personell. It also didn't undergo the full ARN 101 conversion as previously thought this will save me doing some of the modifications that I had previously planned to incorporate into this build. It flew there for just over two years before it was moved up the road to Spangdahlem.

Image
74-0650 on the pan at Ramstein AFB in late 1978, note that the aircraft now sports a wrap round SEA paint scheme.

In 1980 the aircraft was transferred to Spangdahlem AFB. It was sent there to replace the F-4D's of the 480 Tactical Fighter Wing. These aircraft flew as support aircraft for the wings F-4G's "Wild Weasels". The aircraft did finally undergo the ARN 101 update to bring the aircraft into the digital era. The aircraft flew here until 1987, when the now aging F-4E's where replaced by the more modern F-16.

Image
74-0650 seen here during the 1983 RIAT (Royal International Air Tattoo) in that year it was in dedication of the 25 year anniversary of the F-4 You can just make out the distinctive "dog house" ARN 101 antenna hump on the spine of the aircraft (at the green flag) The aircraft now sported a wrap round version European color scheme and a cool shark mouth on the nose.

In 1987 the aircraft moved back to it's home soil when it got transferred to the 35th Tactical Fighter Training Wing at George AFB in California. It served their to train new pilots (both US and Foreign) in flying supersonic aircraft. This was to be its final job in the USAF because on the June 20th 1991 it took it's final flight.

Image
74-0663 a sister ship of 74-0650, as was unable to find a photo. The aircraft of the 35th TFTW flew in the Air Defense Color Scheme. There was only small difference in the color scheme on 07-0650. It supported a grey tail fin cap, the denoted the different flight of the wing.

On June 20th 1991 the aircraft took it's final flight. The aircraft was phased out and transferred to the 309th Aerospace Maintenance and Regeneration Centre AMARC at Davis-Monthan AFB in Tucson Arizona. This unit runs the "bone yard" and long term storage facility. The aircraft remains there to this date. It has gone thru the stages of long term storage and now sits on the East Side - RIT (Reclamation Insurance Type) Area.

Image
74-0650 in it's final resting place in area 24 of the RIT

Image
Another shot of 74-0650 still in the colors of it's colors of it's last job, with a new addition a stencil aft of its right wing FP704. That is its new inventory tracking number.

Thanks for stopping by and reading my last post.

As always happy modeling and keep sticking styrene. I'm of to the bench to start building this beast.

Paul J (The Other One)

Re: 1:32 Revell F-4E Late 32nd TFS Soesterberg AB The Netherlands

Posted: Sat Oct 01, 2016 2:14 pm
by GuyMac
I think I'll copy this post and keep it as a history book :th:

Re: 1:32 Revell F-4E Late 32nd TFS Soesterberg AB The Netherlands

Posted: Sat Oct 01, 2016 2:22 pm
by Vleugelmoer
GuyMac wrote:I think I'll copy this post and keep it as a history book :th:
:rofl: As I'm building this one as a trip down memory lane and have always had a strong connection to the first strong connection to the 32nd TFS thought it was nice to throw in a bit history on the aircraft and later one a bit about the squadron.... :th: feel free to do so Guy ;)

Re: 1:32 Revell F-4E Late 32nd TFS Soesterberg AB The Netherlands

Posted: Sat Oct 01, 2016 2:27 pm
by ElCapitan
Really looking forward to seeing this one come together! All that AM is making me dizzy! :crazy:

Re: 1:32 Revell F-4E Late 32nd TFS Soesterberg AB The Netherlands

Posted: Sat Oct 01, 2016 4:08 pm
by Twokidsnosleep
Impressive, Paul
You got her history from cradle to grave
Sad to see those bone yard photos
Magnificent aircraft, thank you for all the reference material as well
:cheers2:

Re: 1:32 Revell F-4E Late 32nd TFS Soesterberg AB The Netherlands

Posted: Sat Oct 01, 2016 4:14 pm
by Vleugelmoer
Twokidsnosleep wrote:Impressive, Paul
You got her history from cradle to grave
Sad to see those bone yard photos
Magnificent aircraft, thank you for all the reference material as well
:cheers2:
Thanks Scott, and your more than welcome. That link I posted for the performance data in your build thread, also contains loads of downloadable reference material for the F-4 and other McDonnell Douglas aircraft.

Re: 1:32 Revell F-4E Late 32nd TFS Soesterberg AB The Netherlands

Posted: Mon Oct 03, 2016 12:39 am
by Vleugelmoer
Inbetween aswering to posts of others contestants in this SIG. Posting some more background info and attending the SMC (Scale Model Chalange) in Veldhoven managed to get some bench time in aswell.

Because I will be fitting a Resin cast cockpit and corrected nose from GT Resin my build will deviate from the kit instuctions right from the start. I removed the parts that make up the forward fuselage from the sprue and marked the areas where cuts where going to be made. I cut these of using both my CMK and RB Productions razorsaws. The CMK for the large straight cuts and the RB Productions one where access or the shape of the cut was more challenging. Here are the parts before and after the kist have been made.

Image
The kit parts and the resin cockpit, nose and seamless intakes from GT Resin

Image
Tope view of the forward fuselage halves. The X's indicate the areas that had to be cut out
Image
The forward fuselage halves after the cuts where made.

The instructions that came with the resing upgrade kit made a mention that the kit chin pod (The part that "houses" the gun) on the kit was to wide and that a small strip had to be removed from that section. The locateion where it had to be removed at the bottom of the fuselage join and forward of the nose landing gear door. From experiance I knew that doing it this way would put a large amount of stress in that section making to more prone to breaking open over time. I therefore made two extra cuts in the chin pod to allow for a more easy manipulation of the stryrene in that area.

Image
The nose slid in like an old pair of gloves.

Image
Bottom view of the nose. You can just make out the correction that would have to be made 0,75 mm from both fuselage halves.

During the manipulation of the kit styrene it turned out that the stress was still to much and the parts broke free. This was a blessing as it would now be easier to make a smoothe transition between the resin and the styrene and therefore lead to a cleaner end result.

Image
Detail of the right side of the nose after it was glued

There where still some gaps that needed to filled. So out with the arsenal of putties and other fillers. I also picked up some new Mr. Surfacer 1500 (grey) that came in handy. I never worked with it but watching, reading and positive feedback from others made me try it. My first impression is good, it sure smells less toxic than Mr. Desolved Putty that I previously used to fill the very small gaps.
To fill the gaps here I used: Tamiya Putty White, Mr. Desolved Putty and Mr. Surfacer 1500. The end result is a smooth and clean Nose Job.

Here are the end result photo's of the Nose Graft ;) :lol:

Image
The Left bottom side view

Image
Left top side view

Image
Right top side view.

Image
Right bottom side view

Image
Bottom view

The aft. chip pod gun venting louvers where so misaligned that those where filled with putty. In the Eduard External PE set I have a PE part to enable me to reinstate the later on.

Image
The top view

This last photo also gives a nice size reference as each number indicates 1 cm. She is going to be HUGE.

In the time I was waiting for the putty to cure I also started on the construction of the Nose Landing Gear Bay. In the roof of the bay where 3 massive ejector pin marks that had to be filled.

Image
The roof of the NLG Bay with filled elector pin marks and PE fitted.

As I also had to wait for the putty and Mr. Surfacer to cure I got a chance to start doing some work on the cockpit tub. I was not to impressed with the quality of the casting in the bottom of the top as some bits weren't as crisp and clean as I would have liked them to be. luckily for me I had PE replacements that came compliment of the Eduard Interior set I had purchased for this build.
They fit right in without any hassle at all. Also filled the at the bottom of the casting and sanded down the Instrument Side Panels in the forward cockpit as the raised detail would interfere with the photo etch that I will be using.

Image
Cockpit tub seen from the left

Image
Cockpit tub seen from the right

Image
Detail shot showing the upright portions of the side panels that had the raised detail removed

That's all for now folks, thanks for stopping by and checking out the progress I have made so far.

As always happy modeling and keep sticking styrene.

Paul J (The Other One)

Re: 1:32 Revell F-4E Late 32nd TFS Soesterberg AB The Netherlands

Posted: Mon Oct 03, 2016 6:50 pm
by Spook
Image
Found this while I was flicking through my pictures don't know if you've already got it,
It was taken at raf alconbury july 1979

Re: 1:32 Revell F-4E Late 32nd TFS Soesterberg AB The Netherlands

Posted: Mon Oct 03, 2016 7:00 pm
by Vleugelmoer
Spook wrote:Image
Found this while I was flicking through my pictures don't know if you've already got it,
It was taken at raf alconbury july 1979
:cheers2: Simon, I didn't have this picture yet. Alconbury was some sweet field, got to visit it in my teens with the air scout troop I was in. They where operating A-10's and phasing out the F-5's.

Re: 1:32 Revell F-4E Late 32nd TFS Soesterberg AB The Netherlands

Posted: Tue Oct 04, 2016 7:15 pm
by Vleugelmoer
So inbetween my first steel tip darts match in 18 odd years and a bunch of appointments today managed to squeeze in some bench time. In that time I made so more progress on my build.

First of all I primed the nose section, internals of the nose landing gear bay and cockpit tub in white Ultimate primer. The primer highlighted a couple of area's on the forward fuselage that will require some more work ei filling and sanding and rescribing before the final paint is applied.

Image
The parts that will make up the nose landing gear bay and close the bottom of the forward fuselage

Image
Left side of the nose

Image
Right side of the nose

You can see that some of the pannel lines have some issues that will need to be addressed. Also some of the kit pannel lines don't represent the actual aircraft so those will be addressed when I'm rescribing the forward fuselage section. At the same time I will add some riveting detail to really make it pop.

Image
The cockpit tub primed and ready for the base coats of color

Image
The sections of the nose landing gear bay detail painted and sludge washed

For the detail painting and sludge wash I used the folowing products.

Vallejo Metal Color (77.701) Aluminium. I used it for the hard line hydraulic lines, wiring conduits and juction box, the plunger of the uplock switch and as a base for the erea work lights.

Vallejo Model Color (70.995) German Grey. I used it for the flexible hydraulic lines and the uplock switch body.

Vallojo Model Color (70.869) Basalt Grey. I used it for the crew ground call horn.

Vallejo Model Color (70.947) Red. I used it for the warning square around the uplock switch.

Vallejo Model Color (70.951) White. I used it for cleaning up small paint overspills.

Tamiya (X-23) Clear Blue. I used it for the AN fittings on the hydralic lines.

Tamiya (X-26) Clear Orange. I used it for the light lensses of the area work lights.

The sludge wash was done with Vallejo wash (76.516) Grey.

As an Aircraft engineer by trade I know that there is always a grease build up around the pintle pins (the fulcrum point around wich the gear rotates) of a landing gear. The simulate this I mixed Vallejo Still Water (26.235) and Vallejo Pigment (73.105) Natural Sienna. I chose this pigment becase of the age of the aircraft Aero Shell Grease 7 or 33 (Mil. Spec. MIL-PRF-23827C) was most likily used. These greases are clay based and brownish in color. That paste was applied around the pintle pins with a fine pointed brush. I used the kits upper nose landing gear part as a plug so that the paste didn't seep into areas where I didn't whant it to.
here are some detail photo's of the paste after it was applied.

Image
The fwd side of the nose landing gear

Image
The aft side of the nose landing gear

The fwd side of the nose landing gear is more heavily weathered as the gear itself would have obstructed cleaning of that side.

Only a small warning placard from the Eduard PE zoom set to go onto the electrical junction box and it can be glued up.

For tonight I have the paining of the cockpit tub and the application of the PE part mentioned above on the books. This all whilst watching the ISM Live At the Bench Show on YouTube.

That is all for now. As always happy modeling and keep sticking styrene.

Paul (The Other One)

Re: 1:32 Revell F-4E Late 32nd TFS Soesterberg AB The Netherlands

Posted: Tue Oct 04, 2016 7:26 pm
by Twokidsnosleep
Impressive again!
I am glad the nose assembly went together so well
My alterations tend to fit like this
Image

Re: 1:32 Revell F-4E Late 32nd TFS Soesterberg AB The Netherlands

Posted: Tue Oct 04, 2016 7:28 pm
by Lysus
Loving the detail work. I need to file this sludge away to use later :th:

Re: 1:32 Revell F-4E Late 32nd TFS Soesterberg AB The Netherlands

Posted: Tue Oct 04, 2016 7:30 pm
by Lysus
Twokidsnosleep wrote:Impressive again!
I am glad the nose assembly went together so well
My alterations tend to fit like this
Image
I know what you mean. I rarely seem to have the right tools for the job but then I try some half-baked idea anyway. Results speak for themselves.

Image

Re: 1:32 Revell F-4E Late 32nd TFS Soesterberg AB The Netherlands

Posted: Tue Oct 04, 2016 7:41 pm
by Vleugelmoer
Thanks for the positive feed back it's well appreciated. I posted the products used so that it may help other builders with their weathering process.

Re: 1:32 Revell F-4E Late 32nd TFS Soesterberg AB The Netherlands

Posted: Tue Oct 04, 2016 8:53 pm
by wellzy
Looking forward to your build

Re: 1:32 Revell F-4E Late 32nd TFS Soesterberg AB The Netherlands

Posted: Wed Oct 12, 2016 10:15 pm
by GuyMac
On a break here Mr Vleugelmoer? :scratch::
You went very silent :P

Re: 1:32 Revell F-4E Late 32nd TFS Soesterberg AB The Netherlands

Posted: Thu Oct 13, 2016 12:20 am
by Vleugelmoer
GuyMac wrote:On a break here Mr Vleugelmoer? :scratch::
You went very silent :P
Hello there Mr. Guymac. I had some other stuff going on so modeling had to be put on the back burner :( :cry:

With a bit of luck things will pick up again come Friday :th:

Paul

Re: 1:32 Revell F-4E Late 32nd TFS Soesterberg AB The Netherlands

Posted: Thu Nov 24, 2016 9:15 pm
by Twokidsnosleep
Been missing you, hope all is well

Re: 1:32 Revell F-4E Late 32nd TFS Soesterberg AB The Netherlands

Posted: Fri Nov 25, 2016 4:32 pm
by Vleugelmoer
Twokidsnosleep wrote:Been missing you, hope all is well
Been suffering from some health and modeling Mojo issues unfortunately Scott. Non the less this bird will be built. ..

Re: 1:32 Revell F-4E Late 32nd TFS Soesterberg AB The Netherlands

Posted: Fri Nov 25, 2016 6:43 pm
by Twokidsnosleep
Vleugelmoer wrote:
Twokidsnosleep wrote:Been missing you, hope all is well
Been suffering from some health and modeling Mojo issues unfortunately Scott. Non the less this bird will be built. ..
Ok, hang in there bud.
Sending you my best wishes for your recovery of both issues
Need some of that Phantom Menace knowledge you have to keep me going

Re: 1:32 Revell F-4E Late 32nd TFS Soesterberg AB The Netherlands

Posted: Fri Nov 25, 2016 10:58 pm
by Vleugelmoer
Twokidsnosleep wrote:
Vleugelmoer wrote:
Twokidsnosleep wrote:Been missing you, hope all is well
Been suffering from some health and modeling Mojo issues unfortunately Scott. Non the less this bird will be built. ..
Ok, hang in there bud.
Sending you my best wishes for your recovery of both issues
Need some of that Phantom Menace knowledge you have to keep me going
Shoot me your question Bro, and I'll get you sorted...

Re: 1:32 Revell F-4E Late 32nd TFS Soesterberg AB The Netherlands

Posted: Sat Feb 11, 2017 2:17 pm
by Vleugelmoer
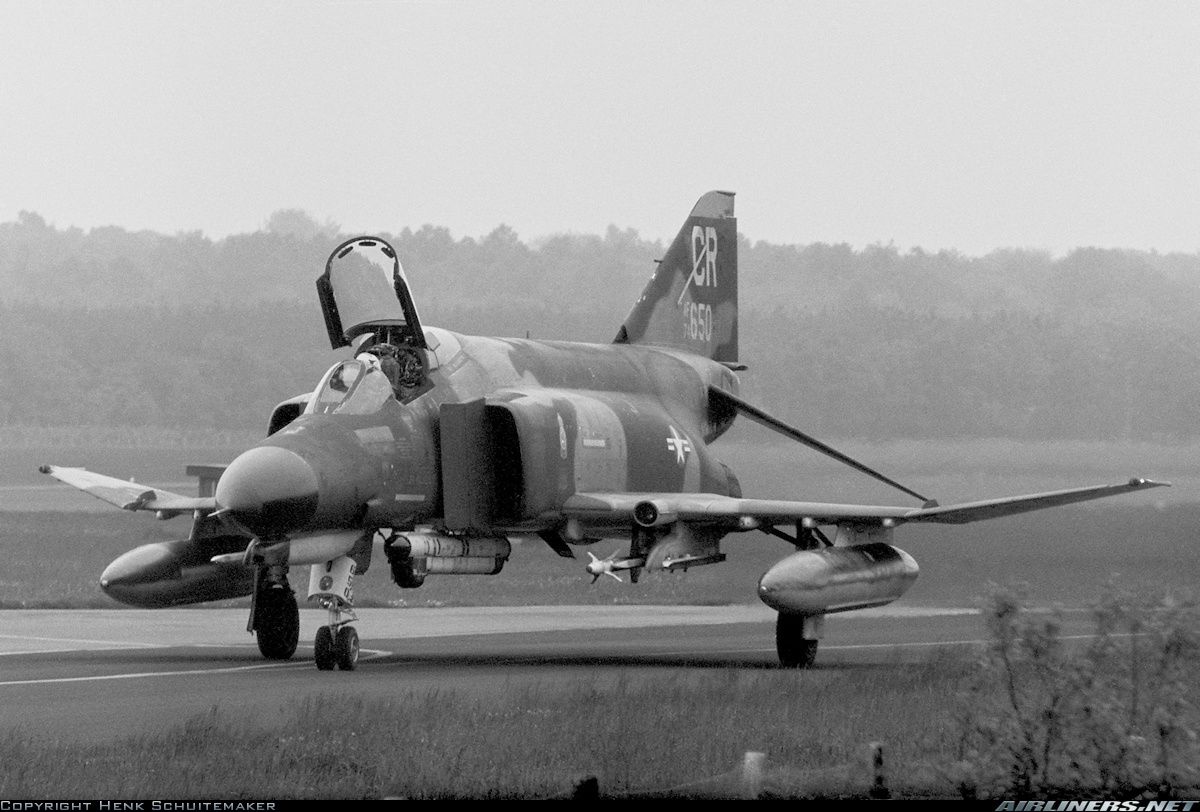
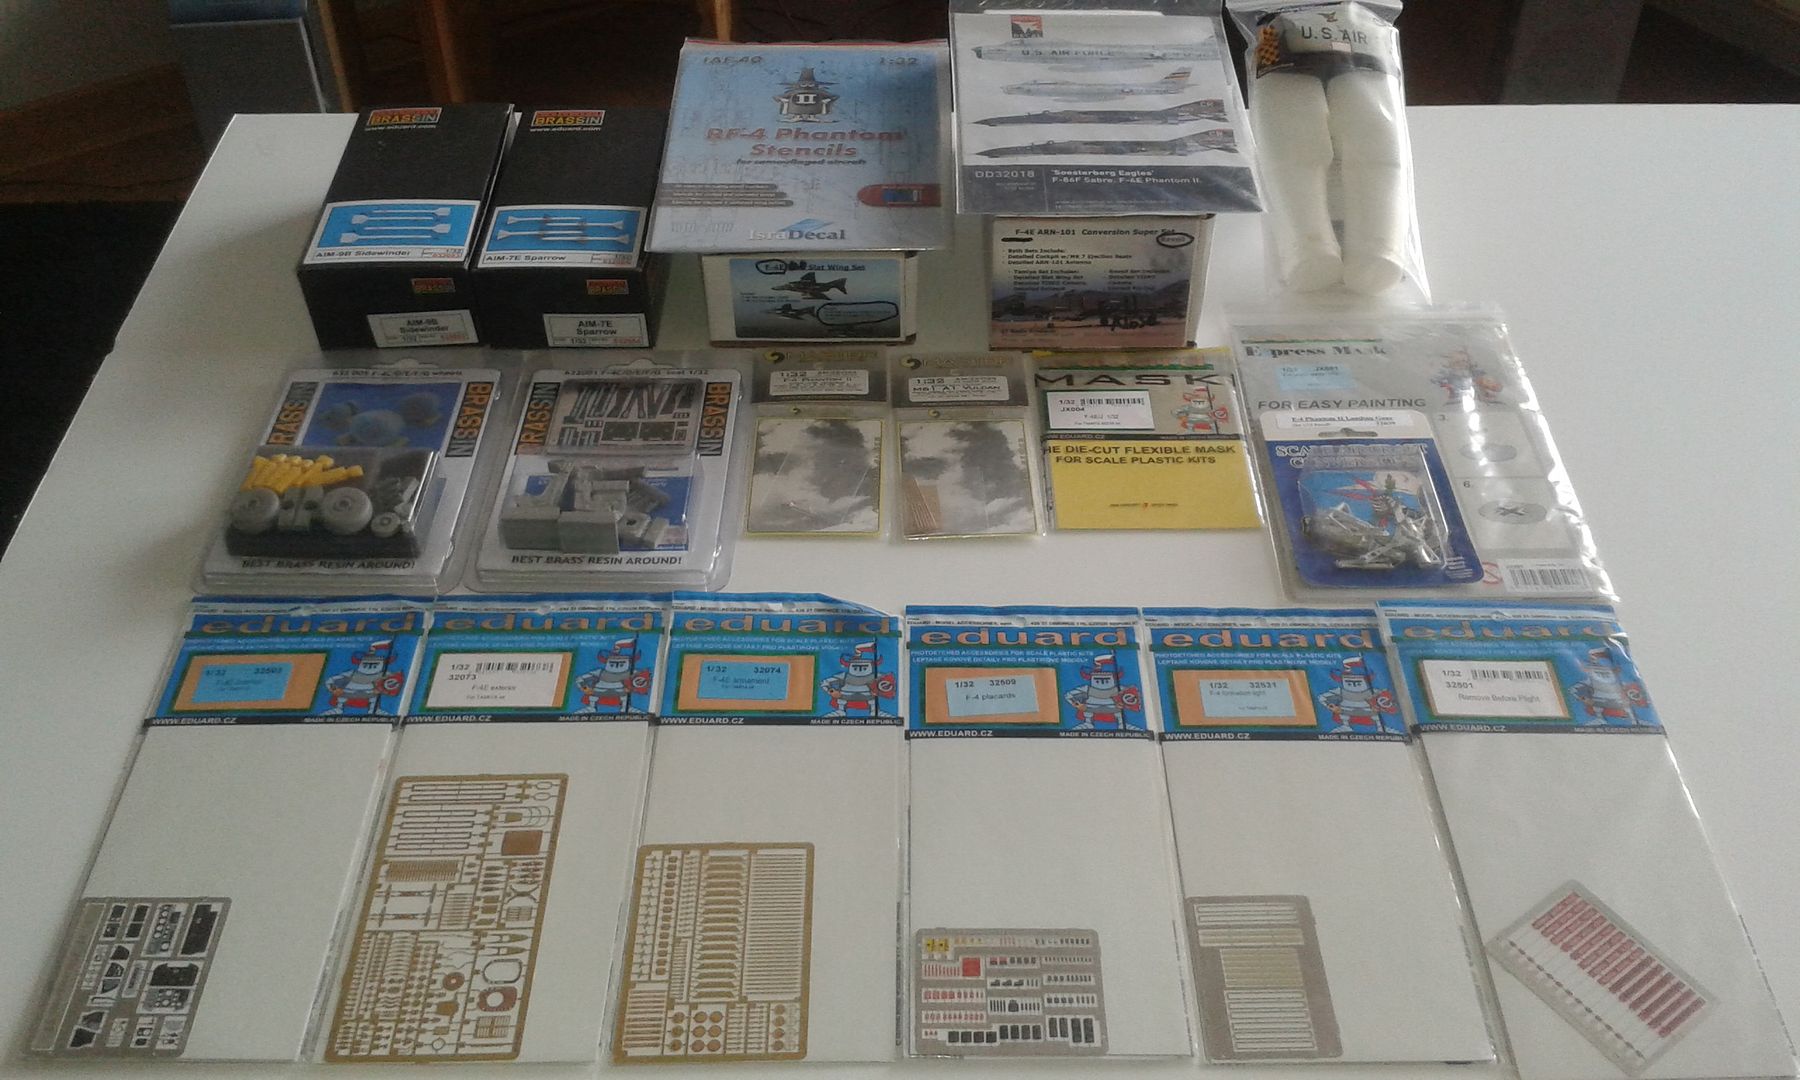
It has been a while since my last post in this build thread. That was due to varying reasons, lack of modeling MOJO being one of the main ones. Luckily for me that has returned so I can continue on this build again. Even during my MOJO slump I have not been sitting totally idle. I have been doing research for some scratch built items that I’m going to include. I have also been in contact with Isra Decal Studio’s to find out what the main differences where between stencil decal set IAF-40 (RF-4 set which I have got) and IAF-39 (the F-4 counterpart set that has been out of production and out of stock for some time now). The owner of Isra Decal Studio’s was very helpful and was able to send me a spare sheet of the needed stencils mainly for the nose, slat wings and TISEO pod. One of the things that was supposed to be included in both sets was the stencil data for the outboard / external wing tank pylons. Here is a photo of the spare sheet that I have received free of charge.
Image
One of the things that were still missing from the stencil data are the decals for the outboard wing pylons and the ECM Pod. As the aircraft I’m portraying almost always flew with the ALQ-119 (long) ECM when it flew with the 32nd TFS. I had a look on scalemates and there I found out that previous releases of the kit I’m using had all the decals included I’m currently in contact with Abtailung X at Revell to see if I can still obtain them.
When I left you last I had just painted the Nose Landing Gear Bay. That was done because the forward fuselage had to be assembled before the test fitting of the GT Resin Cockpit could commence. The forward fuselage came together easy enough, there were some issues though, large panel gaps, missing and incorrect panel line details and some uneven kit part joints. After I installed the Corrected Nose also from GT Resin I had already found that not all the kit panel lines where meeting up as I would have liked, where missing or just incorrect after checking the reference material that I have gathered for this build. To address this issue I have compiled a re-scribing list of all the panel lines that will have to be “fixed”.
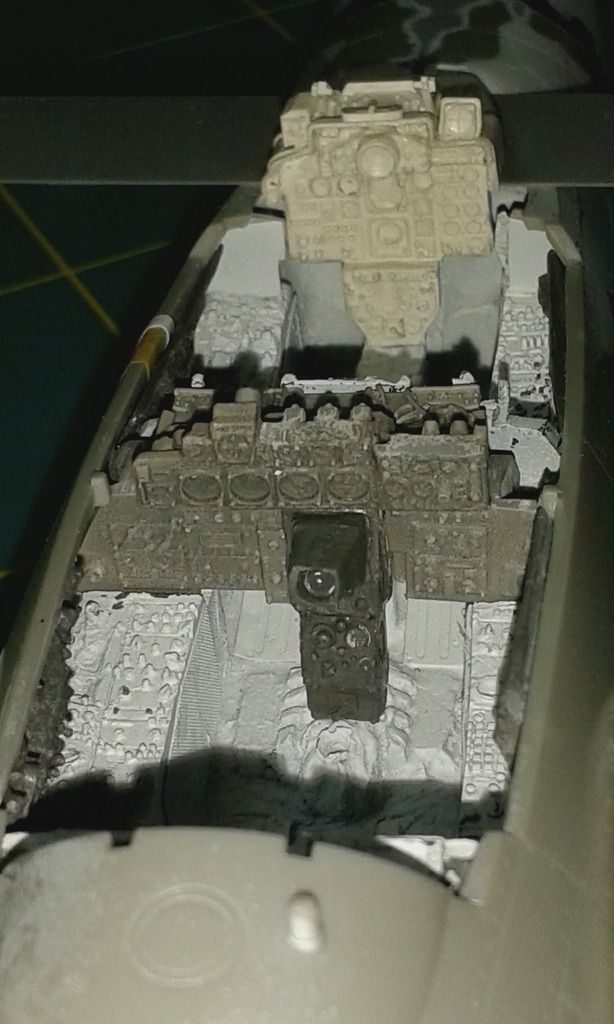
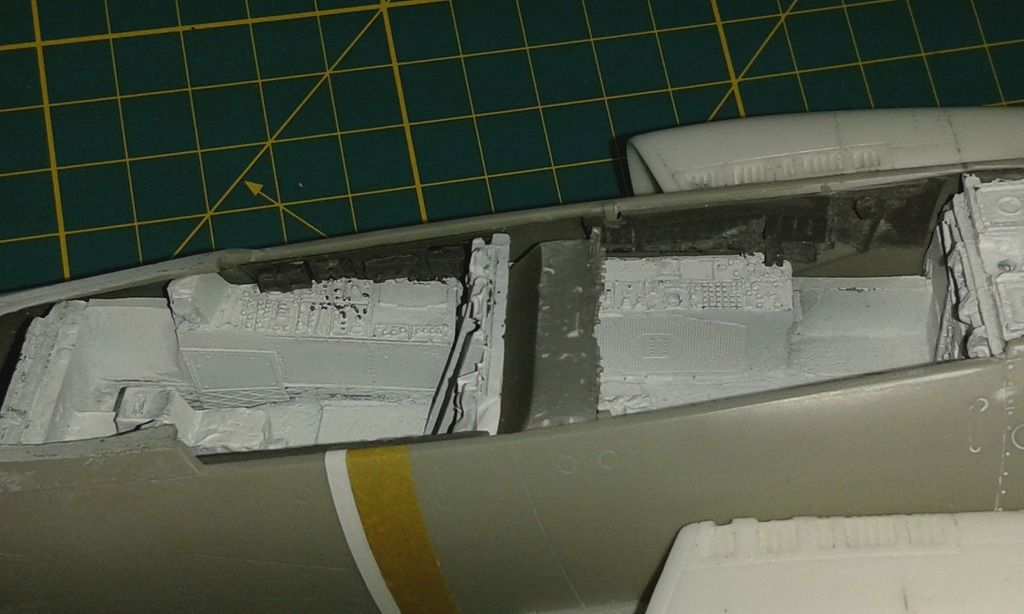
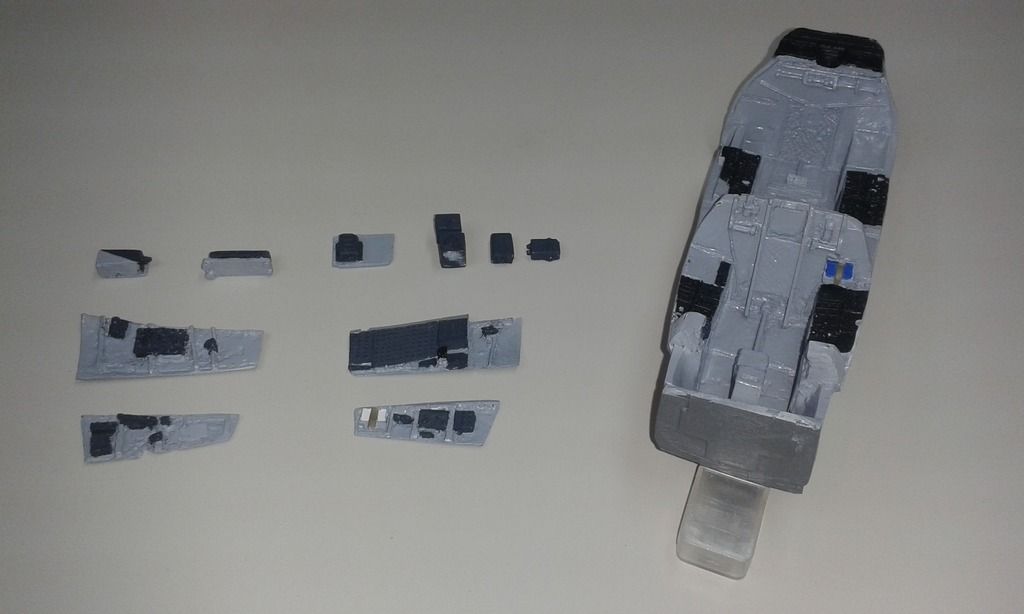
The cockpit itself was an easy slide in replacement with lots of fine detail that was void in the kit office. Even so it is still getting the Eduard Interior PE treatment to enhance the detail even further. Here are some photo’s of the cockpit during the test fit preassembly stage.
Image
Image
Image
After the forward fuselage mod’s where done and test fitted it was time to start on the rear fuselage modifications. These included Seamless intakes, corrected vertical stabilizer Fin Cap and Exhaust conversion. These where all included in the GT Resin Shipment that I had received prior to the build.
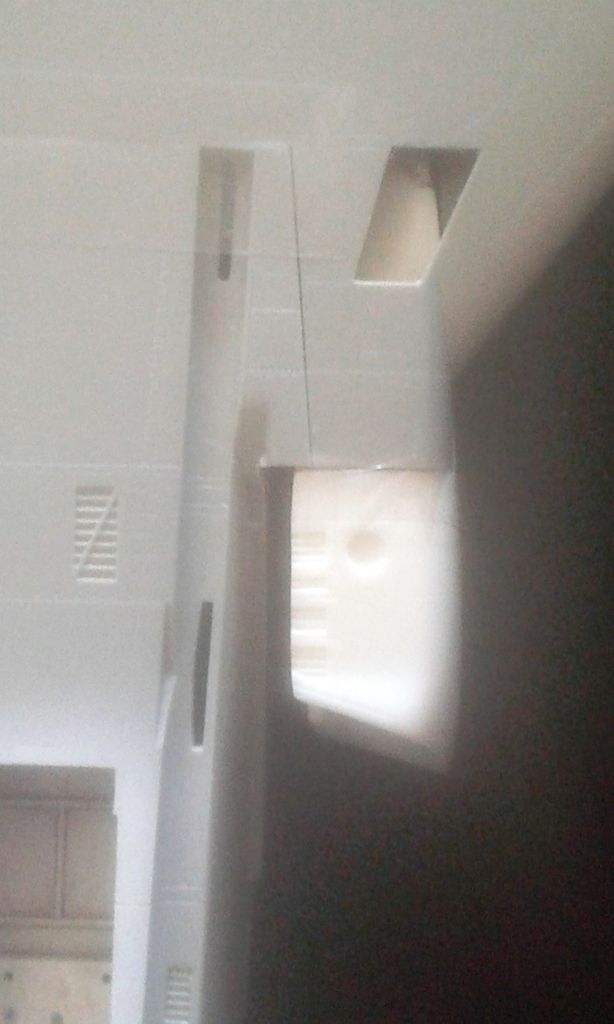
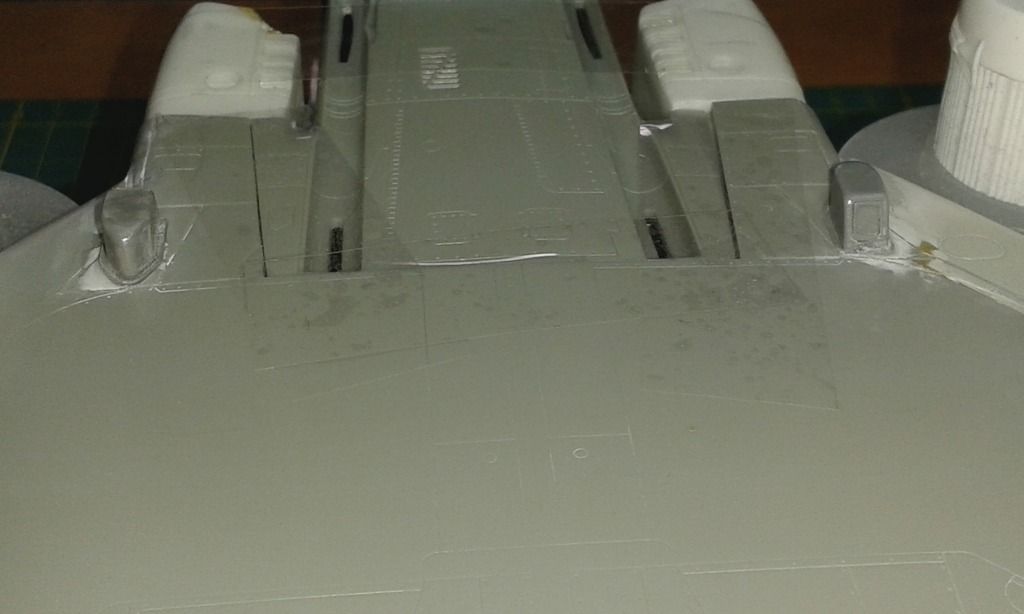
The seamless intakes required some major plastic surgery of the kit parts to make room for these as the design people at Revell had a day off when it came to doing the internals for the kit intakes. The kit intakes where therefore null and void when it came to this build. The effort put in will definitely pay off in upgrading this kit. The cuts were made in both the forward and Aft. fuselage sections, wing bottom and the forward fuselage bottom. Now that access was provided the intakes itself could be test fitted.
Image
Image
As you can see in the photo’s above something went “wrong” during this stage. The photo’s in the instructions where grainy small black and white ones so picking out the fine detail was very hard to put it mildly. As the aftermarket manufacturer GT Resin Is one of the contributors to another forum it was time to take a look over there to see if I could find any info and photo’s there, man o man that was easier said than done. So after being unable to find the info I needed there I contacted the seller directly. He came back with an initial reply within the hour, not bad considering I’m in Western Europe and he is located in sunny Florida in the USA. Taking the time difference into account I can only imagine that he must have been working late as it was around 1am in the morning. Got to love the cottage industry manufacturers that are still out there in the world of aftermarket.
After a short back and forth over the email, Garry (owner of GT Resin) provided a better walk thru of the fitting instructions and also provided some very high resolution color photos that showed all the aftermarket he makes fitted to the latest 1:32 Revell Release Phantom the F-4G. As I had previously built this model out of the box in my younger days I never noticed that the kit intakes where t wide. But this totally explained why I was having difficulties in fitting the correct size and shape intakes. The photos that I had received also clearly showed that a quick sanding and filling job could remedy the mismatch. However as I was also going to fit resin combat strike camera’s to just under the intakes the easy fix was not going to cut it, as this would only highlight the problem area even further. After checking my reference material to find the correct location of the combat strike camera’s I noticed that I would have to perform some real world to modeling world magic to get them to look right. The curvature in the access panel was also very nicely portrayed in its kit counterpart and was even a glue in item. No problem one would assume, but the resin camera’s available are made for the Tamiya F-4’s and I’m building the Revell F-4…. Needless to say now the same mismatched panel on the intake side now also needed work in the back to get the flat resin camera to fit the curved panel. As the transition has to be smooth and straight I decided that a removal of the outer curve with a razorsaw, reworking the part and fitting it in the corrected shape would leave me with a nicer fix.
Image
Image
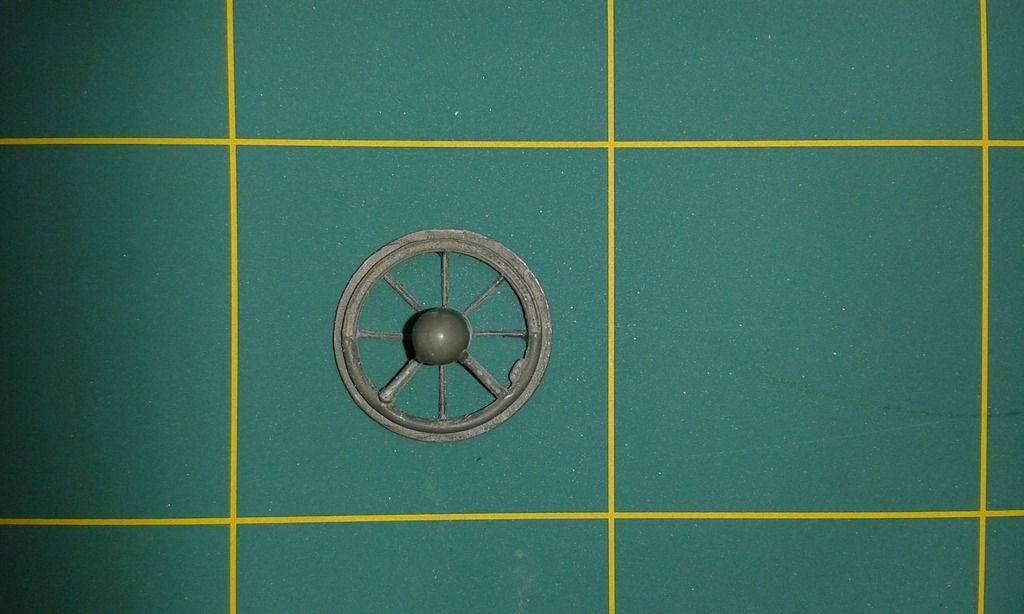
The seamless intake set also included General Electric J-79-17 fan faces. The intricately cast parts had some casting issues and transportation damage on them. Some broken fan blades and hard to clean excess resin overflow.
Image
As the aircraft I’m portraying in this build was delivered new to the squadron from the factory a fix would be in order. The kit does contain plastic fan faces and engine intakes which would come in handy for the fix I came up with. As the resin parts also contained varying sized casing blocks that would interfere with the kit reinforcing bracket with the fan blades on them sanding them down to beyond the norm would leave me with just the engine intake.
Here’s a photo to show the intermediate that I now had.
Image
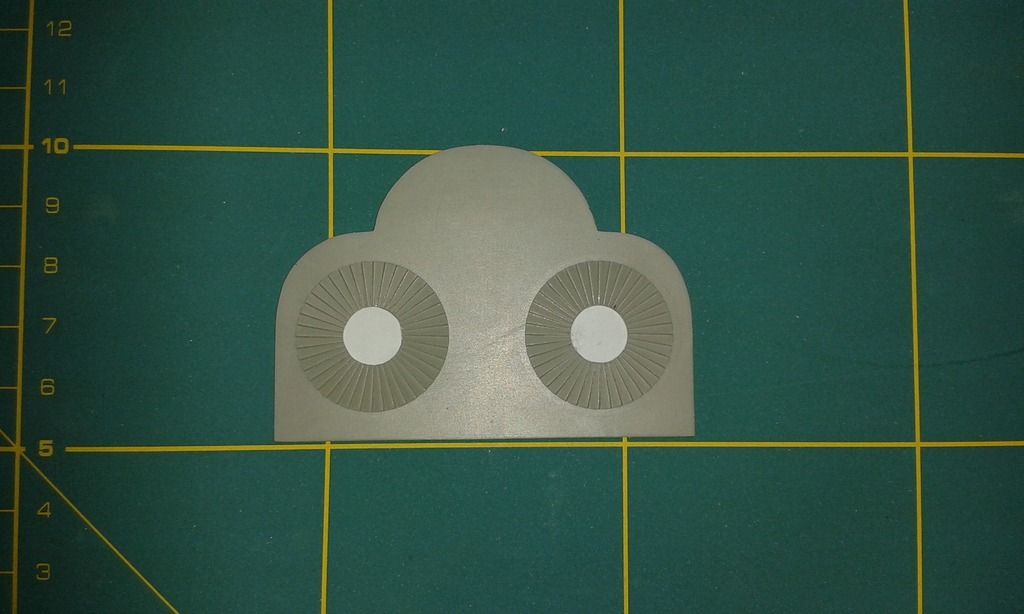
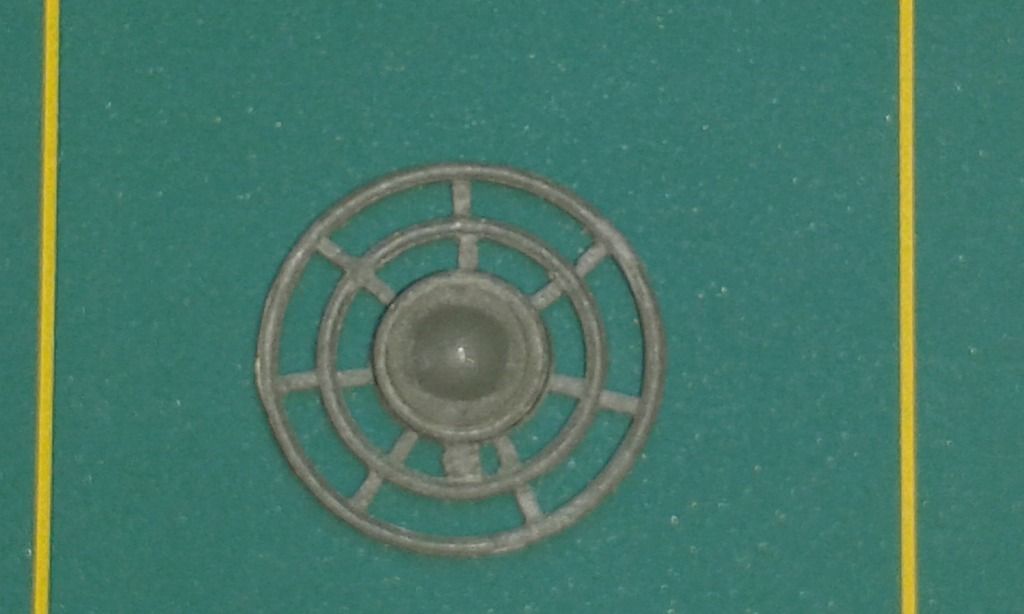
Time for a test fit. This revealed that the injection molded fan-blades from the kit would also need some tinkering to get an accurate end result. Some 0,15mm sheet styrene and a 10mm hole punch came in handy. Here’s a photo of the created plastic discs fitted to the bulkhead with Tamiya Extra Thin.
Image
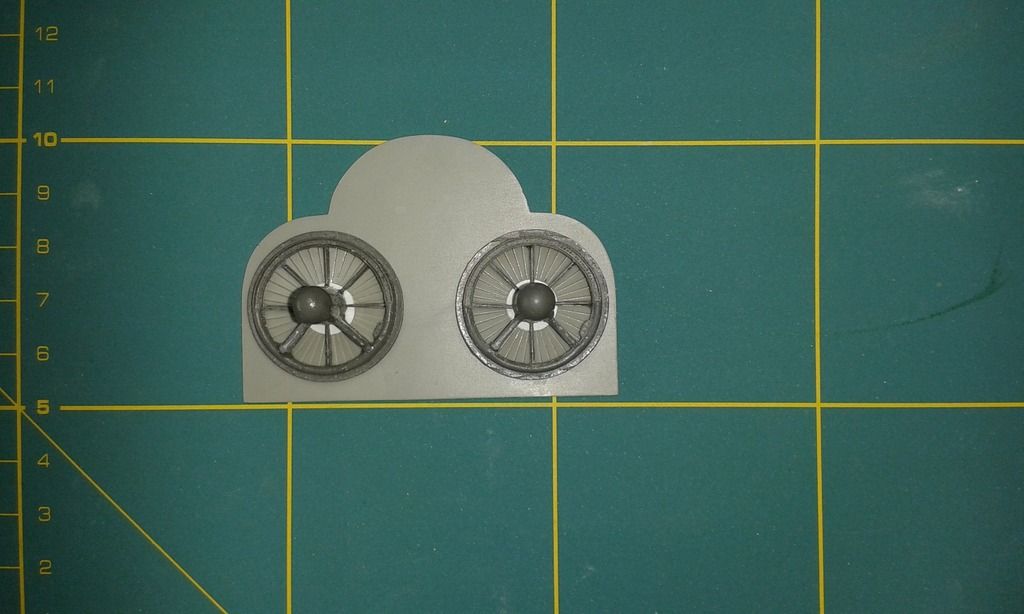
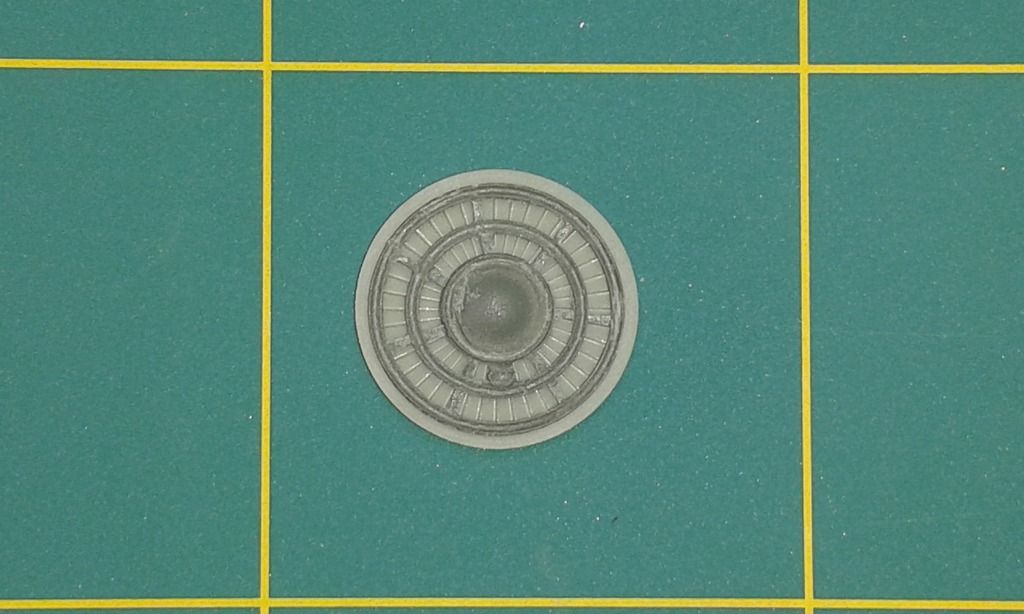
As the kit bulkhead will be sacrificed in this repair an new one was made up out of sheet ABS of the same thickness as the kit part. Some carving of the fine detail is still to do to get the fan blades to meet up accurately. I will do my best to get something looking like this.
Image
Image
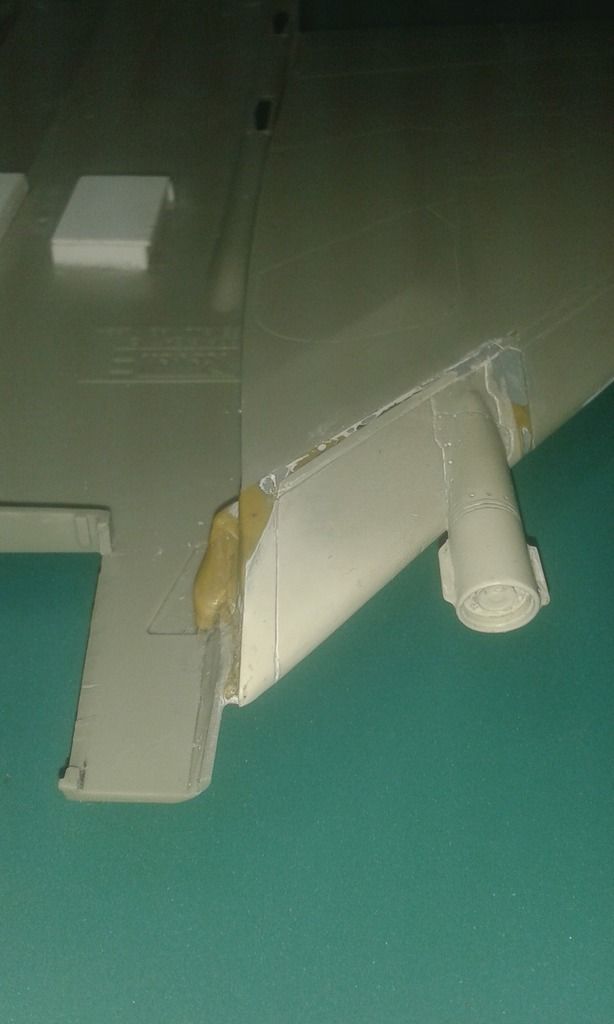
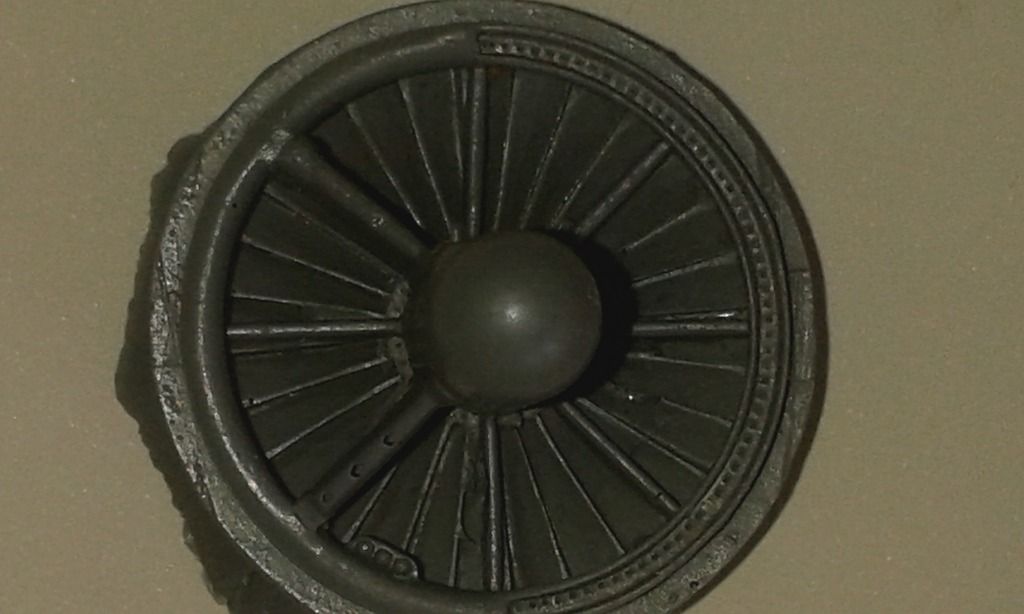
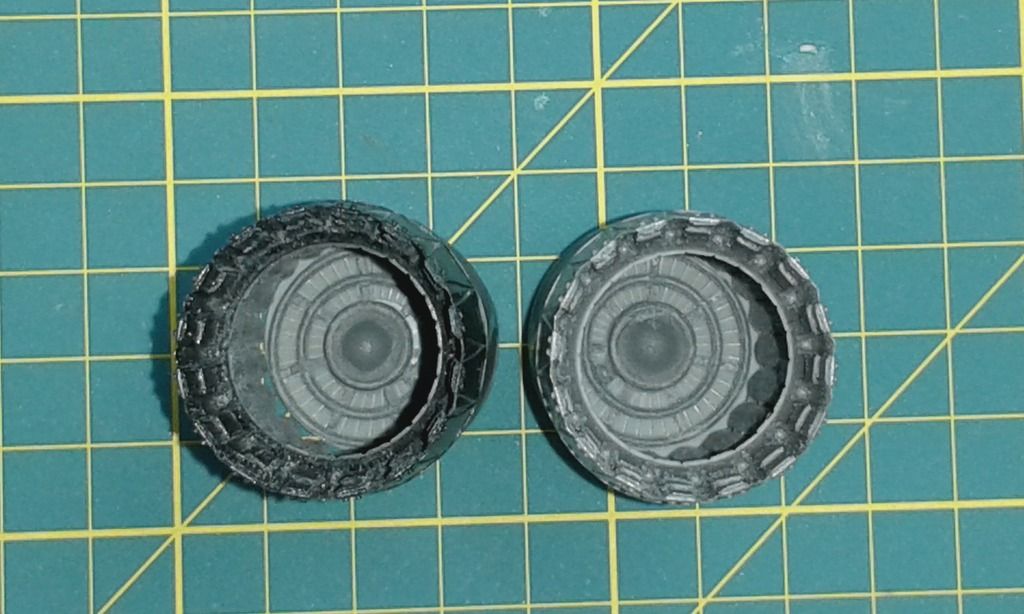
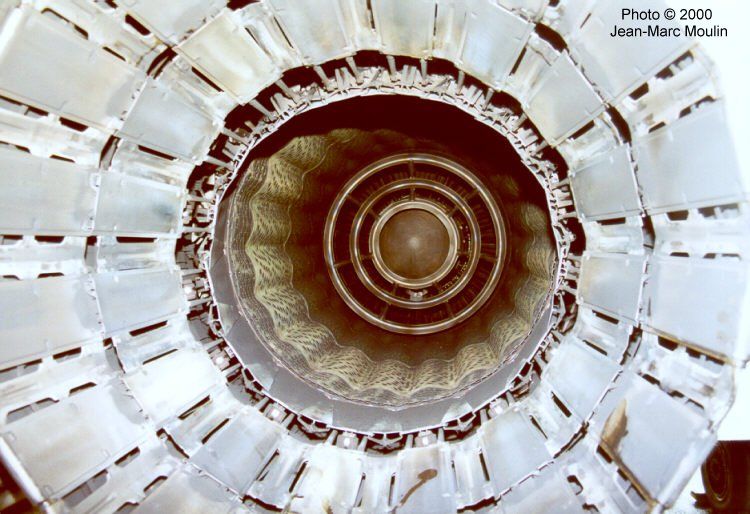
After the intakes it was time to start on the preassembly of the other end of the GE J-79-17 Engine. The GT Resin Kit for the exhausts is wonderfully cast and contains the turkey feather nozzle, a jet tailpipe and a turbine face with afterburner rings. The only small drawback was that the turbine face had some of the same problems as the intake, in that it had some overflow in hard to clean places and some of the blades themselves had casting defects. The kit parts for the exhaust came to the rescue ones again. The cones where cut down to leave me just a thin disk with the turbine blade detail injection molded in. The resin parts where sanded down in the same way as the intakes. I used sheet sandpaper in varying grades on a glass plate to get a flat end result. Here are some photo’s to show the steps and end result.
Image
Image
Image
The resin jet tailpipe was much longer than the kit part. The kit aft. fuselages halves needed a relief cut so that it would not interfere with a correct fit. The removed parts where set aside as the where nice flat and thick styrene, they would come in handy later on in this build. The resin nozzle and tailpipe both had reasonably sized casting blocks and required only little works to get them off. A nice touch ware the scribed in cut line to aid in removal and something not found in some aftermarket. The parts also fit together snugly so only a small amount of medium or thin CA glue will be needed during final assembly. This is a point that I’m reasonably impressed with as GT Resin is only a Mom & Pap after market manufacturer.
Image
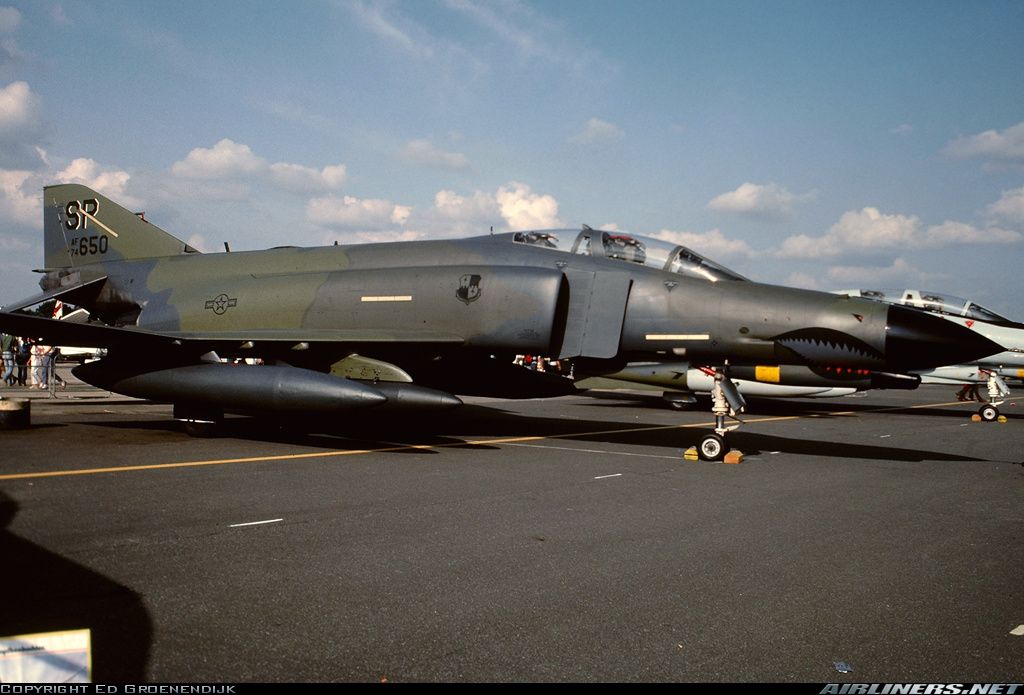
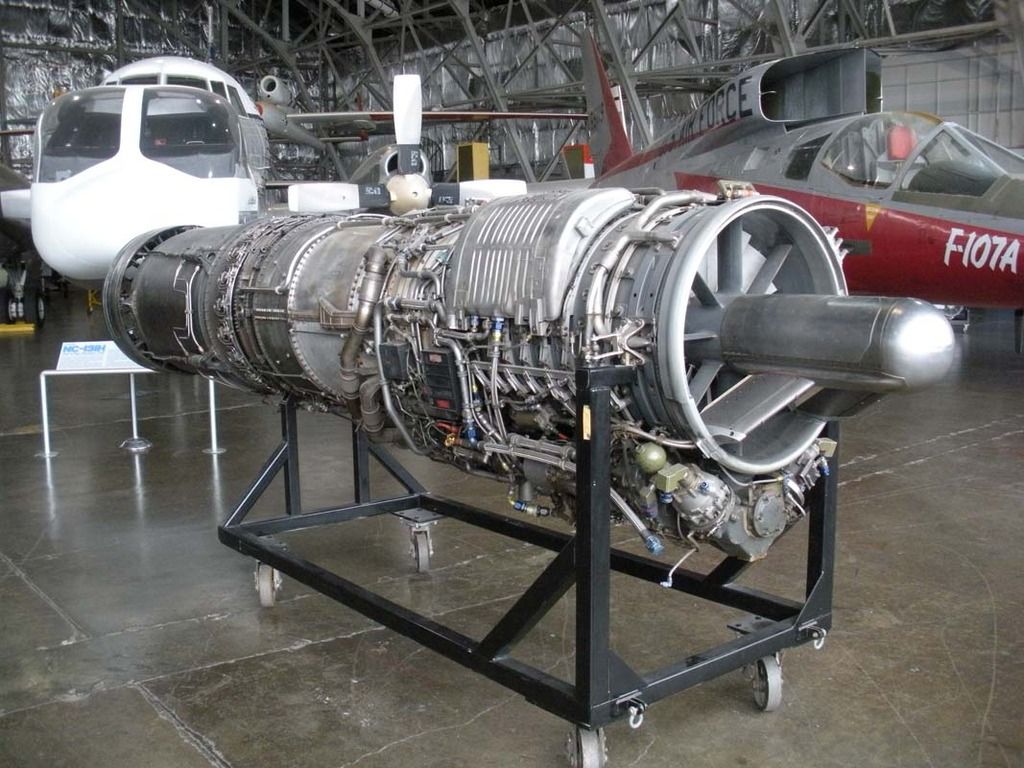
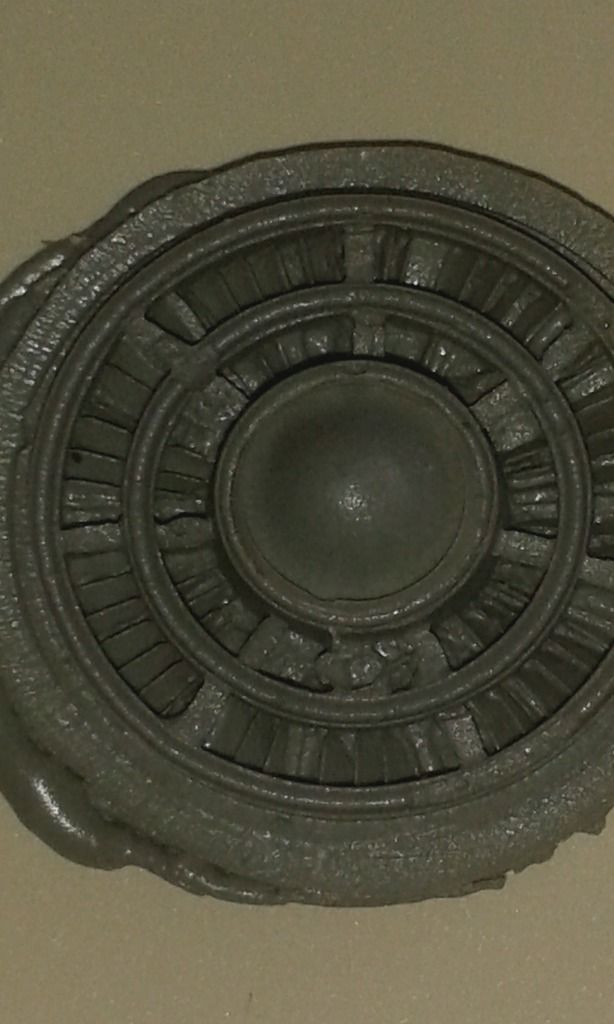
Here’s a photo of the real thing that might come in handy in other builds
Image
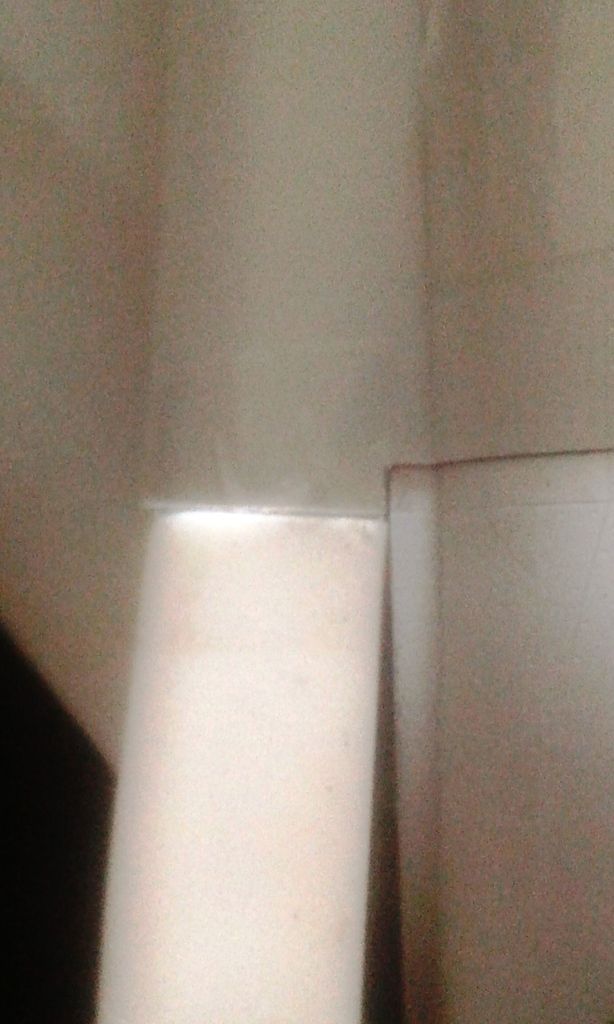
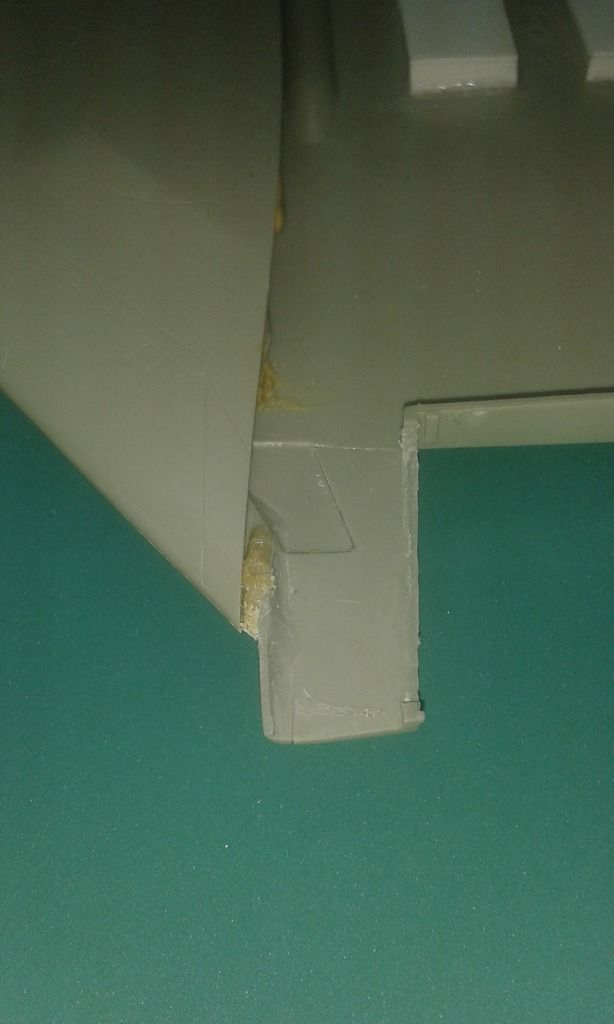
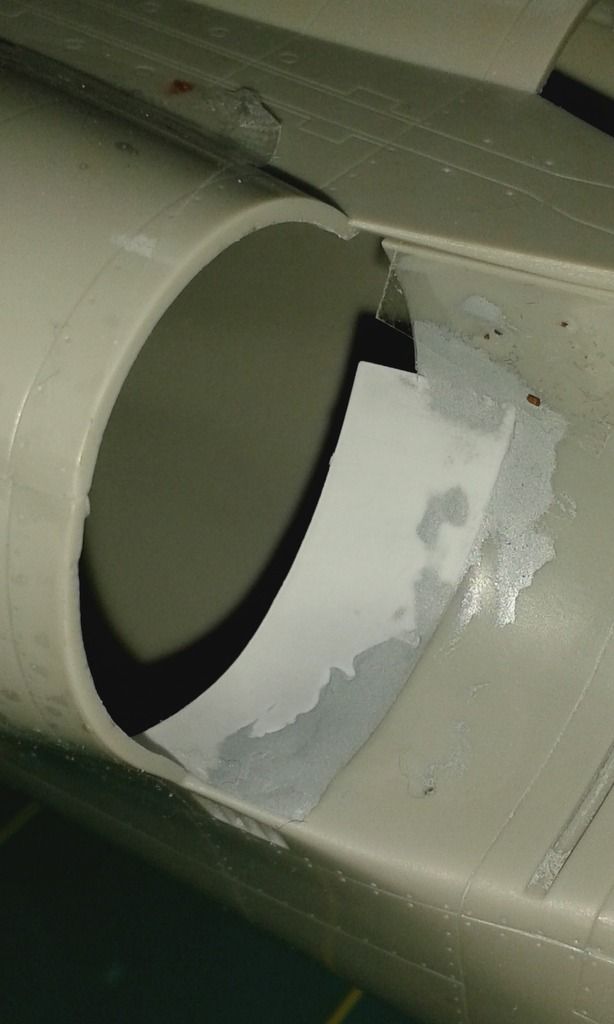
A test fit of the pre-assembly to the aft. fuselage pointed out one of the faults with the kit. The exhaust heat shield aft. of the jet tailpipe fell short. This left light coming thru where the nozzle meets the fuselage. Some 0,1mm sheet styrene was used to make a almost perfect circular repair. Now it represents a more accurate depiction of the real aircraft. This point was also evident when I built a previous version of this kit in my younger days. I also did a similar repair back then.
Here’s a detail shot of the repair. White is the sheet styrene, Gray is standard Tamiya filler to get a supper smooth transition. The later is not absolutely necessary as the will be hidden behind the nozzle but hey I’m a stickler for detail.
Image
The kit Fin Cap included in the kit for the F-4F is one of the other known faults with the kit. It is shaped incorrectly for any F-4 Including the F model for which it is intended. The Conversion Set from GT Resin includes a correct Fin Cap to address this issue. It also has a small issue with it as it. The part of the cap where it meets the rudder is about 1,25mm to short. A bit of Tamiya Epoxy Putty made light work of that little snag.
Image
Now that the aft. fuselage was also done it was time to start converting the wings. The modifications being done include: Resin Slat Wing outer wings, TISEO in the leading edge of the left wing, Placement of resin combat strike cameras and opened up auxiliary air doors as those where almost always open on the ground including scratch built interior.
The outer wing modification was undertaken first as this mod required the removal of the end plate of the inner wing. As this would be almost impossible after the inner wing would be glued this was first on the list. The kit preparation work was well described in the instruction that came with the resin parts from GT Resin. The resin outer wings are full of detail and are a well worth investment over the very basic kit alternatives. There only a couple of small issues, the surface texture of the resin part still includes the milling marks of the master mold. The other one is the inclusion of an access panel on the underside of the right outer wing which should only be on the left side. The last one is that the scribed detail on the underside on the wingfold hinge is a bit soft and could de with a re-scribe. These are all minor issues in my opinion as the modification itself will require sanding, filling and re-scribing to get the optimal end result.
After the outer wings where on it was time to tackle the TISEO. The kit panel lines where almost correct but left me with a cut out that way too big for a straight in replacement. As the wing root also needed tweaking to fit the resin intake this was undertaken at the same time this had a positive effect on the fitting of the resin TISEO pod that was a one piece casting with the leading edge section. Because there was no positive guide to the placing of the replacement leading edge section after removal of the wing root section the access panel that would hold the combat strike camera was glued in place. The resin leading edge section had a notch to accommodate that panel so the inner positive stop was ones again there. The leading edge section was glued in place with thick CA Glue that would also act a preliminary filler for the mismatched gaps. The inner and outer gaps that where left where then filled with Tamiya Epoxy Putty. As the wings are of a hollow monococque construction on this kit without any reinforcement the inner wing joint would be not as strong as one would like where it will meets the aft. fuselage. Reinforcement blocks of Tamiya Epoxy Putty where made up to solve this issue. This also fixed the wing shape issue that is on the kit discrepancy list.
The cut outs for the auxiliary air door where made using nano PE saws from RB Productions. I used scribing tape to outline the panel that had to be cut to get nice clean cuts. 0,25mm Sheet styrene was used to create a box that would hold the interior detail which will all be scratch built just prior to final assembly to minimize the risk of it getting damaged.
Image
Image

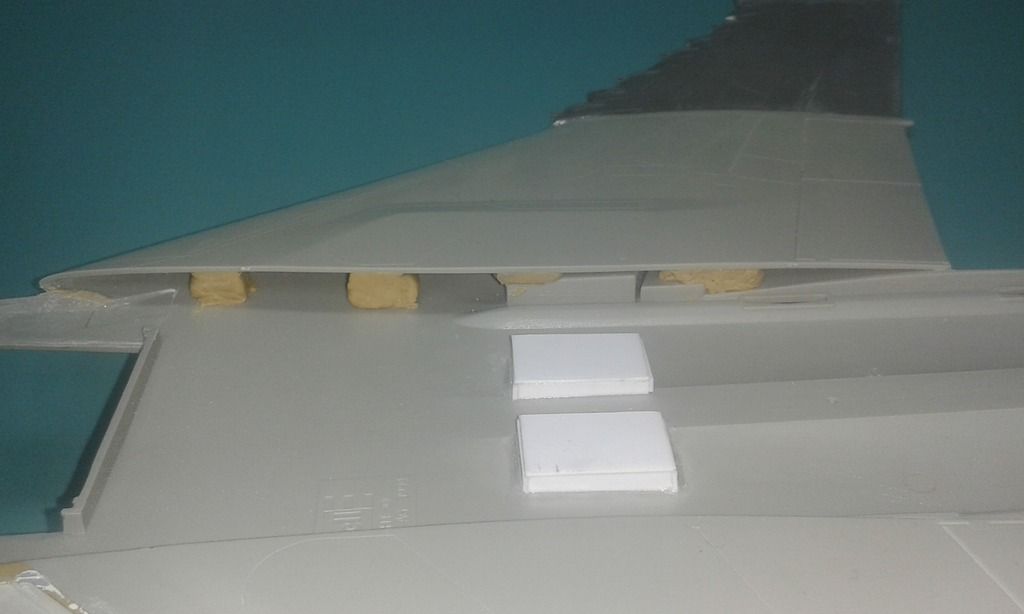
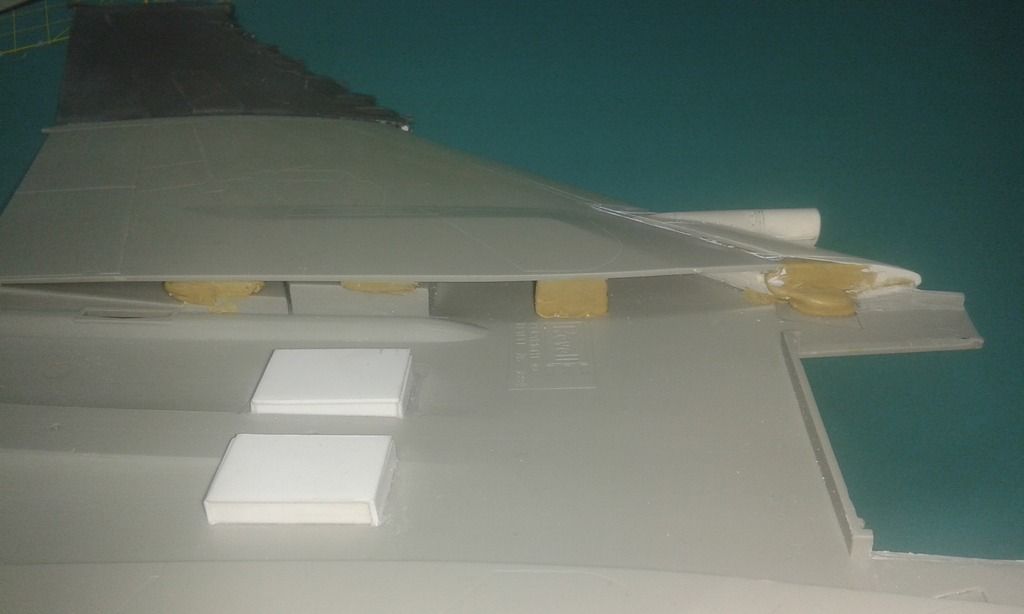
The combat cameras where the easiest of the modifications as they where a glue on and fill addition to the wing. The access panel and the wing root panel required minor filling to get a smooth transition from the bottom wing to the resin intakes.
Image
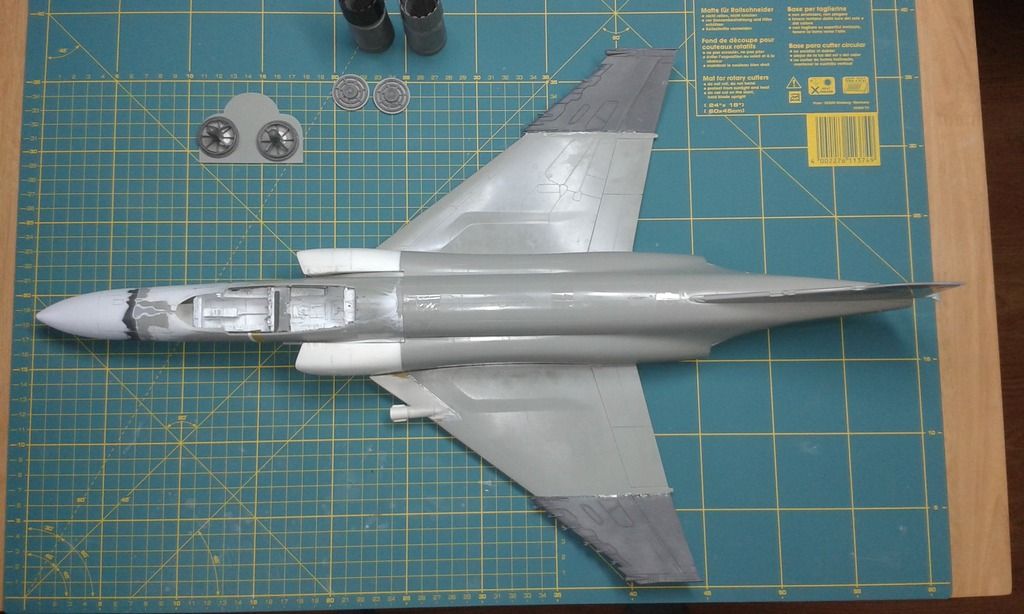
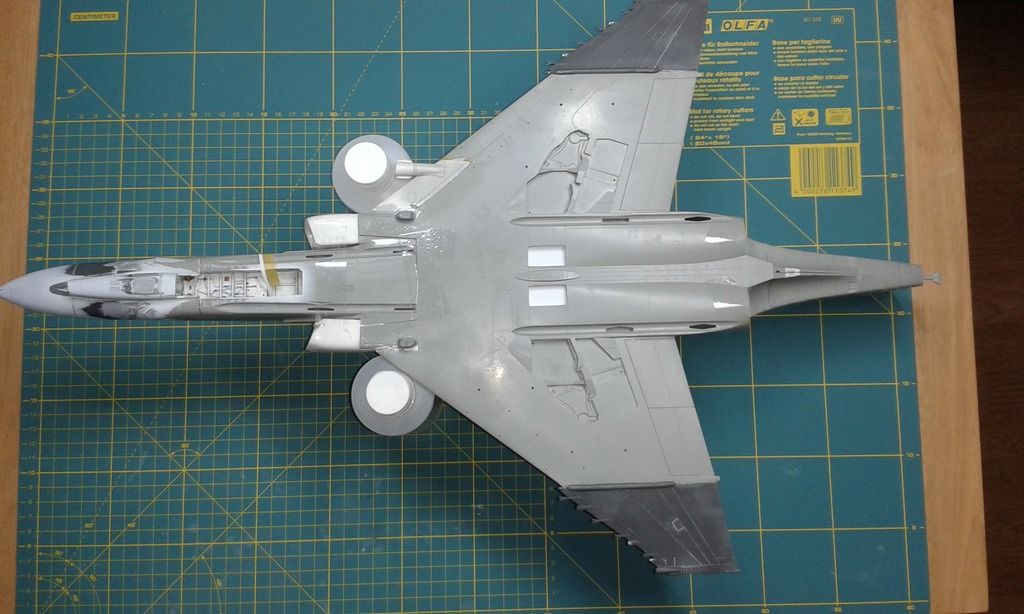
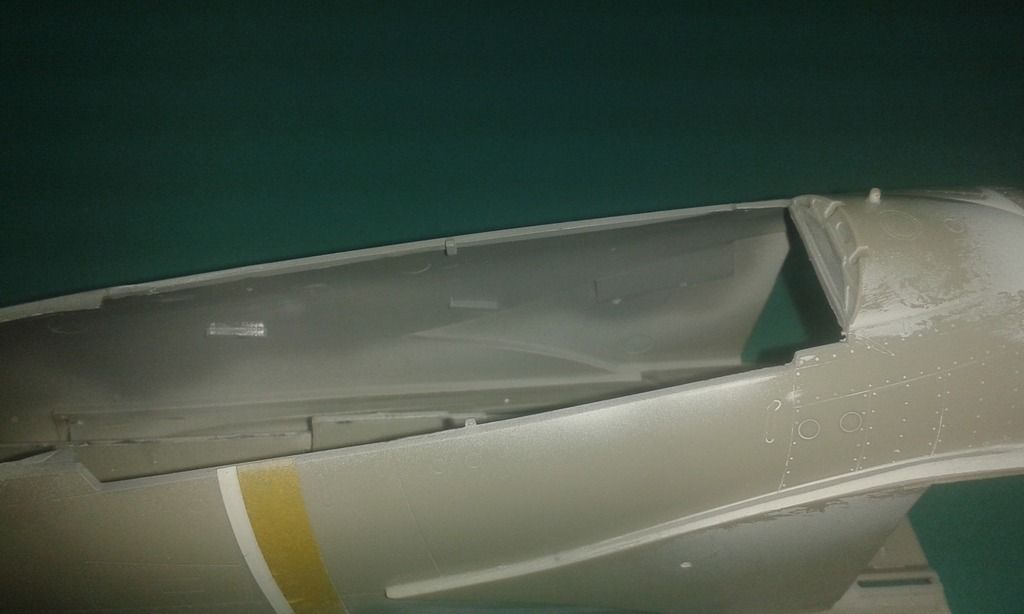
With the wing now also pre-assembled it was time to start on the final assembly. But before I started that I was a nice opportunity to test fit the semi completed build. I used clear cellophane tape as this would leave me with a good indication of any gaps that would occurre during final assembly. This also was a nice photo opp. To show of all the modifications and alterations that have been made. The light gray is the kit plastic. All other colors are resin, filler and sheet styrene.
Image
Image
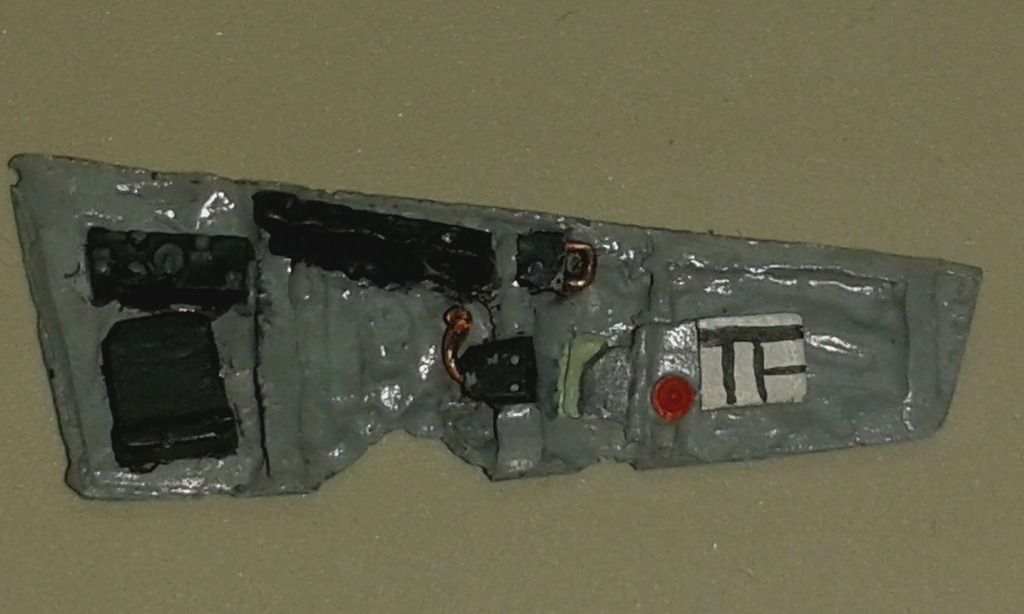
Now that the major modifications where done it was time to start with the final assemble. I opted to start with the forward fuselage that contains the cockpit that has been whispering build me, build me for some time. The resin cockpit tub had already been primed in white after the PE details had been added to it. The resin side walls and ancillaries where taken off the casting blocks and cleaned up prior to test fitting them. After I was satisfied all the part would fit and look alright it was time to spray them in Ultimate White primer ones that had time to cure the base color went down. I used Mr. Hobby Aqueous H306 (FS36270) as this was a close match to the color on the pre-painted PE from the Eduard set. At this point a two small gaps became clear. One was on the right inner wall of the aft. cockpit, where there was a step visible from the intake spike in the outside of the fuselage. The other was a gap where the aft. cockpit deck meets the aft canopy hoop. The flat styrene pieces from the exhaust relief cuts where the correct thickness to solve both issues. Those were trimmed to fit their new home on the model and glued in place with regular Revell professional modeling glue. On the intake side of things a small step was still visible and that was filled using Tamiya putty. The inside of the forward fuselage was then primed in Ultimate White primer followed by the base color. After that it was time to start with the detail painting of the cockpit. Here are some progress photo’s of that as well.
Image
Image
Image
That is all for this installment, as always happy modeling and keep sticking styrene.
Paul J

Re: 1:32 Revell F-4E Late 32nd TFS Soesterberg AB The Netherlands

Posted: Sat Feb 11, 2017 3:19 pm
by Twokidsnosleep
Yay, he is back with mojo and health intact :banana: :banana: :banana:

An epic post as well, gonna take me all weekend to read ;)
That decal sheet gives me a headache just looking at all of them to apply. Yikes!

Speaking of decals, what are the yellow bars on the side and tail of these fighters for???
I cannot find an explanation for their use :scratch::

Good to see you posting again my friend :cheers2:

Re: 1:32 Revell F-4E Late 32nd TFS Soesterberg AB The Netherlands

Posted: Sat Feb 11, 2017 4:40 pm
by Vleugelmoer
Hi there Scott,

Yup I'm back and swinging alright... Looks like you had a promotion in my absence up to Major Sir.. :lol:

I thinnk you are on about the light green electro luminecanct formation lights. Tho's came in around the block 46 stage of production and where later on also retrofitted to earlier production aircraft. Good research will pay of when thinking about weather or not they where fitted to the aircrat.

:cheers2: Scott I presume you are now in the new house...

All the best,

Paul

Re: 1:32 Revell F-4E Late 32nd TFS Soesterberg AB The Netherlands

Posted: Sat Feb 11, 2017 4:53 pm
by Twokidsnosleep
Ha ha, just gotta ask the right guy the right question. This is a description for an F-15

Formation Lights: These are yellow electroluminescent lightstrips designed to use during formation flying at night or under low visibility conditions. There are six of them: two on each wingtip behind the position lights, two on the left and right side of the forward fuselage just forward of the cockpit, and two on the left and right side of the aft fuselage just aft of the trailing edge of the wings.
Formation lights can either be turned off by the pilot, or can be set to continuous illumination (with 6 increasing brightness levels).


Thanks for that nudge in the right direction. I don't like building something if I have no idea what the thing I am attatching is or does. Old kit instructions used to teach you anatomy of what you were building by naming it, not just numbering it.


Yes we made it into the house just before Christmas. Comfortable, but certainly it is not completely done.
Cabinetry to be finished, closets and of course my two hobby rooms to build up. Have a peak at the thread photos.
Harsh winter with snowy three months won't allow any hard or soft landscape work until probably March.....we are usually pretty mild with only a few days of snow and cold, but winter hit hard this year. I don't want them pouring concrete in frost or freezing conditions so will remain patient.

I am so glad you are doing ok, was getting a bit worried when you mentioned health problems :thumb2:
Scott

Re: 1:32 Revell F-4E Late 32nd TFS Soesterberg AB The Netherlands

Posted: Sat Feb 11, 2017 5:40 pm
by Vleugelmoer
The F-15 indeed had the same or similar lights fitted as formation lights. The same stuff is now found on airliners as escape path lighting even though it is rapidly being replaced with the photoluminesent family member that cuts on energy use and weight.

The health problems where more of the mental kind. Good counseling and upped prescription medication intake saved me from going off the deep end this time around. But my modeling mojo took a big hit but that is now back with vengence :th:

I have family up in BC and they have all been saying the same thing hopefully puxatauny Phill won't see a shadow and spring will soon be here. We had a small dusting of fresh snow over here last night and more predicted to come over the next couple of day's. Sure miss a good winter, we'r lucky if we get a snow pack of 3/8 to 9/16 of an inch at the most over here.. And the country go's nust ant can't handle it all, bunch of amatures :whistle:.

Will be making my way back to the forum more often if and when I can manage to squeeze some time in to write an update so I don't have to do 2500 word catch up marathons :banana: . This last one was almost the size of some desertation papers that we'r floating around in my post grad study.

Have a nice one and we'll talk soon.

Paul

Re: 1:32 Revell F-4E Late 32nd TFS Soesterberg AB The Netherlands

Posted: Wed Feb 15, 2017 6:22 pm
by Vleugelmoer
Now that the main conversions are done it's time to start on the final assembly of this big girl.

Started on detail painting of the cockpit over the weekend and here are some update pics.

Image
The side panels all painted and weathered up.

Image
I hid have to add some of the fine detail with copper wire.

Image
Also added the strike camera and gun camera switches and armerment safety switch. I used 0,15 mm styrene sheet for the switch panels and white glue to build up the switch details.

Also made some strides on the tub of the aft cockpit

Image

The white squares will get a smoke filter with Tamiya Clear X-19 to give the TISEO control panel switches a nice lustre.

That's all for now more to come so stay tuned folks.

As always happy modeling and keep sticking styrene.

Paul J.

Re: 1:32 Revell F-4E Late 32nd TFS Soesterberg AB The Netherlands

Posted: Wed Feb 15, 2017 10:25 pm
by Lysus
Love how you always dive right in on details that make a lazier modeler (read: me) shrink in terror.

Re: 1:32 Revell F-4E Late 32nd TFS Soesterberg AB The Netherlands

Posted: Thu Feb 16, 2017 11:06 am
by Vleugelmoer
Thanks Jason,

If you build large scale like I do. I think adding all that minute detail makes the model really come alive. Yes without the detail my build will progress way faster and would still sort of represent an approximation of it but that is just not my stile.

Re: 1:32 Revell F-4E Late 32nd TFS Soesterberg AB The Netherlands

Posted: Sat May 13, 2017 2:39 am
by wjkunert
I had the good fortune to be stationed at Kamp Nieuw Amsterdam from June 1960 till April 1964. We brought the 102's to the Netherlands and I have to say that was the best 4 years of my 10 years in the Air Force. The Dutch people treated us wonderfully and for that I say dank je vaal. I'm currently building a Tamiya 1/48 F 14A but my next two builds will be a F 102A and a F 15A, both in Soesterberg colors. Your build is looking great. A lot of careful attention to detail. I'm anxious to see the completed aircraft. Keep up the great work.