So I am going for a third build and am hoping to do the Tamiya 1/48 DH Mosquito NF Mk II, (Kit No 61062), of No 157 Sqn.
The model has a wingspan of 344mm and a fuselage length of 264mm.
Just hope I can di the kit justice.
There are 6 bags in the box, 3 with 2 sprues in each, 1 with one sprue and the clear canopy sprue. There is also the decal sheet with decals for 3 aircraft. The instruction sheet is the typical Tamiya black and white fold out single sheet. A colour call out and a sheet for the placement of common decals is also included.
The box art is, to me, rather nice as can be seen in the photo. The plastic looks good too with no flash showing to the naked eye.
A little about the night fighter version of the Mossie
Taken from the usual place that is Wiki.
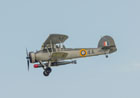
Although it had originally been developed as an unarmed bomber and reconnaissance aircraft, it quickly became clear that the Mosquito design had a great deal of potential as a fighter aircraft. Work began on the fighter prototype (No. W4052) in 1940, to Air Ministry Specification F.21/40.
The prototype replaced the glass nose of the bomber/ reconnaissance version with a solid nose, containing four .303in Browning machine guns. Four 20mm cannon were located below the nose, extending back into the bomb bay. This gave the Mosquito F Mk II a very impressive punch, all concentrated in the nose.
The fighter prototype was the second Mosquito to fly, making its maiden flight on 15 May 1941. It soon became clear that the most important role for this new fighter would be as a radar equipped night fighter. The NF Mk II was equipped with the Mk IV Airborne Intercept Radar set. This needed three antennas – one arrow shaped antenna in the nose (the transmitter), just above the .303in machine guns, and one antenna at the end of each wing (the receivers). This form of radar allowed the NF Mk II to retain all eight guns carried by the F Mk II. Later radar sets would require rather larger antenna, resulting in the removal of the .303s.
The NF Mk II entered service with No. 157 Squadron on 26 January 1942. The squadron was ready to start operations by April 1942, flying its first Mosquito sortie on 3 April 1942. However, the Mosquito NF Mk II would not score its first confirmed victory until 24/25 June 1942.
The NF Mk II suffered from a few minor problems early in its career. Possibly the most serious of these was the choice of paint. At first the standard night fighter paint was used, black paint with a non-reflective rough finish. This was discovered to slow the aircraft down by around 25 mph, and so was replaced by a smooth black finish. This restored the aircraft’s speed, but made it too easy to see, especially on moon lit nights. Finally, a mix of Medium Sea Gray and Dark Green was adopted, and used for the rest of the war.
The NF Mk II was also used to fly offensive missions over occupied Europe. For this task the radar was removed, and extra fuel tanks fitted. The modified aircraft were known as NF Mk II (Special) Intruders. These aircraft were used by No. 23 Squadron to attack enemy airfields at night, starting from bases in Britain in 1942, before moving on the Malta in December 1942.
In total 494 F Mk IIs and NF Mk IIs were built. A number of them were converted for other duties, including two converted to the Photo Reconnaissance role.
Mosquito Aces of World War 2, Andrew Thomas. This volume concentrates on the fighter variants of the Mosquito, looking at their role as a defensive fighter, both over Britain and overseas and their use during the D-Day invasion to protect the fleet. Thomas also looks at the career of the Mosquito as a night intruder over Germany, where it became the scourge of the German night fighters, often being blamed for losses miles from the nearest Mosquito.
Since the last update the engine nacelles have been attached to the wings, a little bit of filling required at the back of the nacelles.
Also the legs and wheels have been built and painted
The office has been constructed,painted and just needs a varnish coat the seat belt decals added and a bit of weathering.
The cockpit builds up in sections this is the front with the instrument panel and the cannons. The cannons are painted in X-10 Gun Metal, the panel and radio/radar are in X-18 Semi-Gloss black all with a dry brush of X-11 Chrome Silver.
The Nav/Radar Op position
Now all the section put together ready for varnish,weathering and fitting to the fuselage.
The Cockpit green is made up of mixing the colours XF-5 Flat Green, XF-21 Sky and XF-65 Field Gray
After placing seat belt decals,I have now fitted the cockpit and joined the two halves together, fitted the canopy after masking. The fuselage went together with no major trouble.
So the next job will be to get the wings on and see how they look.
Hi les, looking mighty fine. It appears to have most of the detail of it's bigger brother. Those green decals for the inside of the canopy look quite fiddly but knowing tamiya they will work out just fine for you
Money is'nt everything but it sure keep's the kid's in touch.
Johnj wrote:Hi les, looking mighty fine. It appears to have most of the detail of it's bigger brother. Those green decals for the inside of the canopy look quite fiddly but knowing tamiya they will work out just fine for you
Always love a Mossie build
Re the canopy frame decals, if they prove to be a PITA you could duplicate the effect by spraying the exterior of the canopy with cockpit green before you get to work on the camo. Always good to have a backup plan!
Its been tried and tested, it works! So don't blame the system if you're no good.
Johnj wrote:It's a pretty effective way of doing it. Am i right in thinking thats the way the 32nd spitfire is done ? Something rings a bell with that.
Sure is. First time I used the method was on their 1/32 P51, worked like a dream. I use it on all canopies and windshields now.
Its been tried and tested, it works! So don't blame the system if you're no good.
Just looking at my own mossie there and it appears it has a frame seperate from the 'glass' and it looks quite fiddly so i might be doing the same with painting the canopy from the outside. Apart from appearing gloss i cant think of any downside to it ?
Money is'nt everything but it sure keep's the kid's in touch.
Not sure about the Mossie. If the frame part is internal and the clear part sits on top, I would paint the frame first, exclusive of the clear part then mask the canopy normally for the external camo colours.
Its been tried and tested, it works! So don't blame the system if you're no good.
Stokesy44 wrote:Not sure about the Mossie. If the frame part is internal and the clear part sits on top, I would paint the frame first, exclusive of the clear part then mask the canopy normally for the external camo colours.
Yeah, the parts are so small and two seperate colours i may just leave it out altogether. I'll post a pic.
Money is'nt everything but it sure keep's the kid's in touch.
Ok dokey, The Mossie is now in her semi gloss black XF-18 and gloss coated in Xtracrylics gloss varnish.
I started the decals on the wings and then a lot of expletives were heard from me when I noticed that I had put the fuselage roundel in the wrong place, no problem just move it over........Ha this is me it's not that simple, tried to move it only to rip it, so thought me I,ll get one from my spares box completely forgetting the oob rule. So I have probably disqualified myself with the Mossie, hey ho am going to finish her and see what happens.
So now finished the decaling for just now, wait for the solutions to dry completely then another gloss coat.
That's the progress for the now, see you all soon Les.
The progress now sees my Mossie up on her legs with the airscrews and antennas on. She was given a second coat of Xtracrylics gloss before being covered in Ultimate dark dirt. The Tyres were given a light wash with Ultimate concrete. All that remains now is either a matte or a satin coat (not yet decided which) and put the cabin door and crew access ladder on and that as they say should be that.
Hi les, i would really like to do the NF version but my kit doesnt have the markings and i think i maybe in the same boat as you with the replaced decal, i lost a part and had to scratch build one which is against the rules.
your mossie is looking mighty fine, top job
Money is'nt everything but it sure keep's the kid's in touch.