Page 1 of 2

Attila's 1:35 Tiger I from Academy

Posted: Mon Sep 04, 2017 8:25 am
by papatika
Hi there!

This old kit lays on my shelf since at least 4 years. I was not brave enough to start working on it. I was waiting for the perfect opportunity. And when I saw the GB plans for this year, I knew that the countdown has been started.

So, Ladies and Gentleman! Let me introduce you the beast, the German Heavy Tank Tiger-I Mid Production Version, with interior, and accompanied by Eduard Big ED PE set!
Image

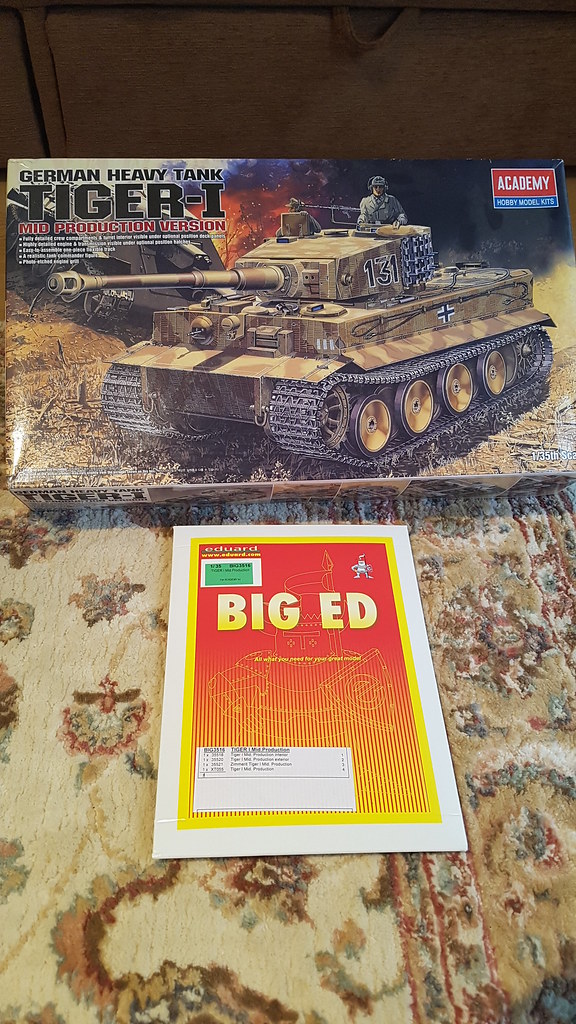
Let's see what's inside:
Image

It is a fairly old kit, based on Academy's early Tiger:
Image

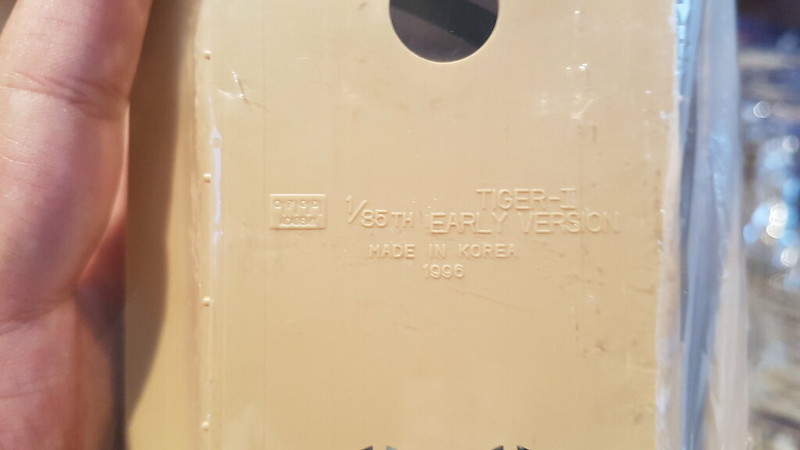
Talking about old kits... Oh Dear Lord!
Image

But the rest seems to be OK, with really nice details OOB.
Image
Image
Image
Image

It has rubber band tracks. Maybe I'll replace them later on (any suggestion with one to use /AFV, RMF, Friul, other/?). Additionally there are multiple spare track links, made of different materials. I suppose these will go on the turret and on the front to give more protection to the lower hull.
Image

PE is also included:
Image

Now let's see the powerups:
BIG3516 is actually a package of 4: 3 PE and a mask.
Image

Interior:
Image
Exterior:
Image
Zimmerit:
Image
and masks:
Image

I spent the last night by reading through all the instructions and marked all the pieces which has to be upgraded with PE. Also I was looking for more information about the mid production Tigers, and the 3 paint schemes the kit offers (early 1944, Tiger 232, 313 and 323).
Here is a change list, which seems to be very useful: http://www.alanhamby.com/changes.shtml
April 1943 is pretty interesting: 3 spare track holder added, and then 2 more. I have to recheck it, but I think the building instruction mentions only 4.
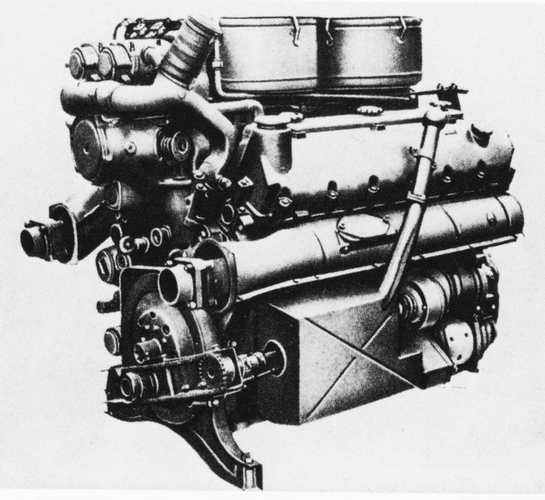
I like the look of the air filters. They were introduced in November 1942, upgraded in March 1943, discontinued in October 1943.
Other visual key is the Zimmerit cover, introduced in July 1943.
Would be nice to have vehicle build between March 1943 and July 1943.
A was wondering what "mid production" exactly mean. I found that Mid-production Tiger I's have the second design turret with the smaller cupola but retain the rubber-rimmed roadwheels. The redesigned cupola has been introduced in July 1943 (along with Zimmerit), and steels road wheels were used until February 1944. Mid Production = July 43 - February 44.
My original goal does not fit... :wall:

Questions:
Which mid production Tiger 1s had air filter and zimmerit together (July 43 - October 43)?
What is the history of Tiger 232, 313 and 323 (paint schemes offered by the kit)
Were there any Tiger Is with gray paint, and zimmerit?

Boxart's 131 is funny... Tiger 131 was an early type tank, without zimmerit, painted with Dunkelgelb, captured in Tunisia, currently owned by Bowington Tank Museum... :clap:

I have to work now, so to be continued later on...

Cheers:
Attila

Re: Attila's 1:35 Tiger I from Academy

Posted: Mon Sep 04, 2017 4:06 pm
by papatika
Ok, I have to revise myself. The turret number was a kind of indication and shows the position of the tank in the 101st Heavy Panzer Battalion.
Image
(About the picture)

So 131 means 1st Company, 3rd Platoon, and nr1 in the group of four.
See full grid here: http://www.panzerace.net/the-tiger-i/or ... z-btn.html

Some more info about the paints used in 101:
all 101 Tigers in Normandy had 3-tone scheme yellow/green/brown.
They all had spare tracklinks in front and the bar was made of a round steel rod.
Due to the weight of the tracklinks that rod are often seen bended down a bit.
Tactical numbers for s. SS Pz.Abt. 101 for this time frame were
1st Company: green-olive with white outline
2nd company: red with white outline
3rd Company: solid white, then later blue with yellow outline.

Re: Attila's 1:35 Tiger I from Academy

Posted: Mon Sep 04, 2017 5:07 pm
by walklong
An awesome line of reference to time and place and persons that will be gathered in your completed model - not just a representation of your skills as modeler but also a representation of the dynamic piece of history it stands for.

Thanks and I'm looking forward to the mileposts in your thread. (No pressure ;))

Re: Attila's 1:35 Tiger I from Academy

Posted: Wed Sep 06, 2017 8:47 am
by papatika
walklong wrote: Mon Sep 04, 2017 5:07 pm An awesome line of reference to time and place and persons that will be gathered in your completed model - not just a representation of your skills as modeler but also a representation of the dynamic piece of history it stands for.

Thanks and I'm looking forward to the mileposts in your thread. (No pressure ;))
There is no bigger pressure than my own coming from inside to give this kit (and all the ones I'm working on) the biggest glory I can achieve. :tongue:
Unfortunately I have a pretty small workplace, and I have 2 projects ongoing. Don't really have room for a 3rd. Both close to the end though, so soon... very soon... or even sooner if I can't wait anymore... :dance:

Re: Attila's 1:35 Tiger I from Academy

Posted: Wed Sep 06, 2017 10:12 am
by papatika
I'd like to share an interesting page with you. It is about markings on German vehicles.

Oh, and scale modeling in large: https://www.youtube.com/watch?time_cont ... Fp2G2Sc3QI :)

Re: Attila's 1:35 Tiger I from Academy

Posted: Tue Sep 19, 2017 7:19 pm
by papatika
Hi guys!

I have to say, this kit is a hard nut to crack... After I carefully studied the building instructions, and marked each piece which will have some kind of PE, I decided not to follow the manual, I'll use it only as a guide. I plan to build several subsection of the interior first to do a dry fit test and see how this thing will come together.

I started with the lower hull, and inserted the torsion bars. It sounds easy, but I had to file and send almost each of them to fit.
The second minibuild was the engine. It was a kind of ... umm... disappointment. While putting it together I was constantly searching for photos of this Maybach HL-230-P45, maybe I can add some more details, like wires.
This was the best one:
Image
(http://www.alanhamby.com/maybach.shtml)

And this is what I got:
Image

The rear section is totally different... :( I was thinking a lot how to upgrade, but at the end I left it as is. I could add the oil level checking tube, but it won't be visible.
I got totally disappointed when I first tried to put it into its final location:
Image

The exhaust pipes do not meat the back wall! The gap is so huge, you could build a house there! :eeek:
It won't be visible too much because of the two pipes above them, and the black paint I'll use, but I still know it is THERE! :(
Ahh, yeah, those little pipes. They look like this when the walls of the engine bay have been installed:
Image

Miles away... Kind of expected... :?

I also assembled the cooling system and the fuel tank.
See, how nice caps they had?
Image
(http://tiger1.info/EN/Upper-fuel-tanks.html)

This is the kit's solution: :shock:
Image
It looks like they planned to add this detail, but forgot it. At least it is missing from the instructions. I keep it like this until the end, maybe I'll find them on one of the sprues...

Next headache: ammo racks. They are short, having at least 1mm gap on both sides:
Image

Fixing them wasn't a big deal, but this mistake is just not acceptable... :-x
Image

And still ammo racks, but this time the lower ones. According to the kit they should be raised, and the hole should be exposed, like this:
Image

No sir!
They should be be lowered. Actually this part of the hull has a slight angle. So the rear boxes shall be on the same level, and the front ones below.
Like here:
Image
(http://tiger1.info/EN/Main-ammunition-bins.html)

The gear box was - surprisingly - fine: fits perfectly.
Axles? Not so much...
Image

Again, they won't visible too much, but hey, that's not the way things should work!

After all this I was ready for painting the main parts of the interior
Image

First a black primer which also acts as shadow
Image

Next is German Gray
Image

masked
Image

and painted the upper portion to Cremeweiß.
Image

I plan to complete the engine bay next, and then do the fighting compartment. I also want to add figures. I have to take it into consideration while planning the next steps... :)

Thank you for reading and commenting, and I will definitely see you on the next post! :D

Cheers,
Attila

Re: Attila's 1:35 Tiger I from Academy

Posted: Wed Sep 20, 2017 9:04 am
by Tomcat64
Wow - this one's making you work for the result isn't it?

Can't believe the miss with the ammo bins, and the detail on the engine looks really half-hearted. As you say most of it will be hidden when completed but it's just disappointing.

Keep at it though as I know you can knock it into shape! :cheers2:

Re: Attila's 1:35 Tiger I from Academy

Posted: Wed Sep 20, 2017 6:23 pm
by SergioSolo
Looks great! I've been curious about those Zimmerit PE. Can't wait for more updates!

Re: Attila's 1:35 Tiger I from Academy

Posted: Thu Sep 21, 2017 12:34 pm
by papatika
Tomcat64 wrote: Wed Sep 20, 2017 9:04 am Wow - this one's making you work for the result isn't it?

Can't believe the miss with the ammo bins, and the detail on the engine looks really half-hearted. As you say most of it will be hidden when completed but it's just disappointing.

Keep at it though as I know you can knock it into shape! :cheers2:
Yes, it was quite a disappointment. And I'm afraid it wasn't the last one. I expect to have more challenge in the turret. I already see one: the kit has only 4 places for spare tracks. Initially there was no such device on the turret, then they added 3 of them, and then 2 more. So there was 3 or 5, but never 4. I suppose I have to scratch build / cast the missing two pieces... :(

But I'm optimistic, and taking it as a challenge. :thumb1:

Re: Attila's 1:35 Tiger I from Academy

Posted: Thu Sep 21, 2017 12:37 pm
by papatika
SergioSolo wrote: Wed Sep 20, 2017 6:23 pm Looks great! I've been curious about those Zimmerit PE. Can't wait for more updates!
Thank you Sergio, I really appreciate it! The zimmerit looks nice, but the "teeth" seem to be too small. I'll take a closer look one I'm ready with the interior. Until then come back frequently, so you won't miss it... ;-)

Re: Attila's 1:35 Tiger I from Academy

Posted: Thu Sep 21, 2017 1:45 pm
by papatika
Ok Lads! Engine compartment!

First I painted all steel parts with gunmetal, and drybrused with steel. I thought I took a photo at this stage, but I didn't... My bad... :roll:
These steel parts were the engine, the grills of the cooling fans, the transmission and the axles.

Next I applied hair spray onto the transmission and the engine, and covered it with grey. When the grey was dry to the touch, I chipped it away with a stiff brush and water.
Image

As next step the fuel tanks were painted with a red primer, and I added some steel chipping with a sponge tool to the tanks, engine and the transmission.
Image

I made a light wash using Abteilung 502's Brown wash to represent grime on a gray surface. I love this paint, it make everything so nice and dirty! :)
This was has been applied to the engine, transmission and axles. I kept working on the engine and put the rest aside.
Applying some Dark Earth pigments to the upper parts (excl. exhausts) the grime gained some volume and texture. In the edges the brown was was still wet, gluing more pigments down, building thicker layer. Finally some leaking and streaking oil and fuel stains were added.
The exhausts were treated with some rust, black and dust pigments to represent corrosion. The steel paint shines through which makes it pretty nice, I think... :)
Image

Here is a better closeup about the engine itself. As you can see I haven't applied any weathering to the lower section. It won't be visible at all.
Image

Next are the fuel tanks. I wasn't pleased how the steel chipping looked like. They were too harsh. I decided to apply a reddish wash. But before I did it, I added some more chipping with chipping color and black to have more tonal variation. For the first wash I used Abteilung's light rust. Not because I wanted to have a rusty fuel tank, but to modify the red base color and blend the chippings. The light rust has been applied all over the tanks.
The second wash was made of Dark Rust from Abteilung, and used as pinwash only to emphasize the panel lines.
They were only light washes, so they dried quickly. When it was dry to the touch, I added some small dots mainly to the edges, using the dark rust again. With a brush damped into white spirit and dried up almost completely I created vertical lines with straight, top-down strokes. The thinner loosened the washes also, creating even more lines and revealing the darker base color here and there.
Finally I touched them up with some fuel stains.
Image

Fans. The metal housing of the grills were already treated with brown wash, I think it was enough. The propellers have been painted with steel, and dark earth and light dust have been brushed on around the vents. Diluted streaking grime was used to cut down the shine of steel paint and add some dirt and depth. Finally the tubes were painted to Rubber.
Image

Here are the engine bay's instruments ready for action:
Image
They are gorgeous if I may say so. 8-)

Last step: prepping the walls of the engine bay. Again, only the visible parts... :)
First Steel was used for chipping, then diluted Fresh Engine Oil has been airbrused on the lower parts. While it was still wet, I added some Dark Earth pigments, then an other layer of oil with airbrush, some more pigments, then some more oil, but as a pinwash this time to build up the thick grime int the corners. Oh, and finally - guess what - pigments. This time I used some rust and back pigments to give more color. As a closing section, fuel stains have been splattered around using toothpick and stiff brush.
I learned here a thing I'd like to share with you. This material is pretty thick, like slime. First I just applied it as is, but thin lines appeared on the walls instead of dots. Similar to what you get when you are sick and sneezing without a handkerchief. :P After diluting it with white spirit dots came back. Still I had to be very careful, because pigments like to such the diluted things -> dots got bigger then originally intended.
Image
Image

And finally: engine bay packed full with goodies! :clap:
Image

It was a great fun! I really liked it! Next up: fighting compartment. I hope I'll accomplish this challenge, too.


As always, Thank you for reading and commenting, and I will definitely see you on the next post! :D

Cheers,
Attila

Re: Attila's 1:35 Tiger I from Academy

Posted: Thu Sep 21, 2017 4:06 pm
by xSCAR45
Excellent work so far. That engine bay is looking sharp! :clap:

Re: Attila's 1:35 Tiger I from Academy

Posted: Thu Sep 21, 2017 4:23 pm
by ElCapitan
Fantastic work on the weathering :th:

Re: Attila's 1:35 Tiger I from Academy

Posted: Thu Sep 21, 2017 4:24 pm
by Quax
Considering the issues you've had with this so far papatika you've done a sterling job, I'm looking forward to further installments! :clap: :clap:

cheers

Paul

Re: Attila's 1:35 Tiger I from Academy

Posted: Fri Sep 22, 2017 8:27 am
by papatika
xSCAR45 wrote: Thu Sep 21, 2017 4:06 pm Excellent work so far. That engine bay is looking sharp! :clap:
ElCapitan wrote: Thu Sep 21, 2017 4:23 pm Fantastic work on the weathering :th:
Quax wrote: Thu Sep 21, 2017 4:24 pm Considering the issues you've had with this so far papatika you've done a sterling job, I'm looking forward to further installments! :clap: :clap:

cheers

Paul
Thank you, Gentlemen! :)

Re: Attila's 1:35 Tiger I from Academy

Posted: Fri Sep 22, 2017 8:55 am
by Tomcat64
Absolutely stunning work on the engine components and bay - you really do have the knack of making plastic look like metal! :clap:

Re: Attila's 1:35 Tiger I from Academy

Posted: Fri Sep 22, 2017 10:10 am
by papatika
Tomcat64 wrote: Fri Sep 22, 2017 8:55 am Absolutely stunning work on the engine components and bay - you really do have the knack of making plastic look like metal! :clap:
Thank you! Gun metal, Steel and brown wash can do magic... :)

Having sub-assemblies and a lot of dryfitting before painting and weathering worked at the engine compartment, so I tend to continue like that.

First of all, PE. I sanded down all details from the instrument panel, with shaking hands - it cannot be reverted. :)
Eduard offers a film and a printed version for the instruments. The film supports only black colors, so I chose the printed one. I carefully glued the paper to the PE using diluted wood glue. Though the paper is thin, wasn't thin enough for me, therefore I peeled away carefully the half of the paper. Thinned wood glue helped me, with a sharp knife I could separate 2 layers of the slightly wet paper, while the glue held it to the stiff metal part. Then I firmly clamped the PE to the plastic and let the thin CA glue to be soaked into the small gap.
Image

Those dials are too small to mask them with tape, and I don't want to let paint go on them. I will use Micro Mask for this job, because it can be removed with tap water and a brush. But since the dials are made of paper, it might soak in the liquid mask, which would be a disaster. I hope Micro Kristal Klear will be my friend. I dropped a few bits on the leftover paper material, and it dried nicely without changing the color of the paper or blurring the paint.
Image

Maybe I'll add one more layer, but this time I'll make the surface wet first.
Image

I'd like to complete the driver's compartment first. Eduard requests to build 2 toolboxes (19 and 62), and place them across 2 torsion bars with 19 rotated by 90 degree. I think... :think: I don't really understand. Why would be there 2 boxes, and you cannot open the lower one without removing the upper one? In a tank there is so little room, which is not ideal to picking up boxes an putting it away to reach the one underneath... :scratch:: I hope you guys can help me! Here is the instruction:
Image

And here is how it the front section looks like:
Image

The there will be a box (62) next to the feet of the radio operator, so you can see it's size. Not too much room next to / behind the driver's seat. Especially if I insert the turret floor, too:
Image

I tried to find some reference material, but havn't succeeded. :(
So, what do you think?

Re: Attila's 1:35 Tiger I from Academy

Posted: Fri Sep 22, 2017 6:33 pm
by Tomcat64
I saw a 360degree look around of the Tiger driver's compartment on Facebook the other day - I'll try and track it down for you again in case it'll help.

You'll probably need to log into facebook to make it happen but try this?

Re: Attila's 1:35 Tiger I from Academy

Posted: Fri Sep 22, 2017 6:45 pm
by papatika
Tomcat64 wrote: Fri Sep 22, 2017 6:33 pm I saw a 360degree look around of the Tiger driver's compartment on Facebook the other day - I'll try and track it down for you again in case it'll help.

You'll probably need to log into facebook to make it happen but try this?
Great stuff, dude! Thanks!

:cheers2:

Re: Attila's 1:35 Tiger I from Academy

Posted: Tue Sep 26, 2017 11:52 am
by gaz45
Nice work there so far mate

Re: Attila's 1:35 Tiger I from Academy

Posted: Tue Sep 26, 2017 8:27 pm
by haxorb
Really cool to see someone building a kit that was my first tank kit :), love the build and will be looking forward to more of this!

Re: Attila's 1:35 Tiger I from Academy

Posted: Wed Sep 27, 2017 10:58 am
by papatika
gaz45 wrote: Tue Sep 26, 2017 11:52 am Nice work there so far mate
Thank you! :)
haxorb wrote: Tue Sep 26, 2017 8:27 pm Really cool to see someone building a kit that was my first tank kit :), love the build and will be looking forward to more of this!
Really? Your first tank kit? You have to like challenges. No trainee kits, right in the middle! :)

Re: Attila's 1:35 Tiger I from Academy

Posted: Wed Sep 27, 2017 1:22 pm
by haxorb
Haha, my first ever kit was a B-17 by revell me and my grandpa bought. It didnt have any glue though.... so we had to get some at a hobby store. Which i had to apply with a toothpick. Also didnt have any paint, but that didnt stop me enjoying it. The second one was this one by academy. Me and my mom bought it with paint only for the outside but not on the inside. I build it overnight. But not as good as this one haha/

Re: Attila's 1:35 Tiger I from Academy

Posted: Wed Sep 27, 2017 3:30 pm
by papatika
haxorb wrote: Wed Sep 27, 2017 1:22 pm Haha, my first ever kit was a B-17 by revell me and my grandpa bought. It didnt have any glue though.... so we had to get some at a hobby store. Which i had to apply with a toothpick. Also didnt have any paint, but that didnt stop me enjoying it. The second one was this one by academy. Me and my mom bought it with paint only for the outside but not on the inside. I build it overnight. But not as good as this one haha/
Lol!

My very first kit was a 1:144 F19 from Revell. Back then items from "western countries" were only available in certain shops, and could be purchased for USD only. You know, iron curtain, Gulash-communism, and such... Somewhere short before 1990... :)
Image
Used "Technokol Rapid" as glue (it was an all-purpose glue, mainly used as paper glue in the school). No paint was needed luckily. :)

Re: Attila's 1:35 Tiger I from Academy

Posted: Thu Sep 28, 2017 10:36 am
by haxorb
Wow, how much would that have costed you in that time. Being in sovjet russia and all?

Re: Attila's 1:35 Tiger I from Academy

Posted: Sat Sep 30, 2017 2:59 pm
by papatika
haxorb wrote: Thu Sep 28, 2017 10:36 am Wow, how much would that have costed you in that time. Being in sovjet russia and all?
No, just Hungary. Warsaw pact, red zone, Soviet sphere of influence... :)

Nothing much happened here. I can't decide whether I want to add figures, or not. If so, which kit shall be used, and what kind of surgery has to be applied. If the tank is in operation, the main switch on the firewall shall be turned on, and the handbrake shall be released for example. First only the driver and the radio operator. Until this decision is taken, I'm doing some small things and prebuilds to see how it will look like.

One small improvement was that I added some dirt and grime to the bottom section. First pigments with different colors here and there. Dark Earth gives the base tone, a little black makes the torsion bars pop, and some Light Sienna gives some tonal variation.
Image

Next I added Fresh Engine Oil to the moving joints of the torsion bars, and some speckling here and there.
Image

Finally I speckled white spirit on it to act as glue for pigments, and to blend the oil stains a bit more.
Image

I was missing the sidewalls of the boxes in the floor, and the floor behind the driver. I glued some styrene pieces here.
Image
Image

When I dry fitted the front panels, I was disappointed - again. No matter how I pushed, twisted, tweaked, there was an at least 1mm offset.
Image

Same gap inside
Image

After 2 hours of micro sandings and dry fittiins the outer section fitted ok
Image

But the interior wasn't completely fixed, yet.
Image

Styrene for the rescue! :)
Image

I also added some wires to the radio. I found a nice photo on the net, and used that as a kind of reference picture:
Image
(http://www.sixtharmygroup.com/portal/vi ... 928470a721

XF-66 Light Gray is used to paint the frame of the radios. I don't know how wide this wire is, my smallest 0.3 mm drillbit is a bit bigger. :)
Image

Wires and buttons painted with red and black, and added a light wash. The two radio received different washes just to have something more for the eyes to watch. :)
Image

Here I am now. Next up is the rest of the interior with or without figures! :)

Thanks for stopping by!

Cheers,
Attila

Re: Attila's 1:35 Tiger I from Academy

Posted: Sat Sep 30, 2017 9:55 pm
by Tomcat64
More nice work getting this into shape mate - the extra detail on the radio is really eye-catching :clap:

Re: Attila's 1:35 Tiger I from Academy

Posted: Sun Oct 01, 2017 12:40 pm
by demarcation
Execellent work so far mate! :th: :th: :clap: :clap:

Re: Attila's 1:35 Tiger I from Academy

Posted: Tue Oct 03, 2017 6:31 pm
by jnbattleship
Very convincing work on the mechanicals and interior. I like every bit of it.

Re: Attila's 1:35 Tiger I from Academy

Posted: Tue Oct 03, 2017 8:09 pm
by pourquoi61
Very nice. :th: :th:

Re: Attila's 1:35 Tiger I from Academy

Posted: Thu Oct 05, 2017 11:59 am
by gaz45
That is some stunning work there mate :jd:

Re: Attila's 1:35 Tiger I from Academy

Posted: Mon Oct 09, 2017 12:17 am
by papatika
Tomcat64 wrote: Sat Sep 30, 2017 9:55 pm More nice work getting this into shape mate - the extra detail on the radio is really eye-catching :clap:
demarcation wrote: Sun Oct 01, 2017 12:40 pm Execellent work so far mate! :th: :th: :clap: :clap:
jnbattleship wrote: Tue Oct 03, 2017 6:31 pm Very convincing work on the mechanicals and interior. I like every bit of it.
pourquoi61 wrote: Tue Oct 03, 2017 8:09 pm Very nice. :th: :th:
gaz45 wrote: Thu Oct 05, 2017 11:59 am That is some stunning work there mate :jd:
Thank you very much, guys, really appreciate it! :thumb2:

I continued to work in smaller sub-assemblies.
One of them was something what I really missed from the original kit, and even from the PE sets: the storage boxes below the turret. I found some really useful information on Tiger info, like some exact measurements. After some calculations I could easily build something very similar. Not 100% exact, but fits my needs. I used 0.5mm styrene sheets, and sanded them a bit even more thinner.
Image

Test fit
Image

I also started an other important part: the turret's floor. Painted with XF-63 German Grey, drybrushed with Steel, applied pigments and washes.
I also painted the ammo boxes.
Image

Floor from and other angle:
Image

Storage boxes in place:
Image

Another smaller piece I worked on is the driver's instrument panel. Ultimate Black primer was used as black varnish, drybrushed with XF-63 German Grey to pop out the details, and XF-66 Light Grey to highlight the upper edges. I also glued some wires to the back of the panel.
Image

And here it is in it's place:
Image

From the other side:
Image

Also made some upgrades on the seats. As far I know the seats in the Tiger were pretty comfortable. And the ones in the kit look everything but comfortable (you can see the scale calculations for the ammo boxes in the background :-) ):
Image

First I sanded them down a bit
Image

and made new cushions using green stuff. Since I had some leftover after the seats of hull, I repeated the process and upgraded the seats in the turret, too.
Image

To achieve a worn look I painted the cushions with AK's Dark Track, and then drybrushed with MIG's Rotbraun. Finally I added some Cremeweiß to the Rotbraun to have a lighter tone, and drybrused the edges only.
Image

Here are the seats and the instrument panel in the hull:
Image

I also painted a few details here and there. like the handles and knobs on the firewall, dirt and damaged paint on the ammorracks
Image

and on the front
Image

Although the lower section is not complete yet, I could not resist to start building the turret.
First challenge was the gun: :doh:
Image

It wasn't that bad at the end. Most of the gun is now assembled:
Image

Also the two halves of the turret have been glued together and the seems have been filled with putty.
Image

Turret dryfit:
Image

And the Tiger is starting to look like a Tiger... :dance:
Image

I have to go to bed now, it's almost 1:30 :)

Thank you everybody for reading my status report, asking questions, leaving comments, or just dropping in and stopping by for a few moments!

Cheers,
Attila

Re: Attila's 1:35 Tiger I from Academy

Posted: Mon Oct 09, 2017 9:00 am
by Tomcat64
This thread is an education every time I stop by - the interior detail is simply eye-popping mate :bow::

As for the banana-shaped gun barrel I don't know why they never caught on :D

Awesome work.

Re: Attila's 1:35 Tiger I from Academy

Posted: Mon Oct 09, 2017 4:50 pm
by jnbattleship
I think, if there was a tiger tank dealership somewhere, they would have to sell yours as a 'All-terrain leisure vehicle, limited edition'. The cushion seats would sell it by themselves! The idea is simple but You have added a whole new dimension to the model. Thank you for sharing the work-thread since I will try to pick up some ideas (shameless as I am :))

Re: Attila's 1:35 Tiger I from Academy

Posted: Mon Oct 09, 2017 5:59 pm
by Quax
Attila I hope you've worked out a way that that interior is going to be visible otherwise I think I'm going to cry on your behalf! Simply spectacular :bow:: :bow::
Paul

Re: Attila's 1:35 Tiger I from Academy

Posted: Mon Oct 09, 2017 7:30 pm
by papatika
Tomcat64 wrote: Mon Oct 09, 2017 9:00 am This thread is an education every time I stop by - the interior detail is simply eye-popping mate :bow::

As for the banana-shaped gun barrel I don't know why they never caught on :D

Awesome work.
Thanx Neil!
Banana-shaped barrel is the best, can fight even around corners without exposing the hull... :)
jnbattleship wrote: Mon Oct 09, 2017 4:50 pm I think, if there was a tiger tank dealership somewhere, they would have to sell yours as a 'All-terrain leisure vehicle, limited edition'. The cushion seats would sell it by themselves! The idea is simple but You have added a whole new dimension to the model. Thank you for sharing the work-thread since I will try to pick up some ideas (shameless as I am :))
Hehe, good idea. Next will be an AT-AT with lift and view point, and a bar... :D
:welcome:
This forum is about telling how you did it so others can use it for their advance in shape of proof of concept, inspiration, tutorial, research material. I also use a lot of resources, in this particular case ENCYCLOPEDIA OF ARMOUR MODELLING TECHNIQUES VOL. 2 – INTERIORS & BASE COLOR and the "Inside the Tanks: The Tiger I" part IV and V on Youtube. So no reason for shame.
By the way, thank you for your kind words! :)
Quax wrote: Mon Oct 09, 2017 5:59 pm Attila I hope you've worked out a way that that interior is going to be visible otherwise I think I'm going to cry on your behalf! Simply spectacular :bow:: :bow::
Paul
Thanx Paul!
At the end I will be able to disassemble it. The upper plate, the front plate, the turret and the turret roof will be snap-fit only (lot of fine sanding... :) ) I still don't know how to place the crew to be interesting, vivid and not to block the view or the disassembling. Maybe something like this:
Image
But in this case they would hide too much details (like the cushions :) ). I'm not afraid of heavily modifying the figures reposing them, though I haven't done such surgery yet.
I have this in my stash:
Image
And also this one, but is is already glued and painted years and years ago:
Image
Tamiya has a brand new set, too:
Image

Any suggestions are highly appreciated! :D

Cheers,
Attila

Re: Attila's 1:35 Tiger I from Academy

Posted: Mon Oct 16, 2017 8:41 am
by papatika
Hi all!

I had a pretty ... hmmm ... interesting (?) week.

I was working on the turret. Or the turret was working on me, I don't know.
First I added the PE parts according to Eduard's instructions.
Image

Primed with allmighty Ultimate Black, painted with Cremweiß
Image

Small parts painted
Image
Image
Image

Milestone: Turret meets the floor (dryfit only) :clap:
Image

But when I added the turret traversing ... umm ... thing, I got disappointed, again. Something is wrong: the pipe is too long, or the frame is too short... :wall:
Image

I checked with a leveler. With the turret traversing ... thing:
Image

And without the turret traversing thing (let's call it Dave):
Image

So, Dave seems to be the guilty. Next problem it that the driver's seat is attached the Dave, so if I just make it shorter, the seat will be lower, and maybe it will interfere with the motor underneath.
Image

So I cut it at the base of the pipe.
Image

Yey! With that done we are back on track of joy! :dance:

The instructions are a bit confusing here. The upper part shows how to place the accessories of the left part (left if you view it from the front). Note the alignment of the storage boxes at the right, they are underneath each other, forming a column. The lower part shows how to place the accessories on the rear of the turret. On this figure the boxes have a totally different layout. And this one is the correct one!
Man! This is the same instruction, the same page, the same side of the page, further more they are next to each other! :bash:
Image

Ok, keep calm, everything will be just fine! Now that I know that the upper figure is bullshit, I can do it correctly.
So, here is my back, with the MG storage rails glued according to Eduard's instructions.
Image

The center line is still visible. What do you think, do I have any chance to use the correct layout? :shock: Et to, Eduard?

Storage rail removed, let's play puzzle! :shifty: Items I have: 6 storage boxes, a rail, and an electric box. 3 of the storage boxes, the rail and the electric box have to be placed somehow between the escape hatch and the center line. This is the best I could achieve:
Image

I'm pretty sure that the electric box is far too much oversized, but currently I don't feel the energy to correct it. I think I'll just drill some holes, put some wires in, paint it, and kiss goodbye. :whistle:

Anyways, one step closer to the final result. I'm curious what kind of other surprises this kit has. :think:

As always thank you everybody for reading my status report, asking questions, leaving comments, or just dropping in and stopping by for a few moments!


Cheers,
Attila

Re: Attila's 1:35 Tiger I from Academy

Posted: Mon Oct 16, 2017 2:59 pm
by Tomcat64
Man, I can't believe it's still fighting you back!

Turret interior looks good to me mate - I think you should be good to go with how you've finished it off.

Re: Attila's 1:35 Tiger I from Academy

Posted: Mon Oct 16, 2017 9:50 pm
by TheNordus
I shouldn't look at these superb build threads, they make me sad that I'll never do as well with my kits.

Great work though, keep it up!

Re: Attila's 1:35 Tiger I from Academy

Posted: Tue Oct 17, 2017 8:15 am
by Kevthemodeller
Some amazing work going on here mate :th:

Re: Attila's 1:35 Tiger I from Academy

Posted: Tue Oct 17, 2017 7:22 pm
by papatika
Tomcat64 wrote: Mon Oct 16, 2017 2:59 pm Man, I can't believe it's still fighting you back!

Turret interior looks good to me mate - I think you should be good to go with how you've finished it off.
Thanks Neil! Yeah, we're building a strong relationship... :lol: I already see my next problem: loader's seat... :?
TheNordus wrote: Mon Oct 16, 2017 9:50 pm I shouldn't look at these superb build threads, they make me sad that I'll never do as well with my kits.

Great work though, keep it up!
Thank you! I think your builds are great! Your Tiger for example looks absolutely OK for me!
Kevthemodeller wrote: Tue Oct 17, 2017 8:15 am Some amazing work going on here mate :th:
Thx Kev! :)

Re: Attila's 1:35 Tiger I from Academy

Posted: Wed Oct 18, 2017 8:27 pm
by SergioSolo
Truly inspiring thread! :clap:

Re: Attila's 1:35 Tiger I from Academy

Posted: Wed Oct 18, 2017 8:48 pm
by Quax
Continuous work of an amazing high standard :clap: :bow::

Re: Attila's 1:35 Tiger I from Academy

Posted: Wed Oct 18, 2017 9:48 pm
by TommyKillander
Fantastic work done with the interior, Attila! :thumb2:

I'm looking forward to the rest. Keep up the good work!

:cheers2:
Tommy

Re: Attila's 1:35 Tiger I from Academy

Posted: Thu Oct 19, 2017 3:02 pm
by papatika
SergioSolo wrote: Wed Oct 18, 2017 8:27 pm Truly inspiring thread! :clap:
Quax wrote: Wed Oct 18, 2017 8:48 pm Continuous work of an amazing high standard :clap: :bow::
TommyKillander wrote: Wed Oct 18, 2017 9:48 pm Fantastic work done with the interior, Attila! :thumb2:

I'm looking forward to the rest. Keep up the good work!

:cheers2:
Tommy
Thank you all, I really appreciate it! :cheers2:

Re: Attila's 1:35 Tiger I from Academy

Posted: Fri Oct 20, 2017 11:05 am
by gaz45
Some very nice work there mate

Re: Attila's 1:35 Tiger I from Academy

Posted: Tue Oct 24, 2017 7:53 am
by papatika
gaz45 wrote: Fri Oct 20, 2017 11:05 am Some very nice work there mate
Thank you, Gaz!
:cheers2:


I spent the last few days by upgrading the turret. First I pimped up the electric box by adding some wires.
Image

I haven't found really good pictures about these wires, so I just put them together, and shaped the end to be thinner and thinner, so it blends into the roof at the end.
Image
Image

I also painted a few more smaller pieces.
Image
Image
Image

Electric box and the manual fire trigger in place
Image

Chipped a bit, added a pin wash, dirt with oils, and a tiny bit of streaking
Image
Image
Image

Here is the other side
Image

Weathered the gun's joint section although it won't be visible too much.
Image
Image

For the periscopes I don't want to have a too bright glass because they have so thin opening on the outside. I made a quick test how the transparent green would look like on light gray, even lighter gray, white and steel background. Light gray was chosen.
Image

To give a bit of luster I painted a thin like with white oil in the middle and blended. With the transparent green overcoat it is pretty close what I wanted to achieve.
Image
Image

Now I could sand down the locator pins (because they just didn't fit), and glue the vision ports to the sides with other bits and pieces together.
Image
Image
Image

Do you remember the picture about the loader's seat? No? Here it is again:
Image

Anything strange? Yep, the loader should sit in the opposite direction... :doh: Luckily only the backrest had to be flipped over. The location of the seat itself is ok.

And finally, I could glue the turret floor to the turret.
Here are some - a bit overexposed :shifty: - pictures:
Image
Image
Image
Image
Image

Currently I'm working on the turret roof ...
Image

... and the gun.
Image

I'm almost ready with the interior! :banana:
Man it feels like building 3 kits, and all at once... :lol:

As always thank you everybody for reading my status report, asking questions, leaving comments, or just dropping in and stopping by for a few moments!

Cheers,
Attila
:hi:

Re: Attila's 1:35 Tiger I from Academy

Posted: Tue Oct 24, 2017 8:18 am
by Kevthemodeller
Some excellent work going on here mate. top stuff :th:

I'm going to watch this build with great interest.

Re: Attila's 1:35 Tiger I from Academy

Posted: Tue Oct 24, 2017 9:11 am
by ElCapitan
Absolutely stunning, good job :clap: :clap: :clap:

Re: Attila's 1:35 Tiger I from Academy

Posted: Tue Oct 24, 2017 10:37 am
by TommyKillander
Interior looks fantastic :thumb2: :clap:

:pop:
Tommy