Page 1 of 2

FINAL REVEAL Commemoration in memory of my Father-In-Law

Posted: Sat Aug 16, 2014 6:29 pm
by UKguyInUSA
Hello Guys,

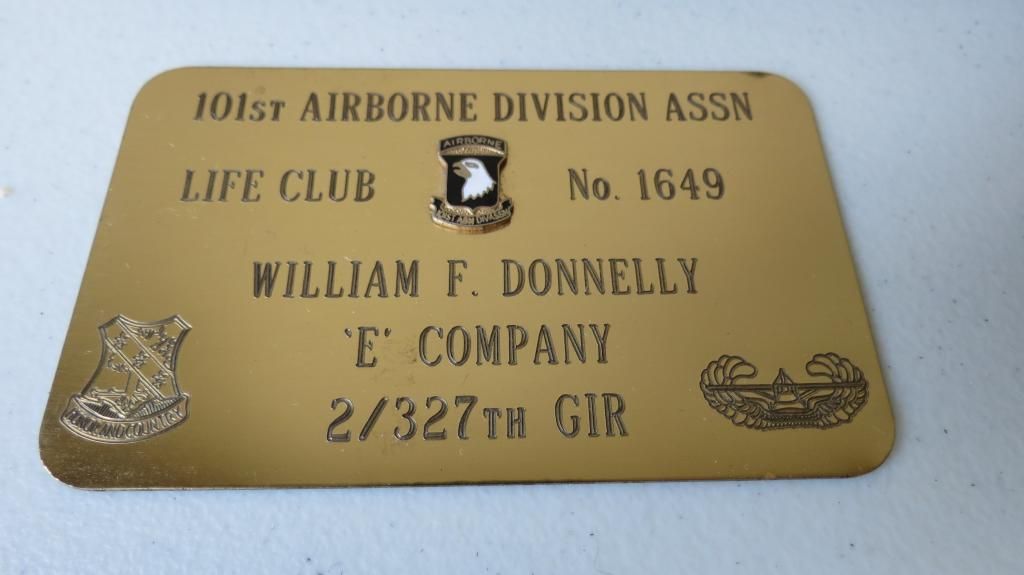
This is the start of a new build thread that I will be entering into the D-Day 70th Anniversary GB that will be in 3 parts, but more importantly to my wife and her family and friends, a tribute / commemorative build to their father who served with the 101st Airborne Paratroopers 2/327th Regiment GIR, "E" Company during WWII.

The three parts will be broken down as follows;

Part 1

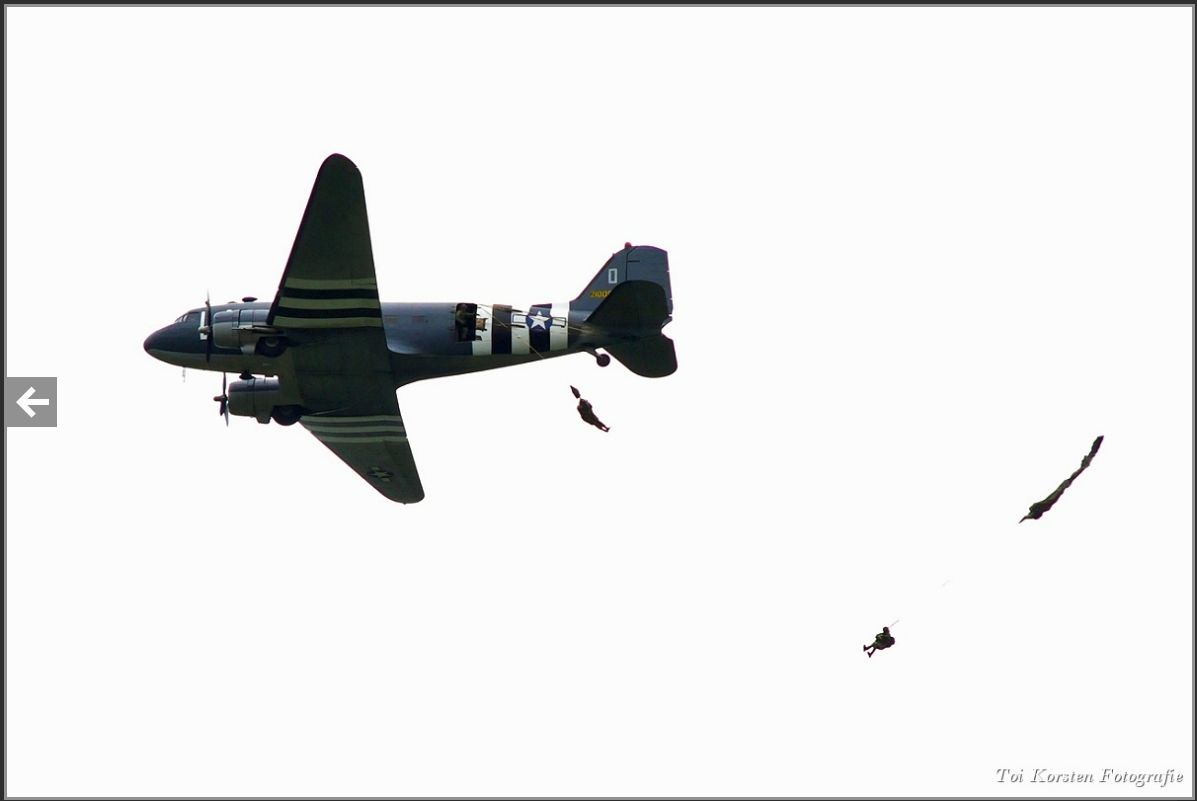
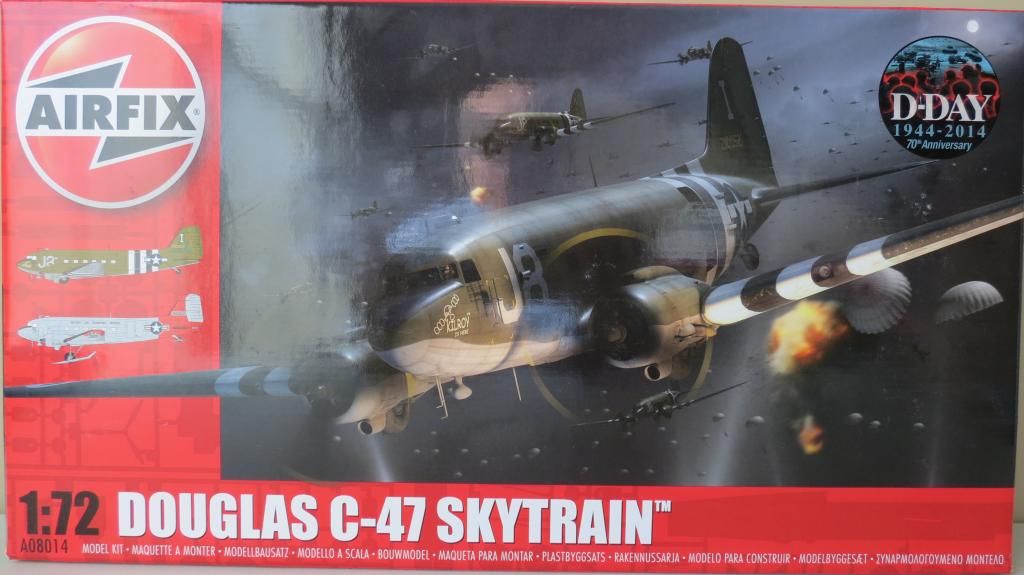
This will be a build of the Airfix 1/72 scale Douglas C-47 Skytrain that was used to drop his company into France during the D-Day Landings.


Image


Part 2

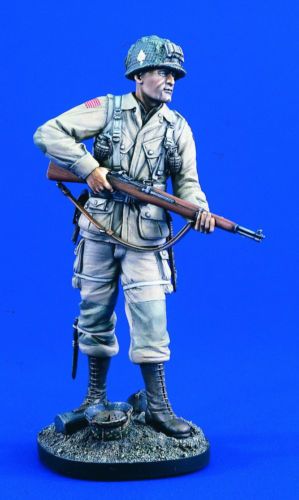
This will be the build of a Verlinden 120mm high 101st Airborne Paratrooper "Easy Company" figurine as a representation of how he might have been dressed during his service in Europe. Although the legendary "E" or "Easy Company" were the 2/506th Regiment, there are no figurines to represent his company available.
This will also be my first time at attempting a figurine :eeek:


Image


Part 3

This will be a historical presentation of my Father-In-Law William Francis Donnelly who passed away on October 9th 2009 aged 85 years old. This will include photos and paperwork associated to his war service, German weapons, articles of clothing, buttons, badges and dog tags. A lot of what he brought back to the USA from Germany was taken by his only son who passed away in 1989, and the whereabouts of those items is unknown. This included a SS officers Helmet, uniform, boots, dagger and sidearm, but, those aside, I still think that the items the family has would still be of particular interest to those that have an affinity with WWII.


Image


I hope that you guys find this to be an interesting thread and enjoy what I have to share in photos during the third and final part....as well as enjoy my builds in parts 1 and 2 :tongue:

I'll be posting the start of part 1 very shortly after posting this introduction, with a "In-Box-Review" of the Douglas C-47 Skytrain.

Cheers :cheers2:

Martin

Re: Commemorative Build in memory of my Father-In-Law

Posted: Sat Aug 16, 2014 6:44 pm
by 1001kjk
I shall follow this with interest having read the story of E company we owe so much to those guys( and every one who served in the war) it's unbelievable

Re: Commemorative Build in memory of my Father-In-Law

Posted: Sat Aug 16, 2014 6:50 pm
by UKguyInUSA
1001kjk wrote:I shall follow this with interest having read the story of E company we owe so much to those guys( and every one who served in the war) it's unbelievable
Cheers mate, appreciate your interest :)

Re: Commemorative Build in memory of my Father-In-Law

Posted: Sat Aug 16, 2014 7:03 pm
by Art17847
Will be following closely.......what great idea with a very personel touch....

Re: Commemorative Build in memory of my Father-In-Law

Posted: Sat Aug 16, 2014 7:19 pm
by UKguyInUSA
Art17847 wrote:Will be following closely.......what great idea with a very personel touch....
Thanks Art, I appreciate your interest :)

Cheers :cheers2:
Martin

Re: Commemorative Build in memory of my Father-In-Law

Posted: Sat Aug 16, 2014 8:36 pm
by Paips
Im looking forward to this Martin , nice that your doing the figure in memory of a family hero. :thumb2:

Re: Commemorative Build in memory of my Father-In-Law

Posted: Sat Aug 16, 2014 8:40 pm
by UKguyInUSA
Part 1- Airfix 1/72nd Scale "Douglas C-47 Skytrain"

Described by General Eisenhower as one of the four weapons that helped the allies to win the Second World War, the Douglas DC3 and its military variant the C-47 Skytrain (called Dakota in RAF service) has since gone on to be an instantly recognizable symbol of both air travel and the liberation of occupied lands that so characterized the Second World War.
Developed from the purely civilian Douglas DC2, the DC3 first flew in 1935 with the military C47 following suit in late 1941, shortly after the Japanese attack on Pearl Harbor. When it entered airline service in the late 1930's, the DC3 revolutionized air transport, enabling journey times across the United States to be drastically reduced. Today, even approaching 80 years after its first flight, hundreds of DC3s and C47s remain in service throughout the world, its reliability and ability to deliver payload and passengers ensuring its longevity.
But it was as the C47 that the design truly found its calling. Instrumental in the invasion of France in 1944, the C47 dropped not only thousands of troops throughout the war but also delivered hundreds of thousands of tons of supplies, much needed by both troops and besieged civilian populations. Serving in the west with both the RAF and the USAAF as well as license built examples serving in Russia with the Soviets, the C47 was even to be found in the Far East, undertaking perilous supply missions to china, flying over "the hump" of the Himalayas. It was even used to deliver vehicles such as jeeps to forward bases. After the war ended the C47 continued to serve as a supply aircraft throughout the Berlin airlift as well as undertaking dangerous roles in the Artic Circle, equipped with Ski undercarriages. C47s even saw service during the Vietnam War as a gunship, nicknamed "Puff the Magic Dragon". C47s continue in service with some air arms even today, with many being up-engined to Turbo-prop power plants.

Length: 63 ft 9 in (19.43 m)
Wingspan: 95 ft 6 in (29.41 m)
Maximum Speed: 224 mph (360 kph) at 10,000 ft (3050 m)
Range: 1,600 miles (2,575 km)


In-Box-Review:

Box art:

The box art depicts paratroopers jumping from C47s into France during the Normandy Invasion.

Image


Within the box there is a large bag containing 5 grey sprues of the newer softer type plastic that Airfix have now adopted for their new tool products. Within the large bag is a smaller sealed bag containing the clear sprue.


Image


There is a 16 sided black and white instruction booklet which has a history of the aircraft on the first page in three languages- English, French and German followed by Spanish and Swedish on page two. Page two also includes Assembly Instructions in 12 languages along with the assembly icon instructions/definitions.
Pages 3 through 12 are the assembly instructions that total 67 separate parts.
Pages 13 and 14 are the color paint guides.
Page 15 is the decal positioning guide.
Page 16, the back page is blank.

There is a sheet of decals and a Airfix Club Flyer.

Image


Image


Image


Image


Image


Image


Image


Image


Sprue "A":


Image


Sprue "B":


Image


Sprue "C":


Image


Sprue "D":


Image


Sprue "E":


Image


Clear Sprue "F":


Image


Close up images of parts on the sprues to show some of the details and the quality of the molded parts:


Image


Image


Image


Image


There were 4 loose pieces within the bag:


Image


The decals are nice and thin with a matte/satin finish and very little carrier film except for the larger continuous text that is part of one decal and thus one large piece of carrier film. A decal for the instrument panel is included and the decals offer two versions of aircraft;

1) Douglas C-47 A-65-DL Skytrain # 41-2100521 "Kilroy is Here", 92nd Troop Carrier Squadron / 439th Troop Carrier Group, Operation "Overlord", Upottery, Devon, England 6th June 1944

2) Douglas C-47 Skytrain # 43-16062 Military Air Transport Service (MATS), Isachsen Airstrip, North West Territory, Canada, 9th October 1949 (strange...the same date my Father-in-Law passed away 60 years later in 2009?)


Image


Overall, the parts look clean, crisp, nice quality with no ejector pin stress marks on visual surfaces, no warp and no flash. The recessed panel lines are about twice the size that you see on Tamiya planes, but, I'm hoping that when primer, paint and weathering is applied, it's not as noticeable.
I shall report on the quality of the fits and decals during the build and anything else that I feel might have been improved by Airfix to provide a better quality kit.

The build began on Thursday evening, so later today I will be publishing my first Build Update Report #1.

Here is a link to my Youtube "In-Box-Review" of this model;

[youtube]7IKV3Y4eTf0[/youtube]


In the meantime, thanks for reading this thread and commenting and I hope you'll enjoy it as much as I'll be enjoying doing this project.

Cheers :cheers2:

Martin :)

Re: Commemorative Build in memory of my Father-In-Law

Posted: Sat Aug 16, 2014 8:47 pm
by UKguyInUSA
Paips wrote:Im looking forward to this Martin , nice that your doing the figure in memory of a family hero. :thumb2:
Hello John, thanks for looking in :) I'm happy that you'll be following this thread. Although we have our family heroes, they were such humble men that didn't speak about those events...I guess, obviously, because of the horrors that they would have witnessed around them and what they had to do during conflict.

Cheers :cheers2:
Martin

Re: Commemorative Build in memory of my Father-In-Law

Posted: Sat Aug 16, 2014 9:37 pm
by Art17847
great review...looks like a real nice kit.....luv those planes got see one up close at a fly in years ago....

Re: Commemorative Build in memory of my Father-In-Law

Posted: Sat Aug 16, 2014 9:47 pm
by felisbarcinonensis
Just discovered your topic! Wow!! THE 101st AIRBORNE!!!! :o :o :o :o :shock: :shock: :shock: I'm going to follow this thread! I love the story, The way you are going to present it with gatgets from your father-in-law and the wonderful kit you've chosen!!!

Re: Commemorative Build in memory of my Father-In-Law

Posted: Sat Aug 16, 2014 10:43 pm
by UKguyInUSA
Art17847 wrote:great review...looks like a real nice kit.....luv those planes got see one up close at a fly in years ago....
Thanks Art! his is one plane that I've never gotten to see up close and personal, yet? :(

Hopefully soon, in the near future?

Cheers :)

Re: Commemorative Build in memory of my Father-In-Law

Posted: Sun Aug 17, 2014 12:36 am
by Willem
Looks like a fab build in the offing. Looking forward to following your progress Martin.

:cheers2:

Re: Commemorative Build in memory of my Father-In-Law Update

Posted: Sun Aug 17, 2014 4:14 am
by UKguyInUSA
Part 1- Airfix 1/72nd Scale Douglas C-47 Skyraider Build Update Report #1

Hello guys,

I made a start on this build Thursday evening at 8.00pm and didn't realize how much time had passed, because when I looked at the clock it was just past 2.00am Friday morning. :eeek: I've just gotten around to creating the video with still images, hence I'm just getting to post this now.

Before any painting was done, I washed the parts in warm soapy water on Thursday night:


Image


Image


I allowed the parts to dry overnight and then I air-brushed a base coat of Tamiya XF-1 Flat Black thinned down with 40% Tamiya X-20A thinners onto all of the internal parts, along with the tires and propellers;


Image


Image


Image


Image


Image


After the black was dry, I then air-brushed a coat of Model Masters Interior Green # 4736 thinned with 30% Tamiya X-20A thinners;


Image


Image


The seats were assembled into the fuselage halves prior to air-brushing the Interior Green;


Image


Image


Image


The Internal flooring was air-brushed with Tamiya XF-82 Ocean Grey and when that was dry the cockpit and internal walls were fitted onto the flooring:


Image


Image


Image


Image


Image


I will now give this a coat of Model Masters Gloss Clear Coat #4638, let it dry, then apply some weathering to the internal flooring, walls and doors; a brown/black wash, muddy stains to the flooring, bases of the seating and doors and chipping to the flooring, seats, doors and walls. After that has been done, I will assemble the interior into the starboard side of the fuselage, then seal the two fuselage halves together followed by assembling the wings, front and back, horizontal stabilizer flaps and rudder and then show this in Build Update Report #2.

Thanks for following this thread, please leave comments including constructive criticism. If you'd like to see my Build Update Report #1 video, here is the link to that on my YouTube account:

[youtube]mXLP5zmj3rI[/youtube]

Thanks for taking time out to watch :)

Cheers :cheers2:

Martin

Re: Commemorative Build in memory of my Father-In-Law Update

Posted: Sun Aug 17, 2014 9:34 pm
by rodrant
Martin , a Thread to follow that's for sure , intresting subject and quite a build here !

A great homenage to your father and law !

and the skytrain is going nicely , seems a very nice kit from Airfix !

Re: Commemorative Build in memory of my Father-In-Law Update

Posted: Sun Aug 17, 2014 9:43 pm
by felisbarcinonensis
Awesome kit! Can't forget the impressive sky-train pre-jump scenes in Band of Brothers

Re: Commemorative Build in memory of my Father-In-Law

Posted: Tue Aug 19, 2014 12:50 am
by UKguyInUSA
felisbarcinonensis wrote:Just discovered your topic! Wow!! THE 101st AIRBORNE!!!! :o :o :o :o :shock: :shock: :shock: I'm going to follow this thread! I love the story, The way you are going to present it with gatgets from your father-in-law and the wonderful kit you've chosen!!!
Hello Felis, glad this topic interests you and I'm happy you'll be following this thread! :)

Cheers, mate! :cheers2:

Re: Commemorative Build in memory of my Father-In-Law

Posted: Tue Aug 19, 2014 12:51 am
by UKguyInUSA
Willem wrote:Looks like a fab build in the offing. Looking forward to following your progress Martin.

:cheers2:
Thanks for the support Will, appreciate it mate :)

Cheers :cheers2:

Re: Commemorative Build in memory of my Father-In-Law Update

Posted: Tue Aug 19, 2014 12:52 am
by UKguyInUSA
rodrant wrote:Martin , a Thread to follow that's for sure , intresting subject and quite a build here !

A great homenage to your father and law !

and the skytrain is going nicely , seems a very nice kit from Airfix !
Hello Antonio, I'm happy you like the idea and will be following this thread! :)

Cheers, mate! :cheers2:

Re: Commemorative Build in memory of my Father-In-Law Update

Posted: Tue Aug 19, 2014 1:28 am
by UKguyInUSA
Part 1- Airfix 1/72nd Scale Douglas C-47 Skyraider Build Update Report #2

Hello Guys, I got quite a bit more done over the weekend, the wife was out all day Saturday with her youngest daughter helping her choose a wedding dress and having a Mother Daughter fun day, so, I was left alone to "sulk" at the bench! :banana:

This Build Update Report # 2 is in two stages because I got a lot done, so here is part one of Build Update Report #2;

Part 1

First a Model Master Gloss Clear Coat was air-brushed onto the interior parts and left to dry, prior to weathering...


Image


A dirty wash was applied all over the interior surfaces then wiped off with a moist cotton bud/Q-Tip. I then applied a mud stain effect on the flooring, the bottom edges of the seats, assuming Paratroopers entering the plane from a muddy airfield would have their boots kicking up against them. I also applied some silver paint chipping to the walls, seats and flooring too....


Image


Image


Image


Image


Image


The rear internal door was painted and the Instrument Panel Decal was placed into position....


Image


Image


Image


Image

When the above was complete, I then sealed everything by air-brushing a coat of Model Masters Flat/Matte Clear Coat...


Image

So, that's part one of what I got achieved over the weekend, part two of my Build Update Report #2 will follow shortly.

Thanks for following this thread, leaving comments and your continued support! :)

Cheers :cheers2:

Martin

Re: Commemorative Build in memory of my Father-In-Law Update

Posted: Tue Aug 19, 2014 4:37 am
by UKguyInUSA
felisbarcinonensis wrote:Awesome kit! Can't forget the impressive sky-train pre-jump scenes in Band of Brothers
Yep...great movie, along with Saving Private Ryan!

Cheers :cheers2:
Martin

Re: Commemorative Build in memory of my Father-In-Law Update

Posted: Tue Aug 19, 2014 5:52 am
by HistoryRider
UKguyInUSA wrote:
felisbarcinonensis wrote:Awesome kit! Can't forget the impressive sky-train pre-jump scenes in Band of Brothers
Yep...great movie, along with Saving Private Ryan!

Cheers :cheers2:
Martin
One cannot forget these two films! The Longest Day and A Bridge Too Far!! :th:

:cheers2:
-Nolan

Re: Commemorative Build in memory of my Father-In-Law Update

Posted: Tue Aug 19, 2014 6:37 am
by Nige201980
What a cracking idea mate. Looks a great kit from Airfix and your doing a great job on it best of luck with the rest of the builds mate.

Re: Commemorative Build in memory of my Father-In-Law Update

Posted: Tue Aug 19, 2014 5:12 pm
by UKguyInUSA
Part 1- Airfix 1/72nd Scale Douglas C-47 Skyraider Build Update Report #2

Stage 2 of Build Update #2

Hello Guys, so I'm back to show you what I got done during stage 2 of my Build Update Report #2;

First, the interior assembly was glued into the starboard side fuselage half and clamped until set;


Image


The back to back radial engines were glued together then mounted onto the gear boxes and the wheels were painted;


Image


Next, the propeller spindles and bearing covers were mounted to the front of the engines and then the engines were given a oily wash;


Image


The propellers were painted and weathered, the wheels were given a muddy look and then the Engine Cowling covers were placed around the radial engines....


Image


I then weathered the two portside rear fuselage doors, by giving them some paint chipping and mud staining around the bottom edges. I assumed that with heavy traffic from Paratroopers carrying lots of equipment, kit bags, rifles, crates of ammo and wearing dirty boots from a muddy airfield, the internal walls and floors would show some evidence of this...


Image


The main undercarriage wheel struts and rear wheel axle struts were then painted...


Image


Image


These were followed by painting the exhausts and the engine oil tanks...


Image

By this time, the interior assembly had set into the starboard fuselage, so the clamp was removed and a quick check to see how it all looked....


Image


Image


Image


It was now time to assemble all the parts together....


Image


First, the two fuselage halves were glued and taped together until the glue set. They seem to fit well together....


Image


I then glued the central underside section to the bottom of the plane....


Image


Followed by the port-side wing root filler section. This profiled section required a little patience and I found that when dry fitting it, it stood proud of the surface of the plane. Therefore, I carefully filed around the joining surfaces a bit at a time and re-checked the fit each time, until it sat flush. I then glued it in place....


Image


The same patience and fitting was required with the starboard side wing root fillet section....


Image


Next, it was time to fit the Engine Oil Tanks into the Engine Nacelles of the Upper Wing halves....


Image


Then the Starboard Side Upper Wing half was glued into place....


Image


This was followed by the Port-Side Upper Wing half....


Image


The internal wing braces/struts have the wing leading edge navigation light features on them and they are set back a little from the leading edge. Therefore, I recommend that you paint them silver before assembling the two wing halves together...


Image


It was now time to assemble the Lower Wing halves onto the Upper Wings to complete the main wing assemblies. But, when dry fitting the Port-Side Lower Wing half, the wing wouldn't close down all the way and a gap was present....


Image


This was due to a combination of the internal wing brace and the thickness of the lower wing section. When those surfaces meet they prevent the wings closing flush. Therefore, I filed down the top surface of the internal wing braces/struts and tried dry-fitting the lower wings again...

Image


And, it worked a treat, the wings closed up nice and flush and so the lower halves were glued into place, first the Starboard Side....


Image


Followed by the Port Side and both wings were "Pegged" to keep the trailing edges together until they set....


Image


It was now time to add the Horizontal Stabilizers, Flaps and Rudder. First the Horizontal Stabilizers were glued into place....


Image


Followed by the Flaps which I positioned in a downward style...


Image


I then fitted the Rudder in place....


Image


With all the wings in place, it was time to fit the Engines. I started with the Starboard side Engine...


Image


Quickly followed by the Port-Side Engine....


Image


Image


I then added the Air-Intakes on top of the Engine Cowlings and she was all done ready to move on to the next stage....


Image


This was my first time using Tamiya Thin cement and although it has an overpowering odor (I had every window open in the home), it is an excellent product for gluing with and it sets really quickly. You can then brush it over seams to provide extra bonding and filling!

So, this stage highlighted a few issues with this model;

a) The Wing Root Fillet Sections need some careful attention, filing down a bit at a time, the rear faces until they sit flush into their locations.

b) When fitting the Lower Wing Section to the Upper Wing Section, they don't close up and a substantial gap is left. Make sure you always dry fit before attempting to glue parts in place. These wing assemblies need some careful attention too as described above to get them to close up flush before gluing.

c) Paint the silver Navigation Lights onto the internal Wing Braces/Struts prior to closing the wing assemblies. They are set back and might be a little difficult to paint without getting silver paint onto the surfaces of the surrounding areas.


So far, I've really enjoyed this build, and it's going together reasonably well. My next stage for Build Update Report #3 will be to glue in place all the fuselage side windows, the cockpit canopy and the overhead "Bulb" canopy. Temporarily fit the doors into location using White-tack, because I'm going to have the doors open on the completed model, and, then mask everything ready for priming followed by pre-shading.

Thanks for watching guys and feel free to leave constructive comments, criticism, ideas etc.

If you'd like to see my Build Update Report #2 Video on YouTube, here is the link:


[youtube]QFy3qxb-LJA[/youtube]


Thanks for you continued support....

Cheers :cheers2:

Martin

Re: Commemorative Build in memory of my Father-In-Law Update

Posted: Tue Aug 19, 2014 5:38 pm
by Art17847
Looks good so far.....your "flying" rite along.....
Nice job fixin that gap it was huge :jd:

Re: Commemorative Build in memory of my Father-In-Law Update

Posted: Tue Aug 19, 2014 7:55 pm
by martin57
HI martin, just caught with this thread .
Just like to say what a great thing you are doing and i know the family will treasure it forever.
NICE progress so far looking good :thumb1:

Re: Commemorative Build in memory of my Father-In-Law Update

Posted: Tue Aug 19, 2014 8:37 pm
by Joesdad
Martin sorry I've overlooked this one. It's brilliant! The Dakota looks like a great kit, all be it with the usual Airfix nonsense. I think you should have some sort of connection with the subject youre building to really 'feel' it, to put that extra effort in.
Lovely stuff Mart...

Re: Commemorative Build in memory of my Father-In-Law Update

Posted: Tue Aug 19, 2014 10:44 pm
by felisbarcinonensis
Looking great! Waiting for the next update :pop: :pop: :pop:

Re: Commemorative Build in memory of my Father-In-Law Update

Posted: Wed Aug 20, 2014 1:11 am
by rodrant
Looking good Martin ! And again what a nice project ! :pop:

:cheers2:

Re: Commemorative Build in memory of my Father-In-Law Update

Posted: Wed Aug 20, 2014 5:57 pm
by UKguyInUSA
Nige201980 wrote:What a cracking idea mate. Looks a great kit from Airfix and your doing a great job on it best of luck with the rest of the builds mate.

Thanks, Nige, appreciate you taking a look and following the build! :)

Cheers :cheers2:

Martin

Re: Commemorative Build in memory of my Father-In-Law Update

Posted: Wed Aug 20, 2014 5:59 pm
by UKguyInUSA
Art17847 wrote:Looks good so far.....your "flying" rite along.....
Nice job fixin that gap it was huge :jd:
That gap appeared at the same location on both sets of wings! It was easy to fix though....just filed down the top of the internal struts.

Thanks for watching :)

Re: Commemorative Build in memory of my Father-In-Law Update

Posted: Wed Aug 20, 2014 8:44 pm
by Paips
Looks great so far Martin :thumb2:

Re: Commemorative Build in memory of my Father-In-Law Update

Posted: Wed Aug 20, 2014 10:13 pm
by UKguyInUSA
martin57 wrote:HI martin, just caught with this thread .
Just like to say what a great thing you are doing and i know the family will treasure it forever.
NICE progress so far looking good :thumb1:
Cheers, Martin and thanks for watching, greatly appreciated mate :)

Re: Commemorative Build in memory of my Father-In-Law Update

Posted: Thu Aug 21, 2014 1:07 am
by UKguyInUSA
felisbarcinonensis wrote:Looking great! Waiting for the next update :pop: :pop: :pop:
Thanks Felis, glad you like her so far! :)

Re: Commemorative Build in memory of my Father-In-Law Update

Posted: Thu Aug 21, 2014 1:08 am
by UKguyInUSA
Joesdad wrote:Martin sorry I've overlooked this one. It's brilliant! The Dakota looks like a great kit, all be it with the usual Airfix nonsense. I think you should have some sort of connection with the subject youre building to really 'feel' it, to put that extra effort in.
Lovely stuff Mart...
Thanks Tim, appreciate your comment and for following this thread :) :thumb1:

Re: Commemorative Build in memory of my Father-In-Law Update

Posted: Thu Aug 21, 2014 1:55 am
by UKguyInUSA
Part 1- Airfix 1/72nd Scale Douglas C-47 Skyraider Build Update Report #3

Hello Guys,

Well since my last update I managed to get some hours in on Tuesday and today (Wednesday) and progressed further with my C-47 Skytrain.

Below is the sequence of stages leading up to where I finished off.....


I fitted all of the fuselage side windows, the cockpit canopy and the upper fuselage dome, then masked them in preparation for air-brushing primer onto the plane...


Image


Image


Fortunately, when measuring the size of the fuselage windows, they were 6mm wide x 4mm high. Therefore, using Tamiya 6mm Tape, I cut off 4mm widths and applied them straight onto the windows and they fit perfectly within the frames. I placed a length of tape onto a steel rule, then using another rule, I measured the 4mm widths and cut pieces off with a scalpel. I then lifted the section of tape with the scalpel tip and applied it to the window...


Image


Image


Image


The Pilots/cockpit door was temporarily located using "White Tack"....


Image


Followed by the two portside fuselage rear doors....


Image


Image


Image


I then masked the engines with damp tissue.....


Image


Followed by masking the wing leading edge navigation lights with "White Tack"....


Image


I then masked the undercarriage wheel bays with damp tissue and placed three cocktail sticks into holes for providing a stand when airbrushing the primer onto the model....


Image


I then air-brushed Model Masters Grey Primer all over the plane....


Image


Image


Image


Now the primer was dry, it was time to pre-shade the panel lines....


Image


I used Tamiya XF-1 Flat Black and XF-24 Dark Grey mixed and thinned down with 40% Tamiya X-20A Thinners....


Image


Because of all the panel lines and how close some were to each other, I hand brushed them....


Image


I left the pre-shading to dry over-night and this morning (Wednesday) I masked the plane in readiness to air-brush the white bands onto the wings and the tail end of the fuselage as the first part of creating the D-Day Stripes...


Image


Image


I then air-brushed Tamiya XF-2 Flat White thinned with 40% X-20 A Tamiya Thinners onto the unmasked areas....


Image


Image


After allowing some drying time, I carefully removed the masking and checked how the white bands looked....


Image


Image


....and I was happy with the results! I liked the amount of pre-shading that was showing through, although these photos don't show that as much as with the naked eye...


Image


Image


So, that's as far as I got and the next step for me is to mask the white bands and air-brush the black stripes. After they are dry, I will mask the upper-side of the model and air-brush the underside grey. When that is dry, I'll mask the underside and air-brush the upper Olive Drab. When that is all done, I'll issue Update #4.

In the meantime, if you'd like to check out my Build Update #3 video on YouTube, here is the link to that video....


[youtube]BR9gEFqmaWA[/youtube]

Thanks for checking in and following this thread and thanks for your comments and continued support!

Cheers :cheers2:

Martin

Re: Commemorative Build in memory of my Father-In-Law Update

Posted: Thu Aug 21, 2014 4:53 pm
by UKguyInUSA
felisbarcinonensis wrote:Looking great! Waiting for the next update :pop: :pop: :pop:
Cheers Felis....hope you liked update #3, she progressed some more :)

Martin :cheers2:

Re: Commemorative Build in memory of my Father-In-Law Update

Posted: Fri Aug 22, 2014 5:27 am
by UKguyInUSA
rodrant wrote:Looking good Martin ! And again what a nice project ! :pop:

:cheers2:
Thanks, Anotonio, I appreciate your support :)

Cheers :cheers2:

Martin

Re: Commemorative Build in memory of my Father-In-Law Update

Posted: Fri Aug 22, 2014 8:44 pm
by UKguyInUSA
Part 1- Airfix 1/72nd Scale Douglas C-47 Skyraider Build Update Report #4

Hello Guys,

I got quite a bit more done in the last couple of days! :banana:

In the last update, I had gotten as far as adding the three white band sections of the "D-Day" stripes, well, since then the following was completed;


I masked the white bands in preparation for airbrushing the black stripes....


Image


Image


I then airbrushed Tamiya XF-1 Flat Black thinned 40% with Tamiya X-20A thinners onto the unmasked areas...


Image


Image


When the paint was touch dry, I removed the masking to check how the black stripes looked....


Image


Image


Image


....and I thought they looked pretty good for my first time doing full D-Day Stripes :) :banana:


Next, it was time to mask in preparation for airbrushing the underside grey....

Image


Image


I then airbrushed Tamiya XF-83 Medium Sea Grey toned down with 15% Tamiya XF-2 Flat White and thinned with 40% Tamiya XF-20A Thinners....


Image


When this was touch dry, I removed the masking to see how it looked...


Image


...and again, I was pleased with the outcome : )


Image


Next, I masked the underside ready to airbrush the Upper Side Olive Drab color....


Image


Image


I airbrushed Tamiya XF-62 Olive Drab, toned down 15% with Tamiya XF-2 Flat White and thinned 40% with Tamiya X-20A Thinners...


Image


I allowed the paint to dry a little then removed all the masking, and again, did a check to see if everything looked okay...


Image


Image


Image


Image


It was now time to add the "De-Icing Boots" to the wing leading edges, front and back, along with the tail. I also added the medium green wavy camo patterns that appear only around the edges of the wings, horizontal stabilizers, tail and rudder, and, painted the black anti-glare panel in front of the cockpit...


Image


Image


I also removed the damp tissue masks from the front sides of the engines, the undercarriage bays and removed the "White Tack" masks from the wing leading edge navigation lights....


Image


Image


Image


Image

So, that's where she ended up at so far! My next stage will be to airbrush a clear coat and decal her, followed by another clear coat before weathering her. When the weathering is completed, I'll add all the external protruding pieces such as the wheels, aerials, antennas and propellers, remove the temporarily fixed doors and glue them into the open position. I'll then give her two coats of Flat/Matte clear coat to finish her, along with removing all the window and canopy masks!


When I came to the end of the painting as shown above, I started to think about decaling, and in doing so, I looked at a lot of photos of C-47's with D-Day stripes and realized that Airfix have screwed up yet again!! :evil: :bash:

Their painting guide shows that the D-Day stripes on the fuselage start with the edge of the first white stripe over the first of the two portside fuselage rear doors, and, this is the way I did the stripes on my model....


Image


As you can see from the above image, the star and bar hang off the furthest side of the D-Day stripes....ie, the Star and Bars are not positioned within the stripes and are partly on the Olive Drab fuselage as well. But, I thought, as I looked at this...."Why didn't they position the Star and Bar within the D-Day stripes?"
When looking at a lot of photos of actual aircraft, I saw that they are within the stripes and that the stripes on actual aircraft are positioned further back toward to the tail end of the plane and that the first door is all Olive Drab?!!! :evil: :bash:

Here are photos of actual aircraft to compare.....fricking Airfix!!! They owe me anew C-47 for free, so I can ignore their paint guide and do it correctly! AAaaarrrrrgggghhhhhh!!!!!!


Image


Image


Image


So far in this build I have come across three points to look out for;

1) The Wing Root Fillet sections stand proud of the surrounding fuselage surface when dry-fitted and have to be filed down on the rear/unseen surfaces carefully to make them fit flush.

2) When fitting the lower Wings halves to the Upper Wing halves, gaps appear because of the wall section thickness of the wings sitting around the internal wing braces. To overcome this, I filed the internal wing braces down to make the wing halves close together and fit.

3) The Airfix painting guide for the fuselage D-Day stripes is incorrect and Airfix need to correct this so as not to piss-off future builders of this model!!

Okay, that's my report done for today. The next report will be the "final reveal" for this part 1 build, but not for the overall 3 part project.

Thanks again for watching, commenting and supporting me through this build. :) :thumb1: :thumb1:

If you'd like to see my "Build Update #4" video on YouTube, here is the link to that;

[youtube]CmQujCI8snM[/youtube]

Happy modeling and have a great weekend!


Cheers :cheers2:

Martin

Re: Commemorative Build in memory of my Father-In-Law Update

Posted: Fri Aug 22, 2014 9:26 pm
by martin57
looking great martin , what a bummer about the stripes will you be having a go at fixing them :cry:

Re: Commemorative Build in memory of my Father-In-Law Update

Posted: Fri Aug 22, 2014 10:05 pm
by Art17847
Thats aweful about the stripes ....unreal that a manufacture cant get the details rite....i know its prolly driven u a bit crazy but all that aside it really looks good the paint looks awesome!!! Keep up the good work

Re: Commemorative Build in memory of my Father-In-Law Update

Posted: Fri Aug 22, 2014 10:27 pm
by Paips
I loved the jump scenes in A Bridge Too Far..this is kinda reminding me of the film, lookin forward to this build for sure well done so far Martin :thumb2:

Re: Commemorative Build in memory of my Father-In-Law Update

Posted: Sat Aug 23, 2014 7:36 am
by felisbarcinonensis
Looks awesome mate!!!

There you have some nice star displacements:

Image

Image

Image

Cheers! :cheers2:

Re: Commemorative Build in memory of my Father-In-Law Update

Posted: Sun Aug 24, 2014 5:04 am
by UKguyInUSA
martin57 wrote:looking great martin , what a bummer about the stripes will you be having a go at fixing them :cry:
Hey Martin, no...I airbrushed a clear coat onto her on Friday morning, then today (Saturday), I spent most of the day putting all the decals on.

Tomorrow (Sunday) morning, I'll give her a clear coat to seal the decals in, then I'll start weathering her on Monday.

I felt that after spending 60 hours getting her to where she was, that I didn't want to end up ruining her trying to attempt a recovery with the stripes. If I hadn't mentioned the mistake by Airfix....would anyone have noticed when I completed my model and did a final reveal?

Cheers :)

Re: Commemorative Build in memory of my Father-In-Law Update

Posted: Sun Aug 24, 2014 5:06 am
by UKguyInUSA
Art17847 wrote:Thats aweful about the stripes ....unreal that a manufacture cant get the details rite....i know its prolly driven u a bit crazy but all that aside it really looks good the paint looks awesome!!! Keep up the good work
It did annoy me for a couple of days, but then I had to let it go to enable me to move forward with her....Airfix can give me one for a free and can always make a new one more correct to the actual craft.

Thanks for checking in and commenting :)

Cheers :cheers2:

Martin

Re: Commemorative Build in memory of my Father-In-Law Update

Posted: Sun Aug 24, 2014 10:16 am
by Joesdad
You're right mate, you can't let it get you down just re-group and go again. And yes we'd probirly never have know if you hadn't mentioned it.
Looking lovely Martin btw.... :thumb1:

Re: Commemorative Build in memory of my Father-In-Law Update

Posted: Sun Aug 24, 2014 9:56 pm
by UKguyInUSA
Paips wrote:I loved the jump scenes in A Bridge Too Far..this is kinda reminding me of the film, lookin forward to this build for sure well done so far Martin :thumb2:

Thanks, John! :)

After reading your comment, I went onto YouTube to remind myself of those scenes and the C-47's in that movie look like a desert/pink shade of brown:

[youtube]yE_CT0n1kqo[/youtube]

Re: Commemorative Build in memory of my Father-In-Law Update

Posted: Mon Aug 25, 2014 2:45 am
by Willem
Just one of those things mate. Tim is dead right.

Your build is coming on in leaps and bounds. It's looking the business now.

A Bridge Too Far is just about my favourite war film. An old teacher of mine (Leicester born and bred but sadly no longer with us) played in the trumpet section on the sound track.

:cheers2:

Re: Commemorative Build in memory of my Father-In-Law Update

Posted: Fri Sep 19, 2014 4:01 am
by UKguyInUSA
Here is the link to my Final Reveal Video on YouTube for Part one of my three part commemorative build in memory of my Father-In-Law who was active during WWII with the 101st Airborne Paratroopers and was dropped into France from a C-47 Skytrain:


[youtube]K5A1x8WIeKs[/youtube]


And here is the link to my Final Reveal ISM thread within the D-Day 70th Anniversary GB: http://intscalemodeller.com/viewtopic.php?f=262&t=8561


Thanks for following this project, watching the videos and for leaving your comments, greatly appreciated! :)

Let's get on with part two of this project!!

Cheers :cheers2:

Martin

Re: Commemorative Build in memory of my Father-In-Law Update

Posted: Fri Sep 19, 2014 4:52 am
by UKguyInUSA
Hello guys,

I finally made a start on part two of this commemoration build in memory of my Father-In-Law who was active during WWII with the 101st Airborne Paratroopers 2/327th GIR "E" company.

Part Two- Verlinden 120mm high 101st Airborne Paratrooper "Easy Company"


When opening the box, all that was inside was one zip-lok bag containing 21 parts attached to their "Resin pools". There wasn't a instruction manual, painting guide or any decals for the uniform badges, which is pretty poor in my opinion considering the cost of this kit- $26.29 from Hobbylinc.com.

http://www.hobbylinc.com/verlinden-120m ... scale-1764


Image


Image


I took the parts out of the bag and checked that everything was there. You can see the large blocks of resin attached to the parts that are called, I believe, resin pools.


Image


First the base, which includes three German items that I guess this Paratrooper is going to take home with him as souvenirs?!


Image


Image


Here are the booted lower leg and feet parts...


Image


Image


A front view of the upper legs...


Image


Rear view of the upper legs...


Image


Front view of the torso and arms...


Image


Rear view of the torso and arms...


Image


A close up view of the left side of the torso showing the pockets/pouches and straps....


Image


Close up views of the head, front and back...


Image


Image


Image


A close up view of the right arm...


Image


and a close up view of the left arm....


Image


A close up view of the left hand...


Image


A close up view of the Rifle showing the right hand attached....


Image


A underside view of the Rifle showing how bowed/warped it is...


Image


The Rifle Strap....


Image


A close up view of his shovel, daggers, hand-grenades, water flask and holstered hand-gun....


Image


Image


Image


Image


Image


After checking that all the part were intact and present, it was then time to make a start, but before I did, consideration for safety when working with Resin is paramount. Time for the latex gloves and a good mask to come out. I then went outside and cut the resin pools from the body parts using a "coping saw", then filed the surfaces smooth. I then washed the parts in detergent and water and used an old toothbrush to scrub them with. I then rinsed them off and laid them out to dry...


Image


When the parts had dried, I then began to glue the figure together, starting with gluing the left hand onto the left arm...


Image


I then glued the torso to the upper legs, followed by gluing the booted lower legs and feet in place...


Image


I then glued the right arm onto the torso....


Image


I used Testors CA Super Glue for gluing the parts together. It doesn't bond instantly, I had to hold the parts together for 5-10 minutes before they began to hold, then position them to allow them to set. It took between 1 - 1 1/2 hours for the glue joints to set?!!


Image


I then glued the left arm and hand onto the torso....


Image


Followed by gluing the barrel onto the front end of the Rifle....


Image


It was now time to airbrush some primer onto all of the parts, so I used white tack to hold the parts.....


Image


I then airbrushed a good coat of Model Master Grey Primer all over each part...


Image


Image


Well, that's as far as I have gotten to date. Tomorrow, I will airbrush a black base coat and let that dry, then air-brush the khaki / light olive color onto the uniform and airbrush base colors onto all the other parts.

Thanks for taking a look guys and please leave comments, constructive criticism and any tips you'd like to share to help me with this model which is the first figurine that I have ever attempted, so, I'm a little anxious and at the beginning of the learning curve with this one!!

If you'd like to see my Build Update #1 Video on YouTube, here's the link to that video....


[youtube]suPUdbxo1jc[/youtube]


Cheers :cheers2:

Martin :)

Re: Commemorative Build in memory of my Father-In-Law Update

Posted: Fri Sep 19, 2014 5:26 am
by Art17847
lookin good so far .....what a bummer about that rifle how do u plan on fixing it....looking forward to the paint :thumb2: :thumb2: