Meng 1:35 BMPT "terminator" Fire Support Combat Vehicle

Whether its tracked or wheeled, this is the place for it
User avatar
MarkVerploeg
Major
Major
Posts: 4837
Joined: Wed Oct 16, 2013 12:21 am
Location: Oss, Noord Braband The Netherlands
Netherlands

Meng 1:35 BMPT "terminator" Fire Support Combat Vehicle

Post by MarkVerploeg »

hello there people of modelling land
this will be my entry for the modern armor sig
Image
this is Meng's "terminator" kit that was released in 2014 so basicly a very new kit
after going through the kit wich has a ton of parts it seems to be a very nice build and if it compares to the D9R Bulldozer they make it should be fun to build it too

but first a introduction on this vehicle
in the early 1960's infanrty fighting vehicles appeared on the battlefield wich represented a substansive improvement of the infantry's combat vehicles firepower
mainly because up to that point all there was where APC's wich had limited firepower that was formed by a single machine gun in most cases
since then there has been significant developments in the coordination between and tanks and the relevant tactics and operational methods
armored forces ,as the elite units of the ground forces thus became more important
however with the devolpment and improvement of anti armor weapons the threats they where facing where getting more and more serious
experiance obtained in actual fights and research showed that : if the performance of the accomanying vehicles was better , the suppression of infantry anti armor weapons and low flying enemies would be improved and the efficiancy of the tanks would be increased
so finally battlefield experiance and new military theories gave birth to a new type of armored vehicle
the heavy infantry fighting vehicle
in 1984 , the tank teachings and research office of the military acedemy of armored forces in the former Soviet Union had put forward a plan about these Heavy Infantry Fighting Vehicles based on the chassis of the T-72 Main Battle Tank
Marshal V.I. Petrov (1917-2014) the then Deputy Minister of Defence authorized the research and devolpment of this project and defined this kind of vehicle as Tank Fire Support Vehicles or BMPT for short (when translated to russian)
the research was mainly proceeded by Design Bureau of the Chelyabinsk Tractor Plant Minselhozmasha and Tula Instrument Design Bureau and received positive response and active participation from the Main Armored Tank Directorate of the Ministry of Defence and the Military Acedemy of the Armored Forces
at that moment the design idea was that : it should have the same armor protection as a tank and be equiped with automatic guns/cannons
it should mix with the tanks when deployed and even lead the attack
the BMPT could soften the defences and suppress the anti tank units so the tanks would be able to flank the opposing forces and hit them from this position
the chassis of the T-72 MBT was chosen as a base for this vehicle , the chassis was produced by Uralvagonzavod
the crew was planned to consist of 7 men while 4 of them could act as mechanized infantry if needed
in the beginning of 1987 , 3 prototypes of the BMPT where produced wich by then was called Obiect 781
however by that time the military was preparing to get equiped with the new generation of MBT's
there for the Design Bureau of the Chelyabinsk Tractor Plant Minselhozmasha suggested that the chassis should be changed to match the chassis used by the new MBT's
the military-industrial Commision agreed to this proposal and on the 18th of february 1991 the plan for the "frame"was carried out
the core of this plan was to develop the prototype of BMPT Obiect 782 wich was based on the Obiect 187 tank chassis by UralVagonZavod
but soon the falling of the Soviet Union came to be and the funding stopped
and the entire project was ceased
during the Chechen war (from 1994 onwards) the Russian had lost a lot of Men and Equipment to anti tank units that operated from tall buildings
the tanks in this situation where helpless as they were too close in most cases and their guns could not elevate that high to fire back
so for the time being they used lightly armored anti aircraft vehicles wich had this feature as most are able to fire in a 90 degree angle
but these vehicles where not protected enough againts even the lighter anti armor weapons and soon fell victim to the units they where meant to attack
in view of this situation the new leader of Chelyabinsk Tractor Plant Minselhozmasha decided to use private funds and restart the BMPT project and quickly recovered the stored research
they soon abandoned the idea of developing a completly new vehicle and decided to use the T-72 chassis wich had been in production for years by then
this would make the BMPT a special multi role vehicle that could lead atacks and make sure the tanks could do their part as attack units without the problem of suppressing anti tank units
so in 1996 the prototype of Obiect 787 was produced , it was equipped with 2 30mm 2A72 automatic guns and 2 7,62mm coaxial machine guns where mounted
one on each side of the turret
however the National Security Authoraty decided it was illegal to develop a combat vehicle if this was done by only a industrial company
so the project was stopped for a second time
but fortunatly the plans for the BMPT where reserved
in July of 1996 Colonel General I.N. Rodionov was appointed as the new Russian Minister of Defence
and in September of the same year he held meetings to learn about the research and developments of military vehicles that had been conducted at the end of the Soviet era
as a result of these meetings the BMPT project was started once again
on the 12th of August 1998 General S.A. Mays , the Director of Main Automotive-Armored Tank Directorate of the Ministry of Defence had decided to deliver the BMPT project to the Ural Design Office of Transport Mechanicl Engineering
the project was thn named Frame 1 and later renamed frame 99
the man who was put in charge of this project was G.F. tyutyuhyn and the Chief designer was A.V. Yakovlev
at first they started with the chassis of the T-72 MBT but this was later replaced with the chassis of the T-90A
a model of the Frame 99 made it's debut at the Russian Arms Expo in 2000
at that time the BMPT was simply named "Fire Support Combat Vehicle" but there was no specific note of it's usage
in the model there where 5 crewmen including 1 commander , 1 driver and 3 weapons operators (instead of 7 crewmen)
weapons included 2 30mm 2A42 automatic cannons , 1 7,62mm coaxial machine gun and 4 9M133"kornet" (AT-14 Spriggan(NATO name) anti tank missle launchers wich where independently stablized
it also mounted 2 30mm AG-30 automatic grenade launchers on the front fenders
it was able to fire all weapons at the same time and due to the brand new fire control system it is even able to effectively fire at long distance with accuracy in complex conditions (wind and other weatherconditions)
the test vehicle of the BMPT was shown at the 2002 Russian Arms Expo
it's arsenal cosisted of 2 30mm 2A42 automatic cannons and a coaxial 7.62 mm PKTM machine gun that where mounted on the turret
by this time the Kornet Anti tank missles where replaced by the modern Attack-T anti tank missle system
the secondary armament consisted of 2 30mm AG-17D automatic grenade launchers that where mounted on the front fenders of the vehicle
the vehicle was equipped with dvanced topographic and navigation systems aswell as latest in viewing sensors
the test vehicle was also equipped with reactive armor modules on both sides of the hull and grille armor fences where mounted to the rear of the vehicle
at that point the protection it provided to it's crew was superior to the T-90 MBT
the BMPT completed the National tests in 2006 and was recommended for use by the Armored Forces
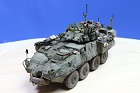
due to it's mighty appearance and large amount of Weaponry it was given the name Terminator
the BMPT can be fitted with both the KMT-8 mine plough and the EMT Electromagnetic Countermine System
the plough is able to clear a path with a width of 4 meter although the actual mine sweeping range is 3 meters ,outside that range it just digs them up without any detonation the EMT has the same effective range
the system weighs in at about 250 kg per side , it uses 0.5 kilowatts of power and can be mounted by the vehicles crew in less then 60 minutes
the source was the instruction book for this part although i did some editing because of the translation problems

and now for some wikipedia wisdom and some pictures of this machine
Type Tank support combat vehicle; Missile tank
Place of origin Russia
Service history
In service 2011–present
Used by Kazakhstan
Production history
Designer Ural Transport Engineering Design Bureau
Designed 1998–2002
Manufacturer Uralvagonzavod
Produced 2002–present
Variants BMPT-72
Specifications (BMPT)
Weight 48 t (53 short tons; 47 long tons)
Length 7.2 m (23 ft 7 in)
Width 3.37 m (11 ft 1 in)[a]
3.8 m (12 ft 6 in)
Height 1.94 m (6 ft 4 in)[c]
3.44 m (11 ft 3 in)
Crew 5
Armor Combination of composite armor, reactive armor and steel
Main
armament
4× 130 mm Ataka-T launchers
2× 30 mm 2A42 autocannons
Secondary
armament
2× 30 mm AG-17D grenade launchers
1× 7.62 mm PKTM machine gun
Engine V-92S2 diesel engine
1,000 hp (736 kW)
Power/weight 20.4 hp/tonne (15.0 kW/tonne)
Suspension Torsion bar
Ground clearance 406 mm (16.0 in)
Fuel capacity 1,200 L (320 US gal)
Operational
range
≥550 km (340 mi)
Speed ≥60 km/h (37 mph)

Image

Image

Image

Image

Image
if you look at this ,you know why it scares the cr*p out of people
you don't want to be on the receiving end of all those barrels and missle tubes

and now finally for the kit it self

Image
the boxart

Image
sort of "first" look
as you can see there is a box of friul tracks on the edge but i am having doubts on using them
i kind of like the no glue needed idea of the kit tracks

Image

Image

Image

Image

Image

Image

Image
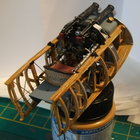
sprueshots and all the other bits and pieces that are in the box
i like the way it all looks , everything looks well detailed and free of flash or other small inconveniances
the little photo etch mask they provided is a nice touch though and should save me some time with the painting later on

but for a good review you should watch this

Lee did a review of this kit a while back and he is better at reviews then me so i let him do the talking ( if he is okay with that and me using his review)

and that is all for now , i have been typing long enough and my fingers start to hurt
i'm looking forward to this build altough i made a small start already (Yesterday)
so untill next time
cheers Mark
On the bench
GB builds
1/35 Trumpeter M1132 ESV

Personal builds
1/35 Hobby Boss M1070 tractor with M1000 semi trailer and Meng M1A2 TUSK II Abrams
1/35 Takom V2 rocket with the Meillerwagen and SS100 tractor
User avatar
JediBoer
Master Sergeant
Master Sergeant
Posts: 437
Joined: Thu Oct 23, 2014 6:33 am
Location: Detroit, MI
United States of America

Re: Meng 1:35 BMPT "terminator" Fire Support Combat Vehicle

Post by JediBoer »

Glad to see another "Terminator" kit in this SiG! Stunning kit! Looking forward to following your build! :cheers2:
JediBoer

On the bench righ now: Hmm... Lots of unfinished business!
User avatar
MarkVerploeg
Major
Major
Posts: 4837
Joined: Wed Oct 16, 2013 12:21 am
Location: Oss, Noord Braband The Netherlands
Netherlands

Re: Meng 1:35 BMPT "terminator" Fire Support Combat Vehicle

Post by MarkVerploeg »

JediBoer wrote:Glad to see another "Terminator" kit in this SiG! Stunning kit! Looking forward to following your build! :cheers2:
It is a great looking kit indeed
A update should be posted pretty soon
I will do a step by step buildlog of this build and will be following the instructions to the letter for it
Cheers Mark
On the bench
GB builds
1/35 Trumpeter M1132 ESV

Personal builds
1/35 Hobby Boss M1070 tractor with M1000 semi trailer and Meng M1A2 TUSK II Abrams
1/35 Takom V2 rocket with the Meillerwagen and SS100 tractor
User avatar
MarkVerploeg
Major
Major
Posts: 4837
Joined: Wed Oct 16, 2013 12:21 am
Location: Oss, Noord Braband The Netherlands
Netherlands

Re: Meng 1:35 BMPT "terminator" Fire Support Combat Vehicle

Post by MarkVerploeg »

Image
hi guys
so the first update already
it is not that much but it is a start right? :lol:
so i will follow the instructions with this build including all the things i would normally leave for later in the build

as for now i have made the lower hull up to step 6
step 7 are the tracks , at the moment i'm not sure if i will use the friuls i have
if the kit tracks work for me i will use them and save the friul tracks for a future build
but enough of that , here is the build so far


STEP 1
Wheel assembly
Image
the parts are placed in the sprues in a good manner , they are easy to remove and in a way that damages can be avioded
i know that some kits have problems with the sprockets where you have to cut them right on the teeth wich are easily damaged

Image
all the parts where cut out of the sprues
then they where cleand up with a hobby knife and the 2 grey colored sanding sticks from Ultimate (thinny sticks)
the pattern on the road wheel tyres where left intact
altough the vehicle will be weathered it is more or less a demo vehicle so it hasen't been used much and the tyres didn't wear out yet

Image
the build up wheels


STEP 2
attaching the front lower glacis plate
Image
and the return rollers

Image
all the parts ready for use
i do things like this often
just lay down all the parts like in the instruction
this way i don't have to look in the instructions all the tima but i only have to glue them on as the order that they are in is already the correct one

Image
all the parts fit well in this step
at the last moment i have seen that you can't switch the parts of the idler wheels
they have different markings on the place where they are glued on so it will only fit on the correct side


STEP 3
ataching the self entreching device
Image
i think this is basicly a big shovel
i know that this is a common feature on many Soviet and Russian armored vehicles but i am not sure of the way they use these and with what purpose

Image
again all the parts needed

Image
the outer parts fit but require some presure while the glue is drying
the other parts just fall in place


STEP 4
attaching the torsionbars
Image
Image
this kit comes with a nice little jig to get all the torsion bars in the right position
but i was having doubts about the way they are placed inside the hull

Image
all the parts where cleaned
there are 2 types of the suspension
1 clean and 1 will be connected to the hull with a small hinge

Image
for the hinged type there is this nice little pin
the part of the hinge can be pressed on and the small tab at the end will hold it in place while it is still moveable

Image
the parts for the hinged torsionbars
the smaller part is made up of the ring , a swing arm and a small plug
the parts are all friction fitted as per instruction wich gives no problem at all and everything still moves

Image
but this is where i was having doubts
the end of the torsion bar is just laying in this open part
there is nothing to stop it from popping out when the suspension is moved

Image
so i have used some plasticard strips, they don't have to look pretty but they will have to fit
they where glued on the raised edges of the receiving end
this way the torsion bar can't pop out there anymore
i'm not sure if this was a needed step but i did it anyway just to be sure

Image
the big hinges where places first
i think they are shock absorbers or something of that kind

Image
then all the torsionbars where placed
the 3 with the hinge where connected and then they are ready for the glue on the inside of the hull tub

Image
then the jig was put on and it was left to dry for about 15 minutes
i didn't test the movement yet as i though the glue could be setting after this time
but after the 15 minutes i did make the suspension on the other side of the hull


STEP 5
attaching the rear plate
Image

Image
i forgot to take a photo of all the parts after cleaning them
this step has one little point of attension
the back of part F5 has 2 pins but these are not even in thickness
so make sure you have them in the correct possition before you try to glue them on
i didn't and snapped a positioning pin on 3 of them
they still fit on there though

Image
the rear plate in place


STEP 6
attaching the wheels
Image

Image
thanks to the poly caps they go on with ease
i will remove them for painting though

Image
the suspension still works
i had to put some weight in there as the hull is still too light and was lifted by the torsion
i think that it will get a base where i will make use of the moving suspension as i like the idea of doing so
most of my builds lack that so far and i think it will be a nice change

and tht is all i have for now
it is not all that much yet but if i waited untill the tracks are done it could have taken a while before i had an update
so i hope you like it so far
thanks for watching and untill next time
cheers Mark
On the bench
GB builds
1/35 Trumpeter M1132 ESV

Personal builds
1/35 Hobby Boss M1070 tractor with M1000 semi trailer and Meng M1A2 TUSK II Abrams
1/35 Takom V2 rocket with the Meillerwagen and SS100 tractor
User avatar
JediBoer
Master Sergeant
Master Sergeant
Posts: 437
Joined: Thu Oct 23, 2014 6:33 am
Location: Detroit, MI
United States of America

Re: Meng 1:35 BMPT "terminator" Fire Support Combat Vehicle

Post by JediBoer »

Great job so far! Don't keep us in suspense for too long! :cheers2:
JediBoer

On the bench righ now: Hmm... Lots of unfinished business!
User avatar
MarkVerploeg
Major
Major
Posts: 4837
Joined: Wed Oct 16, 2013 12:21 am
Location: Oss, Noord Braband The Netherlands
Netherlands

Re: Meng 1:35 BMPT "terminator" Fire Support Combat Vehicle

Post by MarkVerploeg »

Thank you
I won't keep you waiting that long
I am working on the tracks now
I picked the kit tracks ,after a short try out they had proven to be easy to build and i have one full track done and will complete the other today
Then it is off to the real building as the hull has tons of detail and parts as does the turret but that should take a while to get done
Thanks for the comment
On the bench
GB builds
1/35 Trumpeter M1132 ESV

Personal builds
1/35 Hobby Boss M1070 tractor with M1000 semi trailer and Meng M1A2 TUSK II Abrams
1/35 Takom V2 rocket with the Meillerwagen and SS100 tractor
robertw
First Sergeant
First Sergeant
Posts: 509
Joined: Mon Mar 03, 2014 6:36 am
Location: West Virginia, USA

Re: Meng 1:35 BMPT "terminator" Fire Support Combat Vehicle

Post by robertw »

Wow that jig is really awesome! Other companies need to take note.
I build bad models so you can feel good about yourself! :th:
User avatar
schweinhund227
Chief Warrant Officer 4
Posts: 2627
Joined: Fri May 24, 2013 9:51 pm
Location: Ontario,Canada
Contact:
Canada

Re: Meng 1:35 BMPT "terminator" Fire Support Combat Vehicle

Post by schweinhund227 »

Cool project!

Looking forward to next update!
User avatar
timtamtung
Sergeant Major
Sergeant Major
Posts: 689
Joined: Fri Aug 01, 2014 3:42 am
Location: Melbourne, Australia

Re: Meng 1:35 BMPT "terminator" Fire Support Combat Vehicle

Post by timtamtung »

that is so awesome. what a beast vehicle
-tungy
Image
To do list:

1:35 Tasca Fury+Bravo6 crew | 1:48 Danger Zone F-14 |
User avatar
PaulAyrey
Sergeant Major of the Army
Posts: 1141
Joined: Tue Feb 04, 2014 5:24 pm
Location: Worthing, West Sussex, UK
Contact:

Re: Meng 1:35 BMPT "terminator" Fire Support Combat Vehicle

Post by PaulAyrey »

Great thread so far, really looking good too!
User avatar
MarkVerploeg
Major
Major
Posts: 4837
Joined: Wed Oct 16, 2013 12:21 am
Location: Oss, Noord Braband The Netherlands
Netherlands

Re: Meng 1:35 BMPT "terminator" Fire Support Combat Vehicle

Post by MarkVerploeg »

Thanks guys
I think i will post the next update Tonight when i get back from work
On the bench
GB builds
1/35 Trumpeter M1132 ESV

Personal builds
1/35 Hobby Boss M1070 tractor with M1000 semi trailer and Meng M1A2 TUSK II Abrams
1/35 Takom V2 rocket with the Meillerwagen and SS100 tractor
User avatar
countzero99uk
Staff Sergeant
Staff Sergeant
Posts: 213
Joined: Tue Oct 14, 2014 10:35 am
Location: Huddersfield

Re: Meng 1:35 BMPT "terminator" Fire Support Combat Vehicle

Post by countzero99uk »

Looking good :) Hoping to get mine started in the next day or so.
User avatar
MarkVerploeg
Major
Major
Posts: 4837
Joined: Wed Oct 16, 2013 12:21 am
Location: Oss, Noord Braband The Netherlands
Netherlands

Re: Meng 1:35 BMPT "terminator" Fire Support Combat Vehicle

Post by MarkVerploeg »

Thank you
Good luck with your build
On the bench
GB builds
1/35 Trumpeter M1132 ESV

Personal builds
1/35 Hobby Boss M1070 tractor with M1000 semi trailer and Meng M1A2 TUSK II Abrams
1/35 Takom V2 rocket with the Meillerwagen and SS100 tractor
Yevgeny
Sergeant Major
Sergeant Major
Posts: 730
Joined: Tue Sep 30, 2014 10:37 am
Location: Worthing, UK

Re: Meng 1:35 BMPT "terminator" Fire Support Combat Vehicle

Post by Yevgeny »

MarkVerploeg wrote:Thanks guys
I think i will post the next update Tonight when i get back from work
Come on then :mrgreen: We need to see more :banana:
Sir, we're surrounded!
Excellent! Now we can attack in any direction!
------------------------------------------------
Model N1 DONE! - Tamiya 1:35 Panzerkampfwagen V Panther Sd.kfz.171 Ausf.A
Model N2 DONE! - Academy 1:72 M1126 Stryker
Working on:Trumpeter (00204)
Waiting: Meng (SS-004), Airfix (A50125), Tamiya (35068)
peppie
Sergeant Major
Sergeant Major
Posts: 629
Joined: Mon Feb 17, 2014 6:10 pm
Location: Boskoop Holland
Netherlands

Re: Meng 1:35 BMPT "terminator" Fire Support Combat Vehicle

Post by peppie »

Nice one Mark.
I'm going to follow this, I want to try a Meng myself, heard a lot of nice things about them.

Good luck with the rest off the build.
Joined this forum to become a better modell builder. Now, if I can just put away my laptop and start building..

On the Bench:

Piper PA-18-150
Ford GPA
GMC cckw 1947
Ford V3000 "Bello"
User avatar
MarkVerploeg
Major
Major
Posts: 4837
Joined: Wed Oct 16, 2013 12:21 am
Location: Oss, Noord Braband The Netherlands
Netherlands

Re: Meng 1:35 BMPT "terminator" Fire Support Combat Vehicle

Post by MarkVerploeg »

Yevgeny wrote:
MarkVerploeg wrote:Thanks guys
I think i will post the next update Tonight when i get back from work
Come on then :mrgreen: We need to see more :banana:
have a cup of tea first :mrgreen:
i will start with it in a few minutes
peppie wrote:Nice one Mark.
I'm going to follow this, I want to try a Meng myself, heard a lot of nice things about them.

Good luck with the rest off the build.
thanks Peppie
just try one they are very nice to build
well the 2 i have been working on are , i don't know about the rest
On the bench
GB builds
1/35 Trumpeter M1132 ESV

Personal builds
1/35 Hobby Boss M1070 tractor with M1000 semi trailer and Meng M1A2 TUSK II Abrams
1/35 Takom V2 rocket with the Meillerwagen and SS100 tractor
User avatar
MarkVerploeg
Major
Major
Posts: 4837
Joined: Wed Oct 16, 2013 12:21 am
Location: Oss, Noord Braband The Netherlands
Netherlands

Re: Meng 1:35 BMPT "terminator" Fire Support Combat Vehicle

Post by MarkVerploeg »

Image
hi guys
so here is my second attempt to make this update
i tried to make one yesterday but when i hit the preview button the computer froze up and all was lost :wall:

so anyway this time i have done the tracks and about half the steps of the hull
so here is the progress that is made so far

STEP 7
track assembly
Image
this actually looks worse then it is
i tried a small section to decide if i would use the kit tracks or the set of friul tracks i bought for this
and after a while i had decided that i would use the kit tracks as they are pretty easy and the clean up time was about as long as the time i need to clean and drill the friuls
so those will be kept for a kit that needs them more

Image
all the cleaned parts
the horns have a double clip that functions as a pivot while the vinyl or rubber (not sure wich material) end caps keep the entire thing together
you get the end caps in strips of either 4 or 5 parts
you need to keep those seperate as the 5 part pieces are needed for the jig
the smaller ones are used when you connect the pre made sections

Image
how all the steps look with the parts and not a drawing

Image
and in a few short hours you end up with 2 fully workable tracks
i decided to leave the rubber (not really rubber) inlays of as all the photo's i looked at show this vehicle with the fully steel tracks
and not the rubber types that are also used on the T-90


STEP 8
fitting of the tracks
Image
this looks easy enough
but after a test fit i found that the leftside track was on there with a lot of tension so i added a link making that one 82 links long instead of the 81 that the instructions tell you it should be
i didn't finish the track yet but only connected them with the centerpart to make it easier to remover them when it is time for the painting stages

Image
here they are fitted , for the time being


STEP 9
assembly of the upper glacis plate
Image

Image
the big parts that need to be assembled first

Image
the finished piece
this should be nice when it comes to weathering as it is loaded with raised and recessed details so it should hold a wash quite well

Image
parts for the headlights
the inside of the left headlight (rightside of the photo) is painted with mr metal chrome silver
i used this as i didn't have the vallejo anymore
but i will try to paint this in mr hobby (aqueous) paints instead of the vallejo paint that is used in the paint chart
if they are not availeble i will order the vallajo paints instead

Image
the finished upper glacis plate
i was suprised at how well the headlights went together
in my experience the headlights can be one of the most fiddely jobs on a armor build


STEP 10
attachiing the upper glacis and other upper hull parts
Image

Image
first i painted the vision block with clear blue/transparent blue
i didn't have the vallejo but i have a bottle of tamiya
but i will paint the rest of them by hand after they are fitted and the vehicle is painted
this paint actually brush paints well and i will cover the clear parts with some maskol to protect them from the primer and other paints during the painting stages of the build

Image
all the parts together

Image
all the smaller parts should be fitted first

Image
and then the upper glacis can be added


STEP 11
building the front fenders
Image

Image
all the parts needed
be carefull with parts C3 and C6 the are very fragile and i managed to bend them both
i did get them on the feenders okat as the where easy to straighten again

Image
first parts added

Image
and the tow shackles finish this step

STEP 12
attaching the fenders
Image

Image
you can't go wrong here
they won't fit if you switch them around (i tried/had that happen to me)

STEP 13
making the exhaust and parts of the engine deck
Image

Image
all the parts
when placing the pe intake covers you need to be carefull aas you need to watch the way that they are fitted
they have 2 large sections and 1 narrow section the narrow section needs to point to the rear of the hull

Image
here you can see what i mean
the instruction show this because that is how i know of this but the drawing is not all that clear
well it took me several minutes to figure out what i should be carefull with :roll:


STEP 14
attaching the upper hull
Image

Image
the 4 parts that are added aswell in this step

Image
and done
i didn't glue the hull parts yet , again i think it will be easier during painting and when i remove and place the tracks again


STEP 15
left side hull parts
Image

Image
all the parts that are needed

Image
the smaller parts are glued on the back of the main part
the grenade launcher is easy to make but is prone to pop open when the glue is seting
so a bit of pressure is needed when the glue dries

Image
grenade launcher added and the front cover is placed to
this part C16 needs bending to fit on the main part
there is a small cut on the back that allows for this to happen correctly but the 2 positioning pins should be enough to get the right angle

Image
and the vinyl/rubber cover is added and that finished this step
the cover is not glued in place as this is not needed according to the instructions and the fit around the barrel is indeed snug enough to keep it in place


STEP 16
right side hull parts
Image
basicly the same as the left side
altough they are not mirrored

Image
the parts

Image
the finished side


STEP 17
placing the hull sides and a cooling/air intake or exhaust
Image

Image
the parts for this step

Image
all the styrene parts fitted and the intake/exhaust assembled

Image
and the last part is placed

and that is all i have for now
and i think it is enough too as this update would become a bit too long if i did more
so i will save that for the next update wich should be up this week as i almost finished the hull
as for now , i hope you like it so far
thanks for watching and untill next time
cheers Mark
On the bench
GB builds
1/35 Trumpeter M1132 ESV

Personal builds
1/35 Hobby Boss M1070 tractor with M1000 semi trailer and Meng M1A2 TUSK II Abrams
1/35 Takom V2 rocket with the Meillerwagen and SS100 tractor
User avatar
JediBoer
Master Sergeant
Master Sergeant
Posts: 437
Joined: Thu Oct 23, 2014 6:33 am
Location: Detroit, MI
United States of America

Re: Meng 1:35 BMPT "terminator" Fire Support Combat Vehicle

Post by JediBoer »

Great work Mark! You are flying through the build! It is looking awesome! :cheers2:
JediBoer

On the bench righ now: Hmm... Lots of unfinished business!
User avatar
MarkVerploeg
Major
Major
Posts: 4837
Joined: Wed Oct 16, 2013 12:21 am
Location: Oss, Noord Braband The Netherlands
Netherlands

Re: Meng 1:35 BMPT "terminator" Fire Support Combat Vehicle

Post by MarkVerploeg »

Thank you very much
Glad you like it so far
On the bench
GB builds
1/35 Trumpeter M1132 ESV

Personal builds
1/35 Hobby Boss M1070 tractor with M1000 semi trailer and Meng M1A2 TUSK II Abrams
1/35 Takom V2 rocket with the Meillerwagen and SS100 tractor
User avatar
countzero99uk
Staff Sergeant
Staff Sergeant
Posts: 213
Joined: Tue Oct 14, 2014 10:35 am
Location: Huddersfield

Re: Meng 1:35 BMPT "terminator" Fire Support Combat Vehicle

Post by countzero99uk »

This is looking excellent I hope to be able to take blade and glue to mine tomorrow too much on today but I do have a quick question for you. Ive noticed that the upper hull on mine seems to have a slight bend to it, did you have any similar issues?

Keep up the great work
Brian.
User avatar
DC87
Chief Warrant Officer 2
Posts: 1799
Joined: Wed Jun 05, 2013 7:16 pm
Location: Exeter, Devon, UK
England

Re: Meng 1:35 BMPT "terminator" Fire Support Combat Vehicle

Post by DC87 »

Nice work, looks like a superb kit.
Dan C

Filling the workbench with:
Sopwith Snipe late post war
WW1 RFC SE5a

WW1-1/32 Snipe
Workbench gets full with models being built - Buys another workbench!

Image
User avatar
MarkVerploeg
Major
Major
Posts: 4837
Joined: Wed Oct 16, 2013 12:21 am
Location: Oss, Noord Braband The Netherlands
Netherlands

Re: Meng 1:35 BMPT "terminator" Fire Support Combat Vehicle

Post by MarkVerploeg »

I can't say that i have noticed that on mine
Is that on any part in particular like the front right for example
I think mine is as straight as can be
I didn't glue it down but it looks like a good fit to the hull all around
On the bench
GB builds
1/35 Trumpeter M1132 ESV

Personal builds
1/35 Hobby Boss M1070 tractor with M1000 semi trailer and Meng M1A2 TUSK II Abrams
1/35 Takom V2 rocket with the Meillerwagen and SS100 tractor
User avatar
MarkVerploeg
Major
Major
Posts: 4837
Joined: Wed Oct 16, 2013 12:21 am
Location: Oss, Noord Braband The Netherlands
Netherlands

Re: Meng 1:35 BMPT "terminator" Fire Support Combat Vehicle

Post by MarkVerploeg »

DC87 wrote:Nice work, looks like a superb kit.
Thanks DC
it is a great kit
I only had about 5 parts that had crappy spruegates
And that is only a problem with cleaning them
But the overall detail and fit is good
On the bench
GB builds
1/35 Trumpeter M1132 ESV

Personal builds
1/35 Hobby Boss M1070 tractor with M1000 semi trailer and Meng M1A2 TUSK II Abrams
1/35 Takom V2 rocket with the Meillerwagen and SS100 tractor
User avatar
MarkVerploeg
Major
Major
Posts: 4837
Joined: Wed Oct 16, 2013 12:21 am
Location: Oss, Noord Braband The Netherlands
Netherlands

Re: Meng 1:35 BMPT "terminator" Fire Support Combat Vehicle

Post by MarkVerploeg »

Image
hi guys
so i'm back with a new update
although i completed the building stages this weekend i will do this update about the second half of the hull
and the turret will be split in to 2 updates aswell as i just uploaded the photo's and there where 70 of them so a bit much for one update
but let's go to the build shall we

STEP 18
attaching rear hull parts 1
Image

Image
the parts ready for use
the shields that are at the top of the photo are some of the thinnest styrene parts i ever used
they are quite fragile but the detail is great and they really look like thin steel plates

Image
all the parts are glued to the hull
i was kind of worried that the rear plates would grab on to the sponsons and would make it inpossible to get the upper hull seperate from the lower part
but after a short test everything was alright and both part can be seperated as before


STEP 19
attaching rear hull parts 2
Image
just by looking at this step i wasn't really sure how it would look as i thought it would be 2 screens behind eachother but they actually make a box with mesh on one side and slat armor on the other

Image
not too many parts but again a bit fragile
the mesh screen was the hardest though as i already bend it when i tried to pick it up from the cutting mat

Image
the armored box is installed
i don't know if it was my own doing or slightly warped parts but i had to use a bit of pressure to get the sidewalls close enough together to glue on the top
but this was a minor gap and it was barely visible but it was enough to get on my nerves if i didn't fix it


STEP 20
side skirt assembly
Image

Image
no parts shot this time
the both of them only concist of 5 parts in total


STEP 21
attaching the tow cables
Image
i skipped most of this as the cables will connect the upper and lower hull parts and i want to be able to seperate them for the time being

Image
the parts that i did use

Image
so i only added the tow hooks and the 4 supports
they will be for the rear slat armor that protects the engine area
also the side skirts where added but only with some white tac for the picture really
the right side is no problem but on the left is the exhaust and the side skirt will make it inpossible to reach it and get a decect paintjob done there
so again i want to be able to remove them for the painting proces


STEP 22
attaching the side armor plates and rear view mirrors
Image

Image
the parts that i used so far
the parts for the tow cables will be added after i painted everything and then i will paint them with a brush or pre paint them with the ab and glue them on once they are dry

Image
the parts where added to the vehicle
the side armor plates are also put on with some white tac as they overlap the side skirts and it would be hard to get those on if the armor gets in the way


STEP 23
grenade launcher operator hatches assembly
Image

Image
first half of the construction
if you are carefull when using glue or cement the hatches will remain in working order but they where designed that way so a bit of care comes a long way with these things

Image
parts for the second half of the construction
the rubber strips are looking good but they are though to clean as you can't sand them and even cutting is tricky

Image
the finished product as you can see they can still be opened and closed
but 1 of them didn't close well so i glued it shut
i didn't plan to put in a 5 man crew anyway so it is no real problem either but i don't know why it wouldn't close properly as i couldn't find the source of the problem

Image
top view of the hatches


STEP 24
placing the grenade launcher operator hatches and the rear slat armor
Image
not a very big step
the hatches are popped in the tubes in the hull and lock in place
they can be turned left and right a bit but you can't lift them out or you would have to press in the hooks underneath the hull

Image
all the parts

Image
the hatches and deck plates are installed

Image
the slat armor was added too
i again used white tac so i can remove it for painting

and that completes the steps for the hull so far
there are a few steps left in my case as there are mine clearence devices in the kit too but they only apply to the version that was presented at the 2009 russian arms expo
but that has the camo scheme i prefer so i will have those devices on the vehicle but that is one of the last steps of the build
but i will post the first update about the turret somewhere this week as i don't want to bomb you all with updates
so i hope you like it so far
thanks for watching and untill next time
cheers Mark
On the bench
GB builds
1/35 Trumpeter M1132 ESV

Personal builds
1/35 Hobby Boss M1070 tractor with M1000 semi trailer and Meng M1A2 TUSK II Abrams
1/35 Takom V2 rocket with the Meillerwagen and SS100 tractor
User avatar
JediBoer
Master Sergeant
Master Sergeant
Posts: 437
Joined: Thu Oct 23, 2014 6:33 am
Location: Detroit, MI
United States of America

Re: Meng 1:35 BMPT "terminator" Fire Support Combat Vehicle

Post by JediBoer »

Looking awesome so far! Just ordered a paint set for my kit last night! My fingers are itching! :cheers2:
JediBoer

On the bench righ now: Hmm... Lots of unfinished business!
User avatar
MarkVerploeg
Major
Major
Posts: 4837
Joined: Wed Oct 16, 2013 12:21 am
Location: Oss, Noord Braband The Netherlands
Netherlands

Re: Meng 1:35 BMPT "terminator" Fire Support Combat Vehicle

Post by MarkVerploeg »

JediBoer wrote:Looking awesome so far! Just ordered a paint set for my kit last night! My fingers are itching! :cheers2:
Thanks Jediboer
It is a nice kit to work on with just a few parts that need a bit more care when cleaning them up
i did manage to break 1 part but that was a quick fix and it doesn't even show
A really good kit overall
On the bench
GB builds
1/35 Trumpeter M1132 ESV

Personal builds
1/35 Hobby Boss M1070 tractor with M1000 semi trailer and Meng M1A2 TUSK II Abrams
1/35 Takom V2 rocket with the Meillerwagen and SS100 tractor
User avatar
alextheblue
Chief Warrant Officer 5
Posts: 2679
Joined: Mon Jul 15, 2013 11:30 am
Location: Slough, United Kingdom
Contact:
Scotland

Re: Meng 1:35 BMPT "terminator" Fire Support Combat Vehicle

Post by alextheblue »

That's looking mighty fine Mark, some great work there. And loving your build thread, really detailed! :th: :th: :pop:
"Courage is feeling fear and acting anyway."

www.alextheblue.com
User avatar
schweinhund227
Chief Warrant Officer 4
Posts: 2627
Joined: Fri May 24, 2013 9:51 pm
Location: Ontario,Canada
Contact:
Canada

Re: Meng 1:35 BMPT "terminator" Fire Support Combat Vehicle

Post by schweinhund227 »

That's like a Box of Chocolate.....

Num num num !!!

More please !

I'm getting this bad boy... for sure !
User avatar
MarkVerploeg
Major
Major
Posts: 4837
Joined: Wed Oct 16, 2013 12:21 am
Location: Oss, Noord Braband The Netherlands
Netherlands

Re: Meng 1:35 BMPT "terminator" Fire Support Combat Vehicle

Post by MarkVerploeg »

Thank you very much Alex and Norm
I'm glad you like it so far
On the bench
GB builds
1/35 Trumpeter M1132 ESV

Personal builds
1/35 Hobby Boss M1070 tractor with M1000 semi trailer and Meng M1A2 TUSK II Abrams
1/35 Takom V2 rocket with the Meillerwagen and SS100 tractor
User avatar
MarkVerploeg
Major
Major
Posts: 4837
Joined: Wed Oct 16, 2013 12:21 am
Location: Oss, Noord Braband The Netherlands
Netherlands

Re: Meng 1:35 BMPT "terminator" Fire Support Combat Vehicle

Post by MarkVerploeg »

Image
hi guys
so a bit sooner then i planned but here is another update for this build
this will be the first part of the turret wich i will split up just like i did with the hull
this is because i have about 70 photo's for the turret and final steps of the building stages
i think that would be far too big for a single update so i think 2 updates is better in this case

so off to the turret building

STEP 25
turret assembly
Image

Image
the parts
there are not too many at this point but it will form the base of the entire upper structure

Image
at this point it kind of looks like the turret of the T-90 i have only smaller


STEP 26
attaching turret parts
Image

Image
all the parts needed for this step

Image
the turret boxes are added
i guess they are terrible to reach on the real vehicle as the only access point to them will be behind the turret

Image
first sets of smoke launchers are added
it is becoming a bit round from here on


STEP 27
turret parts assemby 1
Image

Image
a lot of small parts for this one
the inside of the camera or night vision ( don't know what it is) is painted with mr metal chrome silver
this was applied with a brush and the big advantage is that is dries a lot faster and smoother then a acrylic paint

Image
finished parts


STEP 28
attaching turret parts 2
Image

Image
the parts
it is a easy step and cleaning the parts took me longer then actually placing them

Image
first part of this step is completed

Image
parts for the second part

Image
second part is done
don't get scared just yet but i think the Russians have created UFO technology


STEP 29
gun assembly
Image
that was about time
i was getting itchy fingers and needed to put some of the weapons together

Image
all the parts for the gun
there are 2 choises to make in this step
you need to pick the coaxial mg in either the covered version for transport or the barrel as it would be in combat
the other thing is a hatch underneath the gun houssing wich can be made opened or closed , i think it is where the shell casings from the coax. mg fall out
i decided to keep the hatch closed and the mg barrel showing

Image
the 2 main components for this step
if you select the barrel for the mg you need to drill out the muzzle or replace it with after market but i don't have tht for this kit

Image
the finished gun pod
when you look at it like this ,you know you don't want to be on the receiving end of that thing
and with enough rounds for 2 minutes of constant firing it should be able to take down a house


STEP 30
turret parts assembly 2
Image

Image
the parts for the 2 blocks that house all the weapons

Image
and they are done
not fit issues or anything of that sort
just don't mix up the parts while building them


STEP 31
attaching the gun pod
Image

Image
all the parts

Image
finally all the scary bits are coming together
this bit is actually bigger then i thought but it still needs the missle launchers at this point


STEP 32
Image

Image
the parts
altough the picture i took from the instructions isn't clear it has part K18 in it
that is the rod like thing that goes on top of the sensor/night vision pod
any way that thin part and as you can see i managed to break it in half
but it wasn't bend so it doesn't show in the end

Image
the finished parts

and i like to leave it at that for now
there still are about 10 steps to go at this point but i will do them in the next update
thanks for watching and untill next time
cheers Mark
On the bench
GB builds
1/35 Trumpeter M1132 ESV

Personal builds
1/35 Hobby Boss M1070 tractor with M1000 semi trailer and Meng M1A2 TUSK II Abrams
1/35 Takom V2 rocket with the Meillerwagen and SS100 tractor
User avatar
JediBoer
Master Sergeant
Master Sergeant
Posts: 437
Joined: Thu Oct 23, 2014 6:33 am
Location: Detroit, MI
United States of America

Re: Meng 1:35 BMPT "terminator" Fire Support Combat Vehicle

Post by JediBoer »

Coming along nicely! :th:
JediBoer

On the bench righ now: Hmm... Lots of unfinished business!
User avatar
MarkVerploeg
Major
Major
Posts: 4837
Joined: Wed Oct 16, 2013 12:21 am
Location: Oss, Noord Braband The Netherlands
Netherlands

Re: Meng 1:35 BMPT "terminator" Fire Support Combat Vehicle

Post by MarkVerploeg »

Thank you very much
The building part is done though
But i didn't order the paint yet as i am in doubt of the paint i want to use it will be either the vallejo modelair or the set from Ammo
I will try to pick one tonight and order the stuff so i can hopefull start painting this weekend
On the bench
GB builds
1/35 Trumpeter M1132 ESV

Personal builds
1/35 Hobby Boss M1070 tractor with M1000 semi trailer and Meng M1A2 TUSK II Abrams
1/35 Takom V2 rocket with the Meillerwagen and SS100 tractor
User avatar
gaz45
Chief Warrant Officer 3
Posts: 1971
Joined: Mon Jan 06, 2014 3:35 pm
Location: Nottingham uk
Great Britain

Re: Meng 1:35 BMPT "terminator" Fire Support Combat Vehicle

Post by gaz45 »

very nice work there mate :th:
User avatar
schweinhund227
Chief Warrant Officer 4
Posts: 2627
Joined: Fri May 24, 2013 9:51 pm
Location: Ontario,Canada
Contact:
Canada

Re: Meng 1:35 BMPT "terminator" Fire Support Combat Vehicle

Post by schweinhund227 »

wow ... that Turret is one Busy thing !!!

Most excellent work my friend ! Keep the good work coming !
User avatar
JediBoer
Master Sergeant
Master Sergeant
Posts: 437
Joined: Thu Oct 23, 2014 6:33 am
Location: Detroit, MI
United States of America

Re: Meng 1:35 BMPT "terminator" Fire Support Combat Vehicle

Post by JediBoer »

MarkVerploeg wrote:Thank you very much
The building part is done though
But i didn't order the paint yet as i am in doubt of the paint i want to use it will be either the vallejo modelair or the set from Ammo
I will try to pick one tonight and order the stuff so i can hopefull start painting this weekend
Just found that AKAH brought out a paint set for the Terminator in the Russian Arms Expo 2013 scheme (http://akan.ru/tematicheskie-nabory-iz- ... tor-3.html). Hobbycolours don't have it ont their site yet and I've never ordered directly from AKAH but it may be worth investigating. Just another suggestion! :th:
JediBoer

On the bench righ now: Hmm... Lots of unfinished business!
User avatar
MarkVerploeg
Major
Major
Posts: 4837
Joined: Wed Oct 16, 2013 12:21 am
Location: Oss, Noord Braband The Netherlands
Netherlands

Re: Meng 1:35 BMPT "terminator" Fire Support Combat Vehicle

Post by MarkVerploeg »

Thanks guys the comments are much apreciated
and thanks for the info Jediboer
But i decided on the 2009 version and received the Ammo paints today
Maybe for a second build when i get another one
On the bench
GB builds
1/35 Trumpeter M1132 ESV

Personal builds
1/35 Hobby Boss M1070 tractor with M1000 semi trailer and Meng M1A2 TUSK II Abrams
1/35 Takom V2 rocket with the Meillerwagen and SS100 tractor
User avatar
timtamtung
Sergeant Major
Sergeant Major
Posts: 689
Joined: Fri Aug 01, 2014 3:42 am
Location: Melbourne, Australia

Re: Meng 1:35 BMPT "terminator" Fire Support Combat Vehicle

Post by timtamtung »

ooooh i like that!
-tungy
Image
To do list:

1:35 Tasca Fury+Bravo6 crew | 1:48 Danger Zone F-14 |
User avatar
JediBoer
Master Sergeant
Master Sergeant
Posts: 437
Joined: Thu Oct 23, 2014 6:33 am
Location: Detroit, MI
United States of America

Re: Meng 1:35 BMPT "terminator" Fire Support Combat Vehicle

Post by JediBoer »

MarkVerploeg wrote:Thanks guys the comments are much apreciated
and thanks for the info Jediboer
But i decided on the 2009 version and received the Ammo paints today
Maybe for a second build when i get another one
Great scheme! I have also ordered the Modern Russian Camo set from Ammo! :th:
JediBoer

On the bench righ now: Hmm... Lots of unfinished business!
User avatar
MarkVerploeg
Major
Major
Posts: 4837
Joined: Wed Oct 16, 2013 12:21 am
Location: Oss, Noord Braband The Netherlands
Netherlands

Re: Meng 1:35 BMPT "terminator" Fire Support Combat Vehicle

Post by MarkVerploeg »

JediBoer wrote:
MarkVerploeg wrote:Thanks guys the comments are much apreciated
and thanks for the info Jediboer
But i decided on the 2009 version and received the Ammo paints today
Maybe for a second build when i get another one
Great scheme! I have also ordered the Modern Russian Camo set from Ammo! :th:
I think that is one of the better looking scheme's in general
But the Russians and before that the Soviets had some awesome camoschemes
timtamtung wrote:ooooh i like that!
Thanks mate
On the bench
GB builds
1/35 Trumpeter M1132 ESV

Personal builds
1/35 Hobby Boss M1070 tractor with M1000 semi trailer and Meng M1A2 TUSK II Abrams
1/35 Takom V2 rocket with the Meillerwagen and SS100 tractor
User avatar
PaulAyrey
Sergeant Major of the Army
Posts: 1141
Joined: Tue Feb 04, 2014 5:24 pm
Location: Worthing, West Sussex, UK
Contact:

Re: Meng 1:35 BMPT "terminator" Fire Support Combat Vehicle

Post by PaulAyrey »

Looks like a very nice kit, and you're doing a great job throwing it together, look forward to seeing some paint on it!
User avatar
MarkVerploeg
Major
Major
Posts: 4837
Joined: Wed Oct 16, 2013 12:21 am
Location: Oss, Noord Braband The Netherlands
Netherlands

Re: Meng 1:35 BMPT "terminator" Fire Support Combat Vehicle

Post by MarkVerploeg »

PaulAyrey wrote:Looks like a very nice kit, and you're doing a great job throwing it together, look forward to seeing some paint on it!
Thank you very much Paul
It is a great kit to build with out any real problems with fitting issues
There was one small thing but that can be solved without much effort
I still need to put it in the primer at the moment but i plan on doing that today
And the paint i need is delivered so the only hold ups come from my other builds and what i feel like doing at the moment
But i don't want to rush it and i rarely do hard edge schemes so i will have to think about how i will do that
On the bench
GB builds
1/35 Trumpeter M1132 ESV

Personal builds
1/35 Hobby Boss M1070 tractor with M1000 semi trailer and Meng M1A2 TUSK II Abrams
1/35 Takom V2 rocket with the Meillerwagen and SS100 tractor
User avatar
MarkVerploeg
Major
Major
Posts: 4837
Joined: Wed Oct 16, 2013 12:21 am
Location: Oss, Noord Braband The Netherlands
Netherlands

Re: Meng 1:35 BMPT "terminator" Fire Support Combat Vehicle

Post by MarkVerploeg »

Image

hi guys
so after a small break i have a new update
i already had this build ready for painting but i like to have the build a head of the updates as that gives you a bit of extra time when building goes slow
i still have some progress to show when that happens

but here is the progress so far


STEP 33
attaching the turret parts
Image

Image
the parts

Image
Image
the finished step


STEP 34
attaching turret parts 2
Image

Image
the parts for this step

Image
Image
the finished step
at this point progress is small on each step as you only add a few bits and pieces


STEP 35
guided missle launchers assembly
Image
just the assembly of the tubes at this point

Image
the parts for just 4 missle tubes

Image
the finished tubes
because the ends are going to be painted red i thought it was a good idea that i didn't glue them in place just yet
they are friction fitted and can be popped out when the time for painting comes

Image
in the second part of this step you need to mount the missle tubes on brackets and then on the mounting plates that will connect them to the turret

Image
the parts

Image
the holes in the photo etch parts are for the bolts of the mount to go through
this way they are flush with the surface of the mounts

Image
the tubes are attached to the mounts

Image
the first tube is mounted along with the wires for the firing and targetting

Image
then the second tube was mounted and a small wire from the sprue with the rubber parts was added to finish these launchers

Image
as you can see the back caps of the missletubes can be removed

STEP 36
attaching turret parts 3
Image

Image
the last parts of the turret

Image
the gun assembly is placed

Image
the antenas where next

Image
and finally the missles
all of that makes the world scariest ufo


STEP 37
Image
before you start with this step you need to decide wich version you want to make
the 2009 version had the mine ploughs and emp devices mounted the 2 later versions didn't have them but you can also choose to have these devices in a transport mode or in a active mode wich has them lowered
i went for the anti mine devices in the active or used mode as i want to make this in the 2009 version as i think that camo looks better then the other 2 and there is the advantage of the extra equipment on there

Image

Image
all the parts for 1 plough

Image
the finished plough
there are 2 caps for them too but they are only used when you have them in transport mode


STEP 38
Image
this is just the same as step 37

Image
the other plough


STEP 39
building the emp devices
Image

Image
there are just 4 parts for each so a quick step


STEP 40
attaching the anti mine devices
Image

Image
the parts for the object on the rear

Image
all done

Image
all the anti mine stuff

Image
every thing in place


STEP 41
attaching the turret to the hull
Image
fianlly the last step of the construction

Image
Image
the entire vehicle is build


Paint preperations
Image
then the thing was stripped down again
to make it easier to paint it
i didn't glue the upper and lower hull to eachother but that gives no problem if you do glue them

Image
this one is a bit blurry :scratch:: :oops:
but all the parts are placed on either sticks or other things i found usefull for this
and now it is ready for some paint


i ordered the russian color set from ammo and tried it after i primed the parts
but i only did one color and was very unhappy with the result
i don't know if it was due to my own fault or that the paint is that much harder to work with but after a afternoon of trial and error i decided i don't want to waste any more time on these paints and i will order the vallejo colors as i find these easy to work with and they give me a much better result

so that is all for now
i hope you like it so far
thanks for watching and untill next time
cheers Mark
On the bench
GB builds
1/35 Trumpeter M1132 ESV

Personal builds
1/35 Hobby Boss M1070 tractor with M1000 semi trailer and Meng M1A2 TUSK II Abrams
1/35 Takom V2 rocket with the Meillerwagen and SS100 tractor
User avatar
rodrant
Chief Warrant Officer 2
Posts: 1774
Joined: Wed Feb 19, 2014 9:22 pm
Location: Maia - Portugal
Portugal

Re: Meng 1:35 BMPT "terminator" Fire Support Combat Vehicle

Post by rodrant »

And I was complaining about the thinny pieces in the Merkava ..... :oops:

Nice work Mark ! A lot of good work here ! :th:

:cheers2:
Cheers ,
António

On the Bench
a lot of stuff right now :-)
User avatar
MarkVerploeg
Major
Major
Posts: 4837
Joined: Wed Oct 16, 2013 12:21 am
Location: Oss, Noord Braband The Netherlands
Netherlands

Re: Meng 1:35 BMPT "terminator" Fire Support Combat Vehicle

Post by MarkVerploeg »

Thank you António
There are a few but i didn't have to use tweezers all the time so they aren't too small
But i am suprised by the amount of detail on this kit
It will take half a bottle of wash justbto cover the thing and there are so many nooks and crannies that will hold that wash
I think it should come out fine and i hope so as i want to enter this build in a contest later this year
But i don't want a really weathered look
The color options are for russian vehicles and they don't see use outside the testing range so a small amount of chipping and some dust with a splash of mud here and there and it should be finished (once painted)
On the bench
GB builds
1/35 Trumpeter M1132 ESV

Personal builds
1/35 Hobby Boss M1070 tractor with M1000 semi trailer and Meng M1A2 TUSK II Abrams
1/35 Takom V2 rocket with the Meillerwagen and SS100 tractor
User avatar
countzero99uk
Staff Sergeant
Staff Sergeant
Posts: 213
Joined: Tue Oct 14, 2014 10:35 am
Location: Huddersfield

Re: Meng 1:35 BMPT "terminator" Fire Support Combat Vehicle

Post by countzero99uk »

Fantastic work :)
User avatar
MarkVerploeg
Major
Major
Posts: 4837
Joined: Wed Oct 16, 2013 12:21 am
Location: Oss, Noord Braband The Netherlands
Netherlands

Re: Meng 1:35 BMPT "terminator" Fire Support Combat Vehicle

Post by MarkVerploeg »

countzero99uk wrote:Fantastic work :)
Thanks mate
How is your build , heared anything from meng about that upper hull
On the bench
GB builds
1/35 Trumpeter M1132 ESV

Personal builds
1/35 Hobby Boss M1070 tractor with M1000 semi trailer and Meng M1A2 TUSK II Abrams
1/35 Takom V2 rocket with the Meillerwagen and SS100 tractor
User avatar
Panzermeister36
Sergeant Major
Sergeant Major
Posts: 692
Joined: Sat Sep 14, 2013 5:59 pm
Location: Ottawa, Ontario, Canada
Contact:

Re: Meng 1:35 BMPT "terminator" Fire Support Combat Vehicle

Post by Panzermeister36 »

Looks freakin' epic so far! What a beast of a kit ... well it is a beast of a tank :mrgreen: Was it an enjoyable build or a bit annoying with all those parts and ludicrous details?
Unleash the DShK!

http://www.youtube.com/user/Panzermeister36

WIPs
Dragon Sd.Kfz.7/2 FlaK 37 - Adam Mann's Halbkettenfahrzeug Gruppenbau
Dragon StuG IV Early - Unarmed Snowplow Modification
Trumpeter BMP-1 w/ BTR-70 Turret
Cyberhobby Geschützwagen 38M FlaK 103/38 - "M" GB
HobbyBoss T-40
Meng T-90
Orochi M3A3 Bradley
User avatar
PaulAyrey
Sergeant Major of the Army
Posts: 1141
Joined: Tue Feb 04, 2014 5:24 pm
Location: Worthing, West Sussex, UK
Contact:

Re: Meng 1:35 BMPT "terminator" Fire Support Combat Vehicle

Post by PaulAyrey »

Looks great built up. Really detailed.
User avatar
MarkVerploeg
Major
Major
Posts: 4837
Joined: Wed Oct 16, 2013 12:21 am
Location: Oss, Noord Braband The Netherlands
Netherlands

Re: Meng 1:35 BMPT "terminator" Fire Support Combat Vehicle

Post by MarkVerploeg »

Panzermeister36 wrote:Looks freakin' epic so far! What a beast of a kit ... well it is a beast of a tank :mrgreen: Was it an enjoyable build or a bit annoying with all those parts and ludicrous details?
thank you
It was a very kit to build actually
They make it easy for you as the fit is great and there us not even a single drop of filler on there
PaulAyrey wrote:Looks great built up. Really detailed.
Thanks Paul
On the bench
GB builds
1/35 Trumpeter M1132 ESV

Personal builds
1/35 Hobby Boss M1070 tractor with M1000 semi trailer and Meng M1A2 TUSK II Abrams
1/35 Takom V2 rocket with the Meillerwagen and SS100 tractor
User avatar
countzero99uk
Staff Sergeant
Staff Sergeant
Posts: 213
Joined: Tue Oct 14, 2014 10:35 am
Location: Huddersfield

Re: Meng 1:35 BMPT "terminator" Fire Support Combat Vehicle

Post by countzero99uk »

Was going to post an update today, but basically ive done the steps up to the track, going to start on that with a film on :) But ive heard nothing from MENG as yet, going to fire of another email tomorrow. Once ive done the tracks ill move onto my Rising Sun build. If I haven't heard back after another week from MENG ill just deal with hull as is and hope for the best. Im really disappointed as everything else ive seen about MENG has been fantastic.
Post Reply

Return to “Armour & Military Vehicles”