Revell 1:48 Roland C.II

Moderator: T3hGuppy

Post Reply
User avatar
Tat2bhoy
Master Sergeant
Master Sergeant
Posts: 403
Joined: Sun May 01, 2016 8:52 pm
Location: Dunfermline
Scotland

Revell 1:48 Roland C.II

Post by Tat2bhoy »

For this Group Build, I will be building the Revell Roland C.II, which is a Rebox of the Eduard kit.

Image

The paint scheme I have decided to use is one of the Eduard ones, I am also planing on making my own stencils to hand paint the markings as I’ll need different ones for the Eduard scheme. This will be the first bi-plane I’ve built since I got one when I was 10! I am actually looking forward to trying the rigging, also a first for me as I didn’t do it when I was 10. I wasn’t going to start this kit just now as there is four months till the end date of this Group Build, but as I’m hoping this won’t be a long build, I wanted to get it done as I’ve got a couple of bigger builds I would like to be getting on with in the near future, plus I don’t like having two or more builds on the go at once.
So here’s a brief description of the plane courtesy of Wikipedia, so if there’s any discrepancies, don’t blame me lol


Image


The C.II had much lower drag than comparable aircraft of its time. It featured a monocoque fuselage built with an outer skin of two layers of thin plywood strips at an angle to each other (known as a Wickelrumpf, or "wrapped body" design). This had both lower drag and better strength per weight than typical of the time, but it was relatively slow and expensive to build. (This approach was further developed in the de Havilland Mosquito of World War II.) The deep fuselage completely filled the vertical gap between the wing panel centre sections, eliminating any need for cabane struts commonly used in biplanes, and gave the aircraft its "whale" nickname. Struts and wires were reduced, without suffering the weight penalty of cantilever wings, like those used on the pioneering all-metal Junkers J 1 of late 1915. There was even some attempt to flair the wings into the fuselage, to eliminate dead air space, a feature prominently missing from the Schneider Trophy contestants of the following decade. The engineer in charge of the design was Tantzen, who was a student of Ludwig Prandtl, the founder of mathematical aerodynamics and the one to introduce the concept of boundary layer.


Image


The C.II was powered by a single 160 hp (120 kW) Mercedes D III, providing a top speed of 165 km/h (103 mph), a ceiling of 4,000 metres (13,000 ft) and an endurance of four hours.

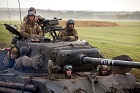
The C.II entered service in the spring of 1916. Operationally, handling was reported as difficult but performance was relatively good. Due to the crew positions with eyes above the upper wing, upward visibility was excellent, but downward visibility was poor. It was also used in a fighter escort role and had a crew of two, pilot and observer/gunner.

Because of its speed, when it was first introduced, it could be intercepted only from above. Because of the lack of downward visibility, it was best attacked by diving below and coming up at it.

Albert Ball, whose first victim was a C.II, said in the latter half of 1916 that it was "the best German machine now".


Image


General characteristics

Crew: 2, pilot and observer
Length: 7.7 m (25 ft 3 in)
Wingspan: 10.3 m (33 ft 9 in)
Height: 2.9 m (9 ft 6 in)
Wing area: 26.00 m² (280.8 ft²)
Empty weight: 764 kg (1,681 lb)
Loaded weight: 1,284 kg (2,825 lb)
Power plant: 1 × Mercedes D.III water-cooled in-line, 160 hp (120 kw)
Performance

Maximum speed: 165 km/h (103 mph) at sea level
Service ceiling: 4,000 m (13,123 ft)
Rate of climb: 12 minutes to 2,000 m (6,562 ft)
Armament

Guns: 7.92 mm (0.312 in) Parabellum machine gun on a ring mounting in rear turret, forward-firing synchronised 7.92mm Spandau machine gun
Bombs: four 12.5 kg bombs carried under the fuselage.
Last edited by Tat2bhoy on Thu Dec 06, 2018 10:35 pm, edited 1 time in total.
Image Image #32
Image
Revell 1:72 Type IXC/40 U-Boat ✅
Meng 1:48 Messerschmitt Me410 B-2/U2/R4 Heavy Fighter✅
Miniart 1:35 T-54-2 Soviet tank✅
User avatar
Tat2bhoy
Master Sergeant
Master Sergeant
Posts: 403
Joined: Sun May 01, 2016 8:52 pm
Location: Dunfermline
Scotland

Re: Revell 1:48 Roland C.II

Post by Tat2bhoy »

Starting with the box, it’s a typical revell style box, nice artwork on the front but a side opening :eeek:

Image

Once the contents were removed, a nice wee pile greeted me, wasn’t quite the same as taking the lid of a top opening box, but still nice once in a pile.

Image

First up we have the instructions, a nice colourful a4 size booklet

Image

At the start is the usual paint colours that are to be used, as far as I know they are humbrols colours, won’t be using those but still handy as it makes converting them easier into other brands of paint.

Image

Next is a layout of the sprues showing which parts aren’t used, only one part is blacked out.
What I have noticed is sprue D is missing, which is the opposite of sprue E

Image

Onto the construction pages, there are 35 steps over five pages, these new style of diagrams are much easier to work too and also look better.

Image
Image
Image

Steps 36 and 37 are the paint schemes, neither of which I’ll l be using

Image
Image

The sheet of decals are nice, but I’ll be painting most of them myself.

Image

The sprues all come in one bag with the clear parts in their own bag inside also.

Image

Image

There are only 6 clear parts which will make masking much easier than than the normal German aircraft I usually build :banana:

Image

Sure A contains the fuselage half’s, there’s some slight flash on parts but nothing that a light buff won’t sort.

Image

Sprues C,D and E are all on the same sprue, not sure why.
They contain the engine and tail parts.

Image

Sprue B contains the wings and other parts

Image

And here you can see that it is an Eduard kit.

Image

So that’s a quick review of what comes with this kit, so far so good, but it is an Eduard kit, so hopefully it’s builds up well,
only time will tell
Image Image #32
Image
Revell 1:72 Type IXC/40 U-Boat ✅
Meng 1:48 Messerschmitt Me410 B-2/U2/R4 Heavy Fighter✅
Miniart 1:35 T-54-2 Soviet tank✅
User avatar
Twokidsnosleep
General
General
Posts: 18026
Joined: Thu Aug 07, 2014 4:07 pm
Location: BC,Canada
Canada

Re: Revell 1:48 Roland C.II

Post by Twokidsnosleep »

Awesome choice :thumb2:
It is a cool looking ugly thing if you get my drift
I like the bright white version you show
Will,be following you along, best of luck with the build :D
:pop:
Scott

On, Under or Near the Bench:
American Graffiti Ford Coupe
Headless Horseman...figure sig
1/72 Black Pearl Pirate Ship
User avatar
Kevthemodeller
Lieutenant Colonel
Lieutenant Colonel
Posts: 5596
Joined: Sat Mar 26, 2016 8:31 am
Location: Newton Abbot UK
England

Re: Revell 1:48 Roland C.II

Post by Kevthemodeller »

At first I was thinking Revell had sorted themselves out, only to learn it's and Eduard kit :th: looks a great kit looking forward to the build mate.
Kev

On the bench:
Border Model FOCKE-WULF W190A-8 R2 - 8
User avatar
Tat2bhoy
Master Sergeant
Master Sergeant
Posts: 403
Joined: Sun May 01, 2016 8:52 pm
Location: Dunfermline
Scotland

Re: Revell 1:48 Roland C.II

Post by Tat2bhoy »

Before I start anything, time to make the end opening box into a top opening box, scalpel out and cut along three sides

Image

Push up and we’re all ready to go

Image

A quick look at some of the parts and I find some poorly placed ejection pin marks!!
Looks like a bit of sanding and filling will be needed, doesn’t look like it’ll be too difficult to fix, hopefully :think:

Image

Image
Image Image #32
Image
Revell 1:72 Type IXC/40 U-Boat ✅
Meng 1:48 Messerschmitt Me410 B-2/U2/R4 Heavy Fighter✅
Miniart 1:35 T-54-2 Soviet tank✅
User avatar
digger303
General
General
Posts: 15761
Joined: Mon Mar 16, 2015 10:01 am
Location: Western Australia
Australia

Re: Revell 1:48 Roland C.II

Post by digger303 »

Tat2bhoy wrote: Mon Sep 17, 2018 9:47 pm Before I start anything, time to make the end opening box into a top opening box, scalpel out and cut along three sides

Image

Push up and we’re all ready to go

Image
Interesting looking kit subject, but I thought you would be taller ..... :lol: :cheers2:
Listen and appear wise
Image
Image

scalemates stash https://www.scalemates.com/profiles/mat ... ION[]=Kits
Image
User avatar
pourquoi61
Sergeant Major of the Army
Posts: 1289
Joined: Tue Feb 16, 2016 12:57 pm
Location: Ilkeston, Derbyshire
Great Britain

Re: Revell 1:48 Roland C.II

Post by pourquoi61 »

Looking like a good build. :th: :th:
Image
User avatar
Twokidsnosleep
General
General
Posts: 18026
Joined: Thu Aug 07, 2014 4:07 pm
Location: BC,Canada
Canada

Re: Revell 1:48 Roland C.II

Post by Twokidsnosleep »

Tat2bhoy wrote: Mon Sep 17, 2018 9:47 pm Before I start anything, time to make the end opening box into a top opening box, scalpel out and cut along three sides

Image

Push up and we’re all ready to go

Image

A quick look at some of the parts and I find some poorly placed ejection pin marks!!
Looks like a bit of sanding and filling will be needed, doesn’t look like it’ll be too difficult to fix, hopefully :think:

Image

Image
I am just gonna drop this how to video on Stop Animation here for you
I think it would be excellent to see your little helper there in action on video :D
Scott

On, Under or Near the Bench:
American Graffiti Ford Coupe
Headless Horseman...figure sig
1/72 Black Pearl Pirate Ship
User avatar
Tat2bhoy
Master Sergeant
Master Sergeant
Posts: 403
Joined: Sun May 01, 2016 8:52 pm
Location: Dunfermline
Scotland

Re: Revell 1:48 Roland C.II

Post by Tat2bhoy »

Twokidsnosleep wrote: Wed Sep 19, 2018 10:43 pm
Tat2bhoy wrote: Mon Sep 17, 2018 9:47 pm Before I start anything, time to make the end opening box into a top opening box, scalpel out and cut along three sides

Image

Push up and we’re all ready to go

Image

A quick look at some of the parts and I find some poorly placed ejection pin marks!!
Looks like a bit of sanding and filling will be needed, doesn’t look like it’ll be too difficult to fix, hopefully :think:

Image

Image
I am just gonna drop this how to video on Stop Animation here for you
I think it would be excellent to see your little helper there in action on video :D

I would try that, but it’s hard enough finding time to build, let alone do animation as well :wtf:
Image Image #32
Image
Revell 1:72 Type IXC/40 U-Boat ✅
Meng 1:48 Messerschmitt Me410 B-2/U2/R4 Heavy Fighter✅
Miniart 1:35 T-54-2 Soviet tank✅
User avatar
Tat2bhoy
Master Sergeant
Master Sergeant
Posts: 403
Joined: Sun May 01, 2016 8:52 pm
Location: Dunfermline
Scotland

Re: Revell 1:48 Roland C.II

Post by Tat2bhoy »

Decided the main seat needed a bit of work to it so it was a bit more like the rear seat

Image

So time to get the milliput out

Image

And give it some cushion effect

Image

Then send it off to the painters for undercoating

Image
Image Image #32
Image
Revell 1:72 Type IXC/40 U-Boat ✅
Meng 1:48 Messerschmitt Me410 B-2/U2/R4 Heavy Fighter✅
Miniart 1:35 T-54-2 Soviet tank✅
User avatar
Tat2bhoy
Master Sergeant
Master Sergeant
Posts: 403
Joined: Sun May 01, 2016 8:52 pm
Location: Dunfermline
Scotland

Re: Revell 1:48 Roland C.II

Post by Tat2bhoy »

Back from the painters , undercoat and cockpit parts painted ready for fitting

Image

Cockpit and engin painted and fitted, filed a bit too much off from one of the windows, nothing a bit of filler and some paint won’t fix.

Image

Jumping ahead a bit again, fuselage, tail and lower wings fitted and primed with some foam inserted into the cockpit to stop it from getting painted again. Not putting on the upper wings till it’s all painted and some of the rigging done as it will all be easier to do without them on

Image

I made the decision to mask and paint the markings instead of using the decals, but instead of doing them after all the paint work is done, I’m doing them first.
So the way I’m doing them is to paint the base colours first.

Image

I then traced the crosses and numbers from the decal sheet onto a sheet of paper

Image

I then put the stencil mask sheet over the line drawings then cut each one out with a new scalpel blade.

Image

To get the yellow 4, I used the 4 that I cut out and to get the black cross with the white square, I used the square with the cross cut out

Image

Image

For the red stripe, I once again traced it from the decal sheet onto Tamiya tape, I redone the tape as that one was a bit iffy :crazy:

Image

Image

I then place over the crosse with Tamiya tape as I’ll paint the black crosses once the camouflage is done

Image

I used Mr color 117 for the underside

Image

Using Tamiya tape, I cut it into 1mm wide lengths

Image

I will be using it for putting on the raised parts of the wings to get different shades on the wings

Image

Once all the raised areas were masked, I lightly sprayed over the tape slightly to one side of it with Mr color 67 to give it a slight shadow effect

Image

When the tape is removed, a slight difference in colour is achieved

Image


Image


Image
Image Image #32
Image
Revell 1:72 Type IXC/40 U-Boat ✅
Meng 1:48 Messerschmitt Me410 B-2/U2/R4 Heavy Fighter✅
Miniart 1:35 T-54-2 Soviet tank✅
User avatar
Tat2bhoy
Master Sergeant
Master Sergeant
Posts: 403
Joined: Sun May 01, 2016 8:52 pm
Location: Dunfermline
Scotland

Re: Revell 1:48 Roland C.II

Post by Tat2bhoy »

On the upper part, I sprayed the first part of the camouflage using Mr color 423

Image

Once that was dry, it was masked off ready for the next colour

Image

I then painted the purple using mr color h39

Image

Masking removed ready for post shading

Image

I the repeated the masking on the upper parts as I did on the lower wing, which I then over painted using Tamiya x19 smoke the same way I painted the lower parts

Image

Which also gives the same effect

Image

I removed the Tamiya tape from the crosses ready to paint them using Tamiya flat black xf1 and Tamiya nato black xf69 to give the shadow look, hopefully ;)

Image

I give it several light coats to build up the black

Image

Image

Image

Then carefully I remove the stencil mask

Image

And the finished result

Image

And all the masks removed

Image
Last edited by Tat2bhoy on Fri Oct 19, 2018 10:32 pm, edited 1 time in total.
Image Image #32
Image
Revell 1:72 Type IXC/40 U-Boat ✅
Meng 1:48 Messerschmitt Me410 B-2/U2/R4 Heavy Fighter✅
Miniart 1:35 T-54-2 Soviet tank✅
User avatar
Timplastic
Sergeant Major
Sergeant Major
Posts: 648
Joined: Thu Oct 09, 2014 7:29 am
Location: French quarter
Contact:
UN

Re: Revell 1:48 Roland C.II

Post by Timplastic »

That really is some super work. lots of work done on the ribs which has really paid off :cheers2:
I like to know what you think even if it is critique , If you spotted it let me know
Trying to finish what I started, and take part

My youtube channel that needs some updates
https://www.youtube.com/channel/UCjQvLz ... subscriberImage
User avatar
Tat2bhoy
Master Sergeant
Master Sergeant
Posts: 403
Joined: Sun May 01, 2016 8:52 pm
Location: Dunfermline
Scotland

Re: Revell 1:48 Roland C.II

Post by Tat2bhoy »

Timplastic wrote: Fri Oct 19, 2018 10:25 pm That really is some super work. lots of work done on the ribs which has really paid off :cheers2:
Thanks Tim, it was a technique I saw used on YouTube, and I’m really pleased with the way it came out
Image Image #32
Image
Revell 1:72 Type IXC/40 U-Boat ✅
Meng 1:48 Messerschmitt Me410 B-2/U2/R4 Heavy Fighter✅
Miniart 1:35 T-54-2 Soviet tank✅
User avatar
digger303
General
General
Posts: 15761
Joined: Mon Mar 16, 2015 10:01 am
Location: Western Australia
Australia

Re: Revell 1:48 Roland C.II

Post by digger303 »

Not only good work , but smart as well. You understand how the colors react with each other when over coated. Loved the ribs. :bow:: :bow:: :cheers2:
Listen and appear wise
Image
Image

scalemates stash https://www.scalemates.com/profiles/mat ... ION[]=Kits
Image
User avatar
Kevthemodeller
Lieutenant Colonel
Lieutenant Colonel
Posts: 5596
Joined: Sat Mar 26, 2016 8:31 am
Location: Newton Abbot UK
England

Re: Revell 1:48 Roland C.II

Post by Kevthemodeller »

Lovely detail work going on here, the stencils you made are terrific :th: :clap:
Kev

On the bench:
Border Model FOCKE-WULF W190A-8 R2 - 8
User avatar
JoaquinGM
Staff Sergeant
Staff Sergeant
Posts: 175
Joined: Sun Oct 07, 2018 1:09 pm
Location: Zaragoza
Spain

Re: Revell 1:48 Roland C.II

Post by JoaquinGM »

Love biplanes and this look that will be a great build.
:pop:
User avatar
Twokidsnosleep
General
General
Posts: 18026
Joined: Thu Aug 07, 2014 4:07 pm
Location: BC,Canada
Canada

Re: Revell 1:48 Roland C.II

Post by Twokidsnosleep »

Holy geeze, look at all that colour
Great job :thumb2:
Scott

On, Under or Near the Bench:
American Graffiti Ford Coupe
Headless Horseman...figure sig
1/72 Black Pearl Pirate Ship
User avatar
Tomcat64
Brigadier General
Brigadier General
Posts: 7034
Joined: Thu Sep 22, 2016 3:24 pm
Location: Swindon, UK
England

Re: Revell 1:48 Roland C.II

Post by Tomcat64 »

That's just stunning work on the paintjob :eeek:

And awesome to see MiniStu in action helping out too :)
Cheers, Neil

On the Bench:
Tamiya 1/35 PzKpfwIB
Tamiya 1/35 Willys Jeep
Revell 1/72 Millennium Falcon
User avatar
pourquoi61
Sergeant Major of the Army
Posts: 1289
Joined: Tue Feb 16, 2016 12:57 pm
Location: Ilkeston, Derbyshire
Great Britain

Re: Revell 1:48 Roland C.II

Post by pourquoi61 »

Lovin it so far. :clap: :clap: :clap:
Image
Panzergrau
Staff Sergeant
Staff Sergeant
Posts: 195
Joined: Thu May 31, 2018 2:27 pm
Location: Sint Maarten
Contact:
Sint Maarten

Re: Revell 1:48 Roland C.II

Post by Panzergrau »

Looking great so far! An inspirational. I might give a try to masking the ribs method. And your mascot really conquered me!

Cheers!
Gabriel :thumb2:
User avatar
Tat2bhoy
Master Sergeant
Master Sergeant
Posts: 403
Joined: Sun May 01, 2016 8:52 pm
Location: Dunfermline
Scotland

Re: Revell 1:48 Roland C.II

Post by Tat2bhoy »

Kevthemodeller wrote: Sat Oct 20, 2018 8:59 am Lovely detail work going on here, the stencils you made are terrific :th: :clap:
JoaquinGM wrote: Sat Oct 20, 2018 5:09 pm Love biplanes and this look that will be a great build.
:pop:
Twokidsnosleep wrote: Sun Oct 21, 2018 12:06 am Holy geeze, look at all that colour
Great job :thumb2:
Tomcat64 wrote: Tue Oct 23, 2018 5:02 pm That's just stunning work on the paintjob :eeek:

And awesome to see MiniStu in action helping out too :)
pourquoi61 wrote: Tue Oct 23, 2018 9:47 pm Lovin it so far. :clap: :clap: :clap:
Panzergrau wrote: Wed Oct 24, 2018 1:54 am Looking great so far! An inspirational. I might give a try to masking the ribs method. And your mascot really conquered me!

Cheers!
Gabriel :thumb2:
digger303 wrote: Sat Oct 20, 2018 12:30 am Not only good work , but smart as well. You understand how the colors react with each other when over coated. Loved the ribs. :bow:: :bow:: :cheers2:
Thanks guys, time to get more pictures up
Image Image #32
Image
Revell 1:72 Type IXC/40 U-Boat ✅
Meng 1:48 Messerschmitt Me410 B-2/U2/R4 Heavy Fighter✅
Miniart 1:35 T-54-2 Soviet tank✅
User avatar
Tat2bhoy
Master Sergeant
Master Sergeant
Posts: 403
Joined: Sun May 01, 2016 8:52 pm
Location: Dunfermline
Scotland

Re: Revell 1:48 Roland C.II

Post by Tat2bhoy »

The whole plane was then coated with Tamiya x22 clear to protect the paintwork from the weathering.
I then used AK panelliner and Mig streaking effects to get a finish I was happy with.

Image

Image

Now onto the potentially fun bit, the rigging, first time doing it. Started with the undercarriage, this isn’t easy but very satisfying in a strange type of way :wtf:

Image

Once the underside was done it was time to start on the wings

Image

Fitted the upper wing,

Image

Then repeated on the other side

Image
Image Image #32
Image
Revell 1:72 Type IXC/40 U-Boat ✅
Meng 1:48 Messerschmitt Me410 B-2/U2/R4 Heavy Fighter✅
Miniart 1:35 T-54-2 Soviet tank✅
User avatar
digger303
General
General
Posts: 15761
Joined: Mon Mar 16, 2015 10:01 am
Location: Western Australia
Australia

Re: Revell 1:48 Roland C.II

Post by digger303 »

What are you using for the rigging ?
Listen and appear wise
Image
Image

scalemates stash https://www.scalemates.com/profiles/mat ... ION[]=Kits
Image
User avatar
Tat2bhoy
Master Sergeant
Master Sergeant
Posts: 403
Joined: Sun May 01, 2016 8:52 pm
Location: Dunfermline
Scotland

Re: Revell 1:48 Roland C.II

Post by Tat2bhoy »

digger303 wrote: Sun Nov 25, 2018 10:27 am What are you using for the rigging ?
This is what I use, I bought it in the sewing section of Tesco’s (a uk supermarket) it’s 100% polyamide, not sure what that is lol, it also melts with heat, so can be tightened when fixed in place with a little bit of heat.

Image
Image Image #32
Image
Revell 1:72 Type IXC/40 U-Boat ✅
Meng 1:48 Messerschmitt Me410 B-2/U2/R4 Heavy Fighter✅
Miniart 1:35 T-54-2 Soviet tank✅
User avatar
digger303
General
General
Posts: 15761
Joined: Mon Mar 16, 2015 10:01 am
Location: Western Australia
Australia

Re: Revell 1:48 Roland C.II

Post by digger303 »

Tat2bhoy wrote: Mon Nov 26, 2018 9:22 am
digger303 wrote: Sun Nov 25, 2018 10:27 am What are you using for the rigging ?
This is what I use, I bought it in the sewing section of Tesco’s (a uk supermarket) it’s 100% polyamide, not sure what that is lol, it also melts with heat, so can be tightened when fixed in place with a little bit of heat.

Image
thanks I shall take a look at our shops :th: :th: :cheers2:
Listen and appear wise
Image
Image

scalemates stash https://www.scalemates.com/profiles/mat ... ION[]=Kits
Image
User avatar
Tat2bhoy
Master Sergeant
Master Sergeant
Posts: 403
Joined: Sun May 01, 2016 8:52 pm
Location: Dunfermline
Scotland

Re: Revell 1:48 Roland C.II

Post by Tat2bhoy »

The Roland is complete, so now onto the base

I decided to try and copy the look from a picture I found on the wingnut wings website

Image

I forgot to take some photos of some of the first stage, schoolboy error :bash:

First of all I made a circular base out of mdf, painted the edge a gloss black then gave part of the base I wanted to remain black two layers of masking tape.
On a separate piece of paper cut to the size if the base, I marked out the layout. I then traced where the bricks would go onto a piece of the clear sticky stuff I made the stencils out off. Removed the backing sheet and taped it upside down onto the cutting mat with the sticky side up then commenced in the tedious job of placing the bricks onto it. The wooden planks were made out of plasticard. I made groves into it to make it look like individual planks the a couple of rubs with 80 grit sand paper to give it a grainy look. I marked on the base where each part was to be placed, started with the large plasticard wooden part followed by the bricks then the shorter wooden bits at the end of the bricks, all were secured using PVA glue, once all was dry I rèmoved the backing and ff from the bricks, I should've taken photos so it would make more sense Lol

Image

Image

Image

Before the glue dried, I spread some dirt in between the bricks
Image Image #32
Image
Revell 1:72 Type IXC/40 U-Boat ✅
Meng 1:48 Messerschmitt Me410 B-2/U2/R4 Heavy Fighter✅
Miniart 1:35 T-54-2 Soviet tank✅
User avatar
Tat2bhoy
Master Sergeant
Master Sergeant
Posts: 403
Joined: Sun May 01, 2016 8:52 pm
Location: Dunfermline
Scotland

Re: Revell 1:48 Roland C.II

Post by Tat2bhoy »

The next stage was to paint the rest of the base a dark brown using artists acrylic paint

Image

To make the ground covering I mixed some dirt I collected from the side of the road which I sieved out to get various sizes, with the smallest particles i mixed it with some cheap premixed filler and brown acrylic paint together until I got a consistency I was happy with, then started to apply it onto the base.

Image

Image

Before it dried, I removed the first layer of masking tape

Image

Image
Image Image #32
Image
Revell 1:72 Type IXC/40 U-Boat ✅
Meng 1:48 Messerschmitt Me410 B-2/U2/R4 Heavy Fighter✅
Miniart 1:35 T-54-2 Soviet tank✅
User avatar
Tat2bhoy
Master Sergeant
Master Sergeant
Posts: 403
Joined: Sun May 01, 2016 8:52 pm
Location: Dunfermline
Scotland

Re: Revell 1:48 Roland C.II

Post by Tat2bhoy »

I then started on the crate and bucket, I made the crate out of plasticard, once agai, forgot to take photos :wtf:
For the bucket, I finally came up with the idea to make it out of the spout of a plastic bottle I keep distilled water in. Decide on the size to make it then cut of the top of the spout.

Image

Glued on a piece of plasticard and when dry, sanded it all smooth

Image

Cut it off from the rest of the spout and put some Tamiya tape around it to look like the metal rims that would normally be found on the real thing, and put some grooves down it

Image
Image Image #32
Image
Revell 1:72 Type IXC/40 U-Boat ✅
Meng 1:48 Messerschmitt Me410 B-2/U2/R4 Heavy Fighter✅
Miniart 1:35 T-54-2 Soviet tank✅
User avatar
Tat2bhoy
Master Sergeant
Master Sergeant
Posts: 403
Joined: Sun May 01, 2016 8:52 pm
Location: Dunfermline
Scotland

Re: Revell 1:48 Roland C.II

Post by Tat2bhoy »

A quick test fit to make sure all looks ok

Image

And once again, the final stages of the base do not have photos to go with them :eeek:
I decided to go with a grass field instead of a muddy field. So after spending a while deciding how to do it, I went for the static grass approach, not having a static grass applicator, I looked into buying one, but seemed a bit pricey for what I was needing one for, so after doing some research on YouTube, I decide to make one. I went for the DIY ne that Luke Town made, if you haven't seen his work, I would highly recommend watching his channel, an amazing landscape modeller. I purchased some 2mm static grass and set about making the applicator.
Before applying the grass, I gave the groundwork a wash of a thinned black/brown acrylic paint.
The wood was all painted using Tamiya paints and also given some of the acrylic wash.
Once everything was dry, I then set about doing the static grass for the first time.
Applied a thin coat of diluted PVA glue then using my DIY applicator, set about applying the grass.
It went better than I thought it would :banana:
The crate and bucket were glued into place, the plane added then three bricks were glued in place to act as chocks.

Will put up the finished build in the final reveal section
Last edited by Tat2bhoy on Tue Dec 04, 2018 1:58 pm, edited 1 time in total.
Image Image #32
Image
Revell 1:72 Type IXC/40 U-Boat ✅
Meng 1:48 Messerschmitt Me410 B-2/U2/R4 Heavy Fighter✅
Miniart 1:35 T-54-2 Soviet tank✅
User avatar
Kevthemodeller
Lieutenant Colonel
Lieutenant Colonel
Posts: 5596
Joined: Sat Mar 26, 2016 8:31 am
Location: Newton Abbot UK
England

Re: Revell 1:48 Roland C.II

Post by Kevthemodeller »

Looking really good mate :th:
Kev

On the bench:
Border Model FOCKE-WULF W190A-8 R2 - 8
User avatar
Twokidsnosleep
General
General
Posts: 18026
Joined: Thu Aug 07, 2014 4:07 pm
Location: BC,Canada
Canada

Re: Revell 1:48 Roland C.II

Post by Twokidsnosleep »

Cool work all around, top to bottom
Loving the diorama development :thumb2:
Scott

On, Under or Near the Bench:
American Graffiti Ford Coupe
Headless Horseman...figure sig
1/72 Black Pearl Pirate Ship
User avatar
Tomcat64
Brigadier General
Brigadier General
Posts: 7034
Joined: Thu Sep 22, 2016 3:24 pm
Location: Swindon, UK
England

Re: Revell 1:48 Roland C.II

Post by Tomcat64 »

Awesome work mate - love the way you've brought this all together :cheers2:
Cheers, Neil

On the Bench:
Tamiya 1/35 PzKpfwIB
Tamiya 1/35 Willys Jeep
Revell 1/72 Millennium Falcon
User avatar
Tat2bhoy
Master Sergeant
Master Sergeant
Posts: 403
Joined: Sun May 01, 2016 8:52 pm
Location: Dunfermline
Scotland

Re: Revell 1:48 Roland C.II

Post by Tat2bhoy »

Twokidsnosleep wrote: Tue Dec 04, 2018 4:15 pm Cool work all around, top to bottom
Loving the diorama development :thumb2:
Tomcat64 wrote: Tue Dec 04, 2018 4:40 pm Awesome work mate - love the way you've brought this all together :cheers2:
Kevthemodeller wrote: Tue Dec 04, 2018 12:28 pm Looking really good mate :th:
Thanks guys, this was a build I wasn’t sure myself how it would come together having never done plane rigging before, plus I don’t normally build dioramas now as I feel I don’t have enough space to keep them, but this isn’t much bigger than the plane so won’t take up much space.
Image Image #32
Image
Revell 1:72 Type IXC/40 U-Boat ✅
Meng 1:48 Messerschmitt Me410 B-2/U2/R4 Heavy Fighter✅
Miniart 1:35 T-54-2 Soviet tank✅
Post Reply

Return to “Build Threads”