Si's 'Zombie trouble' 1/35 Diorama

All your builds here...

Moderator: T3hGuppy

User avatar
ScaleModelJedi
Master Sergeant
Master Sergeant
Posts: 396
Joined: Sun Dec 20, 2015 12:47 am
Location: Birmingham, UK
Contact:

Si's 'Zombie trouble' 1/35 Diorama

Post by ScaleModelJedi »

I've been looking forward to this build and will be making a start straight away. :banana:
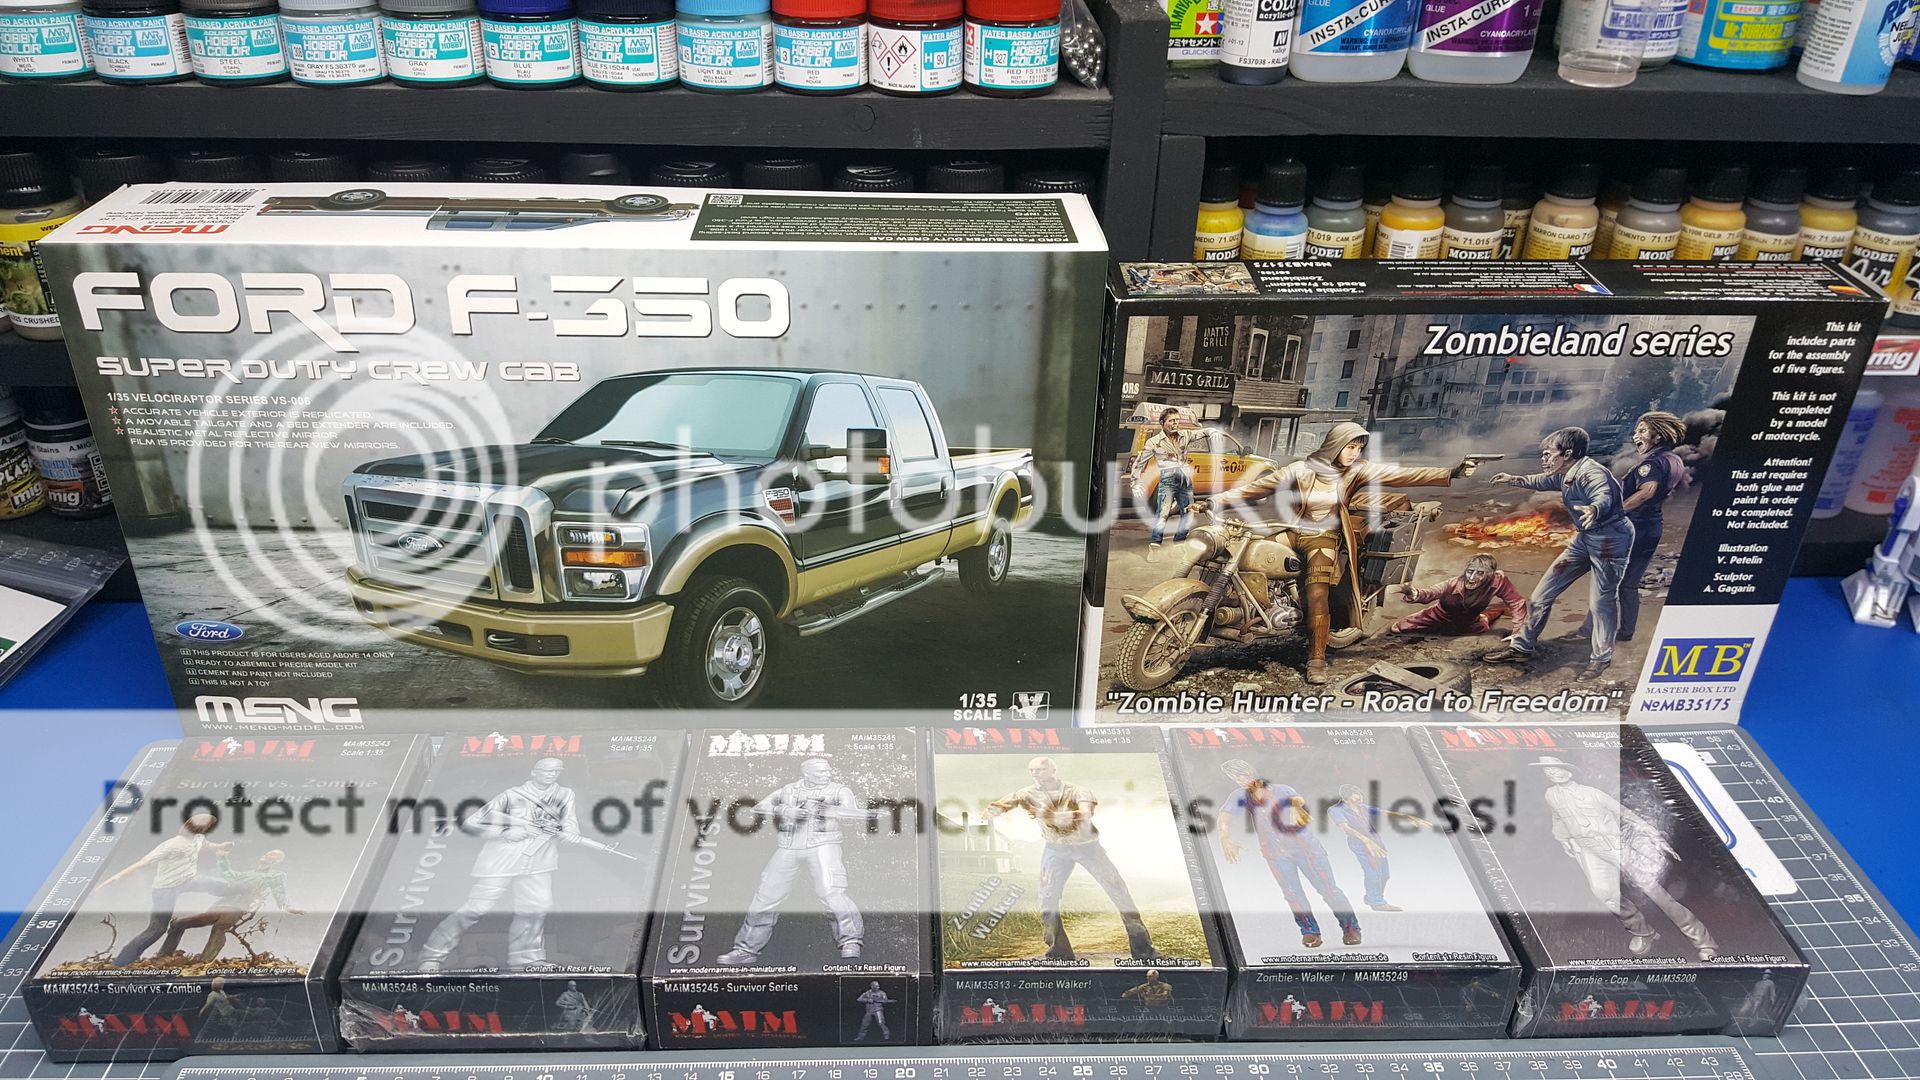
The plan is a dio using the Meng 1/35 Ford F-350 and some figures from M.A.I.M and Masterbox. I will be mostly scratch building the base and the building.

The pick up and figures I have to use. I will make a start on getting the pick up built and the figures assembled so I can then use these to plan out the base.
Image

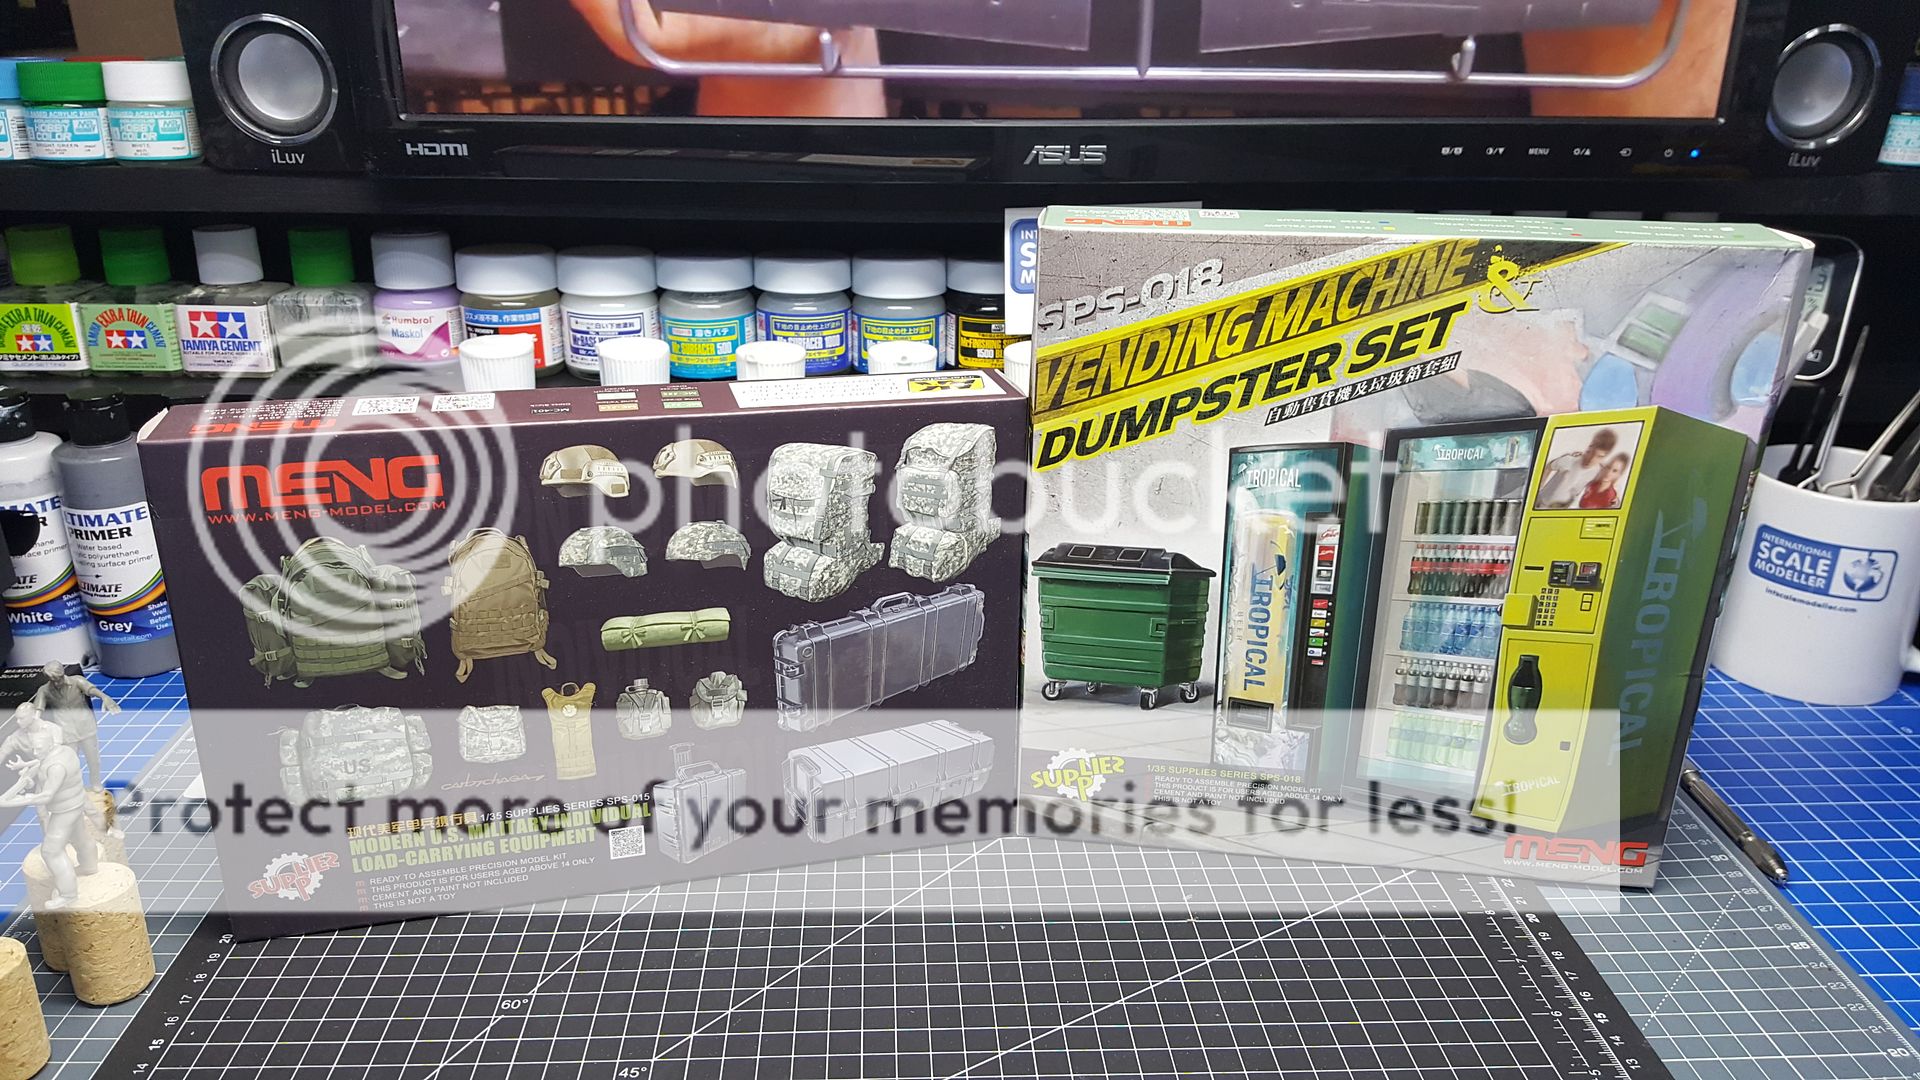
All few more bits I will be using on the build
Image

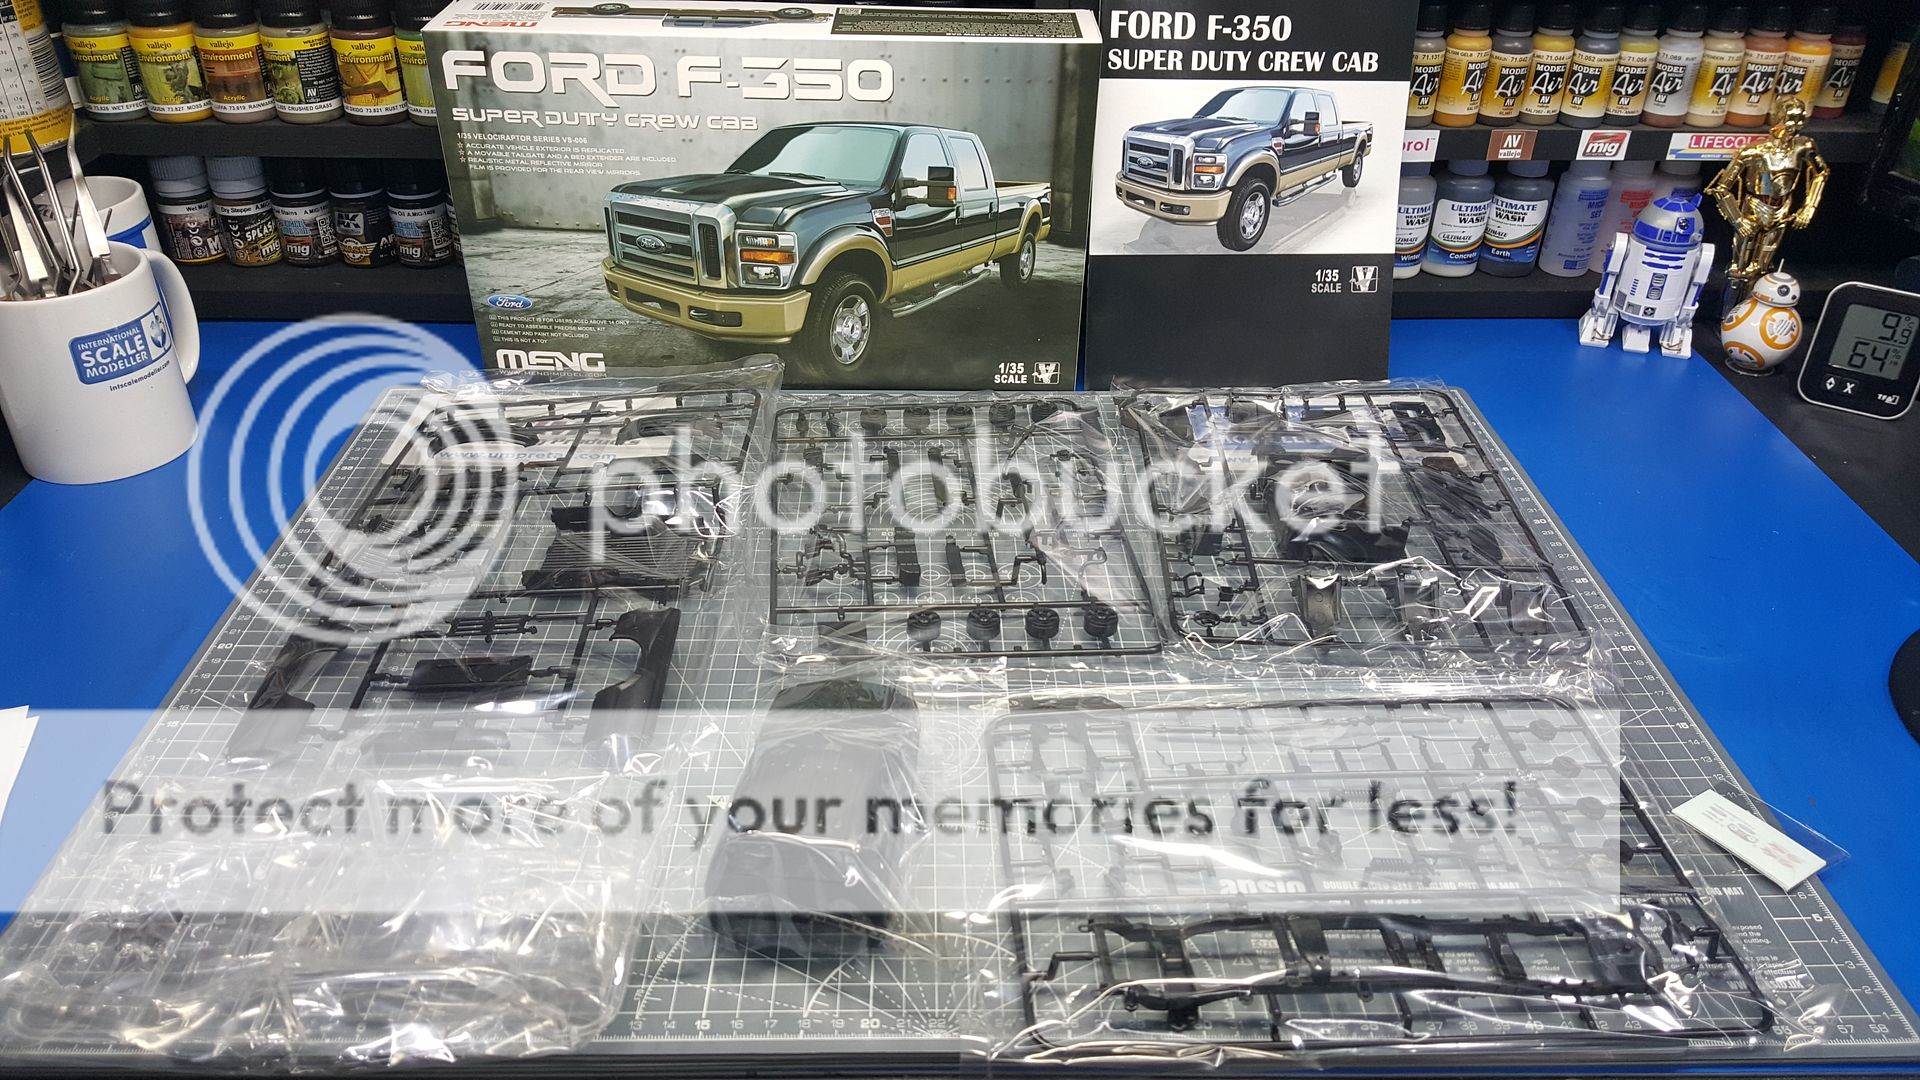
The box contents of the Men Ford F-350. Kit number is VS-006
Image

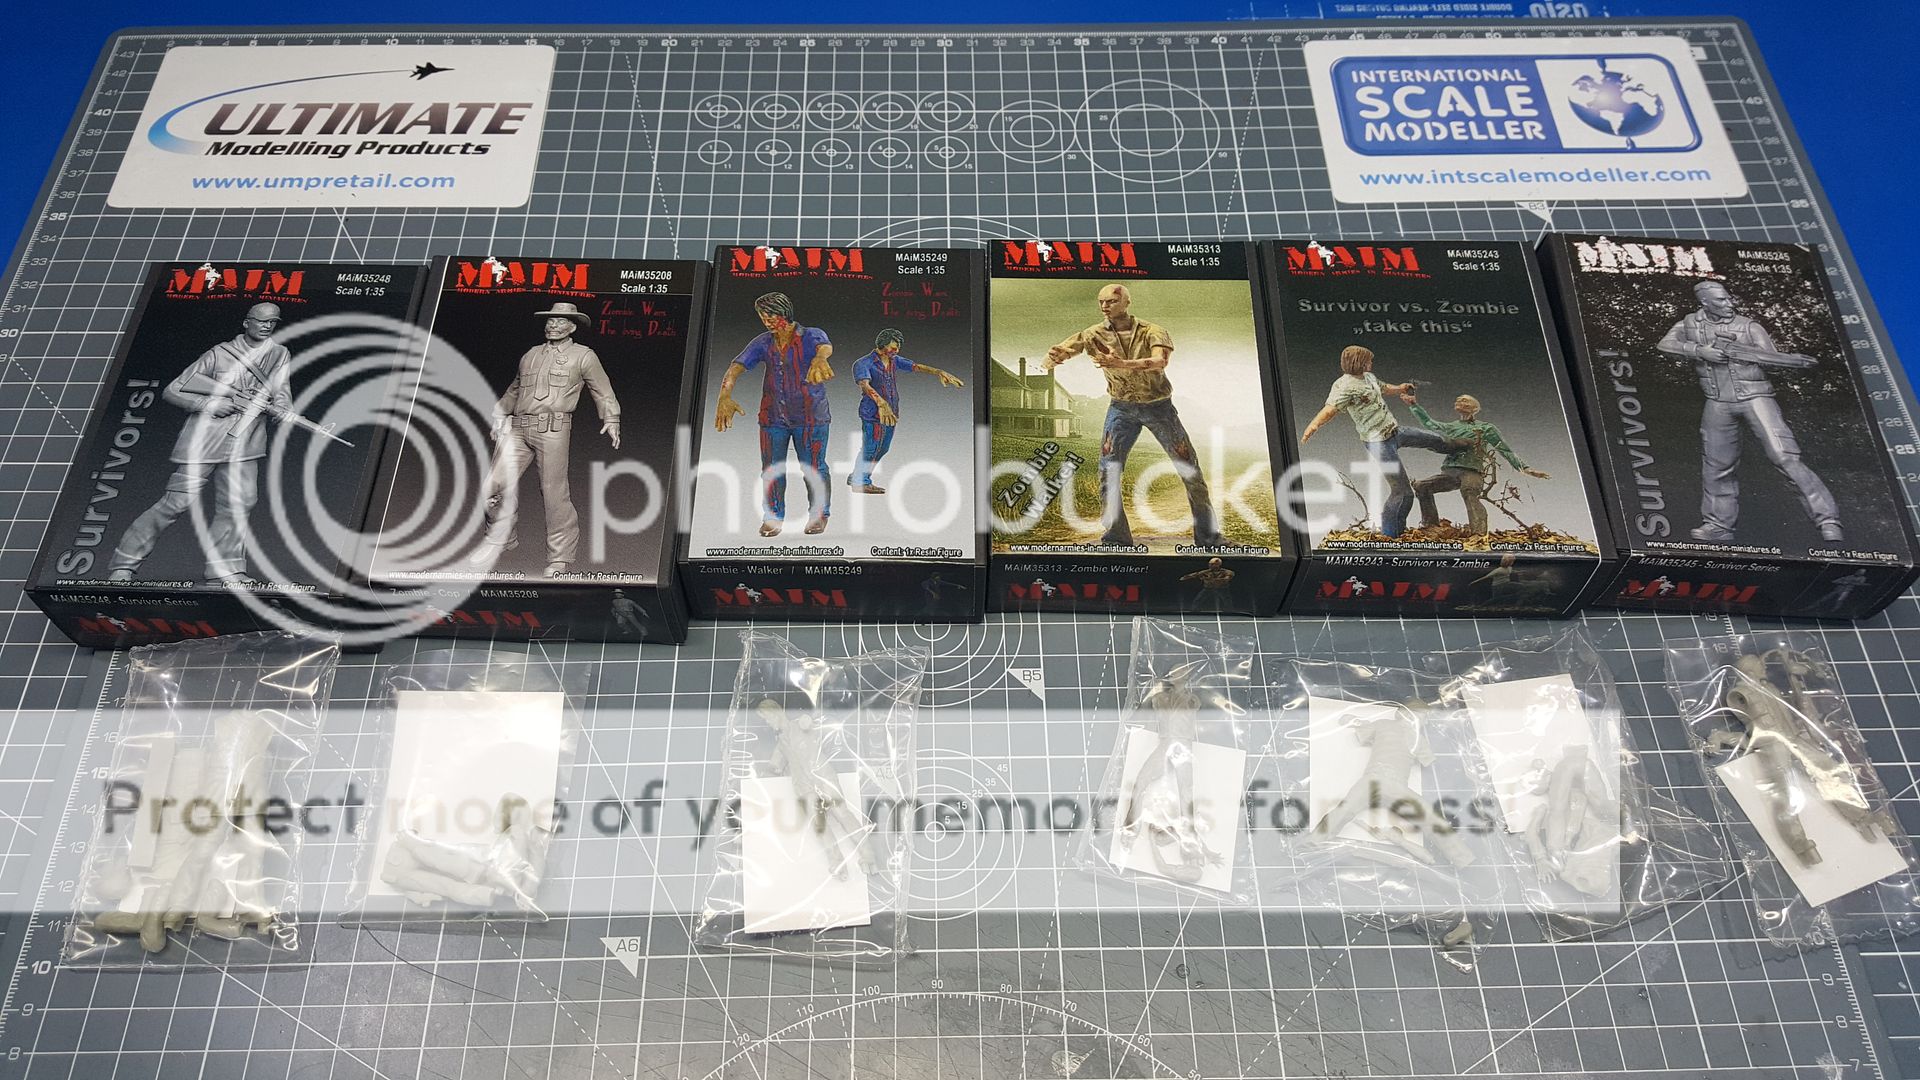
The M.A.I.M resin figures. These are MAiM35248, MAiM35208 zombie copy, MAiM35249 zombie walker, MAiM35313 zombie walker, MAiM35243 survivor Vs zombie and MAIM35245.
Image
Last edited by ScaleModelJedi on Mon Jan 16, 2017 7:53 am, edited 4 times in total.
There are no failed builds only learning experiences.
MY Youtube channel : Scale Model Jedi
https://www.youtube.com/channel/UCSk5py ... taceCr3_3g
User avatar
DBMiller
Chief Warrant Officer 3
Posts: 2216
Joined: Mon Jan 06, 2014 8:10 pm
Location: Guilford, Vermont, USA
United States of America

Re: Si's 'Zombie trouble' 1/35 Diorama

Post by DBMiller »

Those darned Zombies! Always causing trouble! :thumb1:
User avatar
Lysus
Captain
Captain
Posts: 4562
Joined: Fri Dec 18, 2015 11:37 pm
Location: Seattle, US
United States of America

Re: Si's 'Zombie trouble' 1/35 Diorama

Post by Lysus »

Quite a pile to start with! I'm in.

:pop:
Backlog Progress: |||||||||||||||-------|----------|----------| 26/80
On the bench: Hasegawa 1/72 Tatiana's Vanship
Last Completed: Bandai HGUC Geara Zulu // Hasegawa 1/48 J2M3Raiden Prisoner of War
User avatar
NorthernModeller
Command Sergeant Major
Posts: 927
Joined: Sat Jan 09, 2016 8:39 pm
Location: Preston, Lancashire, England
Contact:
England

Re: Si's 'Zombie trouble' 1/35 Diorama

Post by NorthernModeller »

Cant wait to see this come together, Love what you have bought for it :)
SAMI Magazine, Model aircraft and Tamiya Model Magazine contributor
privatepete
First Lieutenant
First Lieutenant
Posts: 3871
Joined: Thu Dec 11, 2014 1:13 pm

Re: Si's 'Zombie trouble' 1/35 Diorama

Post by privatepete »

Love the look of those zombie figures they seem very detailed?
Good luck with the build.
Pete :thumb2:
User avatar
ScaleModelJedi
Master Sergeant
Master Sergeant
Posts: 396
Joined: Sun Dec 20, 2015 12:47 am
Location: Birmingham, UK
Contact:

Re: Si's 'Zombie trouble' 1/35 Diorama

Post by ScaleModelJedi »

DBMiller wrote:Those darned Zombies! Always causing trouble! :thumb1:
Yep always a nuisance those pesky zombies
There are no failed builds only learning experiences.
MY Youtube channel : Scale Model Jedi
https://www.youtube.com/channel/UCSk5py ... taceCr3_3g
User avatar
ScaleModelJedi
Master Sergeant
Master Sergeant
Posts: 396
Joined: Sun Dec 20, 2015 12:47 am
Location: Birmingham, UK
Contact:

Re: Si's 'Zombie trouble' 1/35 Diorama

Post by ScaleModelJedi »

Lysus wrote:Quite a pile to start with! I'm in.

:pop:
Yeah it certainly is, Going to be fun putting it all together :)
There are no failed builds only learning experiences.
MY Youtube channel : Scale Model Jedi
https://www.youtube.com/channel/UCSk5py ... taceCr3_3g
User avatar
ScaleModelJedi
Master Sergeant
Master Sergeant
Posts: 396
Joined: Sun Dec 20, 2015 12:47 am
Location: Birmingham, UK
Contact:

Re: Si's 'Zombie trouble' 1/35 Diorama

Post by ScaleModelJedi »

privatepete wrote:Love the look of those zombie figures they seem very detailed?
Good luck with the build.
Pete :thumb2:
NorthernModeller wrote:Cant wait to see this come together, Love what you have bought for it :)
Thank you :th:, The figures look cool and I'm looking forward to painting them :D
There are no failed builds only learning experiences.
MY Youtube channel : Scale Model Jedi
https://www.youtube.com/channel/UCSk5py ... taceCr3_3g
User avatar
ScaleModelJedi
Master Sergeant
Master Sergeant
Posts: 396
Joined: Sun Dec 20, 2015 12:47 am
Location: Birmingham, UK
Contact:

Re: Si's 'Zombie trouble' 1/35 Diorama

Post by ScaleModelJedi »

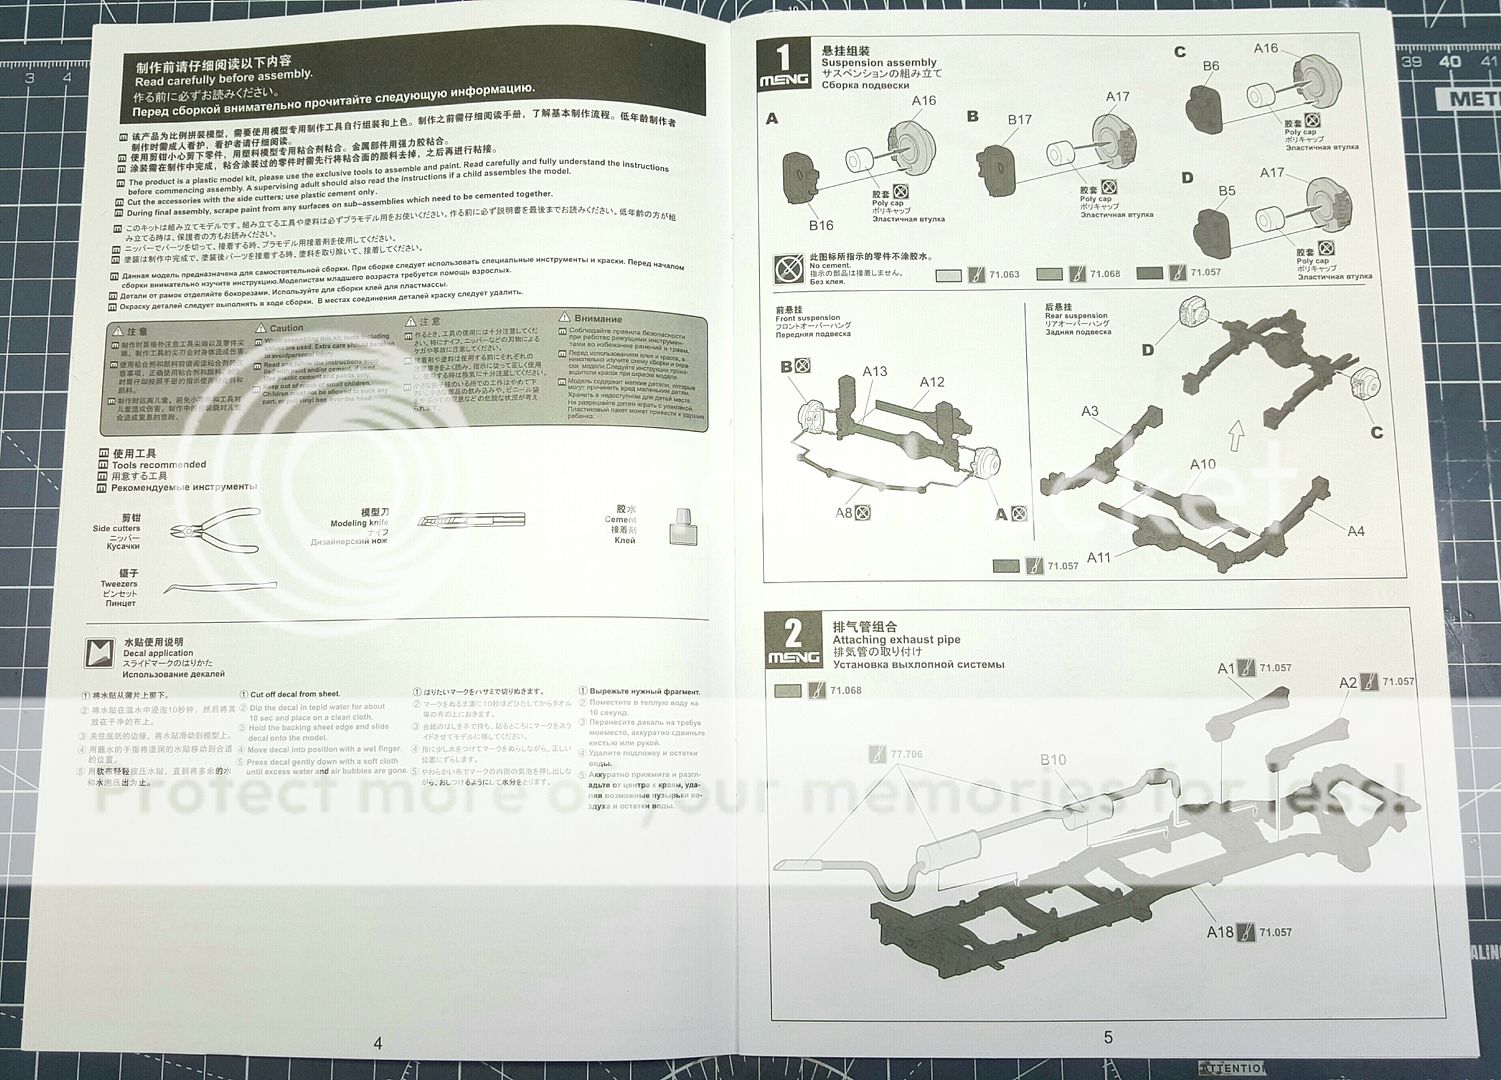
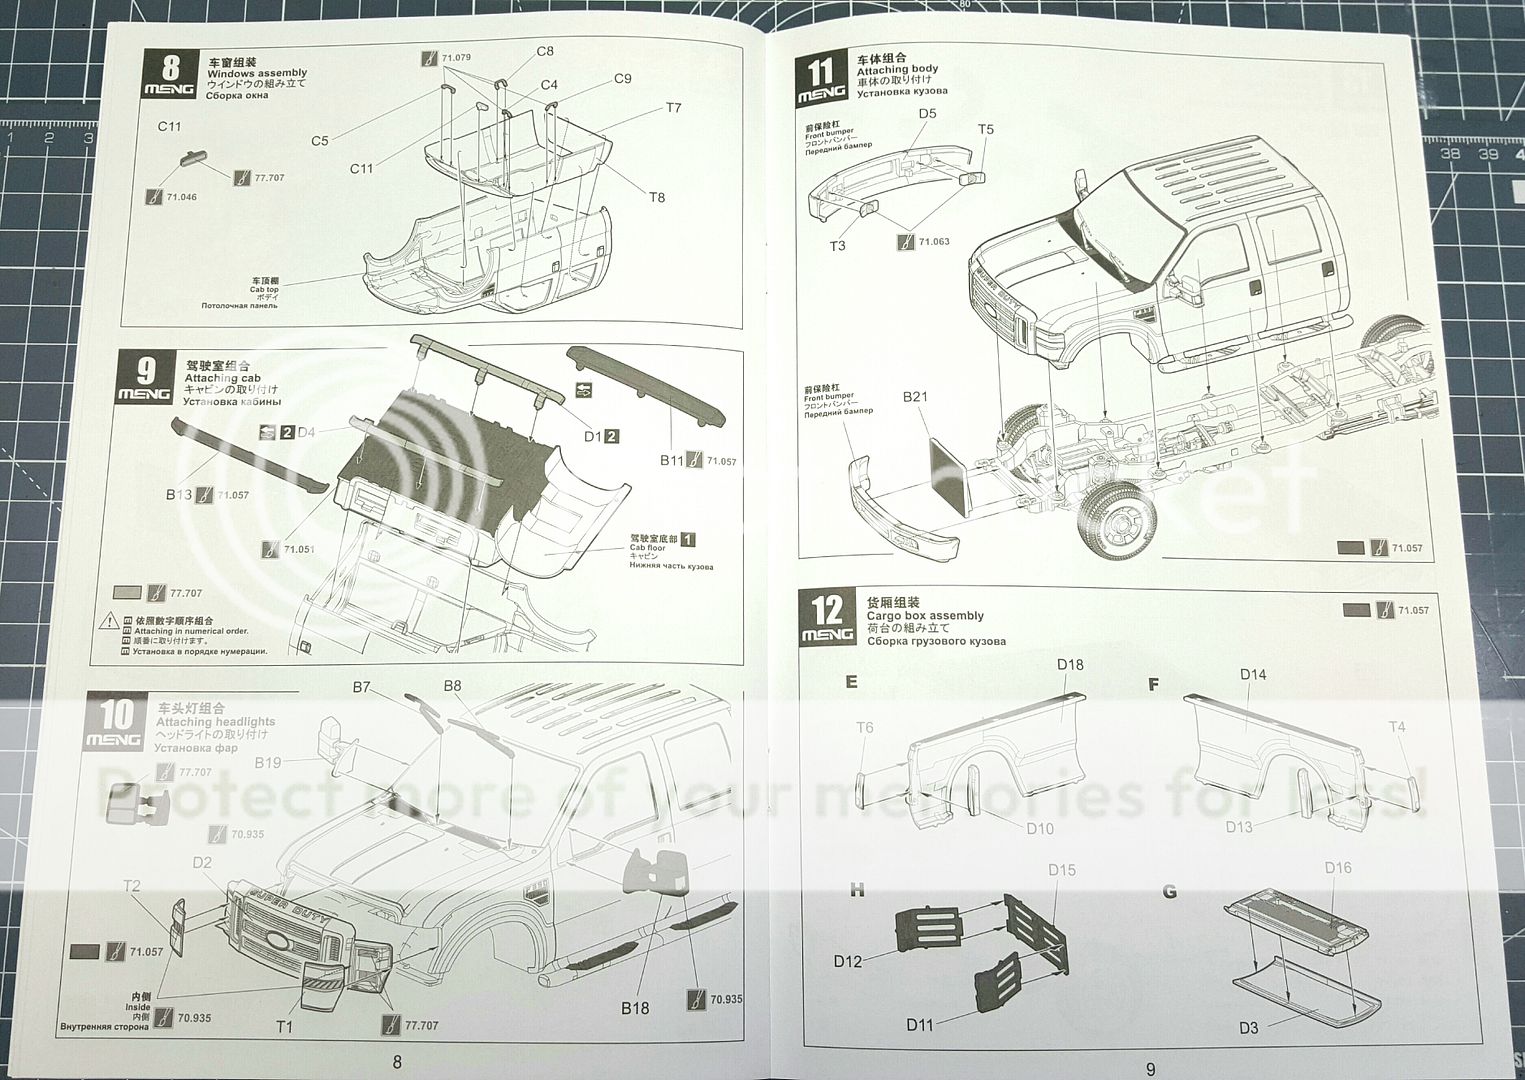
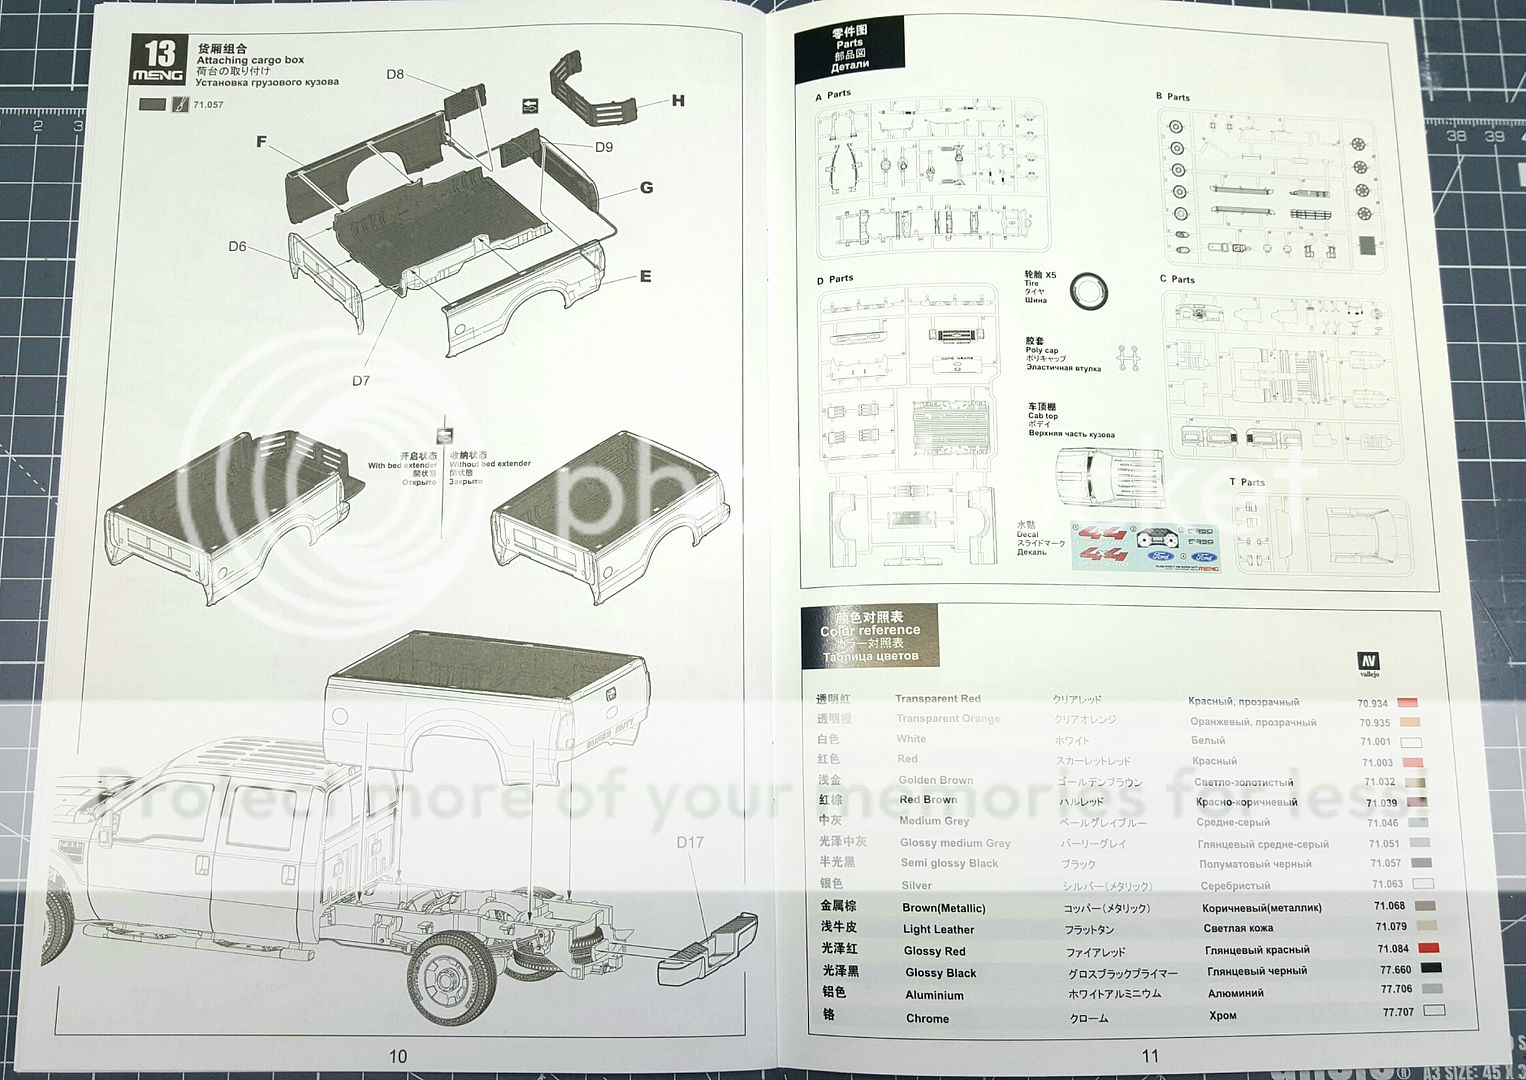
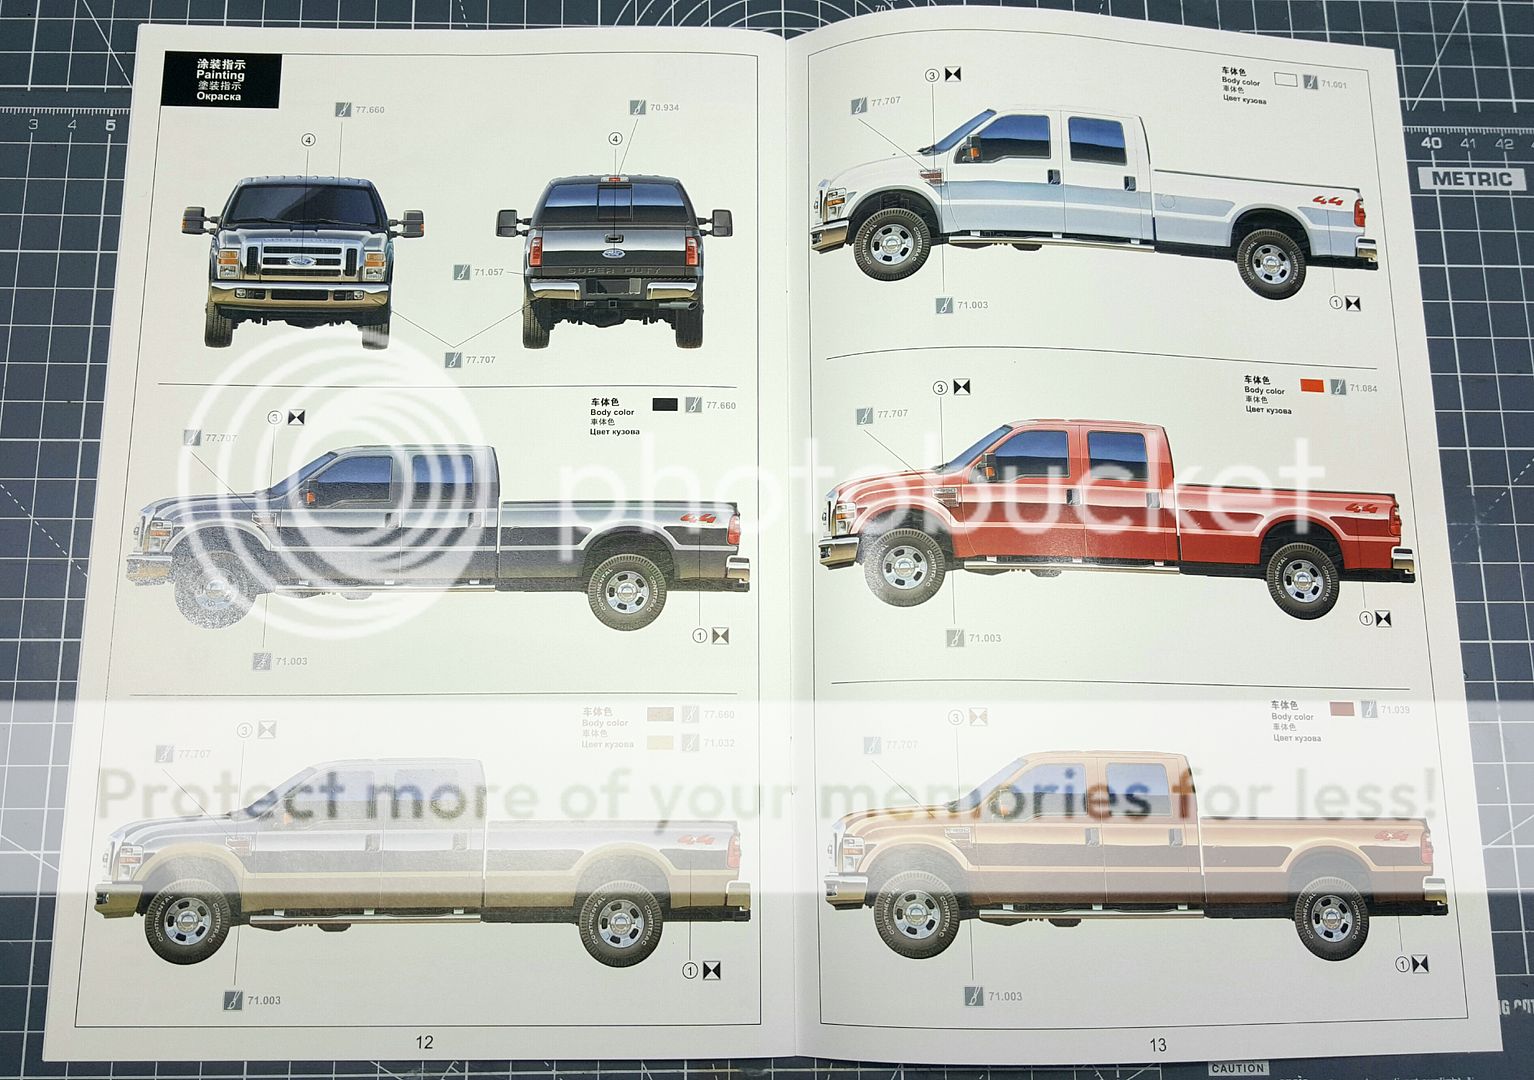
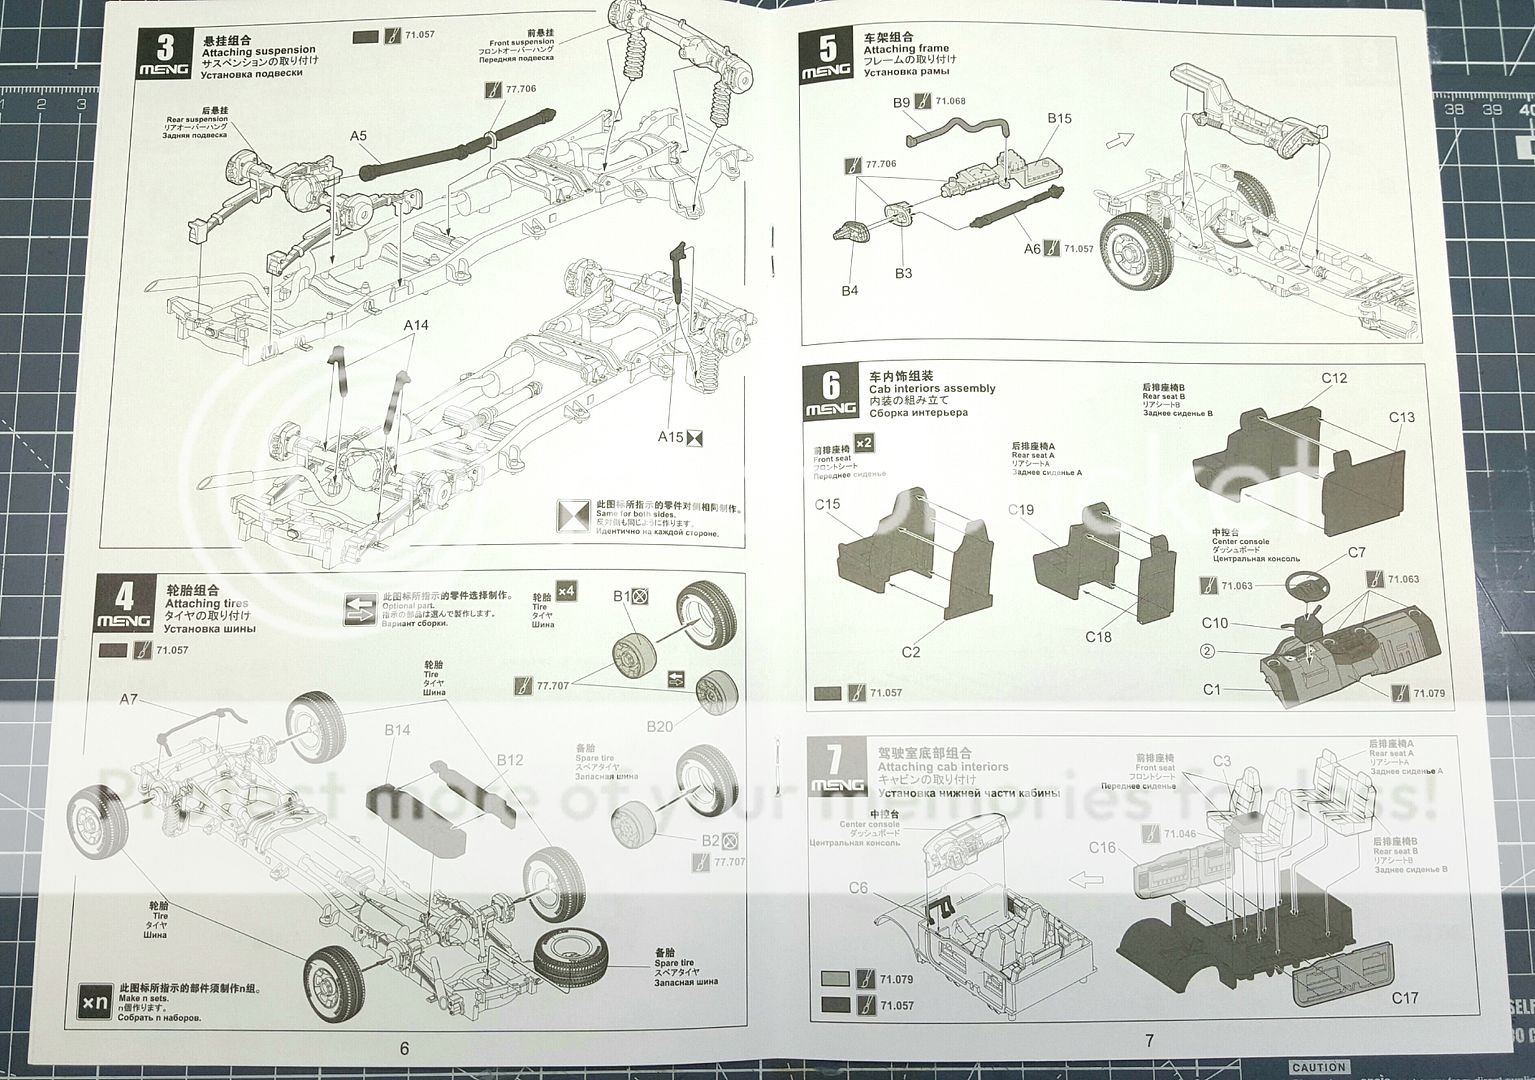
The instructions for the Meng F-350

Steps 1 & 2
Image

Steps 3-7
Image

Steps 8-12
Image

Step 13, Sprue map and colour reference
Image

Colour call out
Image

I made a start on this yesterday and made some good progress.
So far there have been no problems with any of the instructions or fit of parts.

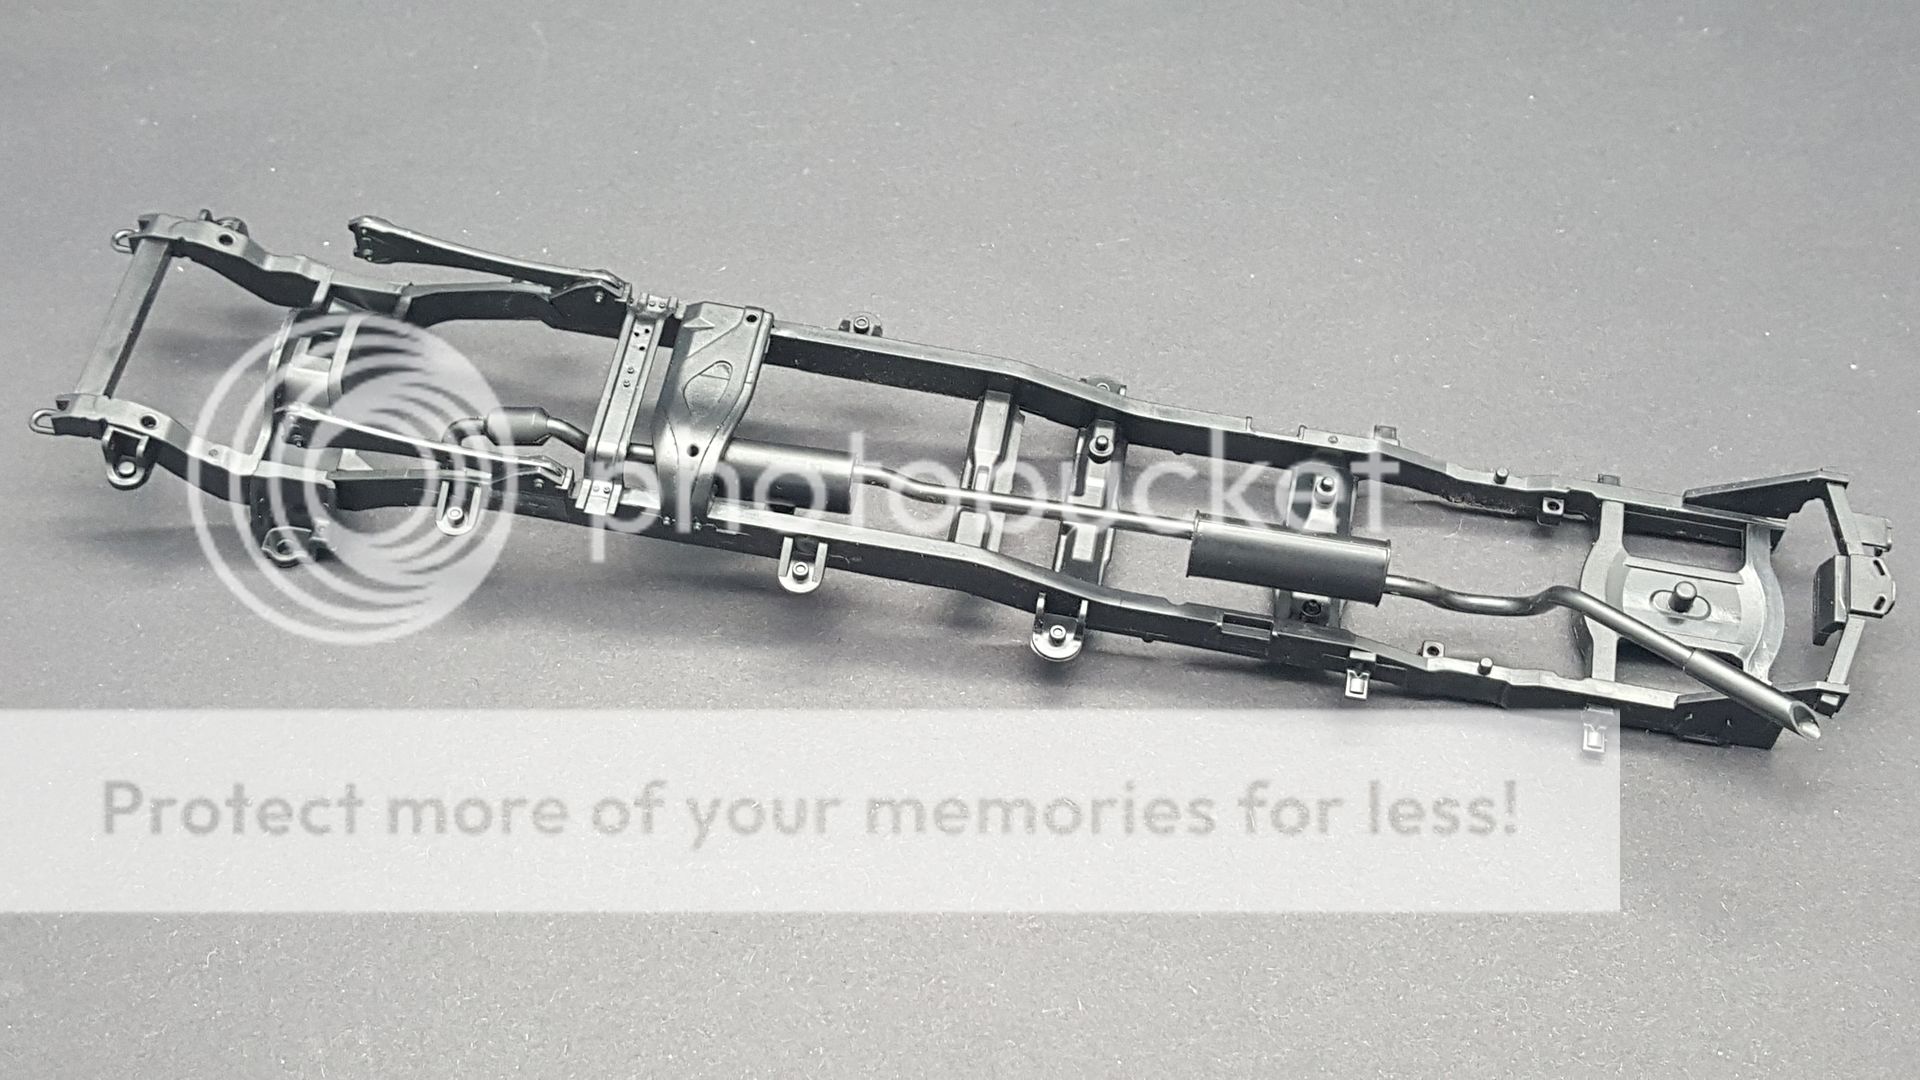
Step 1 of the instructions is building up the wheel hubs, axles and suspension
Image

Step 2 is fitting the exhaust and a couple of other parts to the chassis. I have left the exhaust loose so I can paint it separately and fit afterwards.
Image

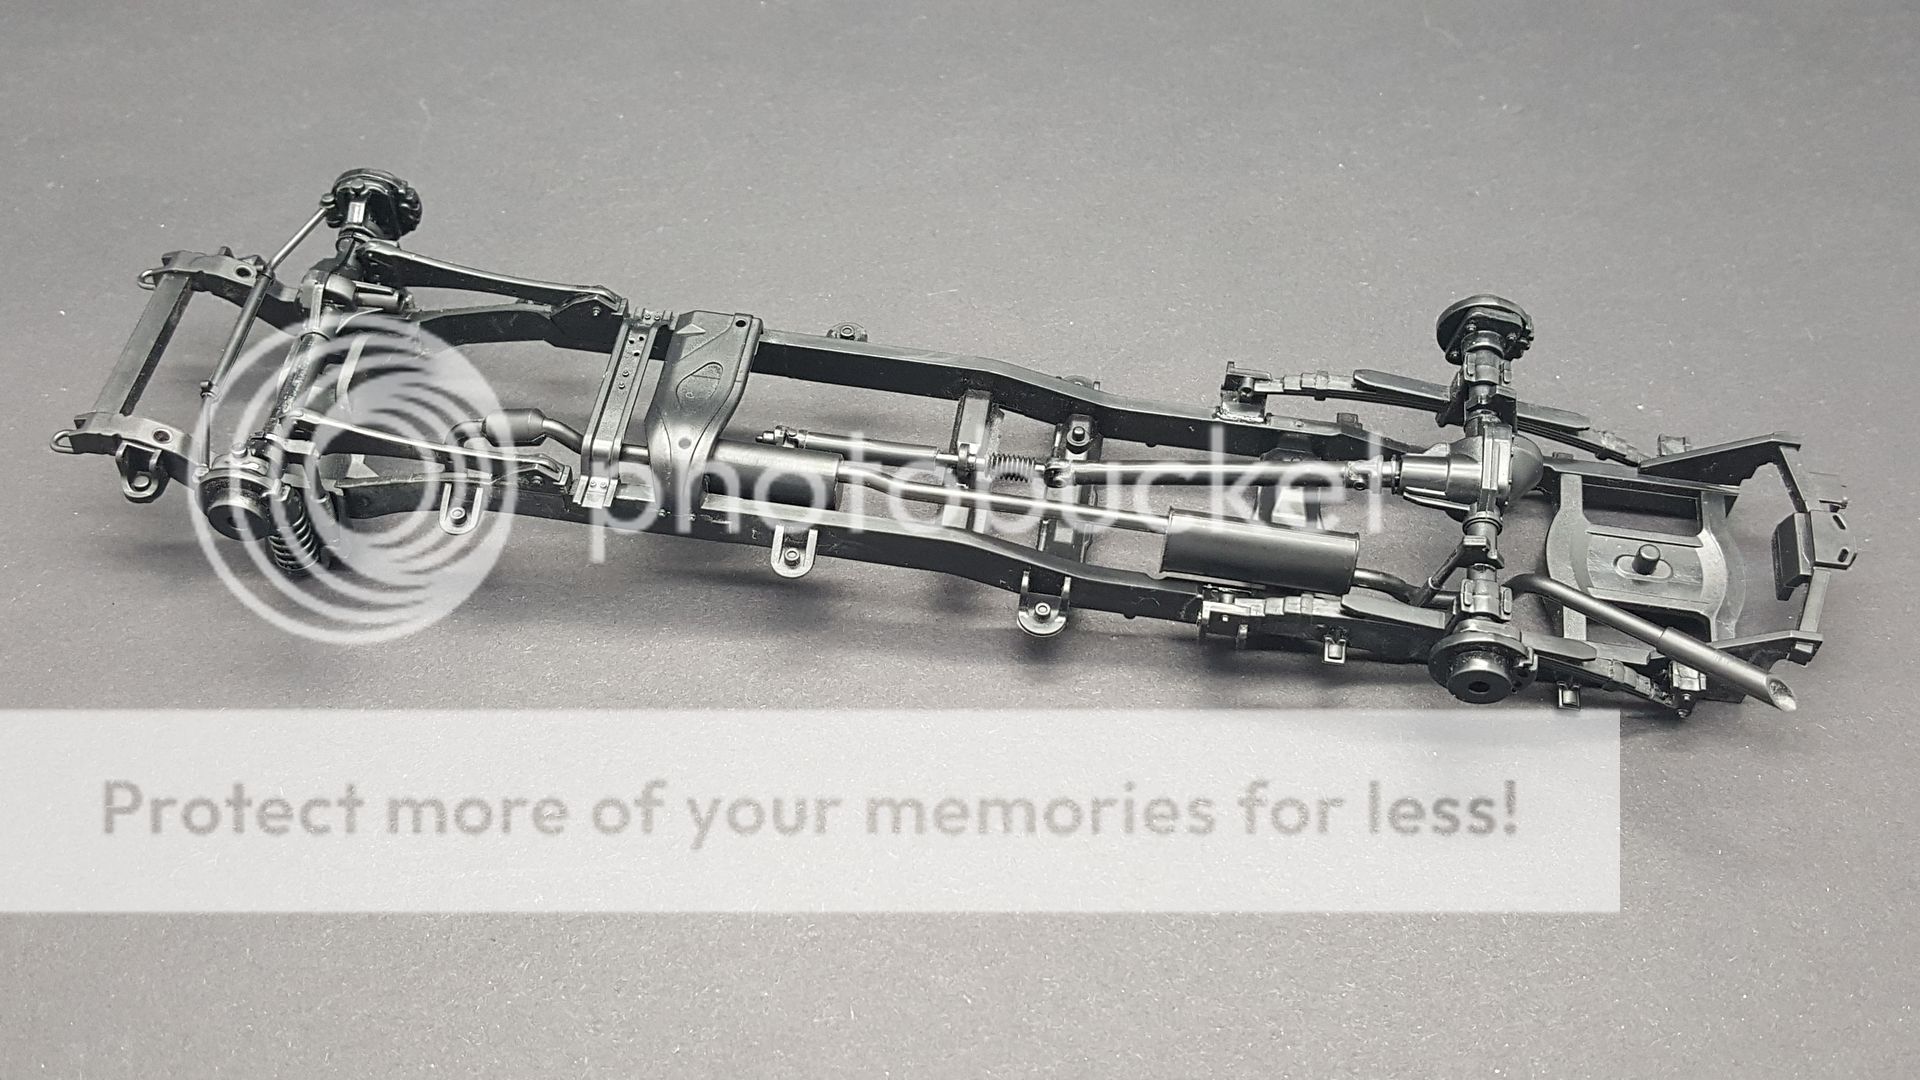
Step 3 requires fitting the axles to the chassis, dampners and the drive shafts. I tried to see if I could still remove the exhaust and fit it back in place with no problems as it looked like it may be difficult with the axles in place. It can still be removed just not quite as easy.
Image

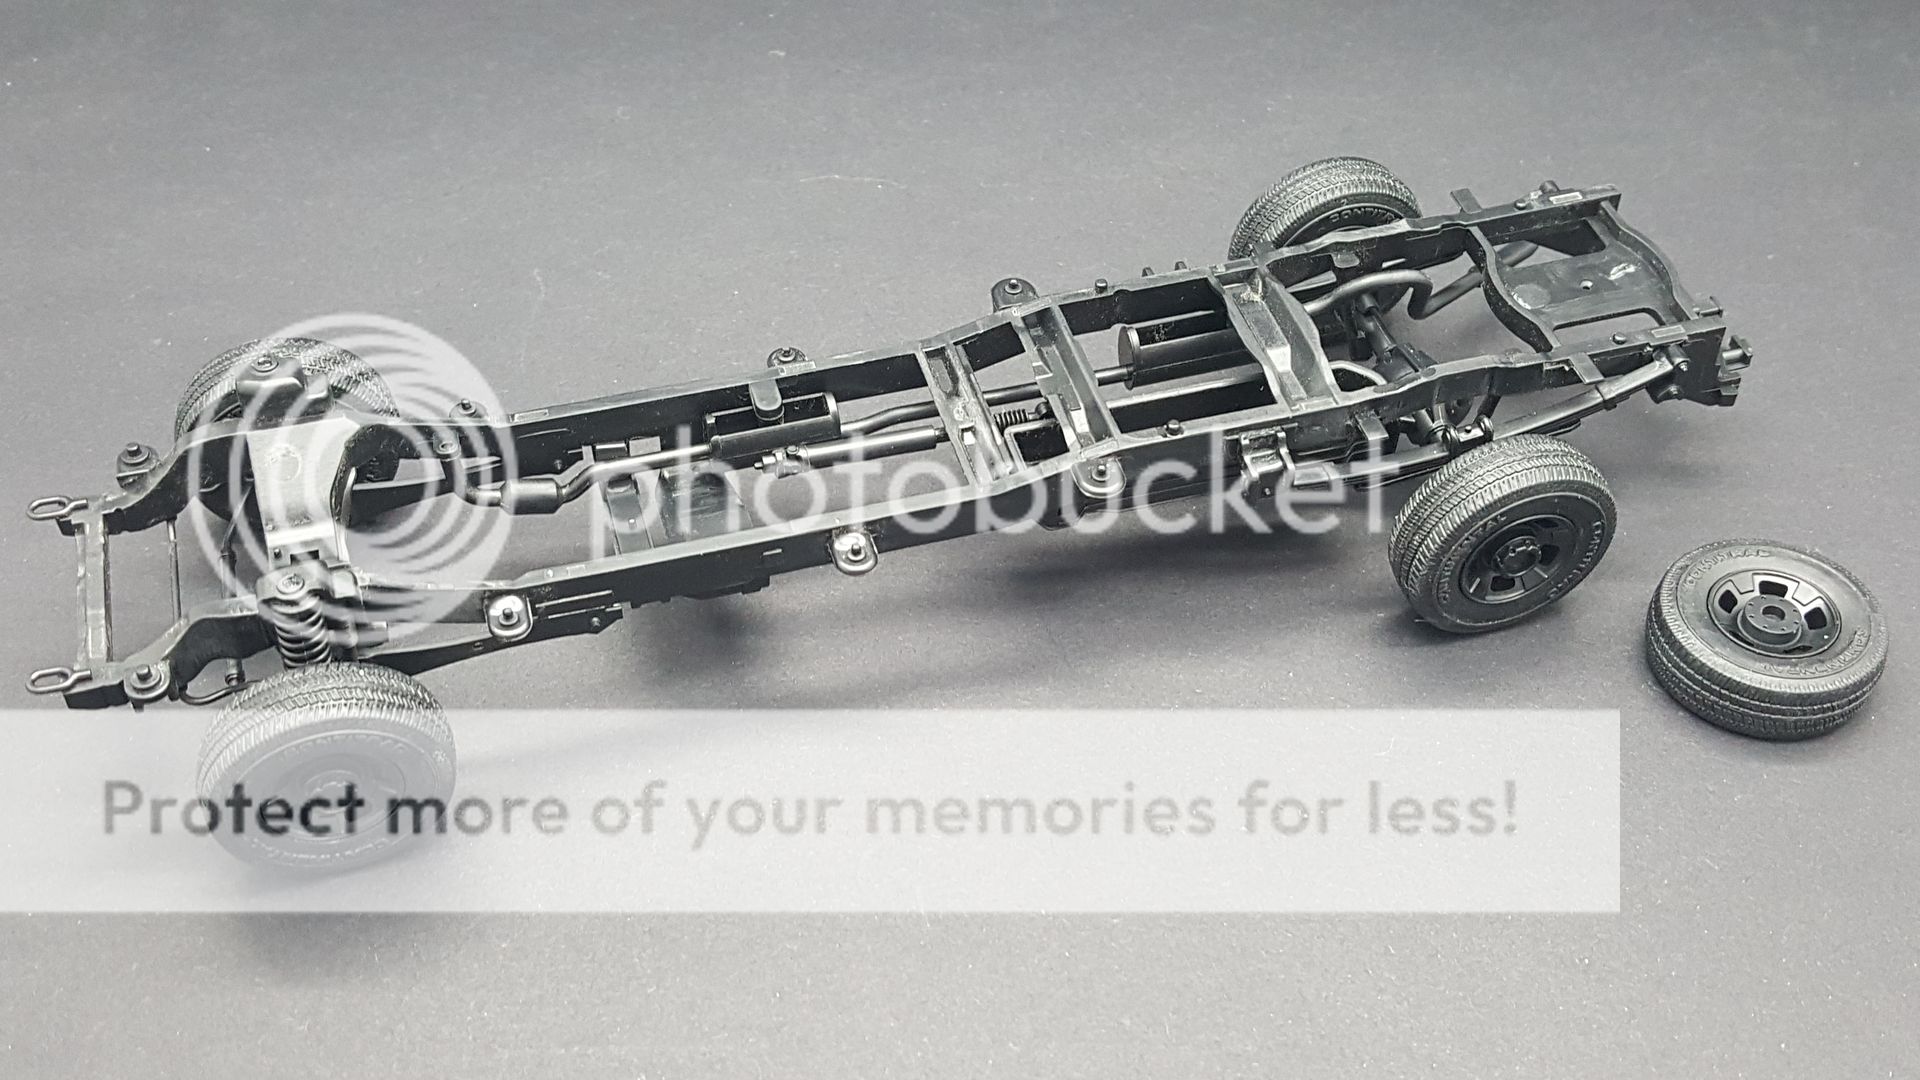
Step 4, There are a couple of parts to fit to the chassis and also cleaning up the wheels to fit the tires. There are two sets of wheels to choice from in the kit. The tires are easy to be removed and will be to paint the wheels.
Image

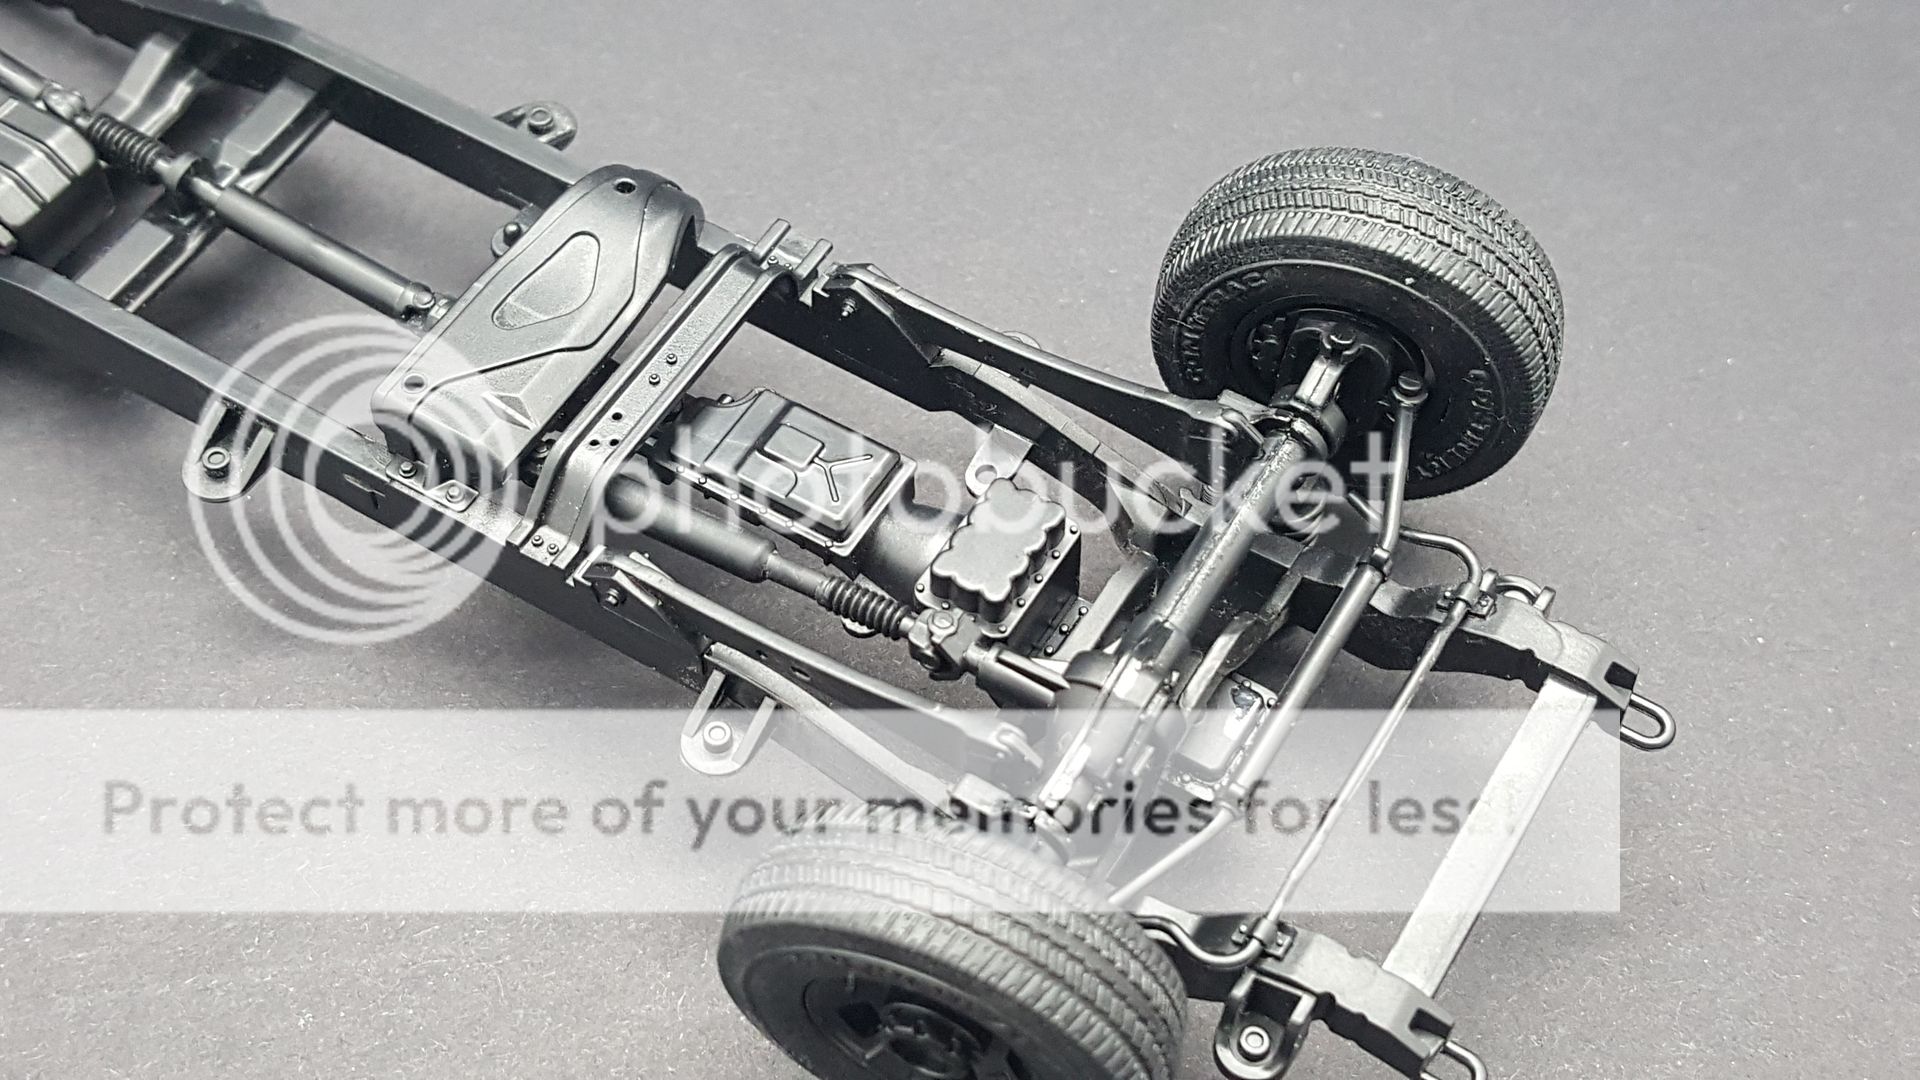
Step 5 is fitting part of the transmission and the other part of the drive shafts. The kit doesn't have any engine detail included.
Image

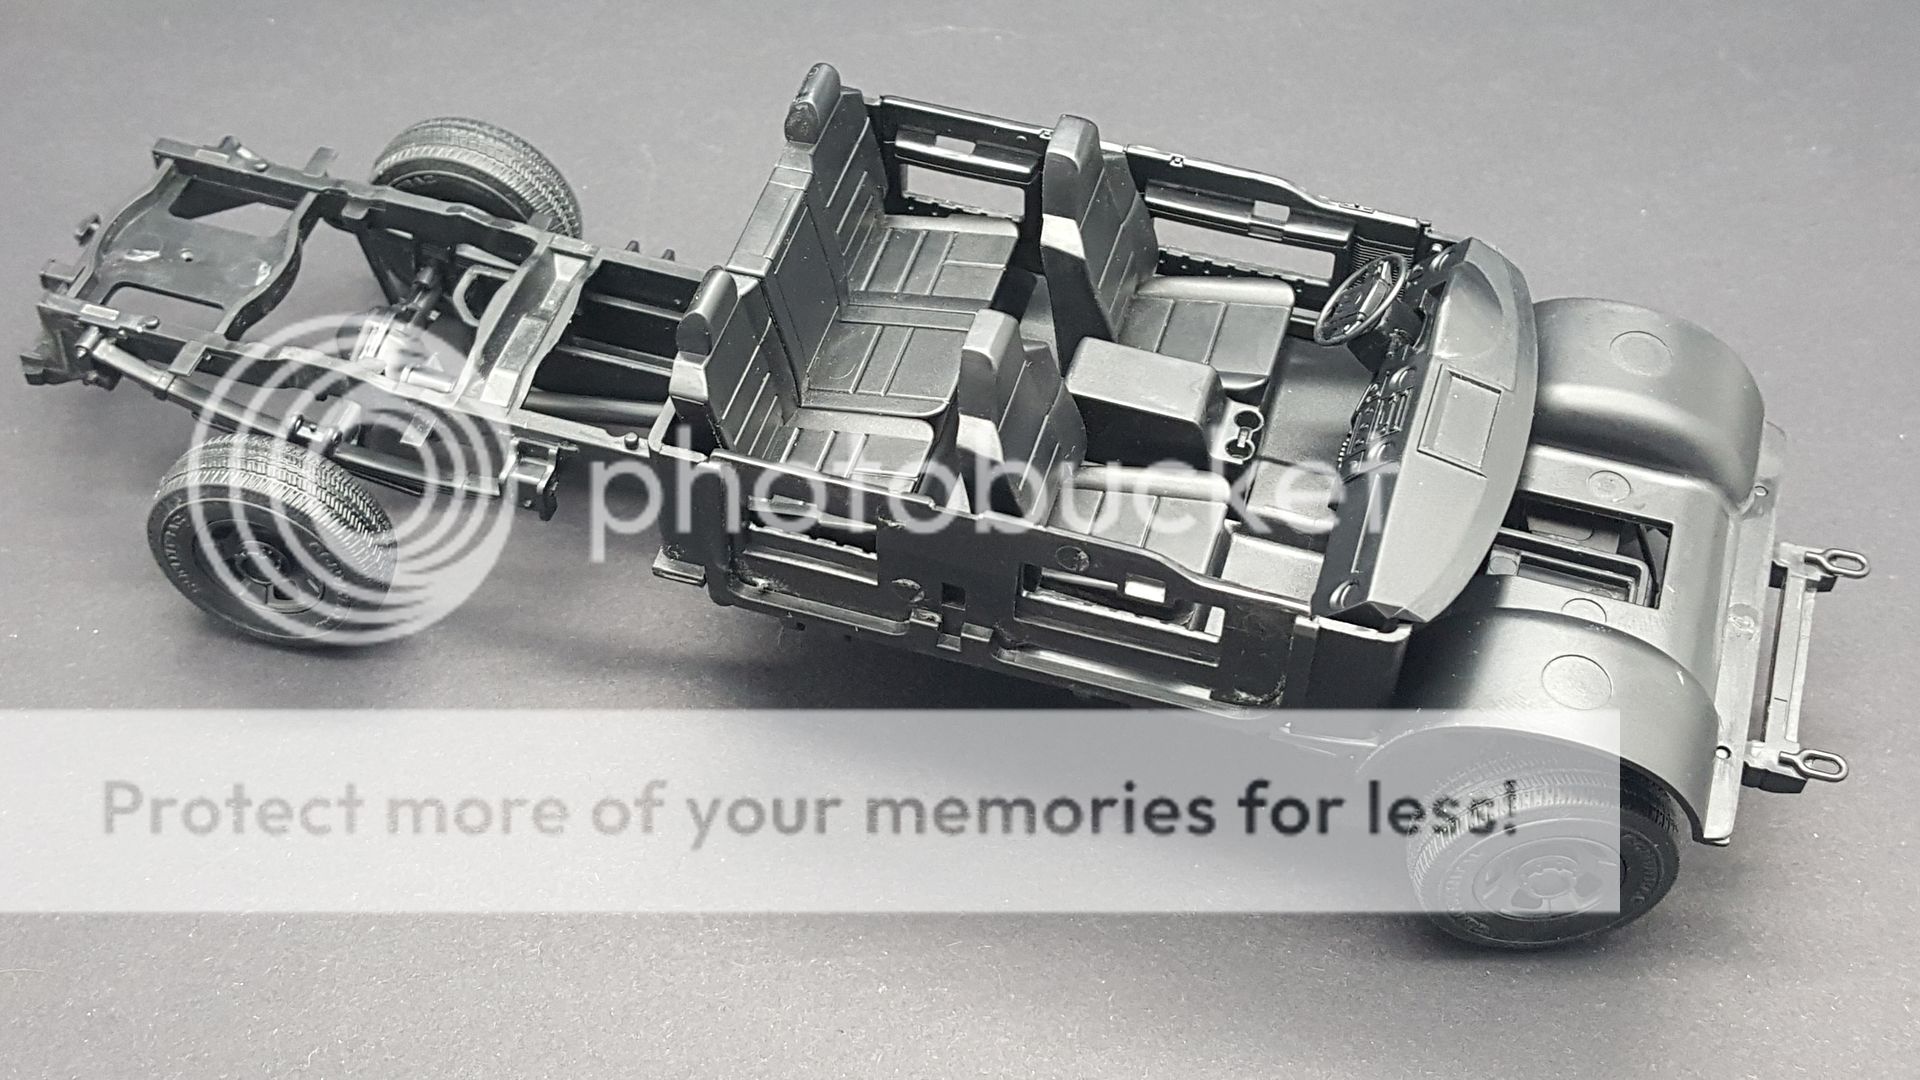
Steps 6 & 7 are assembling the seats, dashboard and building up the cab. All of the parts are loosely fitted and will be painted separately.
Image

That's where I'm currently up to with the truck. I will continue building it up and get everything ready for paint. I will leave it then and get the figures all assembled.

So far it's going well :banana:
Tank you for looking :th:
There are no failed builds only learning experiences.
MY Youtube channel : Scale Model Jedi
https://www.youtube.com/channel/UCSk5py ... taceCr3_3g
User avatar
ScaleModelJedi
Master Sergeant
Master Sergeant
Posts: 396
Joined: Sun Dec 20, 2015 12:47 am
Location: Birmingham, UK
Contact:

Re: Si's 'Zombie trouble' 1/35 Diorama

Post by ScaleModelJedi »

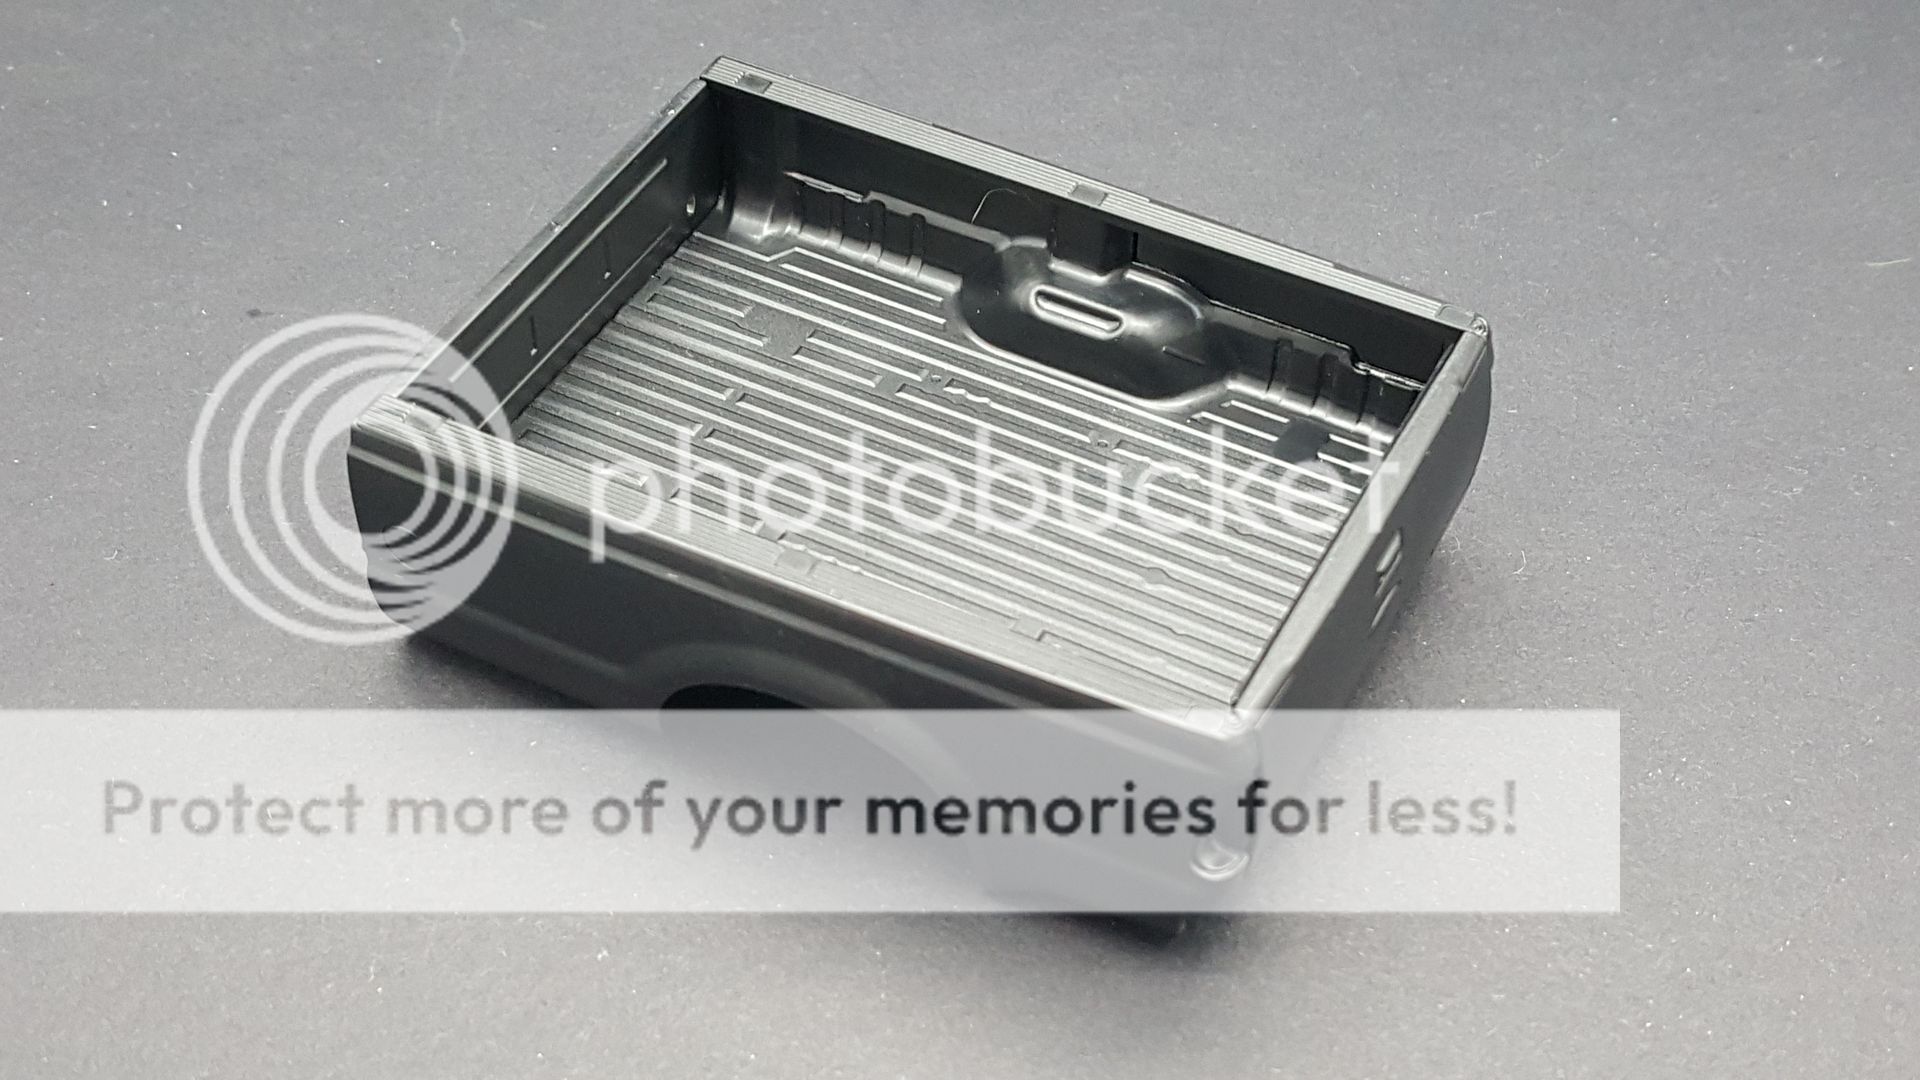
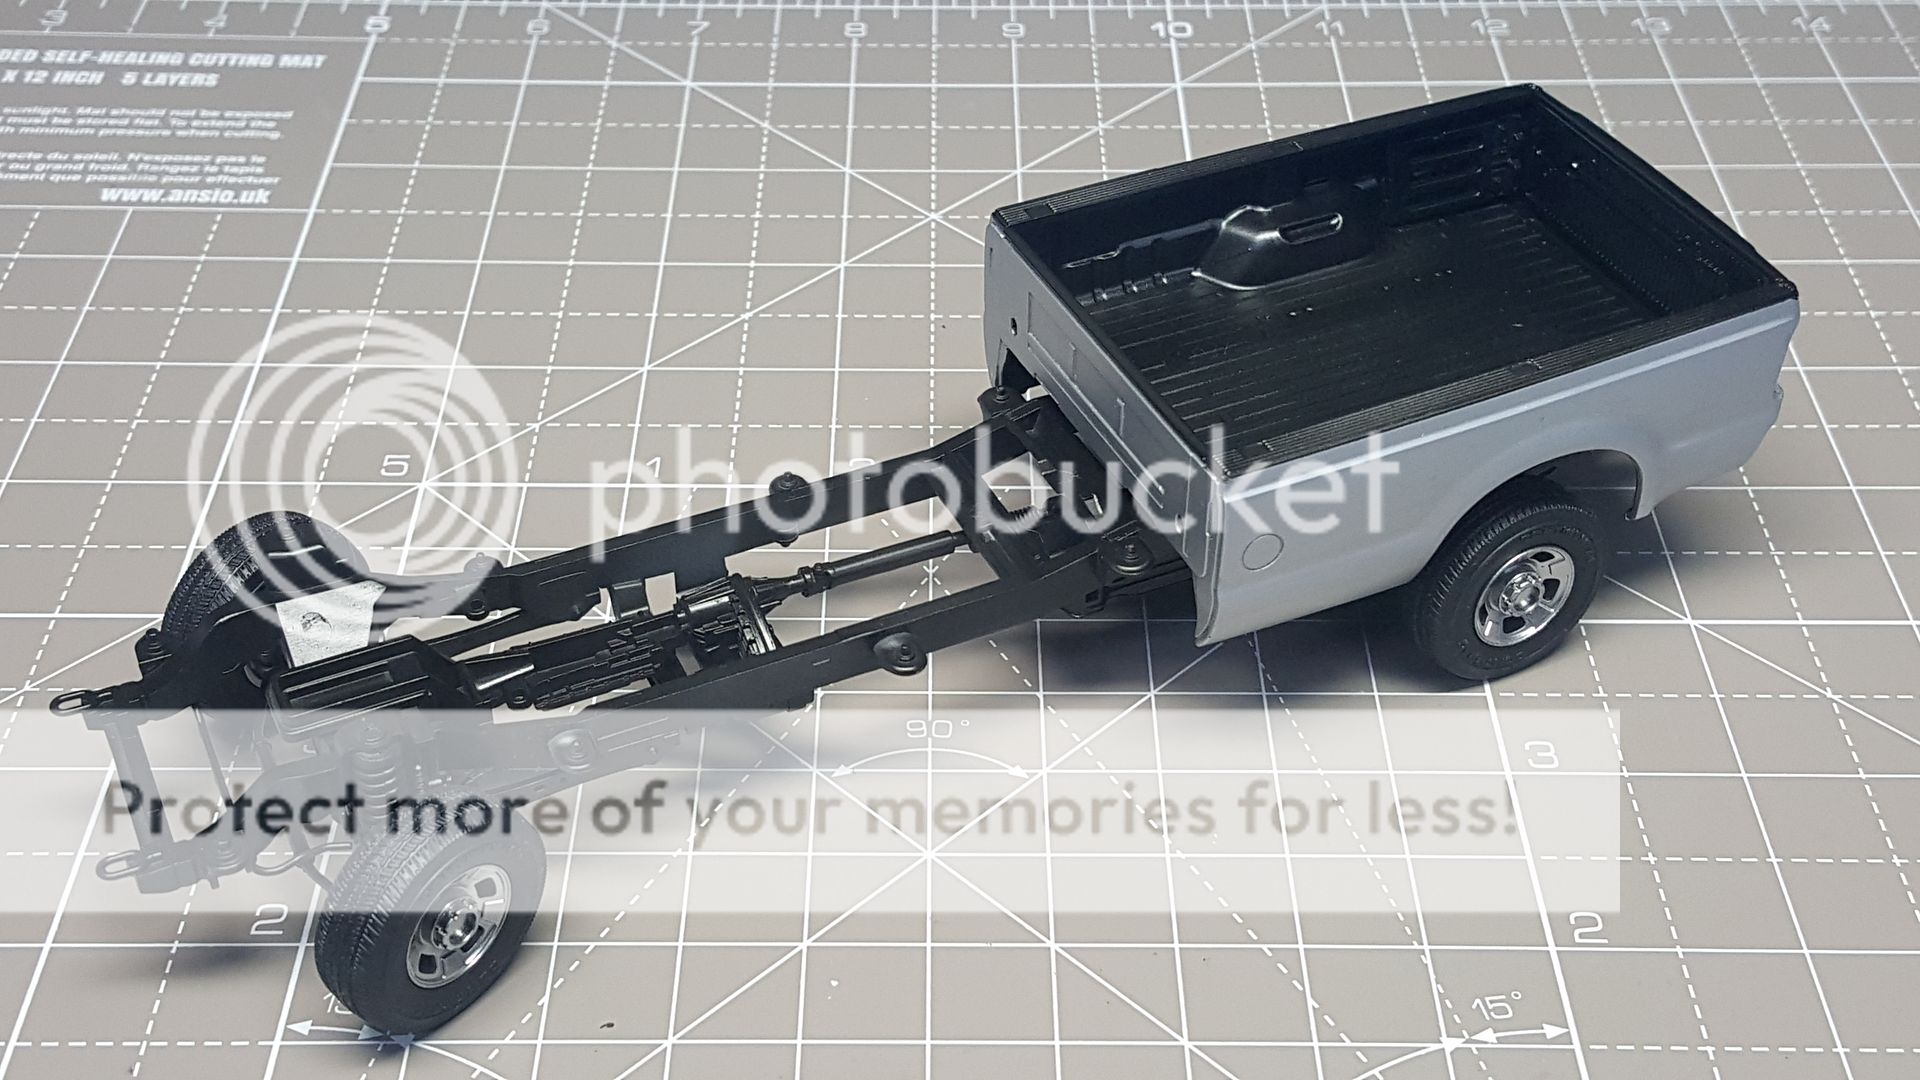
Got a little bit more done on the pickup. Most of the parts through steps 8-11 have only been cleaned up ready for painting and will be fitted afterwards. Steps 12-13 was building up the bed of the truck, all the parts fitted really well.
Image

The bed and cab fitted onto the chassis. These are all still loose so I can paint everything separately.
Image

Everything is now all cleaned up and prepped for painting. Next step primer and top coats. I was going to leave the build at this point and make a start on the figures but will now got this painted first and while waiting for parts to dry will do some work on the figures.

Thanks for looking :th:
There are no failed builds only learning experiences.
MY Youtube channel : Scale Model Jedi
https://www.youtube.com/channel/UCSk5py ... taceCr3_3g
SprueSurgeon
Sergeant
Sergeant
Posts: 142
Joined: Thu Sep 15, 2016 12:15 pm

Re: Si's 'Zombie trouble' 1/35 Diorama

Post by SprueSurgeon »

Si, why have you painted everything silver? i really want to do a zombie scene, so i'm intersted in how this will come together.
Deuteronomy 32:35
User avatar
Twokidsnosleep
General
General
Posts: 18026
Joined: Thu Aug 07, 2014 4:07 pm
Location: BC,Canada
Canada

Re: Si's 'Zombie trouble' 1/35 Diorama

Post by Twokidsnosleep »

Fine looking truck. Plans to bash it up a bit I imagine???
:pop:
Scott

On, Under or Near the Bench:
American Graffiti Ford Coupe
Headless Horseman...figure sig
1/72 Black Pearl Pirate Ship
User avatar
ScaleModelJedi
Master Sergeant
Master Sergeant
Posts: 396
Joined: Sun Dec 20, 2015 12:47 am
Location: Birmingham, UK
Contact:

Re: Si's 'Zombie trouble' 1/35 Diorama

Post by ScaleModelJedi »

Si, why have you painted everything silver? i really want to do a zombie scene, so i'm intersted in how this will come together
.

I haven't painted anything on the build yet, all the pics are of the truck in bare plastic. Think it's just the light that's making it look silvery.
Fine looking truck. Plans to bash it up a bit I imagine???
It is a great looking truck and a really nice kit, I'm not going to do too much damage to this one more make it look quite dirty.

Got some more progress to put up later today. :th:
There are no failed builds only learning experiences.
MY Youtube channel : Scale Model Jedi
https://www.youtube.com/channel/UCSk5py ... taceCr3_3g
User avatar
ScaleModelJedi
Master Sergeant
Master Sergeant
Posts: 396
Joined: Sun Dec 20, 2015 12:47 am
Location: Birmingham, UK
Contact:

Re: Si's 'Zombie trouble' 1/35 Diorama

Post by ScaleModelJedi »

All the parts of the truck were primed in Ultimate grey before applying the top coats.
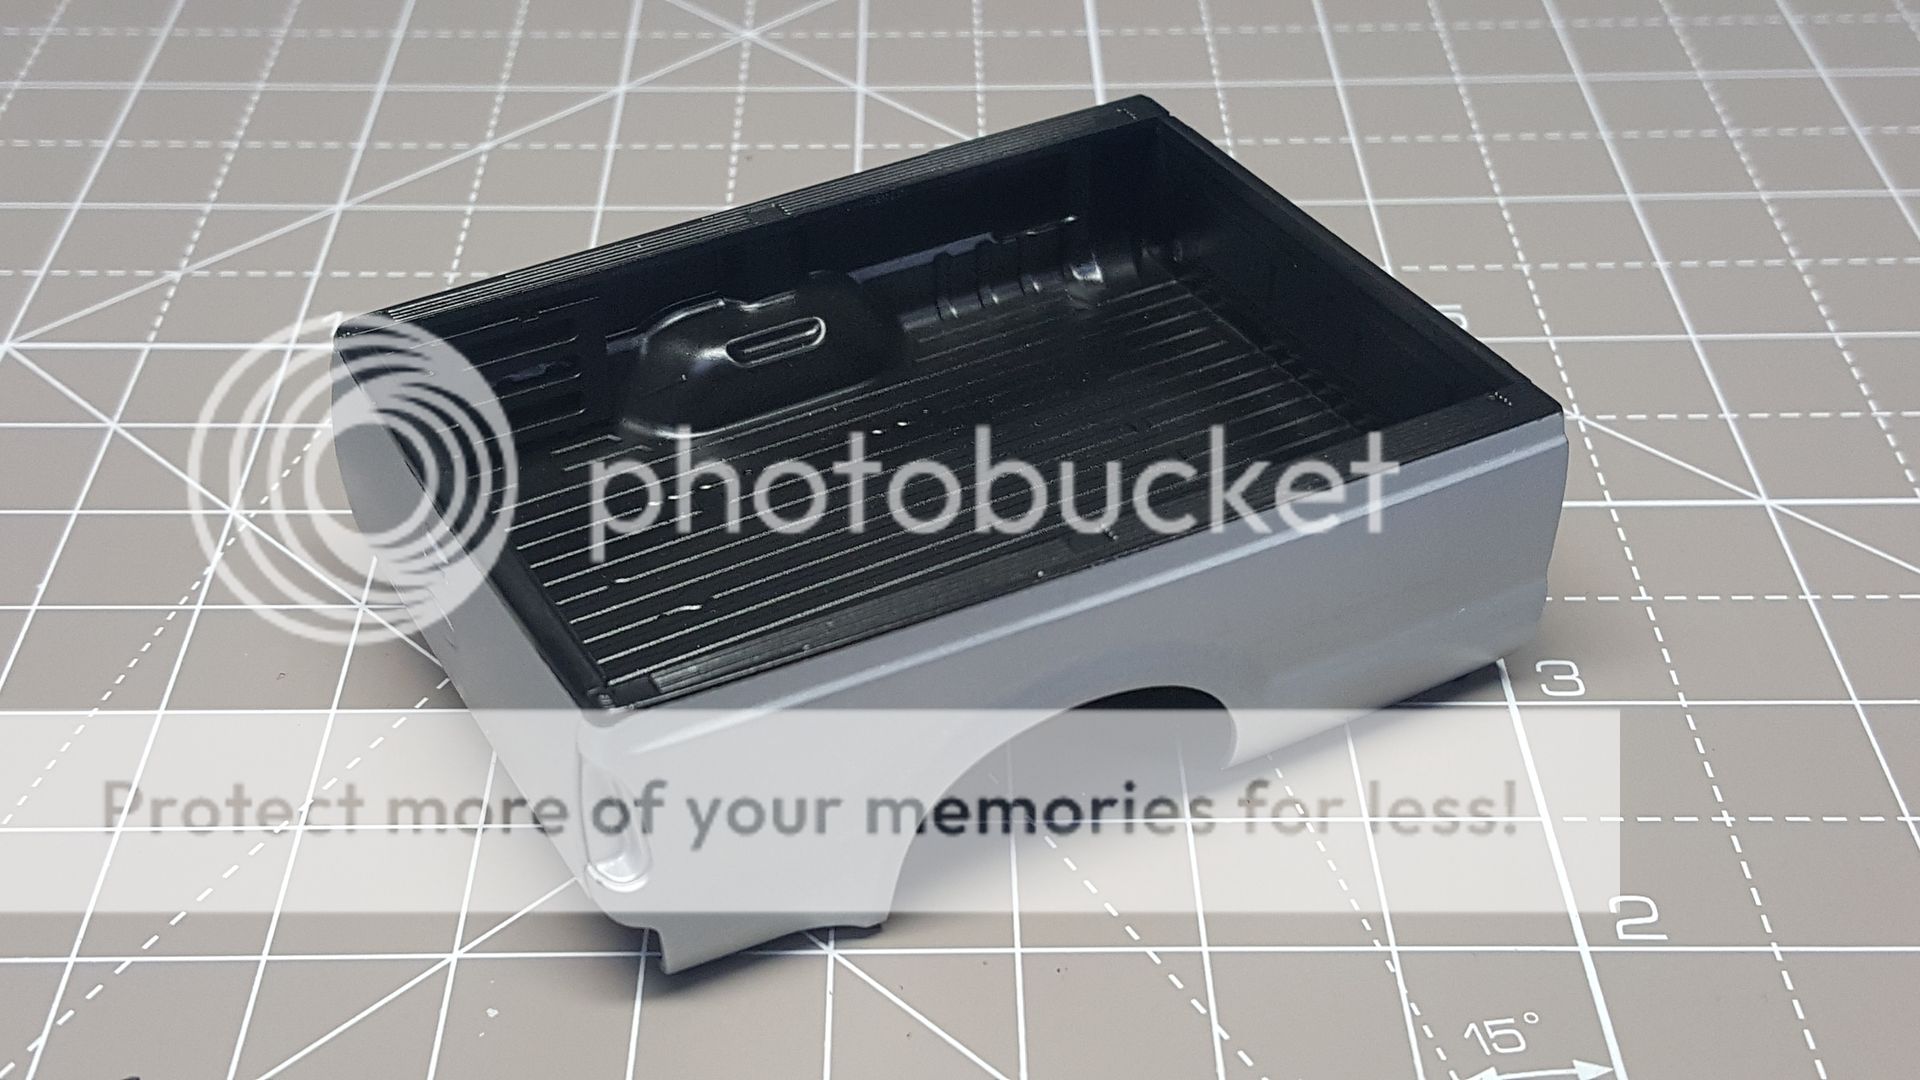
The bed of the truck all painted. For the main body colour I used Mr Color 8 silver and the inside of the bed was painted using Mr Color 2 black. I will leave the weathering until after I have fully assembled the truck.
Image

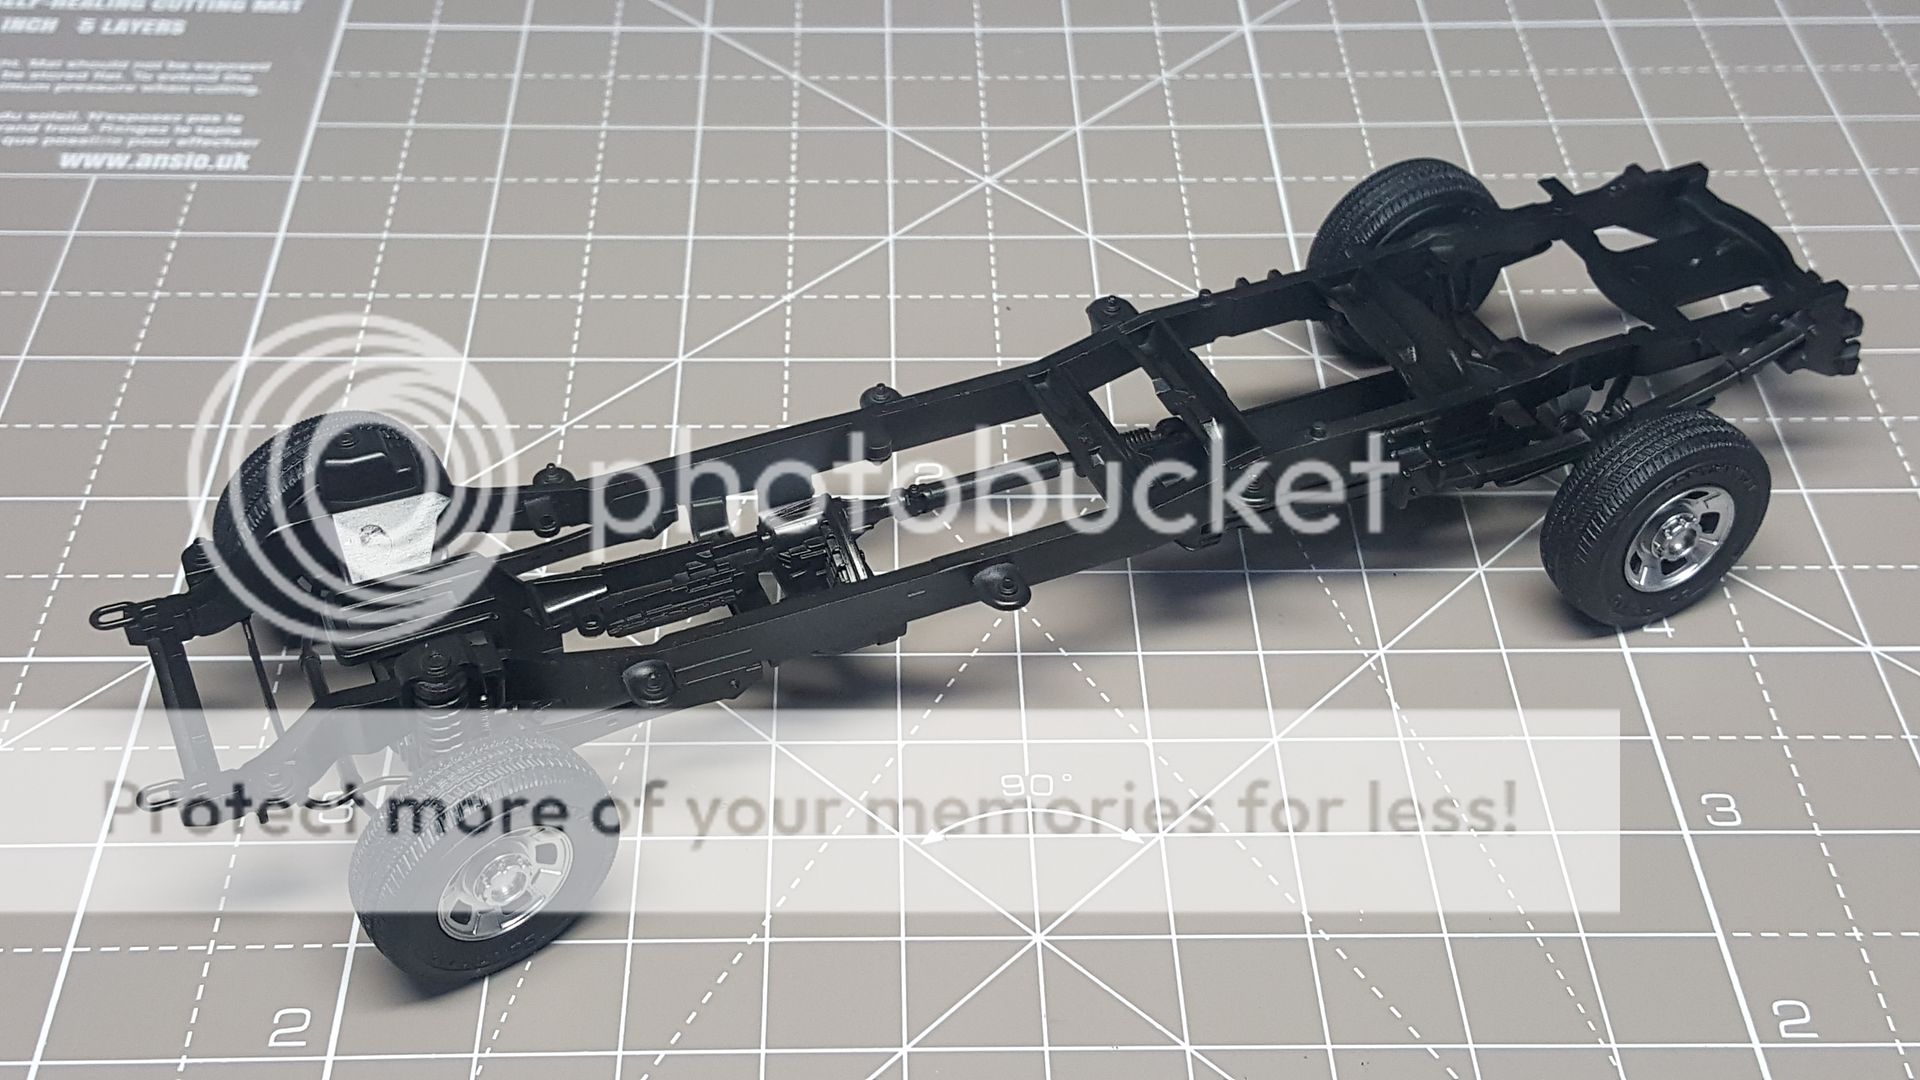
The chassis also painted with Mr Color 2 black. The wheels were painted using Mr Color super metallic SM06 chrome silver.
Image

The truck bed in place on the chassis.
Image

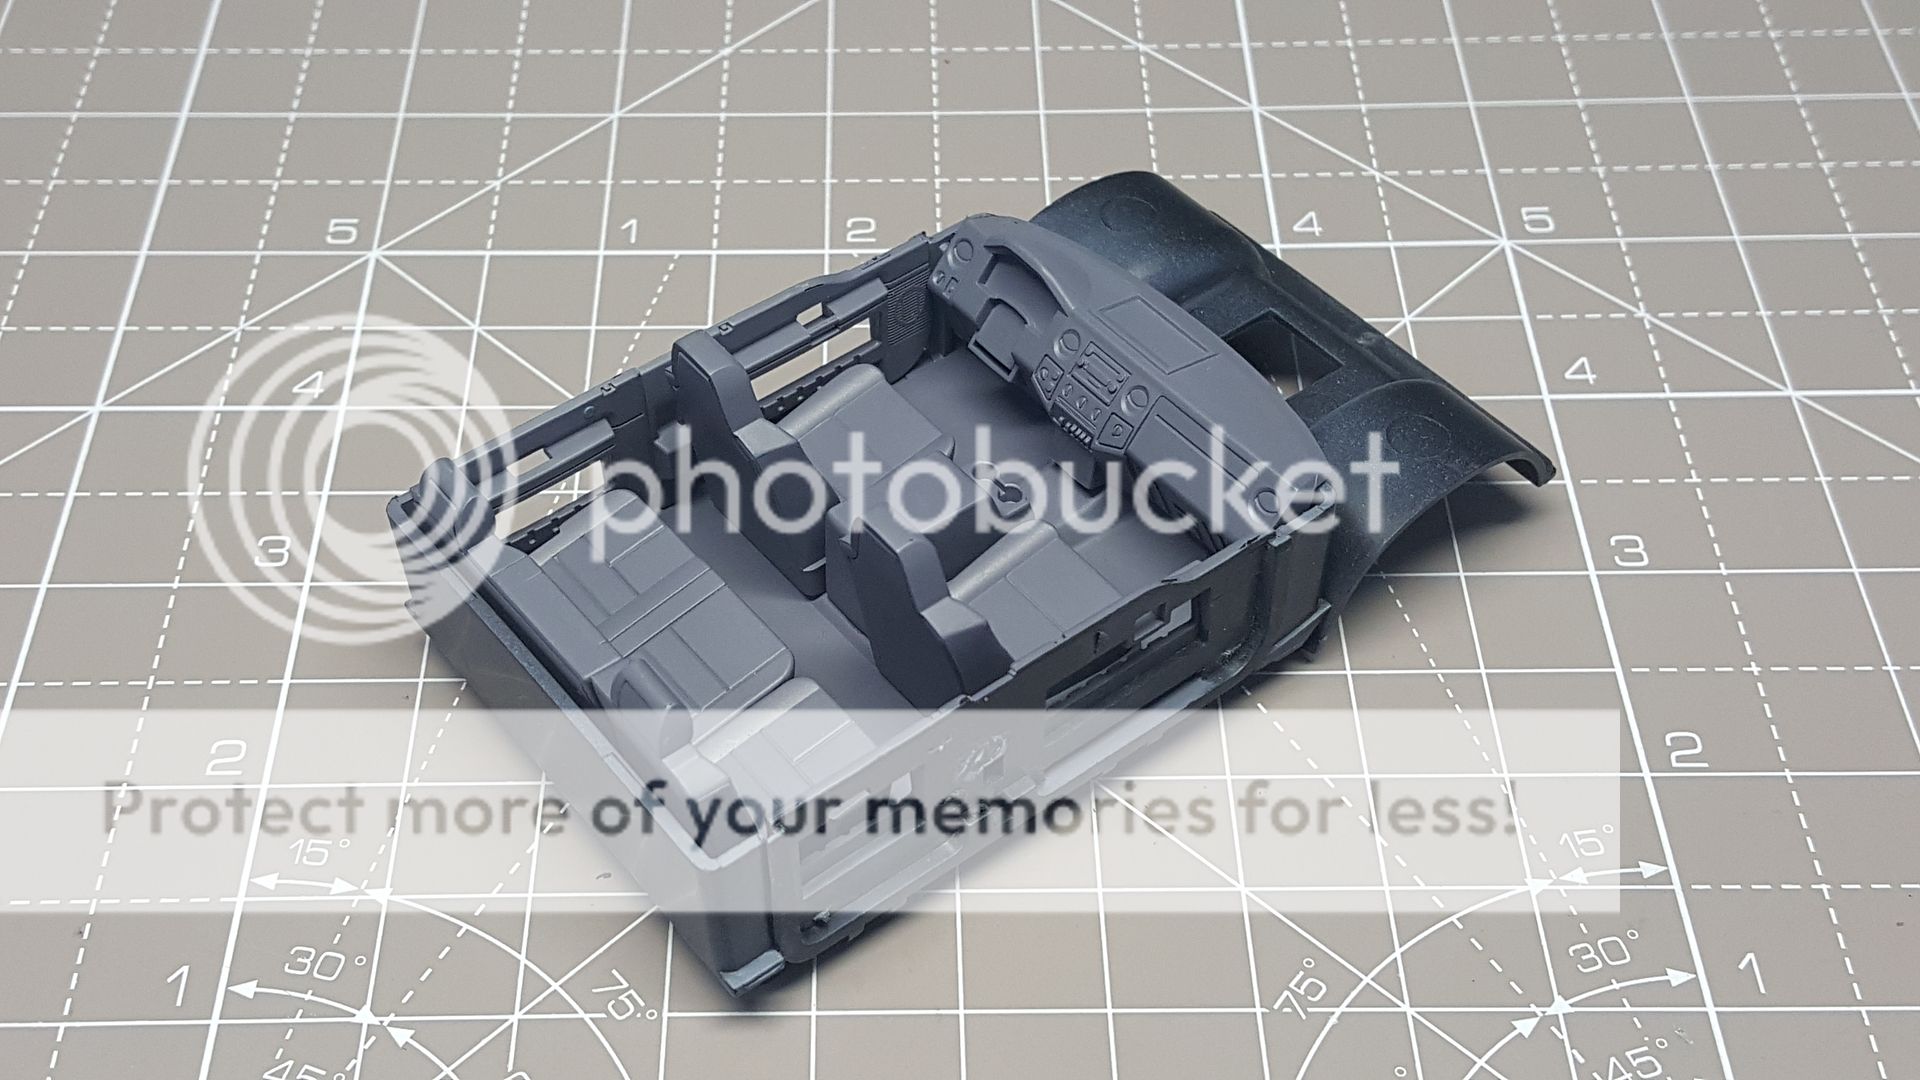
The interior of the cab. I've still got some detail painting to do and the decal for the dash to fit in place as well as the steering wheel. The dash is only slotted in place and can be removed. The seats were painted using Mr Color 331 dark sea grey. I will be doing a bit of weathering to the inside and adding a few items on the back seats.
Image

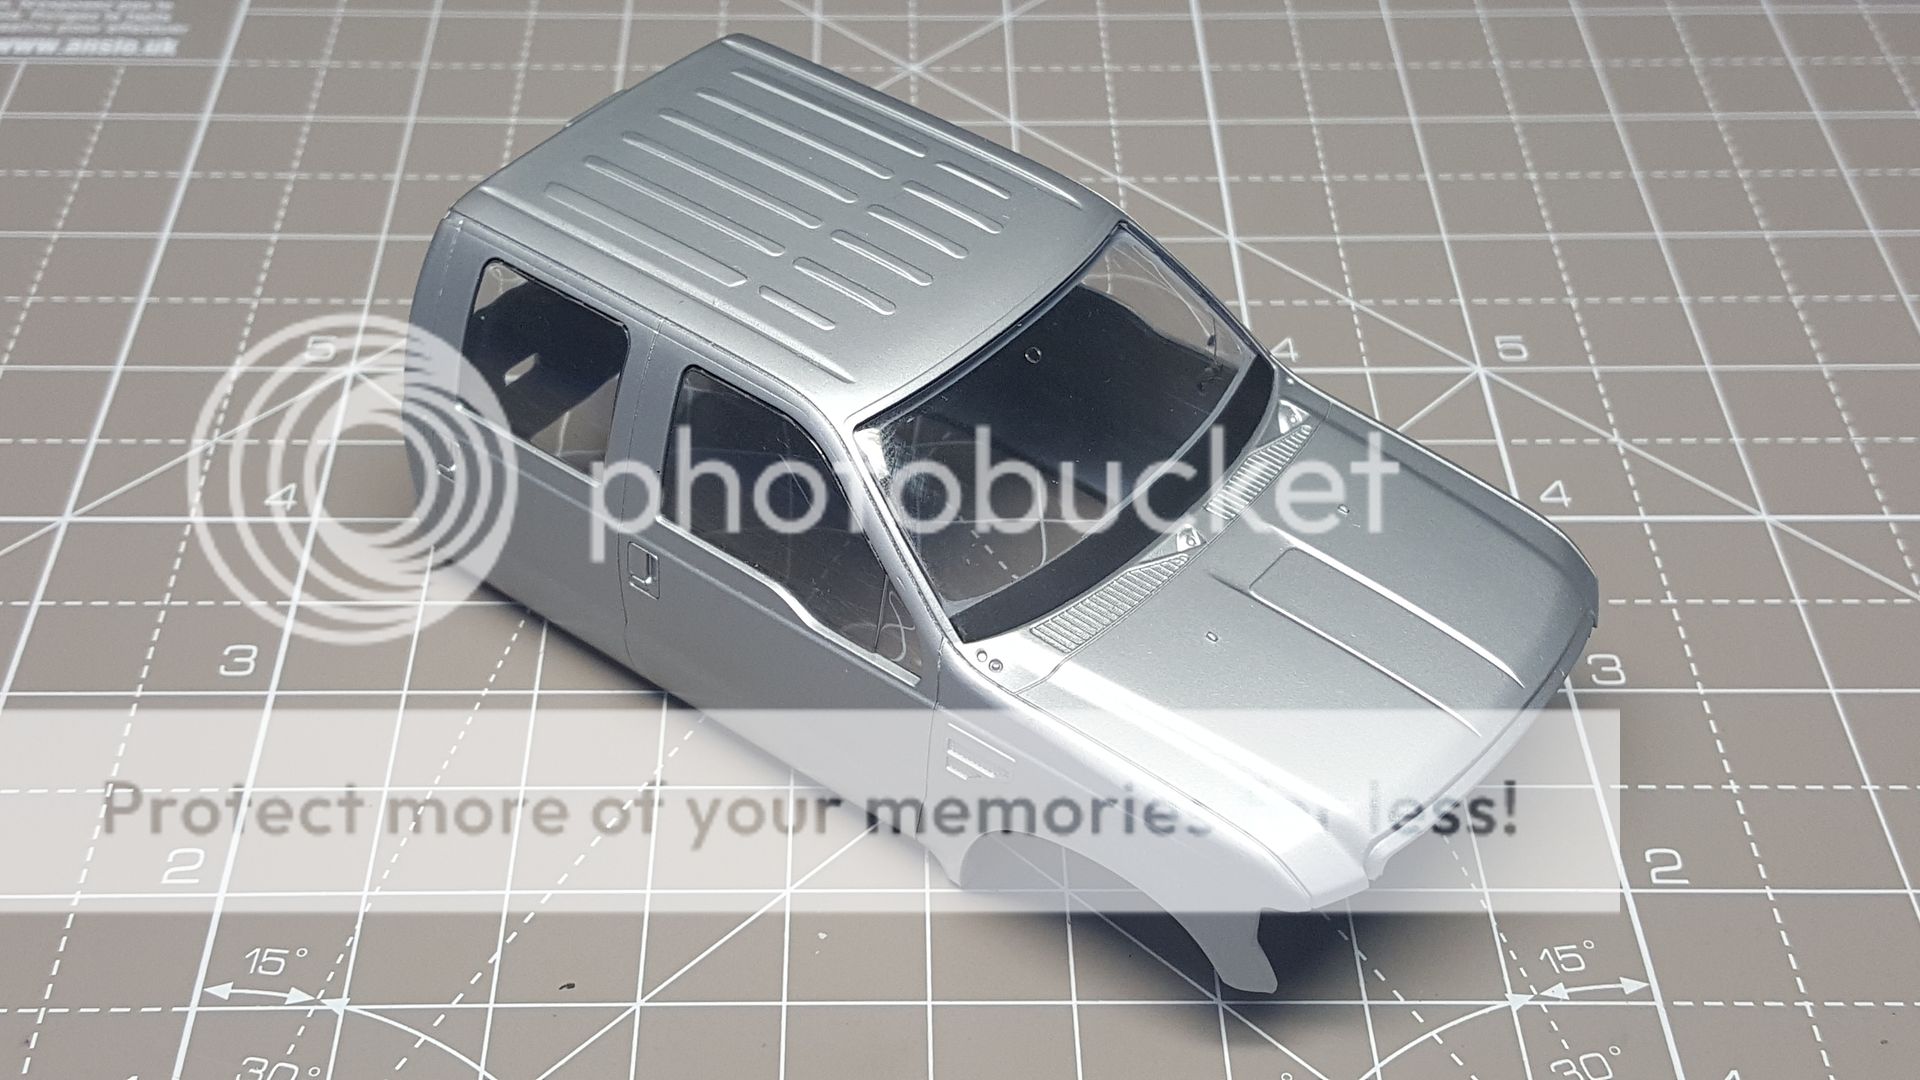
The main body of the cab. The clear parts were masked and painted before fitting. I made a mistake on the inside as I should of painted it black first and then the grey over the top. As you can see from the outside you can see the grey around the front windscreen. This shouldn't be to much of a problem as I plan on making it look dusty around the edges leaving clear areas the windscreen wipers would clean.
Image

I still have a fair bit to do on the truck and still loads on the whol project it's self but I'm pleased with how it's going so far.

Thank you for looking and happy modelling :th:
There are no failed builds only learning experiences.
MY Youtube channel : Scale Model Jedi
https://www.youtube.com/channel/UCSk5py ... taceCr3_3g
User avatar
Timplastic
Sergeant Major
Sergeant Major
Posts: 648
Joined: Thu Oct 09, 2014 7:29 am
Location: French quarter
Contact:
UN

Re: Si's 'Zombie trouble' 1/35 Diorama

Post by Timplastic »

The truck built up quick :th:
And it's given you a good start too the dio. Getting hung up on this could have really slowed you down at the start but your really powering on. I'm sure there is a lot more work to do, just the figures alone would give me night mares ( you get it ? Night mares ? Scary ? Zombies ? Ow I give up)
Look forward to the rest of the build keep up the good work
I like to know what you think even if it is critique , If you spotted it let me know
Trying to finish what I started, and take part

My youtube channel that needs some updates
https://www.youtube.com/channel/UCjQvLz ... subscriberImage
User avatar
AdamLuscombe
First Sergeant
First Sergeant
Posts: 523
Joined: Mon Oct 13, 2014 6:57 pm
Location: texas
United States of America

Re: Si's 'Zombie trouble' 1/35 Diorama

Post by AdamLuscombe »

Great start :)
On the bench:
Dragon
1/35 Jagdpanzer IV L/48
Italeri
1/24 Ford Escort Mk. II
User avatar
ScaleModelJedi
Master Sergeant
Master Sergeant
Posts: 396
Joined: Sun Dec 20, 2015 12:47 am
Location: Birmingham, UK
Contact:

Re: Si's 'Zombie trouble' 1/35 Diorama

Post by ScaleModelJedi »

Timplastic wrote: Mon Jan 16, 2017 11:06 am The truck built up quick :th:
And it's given you a good start too the dio. Getting hung up on this could have really slowed you down at the start but your really powering on. I'm sure there is a lot more work to do, just the figures alone would give me night mares ( you get it ? Night mares ? Scary ? Zombies ? Ow I give up)
Look forward to the rest of the build keep up the good work
Thank you Tim, Yeah the truck built up quick and then everything slowed right down with the build lol.
AdamLuscombe wrote: Sun Jan 22, 2017 1:01 pm Great start :)
Thank you Adam :th:
There are no failed builds only learning experiences.
MY Youtube channel : Scale Model Jedi
https://www.youtube.com/channel/UCSk5py ... taceCr3_3g
User avatar
ScaleModelJedi
Master Sergeant
Master Sergeant
Posts: 396
Joined: Sun Dec 20, 2015 12:47 am
Location: Birmingham, UK
Contact:

Re: Si's 'Zombie trouble' 1/35 Diorama

Post by ScaleModelJedi »

I wanted to get the truck all finished before starting on other parts of the build but lost a bit of mojo so I decided to make a start on the base and some of the other elements to the build.

I started building up the dumpster and vending machine from the Meng SPS-018 Vending machine and dumpster set.
The dumpster comes in four parts and the four wheels.
Image

The parts fit together really well and only required a small bit of filler to tidy up the joins on the two corners.
Image

The vending machine comes with a clear plastic part for the door, As i wanted to do it with the glass broken I decided to replace the door with a scratch built one as the supplied kit part is quite thick. I used some clear plastic packaging and Evergreen styrene to make the framing.
Image

I then cut the clear sheet to make it look like broken glass using a sharp scalpel. I will cut up the bit out of the middle into small bits and use them on the ground around the base of the vending machine. I presume that the glass on these would probably shatter but like the effect I've got and it was easier than trying to do shattered glass lol
Image

All the parts for the vending machine with the scratch built door. The kit comes with some clear plastic bottles to go inside, I will not be using these as I will be doing it empty with the odd bottle on the floor.
Image

The vending machine and dumpster built up. The vending machine goes together really well with no filler required. The door is not fixed yet and will be left loose till after painting. The kit comes with another vending machine but I'm not going to use it.
Image

The base is cut from 12mm MDF and is about 450mm x 240mm. I roughly marked out the road and pavement using the vehicles.
Image

For the road bed I used some 1.5mm cork. This was fixed with pva glue.
Image

The curbstones are made from 6mm foam cut in a 5mm strip and then each one cut to a length of 25mm. I lightly sanded the front edge to round it slightly. These were stuck along the edge of the cork with PVA.
Image

The pavement was made with the 6mm foam as well. I cut it in a strip 50mm wide and then used a scalpel to scribe the slabs, These are 17mm square . I also added some cracks across some of them. I also dug out some of the cork on the road bed for a pot hole, This was just to see how it looks and will make it a bit bigger and add a few more.
Image
Image

Next up I will be making a start on the building which will go across the back and will be one or two shops depending how it looks.

Thank you for looking and happy modelling :th:
There are no failed builds only learning experiences.
MY Youtube channel : Scale Model Jedi
https://www.youtube.com/channel/UCSk5py ... taceCr3_3g
User avatar
Tiger213
Master Sergeant
Master Sergeant
Posts: 433
Joined: Wed Mar 02, 2016 10:39 am
Location: Slovakia
Contact:
Slovakia

Re: Si's 'Zombie trouble' 1/35 Diorama

Post by Tiger213 »

WOW :jd: The dumpster looks amazing, but what I love is the broken glass :thumb2:
Well done so far, mate.
:cheers2:
User avatar
NorthernModeller
Command Sergeant Major
Posts: 927
Joined: Sat Jan 09, 2016 8:39 pm
Location: Preston, Lancashire, England
Contact:
England

Re: Si's 'Zombie trouble' 1/35 Diorama

Post by NorthernModeller »

Love it mate, starting to really look like a story
SAMI Magazine, Model aircraft and Tamiya Model Magazine contributor
User avatar
DBMiller
Chief Warrant Officer 3
Posts: 2216
Joined: Mon Jan 06, 2014 8:10 pm
Location: Guilford, Vermont, USA
United States of America

Re: Si's 'Zombie trouble' 1/35 Diorama

Post by DBMiller »

Coming along very nicely! :th:
Bissyboat
Sergeant Major of the Army
Posts: 1254
Joined: Sun Jan 05, 2014 9:49 pm
Location: Norway

Re: Si's 'Zombie trouble' 1/35 Diorama

Post by Bissyboat »

Looks amazing. Wonder eye for details. :th:
Where`s my dinghy?
User avatar
Lysus
Captain
Captain
Posts: 4562
Joined: Fri Dec 18, 2015 11:37 pm
Location: Seattle, US
United States of America

Re: Si's 'Zombie trouble' 1/35 Diorama

Post by Lysus »

That broken glass looks sweet, well done.
Backlog Progress: |||||||||||||||-------|----------|----------| 26/80
On the bench: Hasegawa 1/72 Tatiana's Vanship
Last Completed: Bandai HGUC Geara Zulu // Hasegawa 1/48 J2M3Raiden Prisoner of War
User avatar
ScaleModelJedi
Master Sergeant
Master Sergeant
Posts: 396
Joined: Sun Dec 20, 2015 12:47 am
Location: Birmingham, UK
Contact:

Re: Si's 'Zombie trouble' 1/35 Diorama

Post by ScaleModelJedi »

NorthernModeller wrote: Tue Feb 07, 2017 10:40 pm Love it mate, starting to really look like a story
DBMiller wrote: Wed Feb 08, 2017 8:30 pm Coming along very nicely! :th:
Bissyboat wrote: Wed Feb 08, 2017 10:21 pm Looks amazing. Wonder eye for details. :th:
Lysus wrote: Fri Feb 10, 2017 12:52 am That broken glass looks sweet, well done.
Tiger213 wrote: Tue Feb 07, 2017 10:02 pm WOW :jd: The dumpster looks amazing, but what I love is the broken glass :thumb2:
Well done so far, mate.
:cheers2:
Thank you guys :th: The build is progressing really well and starting to all come together.
There are no failed builds only learning experiences.
MY Youtube channel : Scale Model Jedi
https://www.youtube.com/channel/UCSk5py ... taceCr3_3g
User avatar
ScaleModelJedi
Master Sergeant
Master Sergeant
Posts: 396
Joined: Sun Dec 20, 2015 12:47 am
Location: Birmingham, UK
Contact:

Re: Si's 'Zombie trouble' 1/35 Diorama

Post by ScaleModelJedi »

Update video on the build
[youtube]lIKvkupJdAc[/youtube]
There are no failed builds only learning experiences.
MY Youtube channel : Scale Model Jedi
https://www.youtube.com/channel/UCSk5py ... taceCr3_3g
User avatar
AdamLuscombe
First Sergeant
First Sergeant
Posts: 523
Joined: Mon Oct 13, 2014 6:57 pm
Location: texas
United States of America

Re: Si's 'Zombie trouble' 1/35 Diorama

Post by AdamLuscombe »

Great update video Si :th:
On the bench:
Dragon
1/35 Jagdpanzer IV L/48
Italeri
1/24 Ford Escort Mk. II
Bissyboat
Sergeant Major of the Army
Posts: 1254
Joined: Sun Jan 05, 2014 9:49 pm
Location: Norway

Re: Si's 'Zombie trouble' 1/35 Diorama

Post by Bissyboat »

Nice looking composition. :th:
Where`s my dinghy?
User avatar
ScaleModelJedi
Master Sergeant
Master Sergeant
Posts: 396
Joined: Sun Dec 20, 2015 12:47 am
Location: Birmingham, UK
Contact:

Re: Si's 'Zombie trouble' 1/35 Diorama

Post by ScaleModelJedi »

AdamLuscombe wrote: Wed Feb 15, 2017 10:57 pm Great update video Si :th:
Thank you Adam :th:
Bissyboat wrote: Thu Feb 16, 2017 2:42 pm Nice looking composition. :th:
Thank you :thumb2:
There are no failed builds only learning experiences.
MY Youtube channel : Scale Model Jedi
https://www.youtube.com/channel/UCSk5py ... taceCr3_3g
Cornishreaper
New Recruit
Posts: 1
Joined: Sat Feb 18, 2017 1:32 pm

Re: Si's 'Zombie trouble' 1/35 Diorama

Post by Cornishreaper »

You've just got to love that kit from meng.
I had the exact same idea when I picked mine up which was to use it in a Zombie diorama so I did this with mine.

http://i649.photobucket.com/albums/uu21 ... 134524.jpg

I can't wait to see another zombie vehicle come from this.
My next vehicle is to be a willy's jeep as a survivors vehicle.
User avatar
Les
First Sergeant
First Sergeant
Posts: 545
Joined: Wed Feb 05, 2014 7:53 am
Location: Westminster, Colorado, United States

Re: Si's 'Zombie trouble' 1/35 Diorama

Post by Les »

A wonderful diorama you have going Si; looking forward to its completion man! :th:
Image
User avatar
ScaleModelJedi
Master Sergeant
Master Sergeant
Posts: 396
Joined: Sun Dec 20, 2015 12:47 am
Location: Birmingham, UK
Contact:

Re: Si's 'Zombie trouble' 1/35 Diorama

Post by ScaleModelJedi »

Ahhh :crazy: the end is nigh on this SIG and I have a lot of work to do, First off I need to get upto date on the thread as I'm a bit behind.

The building is made from the same 6mm styrofoam I used for the paving and curbstones. The brickwork was scribed using a scalpel and steel rule. This was a tedious job and I did make a few mistakes and had a few scrap bits but worth the effort.

The start of the brickwork
Image

The first shop all scribed and doors, windows cut out. This was just to give an idea of how it will look.
Image

The first part built up. The doors, door frames and windows were all made with various strips of balsa wood glued in place with some Deluxe materials rocket card glue. The door handles are made from staples pushed into the balsa wood and secured with a drop of CA glue.
Image

I add a storm drain on the base by removing some of the cork to sit it in. The cover and frame are two separate pieces and the frame had to be sanded down as it sat too high above the cork. I have left it slightly proud as I will be adding some asphalt paste over the cork.
Image

The base all primed with Ultimate black primer.
Image

Another mock up with both buildingsides in place. They were primed in Ultimate grey primer. The road surface wasurprised covered with AK interactive asphalt from there new terrain series of products. This is a water based product that comes ready mixed and coloured. It is easily spread over the surface using an artists pallette knife. It can be smoothed easily with a damp knife although I didn't manage to get a completely smooth surface as it was a large area to cover. The pot holes in had cut out in the cork got filled aswell so need to open these out again.
Image

The pavement was painted with a mix of vallejo model colour dark grey and stone. This was applied using a sponge to dab it on and give a varied finish. I then went around the joins with some starship filth oilbrusher. This was then blended in using thinners and a round brush.
Image
The left is the blended part and the right shows the base colour with the oil around the edges before blending.


I went over the building with some pva glue that had been coloured with some beige vallejo model colour. The idea was to try and fill the mortar courses. This worked in some areas but not so good in others but I decided to leave it and will see how it looks. I may have a look at doing something else after I have painted all the bricks.
Image

All the bricks were painted individually using Vallejo model colour 70.818 red leather, 70.940 saddle brown and 70.981 orange brown.
They were painted in a random pattern using the orange brown the least.
Image

The building all painted except the windows and doors. I have also added some yellow lines down the centre of the road. These were masked and painted with Ammo A.MIG-048 Yellow. They came out way brighter than I thought they would but will be toned down with weathering. Also finished all the side walk.
Image

The road surface wasurprised weathered using some AK interactive light dust and brown earth from the dust and deposits set. This was applied using a brush and then blended with thinner. I have done it heavier along the curbs to give the look of dust and dirt that has built up in those areas.
Image

That's where I'm currently up to. Still have plenty of work to do and not long to go.
Thank you for looking and happy modelling :th:
There are no failed builds only learning experiences.
MY Youtube channel : Scale Model Jedi
https://www.youtube.com/channel/UCSk5py ... taceCr3_3g
User avatar
Lysus
Captain
Captain
Posts: 4562
Joined: Fri Dec 18, 2015 11:37 pm
Location: Seattle, US
United States of America

Re: Si's 'Zombie trouble' 1/35 Diorama

Post by Lysus »

Well I quit, that's awesome work!
Backlog Progress: |||||||||||||||-------|----------|----------| 26/80
On the bench: Hasegawa 1/72 Tatiana's Vanship
Last Completed: Bandai HGUC Geara Zulu // Hasegawa 1/48 J2M3Raiden Prisoner of War
Lars
Private First Class
Private First Class
Posts: 35
Joined: Mon Feb 20, 2017 6:05 pm
Location: Vechta, Germany

Re: Si's 'Zombie trouble' 1/35 Diorama

Post by Lars »

Looking good. The wall looks pretty realistic to me.
On the Bench:

PZH 2000 (Meng)
T62A (Tamiya)
User avatar
Twokidsnosleep
General
General
Posts: 18026
Joined: Thu Aug 07, 2014 4:07 pm
Location: BC,Canada
Canada

Re: Si's 'Zombie trouble' 1/35 Diorama

Post by Twokidsnosleep »

Holy cow!! :banana: :banana: :banana:

I would suggest you post into Dan's thread for the live show on Friday
viewtopic.php?f=10&t=21655
Just post up a photo and describe what you are using and doing..just a single picture
This is great stuff and needs to be shown widely, it will get a ton of discussion going on dioramas

Wow, so cool :thumb2: :bow:: :clap:
Scott

On, Under or Near the Bench:
American Graffiti Ford Coupe
Headless Horseman...figure sig
1/72 Black Pearl Pirate Ship
User avatar
Tomcat64
Brigadier General
Brigadier General
Posts: 7034
Joined: Thu Sep 22, 2016 3:24 pm
Location: Swindon, UK
England

Re: Si's 'Zombie trouble' 1/35 Diorama

Post by Tomcat64 »

That's just stunning work :jd:

The scratch-building, attention to detail and finished effect are all just... :jd:

Blown away... :bow::
Cheers, Neil

On the Bench:
Tamiya 1/35 PzKpfwIB
Tamiya 1/35 Willys Jeep
Revell 1/72 Millennium Falcon
User avatar
panzerman825
Corporal
Corporal
Posts: 70
Joined: Thu Jan 19, 2017 10:23 am
Location: Maryland, USA
Contact:
United States of America

Re: Si's 'Zombie trouble' 1/35 Diorama

Post by panzerman825 »

Base work looks fantastic. Awesome store front. Paintwork is perfect. Bill
Image
User avatar
ScaleModelJedi
Master Sergeant
Master Sergeant
Posts: 396
Joined: Sun Dec 20, 2015 12:47 am
Location: Birmingham, UK
Contact:

Re: Si's 'Zombie trouble' 1/35 Diorama

Post by ScaleModelJedi »

Lars wrote: Tue Mar 07, 2017 7:48 pm Looking good. The wall looks pretty realistic to me.
Twokidsnosleep wrote: Thu Mar 09, 2017 5:29 am Holy cow!! :banana: :banana: :banana:

Wow, so cool :thumb2: :bow:: :clap:
Lysus wrote: Tue Mar 07, 2017 6:15 pm Well I quit, that's awesome work!
Tomcat64 wrote: Fri Mar 10, 2017 11:42 am That's just stunning work :jd:

The scratch-building, attention to detail and finished effect are all just... :jd:

Blown away... :bow::
panzerman825 wrote: Sat Mar 11, 2017 11:04 am Base work looks fantastic. Awesome store front. Paintwork is perfect. Bill
Thank you guys :th:
There are no failed builds only learning experiences.
MY Youtube channel : Scale Model Jedi
https://www.youtube.com/channel/UCSk5py ... taceCr3_3g
User avatar
ScaleModelJedi
Master Sergeant
Master Sergeant
Posts: 396
Joined: Sun Dec 20, 2015 12:47 am
Location: Birmingham, UK
Contact:

Re: Si's 'Zombie trouble' 1/35 Diorama

Post by ScaleModelJedi »

Latest update video

[youtube]2m-8BDP7aHU[/youtube]
There are no failed builds only learning experiences.
MY Youtube channel : Scale Model Jedi
https://www.youtube.com/channel/UCSk5py ... taceCr3_3g
User avatar
ScaleModelJedi
Master Sergeant
Master Sergeant
Posts: 396
Joined: Sun Dec 20, 2015 12:47 am
Location: Birmingham, UK
Contact:

Re: Si's 'Zombie trouble' 1/35 Diorama

Post by ScaleModelJedi »

Time to get caught up on the thread as it's a bit behind the video update and now the end is even closer :eeek:

I built up a canopy/awning to go on the front of the building and over the sidewalk.
The frame was made from strips of balsa wood, starting with the two long sections and then cutting the smaller cross pieces. I measured out and marked the first one and cut it with a razor saw. I then used that as a template to cut the rest of them. I used CA glue to fix it all together.
Image

Image

The frame in place on the building.
I fixed some small bits of wire into the back of the frame which I then pushed into the foam.
Image

I painted the frame with AK interactive AK 788 medium brown. I then applied a wash using Ammo dark wash.
Image

The corrugated sheets were using foil cut from the base of some disposable platters. I cut the base out and then cut it into strips. The strips were then cut into individual sections.

Image

I then used two sections of plastic corrugated sheets from Juweela. I bought these to use but decided to make my own from foil as I can make as many as I need and the foil is slightly thinner.
Image

The foil strips were cut wider and then placed over the former.
Image

Placing another former over the top and then pushing down firmly to shape the foil.
Image

They work really well and will work out alot cheaper than buying the packs of plastic ones.
Two of the formed foil corrugated sheets
Image

Once I had enough I primed them black and misted over various rust shades before applying a layer of chipping fluid.
Image

I then sprayed them with Mr hobby H21 off white and after drying I then used water and a small stiff brush to activate the chipping fluid.
Image

More to follow soon.....
There are no failed builds only learning experiences.
MY Youtube channel : Scale Model Jedi
https://www.youtube.com/channel/UCSk5py ... taceCr3_3g
privatepete
First Lieutenant
First Lieutenant
Posts: 3871
Joined: Thu Dec 11, 2014 1:13 pm

Re: Si's 'Zombie trouble' 1/35 Diorama

Post by privatepete »

Very nice, good idea with the foil, the hole build is certainly coming together, keep up the excellent work :clap:
User avatar
Paul
Site Admin
Site Admin
Posts: 12622
Joined: Thu May 23, 2013 4:47 pm
Location: Merseyside, England, UK
Contact:
England

Re: Si's 'Zombie trouble' 1/35 Diorama

Post by Paul »

Excellent work Si, some top quality scratch building there mate :banana:
User avatar
DBMiller
Chief Warrant Officer 3
Posts: 2216
Joined: Mon Jan 06, 2014 8:10 pm
Location: Guilford, Vermont, USA
United States of America

Re: Si's 'Zombie trouble' 1/35 Diorama

Post by DBMiller »

This is looking friggin' awesome! :jd:
User avatar
ScaleModelJedi
Master Sergeant
Master Sergeant
Posts: 396
Joined: Sun Dec 20, 2015 12:47 am
Location: Birmingham, UK
Contact:

Re: Si's 'Zombie trouble' 1/35 Diorama

Post by ScaleModelJedi »

privatepete wrote: Sun Mar 19, 2017 11:04 am Very nice, good idea with the foil, the hole build is certainly coming together, keep up the excellent work :clap:
DBMiller wrote: Mon Mar 20, 2017 12:57 pm This is looking friggin' awesome! :jd:
Paul wrote: Sun Mar 19, 2017 12:05 pm Excellent work Si, some top quality scratch building there mate :banana:
Thank you guys :th: Let's hope I get it finished in time :crazy:
There are no failed builds only learning experiences.
MY Youtube channel : Scale Model Jedi
https://www.youtube.com/channel/UCSk5py ... taceCr3_3g
User avatar
ScaleModelJedi
Master Sergeant
Master Sergeant
Posts: 396
Joined: Sun Dec 20, 2015 12:47 am
Location: Birmingham, UK
Contact:

Re: Si's 'Zombie trouble' 1/35 Diorama

Post by ScaleModelJedi »

Time to catch up with the thread and get it upto the point I'm at with the build. I'm progressing really well with the build at the moment and I'm pretty confident I will be finished in time, but there is still lots to do :crazy:

The brickwork was first given a wash with Vallejo game colour wash 73.200 Sepia. This was applied all over toning down the brickwork and blending the different colours together. I then used some Abteilung 502 ABT090 Industrial earth to add some dark spots and staining. This was put on in small dots and then blended using thinners. On the lower section of the end I applied some Ammo A.MIG-1410 Slimy grime dark and A.MIG-1411 Slimy grime light. This was applied with the darker colour at the base and the lighter one above and then blended with thinner.
Image

The shop signs were created using corel draw and printed out on to paper. These were then stuck on some 10 thou styrene and the edges painted with some Vallejo model colour. These were attached to the building and then given a coat of matt varnish to seal them.
Image

Image

The canopy was weathered using Ammo A.MIG 3513 starship filth oilbrusher, this was brushed along the top and then streaked down using a flat brush dampened with thinner. I also used some A.MIG 3510 rust in some areas. I then applied some AK interactive dust and dirt deposits brown earth and light dust.
Image

For the glazing I used some clear packaging from a box of static grass. This was cut to size and after test fitting I misted over some Ammo A.MIG-1401 light dust with the airbrush to give a dirty/dusty look. These were then fixed in place with small amounts of CA glue.
Image

The first abandoned vehicle I made a start on was the Takom German civilian car kit #2005
Image

Construction started withe the wheels and dashboard. The supplied tires are far too narrow to fit the wheels properly but not really a problem as you will not be able to see. No other problems with the first part.
Image

The next step was to build up the interior. Again no problems and for a small kit it's reasonably well detailed although the interior will not be visible.
Image

The doors have the option to be open or closed, if I had more time I would have liked to do them open and weather up the interior but as I have dragged out parts of the build I will be doing them closed.
The body all cleaned up and doors glued in place.
Image

The interior and body all primed up in trusty old Ultimate black.
I will be leaving the interior in this colour.

Image

The car all assembled and painted. I sprayed the body with Mr.Color 2 gloss black. The wheels and other chrome parts were painted with AK extreme metal 488 matt aluminium.
I didn't worry to much about getting a brilliant finish as it being an abandoned vehicle it's going to get dirty.
Image

I sprayed some of the AK dust and dirt deposits over the top to try and give it a dusty look. I had a few attempts at doing this as I was not happy with how it looked. Being enamels it was easy enough to remove using a cotton bud and some odourless thinners. I eventually settled on what is in the image below not entirely happy with it but I didn't want to mess around with it anymore and completely mess it up. As the scene is set fairly early in the outbreak I didn't want to depict the vehicle as one that had sat there for years so tried to just give it a dirty/dusty look.
Image

Image

The second abandoned vehicle is the Takom Japanese made SUV kit #2007
Image

First part was the wheels and axles. Fit was really good and there are some nice details on the parts.
Image

The axles fitted to the underside. Again fit of parts was really good and the detail is very nice.
Image

The interior all fitted. As with the previous car this will not be visible but I still decided to add it all.
Image

The body and interior were primed in Ultimate black. The front doors can be built open or closed. I have left them off at the moment and will fit them before weathering the whole vehicle. The interior will be left in black. The body was painted with Mr.Color 330 Dark green. This was then masked and the lower sections painted with AK extreme metal 477 Chrome.
Image

Hoping to get the SUV all done today and get back to the F-350 and then the figures. It will be just the detailing stuff left to do then. :banana:

Thank you for looking :th:
There are no failed builds only learning experiences.
MY Youtube channel : Scale Model Jedi
https://www.youtube.com/channel/UCSk5py ... taceCr3_3g
User avatar
MrBowcat
Command Sergeant Major
Posts: 786
Joined: Wed Mar 15, 2017 3:34 pm
Location: London
England

Re: Si's 'Zombie trouble' 1/35 Diorama

Post by MrBowcat »

Impressive build!
Si vis pacem, para bellum
User avatar
Tomcat64
Brigadier General
Brigadier General
Posts: 7034
Joined: Thu Sep 22, 2016 3:24 pm
Location: Swindon, UK
England

Re: Si's 'Zombie trouble' 1/35 Diorama

Post by Tomcat64 »

This is an absolute masterclass - thanks for sharing all those scratch-building techniques it's been a real insight! :bow::
Cheers, Neil

On the Bench:
Tamiya 1/35 PzKpfwIB
Tamiya 1/35 Willys Jeep
Revell 1/72 Millennium Falcon
User avatar
ScaleModelJedi
Master Sergeant
Master Sergeant
Posts: 396
Joined: Sun Dec 20, 2015 12:47 am
Location: Birmingham, UK
Contact:

Re: Si's 'Zombie trouble' 1/35 Diorama

Post by ScaleModelJedi »

Tomcat64 wrote: Fri Mar 24, 2017 7:24 pm This is an absolute masterclass - thanks for sharing all those scratch-building techniques it's been a real insight! :bow::
MrBowcat wrote: Wed Mar 22, 2017 1:26 pm Impressive build!
Thank you :thumb1:
There are no failed builds only learning experiences.
MY Youtube channel : Scale Model Jedi
https://www.youtube.com/channel/UCSk5py ... taceCr3_3g
User avatar
ScaleModelJedi
Master Sergeant
Master Sergeant
Posts: 396
Joined: Sun Dec 20, 2015 12:47 am
Location: Birmingham, UK
Contact:

Re: Si's 'Zombie trouble' 1/35 Diorama

Post by ScaleModelJedi »

[youtube]hWH49d_Tf88[/youtube]
There are no failed builds only learning experiences.
MY Youtube channel : Scale Model Jedi
https://www.youtube.com/channel/UCSk5py ... taceCr3_3g
User avatar
Twokidsnosleep
General
General
Posts: 18026
Joined: Thu Aug 07, 2014 4:07 pm
Location: BC,Canada
Canada

Re: Si's 'Zombie trouble' 1/35 Diorama

Post by Twokidsnosleep »

I like the store fronts and especially the Bimmer :thumb2:
Great progress
Scott

On, Under or Near the Bench:
American Graffiti Ford Coupe
Headless Horseman...figure sig
1/72 Black Pearl Pirate Ship
User avatar
Lysus
Captain
Captain
Posts: 4562
Joined: Fri Dec 18, 2015 11:37 pm
Location: Seattle, US
United States of America

Re: Si's 'Zombie trouble' 1/35 Diorama

Post by Lysus »

I might have to watch these vids and read the thread a dozen times today; have my own base to get done by Friday :eeek:

Outstanding work, Si!
Backlog Progress: |||||||||||||||-------|----------|----------| 26/80
On the bench: Hasegawa 1/72 Tatiana's Vanship
Last Completed: Bandai HGUC Geara Zulu // Hasegawa 1/48 J2M3Raiden Prisoner of War
Post Reply

Return to “Build Threads”