Aur0ra145's Tamiya Flakpanzer Gepard

Post Reply
User avatar
aur0ra145
Second Lieutenant
Second Lieutenant
Posts: 3124
Joined: Thu Jan 14, 2016 9:44 am
Location: TX
United States of America

Aur0ra145's Tamiya Flakpanzer Gepard

Post by aur0ra145 »

Howdy folks!

Decided on this kit for the group build. With the long weekend, I'm attempting to finish it in less than a week. Also, no aftermarket. Just a quick clean build. I do plan on painting it in NATO woodland camo.

When building for speed, I've noticed myself prioritizing things that take a while to set. So, lots of TET needs a few hours to dry. CA glue sets up quickly; but is brittle. I'm going to need to prime this at some point. It will need to sit for at least 24 hours before decals, etc.

Good engineering on this kit, even with it having been made in 1977. The sprues were clean too, with no flashing.

Image

Image

Image

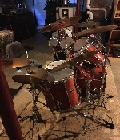
The scene after the first session.

Image
User avatar
digger303
General
General
Posts: 16125
Joined: Mon Mar 16, 2015 10:01 am
Location: Western Australia
Australia

Re: Aur0ra145's Tamiya Flakpanzer Gepard

Post by digger303 »

Best of luck with your aim of finishing in a week. Should be doable
:th: :th: :th:
:cheers2:
Listen and appear wise
Image
Image

scalemates stash https://www.scalemates.com/profiles/mat ... ION[]=Kits
Image
User avatar
aur0ra145
Second Lieutenant
Second Lieutenant
Posts: 3124
Joined: Thu Jan 14, 2016 9:44 am
Location: TX
United States of America

Re: Aur0ra145's Tamiya Flakpanzer Gepard

Post by aur0ra145 »

Major assembly complete. Now I just need the turret ring to dry prior to primer. I'm painting this in a few sub assemblies: hull, turret, road wheels, skirt armor, main armament. Idea is to get everything primed in grey. Then paint the under side of the hull green. Slap the wheels and side skirt armor on. Paint the root of the guns green, then place them. Paint rest of the model in the NATO woodland camo. Hopefully it all works out. I'm planning on using a lot of mud/weathering to cover up any cosmetic blemishes or mistakes. That should help with overall speed of build.

Image
User avatar
aur0ra145
Second Lieutenant
Second Lieutenant
Posts: 3124
Joined: Thu Jan 14, 2016 9:44 am
Location: TX
United States of America

Re: Aur0ra145's Tamiya Flakpanzer Gepard

Post by aur0ra145 »

And... she's primed! Now I've got to wait a bit for the thing to cure good enough. I'm thinking later on tonight after everyone else has gone to bed I'll be able to hit this with some NATO Green.

Image
User avatar
digger303
General
General
Posts: 16125
Joined: Mon Mar 16, 2015 10:01 am
Location: Western Australia
Australia

Re: Aur0ra145's Tamiya Flakpanzer Gepard

Post by digger303 »

:th: :th: :th:
:cheers2:
Listen and appear wise
Image
Image

scalemates stash https://www.scalemates.com/profiles/mat ... ION[]=Kits
Image
User avatar
aur0ra145
Second Lieutenant
Second Lieutenant
Posts: 3124
Joined: Thu Jan 14, 2016 9:44 am
Location: TX
United States of America

Re: Aur0ra145's Tamiya Flakpanzer Gepard

Post by aur0ra145 »

Disaster! When going to press on the drive sprockets, one of the pins popped out. Not a huge deal; though, it will slow down the build as I need that to cure prior to putting on the tracks and skirt armor. In other news, painted the tracks XF-85 Rubber Black. I'll end up giving them a dry pigment once over with a track rust color.

Image

Image

I do sort of wish I had black based this, then did panel highlights with grey. In the end it won't be a big deal. Though something for me to keep in mind if doing another NATO Woodland color scheme.

Image

One last cool thing of this old kit is that the sprue number if molded on a non seen side of the piece. Makes keeping everything organized a lot easier.

Image
User avatar
digger303
General
General
Posts: 16125
Joined: Mon Mar 16, 2015 10:01 am
Location: Western Australia
Australia

Re: Aur0ra145's Tamiya Flakpanzer Gepard

Post by digger303 »

Wow loads of progress and well on track to get it completed by weeks end.
:th: :th: :th:
:cheers2:
Listen and appear wise
Image
Image

scalemates stash https://www.scalemates.com/profiles/mat ... ION[]=Kits
Image
User avatar
aur0ra145
Second Lieutenant
Second Lieutenant
Posts: 3124
Joined: Thu Jan 14, 2016 9:44 am
Location: TX
United States of America

Re: Aur0ra145's Tamiya Flakpanzer Gepard

Post by aur0ra145 »

Further disaster. When attempting to put the tracks on the good side. The drive sprocket cracked in half. Seems like the TET wasn't doing quite what it should. This is a rather old bottle, maybe over time the compound doesn't work as good? I should have a spare full one around here somewhere.

With this second setback, I don't think I'll finish the model tonight. However, there is enough completed that it should be finished by the end of next weekend. Which, was the initial goal.

Lesson Learned: put more TET on than you think is necessary. Especially if it's a part that is hidden and load bearing.

Image

Until next time!
User avatar
Tomcat64
Brigadier General
Brigadier General
Posts: 7107
Joined: Thu Sep 22, 2016 3:24 pm
Location: Swindon, UK
England

Re: Aur0ra145's Tamiya Flakpanzer Gepard

Post by Tomcat64 »

Stewth that came together quickly - hopefully you can sort out the broken parts easily enough.

Looking at the mounting points for the sprockets this looks like it may have been one of those old Tamiya kits that was originally designed to take a battery operated motor.

Looking forward to seeing how this turns out.
Cheers, Neil

On the Bench:
Revell 1/72 Millennium Falcon
Tamiya 1/48 P-38F/G
User avatar
aur0ra145
Second Lieutenant
Second Lieutenant
Posts: 3124
Joined: Thu Jan 14, 2016 9:44 am
Location: TX
United States of America

Re: Aur0ra145's Tamiya Flakpanzer Gepard

Post by aur0ra145 »

Tomcat64 wrote: Tue Jan 20, 2026 3:25 pm Stewth that came together quickly - hopefully you can sort out the broken parts easily enough.

Looking at the mounting points for the sprockets this looks like it may have been one of those old Tamiya kits that was originally designed to take a battery operated motor.

Looking forward to seeing how this turns out.
It definitely might have been one with a motor in it in the past. The inside of the hull looks like it has room for something like that.

Today, we had great success. The repairs on the sprockets seem to have worked and got the tracks on. In honor of this Tamiya build, I chose to actually do what the picture says. Which is to use a heated up screw driver to melt the tracks together. It worked wonderfully well. Don't fret, I also put some CA glue on afterwards for good measure as these will be hidden under the armor skirt.

Image

Image

Also ended up getting the skirt armor on. Now, I just need that to set up, and we'll be onto painting.

Image
User avatar
digger303
General
General
Posts: 16125
Joined: Mon Mar 16, 2015 10:01 am
Location: Western Australia
Australia

Re: Aur0ra145's Tamiya Flakpanzer Gepard

Post by digger303 »

Almost looks aerodynamic and the details are pretty sharp too. Nicely built.
:th: :th: :th:
:cheers2:
Listen and appear wise
Image
Image

scalemates stash https://www.scalemates.com/profiles/mat ... ION[]=Kits
Image
User avatar
Tomcat64
Brigadier General
Brigadier General
Posts: 7107
Joined: Thu Sep 22, 2016 3:24 pm
Location: Swindon, UK
England

Re: Aur0ra145's Tamiya Flakpanzer Gepard

Post by Tomcat64 »

Nice work - we saw one of these flakpanzers (can't remember if it was the Leopard though) at a show a few years back and the way the guns stayed locked on target while the tank was thrown over the obstacle course was mesmerizing.

Looking forward to seeing it under paint now :th:
Cheers, Neil

On the Bench:
Revell 1/72 Millennium Falcon
Tamiya 1/48 P-38F/G
User avatar
digger303
General
General
Posts: 16125
Joined: Mon Mar 16, 2015 10:01 am
Location: Western Australia
Australia

Re: Aur0ra145's Tamiya Flakpanzer Gepard

Post by digger303 »

Tomcat64 wrote: Wed Jan 21, 2026 4:12 pm Nice work - we saw one of these flakpanzers (can't remember if it was the Leopard though) at a show a few years back and the way the guns stayed locked on target while the tank was thrown over the obstacle course was mesmerizing.

Looking forward to seeing it under paint now :th:
Yeah it's like black magic....eery
:cheers2:
Listen and appear wise
Image
Image

scalemates stash https://www.scalemates.com/profiles/mat ... ION[]=Kits
Image
User avatar
DRUMS01
Chief Warrant Officer 3
Posts: 2218
Joined: Wed Jun 08, 2016 1:48 am
Location: Ohio, USA
United States of America

Re: Aur0ra145's Tamiya Flakpanzer Gepard

Post by DRUMS01 »

Sorry for not chiming in earlier in the build. I've also got this old kit and am liking what you're doing with it. Just a question; did you paint the rubber on the road wheels "black or rubber, or did you leave it in the green color?

Looking forward to your next update.
On the table or recently completed:

1/18 AV8-B Harrier - WIP
1/35 Churchill AVRE with SBG Bridge Diorama - DONE
75mm BMW R75 WW2 motorcycle with rider - DONE
User avatar
aur0ra145
Second Lieutenant
Second Lieutenant
Posts: 3124
Joined: Thu Jan 14, 2016 9:44 am
Location: TX
United States of America

Re: Aur0ra145's Tamiya Flakpanzer Gepard

Post by aur0ra145 »

Thanks for all the kind words!
DRUMS01 wrote: Thu Jan 22, 2026 1:49 am Sorry for not chiming in earlier in the build. I've also got this old kit and am liking what you're doing with it. Just a question; did you paint the rubber on the road wheels "black or rubber, or did you leave it in the green color?

Looking forward to your next update.
No worries! I left them in a green color. My plan is to weather the road wheel well enough that it shouldn't be apparent that I didn't paint the rubber part rubber. We'll see how it turns out. If I was doing a longer, more drawn out build. I would have painted them rubber black, then spray the hub caps green.

:cheers2:
Post Reply

Return to “Build Page”